Creating a Connection
Perform the following steps to create a new connection:
-
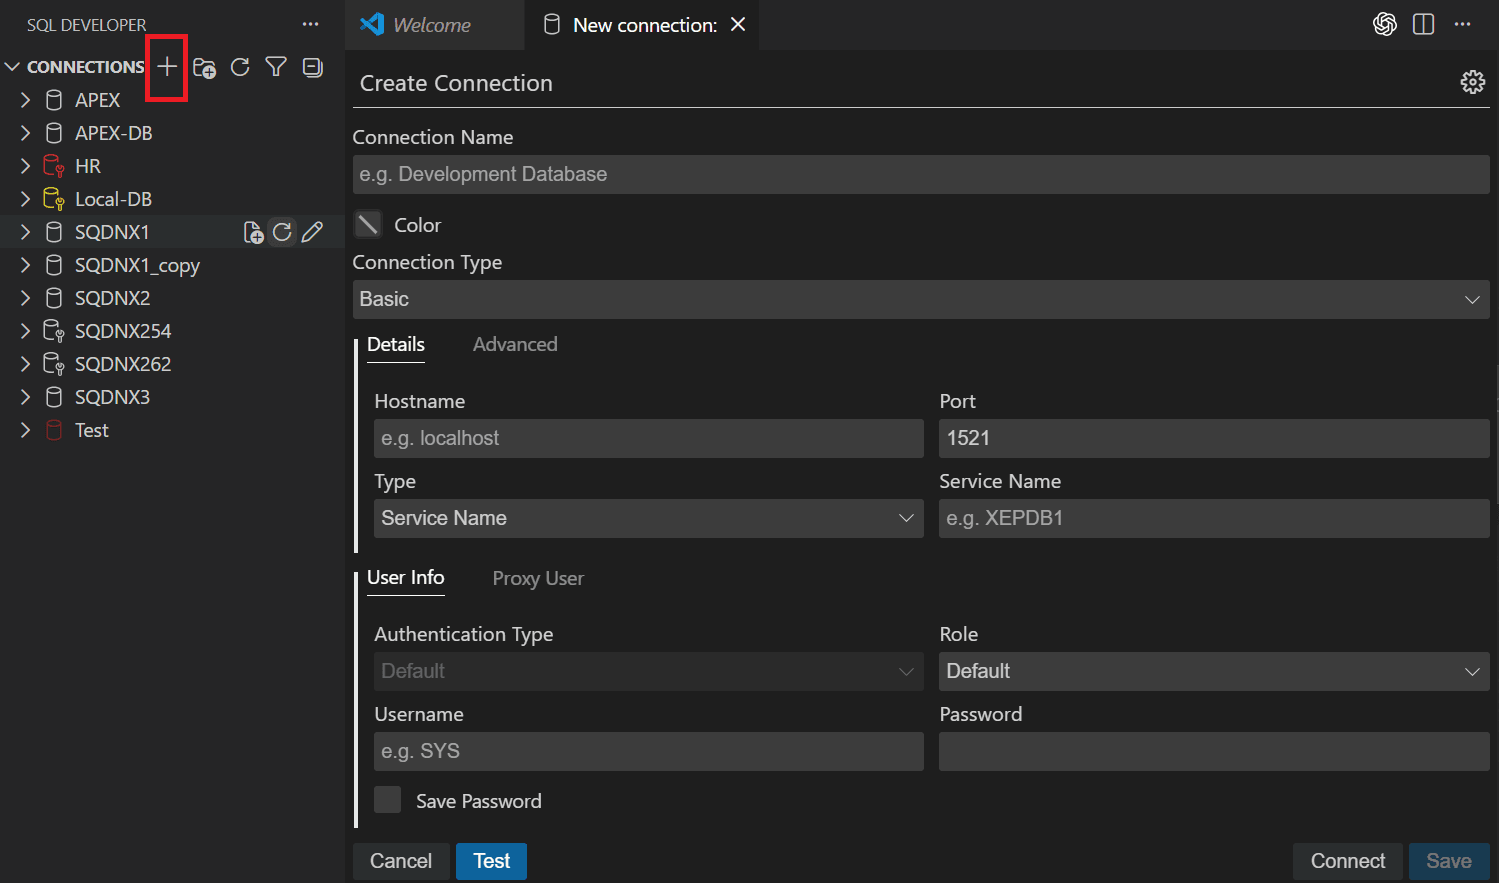
In the Connections panel, click the Add icon.
The Create Connection pane appears.
-
Enter the connection details.
Connection Name: An alias for the database connection. The connection name is not stored in the database and is not a database object. Suggestion: Include the database name (SID) and user name in the connection name. Example: personnel_joe for connecting to the personnel database as user Joe.
Color: Optionally, select a color for the connection. The selected color is displayed in the Connections panel and throughout connection-specific editor tabs, reports, dashboards, and the status bar to help identify the active database connection.
-
Select a Connection Type.
Select Basic, TNS, Cloud Wallet, Custom JDBC, or OCI DBTools. The displayed fields change based on the selected connection type. For any Oracle connection type, there is an Advanced tab that you can use to set custom JDBC properties.
-
Basic
-
Hostname: Host system for the Oracle database.
-
Port: Listener port.
-
Type: Database name.
-
Service Name: Network service name of the database (for a remote database connection over a secure connection).
On the Advanced tab, you can add custom connection properties and enable Auto Commit, if required.
-
-
TNS
-
Type: Select how to specify the TNS connection details:
-
Network Alias: Oracle Net alias for the database.
-
Connect Identifier: Oracle Net connect identifier.
-
-
TNS File Location: Displays the directory where your TNSNAMES.ORA file is located. Click the Edit in Settings link to add or change the location.
-
-
Cloud Wallet
Use this connection type for Oracle Cloud connections that use Oracle Wallet.
-
Configuration File: Client credentials zip file downloaded from the Cloud service console.
-
Service: Service name in the client credentials file. This field is automatically prefilled after the client credential file is selected.
On the Proxy tab, you can add a custom proxy for Cloud Wallet connections.
On the Advanced tab, you can add custom connection properties and enable Auto Commit, if required.
-
-
Custom JDBC
-
Custom JDBC URL: URL for connecting directly from Java to the database, it overrides any other connection type specification. For example, if you are using TNS or a naming service with the OCI driver, you must specify this information:
jdbc:oracle:thin:scott/@localhost:1521:orclNote that in this example, the “/” is required, and the user will be prompted to enter the password.
On the Advanced tab, you can add custom JDBC properties and enable Auto Commit, if required.
-
-
OCI DBTools
Use this connection type to create a connection from an existing OCI Database Tools connection in Oracle Cloud Infrastructure. For more information, see Creating an OCI Connection.
-
-
On the User Info tab, enter the user credentials.
-
Role: The set of privileges to be associated with the connection. For a user that has been granted the SYSDBA system privilege, you can specify a connection that includes the privilege.
-
Username: Name of the database user for the connection. This user must have sufficient privileges to perform the tasks that you want to perform while connected to the database, such as creating, editing, and deleting tables, views, and other objects.
-
Password: Password associated with the specified database user.
-
Save Password: If this option is selected, the password is saved with the connection information, and you will not be prompted for the password on subsequent attempts to connect using this connection.
-
-
Optionally, configure proxy user details on the Proxy User tab.
-
Proxy Client: Name of the proxy client user.
-
Password: Password for the proxy client user.
-
-
You can also configure advanced settings for the connection. Click Advanced Settings

-
Select the DBA tab, and then select DBA (Database Administrator) and click Save to configure the connection as a DBA connection.
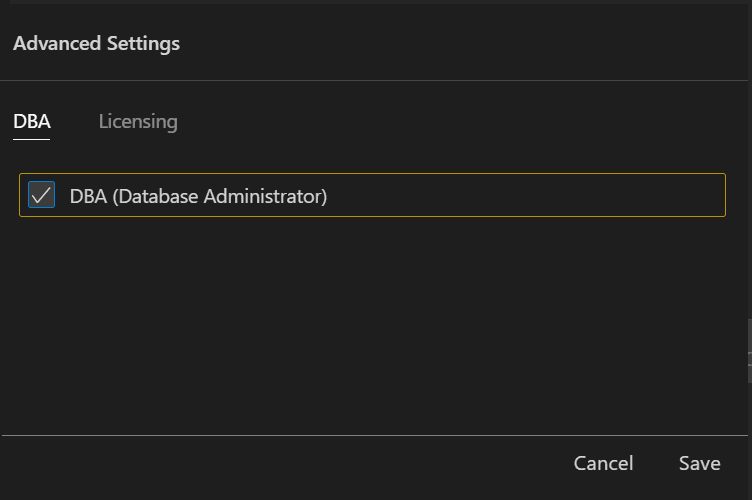
Description of the illustration dba_panel.png
The connection is displayed with a DBA-enabled icon in the Connections panel, and the DBA node is shown for the connection.
Use this option for connections that are intended for database administration tasks, such as managing Scheduler jobs, security objects, and performance information. For more information, see Managing DBA Objects.
Note: Selecting DBA (Database Administrator) displays the DBA node for the connection. It does not grant database privileges.
-
Select the Licensing tab to configure the database packs that are licensed for the connection. Select Diagnostics if the connection is licensed to use Diagnostics Pack features, such as AWR and ASH Reports. Select Tuning if the connection is licensed to use Tuning Pack features, such as SQL Tuning Advisor or Real-Time SQL Monitor. For more information, see Configuring Licensed Database Packs for a Connection.
-
-
Click Test to test the database connection before opening it.
-
Click Save to save the connection details, or click Connect to open the connection.