How-To Instructions for Receiving Shares for Live Data
To consume live data shares, you need to subscribe to them and create views of tables included in the live share. The views can be queried using SQL scripts.
Follow these steps:
- Browse available live shares.
- Go to the Data Share tool. See How to Access and Enable the Data Share Tool.
- Click CONSUME SHARE.

Description of the illustration consume_live_v1.pngA list of available live shares appears.
- Subscribe to the live share provider.
- From the list of available live share providers, click
the + icon to the right of the share provider
you want to consume.
In this example, the QA4-LIVE_ADMIN live share provider is selected.

Description of the illustration select_live_share.png - From the Subscribe to Share Provider page, you can make
changes to the name and description or leave as is.
Click Next.
In this example, the defaults are kept.

Description of the illustration provider_settings.pngThe list of Available Shares for this share provider displays.
- Select the share you want to consume and move it to the
Selected Shares section using the middle
arrows. Click Subscribe.
In this example the SALESQ4 share is selected and moved.

Description of the illustration subscribe.png
- From the list of available live share providers, click
the + icon to the right of the share provider
you want to consume.
- Create a view on top of tables in your share.
- Expand the live data share to view tables included in the share. Drag and
drop the table you want to consume to the right panel. Click Start.
In this example, the SALESQ4 live share is expanded to display the SAHIE_AGE_DIM table. The table is dragged and dropped to the right panel.

Description of the illustration create_view.png - Click Run, in the dialog box that appears.
- When the view has been created, the new view displays with status showing
Complete.

Description of the illustration view_complete.png
- Expand the live data share to view tables included in the share. Drag and
drop the table you want to consume to the right panel. Click Start.
- Query the live share data.
- Click Database Actions in the
breadcrumb.

Description of the illustration db_actions.png - Select Development, then click SQL.
- Select Views, on the left Navigator, from the object drop down.
From the list of available views, drag and drop the SAHIE_AGE_DIM_1 view to the
worksheet.

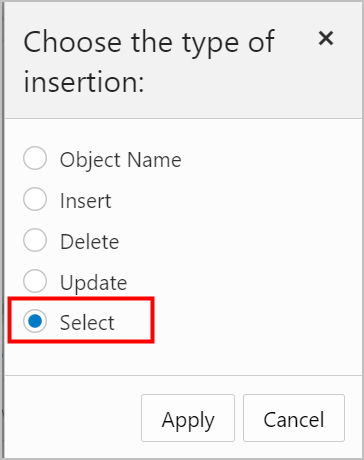
Description of the illustration view_over_share_v1.pngA dialog displays offering the types of available insertions.
- Click Select, then Apply.
- Click Run (the arrow icon at the top of the worksheet). The returned data
displays under Query Results.

Description of the illustration results.png
- Click Database Actions in the
breadcrumb.
