2 Create an Instance
Learn how to create a Transaction Manager for Microservices instance in OCI using the Transaction Manager for Microservices image for OCI.
You can create an instance using the Transaction Manager for Microservices image available in OCI Marketplace in two ways. Either use the Compute instance console or create an instance directly by using the image from OCI Marketplace.
Topics:
- Create Compartment Policies
You must be granted management access to Marketplace applications and Resource Manager if you are not an Oracle Cloud Infrastructure administrator. Transaction Manager for Microservices (MicroTx) image for OCI allows you to create compute instances. - Create an Instance Using the Compute Instance Console
The Compute instance console enables you to create a new instance using Transaction Manager for Microservices image for OCI. - Create an Instance Using the Image in Marketplace
Use the Transaction Manager for Microservices for OCI image available on Oracle Cloud Marketplace to create a new instance. - Access the MicroTx Instance in OCI
When you create an instance using an image, ensure that you provide an SSH key. You require this SSH key to access the instance and launch it. - Enable Copy/Paste from Local Computer to Remote Desktop
You might need to copy text, such as commands from the guide, from your local computer to the remote desktop. While such direct copy/paste isn't supported, you may proceed as indicated below to enable an alternative local-to-remote clipboard with input text field.
2.1 Create Compartment Policies
You must be granted management access to Marketplace applications and Resource Manager if you are not an Oracle Cloud Infrastructure administrator. Transaction Manager for Microservices (MicroTx) image for OCI allows you to create compute instances.
Allow group
        MyGroup to use app-catalog-listing in compartment MyCompartmentAllow group
        MyGroup to manage instance-family in compartment MyCompartmentAllow group
        MyGroup to manage orm-family in compartment MyCompartmentAllow group
        MyGroup to manage virtual-network-family in compartment MyNetworkCompartment
See Also:
Refer to Common Policies in the Oracle Cloud Infrastructure documentation, Managing Policies.Parent topic: Create an Instance
2.2 Create an Instance Using the Compute Instance Console
The Compute instance console enables you to create a new instance using Transaction Manager for Microservices image for OCI.
- Sign in to the Oracle Cloud Infrastructure console.
- Click Navigation from the menu, select Compute and under the Compute group, click Instances.
- Click Create Instance.
If required, you can modify the name of the instance.
- Select the compartment in which to create the instance.
- Under Placement, select the Availability Domain for creating the instance. Click Show advanced options.
- Under Image and Shape, click Change Image and follow the instructions:
- From the Image source drop-down, select Marketplace, and you can either use Search or select the Transaction Manager for Microservices image for OCI.
- Review the terms and conditions and select the Oracle Terms of Use check box and click Select Image.
- Under Image and Shape, click Change Shape. Select the Instance Type and select the shape.
While creating a virtual machine, under Shape series, select a processor group, and then select a shape. To know the supported shapes, see About Transaction Manager for Microservices Images for OCI.
- Configure the network for the instance. Click Show advanced options to specify advanced network settings.
- Under Add SSH keys, generate a key, upload your public key, or paste the keys.
- Under Boot Volume, specify the size and encryption options for the instance's boot volume.
- Click Show advanced options to configure advanced settings.
- Click Create.
For more details, see Creating a Linux instance in Oracle Cloud Infrastructure documentation.
Parent topic: Create an Instance
2.3 Create an Instance Using the Image in Marketplace
Use the Transaction Manager for Microservices for OCI image available on Oracle Cloud Marketplace to create a new instance.
- Sign in to the Oracle Cloud Infrastructure console.
- Click the navigation menu, select Marketplace, and then click All Applications.
- Select the Transaction Manager for Microservices image for OCI.
- From the Version drop down, select the image build version.
Every image is built for a specific operating system, which may not support all operating systems.
- Review the terms and conditions and select the Oracle Terms of Use check box.
- Click Launch Instance.
- Select the compartment in which you want to create the instance.
- Under Placement, select the Availability Domain for creating an instance.
Click Show advanced options to specify capacity type and fault domain.
- Under Image and Shape, click Change Shape. Select the Instance Type and select the shape.
While creating a virtual machine, under Shape series, select a processor group, and then select a shape. To know the supported shapes, see About Transaction Manager for Microservices Images for OCI.
- Configure the network for the instance and click Show advanced options to specify advanced network settings.
- Under Add SSH keys, generate a key, upload your public key, or paste the keys.
- Under Boot Volume, specify the size and encryption options for the instance's boot volume.
- Click Show advanced options to configure advanced settings.
- Click Create.
For more details, see Creating a Linux instance in Oracle Cloud Infrastructure documentation.
Parent topic: Create an Instance
2.4 Access the MicroTx Instance in OCI
When you create an instance using an image, ensure that you provide an SSH key. You require this SSH key to access the instance and launch it.
To access the Transaction Manager for Microservices instance in OCI:
- Use the SSH command to connect to an instance as the
opcuser.- Connect using the SSH private key if the private key associated with the public key was used during provisioning. For example:
ssh -i <private_key> opc@<ip_address> - Connect using the SSH public key if the public key was provided during provisioning. Log in directly with the following command:
ssh opc@<ip_address>For detailed instructions, see Accessing Your Instance.
- Connect using the SSH private key if the private key associated with the public key was used during provisioning. For example:
- Once you are logged in as the
opcuser, switch to theoracleuser.sudo su - oracle - Create an ingress rule to enable traffic to port 6080. A VNC server is configured on this VM. To access the instance using a VNC session, you must add port 6080 to the ingress rules. Skip this step if an ingress rule that permits traffic over port 6080 already exists.
- Go to Networking >> Virtual Cloud Networks
- Choose your network.
- Under Resources, select Security Lists.
- Click Default Security Lists under Create Security List.
- Click Add Ingress Rule.
- Enter the following details:
- Source Type: CIDR
- Source CIDR: 0.0.0.0/0
- IP Protocol: TCP
- Source Port Range: All (keep default)
- Destination Port Range: 6080
- Description: noVNC Remote Desktop
- Click Add Ingress Rules.
- Set a new password to access the VNC session.
echo "<PASSWORD>" | vncpasswd -f >/home/oracle/.vnc/passwdWhere,
<PASSWORD>is the new password that you want to set. Ensure that the password meets the password requirements set by VNC server. - Restart the VNC server on the VM.
sudo systemctl restart vncserver_oracle@:1.service - Run the following command to confirm that the VNC server is in the running state.
sudo systemctl status vncserver_oracle@:1.service - Open the following link in a new browser to login and access the VNC session. Use the password that you have specified in an earlier step.
http://<ip_address>:6080/vnc.html?password=<PASSWORD>&resize=scale&quality=9&autoconnect=true&reconnect=true
Parent topic: Create an Instance
2.5 Enable Copy/Paste from Local Computer to Remote Desktop
You might need to copy text, such as commands from the guide, from your local computer to the remote desktop. While such direct copy/paste isn't supported, you may proceed as indicated below to enable an alternative local-to-remote clipboard with input text field.
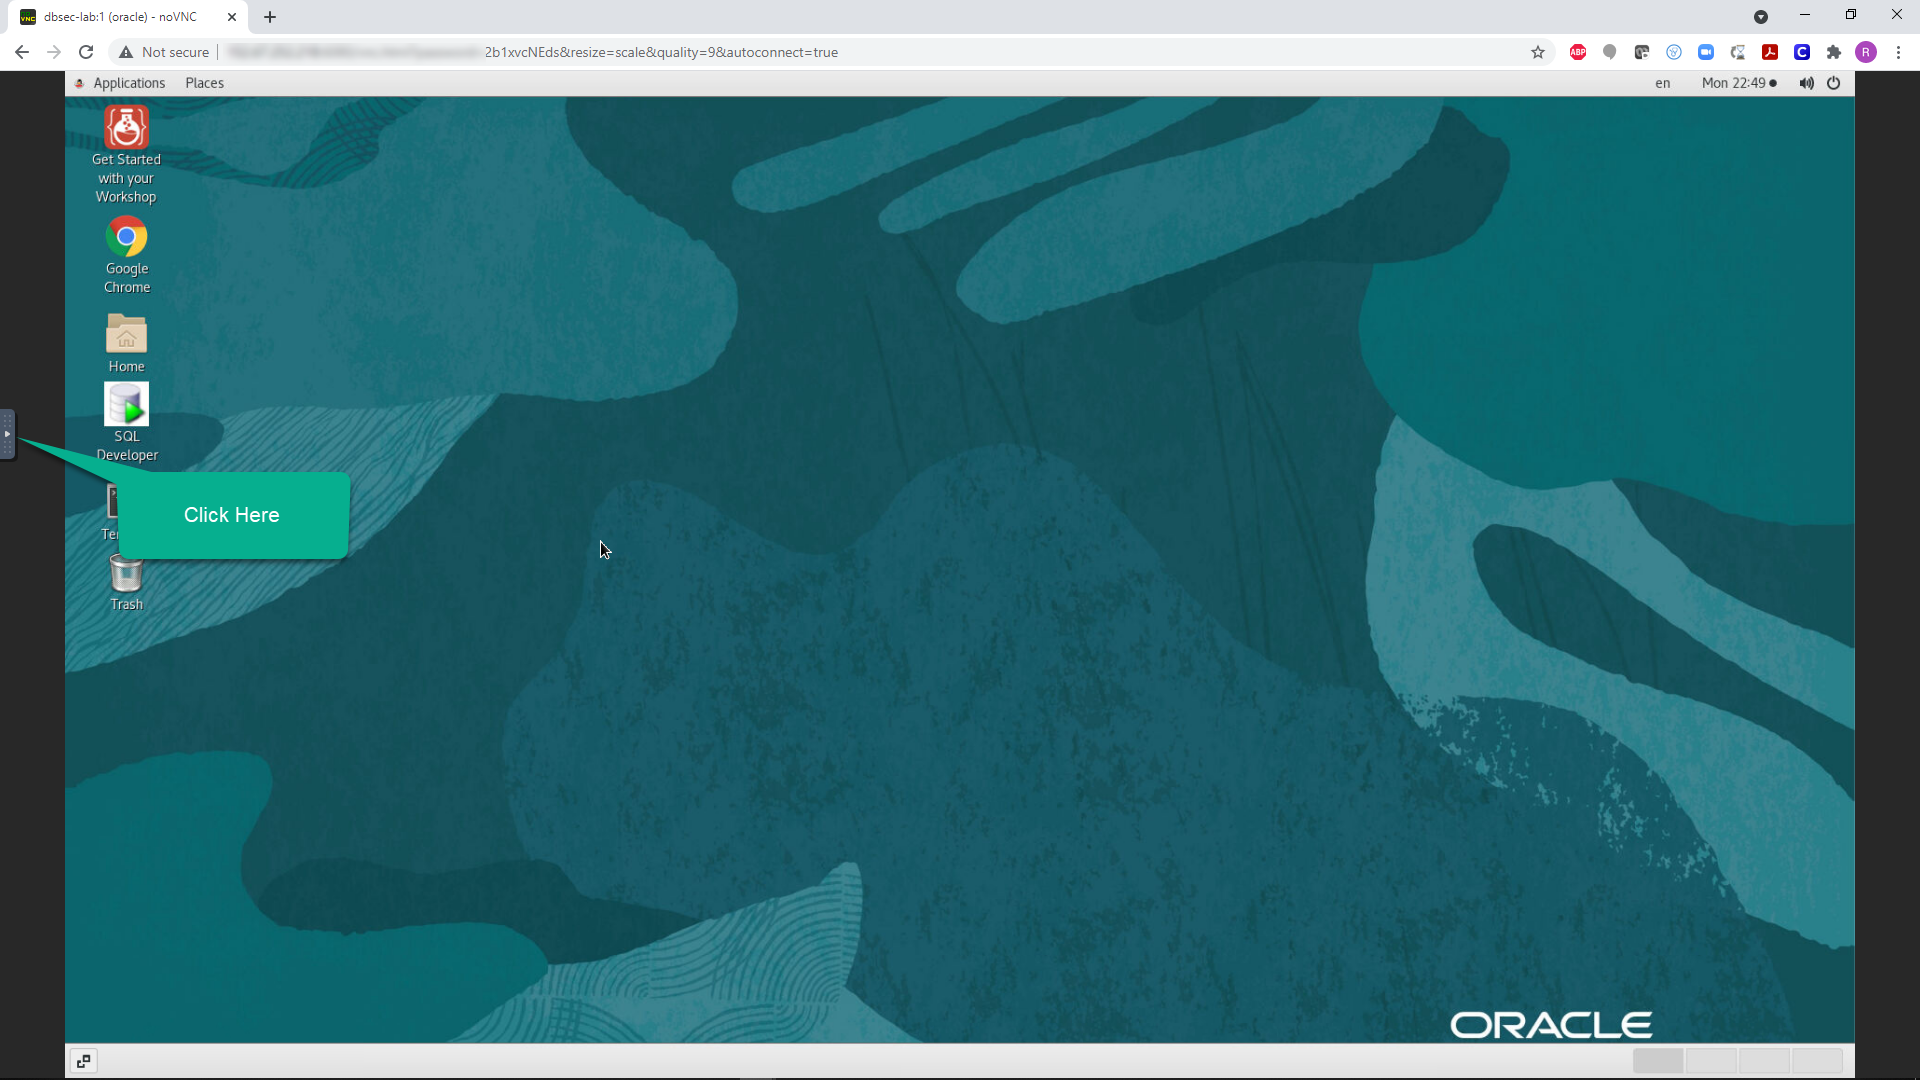
- Click the small gray tab on the middle-left side of your screen to open the control bar.

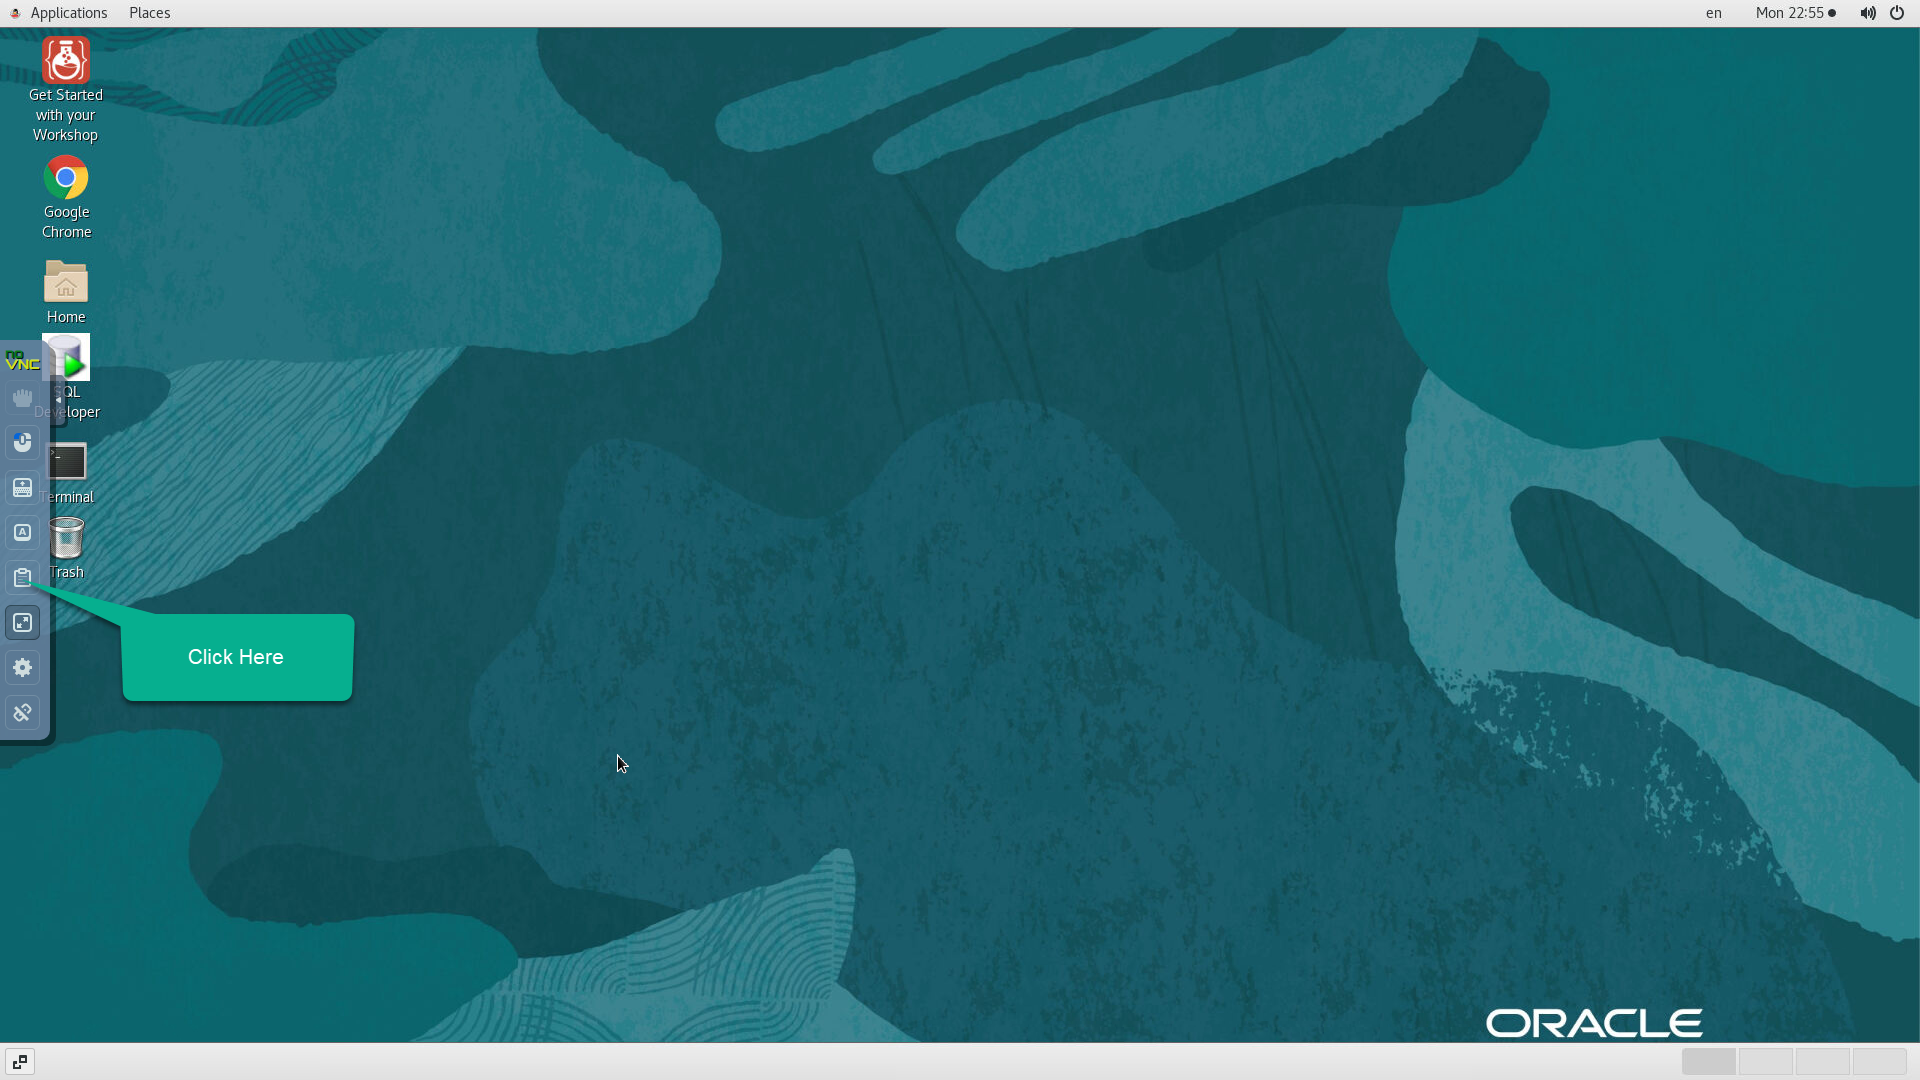
- Click the clipboard icon.

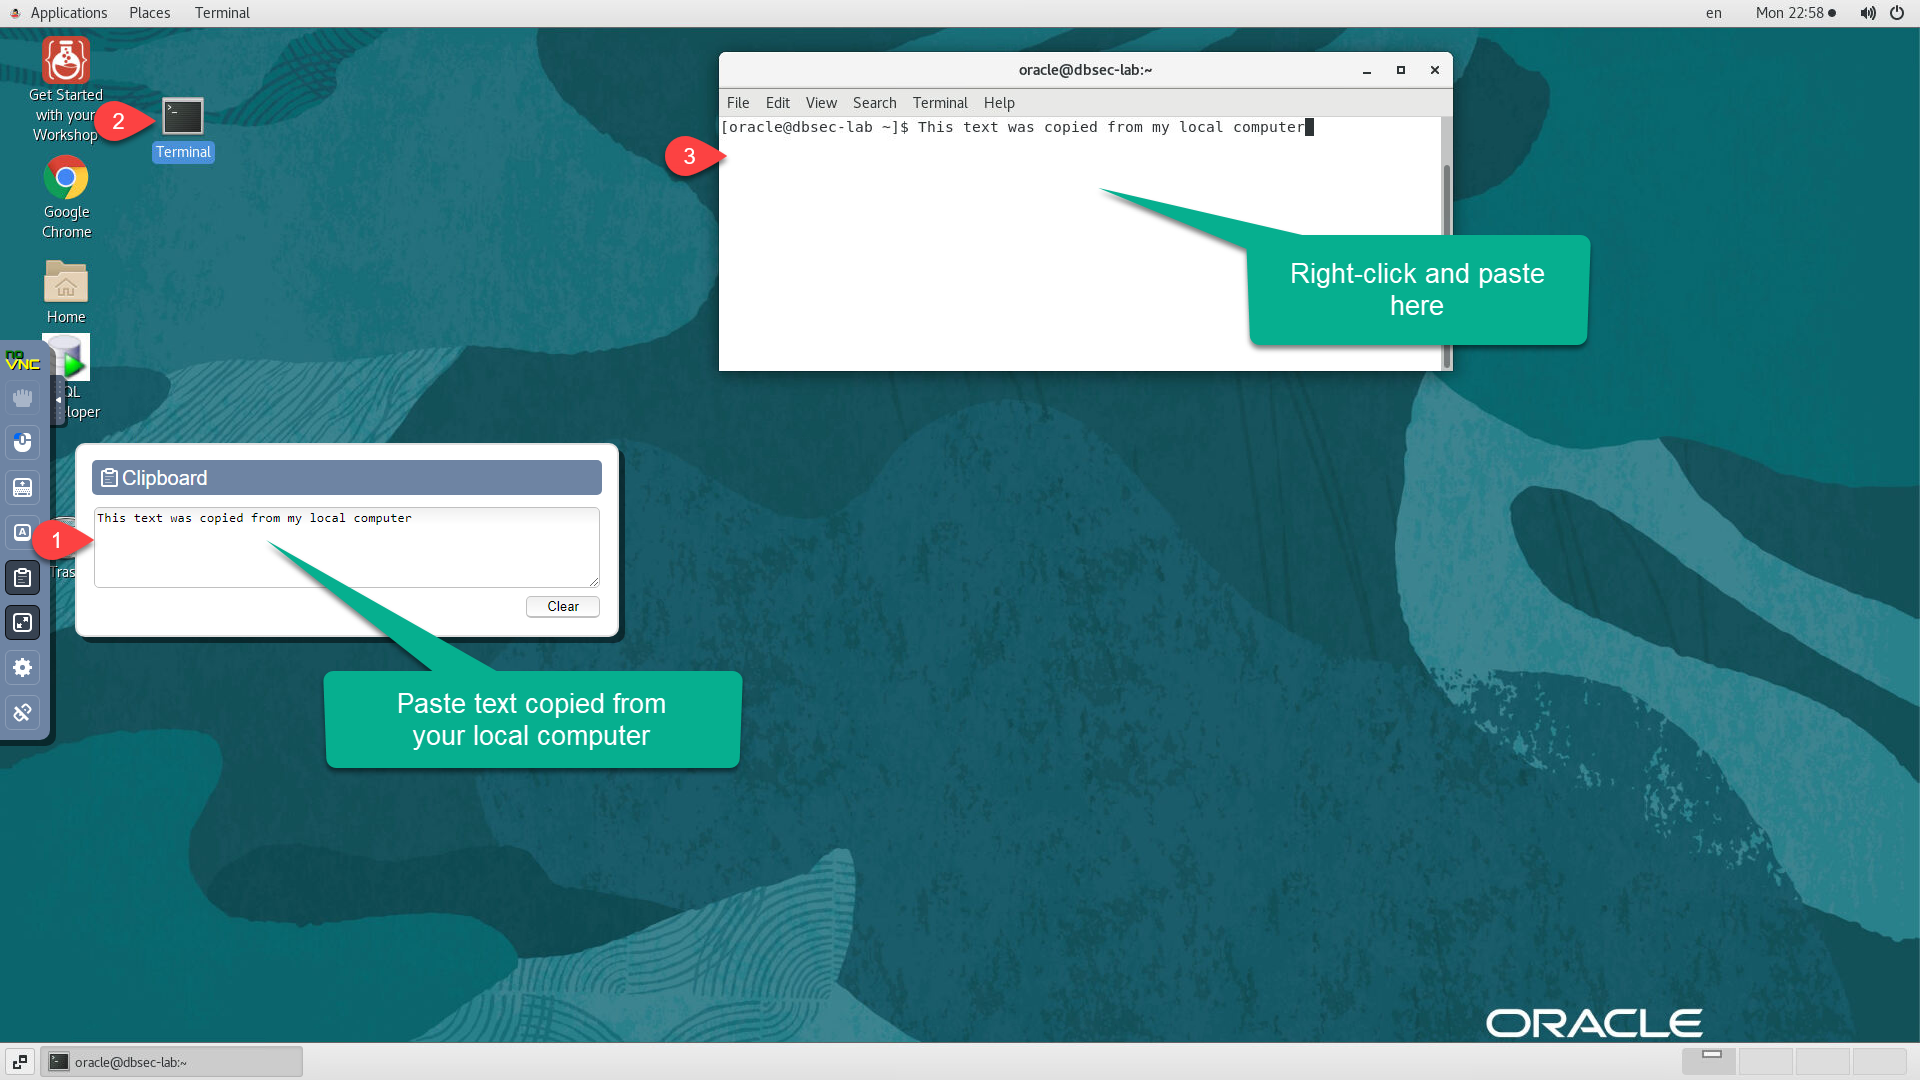
- Copy some text from your local computer as illustrated below and paste it into the clipboard widget. Open the desired application, such as Terminal, and use mouse controls to paste the text.

Note:
Ensure that you initialize your clipboard with Step 2 shown in the screenshot above before opening the target application in which you intend to paste the text. Otherwise will find the paste function in the context menu is grayed out when you attempt to paste for the first time.
Parent topic: Create an Instance