3 Run the Bank and Stock-Trading Application
Learn how to use MicroTx to maintain data consistency across several microservices by deploying and running the Bank and Stock-Trading application.
Caution:
The instructions provided in this section are specific to test or development environments. Do not use these instructions to set up and use MicroTx in production environments.The Bank and Stock-Trading application contains several microservices and it uses distributed, two-phase commit transaction (XA). Run the Bank and Stock-Trading application to purchase and sell stocks as well as transfer money from one account to another. When you run the Bank and Stock-Trading application, you will be able to see how MicroTx ensures consistency of transactions across the distributed microservices and their resource managers. You will also integrate MicroTx with the Kubernetes ecosystem by using tools, such as Kiali and Jaeger, to visualize the flow of requests between MicroTx and the microservices.
Running a sample application is the fastest way for you to get familiar with MicroTx.
Topics:
- About the Bank and Stock-Trading Application
The Bank and Stock-Trading application demonstrates how you can develop microservices that participate in a distributed transaction while using MicroTx to coordinate the requests. You can use the application to withdraw or deposit an amount, as well as buy and sell stocks. Since financial applications that move funds require strong global consistency, the application uses XA transaction protocol. - Configure Minikube and Start a Tunnel
Configure Minikube and then start a tunnel between Minikube and the Kubernetes cluster. - Configure Keycloak
The Bank and Stock-Trading Application console uses Keycloak to authenticate users. - Verify that All the Resources are Ready
Redeploy the Bank and Stock-Trading application, and then ensure that are the resources are available. - Transfer Funds with the Bank and Stock-Trading Application
Run the Bank and Stock-Trading application to transfer funds and to understand how you can use Transaction Manager for Microservices (MicroTx) to coordinate XA transactions. After running the application, use distributed tracing to understand how the requests flow between MicroTx and the microservices. Running sample applications is the fastest way for you to get familiar with MicroTx. - Trade Stocks with the Bank and Stock-Trading Application
Run the Bank and Stock-Trading application to purchase and sell stocks and to understand how you can use Transaction Manager for Microservices (MicroTx) to coordinate XA transactions. After running the application, use distributed tracing to understand how the requests flow between MicroTx and the microservices. Running sample applications is the fastest way for you to get familiar with MicroTx. - Deploy Kiali and Jaeger (Optional)
Optionally, you can use Kiali and Jaeger to track and trace distributed transactions in MicroTx through visualization. Use distributed tracing to track how requests flow between MicroTx and the microservices. - View Service Mesh graph and Distributed Traces (Optional)
To visualize what happens behind the scenes and how a request processed by the distributed services and MicroTx, you can use the Kiali and Jaeger Dashboards that you started in the previous task.
3.1 About the Bank and Stock-Trading Application
The Bank and Stock-Trading application demonstrates how you can develop microservices that participate in a distributed transaction while using MicroTx to coordinate the requests. You can use the application to withdraw or deposit an amount, as well as buy and sell stocks. Since financial applications that move funds require strong global consistency, the application uses XA transaction protocol.
The following figure shows the various microservices in the Bank and Stock-Trading application. Some microservices connect to an Autonomous Transaction Processing Serverless (ATP-S) instance or resource manager. Resource managers manage stateful resources such as databases, queuing or messaging systems, and caches.
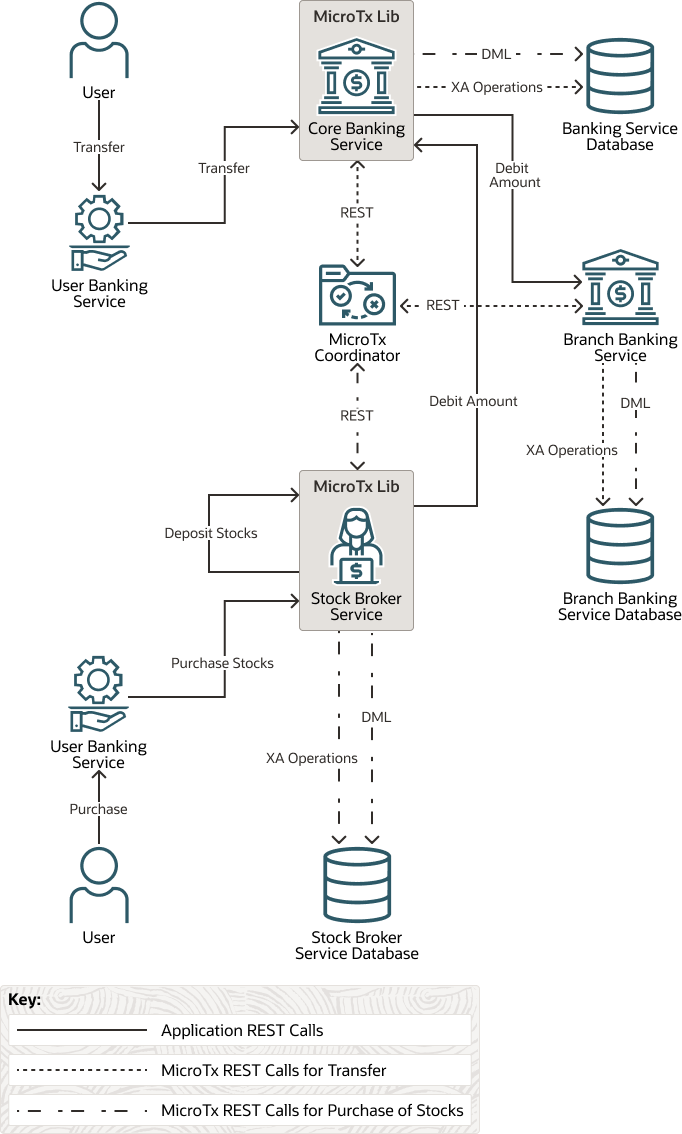
When a user purchases stocks using the Stock Broker service, the application withdraws money from the Core Banking Service and deposits an equivalent number of stocks by creating an XA transaction. Within the XA transaction, all actions such as purchase, sale, withdraw, and deposit either succeed, or they all are rolled back in case of a failure of any one or more actions.
Participant microservices use the MicroTx client libraries which registers callbacks and provides implementation of the callbacks for the resource manager. As shown in the image, MicroTx communicates with the resource managers to commit or roll back the transaction. MicroTx connects with each resource manager involved in the transaction to prepare, commit, or rollback the transaction. The participant service provides the credentials to the coordinator to access the resource manager. The Stock Broker, Core Banking, Branch Banking, and User Banking microservices are based on Spring Boot 3.x. The MicroTx Spring Boot starter client library files, which are available for Spring REST apps, are already integrated with all the microservices.
During a transaction, each microservice also makes updates to a resource manager to track the change in the amount and stocks. When you run the Bank and Stock-Trading application, you will be able to see how MicroTx ensures consistency of transactions across the distributed microservices and their resource managers.
-
The MicroTx coordinator manages transactions amongst the participant services.
-
The Stock Broker microservice initiates the transactions, so it is called a transaction initiator service. The user interacts with this microservice to buy and sell shares. When a new request is created, the helper method that is exposed in the MicroTx library runs the
begin()method to start the transaction. This microservice also contains the business logic to issue the commit and roll back calls. After initiating the transaction, the Stock Broker service also participates in the transaction. After starting a transaction to buy or sell shares, the Stock Broker service also participates in the transaction to deposit or withdraw the shares from a user's account. It uses resources from the Stock Broker Service ATP instance. -
The Core Banking, Branch Banking, and User Banking services participate in the transactions related to the trade in stocks, so they are called participant services. They do not initiate the transaction to buy or sell stocks. The MicroTx library includes headers that enable the participant services to automatically enlist in the transaction. These microservices expose REST APIs to get the account balance and to withdraw or deposit money from a specified account. Core Banking and Branch Banking services also use resources from the Banking Service and Branch Banking Service ATP instances respectively.
The service must meet ACID requirements, so withdraw amount, transfer amount, deposit stocks, sell stocks, debit amount, or credit amount are called in the context of an XA transaction.
Parent topic: Run the Bank and Stock-Trading Application
3.2 Configure Minikube and Start a Tunnel
Configure Minikube and then start a tunnel between Minikube and the Kubernetes cluster.
Parent topic: Run the Bank and Stock-Trading Application
3.3 Configure Keycloak
The Bank and Stock-Trading Application console uses Keycloak to authenticate users.
Parent topic: Run the Bank and Stock-Trading Application
3.4 Verify that All the Resources are Ready
Redeploy the Bank and Stock-Trading application, and then ensure that are the resources are available.
Parent topic: Run the Bank and Stock-Trading Application
3.5 Transfer Funds with the Bank and Stock-Trading Application
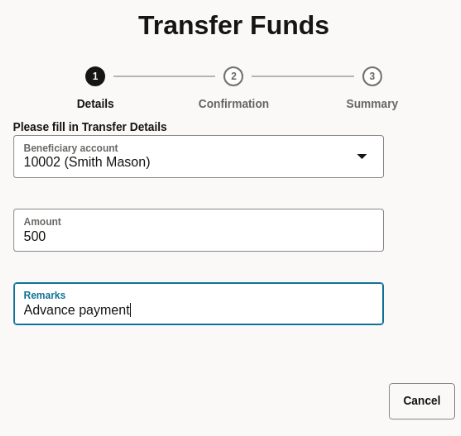
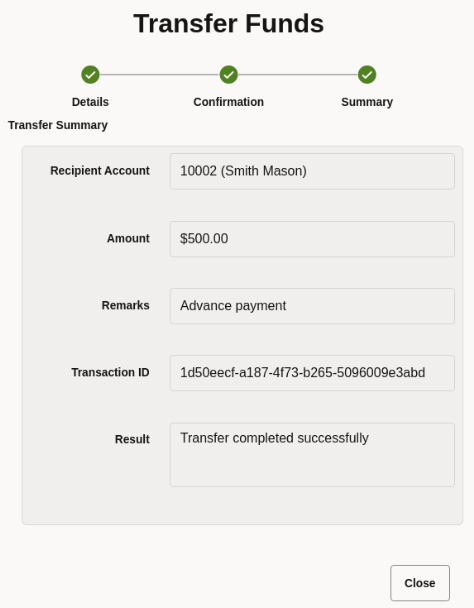
Run the Bank and Stock-Trading application to transfer funds and to understand how you can use Transaction Manager for Microservices (MicroTx) to coordinate XA transactions. After running the application, use distributed tracing to understand how the requests flow between MicroTx and the microservices. Running sample applications is the fastest way for you to get familiar with MicroTx.
When you send a request to transfer funds, the Core Banking service and Branch Banking service interact with each other to perform this task. The Core Banking service in turns sends the debit amount request to the Branch Banking service. Once the amount is successfully debited from the specified bank account, it is credited to another bank account. The microservices use the XA protocol and MicroTx to manage the transactions. Within an XA transaction, all actions such as debit amount and credit amount either succeed, or all actions are rolled back in case of a failure of any one or more actions.
Fund transfer happens between the branches. In this sample application, we have only one branch (Arizona), so the Core banking and Branch banking microservices interact with each other.
Parent topic: Run the Bank and Stock-Trading Application
3.6 Trade Stocks with the Bank and Stock-Trading Application
Run the Bank and Stock-Trading application to purchase and sell stocks and to understand how you can use Transaction Manager for Microservices (MicroTx) to coordinate XA transactions. After running the application, use distributed tracing to understand how the requests flow between MicroTx and the microservices. Running sample applications is the fastest way for you to get familiar with MicroTx.
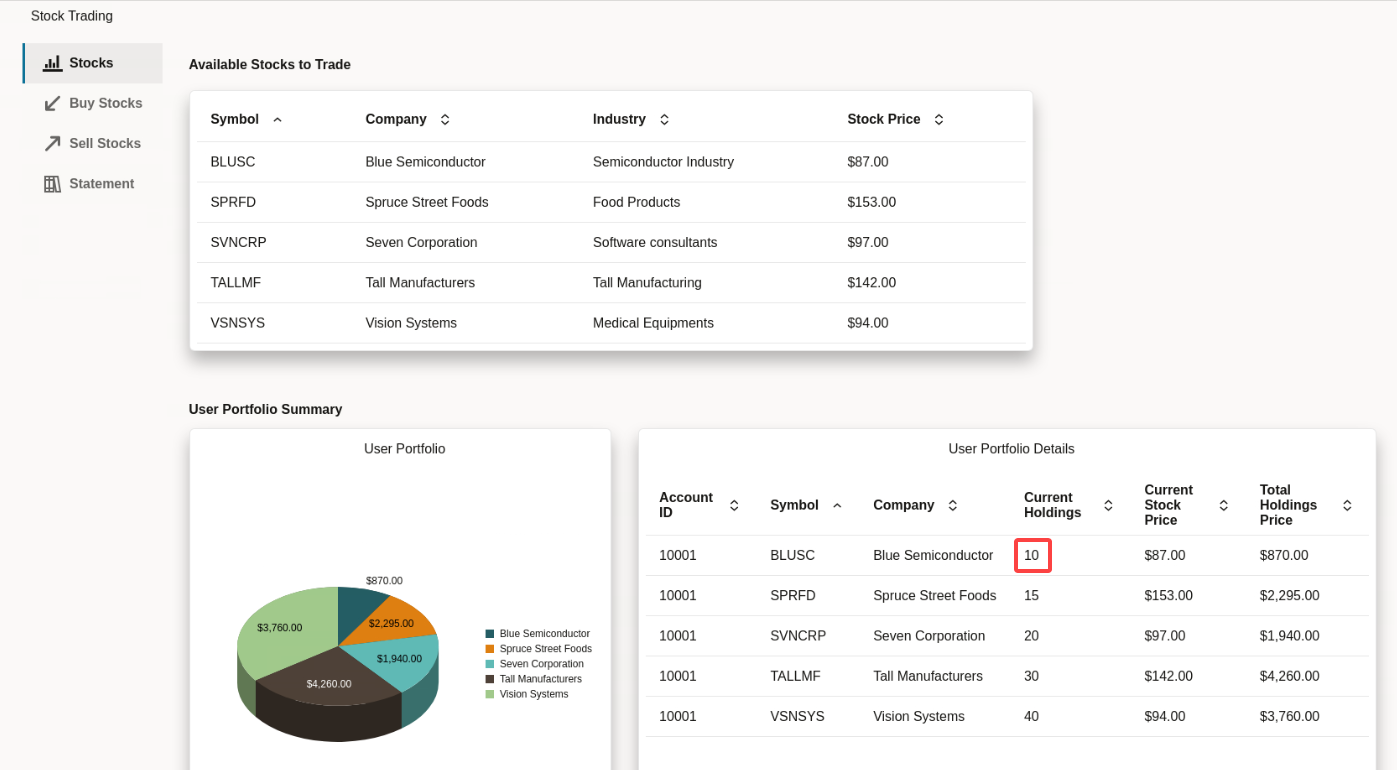
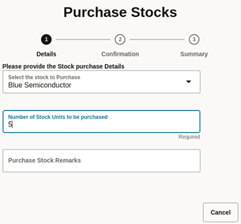
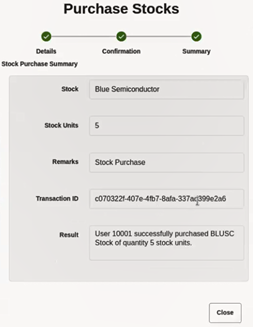
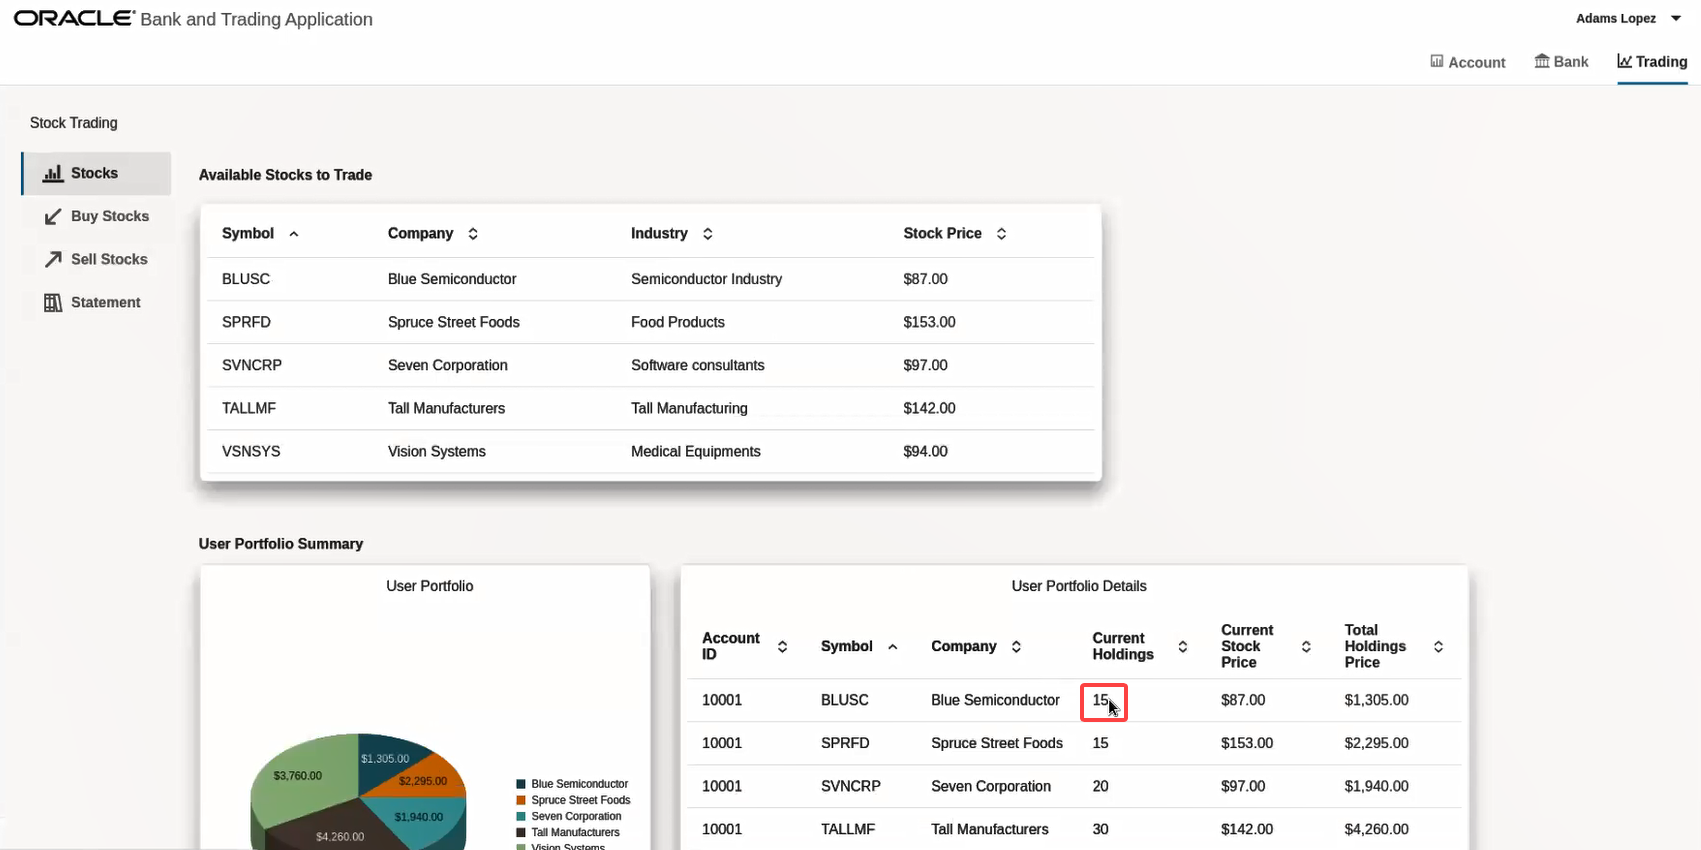
When you send a request to purchase stocks, the Stock Broker service debits the required amount from the Core Banking service. The Core Banking service in turns sends the debit amount request to the Branch Banking service. Once the amount is successfully debited from your bank account, the Stock Broker service purchases the stocks and deposits the purchased stocks into your account. The microservices use the XA protocol and MicroTx to manage the transactions. Within an XA transaction, all actions such as debit amount and deposit stocks either succeed, or all actions are rolled back in case of a failure of any one or more actions.
Parent topic: Run the Bank and Stock-Trading Application
3.7 Deploy Kiali and Jaeger (Optional)
Optionally, you can use Kiali and Jaeger to track and trace distributed transactions in MicroTx through visualization. Use distributed tracing to track how requests flow between MicroTx and the microservices.
Run the following commands to deploy Kiali and Jaeger in a Minikube cluster.
Parent topic: Run the Bank and Stock-Trading Application
3.8 View Service Mesh graph and Distributed Traces (Optional)
To visualize what happens behind the scenes and how a request processed by the distributed services and MicroTx, you can use the Kiali and Jaeger Dashboards that you started in the previous task.
- Open a new browser tab and navigate to the Kiali dashboard URL. For example,
http://localhost:20001/kiali. - Select Graph for the
otmmnamespace. - Open the Jaeger dashboard URL in a new browser. For example,
http://localhost:16686. - In the Service drop-down list, select
istio-ingressgateway. A list of traces is displayed where each trace represents a request. - Select a trace to view it.
Parent topic: Run the Bank and Stock-Trading Application


