Start, Stop, and Destroy an Essbase Stack Instance
You stop, start, and destroy the Essbase stack instance in the Oracle Cloud Infrastructure console.
Topics:
Prepare to Work with an Essbase Stack Instance
Before you can work with the Essbase stack instance, you will need to navigate to the compute instance and find the public IP address.
Navigate to the Essbase compute instance in the Oracle Cloud Infrastructure Console:
- Log in to the Oracle Cloud Infrastructure Console at cloud.oracle.com.
-
Open the navigation menu and click Compute, Instances.
-
Choose your compartment.
-
Click the name of the Essbase instance you want to manage.

-
Under Primary VNIC, find the Public IP Address.
Start the Essbase Stack
The Essbase stack on Oracle Cloud Infrastructure includes the Autonomous AI Database instance, the compute instance, two block storage volumes, object storage bucket, load balancer, and additional network components.
Start the Autonomous AI Database instance:
-
Log in to the Oracle Cloud Infrastructure Console at cloud.oracle.com.
-
Open the navigation menu and click Oracle Database.
-
Under Autonomous Database, select Autonomous Data Warehouse or Autonomous Transaction Processing, depending on which workload type is deployed with Essbase.
-
Choose your compartment.
-
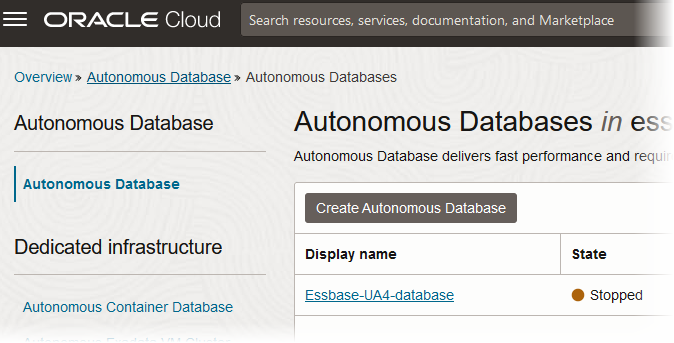
In the list of databases, click the display name of the database you wish to administer.

-
Click Start.

Start the Essbase compute instance:
-
Confirm in the Oracle Cloud Infrastructure Console that the Autonomous AI Database is available.

-
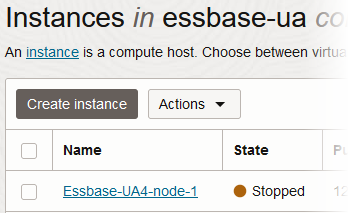
Navigate to the compute instance on the Oracle Cloud Infrastructure Console.
-
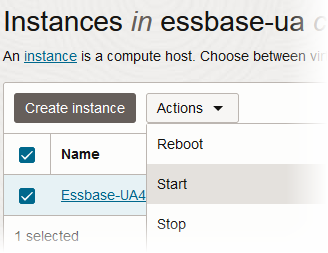
Click Start.

The Essbase compute instance takes a few minutes to start.
Stop the Essbase Stack
The Essbase stack on Oracle Cloud Infrastructure includes the Autonomous AI Database instance, the compute instance, two block storage volumes, object storage bucket, load balancer, and additional network components.
Stop the compute instance:
-
Navigate to the compute instance on the Oracle Cloud Infrastructure Console.
-
Select the instance name, and from the Actions menu, click Stop.
When you stop the compute instance, billing stops for CPU usage.
Optionally, stop the Autonomous AI Database instance, if it is not being used:
-
Confirm in the Oracle Cloud Infrastructure Console that the Essbase compute instance is already stopped.

-
Open the navigation menu and click Oracle Database.
-
Under Autonomous Database, select Autonomous Data Warehouse or Autonomous Transaction Processing, depending on which workload type is deployed with Essbase.
-
Select your compartment.
-
In the list of databases, click the display name of the database you want to administer.
-
From the More actions menu, click Stop.
Billing for storage continues when Autonomous AI Database is stopped. Only the compute instance and the Autonomous AI Database instance are stopped when you stop the stack.
Destroy the Essbase Stack
Destroying the Essbase stack terminates all resources that were created when the stack was created, including the Essbase compute node, the Autonomous AI Database instance, and network components.
Note:
The Destroy action is permanent and cannot be reversed.Before you destroy the stack, ensure that the bucket is empty. For instructions, see "Using the Console" in Managing Objects. The bucket name is backup_databasename.
When using a shared database, delete schemas created by Essbase prior to destroying the stack, or your database may contain orphaned database content. To delete the schemas, ssh to the compute instance and run /u01/vmtools/sysman/drop-schema.sh. You're prompted to enter your database administrator password.
-
If using a shared, existing database, it's recommended to delete schemas created by Essbase prior to destroying the stack, or your database may contain orphaned database content.
-
ssh into the compute instance, and run the following utility to drop the schemas.
/u01/vmtools/sysman/drop-schema.sh -
In the object storage bucket for the database backups, manually delete all items.
-
-
Log in to the OCI Console and click Developer Services.
-
Under Resource Manager, click Stacks.
-
Click on your stack.
-
Click Destroy.
-
When prompted for confirmation, click Destroy.
-
Periodically monitor the progress of the Destroy job until it is finished.
If the destroy job fails, manually terminate the resources that run as part of the stack on Oracle Cloud Infrastructure before you destroy the stack. For example, terminate the networking load balancer (if used), terminate the virtual cloud network (VCN), and terminate the Autonomous AI Database.
If an email address is associated with your user profile, you receive an email notification.
Proceed with destroying the stack regardless of whether the job passes or fails.
Note:
There are cases in which the Destroy job may fail:
- if private endpoint is chosen for the database; re-run Destroy job
- if catalog storage is done in object storage bucket: delete the objects in the bucket and then re-run Destroy job
- if backup operation was performed; delete the backup from the bucket and re-run Destroy job
Refer to destroy job logs for more information.
-
After the destroy job is complete, go back to the stack details, and under More actions, click Delete Stack.
-
When prompted for confirmation, click Delete.