Set Up Admin Server Failover
Essbase in independent deployment runs as a managed server, and depends on the WebLogic Administration Server in order to start, stop, and go into failover mode in case of failure on the primary node.
This topic contains guidelines to set up AdminServer high availability with an Essbase failover configuration. For general information about WebLogic AdminServer high availability, refer to Administration Server High Availability.
Preconfigure High Availability of Essbase Managed Servers
To enable high availability for WebLogic managed servers used for Essbase, complete the following configuration.
-
Log in to the WebLogic Server Admininstration Console.
-
On the home page, under Domain Structure, click the Essbase domain name (for example, essbase_domain).

-
Navigate, using the tabs, to Security > Embedded LDAP.

-
Unselect the following option, and click Save.

-
SSH to Host 1 and restart Essbase (the AdminServer and both the managed servers) as described in Stop, Start, and Check Servers.
Note:
In EPM Shared Services deployments only, the EPM WebLogic Server should be started before starting the Essbase managed server.In order to start and stop each server individually, use the -i parameter with server name.
Linux Example (start):
<Domain Home>/esstools/bin/start.sh -i essbase_server1Windows Example (start):
<Domain Home>\esstools\bin\start.cmd -i essbase_server1
Set Up Admin Server High Availability
Prerequisites
- You have completed the Essbase Failover Prerequisites.
-
You have a shared network drive that is accessible to both (or all) Essbase hosts that you configured for failover. It can be the same location mentioned in Essbase Failover Prerequisites.
To set up WebLogic Admin Server high availability with an Essbase failover environment,
-
Create a virtual IP address (VIP) on the primary node (Host 1).
Use the Linux ip command. The syntax is:
ip addr add <VIP>/<NETMASK> dev <INTERFACE> label <LABEL_NAME>Example:
ip addr add 100.xx.xx.1/20 dev ens3 label ens3:2 -
Set up the Essbase failover environment, as described in Set up an Essbase Failover Environment Using the Failover Setup Script.
-
Test that the Essbase failover environment setup was successful (refer to Start and Validate the Essbase Failover Configuration).
-
Log in to the WebLogic Server Admininstration Console.
-
On the Home page, under Domain Configurations > Environment, navigate to Servers, and click AdminServer.
-
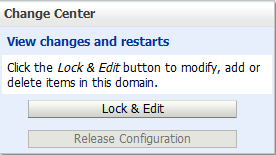
In the Change Center pane, click Lock & Edit.

-
Change the Listen Address to the virtual IP (VIP) address.
-
Click Save.
-
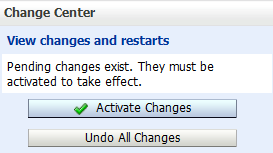
Click Activate Changes.

-
Restart the Admin Server.
-
Log in again to the WebLogic Server Admininstration Console.
-
Under the domain structure, navigate to Environment > Machines.

-
Click Lock & Edit, then click New to add a new machine named adminmachine. Set the Machine OS as Unix, and click Next.

-
Set the Node Manager type to SSL, set the Listen Address to the virtual IP (VIP) address, and set the port to 9557. Click Finish.

-
In the Summary of Machines table, click the link for the new adminmachine, and click the Configuration tab, then the Servers tab.
-
Click Add, select AdminServer, and click Finish.

-
SSH to the Essbase primary node (Host 1), navigate to
<Domain_Home>/servers/AdminServer, and make a directorynodemanager. -
Navigate into
nodemanagerdirectory and create two new files,nodemanager.domainsandnodemanager.properties.Sample of
nodemanager.domains(replace the value to match your own installed Essbase domain name and path):essbase_domain=/u01/oracle/user_projects/domains/essbase_domainSample of
nodemanager.properties(replace the value to match your own installed Essbase domain name and path):DomainsFile=/u01/oracle/user_projects/domains/essbase_domain/servers/AdminServer/nodemanager/nodemanager.domains LogLimit=0 PropertiesVersion=12.2.1.1.0 AuthenticationEnabled=true NodeManagerHome=/u01/oracle/user_projects/domains/essbase_domain/servers/AdminServer/nodemanager JavaHome=/u01/app/oracle/product/JAVA/jdk LogLevel=INFO DomainsFileEnabled=true ListenAddress=100.xx.xx.1 NativeVersionEnabled=true ListenPort=9557 LogToStderr=true weblogic.StartScriptName=startWebLogic.sh SecureListener=true LogCount=1 QuitEnabled=false LogAppend=true weblogic.StopScriptEnabled=false StateCheckInterval=500 CrashRecoveryEnabled=false weblogic.StartScriptEnabled=true LogFile=/u01/oracle/user_projects/domains/essbase_domain/servers/AdminServer/nodemanager/nodemanager.log LogFormatter=weblogic.nodemanager.server.LogFormatter ListenBacklog=50 -
Navigate to
<Domain_Home>/bin. Example:cd /u01/oracle/user_projects/domains/essbase_domain/bin -
Make a copy of the Node Manager startup script, with a new name
startNodeManagerAdmin.sh. Example:cp startNodeManager.sh startNodeManagerAdmin.sh -
Open
startNodeManagerAdmin.shfor editing. Change the value of NODEMGR_HOME to"<Domain_Home>/servers/AdminServer/nodemanager", and save the file. Example:NODEMGR_HOME="/u01/oracle/user_projects/domains/essbase_domain/nodemanager" -
Navigate to
<Domain_Home>/esstools/bin. Example:cd /u01/oracle/user_projects/domains/essbase_domain/esstools/bin -
Stop the AdminServer. Example:
./stop.sh -i AdminServer -
Navigate back to
<Domain_Home>/binand runstartNodeManagerAdmin.shin the background. Example:cd /u01/oracle/user_projects/domains/essbase_domain/bin ./startNodeManagerAdmin.sh & -
Set the domain environment. Example:
source /u01/oracle/user_projects/domains/essbase_domain/bin/setDomainEnv.sh -
Run the WebLogic Scripting Tool, located in
<ORACLE_HOME>/oracle_common/common/bin. Example:/u01/oracle/user_projects/oracle_common/common/bin/wlst.sh -
At the
wls:/offline>prompt, connect to Node Manager, then start the AdminServer. For example, use the following commands (replace <variables> with your values):wls:/offline> nmConnect('<WebLogic_admin_user>','<WebLogic_admin_password>', '<Virtual-IP-address>','9557','<DOMAIN_NAME>','<DOMAIN_HOME>','ssl') wls:/nm/mydomain> nmStart('AdminServer')Example:
wls:/offline> nmConnect('wladmin','wlpa55w0rD', '<100.xx.xx.1>','9557','essbase_domain','/u01/oracle/user_projects/domains/essbase_domain','ssl') wls:/nm/mydomain> nmStart('AdminServer') -
Keeping wlst open, check that you can access the WebLogic Server Administrative console using the virtual IP address. For example,
http://100.xx.xx.1:7001/console. -
Stop the AdminServer.
wls:/nm/mydomain> nmKill('AdminServer') -
Exit the WebLogic Scripting Tool. Example:
exit() -
Go to the shared network drive and make a new directory with the same name as your Essbase <DOMAIN_NAME>. Example:
cd /nfs/essbase_data mkdir essbase_domain -
Move Essbase domain subdirectories
bin,config, and/servers/AdminServerto the new directory on the shared drive. Example:mv /u01/oracle/user_projects/domains/essbase_domain/bin /nfs/essbase_data/essbase_domain/ mv /u01/oracle/user_projects/domains/essbase_domain/config /nfs/essbase_data/essbase_domain/ mv /u01/oracle/user_projects/domains/essbase_domain/servers/AdminServer /nfs/essbase_data/essbase_domain/ -
Navigate back to
<Domain_Home>and make symbolic links to the Essbase domain folders on the shared drive. Example:cd /u01/oracle/user_projects/domains/essbase_domain/ ln -s /nfs/essbase_data/essbase_domain/bin . ln -s /nfs/essbase_data/essbase_domain/config . cd servers/ ln -s /nfs/essbase_data/essbase_domain/AdminServer . -
SSH to the Essbase secondary node (Host 2), navigate to
<Domain_Home>, and make a directory structure/tmp/admin. Example:cd /u01/oracle/user_projects/domains/essbase_domain mkdir /tmp/admin -
Move domain subdirectories
bin,config, and/servers/AdminServerinto/tmp/admin. Example:mv bin /tmp/admin/ mv config /tmp/admin/ mv ./servers/AdminServer /tmp/admin/ -
Make symbolic links to the Essbase domain folders on the shared drive. Example:
ln -s /nfs/essbase_data/essbase_domain/bin .
ln -s /nfs/essbase_data/essbase_domain/config .
cd servers/
ln -s /nfs/essbase_data/essbase_domain/AdminServer .
Validate AdminServer High Availability
To validate that you set up WebLogic AdminServer high availability successfully with the Essbase failover environment, test that you can access the WebLogic Server Administrative console, using the virtual IP address, from the Essbase primary node and any failover nodes.
-
SSH to the Essbase primary node (Host 1), navigate to
<Domain_Home>/bin, and runstartNodeManagerAdmin.shin the background. Example:cd /u01/oracle/user_projects/domains/essbase_domain/bin ./startNodeManagerAdmin.sh & -
Set the domain environment. Example:
source /u01/oracle/user_projects/domains/essbase_domain/bin/setDomainEnv.sh -
Run the WebLogic Scripting Tool, located in
<ORACLE_HOME>/oracle_common/common/bin. Example:/u01/oracle/user_projects/oracle_common/common/bin/wlst.sh -
At the
wls:/offline>prompt, connect to Node Manager, then start the AdminServer. For example, use the following commands (replace <variables> with your values):wls:/offline> nmConnect('<WebLogic_admin_user>','<WebLogic_admin_password>', '<Virtual-IP-address>','9557','<DOMAIN_NAME>','<DOMAIN_HOME>','ssl') wls:/nm/mydomain> nmStart('AdminServer')Example:
wls:/offline> nmConnect('wladmin','wlpa55w0rD', '<100.xx.xx.1>','9557','essbase_domain','/u01/oracle/user_projects/domains/essbase_domain','ssl') wls:/nm/mydomain> nmStart('AdminServer') -
Check that you can access the WebLogic Server Administrative console using the virtual IP address. For example,
http://100.xx.xx.1:7001/console. -
Stop the AdminServer.
wls:/nm/mydomain> nmKill('AdminServer') -
Exit the WebLogic Scripting Tool. Example:
exit() -
SSH to the Essbase secondary node (Host 2), navigate to
<Domain_Home>/bin, and runstartNodeManagerAdmin.shin the background. Example:cd /u01/oracle/user_projects/domains/essbase_domain2/bin ./startNodeManagerAdmin.sh & -
Set the domain environment. Example:
source /u01/oracle/user_projects/domains/essbase_domain2/bin/setDomainEnv.sh -
Run the WebLogic Scripting Tool, located in
<ORACLE_HOME>/oracle_common/common/bin. Example:/u01/oracle/user_projects/oracle_common/common/bin/wlst.sh -
At the
wls:/offline>prompt, connect to Node Manager, then start the AdminServer. For example, use the following commands (replace <variables> with your values):wls:/offline> nmConnect('<WebLogic_admin_user>','<WebLogic_admin_password>', '<Virtual-IP-address>','9557','<DOMAIN_NAME>','<DOMAIN_HOME>','ssl') wls:/nm/mydomain> nmStart('AdminServer')Example:
wls:/offline> nmConnect('wladmin','wlpa55w0rD', '<100.xx.xx.1>','9557','essbase_domain','/u01/oracle/user_projects/domains/essbase_domain2','ssl') wls:/nm/mydomain> nmStart('AdminServer') -
Check that you can access the WebLogic Server Administrative console using the virtual IP address. For example,
http://100.xx.xx.1:7001/console.