Replacing the Battery
The system battery is a replaceable component that requires you to power off the server before servicing.
The real-time clock (RTC) battery maintains system time when the server is powered off and a time server is unavailable. If the server does not maintain the correct time when the system is powered off and not connected to a network, replace the battery.
Caution:
These procedures require that you handle components that are sensitive to electrostatic discharge. This sensitivity can cause the components to fail. To avoid damage, ensure that you follow antistatic practices, as described in Electrostatic Discharge Safety under "Safety Precautions".Caution:
Ensure that all power is removed from the server before removing or installing the battery. You must disconnect the power cables from the system before performing these procedures.Remove the Battery
-
Power off the server.
-
Disconnect the power cords from the power supplies.
-
Extend the server into the maintenance position.
-
Attach an antistatic wrist strap to your wrist, and then to a metal area on the chassis.
-
Remove the server top cover.
-
Locate the battery and RTC battery retainer on the server motherboard.
Note:
Coin battery retainer types that are mounted in the RTC battery motherboard location may be different.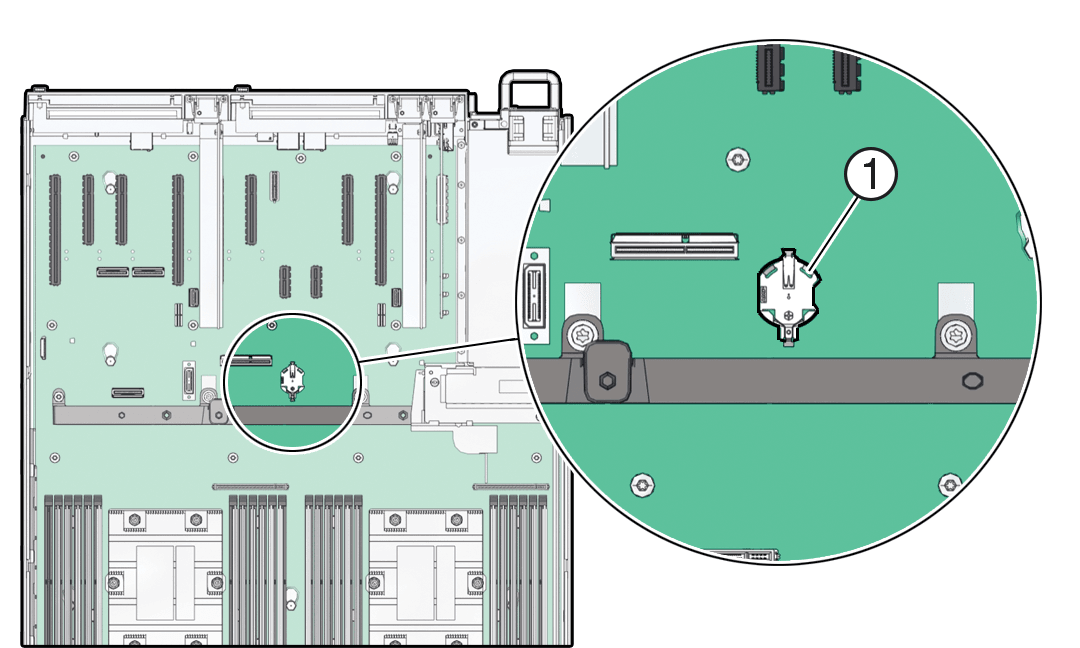
- Remove the battery from the battery holder.
Review the following battery holder (Part number: 8210501) options.
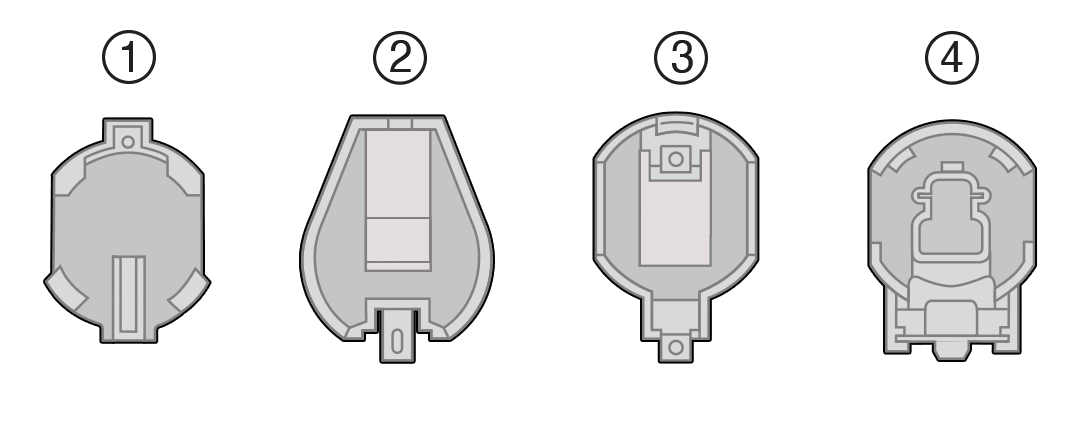
Callout Description 1
796136-1 Top-Load Battery Connector (TE)
2
1093TR Top-Load Battery Connector
3
1070TR Top-Load Battery Connector
4
S8421 Top-Load Battery Connector
Select the detailed instructions below for the specific type of RTC battery retainer on the server motherboard.
-
[Type 1] Remove the battery from the TE Top-Load Battery Connector as follows.
Each connector consists of a housing with a positive contact and a negative contact. The floor of the housing is embossed with a `+' to designate the positive contact. The connector features four lips for positive retention of the battery.
-
Grasp connector. Support the connector by grasping the "positive" end of the connector.
Caution:
The connector must be supported, otherwise damage to the soldered contacts could occur. -
Slide battery under lips at positive end of connector. While supporting the connector, simultaneously push the battery toward the positive end of the connector, and slightly move the lips at the negative end of the connector away from the battery. Hold in this position, and lift the battery.
- Pull the battery from the connector.

-
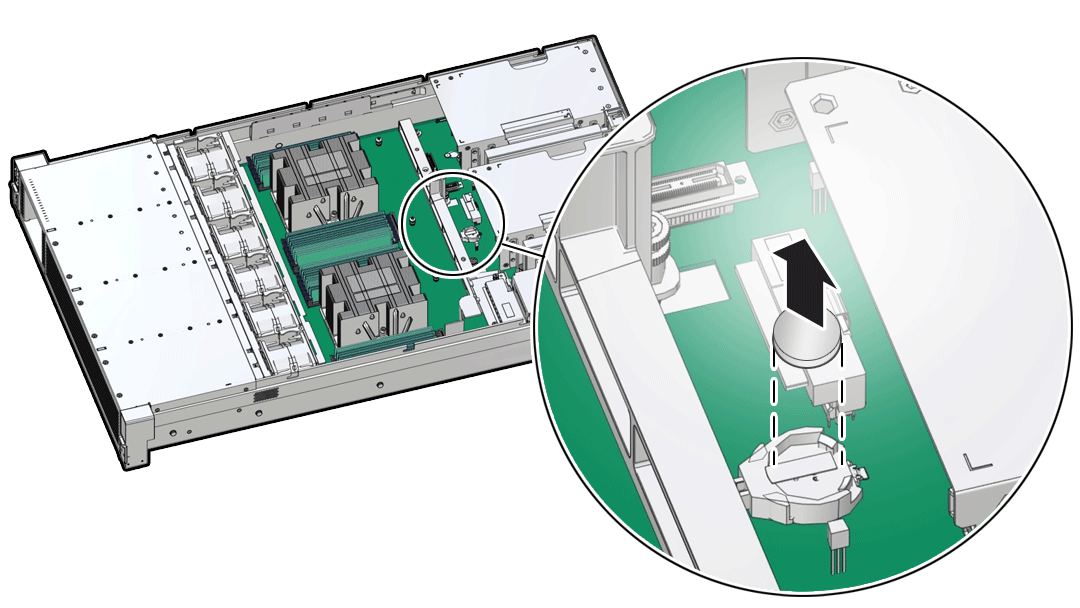
- [Type 2] Remove the battery from the 1093TR battery connector as follows.
Push the coin battery towards the negative spring and then lift up the coin battery to dislodge it from its holder.
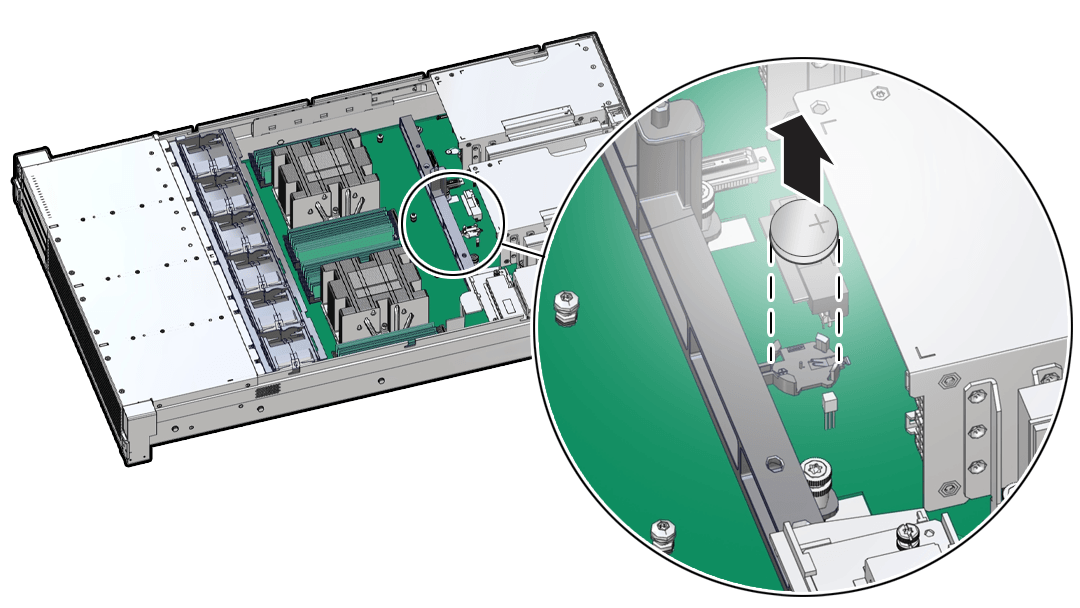
- [Type 3 and 4] Remove the battery from other Top-Load Battery Connectors as
follows.
-
To dislodge the battery from the retainer, place your finger under the side of the battery nearest the rear of the server [1].
-
Gently lift the battery up and out of the retainer [2].
-
-
Install the Battery
-
Unpack the replacement RTC battery.
-
Press the new battery into the battery retainer.
Install the battery into the Top-Load Battery Connector as follows:
-
Each connector consists of a housing with a positive contact and a negative contact. The floor of the housing is embossed with a "+" to designate the positive contact. The connector features four lips for positive retention of the battery.
-
Grasp connector. Support the connector by grasping the positive end of the connector.
Caution:
The connector must be supported, otherwise damage to the soldered contacts could occur. -
Slide battery under lips at positive end of connector. While supporting the connector, hold the battery at an angle with the positive side facing up, and slide the battery under the lips at the positive end of the connector.
Note:
Positive side of battery is marked with a "+". - Fully seat battery onto housing floor. Gently push the battery onto the floor of
the housing until the battery is fully seated. There should be an audible "snap".
Note:
Insert the battery so that the positive (+) side is facing up.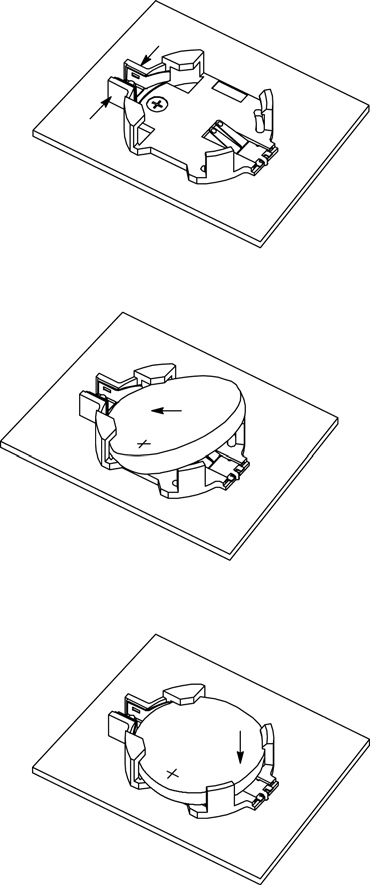
-
- Press the new battery into the battery retainer with the positive side (+) facing up.
-
-
Install the server top cover.
-
Return the server to the normal rack position.
-
Reconnect the power cords to the server power supplies, and power on the server.
See Reconnect Power and Data Cables and Power On the Server.
-
Verify that the System OK LED indicator is lit.
Note:
If the service processor is configured to synchronize with a network time server using the Network Time Protocol (NTP), the Oracle ILOM SP clock is reset as soon as the server is powered on and connected to the network. Otherwise, proceed to the next step. -
If the service processor is not configured to use NTP, you must reset the Oracle ILOM clock using Oracle ILOM CLI or web interface. Refer to Oracle ILOM Documentation.