Oracle Key Vault and Recovery Appliance
The Oracle Key Vault (OKV) stores the TDE master keys and also keeps track of all enrolled endpoints.
Endpoints are the database servers, application servers, and computer systems where actual cryptographic operations such as encryption or decryption are performed. Endpoints request OKV to store and retrieve security objects.
A brief overview of the Oracle Key Vault (OKV) configurations:
-
All compute nodes of the Recovery Appliance are registered and enrolled as OKV endpoints.
-
A single OKV endpoint group contains all the endpoints corresponding to all of the compute nodes of the Recovery Appliance.
-
A single wallet is shared and configured as
'Default Wallet'for all endpoints corresponding to all of the compute nodes of the Recovery Appliance. -
The OKV endpoint group is configured with read/write/manage access to the shared virtual wallet.
-
If more than one Recovery Appliance is involved, each Recovery Appliance has its own end point group and wallet.
-
The host-specific
okvclient.jaris created and saved during the enrollment process of each endpoint to the staging path on its respective node. If the root user is performing the operation, the/radumpis the staging path. If a named user (such asraadmin) is performing the operation, then the staging has to be in/tmp. The staged file has to be named either as-isokvclient.jaror<myHost>-okvclient.jar, where<myHost>matches whathostnamereturns.
Note:
Refer to Oracle Key Vault Administrator’s Guide for more information.
Review: Oracle Key Vault
This reference section employs concepts from the Oracle Key Vault Administrator’s Guide (OKV).
The OKV administrator performs these tasks, and are a pre-requisite for the operations performed by the Recovery Appliance administrator. The OKV administrator configures the OKV Endpoints.
Creating the Endpoints
These operations for created an Endpoint are performed from the Key Vault Server Web Console.
-
Log into the Oracle Key Vault Server.
-
Click Endpoints tab.
-
Click Add button in right corner of the Endpoints page.
-
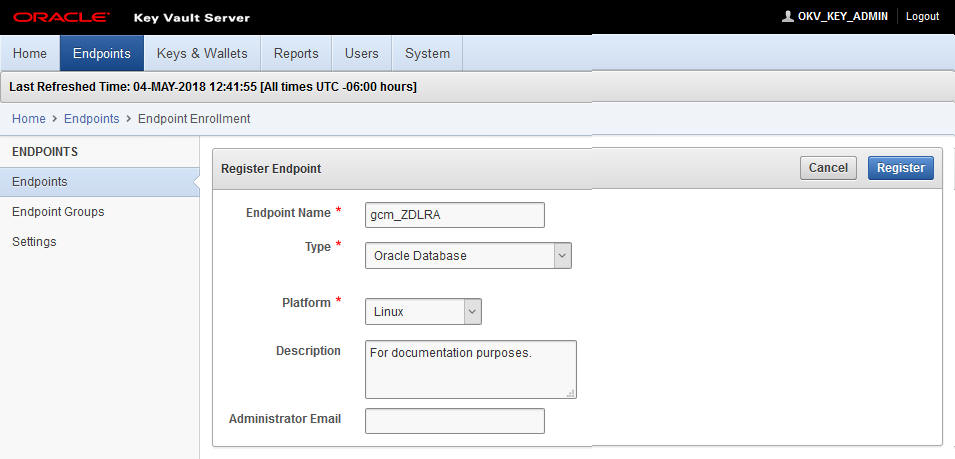
Enter the information specific to the Recovery Appliance node that the endpoint is to be associated with. (Name/Type/Platform/Desc/Email)
Figure 2: Database Access Configuration Tasks in the Recovery Appliance Workflow
-
Click Register button on the right.
-
Repeat the above steps to create an endpoint for every Recovery Appliance node.
Creating the Endpoint Group
These operations for creating an Endpoint Group are performed from the Key Vault Server Web Console.
-
Click Endpoints tab.
-
Click Endpoint Groups option on the left.
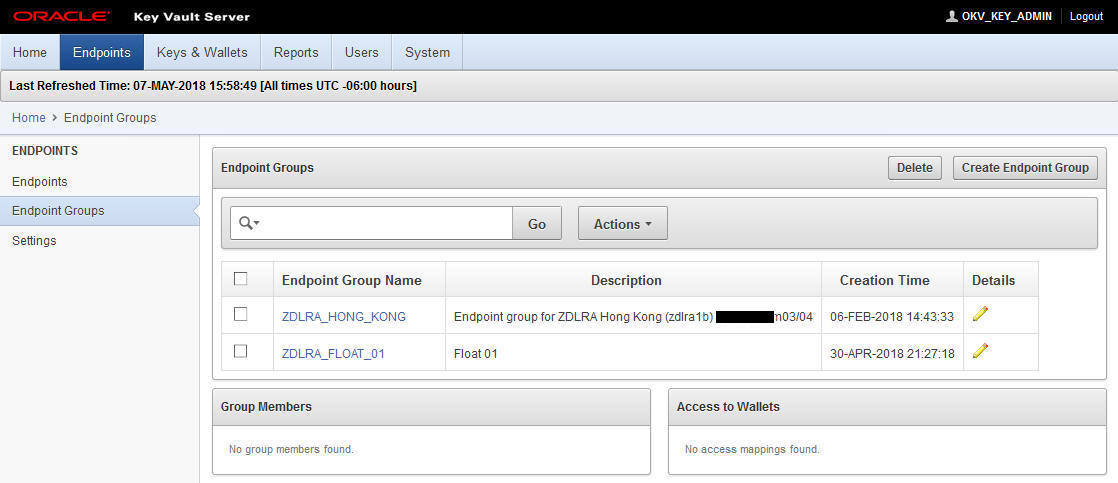
-
Click Create Endpoint Group button on top right.
-
Enter name and description, and select all endpoints created in the previous operations.
-
Click Save button on the right.
Creating a Wallet
These operations for created an Wallet are performed from the Key Vault Server Web Console.
-
Click Keys & Wallets tab.
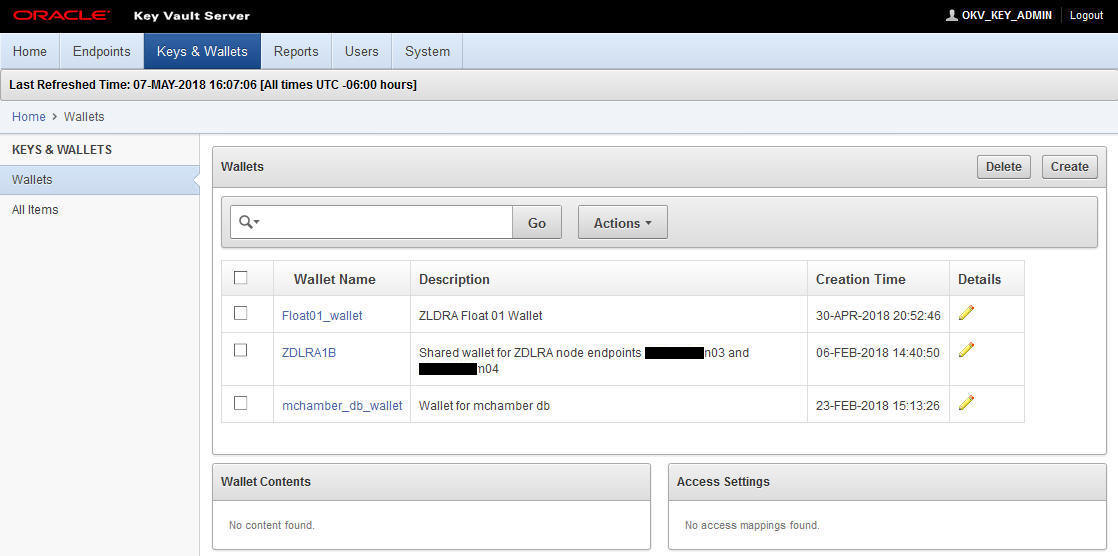
-
Click Create button at top right.
-
Enter name and description specific to the first node/endpoint.
-
Click on the Save button on the right.
Associating Default Wallet with Endpoints
These operations for associating the virtual wallet with an Endpoint are performed from the Key Vault Server Web Console.
-
Click Endpoints tab.
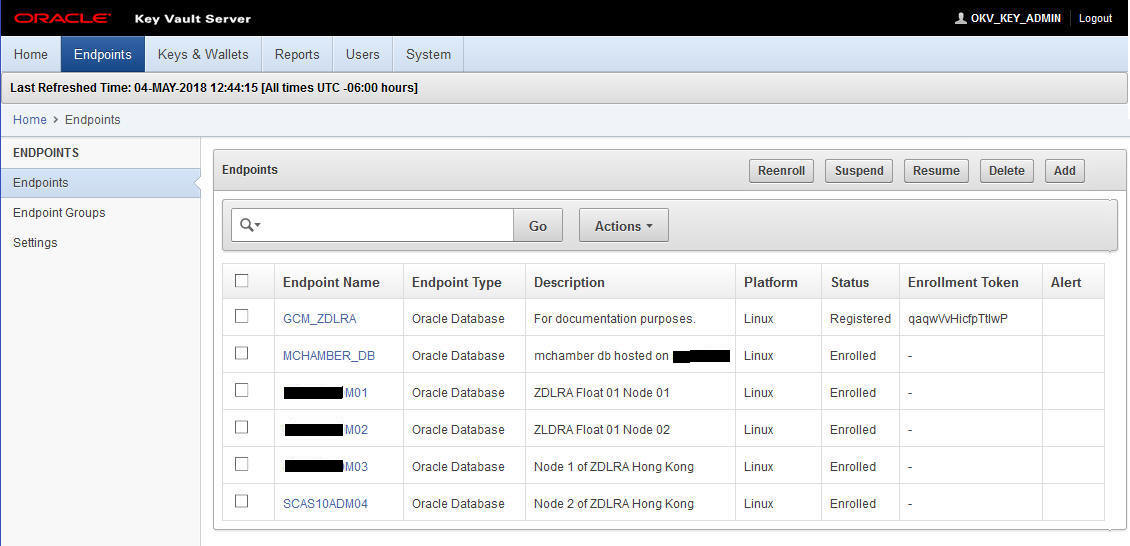
-
Click on the specific name for the endpoint being associated with a wallet.
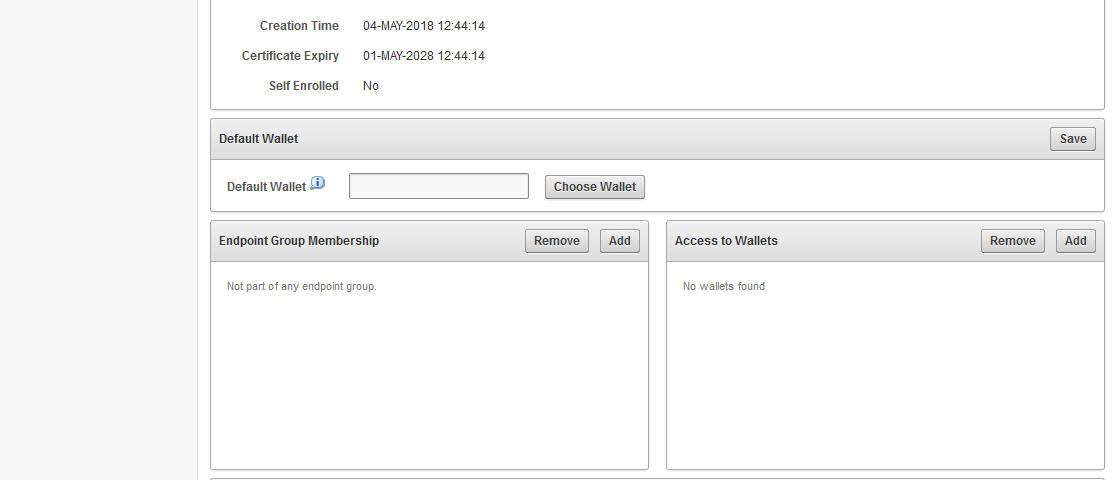
Description of the illustration okv_24_endpointchoosewallet.jpg
-
In Default Wallet section, click Choose Wallet button.
-
Click on the name of the wallet created above, and click Select to assign endpoints.
-
Click Save button on the right.
-
Repeat wallet assignment for other endpoints. The same wallet is assigned to those endpoints.
Acquiring the Enrollment Tokens
These operations for acquiring the enrollment tokens are performed from the Key Vault Server Web Console.
-
Click Endpoints tab.
The page now includes enrollment tokens specific to each endpoint/node.
-
Copy and retain (in a file) the enrollment token specific to each endpoint, because it is used in a later enrollment step.
-
Logout of the web interface. This step is required in order for other steps to display refreshed information.