Discovering Fabrics
Enterprise Manager discovers and manages Ethernet fabrics and InfiniBand fabrics. A network switch contributes its ports, datalinks, and networks to a fabric.
After discovery, you can manage the components of these fabrics and view their attributes and metrics, according to the procedures in Managing Networks.
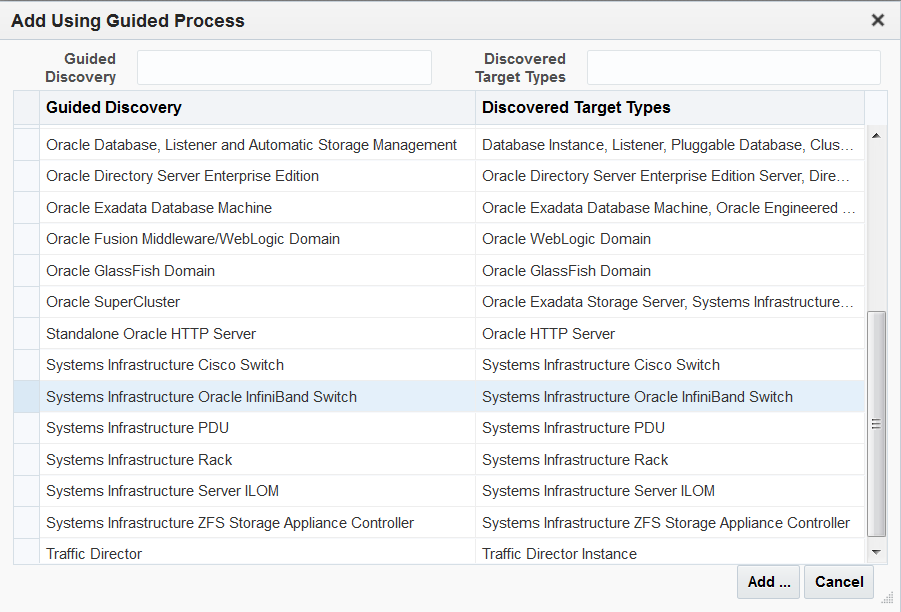
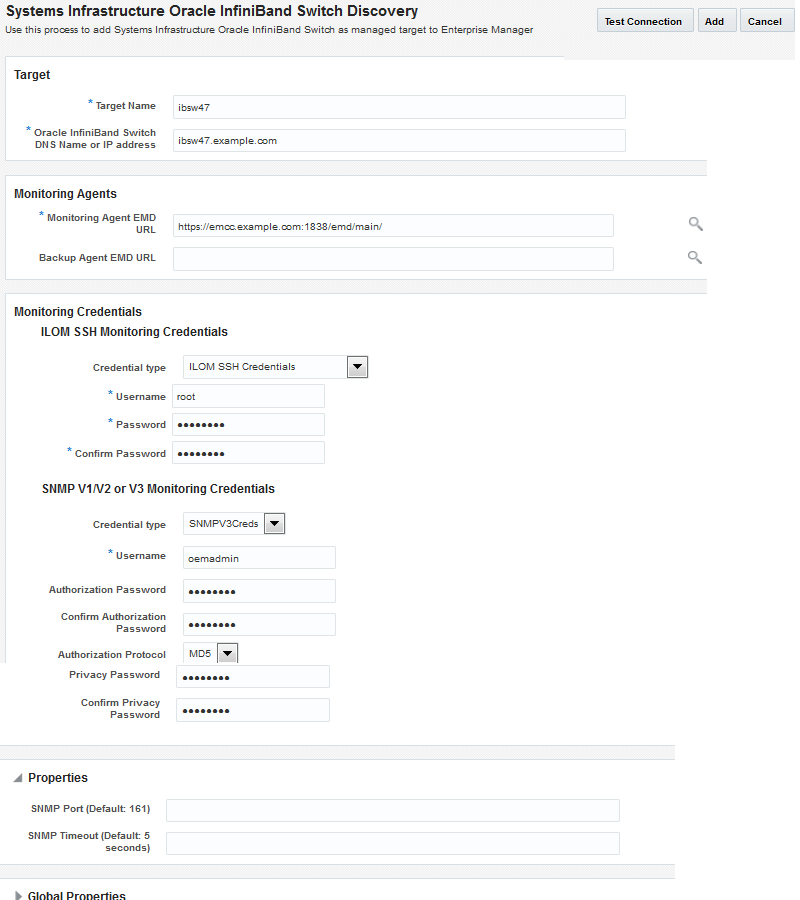
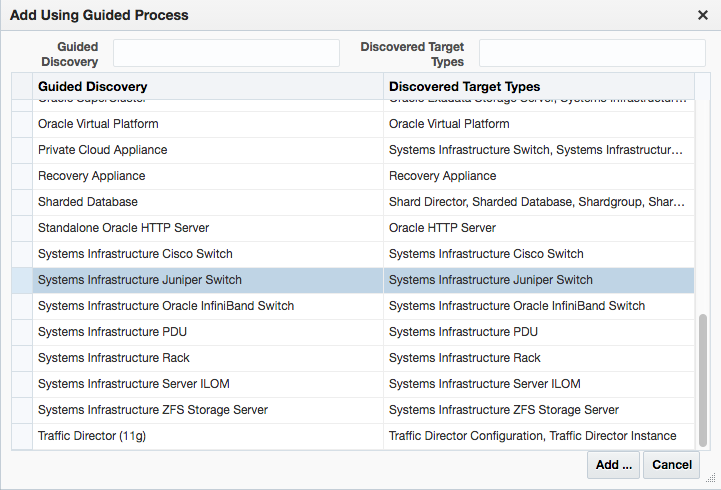
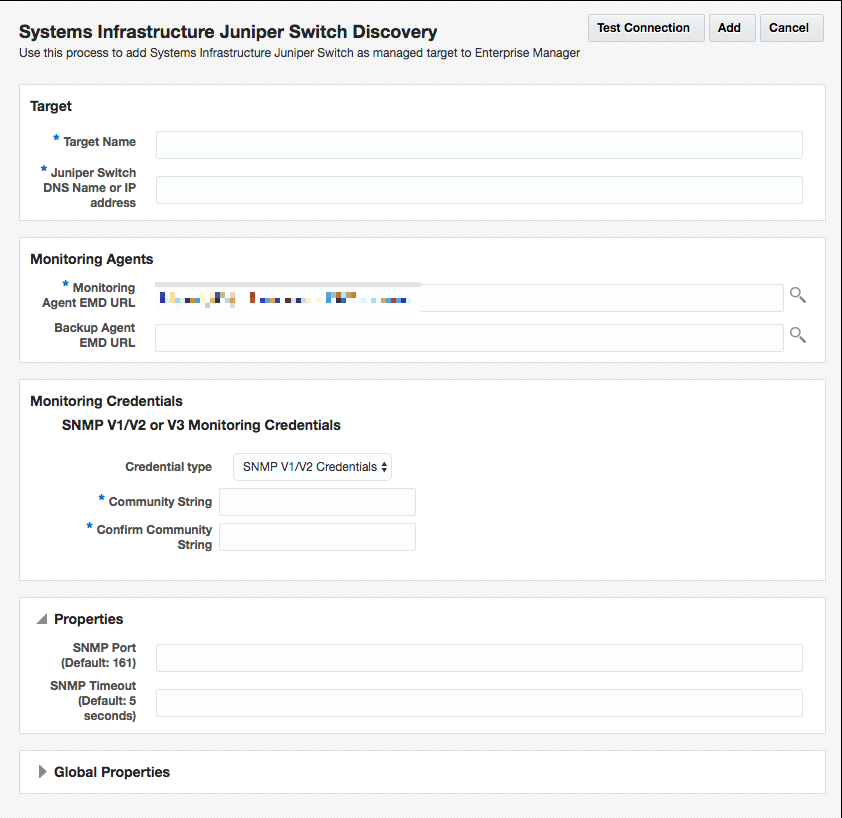
Discover an Ethernet Network Switch
Example 16-6 Example. Command to Discover a Juniper Ethernet Switch Using SNMP Version 3
The following command discovers and manages a Juniper Ethernet switch named MY_SWITCH and sets the SNMP version to Version 3.
emcli add_target -name=MY_SWITCH -type=oracle_si_netswitch -host=AGENT_HOST -access_point_name=MY_SWITCH -access_point_type=oracle_si_switch_juniper_junos -properties='dispatch.url=snmp://MY_SWITCH_IP_ADDR' -subseparator=properties='=' -monitoring_cred='snmp_v1v2_v3;oracle_si_switch_cisco_ios;SNMPV3Creds;authUser:PRINCIPAL;authPwd:AUTHCRED;authProtocol:MD5;privPwd:PRIV_CREDS'Use the Command Line To Discover a Switch
These examples use the Command Line Interface to discover and manage a network switch. You must configure the command line interface before you can issue commands. For more information, click the Setup menu, then click Command Line Interface. Follow the Download and Deploy instructions.
Example 16-7 Command to Discover an InfiniBand Switch Using SNMP Version 3
The following command discovers and manages an InfiniBand switch named MY_SWITCH and sets the SNMP version to Version 3.
emcli add_target -name=MY_SWITCH -type=oracle_si_netswitch -host=AGENT_HOST -access_point_name=MY_SWITCH -access_point_type=oracle_si_switch_oracle_ib -properties='dispatch.url=ilom-ssh://MY_SWITCH_IP_ADDR' -subseparator=properties='=' -monitoring_cred='ilom_creds_set;oracle_si_switch_oracle_ib;ilom_creds;username:PRIV_USER;password:PASSWORD' -monitoring_cred='snmp_v1v2_v3;oracle_si_switch_oracle_ib;SNMPV3Creds;authUser:PRINCIPAL;authPwd:AUTHCRED;authProtocol:MD5;privPwd:PRIV_CREDS'
Example 16-8 Command to Discover a Cisco Ethernet Switch Using SNMP Version 3
The following command discovers and manages a Cisco Ethernet switch named MY_SWITCH and sets the SNMP version to Version 3.
emcli add_target -name=MY_SWITCH -type=oracle_si_netswitch -host=AGENT_HOST -access_point_name=MY_SWITCH -access_point_type=oracle_si_switch_cisco_ios -properties='dispatch.url=ios-ssh://MY_SWITCH_IP_ADDR' -subseparator=properties='=' -monitoring_cred='cisco_creds_set;oracle_si_switch_cisco_ios;cisco_creds;username:PRIV_USER;userpass:USER_PASSWORD;privpass:PRIV_PASSWORD' -monitoring_cred='snmp_v1v2_v3;oracle_si_switch_cisco_ios;SNMPV3Creds;authUser:PRINCIPAL;authPwd:AUTHCRED;authProtocol:MD5;privPwd:PRIV_CREDS'
Example 16-9 Command to Discover an InfiniBand Switch Using SNMP Version 1
The following command discovers and manages an InfiniBand switch named MY_SWITCH, sets the SNMP version to Version 1, and changes the time interval for the SNMP property.
emcli add_target -name=MY_SWITCH -type=oracle_si_netswitch -host=AGENT_HOST -access_point_name=MY_SWITCH -access_point_type=oracle_si_switch_oracle_ib -properties='dispatch.url=ilom-ssh://MY_SWITCH_IP_ADDR;SNMPTimeout=180' -subseparator=properties='='-monitoring_cred='ilom_creds_set;oracle_si_switch_oracle_ib;ilom_creds;username:PRIV_USER;password:PASSWORD' -monitoring_cred='snmp_v1v2_v3;oracle_si_switch_oracle_ib;SNMPV1Creds;COMMUNITY:<COMMUNITY>'


