4 Creating Service Desk Tickets
You can create tickets automatically or manually. The following sections explain how to create both types, understand post-creation advisory information, and then switch from one console to the other:
Note:
If the default templates do not provide the desired mappings, you can create custom templates to map data as desired. See Customizing Ticket Templates for additional information.
Automatically Creating a Ticket
To automatically create a ticket in CASD, you need to create an incident rule that references a template from the CASD connector.
To create an incident rule to automatically create a ticket in CASD:
-
From the Enterprise Manager console, click Setup, then Incidents and Incident Rules.
-
Click Create Rule Set.
The Create Rule Set page appears.
-
Provide a Name and Description.
-
Click the Rules tab.
-
For events —
This is the typical option to choose to create a ticket for an event, such as a target down availability event.
-
Click Create and select Incoming events or updates to events as a type of rule to create from the pop-up window, then click Continue.
The Create New Rule wizard appears.
-
Follow the steps to create a rule. (Refer to the "Configuring Incident Rule" section in the Oracle Enterprise Manger Advanced Configuration Guide.)
-
-
For incidents —
You can use this option to create tickets based on incident attributes, such as priority 1 incidents or incidents based on fatal or critical severity.
-
Click Create and select Newly created incidents or updates to incidents as a type of rule to create from the pop-up window, then click Continue.
The Create New Rule wizard appears.
-
Follow the steps to create a rule. (Refer to the "Configuring Incident Rule" section in the Oracle Enterprise Manger Advanced Configuration Guide.)
-
-
-
While configuring the above rule in the Add Actions page:
-
For events —
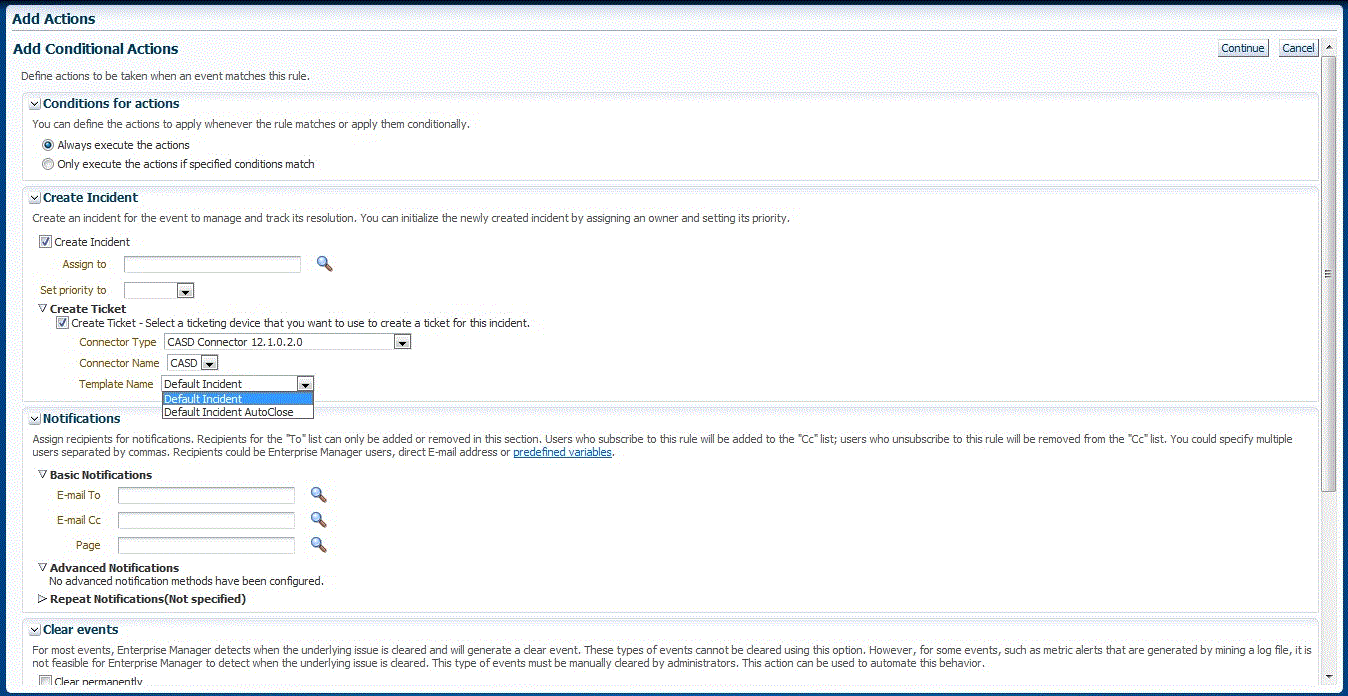
Enable the Create Incident check box. This makes the Create Ticket option visible. Now enable the Create Ticket check box, which displays lists to select the Connector Type, Connector Name, and Template Name as shown in Figure 4-1.
Figure 4-1 Event Add Actions

-
For incidents —
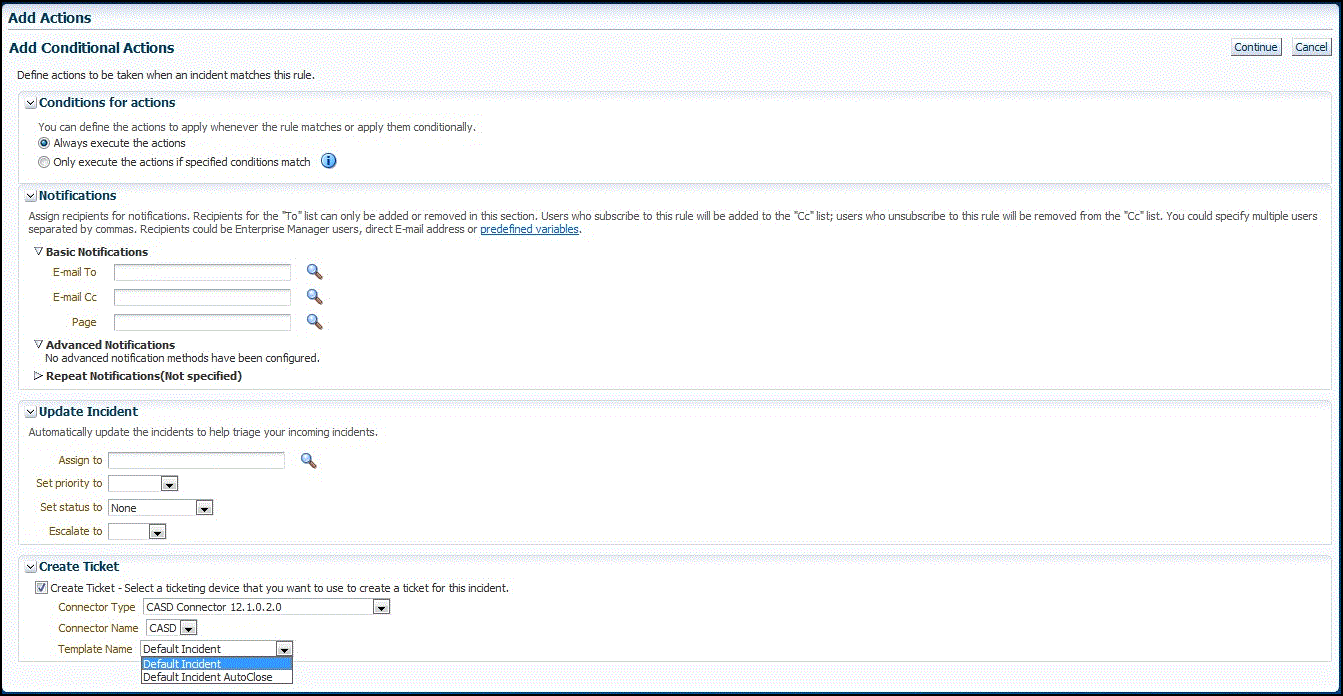
Enable the Create Ticket check box, which displays lists to select the Connector Type, Connector Name, and Template Name as shown in Figure 4-2.
Figure 4-2 Incident Add Actions

-
-
After completing all of the wizard steps, click Save.
The following process occurs after you create the incident rule for your incidents:
-
A request is sent to the CASD Connector when an incident is created due to an event that matches your rule.
-
The ticket is created or updated in the CASD system.
-
In Enterprise Manager, the incident annotation is updated. A comment is added to the event Detail page of the incident to indicate that a ticket was created or updated, along with the ticket ID, status, and ticket URL.
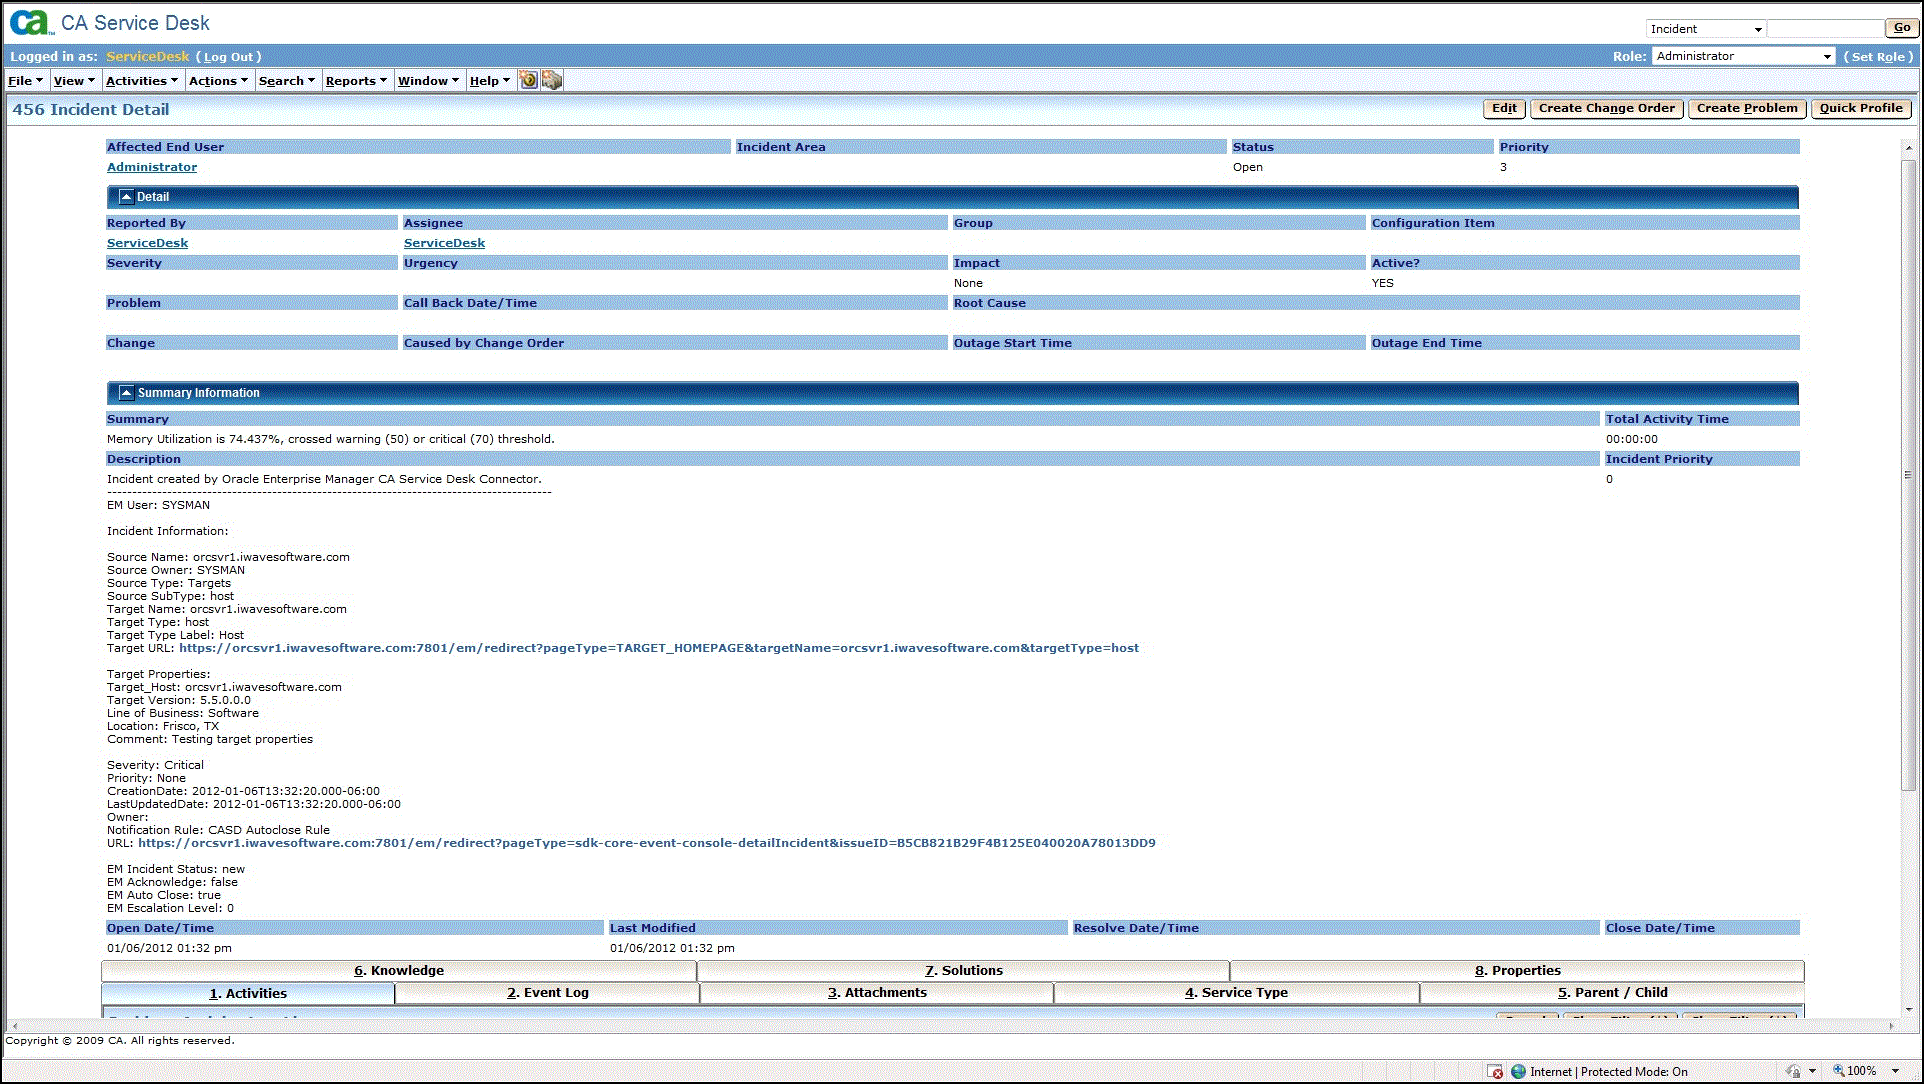
A ticket is updated if there is an existing active ticket for an incident. Figure 4-3 shows the ticket in the CASD console.
Tip:
For information about configuring CASD to return the ticket status to Enterprise Manager, see Customizing Support Ticketing Inbound Operations.
Figure 4-3 CASD Console Incident

Manually Creating a Ticket
To manually create a ticket:
-
After a metric incident occurs, go to its incident details page by clicking on the incident message in the Incident Manager console in Enterprise Manager. The incident details page for the incident should appear.
-
In the Tracking section, select More, then Create Ticket.
The Create Ticket pop-up appears. The Create Ticket option is only available if there is at least one ticketing connector configured, and no prior ticket exists for the same incident.
Post-creation Advisory Information
-
If you have successfully created the ticket, the ticket ID appears in the Last Comment column in the Event Details for the incident and in the Ticket ID column. If the Web console settings are configured and enabled, the ticket ID appears as a link to the ticket page in Service Desk.
-
For tickets that were created manually, you cannot manually update the ticket using the CA Service Desk Connector. You need to manually update the ticket in Service Desk for any subsequent incident severity change.
Navigating Between CASD and Enterprise Manager
The following sections explain how to switch from one console to the other.
Navigating from CASD to Enterprise Manager
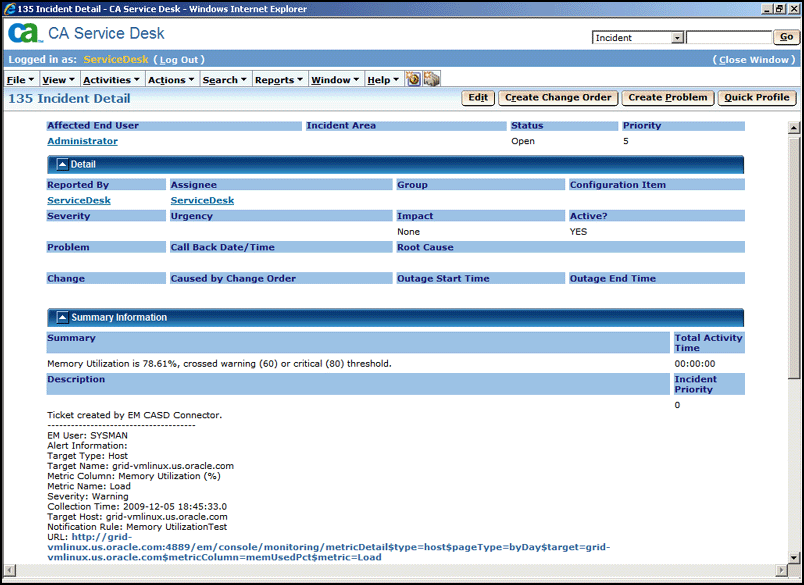
From the ticket Detail page of the CASD console, click the link to the URL label in the Description field, as shown in Figure 4-4. This action takes you to the Enterprise Manager console login page. After you provide the Enterprise Manager user name and password, you are forwarded to the Enterprise Manager ticket related to this CASD ticket.
Note:
The Enterprise Manager user whose name you specify should at least have View privileges on the target on which the ticket was raised.
Figure 4-4 Incident Detail in CASD Console

Navigating from Enterprise Manager to CASD
To navigate from Enterprise Manager to CASD:
-
From the Enterprise menu, select Monitoring, then Incident Manager.
The open tickets appear on the Incident Manager page.
-
Click on the desired incident.
Detailed information for the incident appears in the lower half of the page.
-
Click on the ticket identifier listed to the right of the Ticket ID label in the Tracking section.
You will be forwarded to the CASD Web console login page.
-
Provide valid CASD account details.
The CASD incident details associated with this incident are displayed through the CASD web console.