3 OCCM Supported Features
This section describes the features supported by Oracle Communications Cloud Native Core, Certificate Management (OCCM).
3.1 Integration with Certificate Authority
OCCM integrates with one or more Certificate Authorities (CAs) using the Certificate Management Protocol version 2 (CMPv2), as proposed by the 3GPP TS33.310. Operators have the flexibility to configure OCCM to integrate with a single CA or multiple CAs, depending on the layout of CA hierarchy deployed in the network. However, it is recommended that each intermediate CA manage multiple certificates of the same type.
- Initialization procedure: This is used to create certificates.
- Key update procedure: This is used for certificate renewal scenarios.
- Using a pre-shared key
- Using a key and certificate
Note:
OCCM supports HTTP 1.0 and HTTP 1.1 versions. OCCM initiates the request using HTTP 1.0. If the CA supports HTTP 1.1 only, then OCCM shifts to using HTTP 1.1 version.3.1.1 Establishing Initial Trust Between OCCM and CA
- MAC based trust establishment
- Certificate based trust establishment
3.1.1.1 MAC Based Trust Establishment
OCCM supports initial trust establishment with each of the configured CAs using the preconfigured pre-shared (MAC) key.
Figure 3-1 MAC Based Trust Establishment
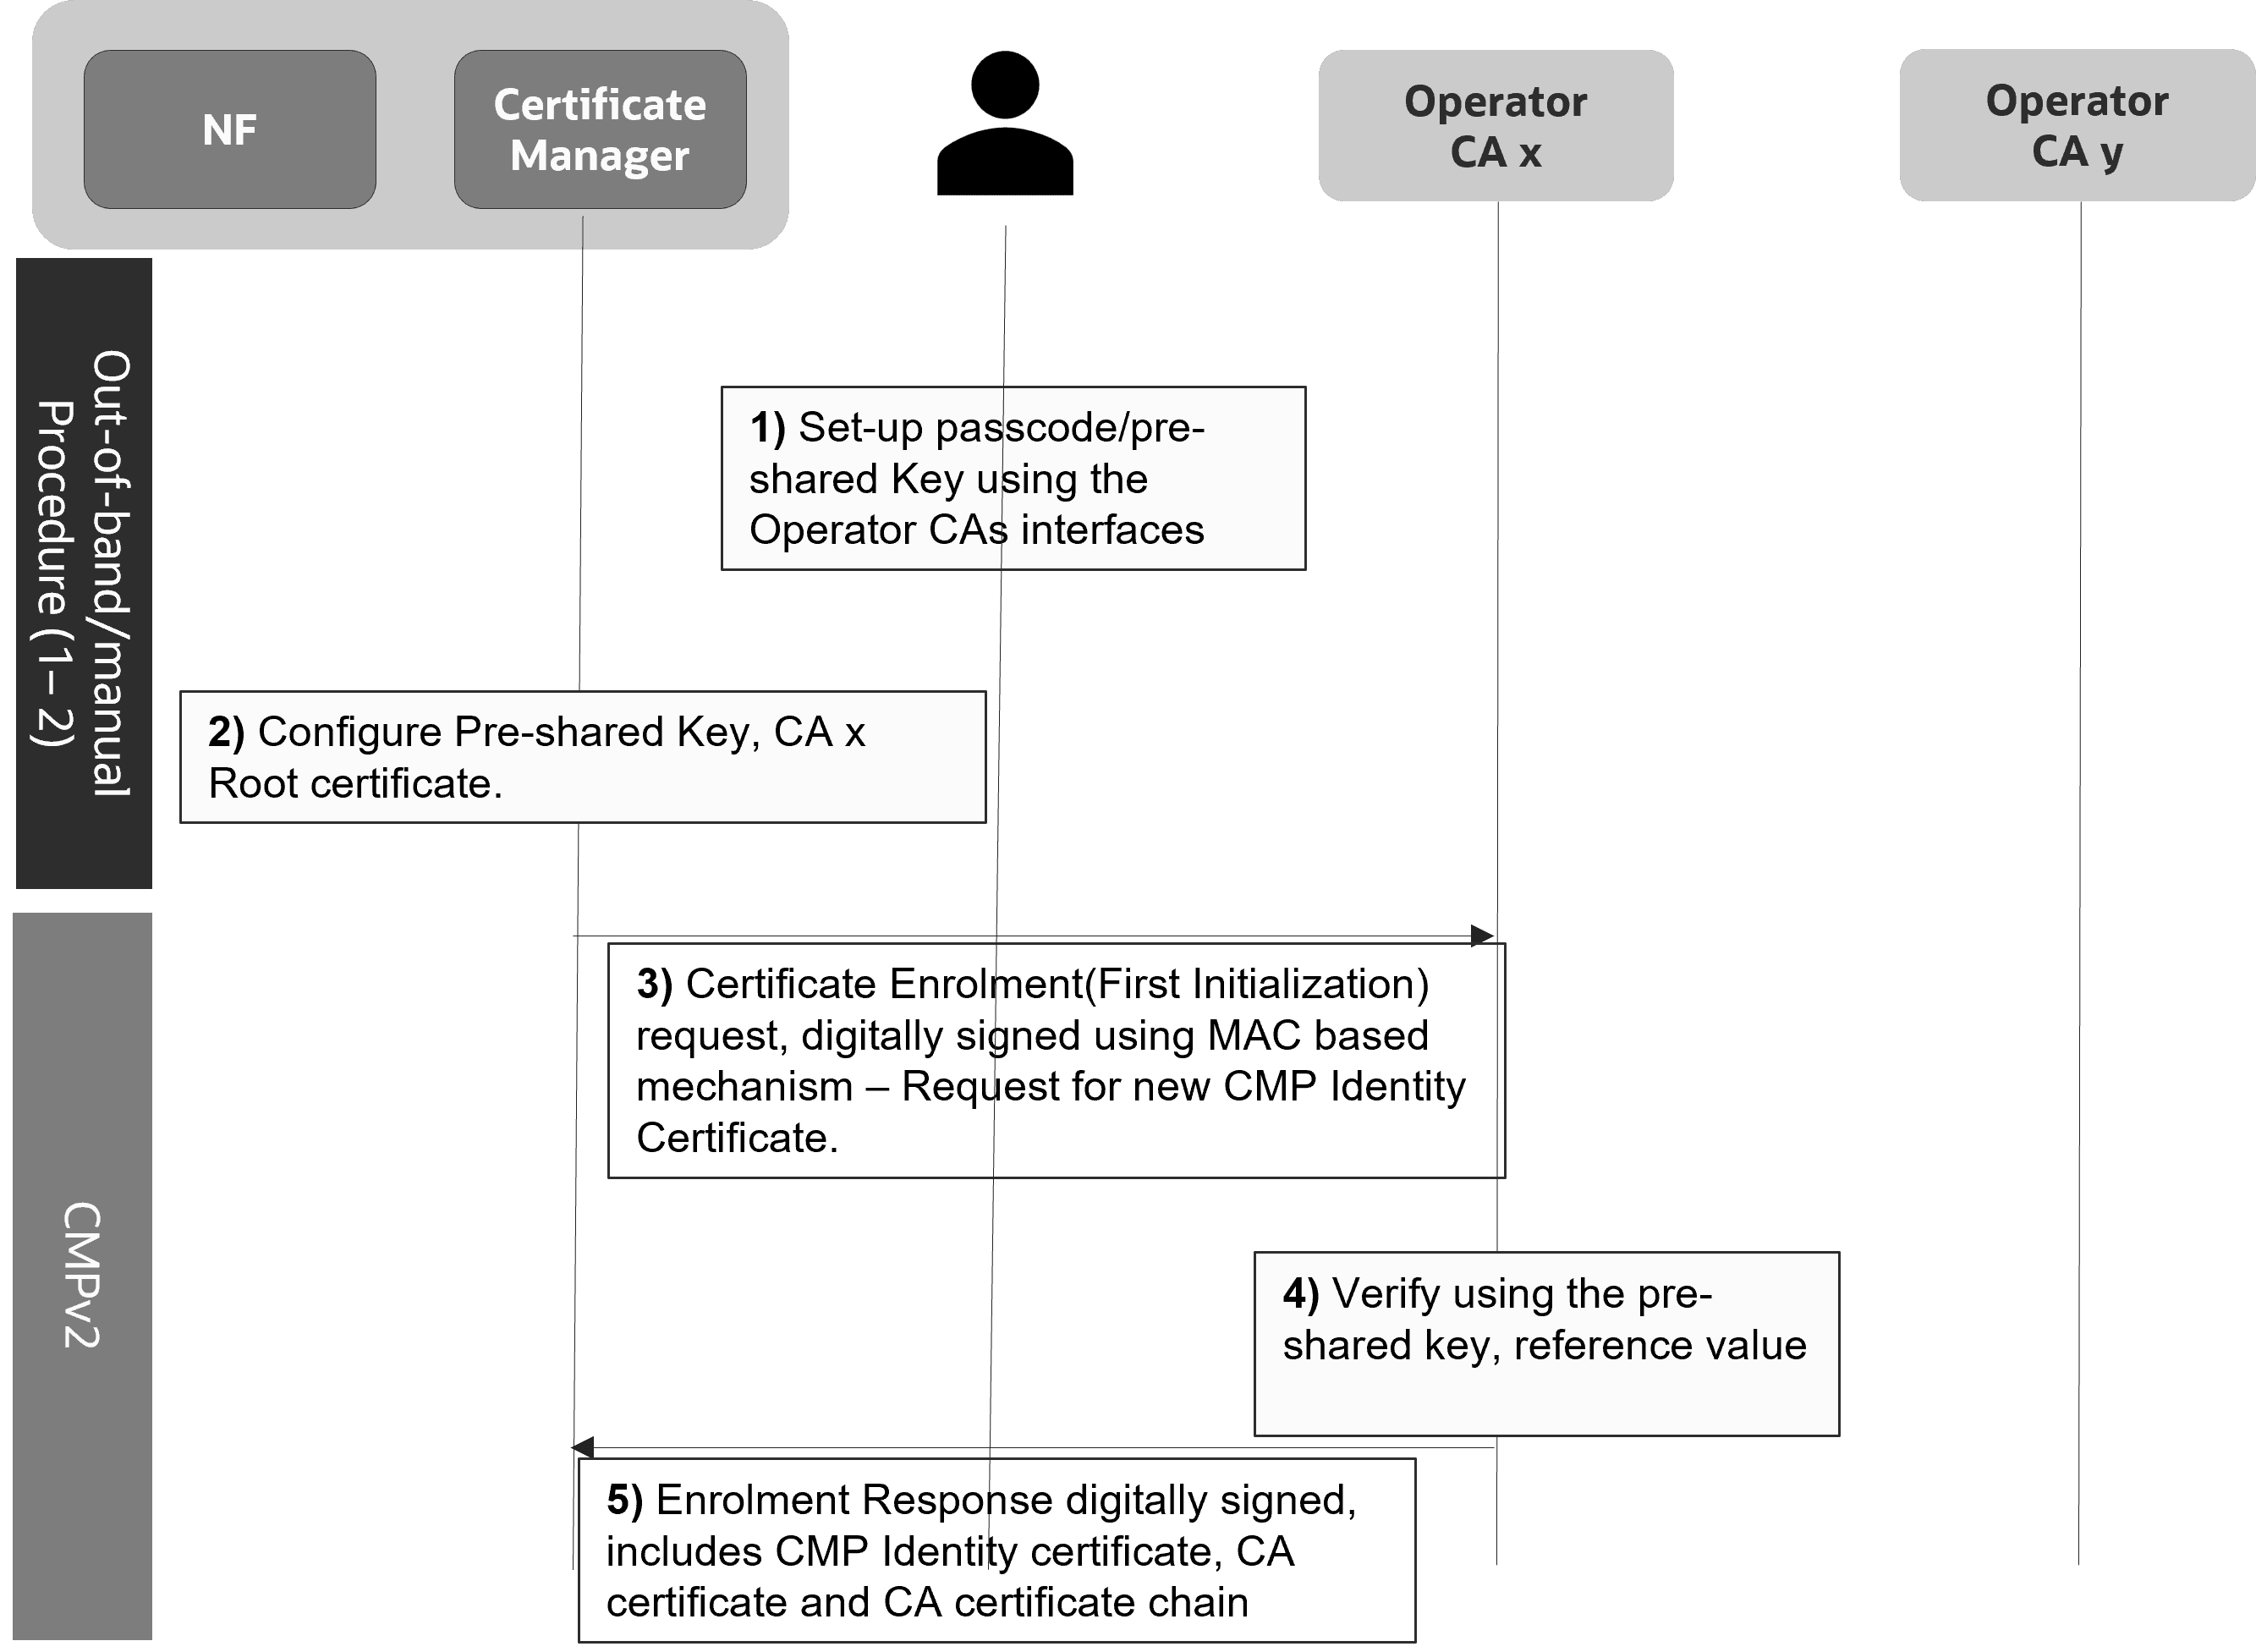
OCCM generates the key pair and requests for the OCCM certificate for each of the configured CAs using the first Initialization Request. The first Initialization Request towards each of the CAs is signed using the preshared key. The CA authenticates the initialization request and signs the OCCM Certificate. OCCM can be configured to authenticate the responses of the first initializing procedure using the preshared (MAC) key. All subsequent requests are always signed using the OCCM key and certificate.
3.1.1.2 Certificate Based Trust Establishment
OCCM supports initial trust establishment with CA using the preconfigured private key and x.509 certificate.
Figure 3-2 Certificate Based Trust Establishment
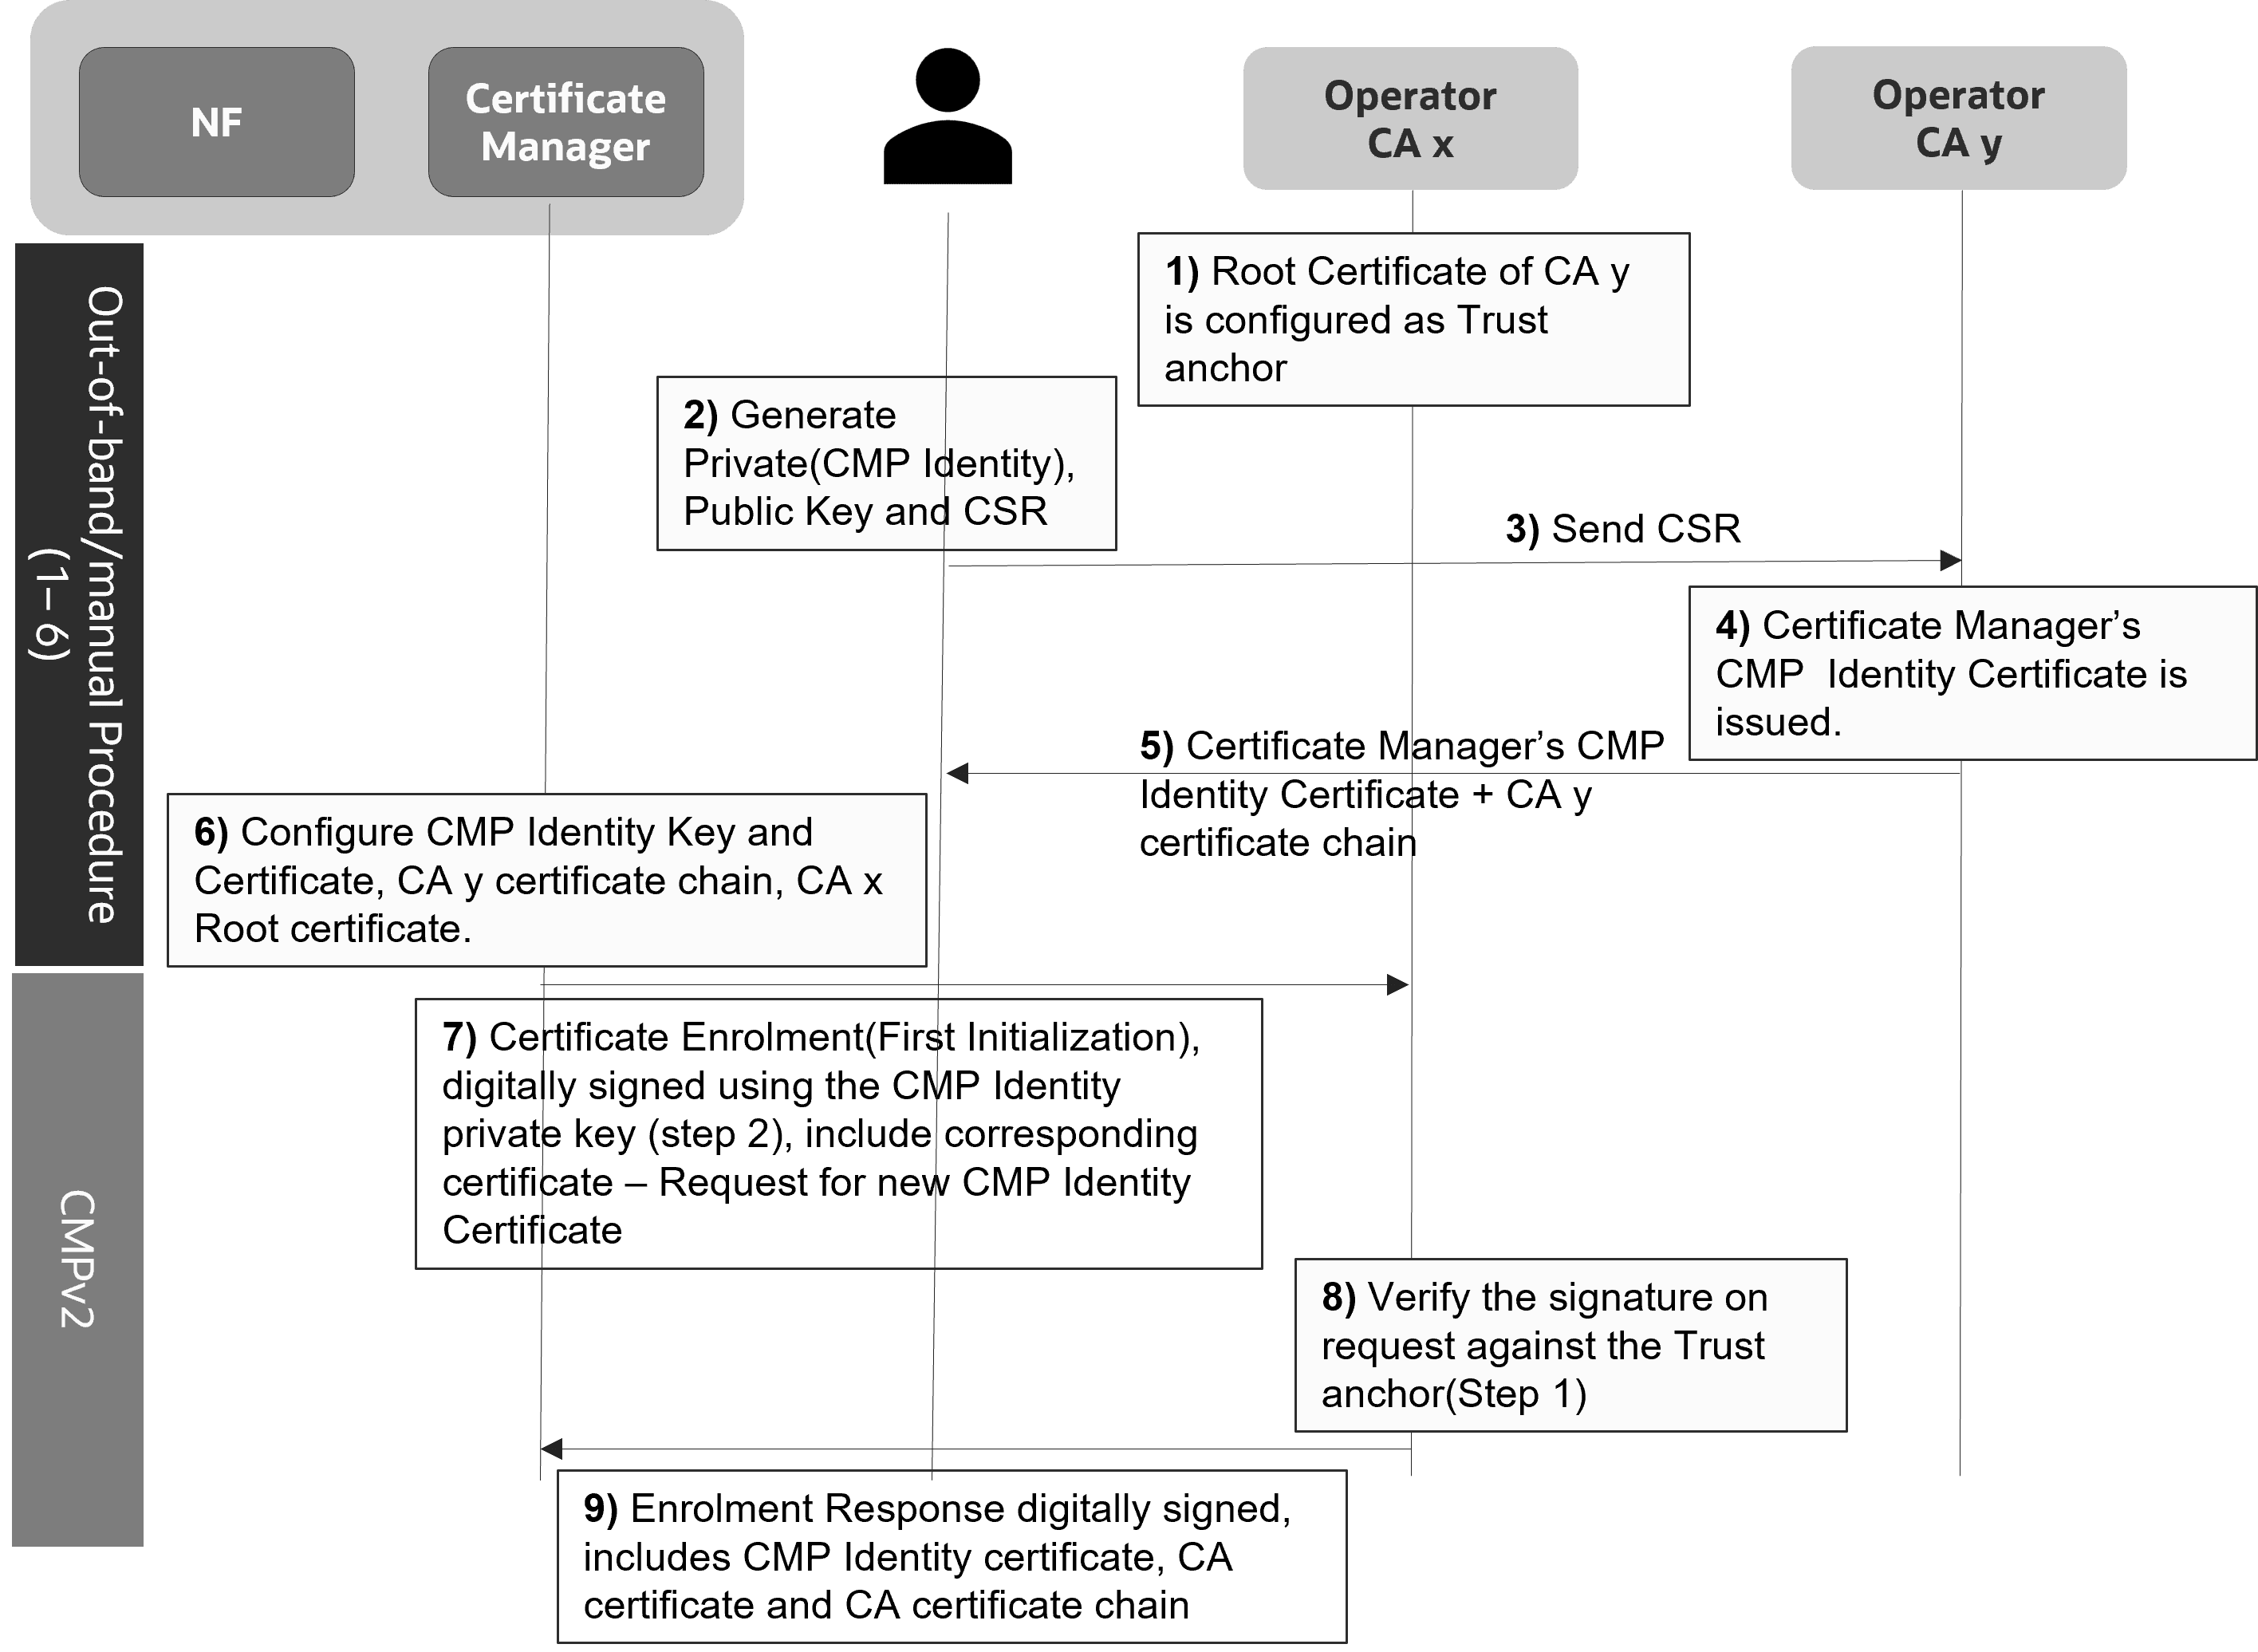
OCCM signs the first initialization request towards a CA using preconfigured key or certificate.
- continue using the same key and certificate to sign the subsequent CMPv2 requests OR
- generate a new certificate using the first Initialization Request
In case OCCM uses the same key and certificate to sign the subsequent CMPv2 requests, OCCM requests for generation of the NF certificate in the first Initialization Request.
In case OCCM generates a new certificate using the first Initialization Request, OCCM requests for generation of OCCM certificate in the first Initialization Request. NF certificate generation is requested from next Initialization Request onwards.
3.2 Support for HTTPs Encryption
Managing HTTPs Encryption
This feature enables you to encrypt the traffic between OCCM and CAs using HTTPs. HTTPs encryption at the transport layer adds an additional layer of security.
OCCM, as a HTTP Client, supports HTTPs connections with CAs using One-Way TLS when authenticating the identity if the CAs. OCCM manages a TrustStore (CA Bundle) to validate the certificates presented by the CAs in the certificate message of the TLS handshake procedure. You can either use the same CA Bundle configuration for all the configured CAs, or different CA Bundles as per your requirements.
- Certificate Path validation
- Certificate expiry
- Certificate Strict checking
- Version TLSv1.2 and TLSv1.3 including support for version rollback to TLSv1.2 in case the CA does not support TLSv1.3
- OCCM acts as the HTTP(s) client while communicating with CA and all the relevant requirements apply.
Configuring HTTPs Encryption
- configure and manually update the CA Bundle used to validate the TLS handshake.
- enable and disable the strict checking of the X.509 certificates presented for HTTPs. This verifies if the certificates are RFC 5280 compliant.
- enable or disable the checking of X.509 certificate critical extensions.
3.3 Accessing OCCM from CNC Console
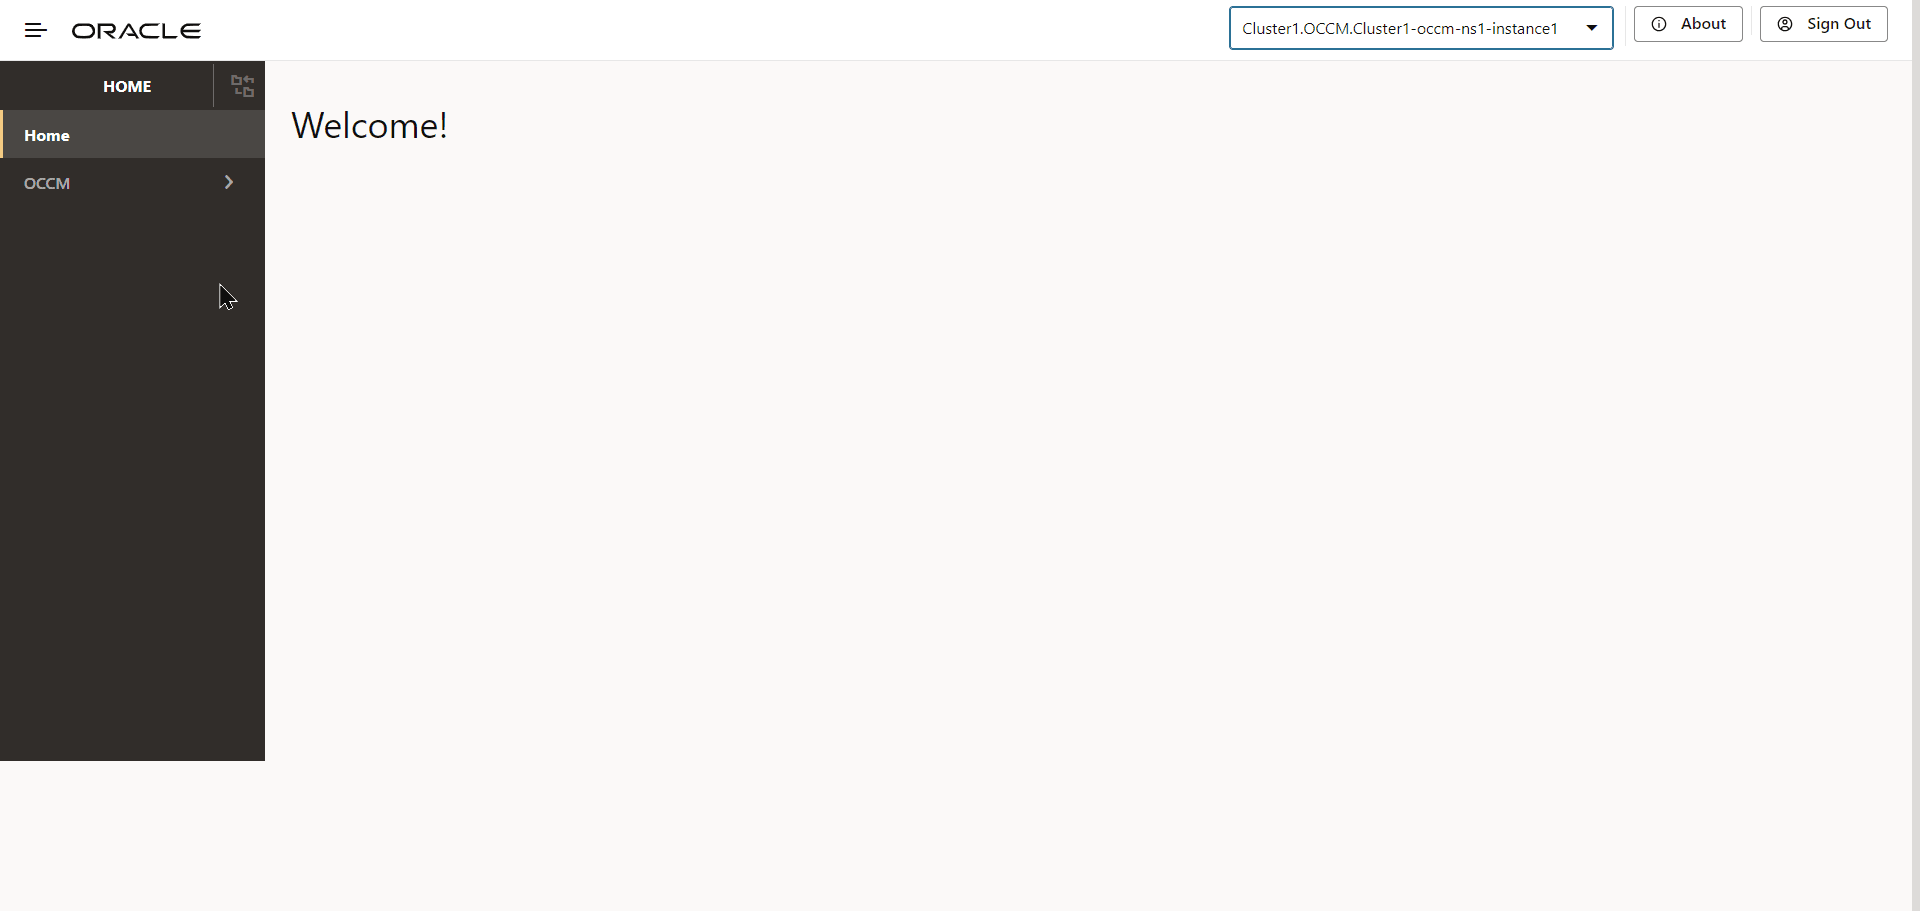
This section describes the procedure to access the OCCM cluster from the CNC Console GUI.
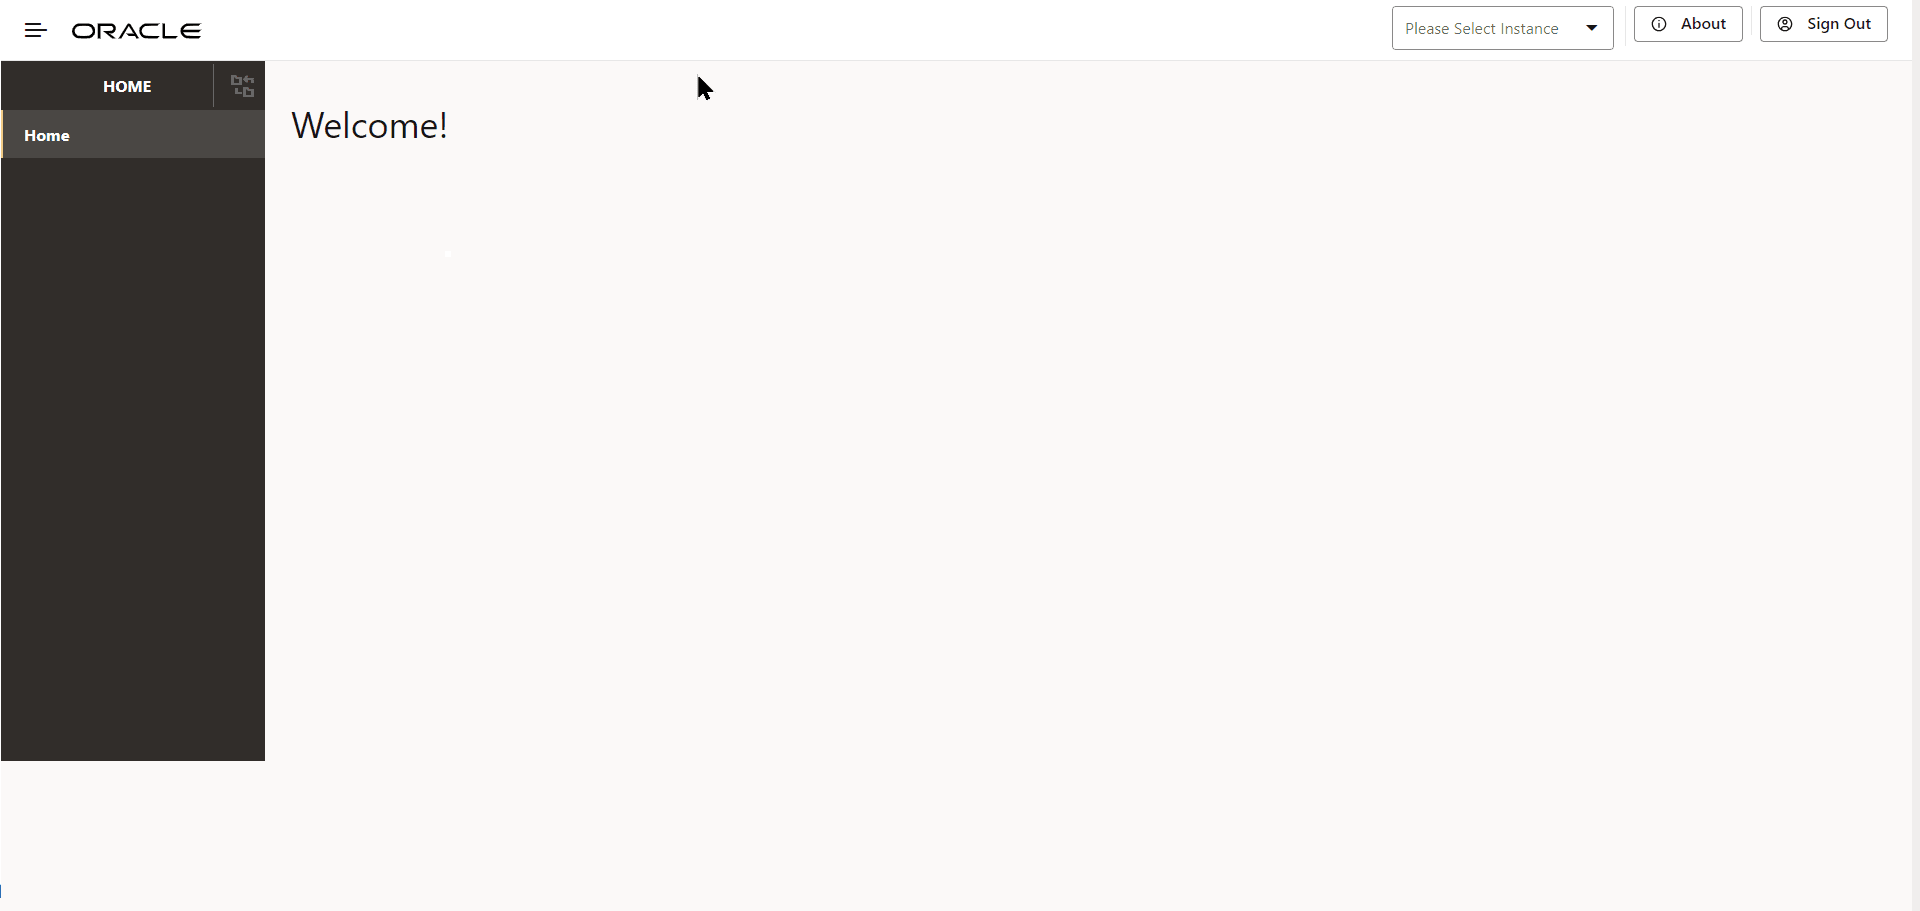
- Log in to CNC Console using your login credentials.
Figure 3-3 CNC Console Landing Page
- From the Select Instance drop-down, select the OCCM
Instance.
The OCCM menu appears on the left pane.
Figure 3-4 OCCM Instance
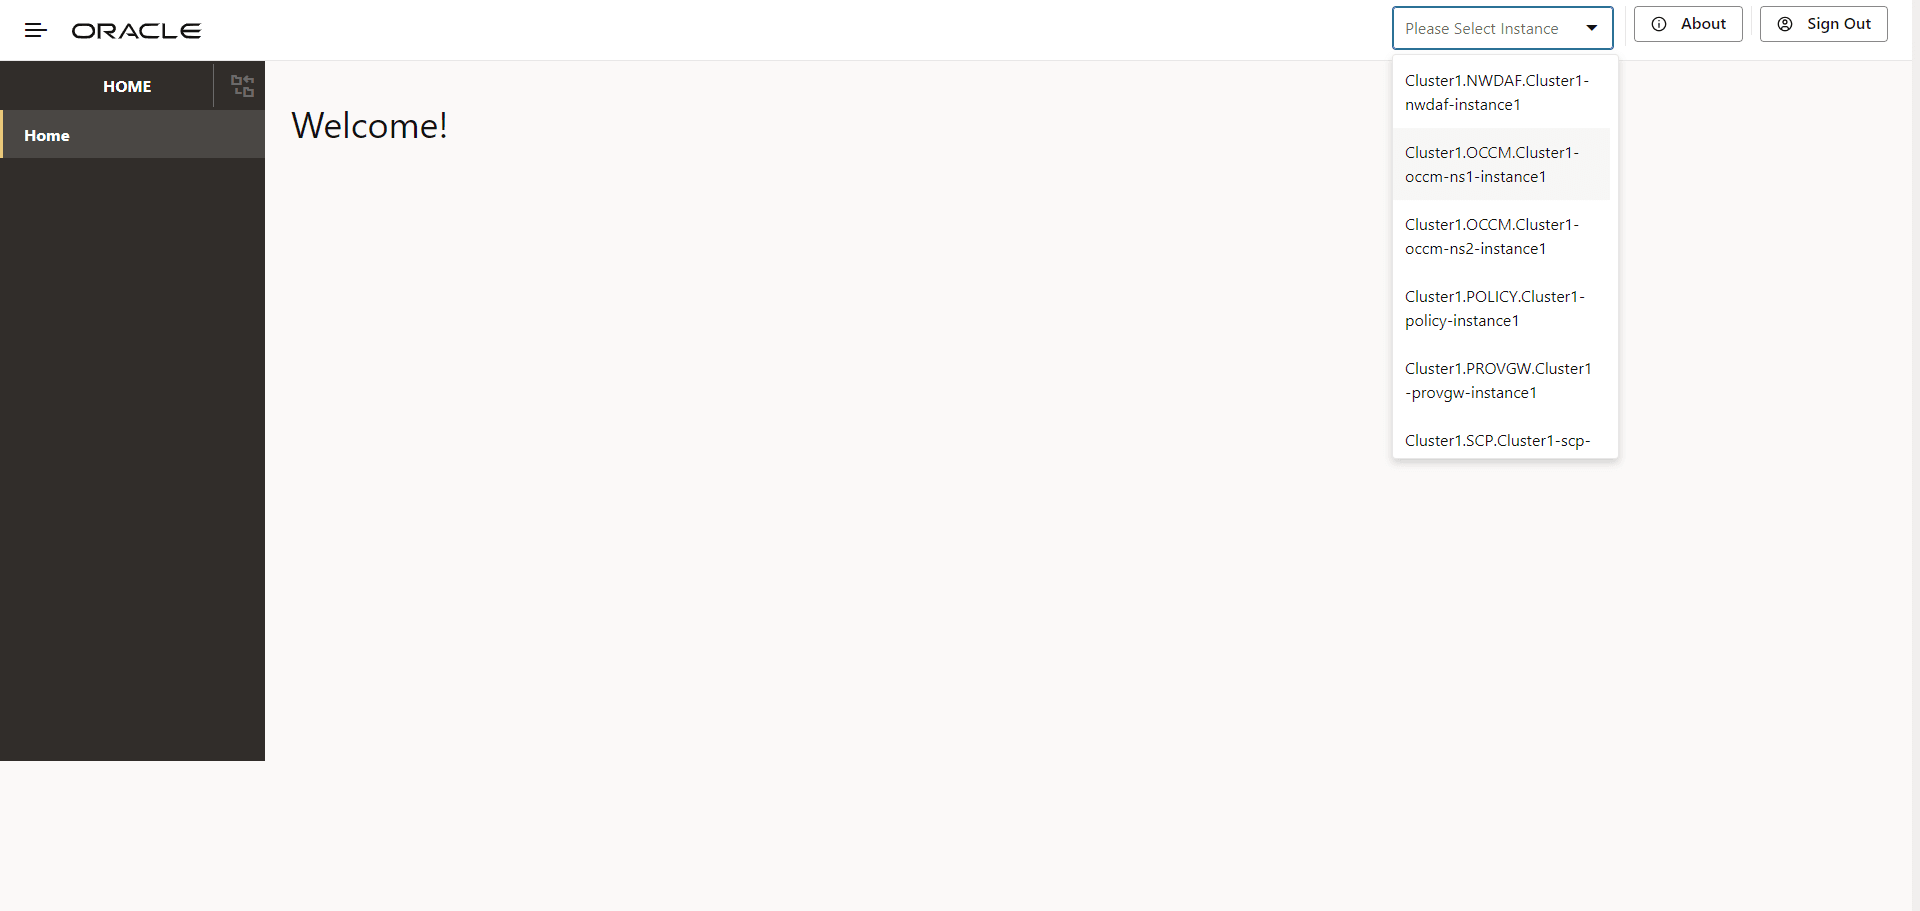
Figure 3-5 OCCM Configuration Options
3.4 Managing Issuers
- Pre-configuration for OCCM Bootstrapping
- Creating Issuers
- Updating Issuers
- Deleting Issuers
3.4.1 Pre-configuration for OCCM Bootstrapping
- MAC Secret: The MAC secret is a manually configured
pre-shared key or password based MAC secret and reference. This is used by OCCM
to sign the first initialization request. CA then validates the request and
issues a signed OCCM certificate. For more information, see the 'Using the
pre-shared key' section in OCCM Certificate Configuration Modes.
To create the MAC Secret, run the following command:
kubectl create secret generic <k8s secret name> --from-literal=<mac secret key>=<mac secret value> --from-literal=<reference key>=<reference value> -n <namespace>For example:kubectl create secret generic ca1-mac-secret --from-literal=pwd='pass:****' --from-literal=ref='abcd' -n ns1 - CMP Identity Secret: The CMP Identity secret is a manually
configured private key and certificate, using which OCCM certificate is
requested from CA. This is used by OCCM to sign the first initialization
request. CA then validates the request and issues a signed OCCM certificate. You
can also use the same private key and certificate as OCCM certificate. For more
information, see the 'Using the pre-configured private key and certificate'
section in OCCM Certificate Configuration Modes.
To create the CMP Identity Key, run the following command:
kubectl create secret generic <k8s secret name> --from-file=<cmp key file location> --from-file=<cmp cert file location> -n <namespace>For example:kubectl create secret generic ca1-cmp-identity-secret --from-file=cmpkey.pem --from-file=cmpcert.pem -n ns1 - OCCM Trust Store Secret: The OCCM Trust Store secret holds
OCCM trust store information (CA certificates), and is used as a trust anchor
when validating the digital signature included in the CMP responses.
To create the OCCM Trust Store secret, run the following command:
kubectl create secret generic <k8s secret name> --from-file=<CA root cert file location> --from-file=<Intermediate CA cert file location> --from-file=<CMP server cert file location> -n <namespace>For example:kubectl create secret generic ca1-occm-trust-store-secret --from-file=caroot.pem --from-file=intcacert.pem --from-file=servercert.pem -n ns1 - TLS Trust Store Secret: If TLS is enabled for issuer, TLS
Trust Store secret should be provided, else it should be skipped. It holds the
CA certificates to be used as trust anchors when authenticating the TLS server
certiifcate. To create the TLS Trust Store secret, run the following
command:
For example:kubectl create secret generic <k8s secret name> --from-file=<CA cert file location> -n <namespace>kubectl create secret generic ca1-tls-trust-store-secret --from-file=caroot1.pem -n ns1
HTTPS communication between OCCM and CA
OCCM supports HTTPS connections with CA using one-way TLS. To enable the same, the operator has to set enableTLS option in the issuer configuration to true and configure the HTTPS schemed server URL. TLS trust store has to be configured with trust anchors in order to authenticate the TLS server.
In order to enable or disable strict checking of the X.509 certificates presented for HTTPs, the following deployment time (helm) parameters can be configured.
- occmConfig.cmp.config.tls.enableX509StrictCheck: This field when set to true enables strict checking of the X.509 certificates presented for HTTPs. Errors are thrown for the certificates which are not compliant with RFC 5280.
- occmConfig.cmp.config.tls.ignoreCriticalExtensionsCheck:
This field when set to true ignores checking of the critical extensions in X.509 certificates presented for HTTPs.
Normally, if an unhandled critical extension is present that is not supported by OpenSSL, the certificate is rejected in compliance with RFC 5280.
Note:
This configuration will be applied only when TLS is enabled for an issuer.
3.4.2 Creating Issuer
Configuring Issuer Using CNC Console GUI
- Log in to CNC Console using your login credentials and select the OCCM Instance.
- Click OCCM from the left pane and then click Issuer.
- Click Add. The Create Issuer page
appears.
Figure 3-6 Create Issuer
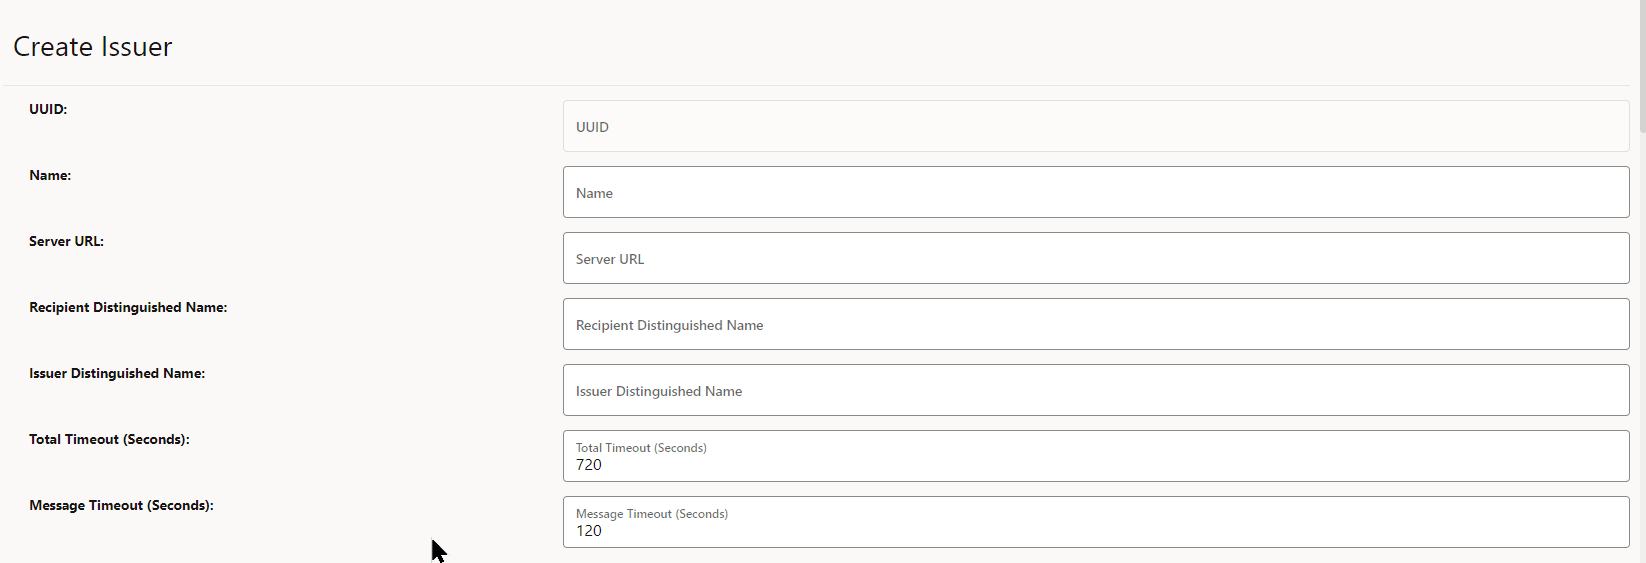
- Enter the following information on the Create Issuer
page:
Table 3-1 Create Issuer
Field Name Description Name Name of the Issuer Recipient Distinguished Name Distinguished name(DN) of the CMP server (usually the addressed CA) used in the recipient field of CMP request message headers.
The argument must be formatted as /type0=value0/type1=value1/type2=....
Special characters may be escaped by \ (backslash); whitespace is retained. Empty values are permitted, but the corresponding type will not be included. Giving a single / will lead to an empty sequence of RDNs (a NULL-DN). Multi-valued RDNs can be formed by placing a + character instead of a / between the AttributeValueAssertions (AVAs) that specify the members of the set. For example:
/DC=org/DC=OpenSSL/DC=users/UID=123456+CN=John
                        Doe
Server URL Domain URL of CA Issuer Distinguished Name X509 issuer Distinguished Name of the CA server to place in the requested certificate template in IR or KUR.
The argument must be formatted as /type0=value0/type1=value1/type2=....
Special characters may be escaped by \ (backslash); whitespace is retained. Empty values are permitted, but the corresponding type will not be included. Giving a single / will lead to an empty sequence of RDNs (a NULL-DN). Multi-valued RDNs can be formed by placing a + character instead of a / between the AttributeValueAssertions (AVAs) that specify the members of the set. For example:
/DC=org/DC=OpenSSL/DC=users/UID=123456+CN=John
                        Doe
Total Timeout (Seconds) The total time in seconds allowed for the CMP transaction to complete. Message Timeout (Seconds) The total time (in seconds) a CMP request-response message round trip is allowed to take. - Under Initial CMP Client(OCCM) Authentication
Options, enter the following information:
Table 3-2 Initial Authentication Options
Field Name Possible Values Type MAC, SIGNATURE For more information, see OCCM Certificate Configuration Modes.
Digest Algorithm SHA256, SHA384, SHA512 MAC Algorithm HMACSHA256, HMACSHA384, HMACSHA512 Figure 3-7 Initial CMP Client(OCCM) Authentication Options

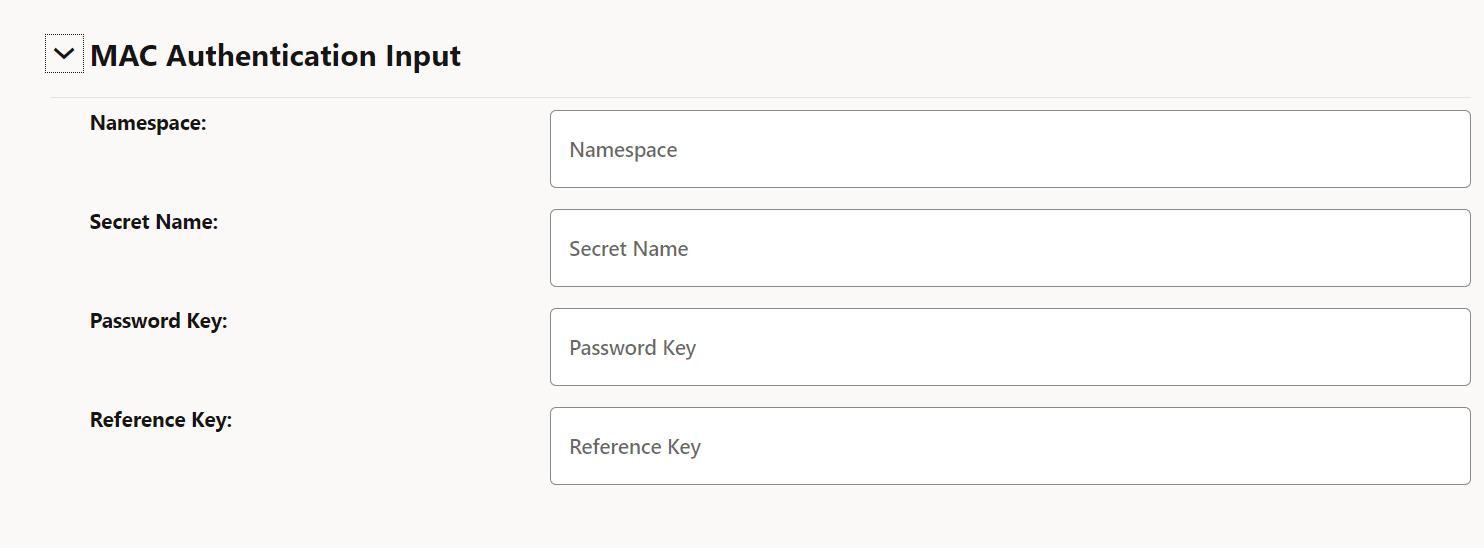
- If you are using the password based MAC
authentication mechanism, then under MAC Authentication Input, enter the following
information:
Table 3-3 MAC Authentication Input
Field Name Description Namespace Name of the Kubernetes namespace. Secret Name Kubernetes secret name. Password Key Kubernetes secret data key against which MAC secret is provided. Reference Key Kubernetes secret data key against which reference string is provided. Figure 3-8 MAC Authentication Input
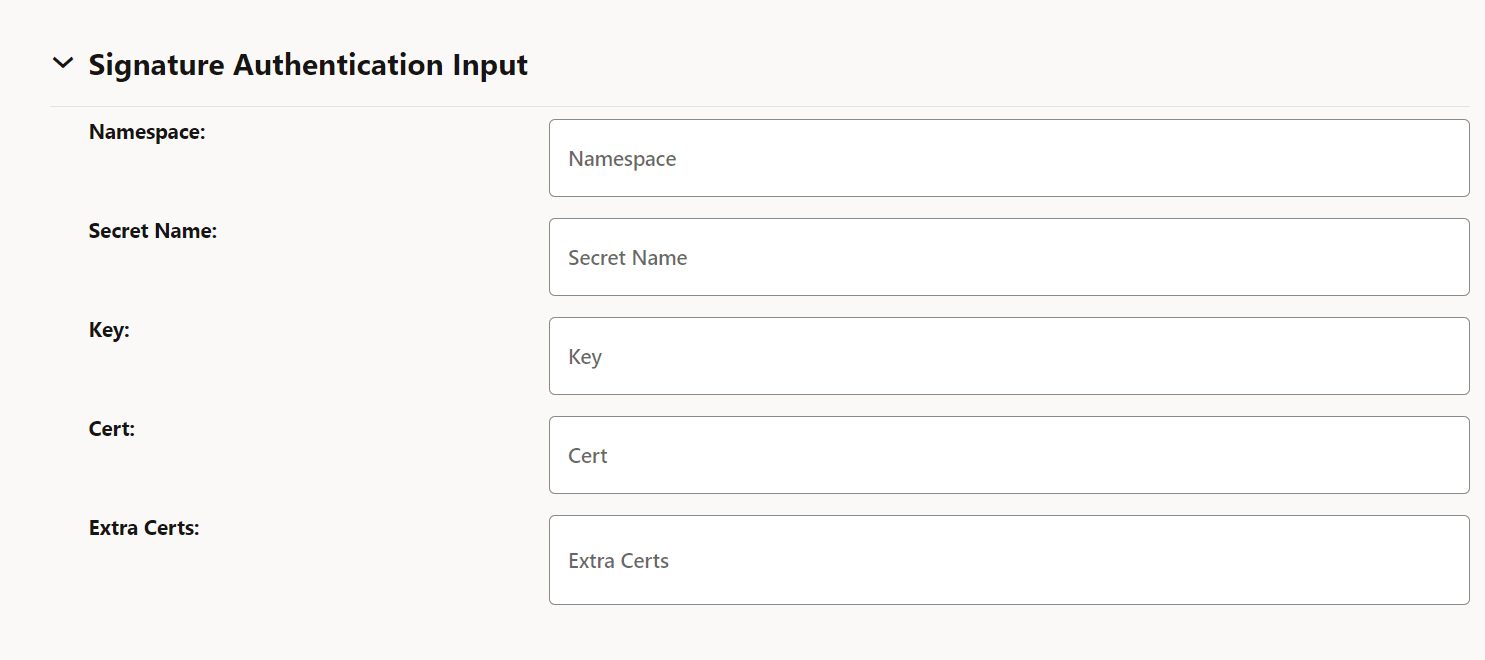
- Under Signature Authentication Input, enter
the following information:
Table 3-4 Signature Authentication Input
Field Name Description Namespace Name of the Kubernetes namespace. Secret Name A unique secret name. Key Kubernetes secret data key against which the pre-configured private key file (private key file for the client's current CMP signer certificate) is provided. Cert Kubernetes secret data key against which the pre-configured certificate (client's current CMP signer certificate) is provided. Extra Certs Extra Certificates, if any, for client authentication. Figure 3-9 Signature Authentication Input
- Under CMP Client Authentication Options For Other
certificate, enter the following information:
Table 3-5 CMP Client Authentication Options For Other certificate
Field Name Possible Values Type SIGNATURE Digest Algorithm SHA256, SHA384, SHA512 Figure 3-10 CMP Client Authentication Options For Other certificate

- Under Signature Authentication Input, enter
the following information:
Table 3-6 Signature Authentication Input
Field Name Description Namespace Name of the Kubernetes namespace Secret Name A unique secret name Key Kubernetes secret data key against which OCCM key is provided or created based on whether OCCM certificate is created in manual or automatic mode. Cert Kubernetes secret data key against which OCCM certificate is provided or created based on whether OCCM cert is created in manual or automatic mode. Extra Certs List of Kubernetes secret data keys against which the certificates to append in the extraCerts field can be provided or will be created (if received from CA) along with the OCCM certificate, based on whether OCCM cert is created in manual or automatic mode. Figure 3-11 Signature Authentication Input

- Under Occm Trust-Store Secret Input, enter
the following information:
Table 3-7 Occm Trust-Store Secret Input
Field Description Namespace Name of the Kubernetes namepace. Name Kubernetes secret which holds OCCM trust store information (CA certificates). Root CA Certs The certificate(s), typically of root CAs, the client uses as trust anchors when validating the certificate issued by CA. Note: If server certtificate is present, this is ignored.
Intermediate CA Certs Any untrusted intermediate CA certificate(s) to use when validating newly enrolled certificates. Server Cert CMP server or CA server's certificate to expect and directly trust when validating the certificate issued by CA. Note: If this is present, root CA certificates will be ignored.
Figure 3-12 Occm Trust-Store Secret Input
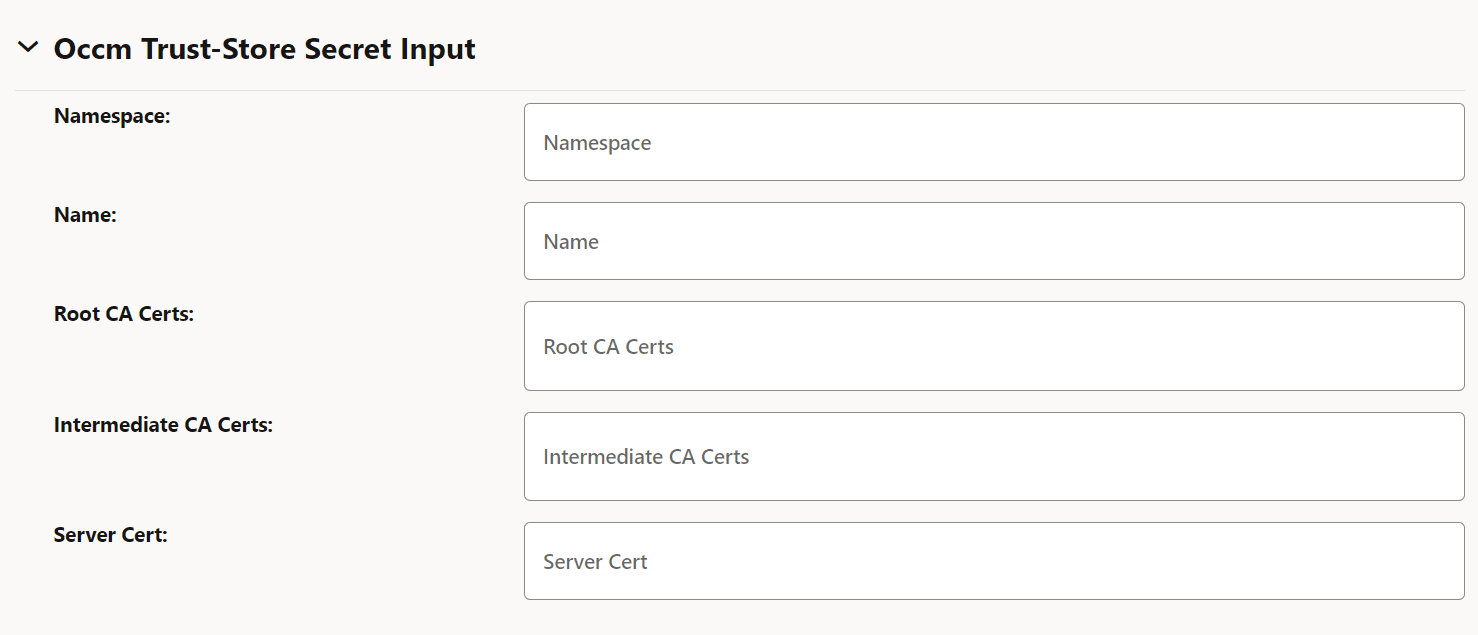
- Enter either the root CA certificates and intermediate CA certificate, or the server certificate in the respective fields.
- Under TLS Configuration, enter the following information:
Table 3-8 TLS Configuration
Field Description Enable TLS When set to true, HTTPS connection to CA is made. Ensure that you select scheme as HTTPS in server URL if this is set to true. Figure 3-13 TLS Configuration

Table 3-9 TLS Trust-Store secret Input
Field Description Namespace Kubernetets namespace where TLS trust store secret is present. Name Kubernetes secret which holds TLS trust store information (CA certificates). TLS trusted Certs Trusted certificate(s) to use for validating the TLS server certificate. Figure 3-14 Enable TLS
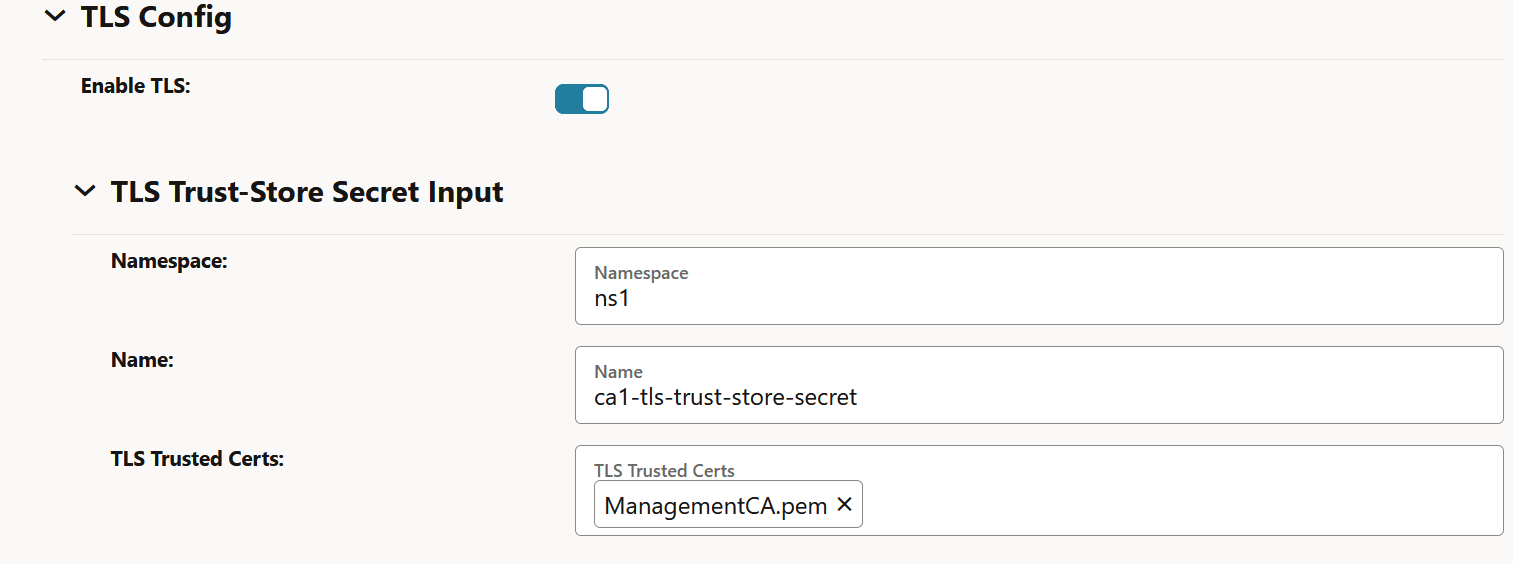
- Click Save.
3.4.3 Updating Issuer
- Server URL
- TLS Configuration
- Log in to CNC Console using your login credentials and select the OCCM Instance.
- Click OCCM from the left pane and then click Issuer.
Figure 3-15 Issuer Page

- Click the edit icon next to the issuer that you want to update. The
Edit Issuer page appears.
Figure 3-16 Edit Issuer
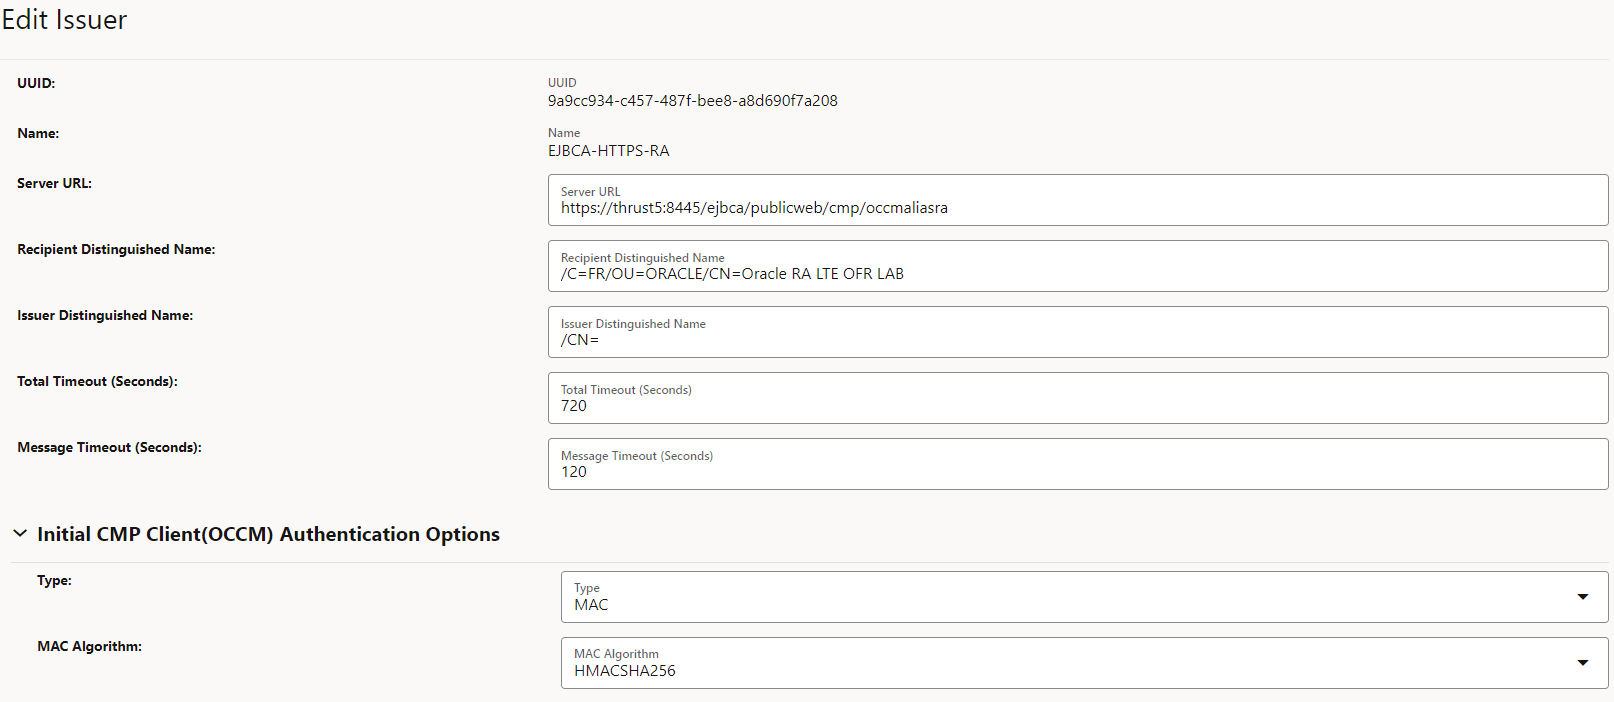
- Edit the fields that you need to update and then click Save.
Note:
Issuer can't be edited if it is in use by any certificate.3.4.4 Deleting Issuers
- Log in to CNC Console using the login credentials, and select the OCCM Instance.
- Click OCCM from the left pane and then click Issuer.
- Click Delete and click OK on the confirmation prompt to delete the issuer.
Note:
An issuer can only be deleted if there are no certificates referring to this issuer entry.3.5 Managing Certificates
OCCM creates a new key-pair (private and public key) for each of the certificates to be created. This is applicable to both NF and OCCM certificates.
- Creating OCCM Certificates
- Creating NF Certificates
- Monitoring and Renewing OCCM and NF Certificates
Note:
- Grafana dashboards can be used to visualize certificate status such as expiry time.
- The maximum number of certificates supported (OCCM certificates and NF certificates combined) is 100.
- OCCM supports the generation of certificates in compliance with 3GPP TS 33.310 version 17.3.0, release 17, section 6.1.3c.3. You must refer to the 3GPP specification when configuring certificates.
3.5.1 Creating OCCM Certificates
Each certificate configuration in OCCM is a certificate request. It specifies input fields that are used to generate a private key pair and certificate signing request to obtain a signed certificate from the referenced issuer.
- A CMPv2 Initialization Request (IR) is sent to the CA. Each request supports one certificate request. A separate IR for each certificate request is used.
- The IRs and Certificate Confirm(s) are digitally signed by the CMP Identity Key.
- OCCM supports Proof of Possession (PoP) in the initialization request. PoP of the signing key contains the algorithm identifier and signature. This signature is based on the certificates template structure.
- The recommended signing algorithms for the CMPv2 messages and Proof of Possession are RSA Encryption and ECDSA.
- The recommended hash algorithms for the CMPv2 messages and Proof of Possession are SHA-256 and SHA-384.
When the preshared key mechanism is used to establish the initial trust between OCCM and CA, the first OCCM certificate, also known as CMP Identity Key Certificate, corresponding to a particular CA is created in the first initialization procedure.
When certificate based initial trust is established, then the operator can choose to continue with the preconfigured OCCM certificate, or can choose to create a new OCCM certificate using the first initialization procedure, which is configurable.
- Log in to CNC Console using your login credentials and select the OCCM Instance.
- Click OCCM from the left pane and then click Certificate.
- Click Add. The Create Certificate page appears.
Figure 3-17 Create OCCM Certificate
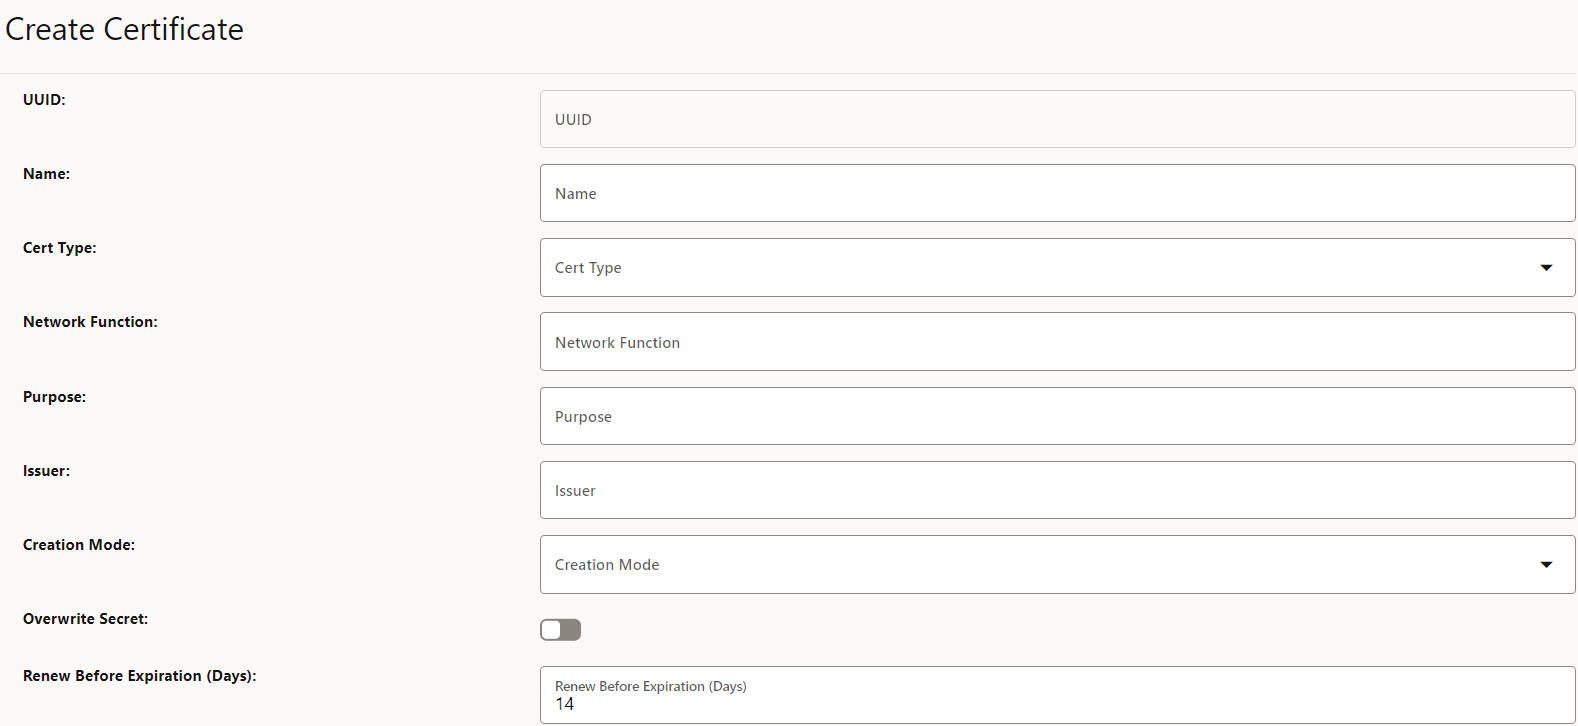
- Enter the following information:
Table 3-10 Create OCCM Certificate
Field Name Description and Possible Values Name Name of the certificate. Cert Type Select OCCM for OCCM certificates. Network Function OCCM Purpose Purpose of the OCCM Certificate. Issuer Name of the issuer for the certificate. Creation Mode Possible values are MANUAL and AUTOMATIC. For more information, see OCCM Certificate Configuration Modes. - Under Private Key Options, enter the following
information:
Table 3-11 Private Key Options
Field Name Possible Values Key Algorithm RSA, EC Key Encoding DER, PEM Key Size KEYSIZE_2048, KEYSIZE_4096 Elliptic Curve SECP256r1, SECP384r1 Figure 3-18 Private Key Options

- The Private Key Output section is auto populated from
corresponding issuer after the certificate is saved. You can skip this
section.
Table 3-12 Private Key Output
Field Name Description Namespace Name of the namespace. Secret Name Kubernetes Secret Name. Key Kubernetes secret key against which the key-pair will be stored. Figure 3-19 Private Key Output

- Under Public Key Certificate Options, enter the
following:
Table 3-13 Public Key Certificate Options
Field Name Description Key Usage Value(s): DIGITAL_SIGNATURE Extended Key Usage Value(s): CLIENT_AUTH and SERVER_AUTH Basic Constraints Value(s): END_ENTITY Subject Country: Enter country code: State: Enter state code.
Location: City or town where company is legally located.
Organization: Name of your organization.
Organisation Unit: Name of business unit.
Common Name: The Common Name (CN) represents the server name to be protected by the certificate.
Requested Validity (Days): Number of days requested for which the certificate will be valid.
Figure 3-20 Public Key Certificate Options
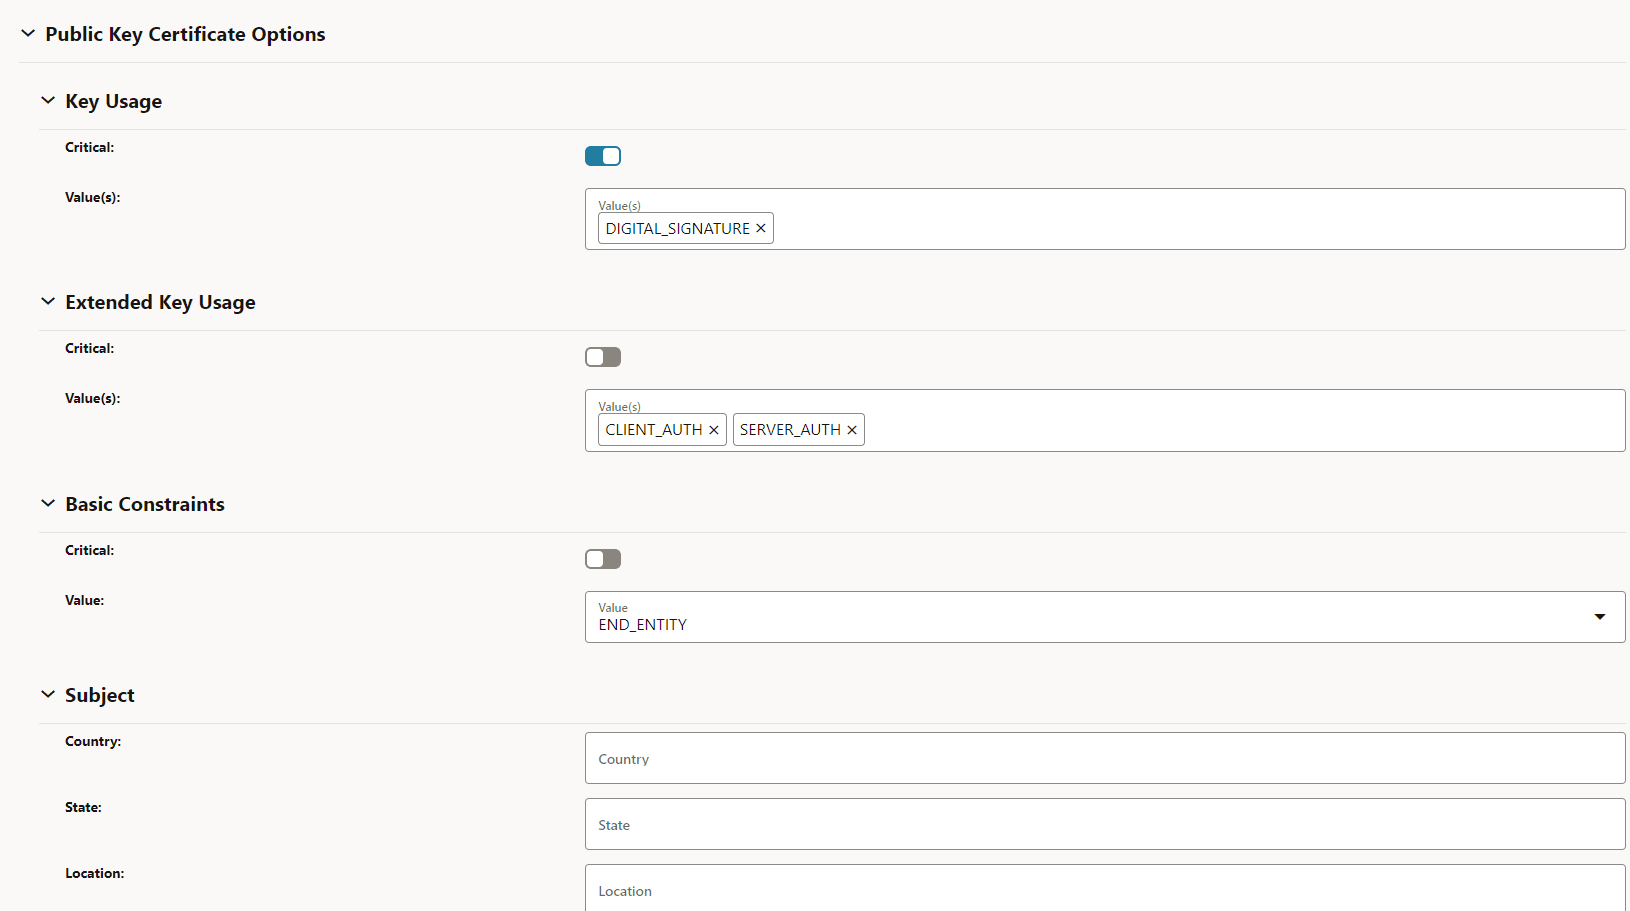
- Under Subject Alternate Names, enter the following:
Table 3-14 Subject Alternate Names
Field Name Description IP Address The IPs you want to protect under this certificate. DNS Names List of DNS domain names. URI ID API Roots List of URI IDs. URI ID URNs List of URI IDs. Figure 3-21 Subject Alternate Names

- The Certificate Output section is auto populated from
corresponding issuer after the certificate is saved. You can skip this
section.
Table 3-15 Certificate Output
Field Name Description Namespace Name of the namespace. Secret Name Name of the secret. Key The key against which the certificate will be populated. Figure 3-22 Certificate Output

- (Optional) Under Certificate Chain Output, enter the
following:
Table 3-16 Certificate Chain Output
Field Name Description Namespace Name of the namespace. Secret Name Name of the secret. Key Kubernetes secret key against which the certificate chain will be stored. Figure 3-23 Certificate Chain Output

If the Certificate Chain Output section is filled, then the certificate chain can either be obtained from the CA or can be configured manually. This is based on the extractCertChainFromCmpResponse helm parameter. For more information, see Oracle Communications Cloud Native Core, Certificate Management Installation, Upgrade, and Fault Recovery Guide.
Note:
extractCertChainFromCmpResponse: This field, when set to true, specifies that certificate chain will be extracted from CA's CMP response message. When false, the operator can configure the chain manually. This certificate chain is used in the TLS handshake along with the certificate. - Merge Certificate and Certificate Chain:
To get the complete certificate chain including the leaf certificate and the intermediate CA certificate(s), enable the Merge Certificate and Certificate Chain option and provide the same output secret for both Certificate Output and Certificate chain output fields. The Certificate Output secret can be taken from the issuer's CMP client options for Other Certificate field.
Figure 3-24 Merge Certificate and Certificate Chain

Note:
This is an optional field and is set to false by default. In case the issuer CA doesn't respond with the chain (intermediate CA certificates), only the leaf certificate will be populated against the specified Kubernetes secret key. - Click Save.
3.5.1.1 OCCM Certificate Configuration Modes
The following section highlights the configuration applicable to these modes and control how the OCCM certificates are generated. The purpose of the following issuer configuration and certificate configuration sections is to highlight the difference in the fields for different modes.
- Using the pre-shared key
- Using the pre-configured private key and certificate
Using the pre-shared Key
With this mode of configuration, OCCM signs the first initialization request using the pre-shared key. CA validates the request and issues a signed OCCM certificate.
- Issuer configurationTo configure the issuer using the pre-shared key,
- The MAC authentication input must be provided under
Initial CMP Client (OCCM) Authentication Options.
Figure 3-25 Initial CMP Client(OCCM) Authentication Options

- OCCM key and certificate output location must be
specified under CMP Client Authentication Options for Other
Certificate. OCCM certificate received from CA will be
written here.
Figure 3-26 CMP Client Authentication Options for Other Certificate

- The MAC authentication input must be provided under
Initial CMP Client (OCCM) Authentication Options.
- Certificate configurationTo configure the OCCM Certificate using the pre-shared key, select OCCM from the Cert Type drop-down and select AUTOMATIC from Creation Mode on the Create Certificate page.
Figure 3-27 OCCM Certificate Configuration using Pre-shared Key
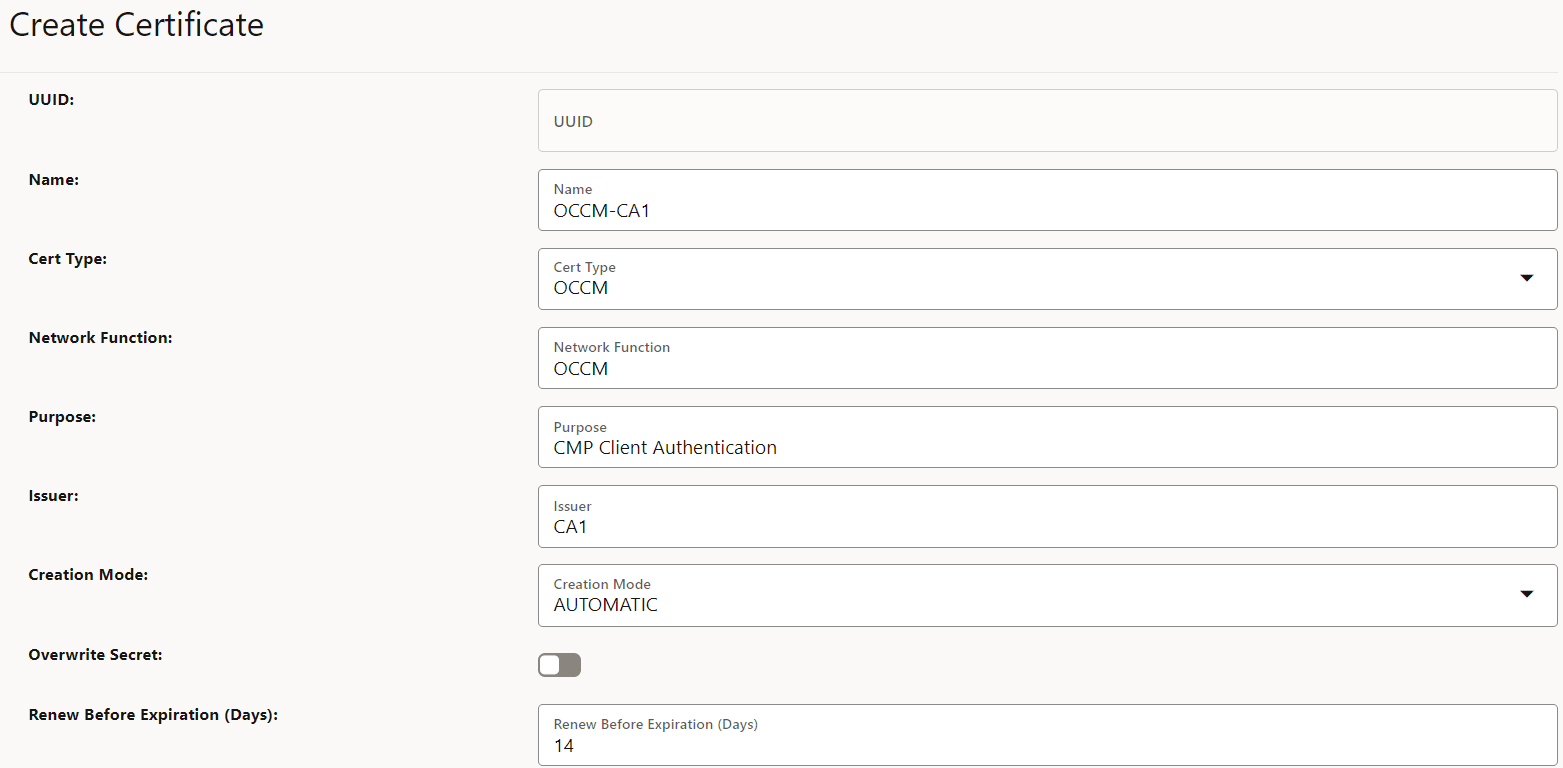
Using the pre-configured private key and certificate
- OCCM signs the first initialization request using the
pre-configured private key and certificate. CA validates the request and
issues a signed OCCM certificate.
- Issuer ConfigurationHere, to configure the issuer,
- Provide the Signature authentication input
under Initial CMP Client(OCCM) Authentication
Options.
Figure 3-28 Initial CMP Client(OCCM) Authentication Options
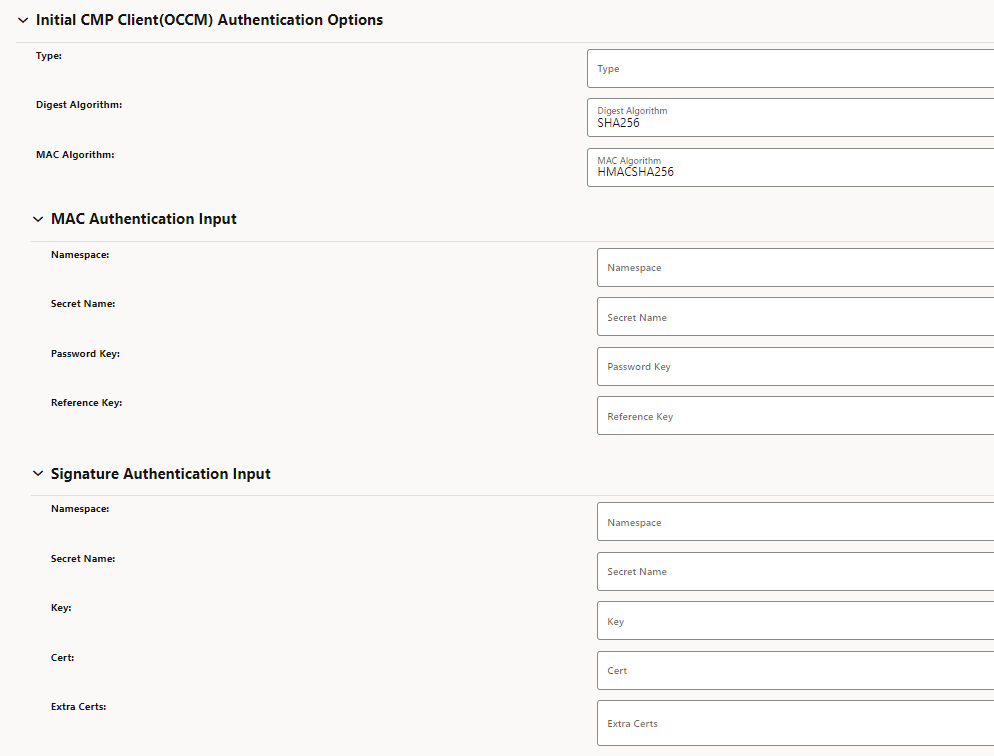
- OCCM key and certificate output location
need to be specified under CMP Client Authentication
Options for Other Certificate. OCCM certificate
received from CA will be written here.
Figure 3-29 CMP Client Authentication Options for Other Certificate

- Provide the Signature authentication input
under Initial CMP Client(OCCM) Authentication
Options.
- OCCM Certificate Configuration
To configure the OCCM Certificate, select OCCM from the Cert Type drop-down and select AUTOMATIC from the Creation Mode on the Create Certificate page.
- Issuer Configuration
- The pre-configured private key and certificate (generated out of
band) can be used as the OCCM certificate.
- Issuer Configuration
- Here, you must skip the Initial CMP
Client(OCCM) Authentication Options.
Figure 3-30 Issuer Configuration
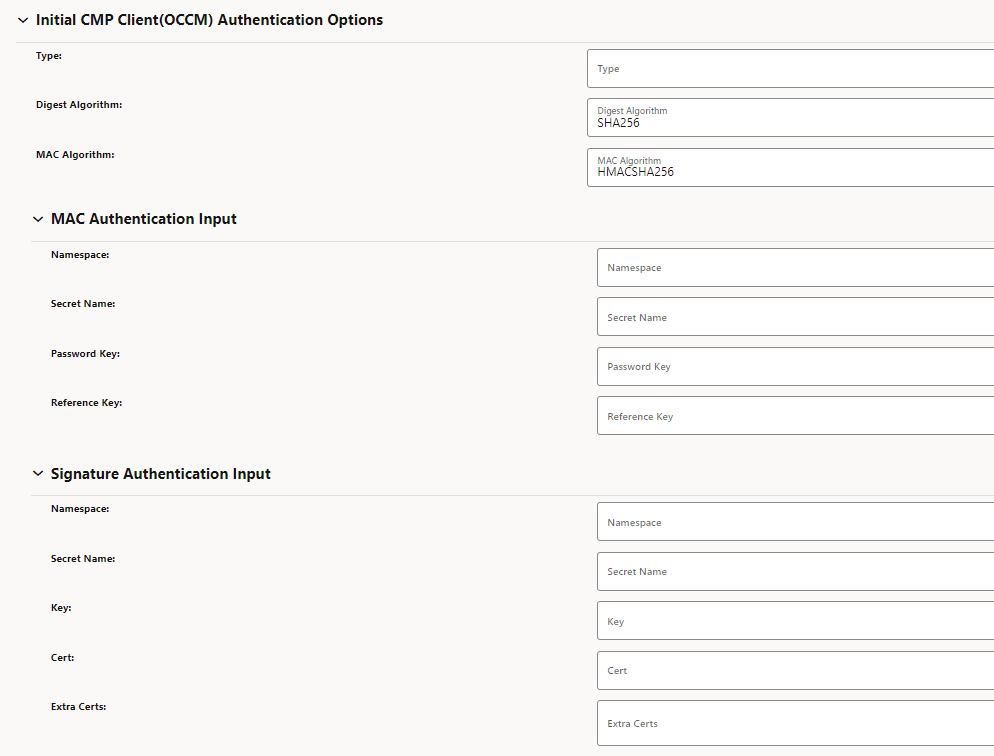
- OCCM key and certificate output location
need to be specified under CMP Client Authentication
Options for Other Certificate. Specify the
manually created OCCM key and certificate location
here.
Figure 3-31 CMP Client Authentication Options for Other Certificate

- Here, you must skip the Initial CMP
Client(OCCM) Authentication Options.
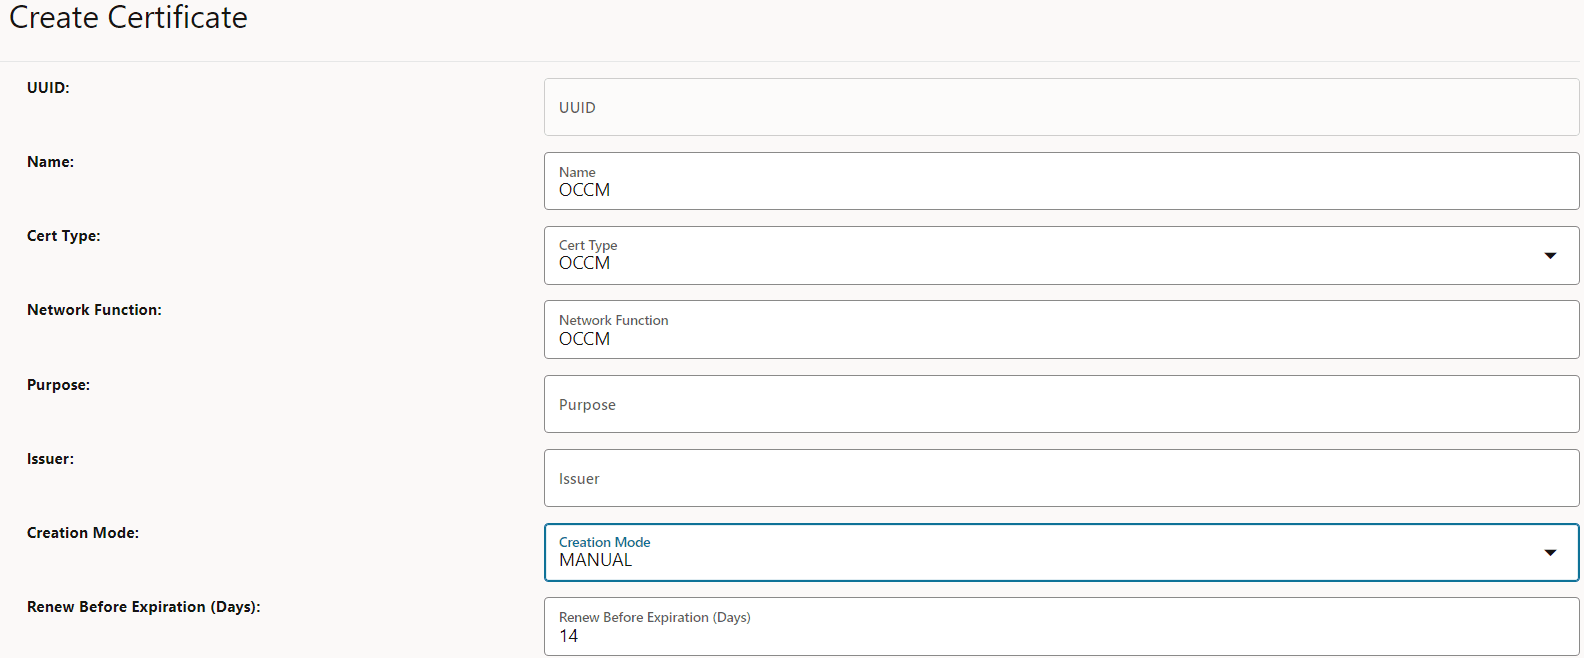
- OCCM Certificate ConfigurationTo configure the OCCM Certificate, select OCCM from the Cert Type drop-down and select MANUAL from the Creation Mode on the Create Certificate page.
Figure 3-32 OCCM Certificate Configuration
- Issuer Configuration
Note:
This configuration is available for each of the issuers, therefore the modes for the CAs can be controlled individually.3.5.2 Create NF Certificates
- A CMPv2 Initialization Request (IR) is sent to the CA. Each request supports one certificate request. A separate initialization request for each certificate request is used.
- The IRs and Certificate Confirms are digitally signed by the CMP Identity Key.
- OCCM supports Proof of Possession (PoP) in the initialization request. PoP of the signing key contains the algorithm identifier and signature. This signature is based on the certificates template structure.
- The recommended signing algorithms for the CMPv2 messages and Proof of Possession are RSA Encryption and ECDSA.
- The recommended hash algorithms for the CMPv2 messages and Proof of Possession are SHA-256 and SHA-384.
You can configure NF certificates through REST API or using the CNC Console GUI.
- Log in to CNC Console using your login credentials and select the OCCM Instance.
- Click OCCM from the left pane and then click Certificate.
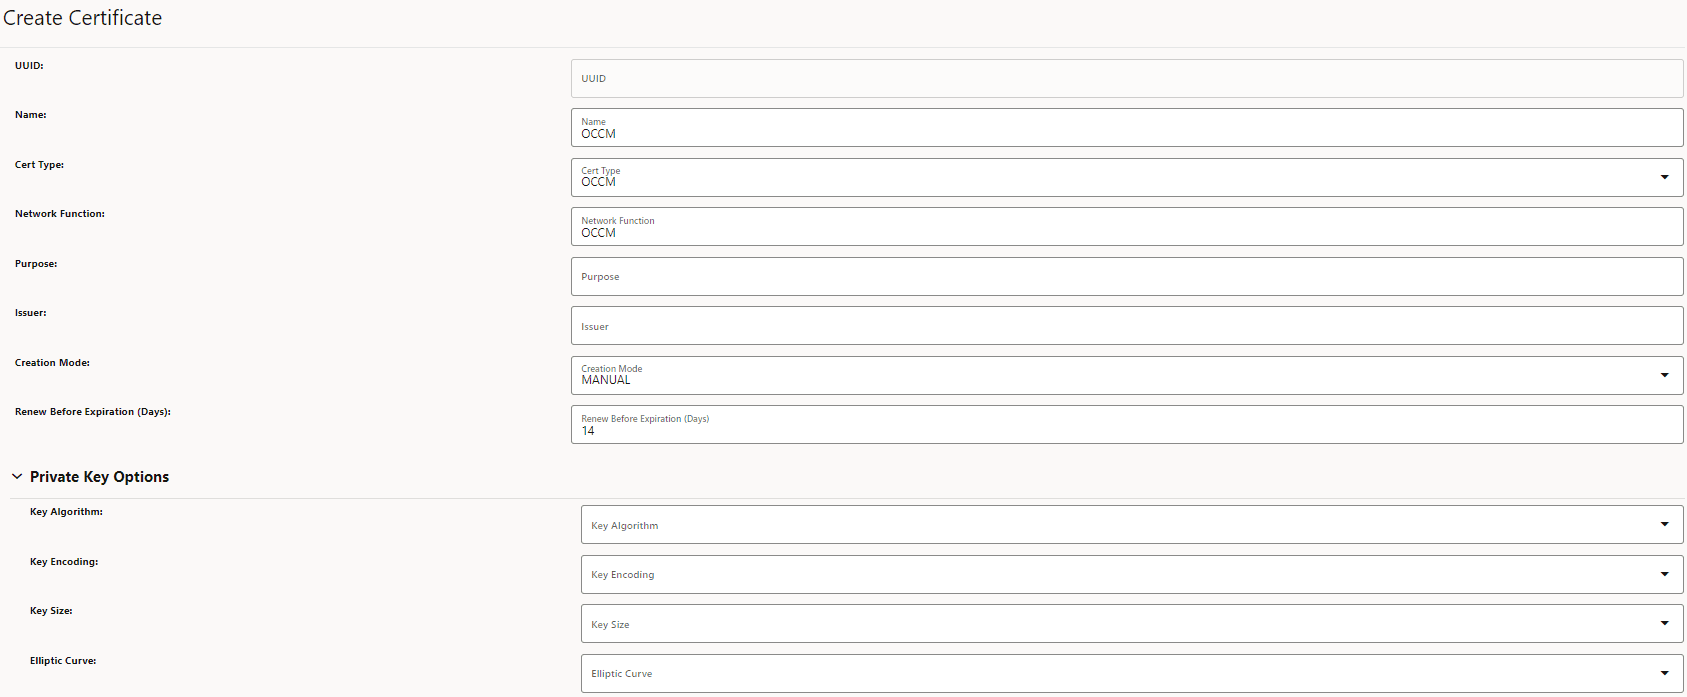
- Click Add. The Create Certificate page appears.
Figure 3-33 Create NF Certificate
- Enter the following information:
Table 3-17 Create NF Certificate
Field Name Description and Possible Values Name Name of the certificate. Cert Type Select OTHER for NF certificates. Network Function Name of the NF. Purpose Purpose of the NF certificate. Issuer Name of the issuer for the certificate. Creation Mode Possible values are MANUAL and AUTOMATIC. - Under Private Key Options, enter the following
information:
Table 3-18 Private Key Options
Field Name Possible Values Key Algorithm RSA, EC Key Encoding DER, PEM Key Size KEYSIZE_2048, KEYSIZE_4096 Elliptic Curve SECP256r1, SECP384r1 Figure 3-34 Private Key Options

- Under Private Key Output, enter the following
information:
Table 3-19 Private Key Output
Field Name Description Namespace Name of the namespace. Secret Name Kubernetes Secret Name. Key Kubernetes secret key against which the key-pair will be stored. Figure 3-35 Private Key Output

- Under Public Key Certificate Options, enter the
following:
Table 3-20 Public Key Certificate Options
Field Name Description Key Usage Value(s): DIGITAL_SIGNATURE Extended Key Usage Value(s): CLIENT_AUTH and SERVER_AUTH Basic Constraints Value(s): END_ENTITY Subject Country: Enter country code. State: Enter state code.
Location: City or town where company is legally located.
Organization: Name of your organization.
Organisation Unit: Name of business unit.
Common Name: The Common Name (CN) represents the server name to be protected by the certificate.
Requested Validity (Days): Number of days requested for which the certificate will be valid.
Figure 3-36 Public Key Certificate Options

- Under Subject Alternate Names, enter the following:
Table 3-21 Subject Alternate Names
Field Name Description IP Address The IPs you want to protect under this certificate. DNS Names List of DNS domain names. URI ID API Roots List of URI ID (API root of the NF Instance). URI ID URNs List of URI ID (URN of the NFInstanceId). Figure 3-37 Subject Alternate Names

- Under Certificate Output, enter the following for the NF
certificate:
Table 3-22 Certificate Output
Field Name Description Namespace Name of the namespace. Secret Name Name of the secret. Key The key against which the certificate will be populated. Figure 3-38 Certificate Output

- (Optional) Under Certificate Chain Output, enter the
following:
Table 3-23 Certificate Chain Output
Field Name Description Namespace Name of the namespace. Secret Name Name of the secret. Key Kubernetes secret key against which the certificate chain will be stored. Figure 3-39 Certificate Chain Output

If the Certificate Chain Output section is filled, then the certificate chain (intermediate CA certificates ) can either be obtained from the CA or can be configured manually. This is based on the extractCertChainFromCmpResponse helm parameter. For more information, see Oracle Communications Cloud Native Core, Certificate Management Installation, Upgrade, and Fault Recovery Guide.
Note:
extractCertChainFromCmpResponse: This field when set to true specifies that certificate chain will be extracted from CA's CMP response message. When false, the operator can configure the chain manually. This certificate chain can be used in the TLS handshake along with the certificate. - Merge Certificate and Certificate Chain.
To get the complete chain including the leaf certificate and the intermediate CA certificate(s), enable the Merge Certificate and Certificate Chain option and provide the same output secret for both Certificate Output and Certificate chain output fields. The Certificate Output secret can be taken from the Issuer's CMP client options for Other Certificate field.
Figure 3-40 Merge Certificate and Certificate Chain

Note:
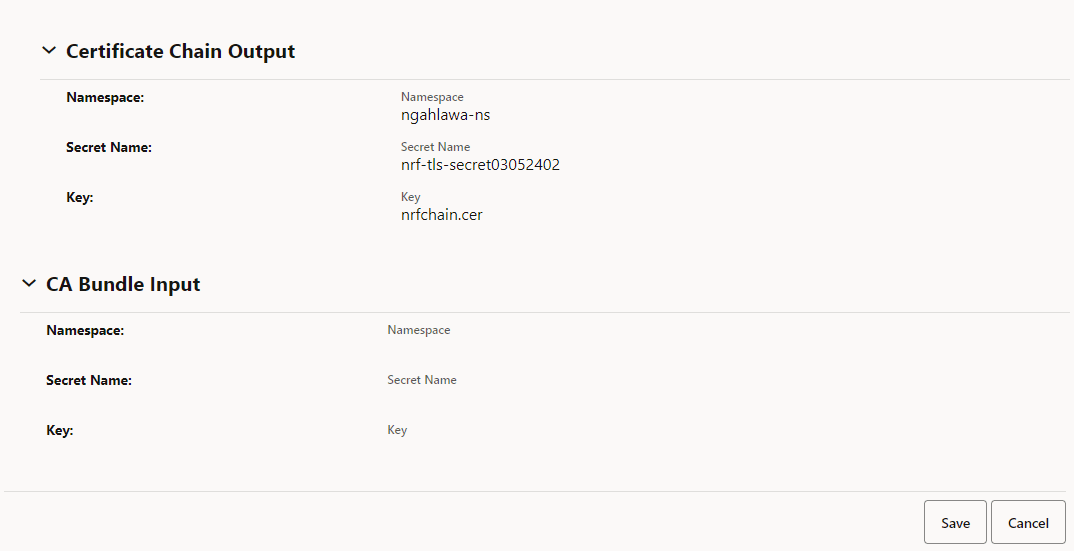
This is an optional field and is set to false by default. In case the issuer CA doesn't respond with the chain (intermediate CA certificates), only the leaf certificate will be populated against the specified Kubernetes secret key.For example, The certificate chain (leaf certificate and intermediate CA certificate(s)) will be populated against the key nrfcertchain.pem of the Kubernetes secret nrf-tls-secret present in namespace ns1.Figure 3-41 Sample Certificate Output and Certificare Chain Output

- (Optional) under CA Bundle Input, enter the following information:
Table 3-24 CA Bundle Input
Field Name Description Namespace Name of the namespace. Secret Name Name of the secret. Key Kubernetes secret key against which CA bundle certificate(s) will be stored. Figure 3-42 CA Bundle Input

- Click Save.
For sample NF configuration, see Creating NF Certificate Using OCCM - Sample Configuration.
3.5.3 Renew NF Certificates
- OCCM sends CMPv2 Key Update Request (KUR) to the CA.
- KUR is used to renew OCCM certificate (CMP Identity Key) and NF Certificates.
- The KUR can be signed either by the OCCM key and certificate or by the certificate that is being renewed and its corresponding key. The corresponding certificate is included in extraCerts.
- Set the Key Update Request mode:Certificate renewal is a CMP KUR procedure. You can configure OCCM to sign the KUR in two ways:
- Using OCCM key and certificate.
- Using the certificate that is being renewed and its corresponding key.
You can use the occmConfig.cmp.config.useOccmCertSignForKur parameter to determine how OCCM will sign the KUR at the time of deployment.- If occmConfig.cmp.config.useOccmCertSignForKur is set to true, OCCM key and certificate will be used to sign the CMP KUR message.
- If occmConfig.cmp.config.useOccmCertSignForKur is set to false, the certificate that is being renewed will be used.
- Configure Renew Before Expiration (days):
OCCM monitors the certificate validity and initiates automatic certificate renewal based on the renew before period configuration. You can update the Renew Before Expiration (Days) field on the Create Certificate page at the time of certificate creation. This field specifies the number of days before the certificate expiry date when the certificate must be renewed.
Figure 3-43 Renew Before Expiration (Days)

3.5.4 Polling for Certificates
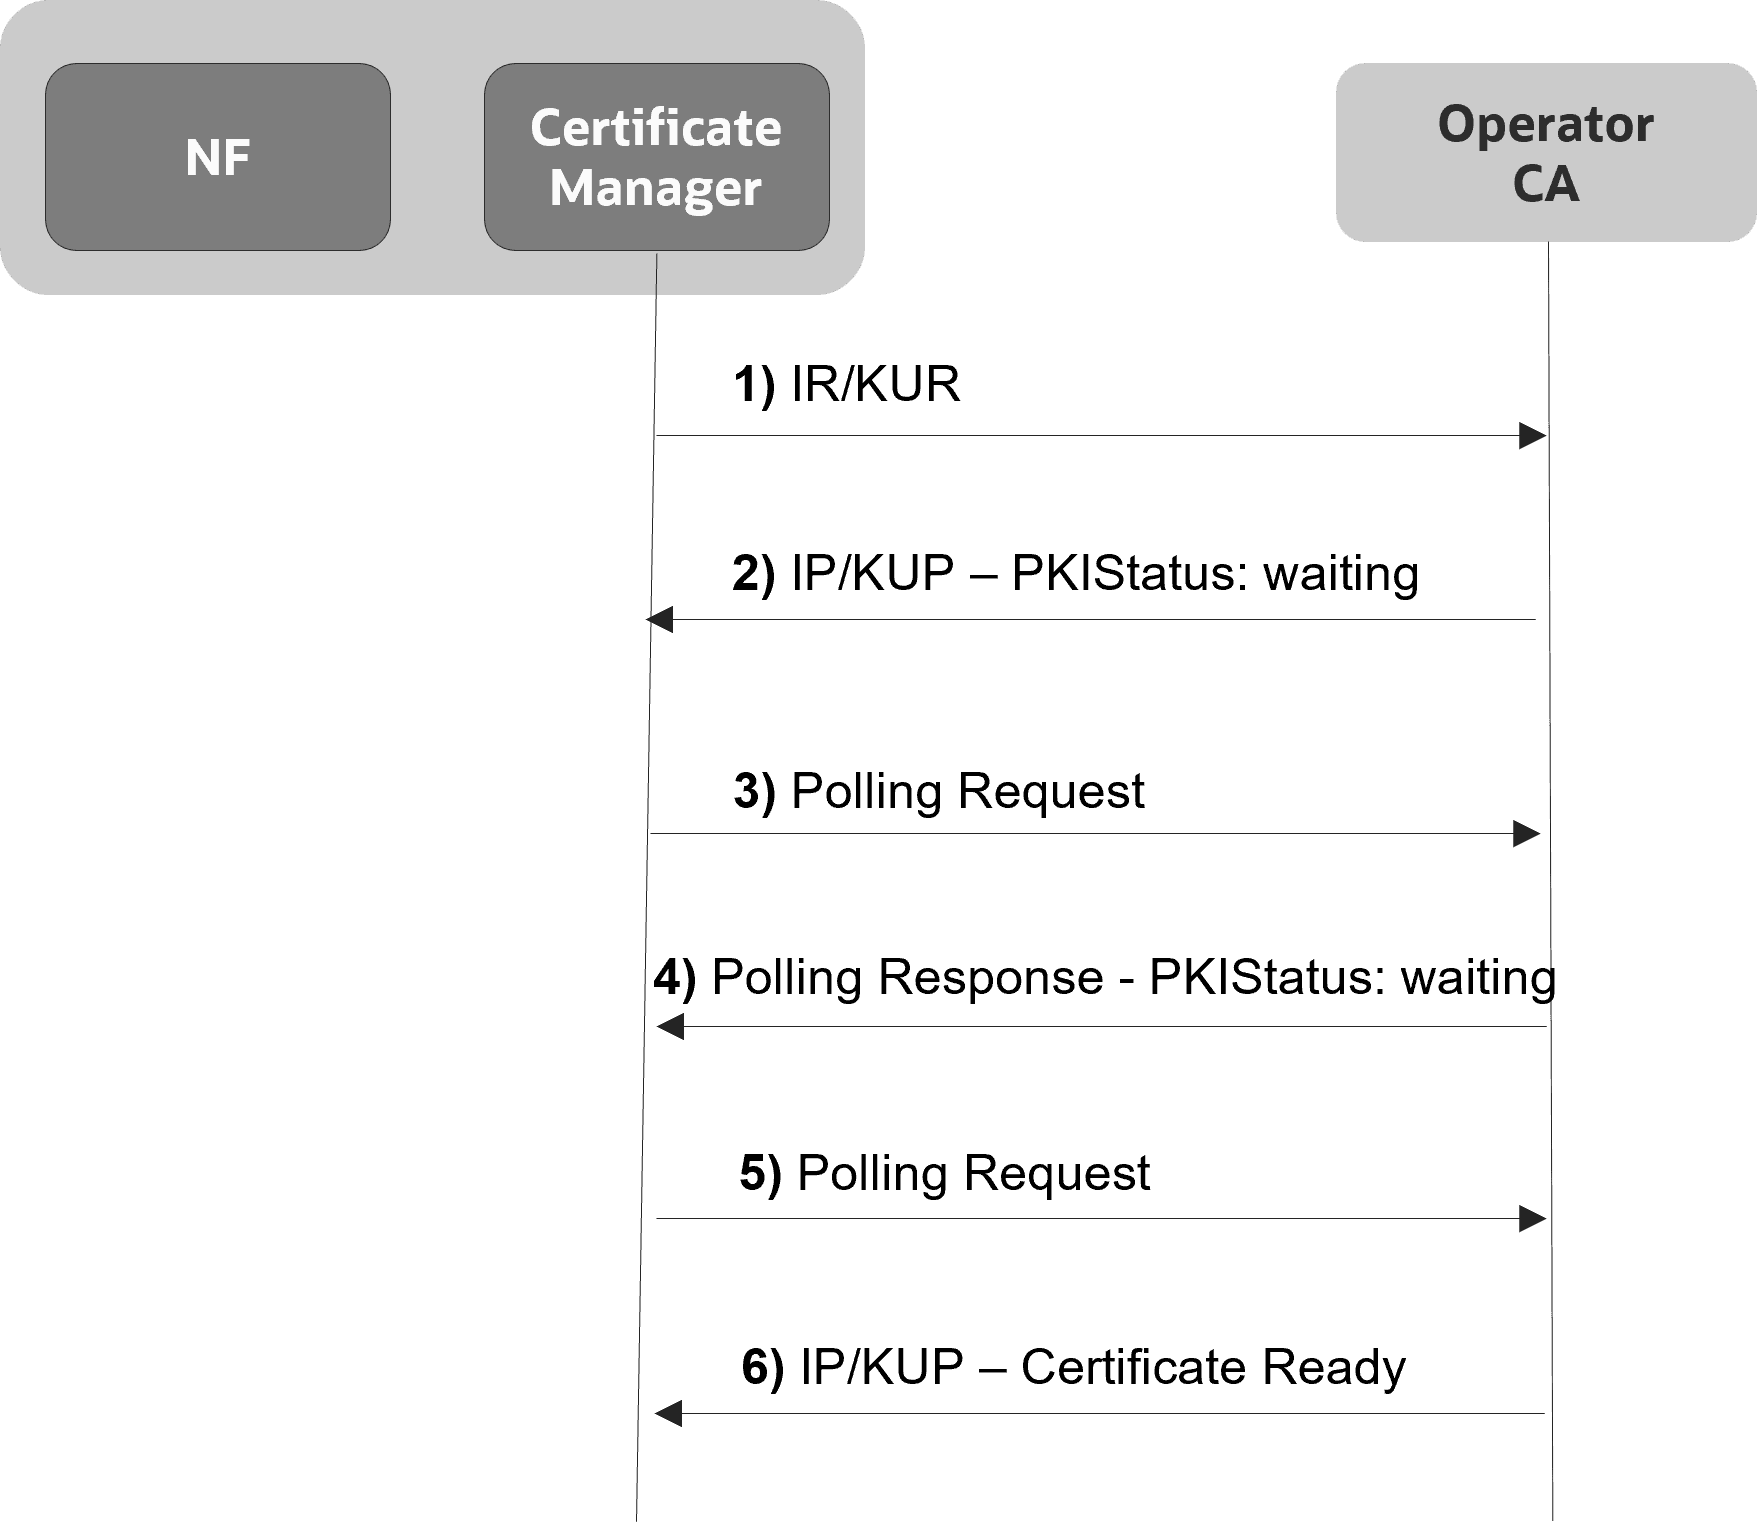
After the IR or KUR, if the certificate is not available yet, the CA responds with PKI status 'Waiting'. The application keeps polling until the CA is ready with the certificate. Openssl implicitly handles polling. No additional configuration is required at the application level in this regard. However, the Total Timeout field can be set in the issuer configuration, which can restrict this polling time. It is the maximum number of seconds a transaction may take, including polling etc. If the time specified by total timeout has elapsed, the polling will stop.
Figure 3-44 Polling for Certificates
3.5.5 Deleting the Certificate Configuration
- Login to CNC Console using your login credentials and select the OCCM Instance.
- Click OCCM from the left pane and then click Certificate.
- Click Delete and click OK on the confirmation prompt to delete the certificate.
Note:
This procedure only deletes the certificate configuration from OCCM.kubectl delete secrets <secret name> -n <namespace>kubectl delete secrets nrf-tls-secret -n ns13.5.6 Recreating Certificates
This feature enables you to recreate certificates using the existing certificate configuration on CNC Console GUI. Certificate recreation uses CMPv2 initialization request and response procedures.
You can recreate any certificate that is in ready or expired status. This enhances OCCM's usablity in managing certificate lifecycle operations. For example, if a certificate has been deleted, revoked or has expired, the operator can recreate it using existing configurations.
- Log in to CNC Console using your login credentials and select the OCCM Instance.
- Click OCCM from the left pane and then click Certificate.
- Click Edit under
Actions for the certificate you want to recreate.
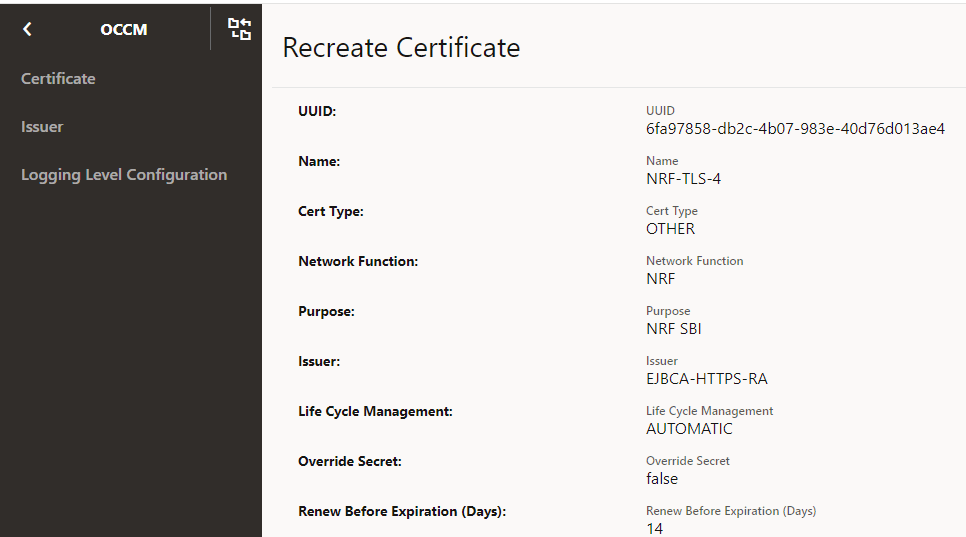
The Recreate Certificate page appears. The configurations on this page are not editable.
Figure 3-45 Certificate Page

Figure 3-46 Recreate Certificate Page
- On the Recreate Certificate page, click
Save to trigger the recreate request.
Figure 3-47 Click Save
- Monitor OCCM Metrics or Grafana dashboard for certificate recreation status.
3.5.7 Monitoring Certificates For Manual Update and Delete
The monitoring certificates functionality enables you to monitor and manage previously created certificates. It enables you to identify and take action if certificates are modified or deleted manually, without experiencing loss of service.
Certificate monitoring is performed in the following scenarios:
- The certificate or the Kubernetes secret holding the certificate is deleted.
- The certificate is manually updated.
When the Kubernetes secret holding the NF or OCCM certificate or key gets deleted manually, but the corresponding certificate configuration in OCCM exists, an alert is raised and a log is generated to indicate the deletion. The deleted certificate will be recreated automatically using the CMPv2 Initialization Request procedure.
When the Kubernetes secret holding the NF or OCCM certificate or key gets updated manually, but the corresponding certificate configuration in OCCM exists, OCCM identifies this change, and the updated certificate is validated against the certificate configurations available in OCCM.
If the validation fails, then certificate is recreated automatically, otherwise, the corresponding configurations at OCCM are updated, and alert is triggered to indicate certificate update.
This feature helps to identify changes when the operator updates the certificate secret manually when an certificate is revoked, or a certificate is up for renewal but the CA is not reachable, or connectivity is down.
Note:
- For changes to input secret, only an alert is raised. Automatic recreation of certificates is not perfromed.
- Alerts are triggered and automatic recreation of certificates are performed for output secrets changes.
- This feature is applicable only while OCCM is up. If any operation performed on the secrets while OCCM is down, then those changes are not notified by this feature.
- Input Secrets are secrets that given as input to OCCM for generating the certificate. For example, mac secrets, trust stores, and so on.
- Output Secrets are the secret name used by OCCM to create the Kubernetes secret that holds the key and certificate. For example, secrets where OCCM stores secret after creation.
3.6 OCCM Retry on Failure
OCCM supports retry on encountering failures during the certificate creation, certificate renewal and manipulation of Kubernetes secrets.
- The procedure is retried until successful or interrupted by an action executed by the operator.
- Retry is not controlled through any maximum limit.
- The retry interval is an pre-defined value and set to 30s.
Some of the failure scenarios for which retries will be attempted:
- CA is unavailable, not reachable, or busy
- Any errors returned by CA
Note:
In this case, there is no attempt to recreate the Key and Certificate. The retry is restricted to updating the Kubernetes secrets with the key and certificate that are already generated.3.7 Network Policies
Network Policies are an application-centric construct that allows you to specify how a pod communicates with various network entities. It creates pod-level rules to control communication between the cluster pods and services, and to determine which pods and services can access one another inside a cluster.
Previously, the pods under deployment could be contacted by any other pods in the Kubernetes cluster without any restrictions. Now, Network Policy provides namespace-level isolation, which allows secured communications to and from OCCM with rules defined in the respective Network Policies. The network policies enforce access restrictions for all the applicable data flows except communication from Kubernetes node to pod for invoking container probe. For example, OCCM internal microservices can't be contacted directly by any other pods.
Managing Support for Network Policies
Enable
To use this feature, network policies need to be applied to the namespace wherein OCCM is applied.
Configure
You can configure this feature using Helm. For information about Configuring Network Policy for OCCM deployment, see Oracle Communications Certificate Management Installation, Upgrade, and Fault Recovery Guide.
Observe
There are no specific metrics and alerts required for the Support of Network Policy functionality.
3.8 Traffic Segregation
This feature provides end-to-end traffic segregation to OCCM based on traffic types. Within a Kubernetes cluster, traffic segregation can divide applications or workloads into distinct sections such as OAM, SBI, Kubernetes control traffic, etc. The Multus CNI container network interface (CNI) plugin for Kubernetes enables attaching multiple network interfaces to pods to help segregate traffic from OCCM microservice.
This feature addresses the challenge of logically separating IP traffic of different profiles, which are typically handled through a single network (Kubernetes overlay). The new functionality ensures that critical networks are not cross-connected or sharing the same routes, thereby preventing network congestion.
With traffic segregation, operators can segregate traffic to external feeds and applications more effectively. Previously, all external traffic was routed through the same external network, but now, egress traffic from the OCCM pods can be directed through non-default networks to third-party applications. This separation is achieved by leveraging cloud-native infrastructure and the load balancing algorithms in OCCNE.
The feature supports the configuration of separate networks, Network Attachment Definitions (NADs), and the Cloud Native Load Balancer (CNLB). These configurations are crucial for enabling cloud native load balancing, facilitating ingress-egress traffic separation, and optimizing load distribution within OCCM.
Prerequisites
The CNLB feature is only available in OCCM if OCCNE is installed with CNLB and Multus.
Cloud Native Load Balancer (CNLB)
CNE provides Cloud Native Load Balancer (CNLB) for managing the ingress and egress
network as an alternate to the existing LBVM, lb-controller, and egress-controller
solutions. You can enable or disable this feature only during a fresh CNE installation.
When this feature is enabled, CNE automatically uses CNLB to control ingress traffic. To
manage the egress traffic, you must preconfigure the egress network details in the
cnlb.ini file before installing CNE.
For more information about enabling and configuring CNLB, see Oracle Communications Cloud Native Core, Cloud Native Environment User Guide, and Oracle Communications Cloud Native Core, Cloud Native Environment Installation, Upgrade, and Fault Recovery Guide.
Network Attachment Definitions for CNLB
A Network Attachment Definition (NAD) is a resource used to set up a network attachment, in this case, a secondary network interface to a pod. OCCM supports following types of CNLB NADs:
Egress Only Network Attachment Definitions
Egress Only NADs enable outbound traffic only. An NF pod can initiate traffic and route it through a CNLB application, translating the source IP address to an external egress IP address. An egress NAD contains network information to create interfaces for NF pods and routes to external subnets.
- Requirements:
- Ingress NADs are already created for the desired internal networks.
- Destination (egress) subnet addresses are known beforehand and defined under
the
cnlb.inifile'segress_destvariable to generate NADs. - The use of an Egress NAD on a deployment can be combined with Ingress NADs to route traffic through specific CNLB apps.
- Naming Convention
nf-<service_network_name>-egr
Traffic Segregation
The traffic segregation feature enables OCCM users to manage egress traffic, that is, all outgoing data and communication from OCCM to CAs. It ensures that the traffic directed towards CAs is segregated and managed to maintain security and improve efficiency.
Note: Incoming traffic like REST API requests are managed separately using CNC Console. CNC Console is responsible for managing and processing these incoming requests, ensuring that they are appropriately routed and secured.
Enable and Configure
This feature is disabled by default. To enable this feature, you must configure the network attachment annotations in the custom values file. For more information, see the "Installing OCCM Package" section in the Oracle Communications Certificate Management Installation, Upgrade, and Fault Recovery Guide.
Observe
There are no metrics, KPIs, or alerts required for this feature.