4 Running NF Test Cases Using ATS
4.1 Running BSF Test Cases using ATS
This section describes how to run BSF test cases using ATS.
Note:
Restart the NRF-client pod of BSF for UDR and CHF discovery as part of each test case.4.1.1 Prerequisites
- Deploy BSF 25.2.200 with default helm configurations using helm charts to run all test cases. The
ATS version must be compatible with BSF 25.2.200.
For more information on how to install BSF, see Oracle Communications Cloud Native Core, Binding Support Function Installation, Upgrade, and Fault Recovery Guide.
- Go-STUB must be installed in the same namespace where ocbsf is installed.
-
Add the following to Kubernetes namespace to grant role access:
PolicyRule: Resources Non-Resource URLs Resource Names Verbs --------- ----------------- -------------- ----- pods/log [] [] [get list] configmaps [] [] [watch get list delete update create] pods [] [] [watch get list delete update create] secrets [] [] [watch get list delete update create] services [] [] [watch get list delete update create] deployments.apps [] [] [watch get list update] replicasets.apps [] [] [watch get list update] deployments.extensions [] [] [watch get list update] replicasets.extensions [] [] [watch get list update] - ATS Prometheus metrics validation works only when:
- the metrics suffixes are not configured
- installation has a single pod for each microservice in the BSF deployment
- You can customize test cases in the custom test case folders (cust_newfeatures, cust_regression and cust_performance). You can add new test cases, remove unwanted test cases and modify existing test cases. It does not impact the original product packaged test cases available in the newfeatures, regression and performance folders respectively. For more details about custom test case folders, see Custom Folder Implementation.
- Install Prometheus server in the cluster.
- Database cluster is in the running state with all required tables. Verify that there are no previous entries in the database before running test cases.
- Do not initiate a job in two different pipelines at the same time.
- For running ATS features, ensure to update the
following mandatory parameters in ocbsf_custom_values_25.2.200.yaml file only when you are not using the minimal custom values.yaml
file.
logging:
  burst:
    rate: 500
    max: 3000
    onMismatch: DENY
    logLevel: DEBUG
Note:
Please ensure that you use the latest version of the Custom Values file when installing BSF initially. - For using Controlled Shutdown feature, ensure that
enableControlledShutdownparameter is enabled on BSF during installation. If this parameter is not enabled, the test case for this feature will fail. -
In the
application-configconfigmap, configure the following parameters with the respective values:-
primaryNrfApiRoot=nf1stub.<namespace_gostubs_are_deployed_in>.svc:8080For example:
primaryNrfApiRoot=nf1stub.ocats.svc:8080 -
secondaryNrfApiRoot=nf11stub.<namespace_gostubs_are_deployed_in>.svc:8080For example:
secondaryNrfApiRoot=nf11stub.ocats.svc:8080 -
virtualNrfFqdn =
                                        nf1stub.<namespace_gostubs_are_deployed_in>.svc
For example:
virtualNrfFqdn=nf1stub.ocats.svc retryAfterTime=PT30S
-
- To
enable ATS BSF GUI with the HTTPS protocol, the above mentioned
application-configconfigmap related following parameters should be configured with the respective values:# Please edit the object below. Lines beginning with '#' will be ignored, # and an empty file will abort the edit. If an error occurs while saving this file will be # reopened with the relevant failures. # apiVersion: v1 data: profile: | - [appcfg] primaryNrfApiRoot=nf1stub.ocats.svc:8443 secondaryNrfApiRoot=nf11stub.ocats.svc:8443 nrfScheme=https virtualNrfPort=8443 virtualNrfScheme=https -
Before running ATS Test suite, restart
nrf-client-nfdiscoveryandnrf-client-nfmanagementpods.-
Run the following command to get all the configmaps in your namespace.
kubectl get configmaps -n <BSF_namespace> -
Edit the
alternate route servicedeployment pointing towards DNS Stub.Run the following command to get searches information from
dns-bindpod to enable communication between Alternate Route anddns-bindservice.kubectl exec -it <dns-bind pod> -n <NAMESPACE> -- /bin/bash -c 'cat /etc/resolv.conf' | grep search | tr ' ' '\n' | grep -v 'search'Example:
Figure 4-1 Editing Alternate Route Service deployment pointing towards DNS Stub

By default, Alternate Route Service points to CoreDNS.
Figure 4-2 Alternate Route Service settings in deployment file

Change the deployment file to add following content in alternate service to query DNS stub.
kubectl edit deployment ocbsf-occnp-alternate-route -n ocbsf- Add the nameservers IPaddress.
- Add all the search information.
- Set dnsPolicy to
None.dnsConfig: nameservers: - <dns_stub_cluster_ip_address> searches: - dns-bind search - dns-bind search - dns-bind search dnsPolicy: NoneFigure 4-3 dnsConfig

-
If Service Mesh check is enabled, create a destination rule to fetch the metrics from the Prometheus. For destination rule to communicate between TLS enabled entity (ATS) and non-TLS entity (Prometheus), Prometheus is kept outside of the service mesh. The rule can be created as follows:
kubectl apply -f - <<EOF apiVersion:networking.istio.io/v1alpha3 kind:DestinationRule metadata: name:prometheus-dr namespace:ocats spec: host:oso-prometheus-server.ocbsf.svc.cluster.local trafficPolicy: tls: mode:DISABLE EOFname: indicates the name of destination rule.namespace: indicates where the ATS is deployed.host: indicates the hostname of the prometheus server.
-
-
For Bsf_To_Nrf_Late_Arrival feature file to be executed, nfInstanceId should be configured in Bsf_To_Nrf_Late_Arrival.yaml parameterization file. This nfInstanceId must be the same as the one under BSF nfInstanceId, that is configured during BSF installation. The nfInstanceId must to be configured in ATS UI under pipeline configuration (BSF_NFINSTANCE_ID).
-
To ensure consistent functioning of ATS related to the audit service, modify the Audit deployment by reducing the value of AUDIT_NOTIFY_SCHEDULER_POLLING_INTERVAL_MILLISEC from 30000 to 1000 (changing from 30 seconds to 1 second).
$ kubectl get deploy -n ocbsf | grep 'audit' ocbsf-ocpm-audit-service 1/1 1 1 10h$ kubectl edit deploy ocbsf-ocpm-audit-service -n ocbsfThe deployment will open. Scroll down until below fields are seen
- name: AUDIT_NOTIFY_SCHEDULER_POLLING_INTERVAL_MILLISEC value: "30000"Update the value of AUDIT_NOTIFY_SCHEDULER_POLLING_INTERVAL_MILLISEC to 1000 if it isn't already.
Application Config map changes for BSF registrations over TLS
- NRF port from 8080 to 8443
- nrfScheme to https
apiVersion: v1
data:
  profile: |-
    [appcfg]
    primaryNrfApiRoot=nf1stub.ocats.svc:8443
    secondaryNrfApiRoot=nf11stub.ocats.svc:8443
    nrfScheme=https
    virtualNrfPort=8443
    virtualNrfScheme=https
Note:
In the config map of application-config, delete the lines which has supportedDataSetId or secondaryNrfApiRoot strings.
4.1.2 Logging into ATS
Before logging into ATS GUI, it is important to get the worker node external IP and node port of the service, 'ocats-bsf'.
Run the following command to get the external IP for the worker node:
Example:
kubectl get nodes -owideocbsf-k8s-node-1 Ready <none> 111d v1.16.7 192.168.200.26 10.75.152.111 Oracle Linux Server 7.8 4.14.35-1902.303.5.3.el7uek.x86_64 containerd://1.2.10Run the following command to get the nodeport:
kubectl get svc -n <BSF_namespace>Example:
kubectl get svc -n ocbsfocbsf-ocats-ocats-bsf LoadBalancer 10.233.53.144 10.75.225.49 8080:31944/TCP 19hhttp://<Worker-Node-IP>:<Node-Port-of-ATS>
If the 'ocats-bsf' Service has an external IP available, <SVC external IP> can also be used to log in to ATS.
http://<External IP of ATS Service>:8080
http://10.75.225.49:8080Running ATS
To run ATS test cases, perform the following steps:
- Enter the username as bsfuser and Password as bsfpasswd.
- Click Sign
in.
Note:
To modify default login password, see Modifying Login Password.On successful log in, users should see the following pipelines:Figure 4-4 Pre-configured Pipelines

- BSF-NewFeatures: This pipeline has all the new test cases delivered for BSF 25.2.200.
- BSF-Performance: This pipeline is not operational as of now. It is reserved for future releases of ATS.
- BSF-HealthCheck: This pipeline checks if BSF and ATS are deployed correctly. This shows only when the user has enabled this feature at the time of installing BSF ATS.
- BSF-Regression: This pipeline has all the test cases delivered in BSF ATS - 25.2.100.
4.1.3 Running BSF_NewFeatures Pipeline
BSF_NewFeatures Pipeline
- Click BSF_NewFeatures in the Name column and then,
click Configure in the left navigation pane as shown below:
Figure 4-5 BSF New Feature Pipeline

- The BSF_NewFeatures, General tab appears. Make sure that the screen loads completely.
- Scroll-down to the end. The control moves from General
tab to the Pipeline tab as shown below:
Figure 4-6 BSF New Features Pipeline Configuration
 You can change the parameter values from "a" - to - "x" as per user requirement. The parameter details are available as comments from line number 2 - to - 7. In the Script area of the Pipeline section, you can change the values of the following parameters:
- a: Name of the NF to be tested in capital (BSF)
- b: Change this parameter to update the namespace where BSF was deployed in your bastion.
- c: Name of Prometheus service namespace (occne-prometheus-server)
- d: Change this parameter to update the namespace where your gostubs are deployed in your bastion.
- e: Set this parameter as 'unsecure', if you intend to run ATS in TLS disabled mode. Else, set this parameter as 'secure'.
- f: Configure this parameter to set BSF_NFINSTANCE_ID.
- g: Set a value more than 45 seconds for this parameter. The default wait time for the pod to come up is 45 seconds. Every TC requires restart of the nrf-client-management pod.
- h: Set a value more than 60 seconds for this parameter. The default wait time to add a configurations to the database is 60 secs.
- i: Set this parameter to more than 140 secs. The default wait time for Nf_Notification Test Cases is given as 140 secs.
- k: Use this parameter to set the waiting time to initialize Test Suite.
- l: Use this parameter to set the waiting time to get response from Stub.
- m: Use this parameter to set the waiting time after adding BSF Configuration.
- n: Use this parameter to set the waiting time for Peer connection establishment.
- o: Use this parameter to set the waiting time before sending next message.
- p: Use this parameter to set Prometheus Server IP.
- q: Use this parameter to set Prometheus
Server Port.
Note:
If PrometheusAuthEnabled is set to true during ATS installation, then set p and q accordingly. - r: Use this parameter to set the interval after which the POD status is checked when it is down.
- s: Use this parameter to set number of retry attempt in which will check the pod down status
- t: Use this parameter to set the interval after which we check the POD status if its UP.
- u: Use this parameter to set number of retry attempt in which will check the pod up status.
- v: Use this parameter to set Wait time to connect to Elastic Search.
- w: Use this parameter to set Elastic Search HostName.
- x: Use this parameter to set Elastic Search Port.
- y: Use this parameter to set To Enable/Disable Stub logs collection.
- z: Use this parameter to set Log collection endpoint either Elasticsearch or Kubernetes.
- A: Use this parameter to set Timer to wait for importing service configurations.
- B: Use bulk_import_to_complete to add custom time in Jenkins post bulk imports.
- C: Use this parameter to set TLS version (1.2 or 1.3). The default value is 1.2.
(Optional)To collect application logs per failed scenario, user can configure the values for the following parameters:- z: If you want log collection to happen
through Elastic search, set the value for this parameter as
Elasticsearch. If not, specify the
value as Kubernetes.
If you want to collect logs through Elastic search, it is required to configure the values for the following parameters:
- v: Specifies the wait time to connect
to Elastic search (
ELK_WAIT_TIME). - w: Specifies the host name of Elastic
search (
ELK_HOST). For example,occne-elastic-elasticsearch-master.occne-infra/ - x: Specifies the port for Elastic
search (
ELK_PORT). For example, 9200.
- v: Specifies the wait time to connect
to Elastic search (
- y: If you want to collect stub logs, set the value for this parameter as yes. If not, specify the value as no.
-
Click Save after updating the parameter values. The BSF_NewFeatures Pipeline page appears.
Note:
It is recommended to save a copy of the pipeline script in your local machine that you may refer while restarting ATS pods.Attention:
Do not modify anything other than the parameter values described in this section.
Running BSF Test Cases
- Click the Build with Parameters link available in the
left navigation pane of the BSF_NewFeatures Pipeline
screen. The following page appears.
Figure 4-7 BSF New Features Build with Parameters

Note:
Make sure that the value of FilterWithTags and Include_NewFeatures is selected as NO.
- If you want to collect logs for any given build, select YES from the drop-down menu of Fetch_Log_Upon_Failure.
-
Click Build and select Console Output to view the test results. The following is a sample test result ouput:
Figure 4-8 Sample: Test Result Output in Console

Note:
For more details on consolidated test report, see Managing Final Summary Report, Build Color, and Application Log.Queuing Jenkins Jobs
Using this feature, you can queue a second job even when current job is still running. The second job can be triggered either from the same or a different pipeline.
Table 4-1 Queuing Jenkins Jobs
| Concurrent Builds | New FeaturesCurrent Build | New FeaturesNew Build | RegressionCurrent Build | RegressionNew Build Build | Result |
|---|---|---|---|---|---|
| Enabled | Running | Triggered | NA | NA | New-Build of New-Features is added to queue. |
| Enabled | Running | NA | NA | Triggered | New-Build of Regression is added to queue. |
| Disabled | NA | NA | Running | Triggered | New-Build of Regression is added to queue. |
| Disabled | NA | Triggered | Running | NA | New-Build of New-Features is added to queue. |
Extracting Application Logs
- Log in to the ATS
pod:
kubectl exec -it pod/ocats-bsf-6f6dfc76b5-jbgzt -n ocbsf bash - Go to Jenkins build
directory:
cd $JENKINS_HOME/jobs/$JOB_NAME/builds/$BUILD_NUMBER/For example:cd /var/lib/jenkins/.jenkins/jobs/BSF_Regression/builds/2 - Extract the
applogs.zipfile:unzip applogs.zip - After successfully unzipping the file, open the
applogfolder to view the pod logs for failed scenarios:(env) [jenkins@ocats-bsf-6f6dfc76b5-jbgzt applog]$ pwd /var/lib/jenkins/.jenkins/jobs/BSF_Regression/builds/2/applog (env) [jenkins@ocats-bsf-6f6dfc76b5-jbgzt applog]$ ls -ltrh total 760K -rw-r--r--. 1 jenkins jenkins 250K Nov 19 11:08 Initial_Run-Register_BSF_With_NFSetIDList.log -rw-r--r--. 1 jenkins jenkins 249K Nov 19 11:08 1st_Rerun-Register_BSF_With_NFSetIDList.log -rw-r--r--. 1 jenkins jenkins 255K Nov 19 11:09 2nd_Rerun-Register_BSF_With_NFSetIDList.log
4.1.4 BSF_NewFeatures Documentation
Figure 4-9 BSF_NewFeatures Feature List Documentation

Click any functionality to view its test cases and scenarios of each test case. For example, when you click FEATURE - BSF_Error_Response_Enhancements, the following test description appears:
Figure 4-10 Test Cases and Scenarios of Feature - BSF_Error_Response_Enhancements

Based on the functionalities covered under Documentation, the Build Requires Parameters screen displays test cases. To navigate back to the pipeline BSF-NewFeatures screen, click Back to BSF_NewFeatures link available on top left corner of the screen.
Test Result Analyzer
Using the Test Result Analyzer plug-in available in ATS, user can view consolidated and detailed reports. For more information, see Test Results Analyzer section.
Test Case Mapping to Features and Display Total Counts
With this feature, users can view Total Count of Features, TestCases/Scenarios and TestCase mapping to each Feature of BSF in ATS View. For more information, see Support for Test Case Mapping and Count section.
Stub Predefined_priming Support
Stub Predefined_priming configuration in ATS enables ATS to respond back with the payload message instead of default message when prime configuration does not match with the feature level priming or when the sub is not primed.
- Stub checks against the feature level prime configuration.
- If a match is found in feature level prime, stub replies with the payload message.
- If there is no match found, stub replies with the default
response.
stub_log: No match found in prime configuration for sending the response. Sending default - 200
ATS log: {default_response}
- Stub checks against the feature level prime configuration.
- If a match is found in feature level prime, feature level prime is used for responding to the request.
- If a match is not found in the feature level prime, but found in the pre-configured prime, pre-configured prime is used for responding to the request.
- If a match is found in both pre-primed as well as feature level prime, feature level prime configuration is given priority and the same is used for responding to the request.
- If a match is not found in both pre-primed as well as feature level prime, stub sends a default response.
4.1.5 Running BSF Regression Pipeline
This section describes how to run test cases for Binding Support Function (BSF) Regression pipeline.
The BSF_Regression pipeline is a pre-configured pipeline where all the test cases of previous releases are available. For example, for BSF 25.2.200, this pipeline has all the test cases released till BSF 25.2.100.
- Click BSF_Regression in the Name column.
- Click Build with Parameters in the left navigation pane.
- Copy the required test cases that are available in the BSF folder and place them appropriately within the custom folder for BSF_Regression.
- Reload the page to view the test cases available in the custom Regression folder.
- Click Build.
Figure 4-11 BSF_Regression Pipeline

Note:
The Regression pipeline does not have any sanity option. However, users must perform all the steps performed in the BSF_NewFeatures pipeline. Ensure that the pipeline script is configured according to the environment variables.4.1.6 BSF_Regression Documentation
This section describes the documentation for BSF_Regression pipeline.
To view the documentation for any of the BSF features, on the ATS home page, click BSF_Regression. Then, click Documentation in the left navigation pane.
This page shows features of only those test cases that are released in previous releases.
Figure 4-12 BSF_Regression Features Documentation

4.1.7 Running BSF_HealthCheck Pipeline
This is a pre-configured pipeline where ATS performs a test probe with SUT. It triggers helm test and provides the results in Jenkins Console Logs.
You can run BSF_HealthCheck pipeline to check if all BSF pods are up and running. If yes, it provides the status as successful. If any pod is down due to any reason, then the pipeline fails.
- Click BSF_HealthCheck in the Name column.
- Click Configure in the left navigation pane.
- When you scroll-down, the General tab becomes active. Be sure that the screen loads completely.
- Continue scrolling down until the
Pipeline tab becomes active. The following is a
screen capture that shows the Pipeline script:
Figure 4-13 Helm Test Script

- In the Script area under the
Pipeline section, users may customize the values for the following
parameters:
Attention:
Do not modify values of parameters other than the ones described in this section.- a: Change this parameter to update the helm release name where BSF is deployed in your bastion.
- b: Change this parameter to update the namespace where BSF is deployed in your bastion.
- Click Save to update the values.
Running Helm Test
To run BSF test cases, click Build Now.
4.2 Running NRF Test Cases using ATS
4.2.1 Prerequisites
To run NRF test cases using NRF ATS 25.2.201, you need to ensure that following prerequisites are met.
- For three-site georedundancy test cases, deploy NRF 25.2.201 on three sites with database replication enabled. The georedundancy feature must be enabled on all NRF sites before running these test cases.
- For two-site georedundancy test cases, deploy NRF 25.2.201 on two sites with database replication enabled. These test cases are run separately, as they require two different NRFs. They can also be run in a three-site georedundancy setup. The georedundancy feature must be enabled on all NRF sites before running these test cases.
- For NRF-Growth test cases, deploy two standalone NRF 25.2.201 instances. These test cases are run separately, as they require two different NRFs.
- All the ATS pipelines other than georedundancy, three-site georedundancy, and NRF Growth, must be run with only one NRF deployment (standalone NRF).
- The following NRF database tables should not have any entries:
- nrfApplicationDB.NfInstances
- nrfApplicationDB.NfStatusMonitor
- nrfApplicationDB.NfSubscriptions
- NRF instances should be deployed with the default Helm and REST
configurations, except for
ocnrfHostandocnrfPort. - For NF-FQDN-Authentication-Feature test cases, deploy both NRF and NRF ATS, with the NF Authentication feature changes.
- All microservices of NRF must be up and running including Alternate route and Artisan microservices.
- To run Alerts test cases, configure NRF Alerts on the AlertManager on the Prometheus server. For more details on configuring alerts, see Oracle Communications Cloud Native Core, Network Repository Function Installation, Upgrade, and Fault Recovery Guide.
- Before deploying NRF, create RSA and ECDSA certificates and keys (public and private) for AccessToken microservice.
- Deploy NRF 25.2.201 with default helm configurations using helm charts to run all test cases except for NF-FQDN-Authentication-Feature cases.
- Ensure all NRF microservices are up and running including Accesstoken microservice. Keys with RSA and ECDSA algorithm are mandatory.
- Copy the ECDSA and RSA public keys to the ATS pod at /var/lib/jenkins/ocnrf_tests/public_keys, naming them ec_public.pem and rs_public.pem , respectively. Then, create a duplicate of rs_public.pem and save it as new_public.pem in the same directory.
- Create JSON files for key and certificate details and copy them to ATS at /var/lib/jenkins/ocnrf_tests/ location. Refer to KID feature specific Prerequisite.
- Deploy ATS using helm charts.
- For NRF 25.2.201, deploy five stub servers for running Roaming, SLF, Forwarding, and SLF via SCP functionality test cases. The service name for the stub servers must be notify-stub-service, notify-stub-service02, notify-stub-service03, amf1-cluster1-net2-amf-5gc-mnc016-mcc310-3gppnetwork-org, and slf-stub-service01.
- The slf-stub-service01 stub must be deployed with service port as 80. For more information, see Installing ATS for NRF.
- Replace the existing content with the following content in the
alternate-route section of the
ocnrf_custom_values.yamlfile:The following configuration changes are required to accommodate alternate routing test cases based on the latest configuration.
staticVirtualFqdns: - name: https://abc.test.com alternateFqdns: - target: notify-stub-service03 port: 8080 priority: 10 weight: 20 - target: notify-stub-service03 port: 8080 priority: 20 weight: 30 - name: http://xyz.test.com alternateFqdns: - target: notify-stub-service03 port: 8080 priority: 10 weight: 20 - target: notify-stub-service03 port: 8080 priority: 20 weight: 30 dnsSrvEnabled: false - Ensure Prometheus service is up and running.
- Deploy ATS and Stubs in the same namespace as NRF, as default ATS deployment is with role binding. In addition, deploy test stubs in the same namespace as NRF.
- User must not initiate a job in two different pipelines at the same time.
- User must not abort a running job, this may lead to data corruption in database.
- For getting PVC support to retain NRF ATS environment variables and pipeline console histories, follow the installation step. By default PVC support is disabled.
- If installation is done with Service mesh, the NRF must be deployed
with below annotation in lbDeployments and nonlbDeployments
section:
oracle.com/cnc: "true"
traffic.sidecar.istio.io/excludeInboundPorts: "9090,8095,8096,7,53"
traffic.sidecar.istio.io/excludeOutboundPorts: "9090,8095,8096,7,53"
where, first one is for connecting to Operations Services Overlay (OSO) for Alerts test cases. Second one is for connecting to ATS for fetching the metrics from pods.
- If Service Mesh is enabled, then create a destination rule to fetch
the metrics from the Prometheus. In most of the deployments, Prometheus is kept
outside the service mesh and a destination rule is required to communicate
between TLS enabled entity (ATS) and non-TLS enabled entity (Prometheus).
To create a rule:
kubectl apply -f - <<EOF
apiVersion:networking.istio.io/v1alpha3
kind:DestinationRule
metadata:
  name:prometheus-dr
  namespace:ocnrf
spec:
  host:oso-prometheus-server.ocnrf.svc.cluster.local
  trafficPolicy:
    tls:
      mode:DISABLE
EOF
In the above rule,- name indicates the name of destination rule.
- namespace indicates where the ATS is deployed.
- host indicates the hostname of the Prometheus server.
- In case NRF is deployed with network policy enabled, then before
running NRF-ATS a new network policy must be created to access NRF-ATS Jenkins
GUI. Following is the sample:
kubectl apply -f nodePort.yaml -n ocnrf
apiVersion: networking.k8s.io/v1
kind: NetworkPolicy
metadata:
  name: allow-from-node-port
spec:
  podSelector:
    matchLabels:
      app: ocats-nrf
  policyTypes:
  - Ingress
  ingress:
  - ports:
    - protocol: TCP
      port: 8080
kubectl apply -f allowEgressPrometheus.yaml -n ocnrf apiVersion: networking.k8s.io/v1 kind: NetworkPolicy metadata: name: allow-egress-prometheus spec: policyTypes: - Egress podSelector: matchLabels: app: ocats-nrf egress: - ports: - port: 9090 protocol: TCP to: - namespaceSelector: matchLabels: kubernetes.io/metadata.name: occne-infra - podSelector: matchLabels: app.kubernetes.io/name: prometheus - To run with CNE
HA Prometheus, update the prom_type value in
product_config/global.yamlandcustom_config/global.yamlfile to "cne".
Custom Folder Implementation
ATS provides custom test case folders (cust_newfeatures, cust_regression, and cust_performance) using which you can add new test cases, remove unwanted test cases, and modify existing test cases. It does not impact the original product packaged test cases available in the newfeatures, regression and performance folders. For more details, refer to Custom Folder Implementation.
Apart from cust_newfeatures and cust_regression, NRF ATS has cust_FQDNauthentication, cust_GeoRedundancy, and cust_3SiteGeo directories that contains test cases related to NF-FQDN and georedundancy respectively.
Key Identifier (KID) feature specific Prerequisite
- set_keyDetailsList.json
- set_currenKeyId.json
- tokenSigningDetails.json
$ cat set_keyDetailsList.json
{
        "tokenSigningDetails": {
                "defaultK8SecretDetails": {
                        "k8SecretNameSpace": "ocnrf",
                        "k8SecretName": "ocnrfaccesstoken-secret"
                },
                "keyDetailsList": [{
                                "keyID": "EcdsaKid",
                                "algorithm": "ES256",
                                "privateKey": {
                                        "k8SecretName": "ocnrfaccesstoken-secret",
                                        "k8SecretNameSpace": "ocnrf",
                                        "fileName": "ecdsa_private_key.pem"
                                },
                                "certificate": {
                                        "k8SecretName": "ocnrfaccesstoken-secret",
                                        "k8SecretNameSpace": "ocnrf",
                                        "fileName": "ecdsa_certificate.crt"
                                }
                        },
                        {
                                "keyID": "RsaKid",
                                "algorithm": "RS256",
                                "privateKey": {
                                        "k8SecretName": "ocnrfaccesstoken-secret",
                                        "k8SecretNameSpace": "ocnrf",
                                        "fileName": "rsa_private_key.pem"
                                },
                                "certificate": {
                                        "k8SecretName": "ocnrfaccesstoken-secret",
                                        "k8SecretNameSpace": "ocnrf",
                                        "fileName": "rsa_certificate.crt"
                                }
                        },
                        {
                                "keyID": "newKey",
                                "algorithm": "RS256",
                                "privateKey": {
                                        "k8SecretName": "ocnrfaccesstoken-secret",
                                        "k8SecretNameSpace": "ocnrf",
                                        "fileName": "rsa_private_key.pem"
                                },
                                "certificate": {
                                        "k8SecretName": "ocnrfaccesstoken-secret",
                                        "k8SecretNameSpace": "ocnrf",
                                        "fileName": "rsa_certificate.crt"
                                }
                        }
                ]
        }
}
Note:
Update the following parameters in the above files:- k8SecretName
- k8SecretNameSpace
- fileName (name of the private keys and corresponding certificates)
For more information about parameter values, see Oracle Communications Cloud Native Core, Network Repository Function Installation, Upgrade, and Fault Recovery Guide.
After updating the files, copy them under the /var/lib/jenkins/ocnrf_tests/ directory.
$ cat set_currenKeyId.json
{
        "tokenSigningDetails":
                {"currentKeyID":"EcdsaKid"
        }
}
Note:
User need not update thecurrentKeyID name (for example: EcdsaKid), if
the same file name as in keyID is used while configuring the
set_currenKeyId.json file.
$ cat tokenSigningDetails.json
{
 "presentCurrentKey" : {
    "algorithm" : "ES256",
    "privateKey" : {
        "k8sSecretName" : "ocnrfaccesstoken-secret",
        "fileName" : "ecdsa_private_key.pem"
    },
    "certificate" : {
        "k8sSecretName" : "ocnrfaccesstoken-secret",
        "fileName" : "ecdsa_certificate.crt"
    }
 },
 "newCurrentKey" : {
    "algorithm" : "RS256",
    "privateKey" : {
        "k8sSecretName" : "ocnrfaccesstoken-secret",
        "fileName" : "rsa_private_key.pem"
    },
    "certificate" : {
        "k8sSecretName" : "ocnrfaccesstoken-secret",
        "fileName" : "rsa_certificate.crt"
    }
 }
}
$ cat set_currenKeyId.json
{
"tokenSigningDetails":
{"currentKeyID":"EcdsaKid"
}
}Note:
User doesn't want to update the name of the key if the same name was used while configuring.$ cat tokenSigningDetails.json
{
"presentCurrentKey" : {
"algorithm" : "ES256",
"privateKey" : {
"k8sSecretName" : "ocnrfaccesstoken-secret",
"fileName" : "ecdsa_private_key.pem"
},
"certificate" : {
"k8sSecretName" : "ocnrfaccesstoken-secret",
"fileName" : "ecdsa_certificate.crt"
}
},
"newCurrentKey" : {
"algorithm" : "RS256",
"privateKey" : {
"k8sSecretName" : "ocnrfaccesstoken-secret",
"fileName" : "rsa_private_key.pem"
},
"certificate" : {
"k8sSecretName" : "ocnrfaccesstoken-secret",
"fileName" : "rsa_certificate.crt"
}
}
}Note:
Here, user should update k8SecretName fileName (name of private keys and the corresponding certificates.Note:
Update the following parameters in the above code snippet:- k8SecretName
- fileName (name of the private keys and corresponding certificates)
For more information about parameter values, see Oracle Communications Cloud Native Core, Network Repository Function Installation, Upgrade, and Fault Recovery Guide.
$ kubectl cp tokenSigningDetails.json ocats-ocats-nrf-58fc5dcbb9-zjsks:/var/lib/jenkins/ocnrf_tests/tokenSigningDetails.json -n ocnrf
$ kubectl cp set_keyDetailsList.json ocats-ocats-nrf-58fc5dcbb9-zjsks:/var/lib/jenkins/ocnrf_tests/set_keyDetailsList.json -n ocnrf
$ kubectl cp set_currenKeyId.json ocats-ocats-nrf-58fc5dcbb9-zjsks:/var/lib/jenkins/ocnrf_tests/set_currenKeyId.json -n ocnrf
$ kubectl cp ec_public.pem ocats-ocats-nrf-58fc5dcbb9-zjsks:/var/lib/jenkins/ocnrf_tests/public_keys/ec_public.pem -n ocnrf
$ kubectl cp rs_public.pem ocats-ocats-nrf-58fc5dcbb9-zjsks:/var/lib/jenkins/ocnrf_tests/public_keys/rs_public.pem -n ocnrf
$ kubectl cp rs_public.pem ocats-ocats-nrf-58fc5dcbb9-zjsks:/var/lib/jenkins/ocnrf_tests/public_keys/new_public.pem -n ocnrf
Prerequisites to Run Testcases for the CCA-Header Feature
To run the pipeline for the CCA-Header feature, NRF must be deployed with the following changes:
- During installation of NRF, the namespace, secret name and the
caroot.cerfile name must be provided in NRF's custom values, in ingress-gateway section, as follows:ingress-gateway: ccaHeaderValidation: k8SecretName: ocingress-secret k8NameSpace: ocnrf fileName: caroot.cer - In NRF's custom values,
metadata.ccaHeaderValidation.enabledshould be set to true in the 'accesstoken_mapping' object from theingress-gateway.routesConfiglist.Note:
If ccaHeaderValidation is enabled in NRF, only CCA-Header pipeline should be run. The other pipelines (Newfeatures, Regression, 2SiteGeo, 3SiteGeo, or FQDN-Authentication) will not work with the feature enabled.ingress-gateway: routesConfig: - id: accesstoken_mapping uri: http://{{ template "accesstoken.service.fullname" . }}:{{ template "accesstoken.service.port" . }} path: /oauth2/token order: 4 filters: controlledShutdownFilter: applicableShutdownStates: - COMPLETE_SHUTDOWN metadata: ccaHeaderValidation: enabled: true - Create a secret with the
caroot.cerfile provided in the ocats_ocnrf_tests_jenkinsjobs_25.2.201.tgz, using the following command. This samecaroot.cerfile is required to be configured in the secret to run the CCA-Header cases.kubectl create secret generic <secret name> --from-file=<ca root file name> -n <namespace>For example:kubectl create secret generic ocingress-secret --from-file=caroot.cer -n ocnrf - Update the secret name from step 3 in global.yaml file in either /var/lib/jenkins/ocnrf_tests/product_config or /var/lib/jenkins/ocnrf_tests/custom_config based on the whether the pipeline will be run with Product_Config option or Custom_Config option, under the ccaHeaderSecretName parameter.
Prerequisites to Run Testcases for the NRF Growth Features
To run the pipeline for the NRF Growth feature, the following prerequisites have to be done.
- Install two NRFs that are not georedundant with each other.
- The pipeline configuration has to be set to the below before running
the pipeline. The values of options "u" to "x" have to be set to
0.1.
node ('master'){
    //a = SELECTED_NF    b = NF_NAMESPACE        c = FT_ENDPOINT      d = GATEWAY_IP        e = GATEWAY_PORT
    //f = CONFIG_IP      g = CONFIG_PORT         h = STUB_IP          i = STUB_PORT         j = NFINSTANCEID
    //k = PROMETHEUS_IP  l = PROMETHEUS_PORT     m = RERUN_COUNT      n = PROMETHEUS_URI    o = HELM_RELEASE_NAME
    //p = MYSQL_HOST     q = PRIVILEGED_USER_SECRET_NAME              r = DISCOVERY_WAIT_TIME
    //s = REPLICATION_STATUS_URI                 t = CLUSTER_DOMAIN   u = REGISTER_WRITE_WAIT_TIME
    //v = SUBSCRIPTION_WAIT_TIME                 w = ACCESSTOKEN_WAIT_TIME                  x = REGISTER_READ_WAIT_TIME
    sh '''
        sh /var/lib/jenkins/ocnrf_tests/preTestConfig.sh \
        -a NRF \
        -b occne-cndbtierone,occne-cndbtiertwo \
        -c ocnrf-ingressgateway.ocnrf.svc.cluster.local:80,ocnrf-1-ingressgateway.ocnrf.svc.cluster.local:80 \
        -d ocnrf-ingressgateway.occne-cndbtierone,ocnrf-1-ingressgateway.occne-cndbtiertwo \
        -e 80,80 \
        -f ocnrf-nrfconfiguration.occne-cndbtierone,ocnrf-1-nrfconfiguration.occne-cndbtiertwo \
        -g 8080,8080 \
        -h notify-stub-service.occne-cndbtierone,notify-stub-service02.occne-cndbtierone \
        -i 8080,8080 \
        -j 6faf1bbc-6e4a-4454-a507-a14ef8e1bc5c,6faf1bbc-6e4a-4454-a507-a14ef8e1bc5d \
        -k oso-prom-svr.oso \
        -l 80 \
        -m 2 \
        -n /prometheus/api/ \
        -o ocnrf,ocnrf-1 \
        -p mysql-connectivity-service.occne-cndbtierone,mysql-connectivity-service.occne-cndbtiertwo \
        -q privilegeduser-secret     \

        -r 0.5 \
        -s http://ocnrf-ocnrf-app-info:5906/status/category/replicationstatus,http://ocnrf-1-ocnrf-app-info:5906/status/category/replicationstatus \
        -t svc.cluster.local \
        -u 0.1 \
        -v 0.1 \
        -w 0.1 \
        -x 0.1
    '''
    if(env.Include_NewFeatures && "${Include_NewFeatures}" == "YES"){
        sh '''sh /var/lib/jenkins/common_scripts/merge_jenkinsfile.sh'''
        load "/var/lib/jenkins/ocnrf_tests/jenkinsData/Jenkinsfile-Merged"
    }
    else{
        load "/var/lib/jenkins/ocnrf_tests/jenkinsData/Jenkinsfile-Regression"
    }

    }
}
4.2.2 Logging into ATS
Running ATS
Note:
To modify default log in password, refer to Modifying Login Password.Figure 4-14 Verifying ATS Pod

For more information on verifying ATS deployment, see Verifying ATS Deployment.
Note:
In the Verifying ATS Pod screen, slave2 is the node where ATS is deployed, 30348 is the ATS nodeport and 10.75.225.227 is the worker node IP, highlighted in red. For more details on ATS deployment, refer to Installing ATS for NRF.Figure 4-15 ATS Login

- Enter the login credentials. Click
Sign in. The
following screen appears.
Figure 4-16 NRF Pre-Configured Pipelines

NRF ATS has two pre-configured pipelines.
- NRF-NewFeatures: This pipeline has all the test cases delivered as part of NRF ATS - 25.2.201.
- NRF-Regression: This pipeline has all the test cases delivered so far in the previous releases.
4.2.3 NRF-NewFeatures Pipeline
After identifying the NRF pipelines, configure ATS as one-time activity as per NRF deployment. In this pipeline, all the new testcases related to NRF are deployed. To configure its parameters:
- Click NRF-NewFeatures in the Name column. The
following screen appears:
Figure 4-17 Configuring NRF-NewFeatures
 In the above screen:
- Click Configure to configure NRF-New Features.
- Click Documentation to view the documented test cases, which are part of this NRF release.
- Click the blue dots inside Build History box to view the success console logs of the "Sanity", "All-NewFeatures" respectively.
- The Stage View represents the already deployed pipeline for the customer reference.
- The Test Results Analyzer is the new plugin integrated in the NRF-ATS. This option can be used to display the previous history of all the execution build-wise. It will provide a graphical representation of the past execution together.
- Click Configure. User must wait for the page to load
completely. Once the page loads completely, click the Pipeline tab:
Note:
Make sure that the following page loads completely before you perform any action on it. Also, do not modify any configuration other than shown below.Figure 4-18 Pipeline Tab
 The Pipeline section of the configuration page appears as follows:
Figure 4-19 Pipeline Section
 In the above screenshot, change the values of the 'Pipeline script'. The content of the pipeline script is as follows:
Figure 4-20 Pipeline Script

Note:
The user must not change any other value apart from line number 15 to line 37.You can change the parameter values from "a" - to - "x" as per user requirement. The parameter details are available as comments from line number 2 - to - 7.- a: Name of the NF to be tested in capital (NRF).
- b: Namespace in which the NRF is deployed.
- c: endPointIP: endPointPort value used while deploying NRF with the help of helm chart.
- d: Comma separated values of NRF1 and NRF2 ingress gateway service (For example: ocnrf-ingressgateway.ocnrf,1.1.1.1). It is also known as cluster_domain.
- e: Comma separated values of NRF1 and NRF2 port of ingressgateway service (For example: 80,31000).
- f: Comma separated values of NRF1 and NRF2 configuration service (For example: ocnrf-nrfconfiguration.ocnrf,1.1.1.1). It is also known as cluster_domain.
- g: Comma separated values of NRF1 and NRF2 port of configuration service (For example: 8080, 31001).
-
h: Name_of_stub_service.namespace
(notify-stub-service.ocnrf).
Note:
Ensure that all the stubs are added to the pretest config after bringing up the deployment. - i: Port of stub service (8080).
- j: NRF_Instance ID (6faf1bbc-6e4a-4454-a507-a14ef8e1bc5c).
- k: Name_of_Prometheus_service.namespace (occne-prometheus-server.occne-infra).
- l: Port of Prometheus service (80).
- m: Number of times the re-run of failed case is allowed (default as 2).
-
n: URI of Prometheus service (/api/) -
- Use "/api/" for CNE version till 1.6.0 and "/prometheus/api/" for CNE version 1.7.0 and 1.8.0.
- For, CNE 1.9.x, CNE 1.10.x, and CNE 22.1.0, cluster name is needed in the URI. The URI must be <cluster_name>/prometheus/api. For example: /bmw/prometheus/api (For more details on the Prometheus URI, check corresponding CNE version's user guide.)
- If OSO is being used, use "/api/" for OSO-1.6.1 or earlier and use "/prometheus/api/" for OSO-1.6.2 or later.
- For OSO-1.10.0, the URI must be <cluster_name>/prometheus/api. For example: /bmw/prometheus/api (For more details on the Prometheus URI, check corresponding OSO version's user guide)
- o: Helm_release_name used to deploy NRF
- p: Host name of MySQL (For example: mysql-connectivity-service)
- q: Privileged User secret name (For example: privilegeduser-secret)
- r: wait time before sending discovery request (0.5)
- s: comma-separated values of replicationStatusUri(s) of the appinfo(s).
- t: the cluster domain
- u: wait time before sending registration requests for write operations
- v: wait time before sending subscription requests
- w: wait time before sending accesstoken requests
- x: wait time before sending registration requests for read operation
Note:
- If the 2-Site-Geo cases are run, the user has to
provide values for NRF2 in corresponding environment variables in
the above script as per the deployment. A sample configuration is
given as
below:
node ('master'){ //a = SELECTED_NF b = NF_NAMESPACE c = FT_ENDPOINT d = GATEWAY_IP e = GATEWAY_PORT //f = CONFIG_IP g = CONFIG_PORT h = STUB_IP i = STUB_PORT j = NFINSTANCEID //k = PROMETHEUS_IP l = PROMETHEUS_PORT m = RERUN_COUNT n = PROMETHEUS_URI o = HELM_RELEASE_NAME //p = MYSQL_HOST q = PRIVILEGED_USER_SECRET_NAME r = DISCOVERY_WAIT_TIME //s = REPLICATION_STATUS_URI t = CLUSTER_DOMAIN u = REGISTER_WRITE_WAIT_TIME //v = SUBSCRIPTION_WAIT_TIME w = ACCESSTOKEN_WAIT_TIME x = REGISTER_READ_WAIT_TIME sh ''' sh /var/lib/jenkins/ocnrf_tests/preTestConfig.sh \ -a NRF \ -b occne-cndbtierone,occne-cndbtiertwo \ -c ocnrf-ingressgateway.ocnrf.svc.cluster.local:80,ocnrf-1-ingressgateway.ocnrf.svc.cluster.local:80 \ -d ocnrf-ingressgateway.occne-cndbtierone,ocnrf-1-ingressgateway.occne-cndbtiertwo \ -e 80,80 \ -f ocnrf-nrfconfiguration.occne-cndbtierone,ocnrf-1-nrfconfiguration.occne-cndbtiertwo \ -g 8080,8080 \ -h notify-stub-service.occne-cndbtierone,notify-stub-service02.occne-cndbtierone \ -i 8080,8080 \ -j 6faf1bbc-6e4a-4454-a507-a14ef8e1bc5c,6faf1bbc-6e4a-4454-a507-a14ef8e1bc5d \ -k oso-prom-svr.oso \ -l 80 \ -m 2 \ -n /prometheus/api/ \ -o ocnrf,ocnrf-1 \ -p mysql-connectivity-service \ -q privilegeduser-secret \ -r 0.5 \ -s http://ocnrf-ocnrf-app-info:5906/status/category/replicationstatus,http://ocnrf-1-ocnrf-app-info:5906/status/category/replicationstatus \ -t svc.cluster.local \ -u 0 \ -v 0 \ -w 0 \ -x 0 ''' if(env.Include_NewFeatures && "${Include_NewFeatures}" == "YES"){ sh '''sh /var/lib/jenkins/common_scripts/merge_jenkinsfile.sh''' load "/var/lib/jenkins/ocnrf_tests/jenkinsData/Jenkinsfile-Merged" } else{ load "/var/lib/jenkins/ocnrf_tests/jenkinsData/Jenkinsfile-Regression" } } } - If 3SiteGeo and georedundancy suite in
Regression pipeline cases are run, the user has to provide values
for NRF2, NRF3 in corresponding environment variables in the above
script as per the deployment. A sample configuration is given as
below:
node ('master'){
    //a = SELECTED_NF    b = NF_NAMESPACE        c = FT_ENDPOINT      d = GATEWAY_IP        e = GATEWAY_PORT
    //f = CONFIG_IP      g = CONFIG_PORT         h = STUB_IP          i = STUB_PORT         j = NFINSTANCEID
    //k = PROMETHEUS_IP  l = PROMETHEUS_PORT     m = RERUN_COUNT      n = PROMETHEUS_URI    o = HELM_RELEASE_NAME
    //p = MYSQL_HOST     q = PRIVILEGED_USER_SECRET_NAME              r = DISCOVERY_WAIT_TIME
    //s = REPLICATION_STATUS_URI                 t = CLUSTER_DOMAIN   u = REGISTER_WRITE_WAIT_TIME
    //v = SUBSCRIPTION_WAIT_TIME                 w = ACCESSTOKEN_WAIT_TIME                  x = REGISTER_READ_WAIT_TIME
    sh '''
        sh /var/lib/jenkins/ocnrf_tests/preTestConfig.sh \
        -a NRF \
        -b occne-cndbtierone,occne-cndbtiertwo,occne-cndbtierthree \
        -c ocnrf-ingressgateway.ocnrf.svc.cluster.local:80,ocnrf-1-ingressgateway.ocnrf.svc.cluster.local:80,ocnrf-2-ingressgateway.ocnrf.svc.cluster.local:80 \
        -d ocnrf-ingressgateway.occne-cndbtierone,ocnrf-1-ingressgateway.occne-cndbtiertwo,ocnrf-2-ingressgateway.occne-cndbtierthree \
        -e 80,80,80 \
        -f ocnrf-nrfconfiguration.occne-cndbtierone,ocnrf-1-nrfconfiguration.occne-cndbtiertwo,ocnrf-2-nrfconfiguration.occne-cndbtierthree \
        -g 8080,8080,8080 \
        -h notify-stub-service.occne-cndbtierone,notify-stub-service02.occne-cndbtierone,notify-stub-service03.occne-cndbtierone \
        -i 8080,8080,8080 \
        -j 6faf1bbc-6e4a-4454-a507-a14ef8e1bc5c,6faf1bbc-6e4a-4454-a507-a14ef8e1bc5d,6faf1bbc-6e4a-4454-a507-a14ef8e1bc5e \
        -k oso-prom-svr.oso \
        -l 80 \
        -m 2 \
        -n /prometheus/api/ \
        -o ocnrf,ocnrf-1,ocnrf-2 \
        -p mysql-connectivity-service \
        -q privilegeduser-secret     \

        -r 0.5 \
        -s http://ocnrf-ocnrf-app-info:5906/status/category/replicationstatus,http://ocnrf-1-ocnrf-app-info:5906/status/category/replicationstatus,http://ocnrf-2-ocnrf-app-info:5906/status/category/replicationstatus \
        -t svc.cluster.local \
        -u 0 \
        -v 0 \
        -w 0 \
        -x 0
    '''
    if(env.Include_NewFeatures && "${Include_NewFeatures}" == "YES"){
        sh '''sh /var/lib/jenkins/common_scripts/merge_jenkinsfile.sh'''
        load "/var/lib/jenkins/ocnrf_tests/jenkinsData/Jenkinsfile-Merged"
    }
    else{
        load "/var/lib/jenkins/ocnrf_tests/jenkinsData/Jenkinsfile-Regression"
    }

    }
}
Note:
If user is using CNE1.6 or OSO 1.6.1 or earlier, change the Prometheus service URI (-n) to "/api/" and Prometheus service name and port to appropriate values. For CNE 1.7.0 or OSO 1.6.2 or later, retain the default value "/prometheus/api/". If OSO 1.10.0 is used, use the URI along with the cluster_name (for example: /bmw/prometheus/api). - Click Save after making necessary changes. The
NRF-NewFeatures screen appears. Click the Build with Parameters link
available in the left navigation pane of the NRF-NewFeatures Pipeline
screen.
In the Pipeline screen, there are three Select_Option(s), which are:
- All: This is the default option. It runs all the NRF test cases. Scroll down and click Build to execute all the test cases.
- Sanity: It is recommended to run sanity before running any test case. It ensures all the deployments are done properly.
- Single/MultipleFeatures: This option allows you
to select any number of test cases that you want to run from the
list of total test cases available for execution.
After selecting the test cases, scroll down and click Build to run the selected NRF test cases.
- Select one of the following configuration types:
- Product_Config: On selecting this option, test cases from product folders are populated on ATS UI and product configuration is applied to them via the key-value pair and yaml files defined or present in the "Product Config" folder.
- Custom_Config: On selecting this option, test
cases from custom folders are populated on ATS UI and custom
configuration is applied to them via the key-value pair and yaml files
defined or present in the "Custom Config" folder. To use the Parameterization feature, always select the
Custom_Config option. User can copy, add, or delete the required test
cases that are available for the NRF and place them appropriately within
the custom folder for NRF-NewFeatures. Reload the page to view the test
cases available in the custom NewFeatures folder.
For more information, see Parameterized approach for SUT custom configuration.
- NRF Sanity - This feature file contains all the basic sanity cases for NRF ATS to validate the deployment is correct or not. It is advisable for user to run these cases before starting a complete suite.
- Discovery - These feature files are listed with a prefix as "Disc". All the discovery microservice related cases will be listed once this option is selected.
- NRF Functional - These feature files are listed with a prefix as "Feat". All the functional cases will be listed once this option is selected.
- Registration - These feature files are listed with a prefix as "Upd". These are related to update operation of registered profiles. All the registration cases will be listed once this option is selected.
- Subscription- These feature files are listed with a prefix as "Subs". All the subscription microservice related cases will be listed once this option is selected.
- Roaming -These feature files are listed with a prefix as "Roaming". All the roaming cases will be listed once this option is selected.
Figure 4-21 Sample Screen: NRF-ATS Full Execution

Figure 4-22 Test Cases Result - Sanity

Note:
For more details on consolidated test report, see Managing Final Summary Report, Build Color, and Application Log.Figure 4-23 Test Cases Result - All-NewFeatures

Parameterized approach for SUT custom configuration
- Add new test cases by adding datafiles
- Remove test cases
- Modify the parameters and their values in the key-value pair or
<feature>.yamlfiles
Cust ConfigN
where N can be any number
At the time of execution, ensure to rename the required folder to Cust Config folder as Jenkins always retrieves data from this folder when user selects Custom_Config.
To use
Custom_Config, it is required to change the value of cust_folder
from data to cust_data in
global.yaml file. In addition, you can customize the
parameters and their respective values in the global.yaml
as per the requirements.
<feature>.yaml files for parameterized
feature:
- In addition to
global.yamlparameters, feature files may also contain parameters for which user can update values at the time of running pipelines. - Changing the values of parameters tagged as "Feature Specific Value" may cause failures at the time of running pipelines.
- Values for parameters tagged with #START_GLOBAL and
#END_GLOBAL tags take values from
global.yaml.
Note:
For NRF-ATS release 25.2.201, parameterization is supported for NRF NewFeatures pipeline only.4.2.4 NRF-NewFeatures Documentation
To view NRF test cases, go to NRF-NewFeatures pipeline and click the Documentation link in the left navigation pane. It lists all the test cases provided as part of NRF ATS -25.2.201 along with sanity cases.
The NRF test cases are divided into multiple groups based on the functionality.
- NF_ACCESSTOKEN_CASES - All the test cases for validating accesstoken operation will be listed once this option is selected.
- NF_ALERTS_CASES - Test case for validating alerts will be listed once this option is selected.
- NF_ALTERNATEROUTE_CASES- All the alternate route microservice related cases will be listed once this option is selected.
- NF_CHFINFO_CASES - All the ChfInfo enhancement cases will be listed once this option is selected.
- NF_CONFIGURATION_CASES- All the cases related to NRF configuration will be listed once this option is selected.
- NF_DISCOVERY_CASES - All the discovery microservice related cases will be listed once this option is selected.
- NRF_FORWARDING_CASES - All the forwarding related cases will be listed once this option is selected.
- NF_FUNCTIONAL_CASES - All the functional cases will be listed once this option is selected.
- NF_KID_CASES - All the K-ID feature related cases will be listed once this option is selected.
- NF_NRFSTATE_DATA_CASES - All the nfStateData related cases will be listed once this option is selected.
- NF_PREFERRED_LOCALITY_CASES - All the preferred locality feature related cases will be listed once this option is selected.
- NF_REGISTRATION_CASES- All the registration cases will be listed once this option is selected.
- NF_ROAMING_CASES - All the roaming related cases will be listed once this option is selected.
- NF_SANITY_CASES- All the sanity cases will be listed once this option is selected.
- NF_SLF_CASES - All the SLF related cases will be listed once this option is selected.
- NF_SUBSCRIPTION_CASES - All subscription related cases will be listed once this option is selected.
Figure 4-24 NRF-NewFeatures Documentation

Figure 4-25 Sample Feature: NF_BASIC_SANITY_CASES

Based on the functionalities covered under Documentation, the Build Requires Parameters screen displays test cases. To navigate back to the Pipeline NRF-NewFeatures screen, click the Back to NRF-NewFeatures link available on top left corner of the screen.
4.2.5 NRF-Regression Pipeline
This pre-configured pipeline contains all the test cases delivered till NRF ATS 25.2.201. However, some test cases are updated as per new implementation of NRF.
The configuration method and parameters are same as the NewFeatures pipeline.
Only difference in this pipeline is, while executing 2-Site-Geo and 3-Site-Geo test cases, user has to provide appropriate values for NRF2 and NRF3 in the Pipeline script. In this pipeline, user will not get option to run Sanity.
- 2-Site-Geo - These feature files are listed with a prefix as "Geo_Redundancy".
- 3-Site-Geo- These feature files contain all the cases which are executed on 3 Site GEO NRF.
- CCA-Header- These feature files contain all cases related to CCA Header feature.
- NF-FQDN-Authentication - These feature files are listed with a prefix as "NfAuthentication".
- AccessToken - These feature files are listed with a prefix as "oAuth" and "AccessToken".
- Alerts - These feature files are list with a prefix as "Alert".
- Configuration - These feature files are listed with a prefix as "Config" and "SystemOptions".
- Discovery - These feature files are listed with a prefix as "Disc".
- NRF Forwarding - These feature files are listed with a prefix as "Forwarding".
- NRF Functional - These feature files are listed with a prefix as "Feat".
- Key-ID - These feature files are listed with a prefix as "Kid".
- NRF State Data - These feature files are listed with a prefix as "State".
- Preferred Locality - These feature files are listed with a prefix as "Pref".
- Registration - These feature files are listed with a prefix as "HBTimerEnhancement", "Reg" and "Upd". These are related to update operation of registered profiles.
- NRF SLF - These feature files are listed with a prefix as "SLF".
- Subscription - These feature files are listed with a prefix as "Subs".
- NRF Growth - These feature files contain all cases related to NRF Growth feature.
Figure 4-26 NRF-Regression

Figure 4-27 NRF-Regression - All-default-Regression

4.2.6 NRF-Regression Documentation
Click Documentation in the left navigation pane of the NRF-Regression pipeline to view all the test cases provided till NRF ATS 25.2.201.
- NF_3SITEGEO_CASES- All the 3-Site Geo-Redundancy related cases will be listed once this option is selected.
- NF_ACCESSTOKEN_CASES - All the test cases for validating accesstoken operation will be listed once this option is selected.
- NF_ALERTS_CASES - Test case for validating alerts will be listed once this option is selected.
- NF_ALTERNATEROUTE_CASES- All the alternate route microservice related cases will be listed once this option is selected.
- NF_CCAHEADER_CASES - Cases related to CCAHeader feature will be listed once this option is selected.
- NF_CHFINFO_CASES - All the ChfInfo enhancement cases will be listed once this option is selected.
- NF_CONFIGURATION_CASES - Cases related to NRF configuration will be listed once this option is selected.
- NF_DISCOVERY_CASES - All the discovery microservice related cases will be listed once this option is selected.
- NF_FORWARDING_CASES - All the forwarding related cases will be listed once this option is selected.
- NF_FQDNAUTHENTICATION_CASES - All the NF FQDN authentication cases will be listed once this option is selected.
- NF_FUNCTIONAL_CASES - All the functional cases will be listed once this option is selected.
- NF_GEOREDUNDANCY_CASES - All the Geo-Redundancy related cases (2-Site-GEO and 3-Site-GEO both) will be listed once this option is selected.
- NF_KID_CASES - All the K-ID feature related cases will be listed once this option is selected.
- NF_NRFGROWTH_CASES - All growth related cases will be listed once this option is selected.
- NF_NRFSTATE_DATA_CASES - All the nfStateData related cases will be listed once this option is selected.
- NF_PREFERRED_LOCALITY_CASES - All the preferred locality feature related cases will be listed once this option is selected.
- NF_REGISTRATION_CASES - All the registration related cases will be listed once this option is selected.
- NF_ROAMING_CASES - All the roaming related cases will be listed once this option is selected.
- NF_SLF_CASES - All the SLF related cases will be listed once this option is selected.
- NF_SUBSCRIPTION_CASES - All subscription related cases will be listed once this option is selected.
Figure 4-28 NRF-Regression Documentation

Figure 4-29 Sample Screen: NRF-Regression Documentation

4.3 Running NSSF Test Cases using ATS
This section describes how to run NSSF test cases using ATS.
4.3.1 Prerequisites
The prerequisites to run NSSF Test Cases using NSSF ATS 25.2.200 are:
- Deploy NSSF 25.2.200 with default helm configurations using helm charts.
- All NSSF microservices must be up and running.
- Both NSSF ATS and ATS Deployment needs to be same namespace.
- For NSSF ATS 25.2.200, deploy one stub server and the service name should be "amf-stubserver". It is required to run AMF-subscription Notification functionality test cases.
- For NSSF ATS 25.2.200, deploy one stub server and the service name should be "nrf-stubserver". It is required to run NRF-subscription Notification functionality test cases.
- For NSSF ATS 25.2.200, deploy one stub server and the service name should be "nrf-stubserver1". It is required to run NRF-selection based on DNS SRV.
- For NSSF ATS 25.2.200, deploy one stub server and the service name should be "nrf-stubserver2". It is required to run NRF-selection based on DNS SRV.
- For NSSF 25.2.200, deploy one DNS stub server and the service name should be "ocdns-bind". It is required to run NRF-selection based on DNS SRV.
4.3.2 Logging into ATS
Before logging into ATS, deploy ATS using HELM charts as shown below:
Verify ATS deployment
[opc@ocnssf-oci-phx-einstein-bastion-01 ~]$ helm status ocats

NAME: ocats
LAST DEPLOYED: Thu May 30 10:21:40 2024
NAMESPACE: cicdnssf-240530102024
STATUS: deployed
REVISION: 1
TEST SUITE: None
There are two ways to log in to ATS GUI.
- When an external load balancer (metalLB in case of OCCNE) is available and you provide an external IP to the ATS service, the user can log in to ATS GUI using <External-IP>:8080.
- When you do not provide an external IP to the ATS service, open the
browser and enter the external IP of the worker node and nodeport of the ATS
service to log in to the ATS GUI.
<Worker-Node-IP>:<Node-Port-of-ATS>Note:
In the Verifying ATS Deployment screenshot, the ATS nodeport is highlighted in red as 32013. For more details on ATS deployment, refer to NSSF ATS Installation Procedure.
Open a browser and enter the IP Address and port details as <Worker-Node-IP>:<NodePort-of-ATS> (In the above example, the Worker-Node-IP and NodePort-of-ATS are 10.98.101.177:32013, which are shown as highlighted in the screenshot above).
The ATS login screen appears.

- Enter the username as 'nssfuser' and password as 'nssfpasswd'.
Click Sign in. A page with preconfigured pipelines appears.
A page with preconfigured pipelines appears.
Note:
To modify the default login password, refer to Modifying Login Password.
- NSSF-New-Features: This pipeline has all the test cases delivered as part of NSSF ATS - 25.2.200.
- NSSF-Regression: This pipeline has the test cases of all the previous releases.
4.3.3 NSSF-NewFeatures Pipeline
In this pipeline, you can configure ATS, which is a one-time activity as per System Under Test (SUT) deployment. You can also run all the new NSSF test cases using the pipeline. To configure its parameters:
- Click NSSF-NewFeatures in the Name column. The
following screen appears:
 In the above screen:
- Click Configure to access the configuration screen.
- Click Documentation to view the documented test cases.
- Click blue dots inside the Build History box to view the success console logs of the "All" and "Sanity" respectively.
- The Stage View represents the already run pipeline for customer reference.
- Click Configure. Users MUST wait for the page to load
completely. Once the page loads completely, click the Pipeline tab to
reach the Pipeline configuration as shown below:
WARNING:
Make sure that the screen shown above loads completely before you perform any action on it. Also, do not modify any configuration other than that discussed below.

- You can modify script pipeline parameters from "a" to "B" on the
basis of your deployment environment and click Save. The content of the pipeline
script is as
follows:
node ('built-in'){
    //a = SELECTED_NF           b = NF_NAMESPACE    c = INGRESS_GATEWAY_IP     d = EGRESS_GATEWAY_IP
    //e = PROMETHEUS_SVC_IP     f = STUB_IP         g = PROMETHEUS_PORT        h = RERUN_COUNT
    //i = NF_DB                 j = NF_DB_SECRET    k = NSCONFIG_IP            l = NRF_STUB_IP
    //m = HELM_RELEASE_NAME     n = ATS_RELEASE_NAME             o = NSSF_INGRESS_GATEWAY_PORT
    //p = NSSF_EGW_PORT         q = NSSF_CONFIG_PORT             r = NSSF_SELECTION_SVC_NAME
    //s = NSSF_AUDITOR_SVC      t = NSSF_AVAILABILITY_SVC_NAME   u = NSSF_SUBSCRIPTION_SVC_NAME
    //v = NSSF_APP_INFO_SVC     w = NSSF_PERFINFO_SVC            x = NSSF_INSTANCEID
    //y = NRF_STUB_1_SVC_NAME   z = NRF_STUB_2_SVC_NAME          A = NSSF_NRF_CLIENT_SVC_NAME
    //B = SUPPORTED_PLMN_LIST_MCC_MNC
    withEnv([

    ]){
    sh '''
        sh /var/lib/jenkins/ocnssf_tests/preTestConfig.sh \
        -a NSSF \
        -b ocnssf \
        -c ocnssf-ingress-gateway.ocnssf \
        -d ocnssf-egress-gateway.ocnssf \
        -e occne-prometheus-server.occne-infra \
        -f amf-stubserver.ocnssf \
        -g 80 \
        -h 2 \
        -i ocnssf-nsdb.ocnssf \
        -j ocnssf-db-creds \
        -k ocnssf-nsconfig.ocnssf \
        -l nrf-stubserver.ocnssf \
        -m ocnssf \
        -n ocats \
        -o 8081 \
        -p 8080 \
        -q 8080 \
        -r ocnssf-nsselection.ocnssf \
        -s ocnssf-nsauditor.ocnssf \
        -t ocnssf-nsavailability.ocnssf \
        -u ocnssf-nssubscription.ocnssf \
        -v ocnssf-ocnssf-app-info.ocnssf \
        -w ocnssf-ocnssf-perf-info.ocnssf \
        -x 9faf1bbc-6e4a-4454-a507-aef01a101a01 \
        -y nrf-stubserver1.ocnssf \
        -z nrf-stubserver2.ocnssf \
        -A ocnssf-ocnssf-nrf-client-nfmanagement.ocnssf \
        -B 311 480 \
    '''
    if(env.Include_Regression && "${Include_Regression}" == "YES"){
        sh '''sh /var/lib/jenkins/common_scripts/merge_jenkinsfile.sh'''
        load "/var/lib/jenkins/ocnssf_tests/jenkinsData/Jenkinsfile-Merged"
    }
    else{
        load "/var/lib/jenkins/ocnssf_tests/jenkinsData/Jenkinsfile-NewFeatures"
    }
    }
}
Note:
The User MUST NOT change any other value apart from these parameters.The description of these parameters is as follows:
- a: Name of the NF to be tested in capital (NSSF).
- b: Namespace in which the NSSF is deployed (default is ocnssf)
- c: Ingress Gateway IP address (default is ocnssf-ingress-gateway.ocnssf)
- d: Egress Gateway IP address (default is ocnssf-egress-gateway.ocnssf)
- e: Prometheus service IP address (default is prometheus.cne-infra)
- f: Stub service IP address (default is ocats-amf-stubserver.ocnssf)
- g: Port of Prometheus service (default is 80)
- h: Number of times the re-run of failed case is allowed (default is 2).
- i: Database name (default is ocnssf-nsdb.ocnssf)
- j Database secrets (default ocnssf-db-creds)
- k: NSSF config ip address (ocnssf-nsconfig.ocnssf)
- l: NRF stub server IP address (ocats-nrf-stubserver.ocnssf)
- m: NSSF release name (ocnssf)
- n: ATS release name (ocats)
- o: NSSF Ingress Gateway Port
- p: NSSF Egress Gateway Port
- q: NSSF Config Port
- r: NSSF Selection Service Name
- s: NSSF Auditor Service Name
- t: NSSF Availability Service Name
- u: NSSF Subscription Service Name
- v: APP Info Service Name
- w:Perf info Service Name
- x: NSSF Supported PLMN
- A: NRF Client Managment Service Name (ocnssf-ocnssf-nrf-client-nfmanagement.ocnssf)
- B: NSSF PLMN List (311 480 )
Note:
- Do not change any value if the OCCNE cluster is used and NSSF, ATS, and STUB are deployed in the ocnssf namespace.
- In the above image NSSF Helm release name is "ocnssf",
ATS Helm Release Name is "ocats" and namespace is "ocnssf". If any
change in helm release name of NSSF, ATS and namespace needs to be
updated accordingly.
For example, NSSF Helm release name is "ocnssfats" and ATS Helm release name is "ocatsnssf" and namespace is "ocnssf2510", then above Pipeline Configuration should be edited as shown below.
- NSSF Helm release name should be updated in "c d i k m r s t u v w" if any change in NSSF helm release name apart from "ocnssf".
- The NSSF Instance ID needs to be updated in the ATS
Jenkins pipeline parameters if there are any changes in the NSSF
custom values (CV) file. By default, the NSSF Instance ID is set to
"
9faf1bbc-6e4a-4454-a507-aef01a101a01". If the Instance ID is modified in the NSSF CV file, the same changes must be reflected in the Jenkins pipeline parameters.By default, NSSF Instance ID in NSSF custom values file as below:#InstanceId of NSSF used in case of GR nfInstanceId: &nfInstanceId "9faf1bbc-6e4a-4454-a507-aef01a101a01"For example, if the nfInstanceId in the NSSF custom values file is modified from "9faf1bbc-6e4a-4454-a507-aef01a101a01" to "9faf1bbc-6e4a-4454-a507-aef01a101a20", the same change must be updated in the "x" Jenkins pipeline parameters as shown below:node ('built-in'){ //a = SELECTED_NF b = NF_NAMESPACE c = INGRESS_GATEWAY_IP d = EGRESS_GATEWAY_IP //e = PROMETHEUS_SVC_IP f = STUB_IP g = PROMETHEUS_PORT h = RERUN_COUNT //i = NF_DB j = NF_DB_SECRET k = NSCONFIG_IP l = NRF_STUB_IP //m = HELM_RELEASE_NAME n = ATS_RELEASE_NAME o = NSSF_INGRESS_GATEWAY_PORT //p = NSSF_EGW_PORT q = NSSF_CONFIG_PORT r = NSSF_SELECTION_SVC_NAME //s = NSSF_AUDITOR_SVC t = NSSF_AVAILABILITY_SVC_NAME u = NSSF_SUBSCRIPTION_SVC_NAME //v = NSSF_APP_INFO_SVC w = NSSF_PERFINFO_SVC x = NSSF_INSTANCEID //y = NRF_STUB_1_SVC_NAME z = NRF_STUB_2_SVC_NAME A = NSSF_NRF_CLIENT_SVC_NAME //B = SUPPORTED_PLMN_LIST_MCC_MNC withEnv([ ]){ sh ''' sh /var/lib/jenkins/ocnssf_tests/preTestConfig.sh \ -a NSSF \ -b ocnssf2510 \ -c ocnssfats-ingress-gateway.ocnssf2510 \ -d ocnssfats-egress-gateway.ocnssf2510 \ -e occne-prometheus-server.occne-infra \ -f amf-stubserver.ocnssf2510 \ -g 80 \ -h 2 \ -i ocnssf-nsdb.ocnssf \ -j ocnssf-db-creds \ -k ocnssfats-nsconfig.ocnssf2510 \ -l nrf-stubserver.ocnssf2510 \ -m ocnssfats \ -n ocats \ -o 8081 \ -p 8080 \ -q 8080 \ -r ocnssfats-nsselection.ocnssf2510 \ -s ocnssfats-nsauditor.ocnssf2510 \ -t ocnssfats-nsavailability.ocnssf2510 \ -u ocnssfats-nssubscription.ocnssf2510 \ -v ocnssfats-ocnssf-app-info.ocnssf2510 \ -w ocnssfats-ocnssf-perf-info.ocnssf2510 \ -x 9faf1bbc-6e4a-4454-a507-aef01a101a20 \ -y nrf-stubserver1.ocnssf2510 \ -z nrf-stubserver2.ocnssf2510 \ -A ocnssfats-ocnssf-nrf-client-nfmanagement.ocnssf2510 \ -B 311 480 \ ''' if(env.Include_Regression && "${Include_Regression}" == "YES"){ sh '''sh /var/lib/jenkins/common_scripts/merge_jenkinsfile.sh''' load "/var/lib/jenkins/ocnssf_tests/jenkinsData/Jenkinsfile-Merged" } else{ load "/var/lib/jenkins/ocnssf_tests/jenkinsData/Jenkinsfile-NewFeatures" } } }
- Click Save after making necessary changes. The Pipeline NSSF-NewFeatures screen appears.
Running NSSF New Features Test Cases
To run NSSF New Features test cases:
- Go back to new features and Click Build with Parameters
present on the NSSF-NewFeatures screen in the extreme left column
corresponding to NSSF-NewFeatures row as shown below:

- The following screen appears:

In the above screen, there are three Select_Option(s), which are:
- By default, features 'ALL', configuration type 'Product_config', include regression 'NO' will be selected, and all test cases will be executed once clicked on BUILD, as shown above.
- Features: ALL. Once you click on ALL, a dropdown
'Select' option will appear. After selecting 'Select,' options will
appear to choose feature files. To run the selected feature files,
click on 'Build,' as shown below.


- Select one of the following configuration types:
- Product_Config: On selecting this option, test cases from product folders are populated on ATS UI and product configuration is applied to them via the keyvalue pair and yaml files defined or present in the "Product Config" folder.
- Custom_Config: On selecting this option, test cases from custom folders are populated on ATS UI and custom configuration is applied to them via the keyvalue pair and yaml files defined or present in the "Custom Config" folder. To use the Parameterization feature, always select the Custom_Config option. User can copy, add, or delete the required test cases that are available for the NSSF and place them appropriately within the custom folder for NSSF-NewFeatures. Reload the page to view the test cases available in the custom NewFeatures folder. For more information, see Parameterized approach for SUT custom configuration.
The NSSF test cases are divided into NSSF Service operations as follows:
- NSSF_204NoContent_NsAvailability_PATCH_REMOVE- This feature file contains test cases related to PATCH or PUT request for deleting all slices.
- Virtual_Host_NRF_Resolution_By_NSSF_Using_DNSSRV- This feature file contains test cases related to DNS SRV based selection of NRF in NSSF.
If you want to run custom_config, select below parameter as custom_config, where the framework automatically points out to custom_config and cust_data.

7 features passed, 0 failed, 0 skipped
99 scenarios passed, 0 failed, 0 skipped
3079 steps passed, 0 failed, 0 skipped, 0 undefined
Took 21m10.088s
Parameterized approach for SUT custom configuration
Using this feature, user can make the following customizations to custom folders:
- Add new test cases by adding datafiles
- Remove test cases
- Modify the parameters and their values in the key-value pair or
<feature>.yaml files
To run ATS test cases, user can maintain as many versions of Custom_Config folder by using the following naming convention:
Cust ConfigN
where N can be any number
At the time of execution, ensure to rename the required folder to Custom Config folder as Jenkins always retrieves data from this folder when user selects Custom_Config.
Updating Global Parameters
To use Custom_Config, it is required to change the value of cust_folder from data to cust_data in global.yaml file. In addition, you can customize the parameters and their respective values in the global.yaml as per the requirements.
Updating Feature Parameters
Consider the following points when customizing <feature>.yaml files for parameterized feature:
- In addition to global.yaml parameters, feature files may also contain parameters for which user can update values at the time of running pipelines.
- Changing the values of parameters tagged as "Feature Specific Value" may cause failures at the time of running pipelines.
- Values for parameters tagged with #START_GLOBAL and #END_GLOBAL tags take values from global.yaml.
Note:
For NSSF-ATS release 25.2.200, parameterization is supported for NSSF NewFeatures pipeline only.4.3.4 NSSF-NewFeatures Documentation
To view NSSF functionalities, go to NSSF-NewFeatures pipeline latest build and click the Documentation link in the left navigation pane. The following screen appears. Click any functionality to view its test cases and scenarios of each test case as shown in the sample screenshot below:

A sample of a few documentation features are as follows:

Once the run of new features done successfully, click on the build number whose logs are to be viewed and then click on Console Output on left side navigation.
Wait till the page is loaded completely, then click Download to download the new features logs.

'

4.3.5 NSSF-Regression Pipeline
This pipeline contains test cases from the previous versions.
Some of the test cases are updated as per the new implementation of NSSF.
The configuration method and parameters are the same as the NewFeatures pipeline.
- NSSF_Sending_Notification_via_ARS_SCP: Tests NSSF's ability to route and send notifications to SCP(s) via ARS, including single/multiple SCPs, priorities, virtual hosts, alternate routes, and related error handling.
- NSSF_User_Agent_Header: Validates the User-Agent headers based on whether the feature is enabled or disabled.
- oauth_signValidationServiceMeshEnabled_false: Validates CRUD operations performed on OAuth in NSSF’s Ingress Gateway configuration.
- NSSF_OAuth_Response_Header: Ensures NSSF sends correct OAuth2-related HTTP error codes and headers for invalid, expired, or insufficient-scope OAuth2 tokens.
- NSSF_Server_Header: Validates the Server Header feature.
- NSSF_SCP_Monitoring_OPTIONS: Tests NSSF SCP peer monitoring and routing logic, including configuration, healthPath enforcement, priorities, and error handling for SBI and indirect routing scenarios.
- Nnssf_NSSelection_PDU_Miscellaneous_AutoConfiguration_ON: Tests NSSelection with auto-configuration ON for PDU session flows, configuration changes, and error scenarios.
- Nnssf_NSSelection_UE_CU_Invalid_Query_Parameters: Tests invalid query parameter scenarios for UE/CU NSSelection requests.
- Nnssf_NSSelection_Initial_Reg_AutoConfiguration_ON_EnhancedNssai_ON: Validates NSSelection behavior when both autoAuthorizeNssaiAvailabilityDataEnable and enhancedAllowedNssaiEnable are True.
- Nnssf_NSSelection_PDU_AutoConfiguration_ON: Validates NSSelection PDU auto-configuration ON scenarios.
- Nnssf_NSSelection_PDU_AutoConfiguration_OFF: Validates NSSelection PDU auto-configuration OFF scenarios.
- Nnssf_NSSelection_PDU_Miscellaneous_AutoConfiguration_OFF: Tests NSSelection PDU miscellaneous cases with auto-configuration OFF, including PDU session establishment and error handling.
- Nnssf_NSSelection_UE_CU_AutoConfiguration_OFF_EnhancedNssai_OFF: Validates NSSelection when both autoAuthorizeNssaiAvailabilityDataEnable and enhancedAllowedNssaiEnable are False.
- Nnssf_NSSelection_Invalid_Accept_ContentType_Header: Tests rejection of NSSelection GET requests with invalid or missing Accept/Content-Type headers.
- Nnssf_NSSelection_Initial_Reg_AutoConfiguration_OFF_EnhancedNssai_OFF: Validates NSSelection for initial registration with auto-configuration OFF and enhancedNssai OFF.
- Nnssf_NSSelection_UE_CU_AutoConfiguration_ON_EnhancedNssai_OFF: Validates NSSelection when auto-configuration is ON and enhancedNssai is OFF.
- Nnssf_NSSelection_PDU_Session_Invalid_Query_Parameters: Validates invalid query parameters for PDU session NSSelection.
- NSSF_Unknown_URI_Unsupported_Method: Validates CRUD behavior for unknown URIs and unsupported HTTP methods.
- Nnssf_NSSelection_Initial_Reg_AutoConfiguration_OFF_EnhancedNssai_ON: Validates initial registration NSSelection with auto-configuration OFF and enhancedNssai ON.
- Nnssf_NSSelection_Initial_Reg_Invalid_Query_Parameters: Validates invalid query parameter handling for initial registration NSSelection.
- Nnssf_NSSelection_UE_CU_AutoConfiguration_OFF_EnhancedNssai_ON: Validates NSSelection when auto-configuration is OFF and enhancedNssai is ON.
- Nnssf_NSSelection_UE_CU_AutoConfiguration_ON_EnhancedNssai_ON: Validates NSSelection when both auto-configuration and enhancedNssai are ON.
- Nnssf_NSSelection_Initial_Reg_AutoConfiguration_ON_EnhancedNssai_OFF: Validates initial registration NSSelection with auto-configuration ON and enhancedNssai OFF.
- NSSF_NSAvailability_OPTIONS: Tests NSSF responses to OPTIONS requests for supported communication methods.
- Nnssf_Nssai_Availability_patch_with_autoconfiguration: Validates PATCH operations on NS availability with auto-configuration enabled.
- Nnssf_Nssai_Availability_put_patch_with_supported_features: Validates PUT and PATCH operations in NS availability with supported features.
- Nnssf_Nssai_Availability_put_delete_with_autoconfiguration: Validates PUT and DELETE operations on NS availability with auto-configuration enabled.
- Nnssf_NSAvailability_Invalid_Accept_ContentType_Header: Validates rejection of NSAvailability requests with invalid or missing Accept/Content-Type headers.
- Nnssf_Nssai_Availability_patch_remove_204_NoContent: Validates PATCH operations with and without auto-configuration and enhanced patch behavior, ensuring correct 204 responses.
- Nnssf_Nssai_Availability_put_delete_without_autoconfiguration: Validates PUT and DELETE NS availability operations with auto-configuration disabled.
- Nnssf_Nssai_Availability_patch_without_autoconfiguration: Validates PATCH operations on NS availability without auto-configuration.
- Nnssf_Nssai_Availability_put_patch_delete_error_scenarios: Validates error scenarios for PUT, PATCH, and DELETE operations in NSAvailability with auto-configuration enabled/disabled.
- NSSF_Sanity: Validates NSSF sanity test cases.
- Nnssf_NSSubscription_Notification_Response_Handling: Validates NSSF subscription notification behavior based on various AMF stub responses.
- Nnssf_NSSubscription_Notification_Auto_Config_OFF: Validates notification behavior when auto-configuration is OFF.
- Nnssf_NSSubscription_Invalid_Accept_ContentType_Header: Validates subscription request handling with invalid Accept/Content-Type headers.
- NSSF_Subscription_Delete: Validates deletion operations and error handling for NSSubscription resources.
- Nnssf_NSSubscription_Indirect_Communication_Negative: Validates negative scenarios for indirect communication with incorrect 3gpp-Sbi-Binding headers.
- Nnssf_NSSubscription_Subscription_Invalid_Params: Validates CRUD operations and parameter validation for NSSubscription requests.
- Nnssf_NSSubscription_Indirect_Communication: Validates indirect communication for the NSSubscription service.
- Nnssf_NSSubscription_Subscription_Update: Validates CRUD operations and input validations for NSSubscription updates.
- Nnssf_NSSubscription_Notification_Auto_Config_ON: Validates notification behavior when auto-configuration is ON.
- Nnssf_NSSubscription_Post: Validates CRUD operations and request handling for NSSubscription POST requests.
- Virtual_Host_NRF_Resolution_By_NSSF_Using_DNSSRV: Validates virtual host NRF resolution by NSSF using DNS SRV.
- Multiple_PLMN: Validates multiple PLMN:

- In the above screen:
- Click Configure to access the configuration screen.
- Click Documentation to view the documented test cases.
- Click blue dots inside the Build History box to view the success console logs of the "All" and "Sanity" respectively.
- The Stage View represents the already run pipeline for customer reference.
- Click Configure. Users MUST wait for the page to load
completely. Once the page loads completely, click the Pipeline tab to
reach the Pipeline configuration as shown below:
WARNING:
Make sure that the screen shown above loads completely before you perform any action on it. Also, do not modify any configuration other than that discussed below.

- You can modify script pipeline parameters from "a" to "B" on the
basis of your deployment environment and click Save. The content of the pipeline
script is as
follows:
node ('built-in'){
    //a = SELECTED_NF           b = NF_NAMESPACE    c = INGRESS_GATEWAY_IP     d = EGRESS_GATEWAY_IP
    //e = PROMETHEUS_SVC_IP     f = STUB_IP         g = PROMETHEUS_PORT        h = RERUN_COUNT
    //i = NF_DB                 j = NF_DB_SECRET    k = NSCONFIG_IP            l = NRF_STUB_IP
    //m = HELM_RELEASE_NAME     n = ATS_RELEASE_NAME             o = NSSF_INGRESS_GATEWAY_PORT
    //p = NSSF_EGW_PORT         q = NSSF_CONFIG_PORT             r = NSSF_SELECTION_SVC_NAME
    //s = NSSF_AUDITOR_SVC      t = NSSF_AVAILABILITY_SVC_NAME   u = NSSF_SUBSCRIPTION_SVC_NAME
    //v = NSSF_APP_INFO_SVC     w = NSSF_PERFINFO_SVC            x = NSSF_INSTANCEID
    //y = NRF_STUB_1_SVC_NAME   z = NRF_STUB_2_SVC_NAME          A = NSSF_NRF_CLIENT_SVC_NAME
    //B = SUPPORTED_PLMN_LIST_MCC_MNC

    withEnv([

    ]){
    sh '''
        sh /var/lib/jenkins/ocnssf_tests/preTestConfig.sh \
        -a NSSF \
        -b ocnssf \
        -c ocnssf-ingress-gateway.ocnssf \
        -d ocnssf-egress-gateway.ocnssf \
        -e occne-prometheus-server.occne-infra \
        -f amf-stubserver.ocnssf \
        -g 80 \
        -h 2 \
        -i ocnssf-nsdb.ocnssf \
        -j ocnssf-db-creds \
        -k ocnssf-nsconfig.ocnssf \
        -l nrf-stubserver.ocnssf \
        -m ocnssf \
        -n ocats \
        -o 8081 \
        -p 8080 \
        -q 8080 \
        -r ocnssf-nsselection.ocnssf \
        -s ocnssf-nsauditor.ocnssf \
        -t ocnssf-nsavailability.ocnssf \
        -u ocnssf-nssubscription.ocnssf \
        -v ocnssf-ocnssf-app-info.ocnssf \
        -w ocnssf-ocnssf-perf-info.ocnssf \
        -x 9faf1bbc-6e4a-4454-a507-aef01a101a01 \
        -y nrf-stubserver1.ocnssf \
        -z nrf-stubserver2.ocnssf \
        -A ocnssf-ocnssf-nrf-client-nfmanagement.ocnssf \
        -B 311 480 \
    '''
    if(env.Include_NewFeatures && "${Include_NewFeatures}" == "YES"){
        sh '''sh /var/lib/jenkins/common_scripts/merge_jenkinsfile.sh'''
        load "/var/lib/jenkins/ocnssf_tests/jenkinsData/Jenkinsfile-Merged"
    }
    else{
        load "/var/lib/jenkins/ocnssf_tests/jenkinsData/Jenkinsfile-Regression"
    }
    }
}
Note:
The User MUST NOT change any other value apart from these parameters.The description of these parameters is as follows:
- a: Name of the NF to be tested in capital (NSSF).
- b: Namespace in which the NSSF is deployed (default is ocnssf)
- c: Ingress Gateway IP address (default is ocnssf-ingress-gateway.ocnssf)
- d: Egress Gateway IP address (default is ocnssf-egress-gateway.ocnssf)
- e: Prometheus service IP address (default is prometheus.cne-infra)
- f: Stub service IP address (default is ocats-amf-stubserver.ocnssf)
- g: Port of Prometheus service (default is 80)
- h: Number of times the re-run of failed case is allowed (default is 2).
- i: Database name (default is ocnssf-nsdb.ocnssf)
- j Database secrets (default ocnssf-db-creds)
- k: NSSF config ip address (ocnssf-nsconfig.ocnssf)
- l: NRF stub server IP address (ocats-nrf-stubserver.ocnssf)
- m: NSSF release name (ocnssf)
- n: ATS release name (ocats)
- o: NSSF Ingress Gateway Port
- p: NSSF Egress Gateway Port
- q: NSSF Config Port
- r: NSSF Selection Service Name
- s: NSSF Auditor Service Name
- t: NSSF Availability Service Name
- u: NSSF Subscription Service Name
- v: APP Info Service Name
- w:Perf info Service Name
- x: NSSF NF Instance ID
- y: NRF stub Server Service name(nrf-stubserver1.ocnssf)
- z: NRF stub Server Service name(nrf-stubserver1.ocnssf)
- A: NRF Client Managment Service Name (ocnssf-ocnssf-nrf-client-nfmanagement.ocnssf)
- B: NSSF PLMN List (311 480 )
Note:
- Do not change any value if the OCCNE cluster is used, and NSSF, ATS, and STUB are deployed in the ocnssf namespace.
- In the above image, the NSSF Helm Release Name is "ocnssf", ATS Helm Release Name is "ocats", and Namespace is "ocnssf". If any change in the helm release name of NSSF, ATS, and namespace needs to be updated accordingly.
- For example, if the NSSF Helm Release Name is
"ocnssfats" and ATS Helm Release Name is "ocatsnssf", and Namespace
is "ocnssf2510", then the above Pipeline Configuration should be
edited as shown below:
- NSSF Helm Release Name should be updated in "c d i k m r s t u v w" if any change in NSSF helm release name apart from "ocnssf".
- The NSSF Instance ID needs to be updated in the ATS
Jenkins pipeline parameters if there are any changes in the NSSF
custom values (CV) file. By default, the NSSF Instance ID is set to
"
9faf1bbc-6e4a-4454-a507-aef01a101a01". If the Instance ID is modified in the NSSF CV file, the same changes must be reflected in the Jenkins pipeline parameters.By default NSSF Instance ID in NSSF custom values file as below:#InstanceId of NSSF used in case of GR nfInstanceId: &nfInstanceId "9faf1bbc-6e4a-4454-a507-aef01a101a01"For example, if the nfInstanceId in the NSSF custom values file is modified from "
9faf1bbc-6e4a-4454-a507-aef01a101a01" to "9faf1bbc-6e4a-4454-a507-aef01a101a20", the same change must be updated in the "x" Jenkins pipeline parameters as shown below.
node ('built-in'){ //a = SELECTED_NF b = NF_NAMESPACE c = INGRESS_GATEWAY_IP d = EGRESS_GATEWAY_IP //e = PROMETHEUS_SVC_IP f = STUB_IP g = PROMETHEUS_PORT h = RERUN_COUNT //i = NF_DB j = NF_DB_SECRET k = NSCONFIG_IP l = NRF_STUB_IP //m = HELM_RELEASE_NAME n = ATS_RELEASE_NAME o = NSSF_INGRESS_GATEWAY_PORT //p = NSSF_EGW_PORT q = NSSF_CONFIG_PORT r = NSSF_SELECTION_SVC_NAME //s = NSSF_AUDITOR_SVC t = NSSF_AVAILABILITY_SVC_NAME u = NSSF_SUBSCRIPTION_SVC_NAME //v = NSSF_APP_INFO_SVC w = NSSF_PERFINFO_SVC x = NSSF_INSTANCEID //y = NRF_STUB_1_SVC_NAME z = NRF_STUB_2_SVC_NAME A = NSSF_NRF_CLIENT_SVC_NAME //B = SUPPORTED_PLMN_LIST_MCC_MNC withEnv([ ]){ sh ''' sh /var/lib/jenkins/ocnssf_tests/preTestConfig.sh \ -a NSSF \ -b ocnssf2510 \ -c ocnssfats-ingress-gateway.ocnssf2510 \ -d ocnssfats-egress-gateway.ocnssf2510 \ -e occne-prometheus-server.occne-infra \ -f amf-stubserver.ocnssf2510 \ -g 80 \ -h 2 \ -i ocnssf-nsdb.ocnssf \ -j ocnssf-db-creds \ -k ocnssfats-nsconfig.ocnssf2510 \ -l nrf-stubserver.ocnssf2510 \ -m ocnssfats \ -n ocats \ -o 8081 \ -p 8080 \ -q 8080 \ -r ocnssfats-nsselection.ocnssf2510 \ -s ocnssfats-nsauditor.ocnssf2510 \ -t ocnssfats-nsavailability.ocnssf2510 \ -u ocnssfats-nssubscription.ocnssf2510 \ -v ocnssfats-ocnssf-app-info.ocnssf2510 \ -w ocnssfats-ocnssf-perf-info.ocnssf2510 \ -x 9faf1bbc-6e4a-4454-a507-aef01a101a20 \ -y nrf-stubserver1.ocnssf2510 \ -z nrf-stubserver2.ocnssf2510 \ -A ocnssfats-ocnssf-nrf-client-nfmanagement.ocnssf2510 \ -B 311 480 \ ''' if(env.Include_Regression && "${Include_Regression}" == "YES"){ sh '''sh /var/lib/jenkins/common_scripts/merge_jenkinsfile.sh''' load "/var/lib/jenkins/ocnssf_tests/jenkinsData/Jenkinsfile-Merged" } else{ load "/var/lib/jenkins/ocnssf_tests/jenkinsData/Jenkinsfile-Regression" } } } } - Click Save after making necessary changes. The Pipeline NSSF-Regression screen appears.
NSSF-Regression - Build with Parameters

- By default, features "ALL," configuration type "Product_config," and include new features "NO" will be selected. All test cases will be executed once you click on BUILD, as shown above.
- Features: ALL. Once you click on ALL, a dropdown "Select" option
will appear. After selecting the "Select" option, as shown below, options will
appear to select feature files. To run the selected feature files, click on
"Build," as shown below.


45 features passed, 0 failed, 0 skipped
784 scenarios passed, 0 failed, 0 skipped
14570 steps passed, 0 failed, 0 skipped, 0 undefined
Took 196m23.264s
4.3.6 NSSF-Regression Documentation
To view NSSF Regression cases, go to NSSF-Regression latest pipeline build and click the Documentation link in the left navigation pane. The following screen appears. Click any functionality to view its test cases and scenarios of each test case as shown below:

A sample of a few documentation features are as follows:

Once the run of regression features is done successfully, click on the build number whose logs are to be viewed and then click on Console Output on left side navigation.
Wait till the page is loaded completely, then click Download to download the regression features logs.


4.4 Running SCP Test Cases using ATS
This section describes how to run SCP test cases using ATS.
4.4.1 Logging in to ATS
Logging in to ATS GUI in Non-OCI Setup
Figure 4-30 Verifying ATS Pod

Note:
In the Verifying ATS Pod image, the ATS nodeport is highlighted in red as 30345. For more information about ATS deployment, see Deploying ATS and Stub in the Kubernetes Cluster. Similarly, verify Stub deployments.To log in to the ATS GUI, open the browser and either provide the
external IP address of the worker node and nodeport of the ATS service as
<Worker-Node-IP>:<Node-Port-of-ATS> or provide the
IP address of the load balancer and serviceport of the ATS service as
<ATS-LB-IP>:<Service-Port-of-ATS>.
The ATS login screen appears.
Figure 4-31 Logging in to ATS GUI

Note:
It is recommended to keep the rerun count to minimum 1 for running ATS testcases.To run ATS:
- Enter the login credentials and click Sign
in.
Note:
To modify default login password, see Modifying Login Password.The following screens appear to display preconfigured pipelines for SCP individually.
Figure 4-32 ATS SCP First Login Screen

The different pre-configured pipelines for SCP are as follows:
- SCP-NewFeatures: This pipeline has all the test cases delivered as part of this release.
- SCP-Regression: This pipeline covers all the test cases from the previous releases.
Logging in to ATS GUI in OCI Setup
To access the ATS GUI in OCI, see the Accessing ATS GUI in OCI section.
Logging in to ATS GUI with HTTPS Enabled
Note:
For more information, see the Support for Transport Layer Security.4.4.2 SCP-NewFeatures Pipeline
This section describes how to configure new feature pipeline parameters, run SCP test cases, and view functionalities.
4.4.2.1 Configuring New Feature Pipelines
This is a pre-configured pipeline where all the SCP test cases are run.
- Click SCP-NewFeatures in the
Name column.
The SCP-NewFeatures screen appears.
Figure 4-33 SCP-NewFeatures

According to the installation guide, the configuration parameters can be modified in the
ocats_ocscp_values.yamlfile before deployment. If you are running SCP test cases for the first time without enabling the parameters in the deployment file, then you have to set the input parameters before running any test case. There is no need to set these parameters again unless there is a change in the configuration. - In the left navigation pane, click
Configure to provide input parameters and scroll
down to the pipeline script as shown in the following image:
The General tab appears.
Note:
Ensure that the following screen loads completely before you perform any action on it. Also, do not modify any other configuration than what is specified in the subsequent steps.The control moves from the General tab to the Pipeline tab, as shown in the following screenshot:
Figure 4-34 Pipeline Tab

- Modify the values of the pipeline script as
required, and then click Save.
Parameter "-I" must be changed as part of "Pipeline script". The content of the pipeline script is as follows:
node ('built-in'){
    //a = SELECTED_NF  b = NFNAMESPACE  c = CLUSTERDOMAIN  d = DESTNAMESPACE
    //e = ATSREGISTRY  f = AUDITINTERVAL  g = GUARDTIME  h = SCPSVCNAME
    //i = SCPCONFIGSVCNAME  j = SCPNOTIFYSVCNAME  k = SCPSUBSVCNAME  l = DBSECRETNAME
    //m = MYSQLHOST  n = ATSSTUBIMAGE  o = ATSSTUBCPU  p = ATSSTUBMEMORY  q = SCPAUDITSVCNAME
    //r = RERUN_COUNT  s = SCPSVCPORT  t = PROMSVCNAME  u = PROMSVCPORT  v = STUBWAITTIME
    //w = PROMSVC_URI  x = SUBVALIDITYTIME z = OPENSEARCH_WAIT_TIME A = OPENSEARCH_HOST
    //B = OPENSEARCH_PORT C = STUB_LOG_COLLECTION D = OPENSEARCH_LOGS E = SCPSVCHTTPSPORT F = SCPNRFPROXYSVCNAME
    //G = KUBERNETES_HOST H = KAFKANAMESPACE I = SCPDDCLIENTSVCNAME J = SCPGLBRATELIMITSTUBSVCNAME K = SCPCONFIGSVCPORT
    //L = SCP_METRICS_VERSION M = SCPSVCIP
    withEnv([

    ]){

    sh '''
        sh /var/lib/jenkins/ocscp_tests/preTestConfig.sh \    -a SCP \
        -b scp-73999881-dev \
        -c cluster.local \
        -d scp-73999881-dev \
        -e cgbu-ocscp-dev-docker.dockerhub-phx.oci.oraclecorp.com/ocats \
        -f 60 \
        -g 10 \
        -h cicdocscp-scp-worker \
        -i cicdocscp-scpc-configuration \
        -j cicdocscp-scpc-notification \
        -k cicdocscp-scpc-subscription \
        -l appuser-secret \
        -m mysql.scp-73999881-dev.svc.cluster.local \
        -n ocats-pystub \
        -o 0.5 \
        -p 0.5G \
        -q cicdocscp-scpc-audit \
        -r 0 \
        -s 8000 \
        -t occne-prometheus-73999881-server.scp-73999881-dev-infra \
        -u 80 \
        -v 300 \
        -w /api/ \
        -x 120 \
        -z 0 \
        -A occne-opensearch-cluster-master.scp-73999881-dev-infra \
        -B 9200 \
        -C yes \
        -D opensearch \
        -E 9443 \
        -F cicdocscp-scp-nrfproxy \
        -G kubernetes.default \
        -H scp-73999881-devkafka \
        -I ocats-ocscp-ocats-ddclientstub \
        -J ocats-ocscp-ocats-scpglbratelimitstub \
        -K 8081 \
        -L v1 \
        -M scpSignallingFqdn \

    '''
    if(env.Include_Regression && "${Include_Regression}" == "YES"){
        sh '''sh /var/lib/jenkins/common_scripts/merge_jenkinsfile.sh'''
        load "/var/lib/jenkins/ocscp_tests/jenkinsData/Jenkinsfile-Merged"
    }
    else{
        load "/var/lib/jenkins/ocscp_tests/jenkinsData/Jenkinsfile-NewFeatures"
    }

    }
}
The description of these parameters is as follows:
Note:
Do not modify anything other than these parameters.- a: Selected NF
- b: NameSpace in which SCP is deployed
- c: K8s Cluster Domain where SCP is deployed
- d: Test Stubs NameSpace - Must be same as SCP Namespace
- e: Docker registry where test stub image is available
- f: Audit Interval provided in SCP Deployment file
- g: Guard Time provided SCP Deployment file
- h: SCP-Worker microservice name as provided during deployment
- i: SCPC-Configuration microservice name as provided during deployment
- j: SCPC-Notification microservice name as provided during deployment
- k: SCPC-Subscription microservice name as provided during deployment
- l: DB Secret name as provided during deployment
- m: Mysql Host name as provided during deployment
- n: Test Stub Image Name with tag
- o: Test Stub CPU requests and limit
- p: Test Stub Memory requests and limit
- q: SCPC-Audit microservice name as provided during deployment
- r: re-run count
- s: SCPSVCPORT with which SCP is deployed
- t: PROMSVCNAME with which Prometheus server is deployed. Note: Prometheus service name is followed by namepsace in which Prometheus service is existing. Prometheus service is in a different namespace related to deployed SCP namespace.
- u: PROMSVCPORT with which Prometheus server is deployed
- v: Time to wait for Stub Creation. Default value of STUBWAITTIME is 240s.Note: A user needs to update the STUBWAITTIME in increments or multiples of 30 seconds. The minimum allowable value for STUBWAITTIME is 30 seconds.
- w: API URI of Prometheus (/api/) - For examples, use /api/or /prometheus/api/
- x: Subscription Validity Time to set by ATS in response to subscription request from SCP
- y: Application Debug Logs collection on Rerun if set to true. The default value is false
- z: Opensearch connection timeout
- A: Opensearch host/service name
- B: Opensearch port
- C: Stub log collection
- D: Provide Kubernetes or OpenSearch for ATS for app log collection (Fetch_Log_Upon_Failure should be enabled)
- E: SCP HTTPS Signaling Port
- F: SCP NRF Proxy service name
- G: Kubernetes Host
- I: scpddclientstub name as provided during deployment
- J: scpglobalratelimitstub name as provided during deployment
- K: port of configuration pod in SCP deployment
- L: scp metrics version
- M: scp worker FQDN or cluster IP: The default value is scpSignallingFqdn, which forwards requests to the worker using the worker's FQDN. Alternatively, an IPv4 or IPv6 address (enclosed in square brackets) can also be provided.
4.4.2.2 Running SCP New Feature Pipelines
To run SCP test cases, perform the following steps
- Click Build with Parameters link available in the left navigation pane of the Pipeline SCP-NewFeatures screen.
- Select the R16 option from the Execute_Suite drop-down menu to run Release 16 test cases for SCP.
- Select the required option from the Features
drop-down menu to run the test cases:
- All: To run all the test cases for SCP based on Release15 or Release16 selection.
- Sanity: Enabled for SCP. Sanity cases are run to do a quick sanity check on SCP SUT features.
- Select: This option allows users to separately select specific features for separate execution. Additionally, users can select the run for an entire stage or group instead of running all feature files.
- Select one of the following configuration types from the
Configuration_Type drop-down menu:
- Product_Config: To run test cases from the features or regression directory. Test cases in this directory should not be modified.
- Custom_Config: To run test cases from the features or cust_regression directory. Any test case customization required should be done in this directory.
- Select an appropriate option and click
Build to perform the test.
Figure 4-35 Build

- Click Full Stage View in the left navigation pane to view the status of the run.
- Hover over values of Execute Tests, and then
click Logs to check test results and logs.
Note:
A sample consolidated test report is shown in the following image when rerun is set to 2, which is the default value. All the features passed within the first rerun, therefore, the second rerun stage has not been run in this case.For more information about consolidated test report, see Managing Final Summary Report, Build Color, and Application Log.Figure 4-36 Sample consolidated report

Note:
- The New Feature tests in this release have been written
according to SCP-ATS parameterization method (Golden Configuration). The
individual features are not populated with direct values for the
parameters, however, with variable names. While performing the tests,
these variables are mapped according to the data provided adjacent to
them in the feature specific
<feature_name>.yamlandglobal.yamlthat can be found in theproduct_configdirectory. This method allows the decoupling of data that can be customer specific from the features. Fore more information about parameterization (Golden Configuration), see Parameterization.
To view the detail view of the respective group, rerun logs, and the consolidated report summary:- Click Open Blue Ocean Homepage from the left navigation pane.
- Click the build number in the run column to view the consolidated output of all the feature that are run.
- Click Download icon to download the log files.
- The New Feature tests in this release have been written
according to SCP-ATS parameterization method (Golden Configuration). The
individual features are not populated with direct values for the
parameters, however, with variable names. While performing the tests,
these variables are mapped according to the data provided adjacent to
them in the feature specific
4.4.3 SCP-NewFeatures Documentation
- To view SCP functionalities, go to the
SCP-NewFeatures pipeline and click the
Documentation option in the left navigation pane.
It lists all the test cases provided as part of SCP ATS -25.2.201.
The following screen appears:
Note:
The Documentation option appears only if the SCP-NewFeatures pipeline test cases are run at least once.Figure 4-37 SCP-NewFeatures Documentation

- Click any functionality to view its test cases and scenarios for
each test case.
Figure 4-38 Sample Scenario

Based on the functionalities covered under Documentation, the screen displays test cases.
- To navigate back to the Pipeline SCP-NewFeatures screen, click the Back to SCP-NewFeatures link available in the upper left corner of the screen.
4.4.4 SCP-Regression Pipeline
This section describes how to configure regression pipeline parameters, run SCP test cases, and view functionalities.
4.4.4.1 Configuring Regression Pipelines
This pre-configured pipeline has all the test cases from previous releases.
- Click SCP-Regression Pipeline:
Figure 4-39 SCP-Regression Pipeline

According to the installation guide, the configuration parameters can be modified in the ocats_ocscp_values.yaml file before deployment. If you are running SCP-Regression pipeline test cases for the first time without enabling the parameters in the deployment file, you have to set the input parameters before running the test cases. Subsequent test case run does not require any input unless there is a need to change any configuration.
- In the left navigation pane, click Configure to
provide input parameters and scroll-down to the pipeline script as shown in the
following image:
Figure 4-40 Regression - Pipeline Script

- Modify the values of the Pipeline script as required, and
then click Save.
Parameter "-I" should be changed as part of "Pipeline script". The content of the pipeline script is as follows:
node ('built-in'){
    //a = SELECTED_NF  b = NFNAMESPACE  c = CLUSTERDOMAIN  d = DESTNAMESPACE
    //e = ATSREGISTRY  f = AUDITINTERVAL  g = GUARDTIME  h = SCPSVCNAME
    //i = SCPCONFIGSVCNAME  j = SCPNOTIFYSVCNAME  k = SCPSUBSVCNAME  l = DBSECRETNAME
    //m = MYSQLHOST  n = ATSSTUBIMAGE  o = ATSSTUBCPU  p = ATSSTUBMEMORY  q = SCPAUDITSVCNAME
    //r = RERUN_COUNT  s = SCPSVCPORT  t = PROMSVCNAME  u = PROMSVCPORT  v = STUBWAITTIME
    //w = PROMSVC_URI  x = SUBVALIDITYTIME z = OPENSEARCH_WAIT_TIME A = OPENSEARCH_HOST
    //B = OPENSEARCH_PORT C = STUB_LOG_COLLECTION D = LOG_SOURCE E = SCPSVCHTTPSPORT F = SCPNRFPROXYSVCNAME
    //G = KUBERNETES_HOST H = KAFKANAMESPACE I = SCPDDCLIENTSVCNAME J = SCPGLBRATELIMITSTUBSVCNAME K = SCPCONFIGSVCPORT
    //L = SCP_METRICS_VERSION M = SCPSVCIP
        withEnv([

    ]){

    sh '''
    sh /var/lib/jenkins/ocscp_tests/preTestConfig.sh \
        -a SCP \
        -b scpsvc \
        -c cluster.local \
        -d scpsvc \
        -e cgbu-ocscp-dev-docker.dockerhub-phx.oci.oraclecorp.com/ocats \
        -f 60 \
        -g 10 \
        -h ocscp-scp-worker \
        -i ocscp-scpc-configuration \
        -j ocscp-scpc-notification \
        -k ocscp-scpc-subscription \
        -l appuser-secret \
        -m mysql.default.svc.cluster.local \
        -n ocats-pystub:tag \
        -o 0.5 \
        -p 0.5G \
        -q ocscp-scpc-audit \
        -r 0 \
        -s 8000 \
        -t occne-prometheus-server.occne-infra \
        -u 80 \
        -v 300 \
        -w /api/ \
        -x 120 \
        -z 0 \
        -A occne-opensearch-cluster-master.occne-infra \
        -B 9200 \
        -C no \
        -D kubernetes \
        -E 9443 \
        -F ocscp-scp-nrfproxy \
        -G kubernetes.default \
        -H scpsvc \
        -I ocats-ocscp-ocats-ddclientstub \
        -J ocats-ocscp-ocats-scpglbratelimitstub \
        -K 8081 \
        -L v1 \
        -M scpSignallingFqdn \

    '''
    if(env.Include_NewFeatures && "${Include_NewFeatures}" == "YES"){
        sh '''sh /var/lib/jenkins/common_scripts/merge_jenkinsfile.sh'''
        load "/var/lib/jenkins/ocscp_tests/jenkinsData/Jenkinsfile-Merged"
    }
    else{
        load "/var/lib/jenkins/ocscp_tests/jenkinsData/Jenkinsfile-Regression"
    }

    }
}
The description of these parameters is as follows:- a: Selected NF
- b: NameSpace in which SCP is deployed
- c: K8s Cluster Domain where SCP is deployed
- d: Test Stubs NameSpace - Must be same as SCP Namespace
- e: Docker registry where test stub image is available
- f: Audit Interval provided in SCP Deployment file
- g: Guard Time provided SCP Deployment file
- h: SCP-Worker microservice name as provided during deployment
- i: SCPC-Configuration microservice name as provided during deployment
- j: SCPC-Notification microservice name as provided during deployment
- k: SCPC-Subscription microservice name as provided during deployment
- l: DB Secret name as provided during deployment
- m: Mysql Host name as provided during deployment
- n: Test Stub Image Name with tag
- o: Test Stub CPU requests and limit
- p: Test Stub Memory requests and limit
- q: SCPC-Audit microservice name as provided during deployment
- r: re-run count
- s: SCPSVCPORT with which SCP is deployed
- t: PROMSVCNAME with which prometheus server is deployed. Note: Prometheus service name is followed by namepsace in which Prometheus service is existing. Prometheus service is in a different namespace related to deployed SCP namespace.
- u: PROMSVCPORT with which prometheus server is deployed
- v: Time to wait for Stub Creation. Default value of STUBWAITTIME is 240s.Note: A user needs to update the STUBWAITTIME in increments or multiples of 30 seconds. The minimum allowable value for STUBWAITTIME is 30 seconds.
- w: API URI of Prometheus (/api/) - Use "/api/" or "/prometheus/api/"
- x: Subscription Validity Time to set by ATS in response to subscription request from SCP
- y: Application Debug Logs collection on Rerun if set to true. The default value is false
- z: Opensearch connection timeout
- A: Opensearch host/service name
- B: Opensearch port
- C: Stub log collection
- D: User can provide Kubernetes/opensearch for ATS to use for app log collection (Fetch_Log_Upon_Failure needs to be enabled)
- E: SCP HTTPS Signaling Port
- F: SCP NRF Proxy service name
- G: Kubernetes Host
- I: scpddclientstub name as provided during deployment
- J: scpglobalratelimitstub name as provided during deployment
- K: port of configuration pod in scp deployment
- L: scp metrics version
- M: scp worker FQDN or cluster IP. The default value is scpSignallingFqdn, which forwards requests to the worker using the worker FQDN. Alternatively, an IPv4 or IPv6 address (enclosed in square brackets) can also be provided.
4.4.4.2 Running Regression Pipelines
This section describes how to run test cases for SCP Regression pipeline.
- To run the pipeline, click Build with Parameters in the left navigation pane.
- Select the R16 option from the Execute_Suite drop-down menu to run Release 16 test cases for SCP.
- Select the required regression option from the
Features drop-down menu to run the test cases:
- All: To run all the test cases for SCP based on
Release15 or Release16 selection. This runs all the cases except
SCP_Audit_nnrf_disc. If SCP is deployed withnnrf-discfor audit or registration with NRF is disabled, then the All option should not be used and instead Single or MultipleFeatures option can be used to select appropriate cases. - Sanity: Enabled for SCP. Sanity cases are run to do a quick sanity check on SCP SUT features. Sanity cases are included in the regression suite and are tagged with @sanity.
- Select: This option allows users to separately select specific features for separate test case run. Additionally, users can select the run for an entire stage or group instead of running all feature files.
- All: To run all the test cases for SCP based on
Release15 or Release16 selection. This runs all the cases except
- Select one of the following configuration types from the
Configuration_Type drop-down menu:
- Product_Config: To run test cases from the features or regression directory. Test cases in this directory should not be modified.
- Custom_Config: To run test cases from the features or cust_regression directory. Any test case customization required should be done in this directory.
- Select an appropriate option and click Build to run the test case.
- Click Full Stage View in the left navigation pane to view the status of the run.
- Hover over the Execute-Tests stage of
the pipeline, and then click Logs to check test case
results and logs.
To view the detail view of the respective group, rerun logs, and the consolidated report summary:
- Click Open Blue Ocean Homepage from the left navigation pane.
- Click the build number in the run column to view the consolidated output of all the feature that are run.
- Click Download icon to download the log files.
4.4.5 SCP-Regression Documentation
- To view SCP functionalities, go to the
SCP-Regression pipeline and click the
Documentation option in the left navigation pane.
It lists all the test cases provided as part of SCP ATS -25.2.201.
The following screen appears:
Note:
The Documentation option appears only if the SCP-Regression pipeline test cases are run at least once.In SCP 24.1.0, the feature files are renamed as per the naming convention. For more information, see Renaming of Regression Feature Files
Figure 4-41 SCP-Regression Documentation

- Click any functionality to view its test
cases and scenarios for each test case.
Figure 4-42 Sample Scenario

Based on the functionalities covered under Documentation, the screen displays test cases.
- To navigate back to the Pipeline SCP-Regression screen, click the Back to SCP-Regression link available in the upper left corner of the screen.
4.4.5.1 Renaming of Regression Feature Files
Table 4-2 Regression Feature File
| Feature Names prior to SCP 24.1.0 | New Feature Names for SCP 24.1.0 |
|---|---|
| Route_group_static_config_api_validation | SCP_AlternateRoutingUsingStaticConfig_API_P0 |
| Alternate_Routing_Using_Static_Config_EgressRL_SMF | SCP_AlternateRoutingUsingStaticConfig_EgressRL_SMF_P0 |
| Alternate_Routing_Using_Static_Configuration_Https_SMF | SCP_AlternateRoutingUsingStaticConfig_HTTPS_SMF_P0 |
| Alternate_Routing_Using_Static_Configuration_Notification_CircuitBreaking. | SCP_AlternateRoutingUsingStaticConfig_NotificationMessageCircuitBreaking_P0 |
| Alternate_Routing_Using_Static_Configuration_SMF | SCP_AlternateRoutingUsingStaticConfig_SMF_P0 |
| Alternate_Routing_Using_Static_Config_Overload_Control | SCP_AlternateRoutingUsingStaticConfig_OverloadControl_P0 |
| SCP_Audit_nnrf_disc_SMF | SCP_Audit_nnrf-disc_SMF_P0 |
| SCP_Audit_nnrf_nfm_SMF | SCP_Audit_nnrf-nfm_SMF_P0 |
| SCP_Audit_nnrf_nfm_SMF_user_agent | SCP_Audit_nnrfnfmSCPsUserAgentHeaderValidation_P0 |
| Dns_Srv_Call_Back_Notification_CD_OD_Cases | SCP_CallBackNotification_DNSSRVbasedCBOD_P0 |
| Callback_And_Notification | SCP_CallBackNotification_P0 |
| SCP_CCA_Header_Validation_API_P0 | SCP_CCAvalidation_API_P0 |
| CCA_validation_AUSF_P0 | SCP_CCAvalidation_AUSF_P0 |
| CCA_validation_AUSF_P1 | SCP_CCAvalidation_AUSF_P1 |
| CCA_validation_InterPLMN_CHF_P0 | SCP_CCAvalidation_InterPLMNRouting_CHF_P0 |
| CCA_validation_InterSCP_CHF_P0 | SCP_CCAvalidation_InterSCP_CHF_P0 |
| CCA_validation_ModelD_CHF_P0 | SCP_CCAvalidation_ModelD_CHF_P0 |
| CCA_validation_ModelD_CHF_P1 | SCP_CCAvalidation_ModelD_CHF_P1 |
| SCP_Circuit_Breaking_Config_API | SCP_CircuitBreaking_ConfigAPI_P0 |
| Circuit_Breaking_PCF | SCP_CircuitBreaking_PCF_P0 |
| Circuit_Breaking_SMF | SCP_CircuitBreaking_SMF_P0 |
| SCP_Congestion_Control_Config_API | SCP_CongestionControl_ConfigAPI_P0 |
| S_Correlation_Header_interplmn_model_C | SCP_CorrelationHeader_InterPLMNModelC_P0 |
| Correlation_Headersepp_model_D_Inter_PLMN_and_Mediation | SCP_CorrelationHeader_InterPLMNRoutingBasedOnModelDandMediation_P0 |
| Interscp_Correlation_Header_model_C | SCP_CorrelationHeader_InterSCP_P0 |
| Correlation_Header_model_C_cases | SCP_CorrelationHeader_ModelC_P0 |
| Notification_Correlation_Header_model_C | SCP_CorrelationHeader_ModelCNotificationRequest_P0 |
| Correlation_Header_SCP_generated_error | SCP_CorrelationHeader_SCPGeneratedError_P0 |
| DefaultNotificationCallbackInitialRouteAndDiscovery_p0 | SCP_DefaultNotificationCallback_InitialRouteAndDiscovery_P0 |
| Dns_Srv_Call_Back_Notification_Https | SCP_DefaultNotificationCallbackUri_DNSSRV_HTTPS_P0 |
| Dns_Srv_Call_Back_Notification | SCP_DefaultNotificationCallbackUri_DNSSRV_P0 |
| DefaultNotificationCallbackUriModelC_Https_p1 | SCP_DefaultNotificationCallbackUri_ModelC_HTTPS_P1 |
| DefaultNotificationCallbackUriModelC_p0 | SCP_DefaultNotificationCallbackUri_ModelC_P0 |
| DefaultNotificationCallbackUriModelC_p1 | SCP_DefaultNotificationCallbackUri_ModelC_P1 |
| DefaultNotificationCallbackUriModelC_CB_p0 | SCP_DefaultNotificationCallbackUri_ModelCCB_P0 |
| DefaultNotificationCallbackUriModelC_SEPP_p1 | SCP_DefaultNotificationCallbackUri_ModelCInterPLMNRouting_P1 |
| DefaultNotificationCallbackUriModelC_SEPP_p1 | SCP_DefaultNotificationCallbackUri_ModelCInterPLMNRouting_P1 |
| Alternate_resolution_api_validation | SCP_DNSSRV_AlternateResolution_API_P0 |
| Dns_Srv_Based_Routing_For_ModelC_Headers_PCF_cases | SCP_DNSSRV_ModelCHeaders_PCF_P0 |
| Dns_Srv_Based_Routing_For_ModelC_Headers_UDM_cases | SCP_DNSSRV_ModelCHeaders_UDM_P0 |
| Dns_Srv_Producer_Overload_Control | SCP_DNSSRV_ProducerBasedOverloadControl_P0 |
| Alert_egress_congestion_based_on_producer_load_and_message_priority_CHF | SCP_EgressCongestionBasedOnProducerLoad_AlertMessagePriority_CHF_P0 |
| Egress_congestion_based_on_producer_load_and_message_priority_PCF | SCP_EgressCongestionBasedOnProducerLoad_MessagePriority_PCF_P0 |
| Egress_congestion_based_on_producer_load_and_message_priority_UDM | SCP_EgressCongestionBasedOnProducerLoad_MessagePriority_UDM_P0 |
| SCP_Egress_Host_Preference_alternate_routing_SMF_P0_P1 | SCP_EgressHostPreference_AlternateRouting_SMF_P1 |
| SCP_Egress_Host_Preference_alternate_routing_withoutHeader_AUSF_P1 | SCP_EgressHostPreference_AlternateRoutingWithoutHeader_AUSF_P1 |
| SCP_Egress_Host_Preference_API_P0 | SCP_EgressHostPreference_API_P0 |
| SCP_Egress_Host_Preference_CHF_P0 | SCP_EgressHostPreference_CHF_P0 |
| SCP_Egress_Host_Preference_CHF_P1 | SCP_EgressHostPreference_CHF_P1 |
| SCP_Egress_Host_Preference_InterPLMN_Routing_P0 | SCP_EgressHostPreference_InterPLMNRouting_P0 |
| SCP_Egress_Host_Preference_InterPLMN_Routing_P1 | SCP_EgressHostPreference_InterPLMNRouting_P1 |
| SCP_Egress_Host_Preference_InterPLMN_Routing_Non_ASM_P0 | SCP_EgressHostPreference_InterPLMNRoutingNonASM_P0 |
| SCP_Egress_Host_Preference_InterSCP_Routing_CHF_P0 | SCP_EgressHostPreference_InterSCPRouting_CHF_P0 |
| SCP_Egress_Host_Preference_InterSCP_Routing_CHF_P1 | SCP_EgressHostPreference_InterSCPRouting_CHF_P1 |
| SCP_Egress_Host_Preference_InterSCP_Routing_CHF_Non_ASM_P0 | SCP_EgressHostPreference_InterSCPRoutingNonASM_CHF_P0 |
| SCP_Egress_Host_Preference_ModelD_routing_CHF_NRF_P0 | SCP_EgressHostPreference_ModelDRoutingCHF_NRF_P0 |
| SCP_Egress_Host_Preference_ModelD_routing_CHF_NRF_P1 | SCP_EgressHostPreference_ModelDRoutingCHF_NRF_P1 |
| SCP_Egress_Host_Preference_ModelD_routing_without_apiRootHdr_CHF_NRF_P1 | SCP_EgressHostPreference_ModelDRoutingWithoutAPIRootHdrCHFandNRF_P1 |
| SCP_Egress_Host_Preference_Notification_PCF | SCP_EgressHostPreference_NotificationRequest_PCF_P0 |
| SCP_Egress_Host_Preference_SCP_Generated_Audit_SMF_NRF_P1 | SCP_EgressHostPreference_SCPGeneratedAuditSMF_NRF_P1 |
| SCP_Egress_Host_Preference_SMF_P0_P1 | SCP_EgressHostPreference_SMF_P1 |
| SCP_Egress_Host_Prefrence_SCP_Generated_Subscription_SCP_NRF_P1 | SCP_EgressHostPrefrence_SCPgeneratedSubscription_NRF_P1 |
| Alert_SCPEgressTrafficRateExceededConfiguredLimit_AUSF | SCP_EgressRateLimiting_AlertTrafficRateExceededConfiguredLimit_AUSF_P0 |
| Alert_SCPEgressTrafficRoutedWithoutRateLimitTreatment_AUSF | SCP_EgressRateLimiting_AlertTrafficRoutedWithoutRateLimitTreatment_AUSF_P0 |
| Egress_Rate_Limiting_Config_API | SCP_EgressRateLimiting_Config_API_P0 |
| EgressRateLimiting_INTERSCP | SCP_EgressRateLimiting_InterSCP_P0 |
| EgressRateLimiting | SCP_EgressRateLimiting_P0 |
| EgressRateLimiting_UDM_Cases | SCP_EgressRateLimiting_UDM_P0 |
| RateLimitingRelease16_AUSF | SCP_EgressRateLimitingRelease16_AUSF_P0 |
| SCP_EgressRateLimiting_DNSSRV.feature | SCP_EgressRateLimiting_DNSSRV_P0.feature |
| Enhanced_Suspended_State_Routing_API_Validation | SCP_EnhancedSuspendedStateRouting_API_P0 |
| Enhanced_Suspended_State_Routing_Alternate_Routing_Using_Static_Config_DNS_SRV | SCP_EnhancedSuspendedStateRouting_ARusingStaticConfigandDNSSRV_P0 |
| Enhanced_Suspended_State_Routing_Inter_PLMN | SCP_EnhancedSuspendedStateRouting_InterPLMNRouting_P0 |
| Enhanced_Suspended_State_Routing_Mode2_API_Validation_P0 | SCP_EnhancedSuspendedStateRouting_Mode2_API_P0 |
| Enhanced_Suspended_State_Routing_Mode2_Alternate_Routing_Using_Static_Config_DNS_SRV_P0 | SCP_EnhancedSuspendedStateRouting_Mode2AlternateRoutingStaticConfigDNSSRV_P0 |
| Enhanced_Suspended_State_Routing_Mode2_ModelC_SMF_P1 | SCP_EnhancedSuspendedStateRouting_Mode2ModelC_SMF_P1 |
| Enhanced_Suspended_State_Routing_Mode2_ModelC_Inter_PLMN_P0 | SCP_EnhancedSuspendedStateRouting_Mode2ModelCInterPLMN_P0 |
| Enhanced_Suspended_State_Routing_Mode2_ModelC_InterSCP_P0 | SCP_EnhancedSuspendedStateRouting_Mode2ModelCInterSCP_P0 |
| Enhanced_Suspended_State_Routing_Mode2_ModelC_Overload_Congestion_SMF_P1 | SCP_EnhancedSuspendedStateRouting_Mode2ModelCOverloadCongestion_SMF_P1 |
| Enhanced_Suspended_State_Routing_Mode2_ModelD_P0 | SCP_EnhancedSuspendedStateRouting_Mode2ModelD_P0 |
| Enhanced_Suspended_State_Routing_Mode2_ModelD_Inter_PLMN_P0 | SCP_EnhancedSuspendedStateRouting_Mode2ModelDInterPLMNRoutin_P0 |
| Enhanced_Suspended_State_Routing_Mode2_ModelD_InterSCP_P0 | SCP_EnhancedSuspendedStateRouting_Mode2ModelDInterSCP_P0 |
| Enhanced_Suspended_State_Routing_ModelC_SMF | SCP_EnhancedSuspendedStateRouting_ModelC_SMF_P0 |
| Enhanced_Suspended_State_Routing_Parallel_ModelC_SMF_UDM_P0 | SCP_EnhancedSuspendedStateRouting_ModelC_SMFandUDM_P0 |
| Enhanced_Suspended_State_Routing_ModelC_UDM | SCP_EnhancedSuspendedStateRouting_ModelC_UDM_P0 |
| Enhanced_Suspended_State_Routing_Model_C_Inter_SCP | SCP_EnhancedSuspendedStateRouting_ModelCInterSCP_P0 |
| Enhanced_Suspended_State_Routing_ModelD | SCP_EnhancedSuspendedStateRouting_ModelD_P0 |
| Enhanced_Suspended_State_Routing_ModelD_InterSCP | SCP_EnhancedSuspendedStateRouting_ModelDInterSCP_P0 |
| Enhanced_NF_Status_Processing_SUSPENDED | SCP_EnhancedSuspendedStateRouting_SuspendedMode2_P0 |
| Enhanced_NF_Status_Processing_SUSPENDED_SMF | SCP_EnhancedSuspendedStateRouting_SuspendedMode2_SMF_P0 |
| Enhanced_NF_Status_Processing_UNDISCOVERABLE | SCP_EnhancedSuspendedStateRouting_UNDISCOVERABLE_P0 |
| SCP_Error_Profile_Config_API_P0 | SCP_ErrorProfile_ConfigAPI_P0 |
| SCPFailureHandling_default_behavior_serverheader_AUSF | SCP_FailureHandling_DefaultBehaviorServerHeader_AUSF_P0 |
| SCPFailureHandling_default_behavior_serverheader | SCP_FailureHandling_DefaultBehaviorServerHeader_P0 |
| SCPFailureHandling_DNSSRV_based_EnhancedServerHeaderV2_NEF_p0 | SCP_FailureHandling_DNSSRVbasedEnhancedServerHeaderV2_NEF_P0 |
| SCPFailureHandling_EnhancedServerHeader | SCP_FailureHandling_EnhancedServerHeader_P0 |
| SCPFailureHandling_EnhancedServerHeaderV2_API | SCP_FailureHandling_EnhancedServerHeaderV2_API_P0 |
| SCPFailureHandling_EnhancedServerHeaderV2_p0 | SCP_FailureHandling_EnhancedServerHeaderV2_P0 |
| SCPFailureHandling_EnhancedServerHeaderV2_p1 | SCP_FailureHandling_EnhancedServerHeaderV2_P1 |
| FailureHandling_InterSCP_EnhancedServerHeader | SCP_FailureHandling_InterSCPEnhancedServerHeader.P0 |
| FormUrlEncoded | SCP_FormUrlEncoded_P0 |
| Global_Egress_Rate_Limiting_Config_API | SCP_GlobalEgressRateLimiting_API_P0 |
| GlobalEgressRateLimiting_P0 | SCP_GlobalEgressRateLimiting_P0 |
| SCP_HealthCheck_Support_API_P0 | SCP_HealthCheckSupport_API_P0 |
| SCP_HealthCheck_Support_HTTPS_P0 | SCP_HealthCheckSupport_HTTPS_P0 |
| SCP_HealthCheckInterSCPModelC_HTTPS_P0 | SCP_HealthCheckSupport_InterSCPModelC_HTTPS_P0 |
| SCP_HealthCheckInterSCPModelC_P0 | SCP_HealthCheckSupport_InterSCPModelC_P0 |
| SCP_HealthCheckInterSCPModelD_P0 | SCP_HealthCheckSupport_InterSCPModelD_P0 |
| Alert_SCPIngressTrafficRateExceededConfiguredLimit | SCP_IngressRateLimiting_AlertTrafficRateExceededConfiguredLimit_P |
| Alert_SCPIngressTrafficRoutedWithoutRateLimitTreatment | SCP_IngressRateLimiting_AlertTrafficRoutedWithoutRateLimitTreatment_P0 |
| Ingress_Rate_Limiting_Config_API | SCP_IngressRateLimiting_API_P0 |
| Ingress_Rate_Limiting_Config_API_SC1 | SCP_IngressRateLimiting_ConfigAPI_P0 |
| Ingress_Rate_Limiting_Config_API_enhancement_for_nfInstanceId | SCP_IngressRateLimiting_ConfigAPIenhancementNFInstanceId_P0 |
| Ingress_Rate_Limiting_enhancement_for_nfInstanceId_to_support_UserAgentHeader | SCP_IngressRateLimiting_NFInstanceIdEnhancementUserAgentHeader_P0 |
| SEPP_Audit_nnrf_nfm | SCP_InterPLMNRouting_Audit_nnrf-nfm_P0 |
| SCP-SEPP_ModelD_Routing | SCP_InterPLMNRouting_ModelDBased_P0 |
| SEPP_Routing_NRF | SCP_InterPLMNRouting_NRF_P0 |
| OutlierDetectionSepp_P0 | SCP_InterPLMNRouting_OutlierDetection_P0 |
| SCP-SEPP_Routing | SCP_InterPLMNRouting_P0 |
| SEPP_plmnInfo_DELETE_API | SCP_InterPLMNRouting_PLMNInfoDeleteAPI_P0 |
| SEPP_plmnInfo_GET_API | SCP_InterPLMNRouting_PLMNInfoGetAPI_P0 |
| SEPP_plmnInfo_PATCH_API | SCP_InterPLMNRouting_PLMNInfoPatchAPI_P0 |
| SEPP_plmnInfo_PUT_API | SCP_InterPLMNRouting_PLMNInfoPutAPI_P0 |
| SCP-SEPP_Routing_UDM | SCP_InterPLMNRouting_UDM_P0 |
| Rel16_Inter_SCP_Audit_nnrf_nfm_p0 | SCP_InterSCP_Audit_nnrf-nfm_P0 |
| InterSCP_MateInfoListRouting | SCP_InterSCP_MateInfoListRouting_P0 |
| Inter_SCP_Routing_NplusK_p0 | SCP_InterSCP_NplusKRouting_P0 |
| Inter_SCP_Subscription_SMF_NRF | SCP_InterSCP_SubscriptionWithForeignNRFforNfTypeSMF_P0 |
| Inter_SCP_Routing | SCP_InterSCPRouting_P0 |
| Jaeger_Api_Validation | SCP_Jaeger_API_P0 |
| SCP_LCI_Support_Config_API | SCP_LCIsupport_API_P0 |
| Scp_Lci_Support_InterPLMN | SCP_LCIsupport_InterPLMNRouting_P0 |
| SCP_Lci_Support_InterSCP | SCP_LCIsupport_InterSCP_P0 |
| SCP_Lci_Support_InterSCP_PCF_SCP | SCP_LCIsupport_InterSCP_PCF_P0 |
| SCP_Lci_Support_InterSCP_UDM | SCP_LCIsupport_InterSCP_UDM_P0 |
| SCP_Lci_Support_Miscellaneous | SCP_LCIsupport_Miscellaneous_P0 |
| Scp_Lci_Support_ModelD | SCP_LCIsupport_ModelD_P0 |
| Scp_Lci_Support_ModelD_notification_cases | SCP_LCIsupport_ModelDNotificationRequest_P0 |
| SCP_Lci_Support | SCP_LCIsupport_P0 |
| Local_N_Plus_K | SCP_LocalNplusK_P0 |
| Location_hdr_update_for_host_mismatch_API_validation | Location_hdr_update_for_host_mismatch_API_validation |
| App_Routing_Options_Config_API | SCP_Mediation_AppRoutingOptionsConfig_API_P0 |
| SCP_Mediation_Config_API | SCP_Mediation_ConfigAPI_P0 |
| SCP_Mediation_Worker_side_cases_PCF_Cases | SCP_Mediation_FunctionalCases_PCF_P0 |
| SCP_Mediation_Cases_AUSF | SCP_Mediation_FunctionalCasesPart1_AUSF_P0 |
| SCP_Mediation_Worker_side_cases_AUSF | SCP_Mediation_FunctionalCasesPart2_AUSF_P0 |
| SCP_Mediation_Worker_side_cases_UDM_SMF | SCP_Mediation_FunctionalTestCases_UDMandSMF_P0 |
| SCP_Mediation_Worker_side_cases_UDM_AUSF_SMF_Notification_cases | SCP_Mediation_FunctionalTestCasesForUDMnAUSFnSMFnNotificationRequest_P0 |
| SCP_Mediation_Cases_PCF | SCP_Mediation_PCF_P0 |
| Alert_SCPRoutingFailedForProducer_CHF | SCP_ModelC_AlertSCPRoutingFailedForProducer_CHF_P0 |
| ModelC_allheaderRequest | SCP_ModelC_AllHeaderRequest_P0 |
| PCF_AMPolicy_forwardRoute_Target_apiRoot | SCP_ModelC_AMPolicyTargetAPIRoot_PCF_P0 |
| ModelC_CatchAll_Routing_Configuration_AUSF | SCP_ModelC_CatchAllRoutingConfiguration_AUSF_P0 |
| ModelC_Direct_Routing_Configuration_AUSF | SCP_ModelC_DirectRoutingConfiguration_AUSF_P0 |
| ModelC_ProducerOverloadControl | SCP_ModelC_EgressCongestionBasedOnProducerLoad_P0 |
| Egress_Congestion_based_on_load_PCF_SMPolicy_forwardRoute_Target_apiRoot | SCP_ModelC_EgressCongestionBasedOnProducerLoad_PCF_P0 |
| Https_Routing_For_ModelC_Headers | SCP_ModelC_HTTPS_P0 |
| ModelC_IngressRateLimiting | SCP_ModelC_IngressRateLimiting_P0 |
| Model-C_based_Inter_SCP_Routing | SCP_ModelC_InterSCProuting_P0 |
| ModelC_Inter_SCP_Routing_Options_Notification_Cases | SCP_ModelC_InterSCPRoutingOptionsNotificationCases_P0 |
| InterSCP_VersionSupport | SCP_ModelC_InterSCPVersionSupport_P0 |
| ModelC_NFInstance_AUSF_Cases | SCP_ModelC_NFInstance_AUSF_P0 |
| ModelC_NFInstance_NEF_Cases | SCP_ModelC_NFInstance_NEF_P0 |
| NF_Notification | SCP_ModelC_NFprofileNotificationWithMultipleVersions_P |
| ModelC_NFSet_NEF_Cases | SCP_ModelC_NFSet_NEF_P0 |
| ModelC_NFSet_PCF_Cases | SCP_ModelC_NFSet_PCF_P0 |
| ModelC_NFSet_SMF_Cases | SCP_ModelC_NFSet_SMF_P0 |
| ModelC_ReverseLookup_CHF_Cases | SCP_ModelC_ReverseLookup_CHF_P0 |
| ModelC_ReverseLookup_UDM_Cases | SCP_ModelC_ReverseLookup_UDM_P0 |
| ModelC_ReverseLookup_UDR_Cases | SCP_ModelC_ReverseLookup_UDR_P0 |
| ModelC_Inter_SCP_Routing_Options | SCP_ModelC_RoutingOptionsInterSCP_P0 |
| AUSF_AUTH_forwardRoute_Target_apiRoot | SCP_ModelC_TargetAPIRoot_AUSF_P0 |
| CHF_SLC_forwardRoute_Target_apiRoot | SCP_ModelC_TargetAPIRoot_CHF_P0 |
| SMF_forwardRoute_Target_apiRoot | SCP_ModelC_TargetAPIRoot_SMF_P0 |
| UDM_SDM_forwardRoute_Target_apiRoot | SCP_ModelC_TargetAPIRootSDM_UDM_P0 |
| UDM_UECM_forwardRoute_Target_apiRoot | SCP_ModelC_TargetAPIRootUECM_UDM_P0 |
| Version_support | SCP_ModelC_VersionSupport_P0 |
| ModelD_Config_API | SCP_ModelD_API_P0 |
| ModelD_enforceReqSpecificSvcDiscovery | SCP_ModelD_EnforceReqSpecificSvcDiscovery_P0 |
| ModelD_based_Routing_implicit_notification_p0 | SCP_ModelD_ImplicitNotificationRouting_P0 |
| ModelD_based_Routing | SCP_ModelD_Routing_P0 |
| Notification_Patch_Profile_Support_SMF | SCP_NotificationRequest_PatchProfileSupport_SMF_P0 |
| SCP_Oauth2_Access_Token_Granularity_Config_API_P0 | SCP_Oauth2Support_AccessTokenGranularity_API_P0 |
| SCP_Oauth2_Support_Alternative_Config_ModelD_SMF_NRF_P0 | SCP_Oauth2Support_AlternativeConfigModelD_SMFandNRF_P0 |
| SCP_Oauth2_Granularity_config_ModelD_SMF_NRF_P0 | SCP_Oauth2Support_GranularityConfigModelD_SMFandNRF_P0 |
| SCP_Oauth2_Local-PLMN-required-config_API_P0 | SCP_Oauth2Support_LocalPLMNRequiredConfig_API_P0 |
| SCP_OAuth2_support_ModelC_CHF_P0 | SCP_Oauth2Support_ModelC_CHF_P0 |
| Scp_Oauth2_Support_ModelC_SMF_NRF_P0 | SCP_Oauth2Support_ModelC_SMFandNRF_P0 |
| SCP_OAuth2_Support_Config_API_P0 | SCP_OAuth2Support_ConfigAPI_P0 |
| SCP_Oauth2_Support_ModelC_Error_Handling_CHF_NRF_P1 | SCP_Oauth2Support_ModelCErrorHandling_CHFandNRF_P1 |
| SCP_Oauth2_Support_ModelD_SMF_NRF_P0_P1 | SCP_Oauth2Support_ModelD_SMFandNRF_P1 |
| SCP_Oauth2_Support_ModelD_interSCP_P0 | SCP_Oauth2Support_ModelDinterSCP_P0 |
| SCP_Oauth2_NRF_Configuration_Config_API_P0 | SCP_Oauth2Support_NRFConfiguration_API_P0 |
| SCP_Observability_And_Inter_Microservice_Resilience_P0 | SCP_ObservabilityAndInterMicroserviceResilience_P0 |
| SCP_OutlierDetection_API | SCP_OutlierDetection_API_P0 |
| OutlierDetectionInterSCP_P0 | SCP_OutlierDetection_InterSCP_P0 |
| OutlierDetectionProducer_AUSF_P0 | SCP_OutlierDetection_ProducerAUSF_P0 |
| PseudoHeadersModification | SCP_PseudoHeadersModification_P0 |
| PseudoHeadersModificationHttps | SCP_PseudoHeadersModification_HTTPS_P0 |
| NRF_Registration | SCP_RegistrationWithNRF_P0 |
| SCP_Registration_With_PLMNList | SCP_RegistrationWithNRF_PLMNList_P0 |
| Scp_profile_mateScpInfo_update | SCP_RegistrationWithNRF_ProfileMateSCPInfoUpdate_P0 |
| Rel16_Canary_support_PCF_Cases | SCP_Rel16CanarySupport_PCF_P0 |
| Rel16_Canary_support_SMF_Cases | SCP_Rel16CanarySupport_SMF_P0 |
| Rel16_Canary_support_UDM_Cases | SCP_Rel16CanarySupport_UDM_P0 |
| Re_routing_based_on_configurable_http_status_codes_api_validation_p0 | SCP_ReroutingBasedonConfigurableHttpStatusCodes_API_P0 |
| Re_routing_based_on_configurable_http_status_codes_p0 | SCP_ReRoutingBasedOnConfigurableHttpStatusCodes_P0 |
| SCP_Ro_Enhancments_For_CB_CC_SMF_P0 | SCP_RoutingOptionEnhancements_CBAndCongestionControl_SMF_P0 |
| SCP_Ro_Enhancments_For_CB_CC_InterSCP_InterPLMN_SMF_PCF_P0 | SCP_RoutingOptionEnhancements_CBAndCongestionControlForInterPLMNandSCPRouting_SMFandPCF_P0 |
| SCP_Ro_Enahancment_For_CC_CB_Notification_PCF_P0 | SCP_RoutingOptionEnhancements_CBAndCongestionControlForNotificationReq_PCF_P0 |
| SCP_Notification_Routing_Option_Config_API | SCP_RoutingOptionForNotificationReq_API_P0 |
| SCP_Routing_Option_Set_API | SCP_RoutingOptionForNotificationReq_RoutingConfigSet_API_P0 |
| Routing_Rules_API_R16 | SCP_RoutingRules_R16_API_P0 |
| Sbi_Message_Priority_Config_API | SCP_SBImessagePriority_ConfigAPI_P0 |
| SbiMessagePriority | CP_SBImessagePriority_P0 |
| SCP_Features_API | SCP_SCPFeatures_API_P0 |
| SCP_Generated_Error_Codes_SMF | SCPGeneratedErrorCodes_SMF_P0 |
| SCP_Generated_Error_Codes_UDM | SCP_SCPGeneratedErrorCodes_UDM_P0 |
| NRF_Subscription | SCP_Subscription_SubscriptionWithNRFforNfTypeUDM_P0 |
| Configurataion_Support_For_NEF_services_NEF_P1 | SCP_SupportForNEFservices_Configuration_APIs_P1 |
| Support_For_NEF_services_NEF_Enhanced_NF_Status_P0 | SCP_SupportForNEFservices_EnhancedSuspendedStateRouting_P0 |
| Support_For_NEF_services_NEF_SEPP_P0 | SCP_SupportForNEFservices_InterPLMNRouting_P0 |
| Support_For_NEF_services_NEF_P0 | SCP_SupportForNEFservices_NEF_P0 |
| Support_For_NEF_services_NEF_NRF_SCP_p0 | SCP_SupportForNEFservices_NRF_P0 |
| Traffic_Feed_REST_API | SCP_TrafficFeed_API_P0 |
| TrafficFeed_CB | SCP_TrafficFeed_CB_P0 |
| TrafficFeed_Notification | SCP_TrafficFeed_NotificationRequest_P0 |
| TrafficFeed_PCF | SCP_TrafficFeed_PCF_P0 |
| TrafficFeed_UDM | SCP_TrafficFeed_UDM_P0 |
| Consumer_Info_API | SCP_UserAgent_ConsumerInfo_API_P0 |
| Scp_User_Agent_Info_API | SCP_UserAgent_Info_API_P0 |
| Worker_Pod_Overload_Action_Policy_Config_API | SCP_WorkerPodOverLoadControl_ActionPolicy_API_P0 |
| CPUOverloadCtrlByNoAction | SCP_WorkerPodOverLoadControl_CPUbasedNoAction_P0 |
| Worker_Pod_Overload_Ctrl_Policy_Config_API | SCP_WorkerPodOverLoadControl_CtrlPolicy_API_P0 |
| Worker_Pod_Overload_Discard_Policy_Config_API | SCP_WorkerPodOverLoadControl_DiscardPolicy_API_P0 |
| Worker_Traffic_Pod_Overload_P0 | SCP_WorkerPodOverLoadControl_PendingTransaction_P0 |
| Worker_Traffic_Pod_Overload_P1 | SCP_WorkerPodOverLoadControl_PendingTransaction_P1 |
| API_Worker_Pod_Pending_Transaction_Overload_Config_P0.feature | SCP_WorkerPodOverLoadControl_PendingTransactionConfig_API_P0 |
| SCP_1_12_0_Bug_Fixes | SCP_1_12_0_BugFixes_P0 |
| SCP_1.9.0_Bug_Fixes_SMF | SCP_1.9.0_BugFixes_SMF_P0 |
| SCP_1.9.0_Bug_Fixes_UDR | SCP_1.9.0_BugFixes_UDR_P0 |
| SCP_22.2.0_Bug_Fixes_PCF_Cases | SCP_22.2.0_BugFixes_PCF_P0 |
| SCP_22.2.0_Bug_Fixes_UDM_Cases | SCP_22.2.0_BugFixes_UDM_P0 |
| SCP_22.3.0_Bug_Fixes | SCP_22.3.0_BugFixes_P0 |
| SCP_22.3.1_Bug_Fixes | SCP_22.3.1_BugFixes_P0 |
| 22.4.0_Bug_Fixes | SCP_22.4.0_BugFixes_P0 |
| 22.4.0_Bug_Fixes_Mediation | SCP_22.4.0_Bug_Fixes_Mediation |
| 22.4.4_Bug_Fixes | SCP_22.4.4_BugFixes_PCF_P0 |
| 23.1.0_Bug_Fixes | SCP_23.1.0_BugFixes_P0 |
| 23.2.0_Bug_Fixes_HTTPS | SCP_23.2.0_BugFixes_HTTPS_P0 |
| 23.2.0_Bug_Fixes | SCP_23.2.0_BugFixes_P0 |
Table 4-3 ATS Regression Feature Tests
| Feature Test Name before Spliting | Feature Test Name after Spliting |
|---|---|
| SCP_SupportForNEFservices_EnhancedSuspendedStateRouting_P0 |
|
| SCP_RoutingOptionEnhancments_CBAndCongestionControl_SMF_P0 |
|
| SCP_OutlierDetection_AUSF_P0 |
|
| SCP_Oauth2Support_GranularityConfigModelD_SMFandNRF_P0 |
|
| SCP_ModelC_NFInstance_NEF_P0 |
|
| SCP_LCIsupport_Miscellaneous_P0 |
|
| SCP_EgressHostPreference_InterSCPRoutingNonASM_CHF_P0 |
|
| SCP_DNSSRV_ModelCHeaders_PCF_P0 |
|
| SCP_AlternateRoutingUsingStaticConfig_SMF_P0 |
|
| SCP_22.3.0_BugFixes_P0 |
|
4.5 Running Policy Test Cases using ATS
This section describes how to run CNC Policy test cases using ATS.
- Converged Policy
- PCF only for both TLS enabled (server side) and disabled mode
- PCRF only
Note:
Restart the NRF-client pod of CNC Policy for UDR and CHF discovery as part of each test case.4.5.1 Prerequisites
PCF only deployment
To run CNC Policy test cases in PCF mode, ensure that the following prerequisites are met:
- Deploy CNC Policy 25.2.201 with default helm configurations using helm charts to run all test cases. The ATS version must be compatible with CNC Policy 25.2.201. For more information on how to install CNC Policy, see Oracle Communications Cloud Native Core Policy Installation, Upgrade and Fault Recovery Guide.
- For running ATS features for optional services such as LDAP, Notifier, and Usage Monitoring, ensure that the respective service is enabled on CNC Policy. If this service is not enabled, the test case for this feature will fail.
- For running SOAP notification service, ensure that the SOAP connector service is enabled on CNC Policy. If this service is not enabled, the test case for this feature will fail.
- For running ATS features, ensure to update the
following mandatory parameters in ocpcf_custom_values_25.2.201.yaml file only when you are not using the minimal custom values.yaml
file.
logging:
  burst:
    rate: 500
    max: 3000
    onMismatch: DENY
    logLevel: DEBUG
Note:
Please ensure that you use the latest version of the Custom Values file when installing Policy initially. - For using Controlled Shutdown feature, ensure that
enableControlledShutdownparameter is enabled on CNC Policy. If this parameter is not enabled, the test case for this feature will fail. - Install
py-stub,ocamf-stub,ocdns-bind stub, andoc-ldap stubfor Converged Policy and PCF deployment modes. - Ensure there is a single pod for each microservice in the CNC Policy deployment for ATS Prometheus metrics validation to work.
- Users can add new test cases, remove unwanted test cases, and modify existing test cases in the custom test case folders (cust_newfeatures, cust_regression, and cust_performance). It does not impact the original test cases packaged with the product under newfeatures, regression, and performance folders. For more details about custom test case folders, see Custom Folder Implementation.
- The ATS prometheus metrics validation works only
when:
- the metrics suffixes are not configured
- installation has a single pod for each microservice in the BSF deployment
- For PRE and Policy_addition timer, Update PRE deployment to reduce
the value of POLLING_INTERVAL from 10s to 5s and POLLING_INTERVAL_POLICYTABLE
from 30s to 10s.
Figure 4-43 PRE and Policy_addition timer
 Run the following command to reduce the value of polling deployment:
[cloud-user@platform-bastion-1 ~]$ kubectl edit deploy ocpcf-ocpm-pre -n ocpcf - The following deployment is displayed:
Figure 4-44 POLLING_INTERVAL and POLLING_INTERVAL_POLICYTABLE Deployment

Note:
The value of POLLING_INTERVAL can be updated to 5000 and POLLING_INTERVAL_POLICYTABLE to 10000 if it is not updated.For the policy_additon timer, the following changes have been made in the config.xml file for NewFeatures, Performance, and Regression.
Figure 4-45 Policy Addition Timer
 For every SUT, change the of value of -n from 15 to 7, as follows:
Figure 4-46 Change in SUT Value

- In the
application-configconfigmap, configure the following parameters with the respective values:- Set the value of
primaryNrfApiRootasprimaryNrfApiRoot=nf1stub.<namespace_pystubs_are_deployed_in>.svc:8080.For example:
primaryNrfApiRoot=nf1stub.ocats.svc:8080
- Remove
secondaryNrfApiRoot.For example:
secondaryNrfApiRoot=nf1stub.ocats.svc:8080 - Set the value of
nrfClientSubscribeTypestoUDR,CHF,NWDAF. - Remove
supportedDataSetId.For example:
supportedDataSetId=POLICYNote:
These values can also be configured during Policy deployment.
Run the following command to get all configmaps in your namespace:
kubectl get configmaps -n <Policy_namespace> - Set the value of
retryAfterTimeequal toPT30S.
- Set the value of
- Before running Policy test cases using ATS, restart
nrf-client-nfdiscoveryandnrf-client-nfmanagementpods. - Edit the Alternate Route Service deployment pointing towards DNS
Stub.
- Run the following command to get searches information from
dns-bind pod to enable communication between Alternate Route and
dns-bind
service:
The following output is displayed after running the command:kubectl exec -it <dns-bind pod> -n <NAMESPACE> -- /bin/bash -c 'cat /etc/resolv.conf' | grep search | tr ' ' '\n' | grep -v 'search'By default alternate service will point to CoreDNS and you will see following settings in deployment file:Figure 4-47 Sample Output

Figure 4-48 Alternate Route Service Deployment File

- Run the following command to edit the deployment file and
add the following content in alternate service to query DNS
stub:
$kubectl edit deployment ocpcf-occnp-alternate-route -n ocpcf- Add the IP Address of the nameserver that you have recorded after installing the DNS stub (cluster IP Address of DNS Stub).
- Add the search information one by one which you recorded earlier.
- Set
dnsPolicyto "None".dnsConfig: nameservers: - 10.233.33.169 // cluster IP of DNS Stub searches: - ocpcf.svc.occne15-ocpcf-ats - svc.occne15-ocpcf-ats - occne15-ocpcf-ats dnsPolicy: None
Figure 4-49 Example

- Run the following command to get searches information from
dns-bind pod to enable communication between Alternate Route and
dns-bind
service:
PCRF only deployment
To run CNC Policy test cases in PCRF mode, ensure that the following prerequisites are met:
-
Run the following command to set the log level to Debug in Diam-GW statefulset:
kubectl edit statefulset <diam-gw statefulset name> -n <namespace>name: LOGGING_LEVEL_APP
value: DEBUG
- Set the peer Configuration using configuration map for backend peers.
Edit and set the default configuration of Diameter peer in the diam configuration map and set
responseOnlyflag to true.kubectl edit cm oc-diam-gateway-config-peers -n <namespace>nodes: - name: 'ocpcf-occnp-pcrf-core' type: 'pcrf' responseOnly: true host: ocpcf-occnp-pcrf-core-headless port: 3868 realm: '' identity: ''
Converged mode deployment
To run CNC Policy test cases in Converged mode, ensure that the following prerequisites are also met:
- Deploy CNC Policy 25.2.201 with default helm configurations using helm charts to run all test cases. The ATS version must be compatible with CNC Policy 25.2.201. For more information on how to install CNC Policy, see Oracle Native Core, Converged Policy Installation, Upgrade, and Fault Recovery Guide.
- For running ATS features for optional services such as LDAP, Notifier, and Usage Monitoring, ensure that the respective service is enabled on CNC Policy.
- Install Prometheus server in cluster.
- Database cluster should be in a running state with all the required tables. Ensure there are no previous entries in database before executing test cases.
- Deploy ATS in the same namespace as Policy using Helm Charts.
- User must not initiate a job in two different pipelines at the same time.
- The installation should have only one pod for each microservice related to ATS Prometheus Metrics validation to work in the CNC Policy deployment.
- If Service Mesh check is enabled, apply the below settings:
For fetching the metrics from the Prometheus, create a destination rule. In most deployments, Prometheus is kept outside of the service mesh. Hence, a destination rule is required to communicate between TLS enabled entity (ATS) and non-TLS entity (Prometheus). Created the rule as follows:
kubectl apply -f - <<EOF apiVersion:networking.istio.io/v1alpha3 kind:DestinationRule metadata: name:prometheus-dr namespace:ocats spec: host:oso-prometheus-server.pcf.svc.cluster.local trafficPolicy: tls: mode:DISABLE EOF Here, 1.) name,indicates the name of destination rule. 2.) namespace,indicates where the ATS is deployed. 3.) host,this indicates the hostname of the prometheus server. - For running ATS features for Model D Indirect Communication Model,
ensure that the custom values yaml of CNC Policy has the following parameters with
the specified values:
routeConfigMode: REST configureDefaultRoute: true - Update the
occnp-servicemesh-config-custom-values-25.2.201.yamlof CNC Policy with the following virtualService configuration for Egress Gateway:virtualService: # - name: nrfvirtual1 # host: ocpcf-occnp-egress-gateway # destinationhost: ocpcf-occnp-egress-gateway # port: 8000 # exportTo: |- # [ "." ] # attempts: "0" - Restart the ocpm-ldap-gateway pod manually before running the LDAP-specific ATS test cases.
-
To ensure the consistent functioning of ATS related to the audit service, modify the audit deployment by reducing the value of AUDIT_NOTIFY_SCHEDULER_POLLING_INTERVAL_MILLISEC from 30000 to 1000 (changing from 30 seconds to 1 second).
$ kubectl get deploy -n ocpcf | grep 'audit' ocpcf-ocpm-audit-service 1/1 1 1 10h$ kubectl edit deploy ocpcf-ocpm-audit-service -n ocpcfThe deployment will open. Scroll down until below fields are seen.
- name: AUDIT_NOTIFY_SCHEDULER_POLLING_INTERVAL_MILLISEC value: "30000"Update the value of AUDIT_NOTIFY_SCHEDULER_POLLING_INTERVAL_MILLISEC to 1000 if it isn't already.
Note:
In order to run stage2 or stage3 cases using configuration_type of custom_config, replace the "data" folder with "cust_data" folder in stage<x>.txt under /var/lib/jenkins/ocpcf_tests/cust_data/common/stage_hooks/stage<x>. directory.Application Config map changes for Policy registrations over TLS
- NRF port from 8080 to 8443
- nrfScheme to https
apiVersion: v1
data:
  profile: |-
    [appcfg]
    primaryNrfApiRoot=nf1stub.ocats.svc:8443
    nrfScheme=https
Note:
In the config map of application-config, delete the lines which has supportedDataSetId or secondaryNrfApiRoot strings.
4.5.2 Logging into ATS
Before logging into ATS GUI, it is important to get the nodeport of the service, 'ocats-policy'.
kubectl get svc -n <Policy_namespace>kubectl get svc -n ocpcfocats-ocats-pcf LoadBalancer 10.233.56.56 10.75.225.49 8080:31944/TCP 19hhttp://<Worker-Node-IP>:<Node-Port-of-ATS>
If the ocats-policy Service has an external IP available, <SVC external IP> can also be used to log in to ATS.
http://<SVC external IP>:8080
Example: http://10.75.225.49:8080
Running ATS
To run ATS test cases, perform the following steps:
- Enter the username as policyuser and password as policypasswd.
- Click Sign
in.
Note:
To modify default login password, see Modifying Login Password.The description of each pipeline is as follows:Figure 4-50 Pre-configured Pipelines

- Policy-HealthCheck: This pipeline checks if CNC Policy and ATS are deployed correctly. This shows only when the user has enabled this feature at the time of installing CNC Policy ATS.
- Policy-NewFeatures: This pipeline has all the new test cases delivered for CNC Policy 25.2.201.
- Policy-Regression: This pipeline has all the test cases delivered in Policy ATS - 25.2.100.
- Policy-Performance: This pipeline is not operational as of now. It is reserved for future releases of ATS.
4.5.3 Running Policy-NewFeatures Pipeline
Policy-New Features Pipeline
This is a pre-configured pipeline where all the Policy new test cases are executed.
Note:
Configuring the parameters is a one-time activity.- Click Policy-NewFeatures in the Name column.
- Click Configure in the left navigation pane.
- When you scroll-down, the General tab becomes active. Be sure that the screen loads completely.
- (Optional) If you want to retain a specified number of builds
in the persistent volume, select the check box for Discard old
Builds. It is recommended to configure this option;
otherwise, Persistent Volume may fail when the builds are exceedingly
high.
Enter values for the following parameters:
- Days to keep builds: Specifies the number of days for which build records are stored.
- Max # of builds to keep: Specifies the number of build records to store.
- Continue scrolling down until the
Pipeline tab becomes active. The following is a
screen capture that shows the Pipeline script:
Figure 4-51 Policy New Pipeline Configuration

- In the Script area under the
Pipeline section, users may customize the values for the following
parameters:
Attention:
Do not modify values of parameters other than the ones described in this section.- a: Name of the NF to be tested in capital (PCF).
- b: Change this parameter to update the namespace where Policy is deployed in your bastion.
- c: Name of Prometheus service namespace (occne-prometheus-server)
- d: Change this parameter to update the namespace where gostubs are deployed in your bastion.
- e: Set this parameter as 'unsecure', if you intend to run ATS in TLS disabled mode. Else, set this parameter as 'secure'.
- g: Set this parameter to more than 45 secs. The default wait time for the pod is 45 secs. Every TC requires restart of the nrf-client-management pod.
- h: Set this parameter to more than 60 secs. The default wait time to add a configured policy to the database is 60 secs.
- i: Set this parameter to more than 140 secs. The default wait time for Nf_Notification Test Cases is given as 140 secs.
- k: Use this parameter to set the waiting time to initialize Test Suite.
- l: Use this parameter to set the waiting time to get response from Stub.
- m: Use this parameter to set the waiting time after adding Policy Configuration.
- n: Use this parameter to set the waiting time after adding Policy.
- o: Use this parameter to set the waiting time before sending next message.
- p: Use this parameter to set Prometheus Server IP.
- q: Use this parameter to set Prometheus Server
Port.
Note:
If PrometheusAuthEnabled is set to true during ATS installation, then set p and q accordingly. - r: Use this parameter to set the interval after which the POD status is checked when it is down.
- s: Use this parameter to set number of retry attempt in which will check the pod down status
- t: Use this parameter to set the interval after which we check the POD status if its UP.
- u: Use this parameter to set number of retry attempt in which will check the pod up status.
- v: Use this parameter to set Wait time to connect to Elastic Search
- w: Use this parameter to set Elastic Search HostName
- x: Use this parameter to set Elastic Search Port
- y: Use this parameter to set To Enable/Disable Stub logs collection
- z: Use this parameter to set Log collection endpoint either Elasticsearch or Kubernetes
- A: Use this parameter to enable or disable snapshots that are created at the start and restored at the end of each test run
- B: Use this parameter for timer to wait for importing service configurations. Setting value to 0 triggers polling mechanism and a non-zero value will cause a static wait
- C: Use this parameter to set PCF_API_ROOT information for Ingress gateway service name and port.
- D: Use this parameter to set bulk_import_to_complete to add custom time in Jenkins post bulk imports.
- E: Use this parameterto configure TLS_VERSION to define the supported TLS version (1.2 or 1.3).
(Optional)To collect application logs per failed scenario, user can configure the values for the following parameter:- z: If you want log collection to happen
through Elastic search, set the value for this parameter as
Elasticsearch. If not, specify the
value as Kubernetes.
If you want to collect logs Elastic search, it is required to configure the values for the following parameters:
- v: Specifies the wait time to
connect to Elastic search
(
ELK_WAIT_TIME). - w: Specifies the host name of Elastic
search (
ELK_HOST). For example,occne-elastic-elasticsearch-master.occne-infra/ - x: Specifies the port for Elastic
search (
ELK_PORT). For example, 9200.
- v: Specifies the wait time to
connect to Elastic search
(
- y: If you want to collect stub logs, set the value for this parameter as yes. If not, specify the value as no.
- A: To enable or disable snapshots that are created at the start and restored at the end of each test run.
- Click Save to update the values. The Policy_NewFeatures
Pipeline page appears.
Note:
It is recommended to save the pipeline script in your local machine as it is needed at the time of ATS pod restart.
Extracting Application Logs
- Log in to the ATS
pod:
kubectl exec -it pod/occnp1-ocats-ocats-policy-xxxxxxxx -n ocpcf bash - Go to build
directory:
cd $JENKINS_HOME/jobs/$JOB_NAME/builds/$BUILD_NUMBER/For example:
cd /var/lib/jenkins/.jenkins/jobs/Policy-Regression/builds/1 - Extract the
applogs.zipfile:unzip applogs.zip - After successfully unzipping the file, open the
applogfolder to view pod logs for failed scenarios:(env) [jenkins@gapcf-ocats-ocats-policy-6df5cd84c-c6cm4 applog]$ pwd /var/lib/jenkins/.jenkins/jobs/Policy-Regression/builds/3/applog (env) [jenkins@gapcf-ocats-ocats-policy-6df5cd84c-c6cm4 applog]$ ls -ltrh total 1.4M -rw-r--r--. 1 jenkins jenkins 461K Sep 1 14:49 Initial_Run-Send_Npcf_SMPolicyControl_Create_request_message_to_PCF_and_verify_the_praInfos_structure_is_downloaded_in_the_response_message_to_SMF_also_check_requests_total_metric_incremented_in_the_PCF.log -rw-r--r--. 1 jenkins jenkins 459K Sep 1 14:49 1st_Rerun-Send_Npcf_SMPolicyControl_Create_request_message_to_PCF_and_verify_the_praInfos_structure_is_downloaded_in_the_response_message_to_SMF_also_check_requests_total_metric_incremented_in_the_PCF.log -rw-r--r--. 1 jenkins jenkins 459K Sep 1 14:49 2nd_Rerun-Send_Npcf_SMPolicyControl_Create_request_message_to_PCF_and_verify_the_praInfos_structure_is_downloaded_in_the_response_message_to_SMF_also_check_requests_total_metric_incremented_in_the_PCF.log
Running Policy Test Cases
- Click the Build with Parameters link available in the
left navigation pane of the Policy-NewFeatures
Pipeline screen. The following screen appears.
Figure 4-52 Pipeline Policy-NewFeatures

-
Select any of following valid values from the drop-down for SUT:
- PCF
- cnPCRF
- Converged Policy
-
Select any of following valid values from the drop-down for Configuration_Type:
- Product_Config: On selecting this option, test cases from product folders are populated on ATS UI and product configuration is applied to them via the key-value pair and yaml files defined or present in the "Product Config" folder.
- Custom_Config: On selecting this option, test
cases from custom folders are populated on ATS UI and custom
configuration is applied to them via the key-value pair and yaml
files defined or present in the "Custom Config" folder.
To use the parameterization feature, always select the Custom_Config option. User can copy, add, or delete the required test cases that are available for the Converged Policy, PCF or PCRF and place them appropriately within the custom folder for Policy-NewFeatures. Reload the page to view the test cases available in the custom NewFeatures folder.
For more information, see Parameterized approach for SUT custom configuration.
-
For the Select_Option field, select any of the following drop-down values:
- All: By default, all the Policy test cases are selected for execution.
- Single/MultipleFeatures: This option allows you to select any number of test cases you want to run from the list of total test cases. Select the check-box for each feature you want to run.
Based on your selection, related Test Cases appear on the page.
- To collect logs for any given build, select YES from the drop-down menu of Fetch_Log_Upon_Failure.
-
Click Build and select Console Output to view the test results. The following is a sample test result ouput:
Figure 4-53 Test Result Output in Console

Note:
For more details on consolidated test report, see Managing Final Summary Report, Build Color, and Application Log.Parameterized approach for SUT custom configuration
- Add new test cases by adding datafiles
- Remove test cases
- Modify the parameters and their values in the key-value pair or <feature>.yaml files
Cust ConfigN
where N can be any number
At the time of execution, ensure to rename the required folder to Cust Config folder as Jenkins always retrieves data from this folder when user selects Custom_Config.
To use
Custom_Config, it is required to change the value of cust_folder
from data to cust_data in global.yaml file.
In addition, you can customize the parameters and their respective values in the
global.yaml as per the requirements.
To use custom diameter identity, update the value of parameter "diam_gw_id" under global.yaml file to the one configured for "DIAMETER_Identity" under diam-gw's statefulset.
<feature>.yaml files for parameterized
feature:
- In addition to
global.yamlparameters, feature files may also contain parameters for which user can update values at the time of running pipelines. - Changing the values of parameters tagged as "Feature Specific Value" may cause failures at the time of running pipelines.
- Values for parameters tagged with #START_GLOBAL and
#END_GLOBAL tags take values from
global.yaml.
Note:
For CNC Policy-ATS release 25.2.201, parameterization is supported for PCF features only.2021-12-17 09:02:43,908[32m INFO LOG.featureHooks:14 [0m| [32mInside before_feature[0m
2021-12-17 09:02:43,908[32m INFO LOG.goldenConfig:305 [0m| [32mInside goldenConfig.py[0m
2021-12-17 09:02:43,912[31m ERROR LOG.goldenConfig:93 [0m| [31mPlease check if the key metricsEnabled is valid or if it is present under correct section[0m
2021-12-17 09:02:43,913[32m INFO LOG.goldenConfig:324 [0m| [32mExiting goldenConfig.py[0m
2021-12-17 09:02:43,913[32m INFO LOG.featureHooks:27 [0m| [32mExiting before_feature[0mThe execution continues to happen without any changes to the data files.
Config-Rollback (Snapshot Backup and Restore)
Using this feature, user can take a snapshot of initial configuration of the system, and then restore it at a later stage. On enabling this feature, a snapshot of system configurations is taken before ATS run starts and is reverted on completion of ATS job.
Queuing Jenkins Jobs
Using this feature, you can queue a second job even when current job is still running. The second job can be triggered either from the same or a different pipeline.
Table 4-4 Queuing Jenkins Jobs
| Concurrent Builds | New FeaturesCurrent Build | New FeaturesNew Build | RegressionCurrent Build | RegressionNew Build Build | Result |
|---|---|---|---|---|---|
| Enabled | Running | Triggered | NA | NA | New-Build of New-Features is added to queue. |
| Enabled | Running | NA | NA | Triggered | New-Build of Regression is added to queue. |
| Disabled | NA | NA | Running | Triggered | New-Build of Regression is added to queue. |
| Disabled | NA | Triggered | Running | NA | New-Build of New-Features is added to queue. |
Test Result Analyzer
Using the Test Result Analyzer plug-in, user can view consolidated and detailed reports. For more information, see Test Results Analyzer section.
Display the Count and Names of Skipped Features Whenever Skipped During a Rerun
- Till now, if a previously failed feature was skipped during a rerun, it was not listed in the Overall Result Summary.
- Starting from the 25.2.200 release, ATS will include additional details in the
Overall Result Summary by showing the count and names of any features that are
skipped during a rerun. The following screenshot depicts this scenario:
Figure 4-54 Overall Result Summary

Test Case Mapping to Features and Display Total Counts
With this feature, users can view total count of features, test cases, and TestCase mapping for each feature of CNC Policy on ATS GUI. For more information, see Support for Test Case Mapping and Count.4.5.4 Policy-NewFeatures Documentation
This section describes the documentation for Policy-NewFeatures pipeline.
To view the documentation for any of the CNC Policy features, on the ATS home page, click Policy-NewFeatures. Then, click Documentation in the left navigation pane.
Figure 4-55 Policy-NewFeatures Feature List

Figure 4-56 Feature - Consolidation_with_T3501_Expiry

Based on the features covered under Documentation, the Build Requires Parameters screen displays test cases.
To navigate back to the Policy-NewFeatures pipeline, click Back to Policy-NewFeatures link available on the top left corner of the screen.
4.5.5 Running Policy-Regression Pipeline
This section describes how to run test cases for CNC Policy Regression pipeline.
The Policy-Regression pipeline is a pre-configured pipeline where all the test cases of previous releases are available. For an example, for Policy 25.2.201, this pipeline has all the test cases released till Policy 25.2.100.
Running Policy Test Cases
- Click Policy-Regression in the Name column.
- Click the Build with Parameters link available in the
left navigation pane of the Policy-Regression
Pipeline screen. The following screen appears.
Figure 4-57 Regression Pipeline

Note:
ATS display empty list for test cases as it is referring to the custom folder for Policy-Regression pipeline. -
Select any of following valid values from the drop-down for SUT:
- PCF
- CN-PCRF
- Converged Policy
-
Select any of following valid values from the drop-down for Configuration_Type:
- Product_Config: On selecting this option, test cases from product folders are populated on ATS UI and product configuration is applied to them via the key-value pair and yaml files defined or present in the "Product Config" folder.
- Custom_Config: On selecting this option, test
cases from custom folders are populated on ATS UI and custom
configuration is applied to them via the key-value pair and yaml
files defined or present in the "Custom Config" folder.
To use the parameterization feature, always select the Custom_Config option. User can copy, add, or delete the required test cases that are available for the Converged Policy, PCF or PCRF and place them appropriately within the custom folder for Policy-NewFeatures. Reload the page to view the test cases available in the custom NewFeatures folder.
-
For the Select_Option field, select any of the following drop-down values:
- All: By default, all the Policy test cases are selected for execution.
- Single/MultipleFeatures: This option allows you to select any number of test cases you want to run from the list of total test cases. Select the check-box for each feature you want to run.
Based on your selection, related Test Cases appear on the page.
- To collect logs for any given build, select YES from the drop-down menu of Fetch_Log_Upon_Failure.
-
Click Build and select Console Output to view the test results. The following is a sample test result ouput:
Figure 4-58 Policy-Regression Console Output

Note:
The Regression pipeline does not have any sanity option. However, users must perform all the steps performed in the Policy-NewFeatures pipeline. Ensure that the pipeline script is configured according to the environment variables.
Note:
For more details on consolidated test report, see Managing Final Summary Report, Build Color, and Application Log.4.5.6 Policy-Regression Documentation
This section describes the documentation for Policy-Regression pipeline.
To view the documentation for any of the CNC Policy features, on the ATS home page, click PolicyRegression. Then, click Documentation in the left navigation pane.
Figure 4-59 Policy-Regression Feature List

Figure 4-60 FEATURE - Add_NFSetIDList

This page shows features of only those test cases that are released in previous releases.
4.5.7 Running Policy-HealthCheck Pipeline
This is a pre-configured pipeline where ATS performs a test probe with SUT. It triggers helm test & provides the results in Jenkins Console Logs.
You can run Policy-HealthCheck pipeline to check if all CNC Policy pods are up and running. If yes, it provides the status as successful. If any pod is down due to any reason, then the pipeline fails.
- Click Policy-HealthCheck in the Name column.
- Click Configure in the left navigation pane.
- When you scroll-down, the General tab becomes active. Be sure that the screen loads completely.
- Continue scrolling down until the
Pipeline tab becomes active. The following is a
screen capture that shows the Pipeline script:
Figure 4-61 Helm Test Script

- In the Script area under the
Pipeline section, users may customize the values for the following
parameters:
Attention:
Do not modify values of parameters other than the ones described in this section.- a: Change this parameter to update the helm release name where Policy is deployed in your bastion.
- b: Change this parameter to update the namespace where Policy is deployed in your bastion.
- Click Save to update the values.
Running Helm Test
To run CNC Policy test cases, click Build Now.
4.6 Running SEPP Test Cases using ATS
4.6.1 Prerequisites
To run SEPP Test Cases using SEPP ATS 25.2.200, you need to ensure that following prerequisites are fulfilled:
- Debug container should be DISABLED for all microservices during ATS runs.
- To run the ATS testcases, the user should not configure any value for apiPrefix
key in
ocsepp-custom-values.yamlfile. It should be empty. - The number of replicas of all SEPP microservices pods must be set to 1 as ATS is enabled to perform the metric validations for metrics obtained from a single pod.
- Create Kubernetes secret with certificates/keys (public and private) for both PLMN and N32 gateways before deploying SEPP.
- Deploy SEPP 25.2.200 with default helm configurations using helm charts.
- For ATS execution, deploy SEPP microservices with single replica.
- Ensure all microservices of SEPP are up and running.
- Create Kubernetes secret with certificates/keys (public and private) for ATS client and stub server microservices before deploying SEPP ATS.
- Update
ocats_ocsepp_values_25.2.200.yamlfile with the latest secrets and certificates. - Deploy ATS using helm charts.
- The user must not initiate a job in two different pipelines at the same time.
- User must not abort a running job, this may lead to data corruption in the database.
- The user needs to edit cn32f-svc and pn32f-svc deployment yaml. Set CACHE_REFRESH_TIMEOUT to 1000.
- User need to set
n32cHandshakePlmnIdListValidationEnabledto true in localProfile section ofocsepp-custom-values.yamlfile. Orn32cHandshakePlmnIdListValidationEnabledParameter can also be changed after SEPP deployment by editing cn32c-svc and pn32c-svc deployment yaml. - User needs to update the plmnIdList provided in the ATS installation guide to run the ATS testcases.
- The user needs to edit cn32f-svc and pn32f-svc deployment yaml. Set "TOPOLOGY_HIDING_CACHE_REFRESH_TIMEOUT" to 1000.
- The user needs to edit cn32f-svc and pn32f-svc deployment yaml. Set "SECURITY_CACHE_REFRESH_TIMEOUT" to 1000.
- All the features are set to disable by default. Ensure that the features must be disabled while configuring SEPP ATS.
-
The user needs to edit cn32f-svc, pn32f-svc, plmn-egress-gateway, and n32-egress-gateway deployment yaml. Set "REQUEST_TIMEOUT" to 2000.
- The user needs to edit n32-ingress-gateway deployment yaml. Set "REQUEST_TIMEOUT" to 5000.
- The user needs to edit configmap of n32-ingress-gateway. Set "requestTimeout" to 5000.
- The user needs to edit n32-ingress-gateway deployment yaml. SET "IDLE_TIMEOUT" to 5000.
- The user needs to edit pn32f-svc deployment yaml. SET "EVICT_SAN_HEADER_CACHE_DELAY" to 100.
- To run the Cat-3 testcases, user must have pre-installed coherence-svc while SEPP installation.
- For DNS SRV and SOR, plmn-egress-gateway should be deployed in REST mode.
- To run the DNS SRV testcases, user must have pre-installed alternate-route service while SEPP installation.
- To run the Load Sharing among Multiple Remote SEPP Nodes testcases, user must have pre-installed alternate-route service while SEPP installation.
- To run the Egress Rate Limiter testcases user must have enabled the
Egress Rate Limiter feature while SEPP deployment. Also set
"EgressRateLimiterFlag" to true in
ocats_ocsepp_values_<version>.yaml. - To run the Ingress Rate Limiter testcases user must have enabled
the Ingress Rate Limiter feature while SEPP deployment. Also set
"IngressRateLimiterFlag" to true in
ocats_ocsepp_values_<version>.yaml. - To run the ATS testcases, user should not configure any value for
apiPrefixkey inocsepp-custom-values.yamlfile. It should be empty. - In ASM mode, set
expose_tls_serviceparameter to false in stubserver section ofocats_ocsepp_values_<version>.yaml file. -
For Hosted SEPP, set the
HSenabledparameter to "true" in the ocats section of theocats_ocsepp_values_<version>.yamlfile. - For Hosted SEPP, set the
hostedSEPPparameter to "true" in the global section of theocsepp_custom_values.yamlfile. - For Hosted SEPP, set the
multiFqdnparameter to "true" in both the n32-ingress-gateway and n32-egress-gateway sections of theocsepp-custom-values.yamlfile. - For Hosted SEPP, set the
n32cHandshakePlmnIdListValidationEnabledparameter to "false" in the global section and the Prefix/Suffix Global Parameters subsection of theocsepp-custom-values.yamlfile. - For Hosted SEPP, set the
retryIntervalparameter to "30000" in the global section of theocsepp-custom-values.yamlfile. - For Hosted SEPP, update the certificates for hostedpartner1, hostedpartner2,
roamingpartner1, roamingpartner2, stubserver2, and stubserver3 in both the
n32-ingress-gateway and n32-egress-gateway sections of the
ocsepp-custom-values.yamlfile.
Custom Folder Implementation
ATS provides custom test case folders (cust_newfeatures, cust_regression and cust_performance) using which you can add new test cases, remove unwanted test cases and modify existing test cases. It does not impact the original product packaged test cases available in the newfeatures, regression and performance folders. For more details, refer to Custom Folder Implementation.
4.6.2 Logging into ATS
Before logging into ATS, you need to ensure that ATS is deployed successfully using Helm charts as shown below:
Note:
To modify default log in password, refer to Modifying Login Password.Figure 4-62 Pods

There are following ways to login to ATS GUI.
- When an external load balancer (metalLB in case of OCCNE) is available and an external IP Address is provided to the ATS service, login to ATS GUI using <External-IP>:8080.
- When an external IP Address is not provided to the ATS service,
open the browser and provide the external IP Address of the worker node and
nodeport of the ATS service to login to ATS GUI.
<Worker-Node-IP>:<Node-Port-of-ATS>Note:
In the Verifying ATS Deployment screen, ATS nodeport is highlighted in red as 30076. For more details on ATS deployment, refer to SEPP ATS Installation Procedure. - When ATS is installed with TLS enabled:
- If the external load balancer IP is used in the
ssl.conffile to open the ATS GUI then the URL will be"https://<IP>:<https_nodeport>". - If the external load balancer IP or worker node IP is not
present on the setup, then with the common name provided in the
ssl.conffile, the user can open the ATS GUI. The user needs to do the ssh port forwarding and then need to update the common name (CN) in theetc/hosts/file of the local machine against the localhost IP (127.0.0.1). - ATS GUI URL format:
https://127.0.0.1:<port-forwarding-port>https://<common name>:<port-forwarding-port>
- If the external load balancer IP is used in the
Open a browser and provide IP Address and port details as <Worker-Node-IP>:<NodePort-of-ATS> (As per the above example: 10.98.101.171:32013). The ATS login screen appears.
Figure 4-63 ATS Login
- Enter the username as 'seppuser' and password as 'sepppasswd'. Click Sign in. The following screen appears showing pre-configured pipelines for SEPP individually (3 Pipelines).
Figure 4-64 Pre-Configured Pipelines

- SEPP-NewFeatures: This pipeline has all the test cases that are delivered as part of SEPP ATS.
- SEPP-Regression: This pipeline has all the test cases of previous releases.
- SEPP-HealthCheck: This pipeline has the utility to run the helm test functionality.
Note:
Currently, SEPP does not have any performance pipeline.4.6.3 SEPP NewFeatures Pipeline
- Click SEPP-NewFeatures in the Name column. The following
screen appears:
Figure 4-65 SEPP-NewFeatures Pipeline
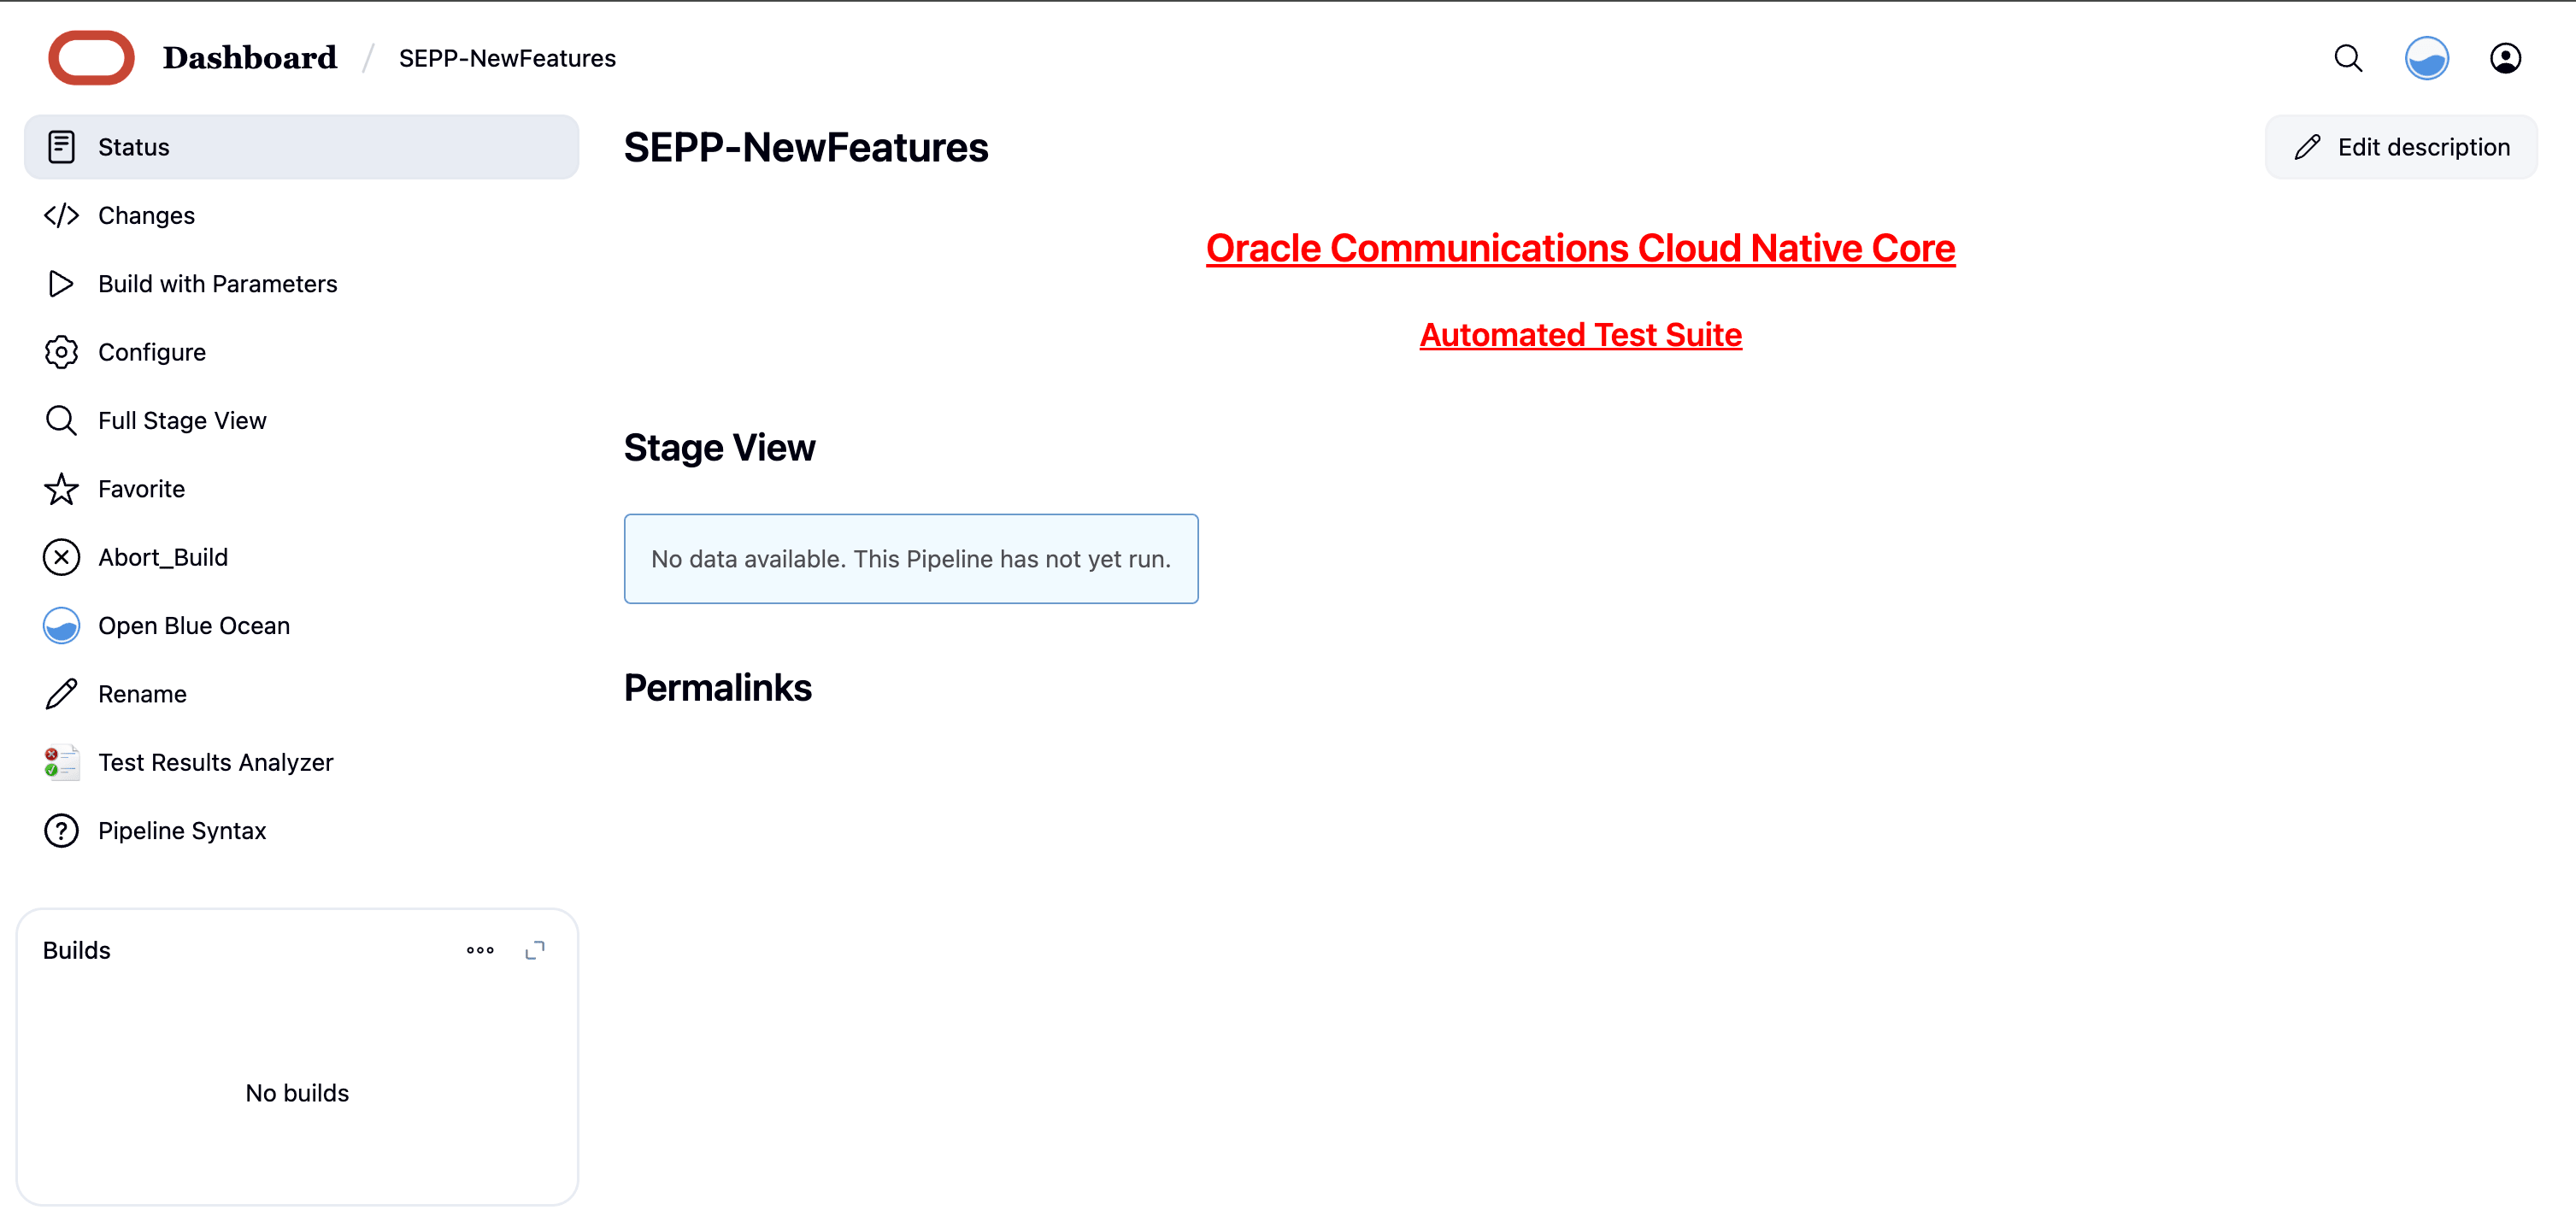 In the above screen:
- Click Configure to configure SEPP-New Features.
- Click Documentation to view the documented test cases which are part of this SEPP release.
- Click blue dots inside Build History box to view the success console logs of the "All" and "Sanity" respectively.
- The Stage View shows pipeline that is already run for the customer reference.
- Click Open Blue Ocean to view the respective group, re-run logs and the consolidated report summary.
- Click Abort_Build button to gracefully stop the currently running ATS build.
- Click Configure. Users must wait for the page to load
completely. Once the page loads completely, click the Pipeline tab to
reach the Pipeline configuration as shown below:
The Pipeline section of the configuration page appears as follows:
Figure 4-66 Pipeline script

- The user must not change any other value apart from line number 12 to line 20 and line number 26.
- User can change only those parameters that are marked as "a" to "h" as per your requirement.
- A new parameter "p" has been introduced to customize the global wait time for the scale up and scale down of pods test cases. Pods scaling time is different on different setups. Sometimes pods take longer than usual for scaling up or scaling down operations. To handle this situation you can increase the global wait time parameter as required. Recommended value is 60.
- Recommended value for rerun count is "3".
a: Name of the NF to be tested in capital (SEPP).
b: Config manager service name and namespace
c: Plmn ingress service name and namespace
d: N32 ingress service name and namespace
e: Stub server service name and namespace
f: SEPP Instance ID configured
g: Prometheus hostname and namespace
h: Prometheus port
i: Prometheus API endpoint
j: Re run count
k: ELK wait time before logs are fetched
l: ELK hostname and namespace
m: ELK port
n: Stub log collection enable
o: Type of log collection method ( kubernetes/Elasticsearch)
p: GLOBAL WAIT TIME
Note:
Do not change any value if OCCNE cluster is used and SEPP, ATS and STUB are deployed in ocsepp namespace.- Click Save after making necessary changes. The Pipeline SEPP-NewFeatures screen appears.
Running SEPP Test Cases
- Click the Schedule a Build with parameters icon present
on the SEPP-NewFeatures screen in the extreme right column corresponding to
SEPP-NewFeatures row. The following screen appears:
Figure 4-67 SEPP-NewFeatures
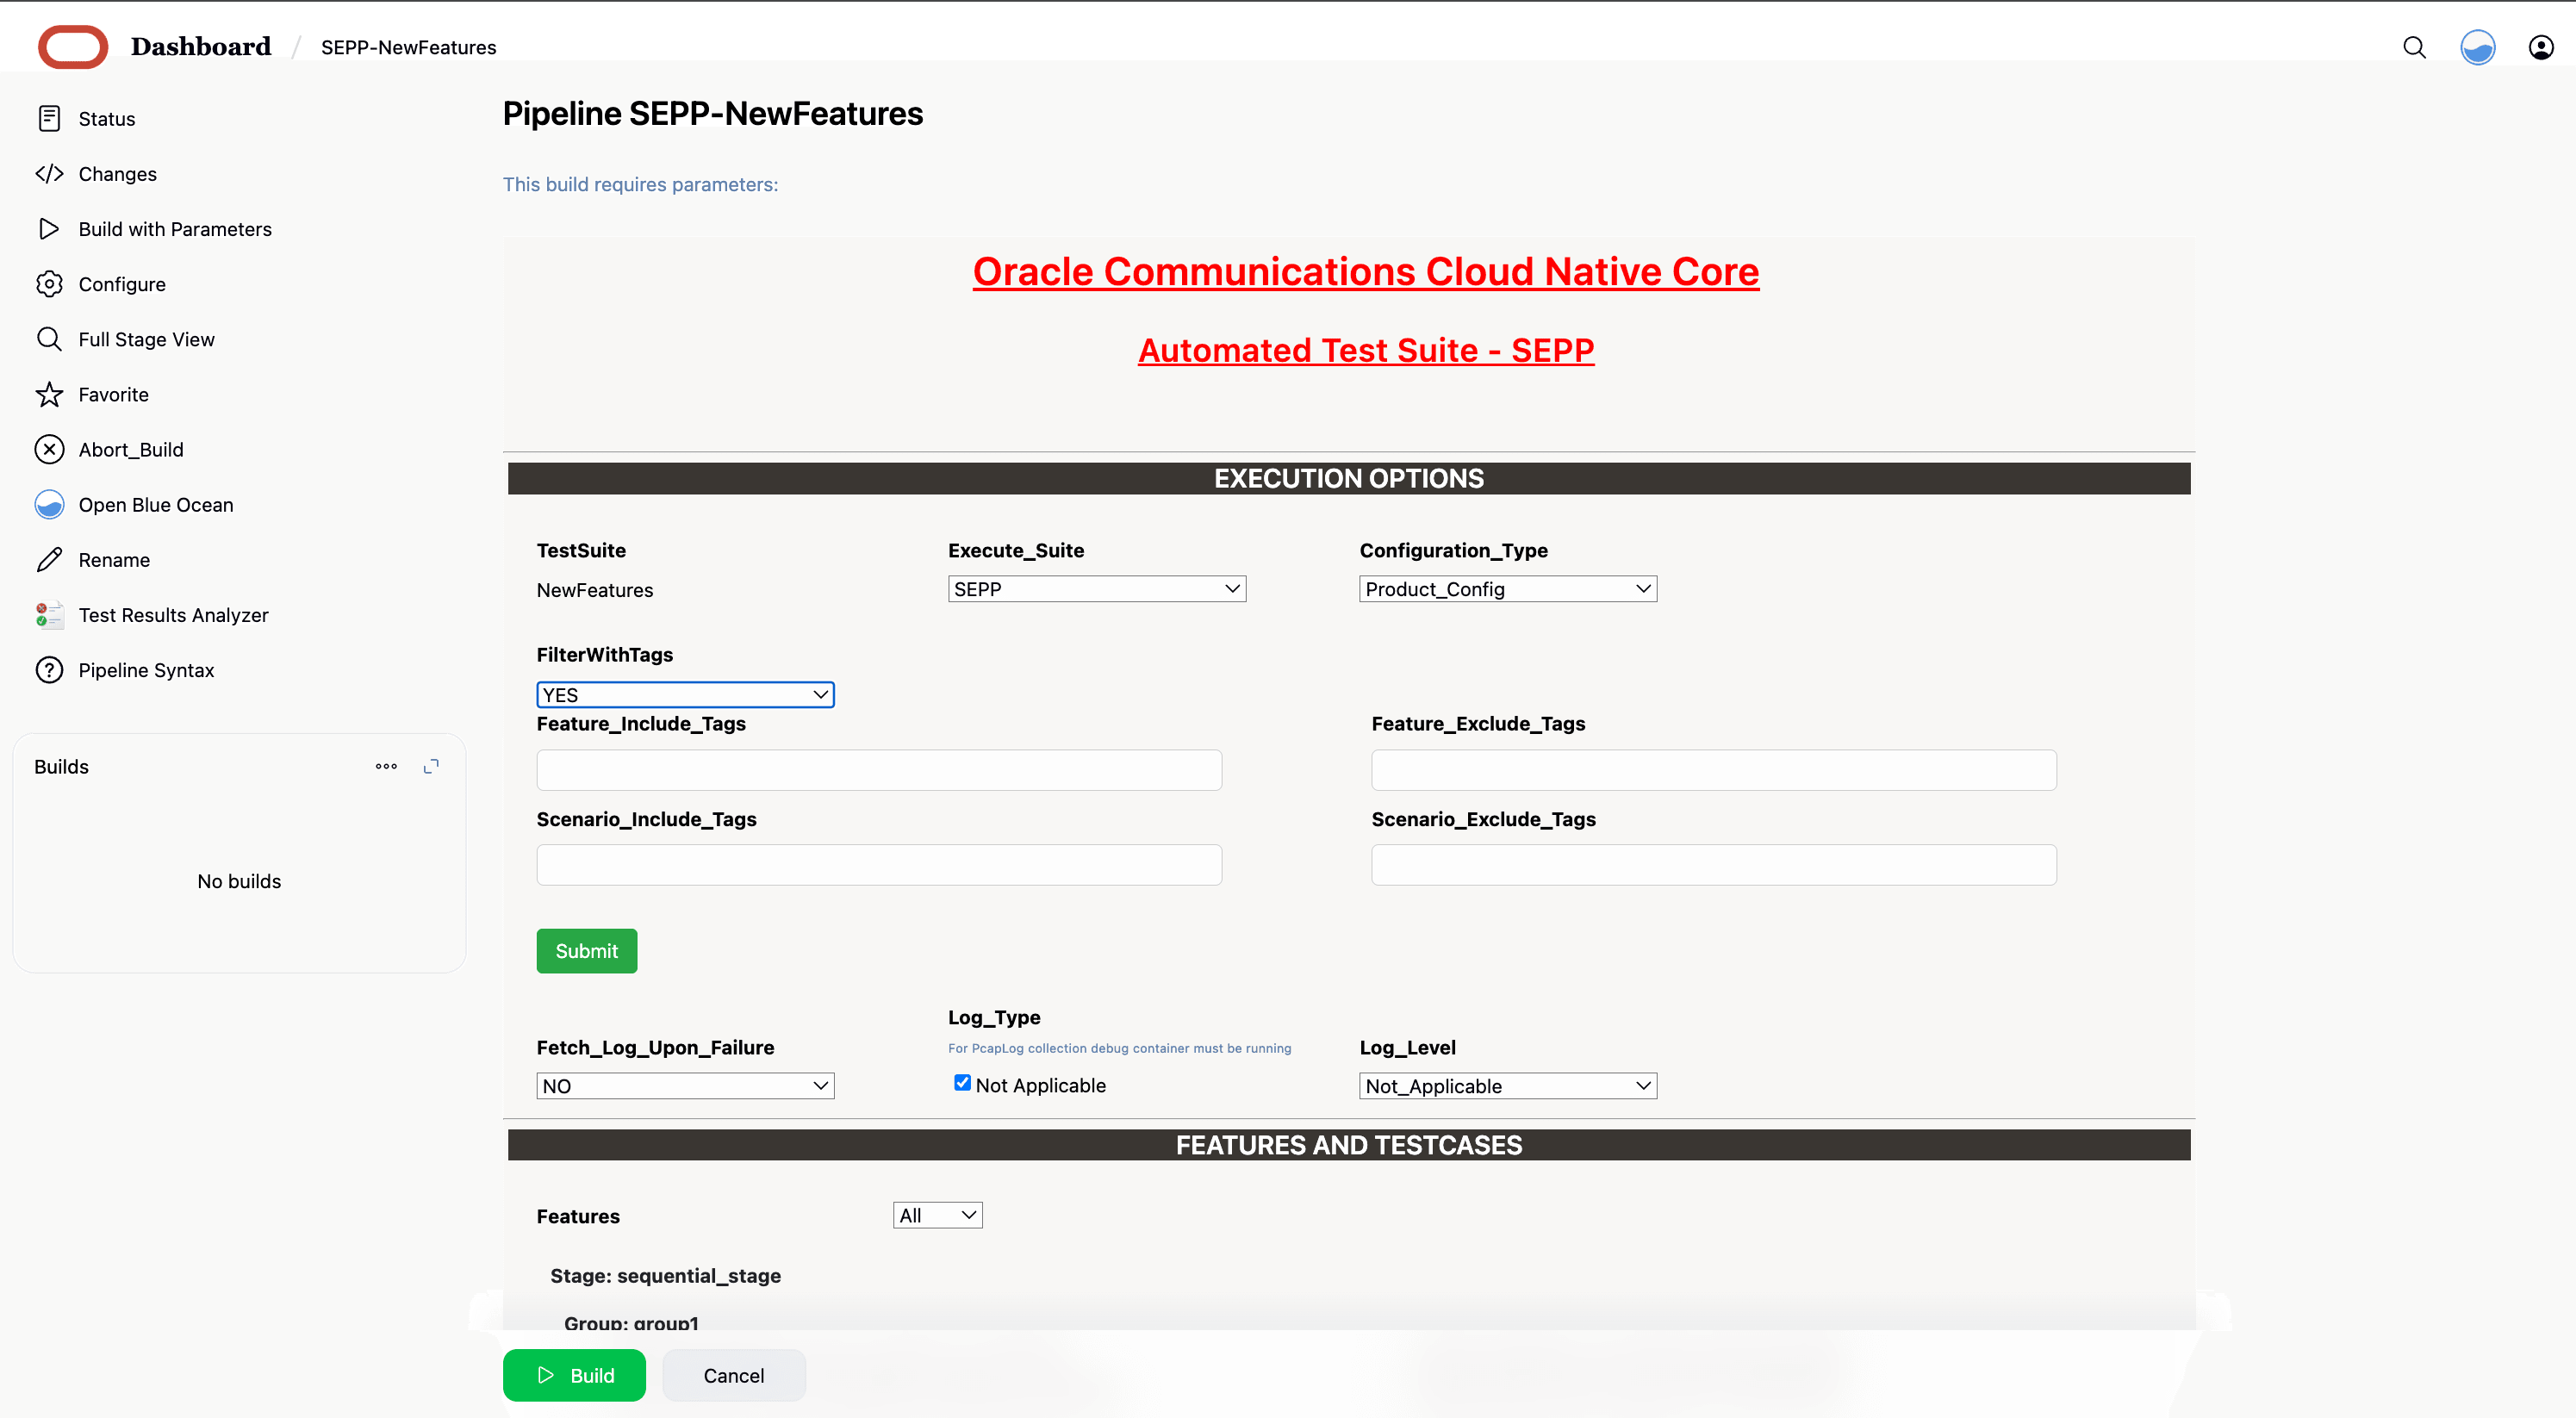
- In the above screen, there is an option Execute_Suite to select SEPP, Roaming_Hub, or Hosted SEPP. If you have deployed SUT as SEPP, select SEPP option and if you have deployed SUT as Roaming_Hub, select Roaming_Hub option.
- In the above screen, there is an option Configuration_Type to select product/custom configuration.
- In the above screen, there are three Select_Option(s),
which are:
- All: This is the default option. It runs all the SEPP test cases. Scroll-down and click Build to run all the test cases.
- Sanity: It is recommended to run Sanity before running any test case. It ensures all the deployments are done properly.
- Single/Multiple Feature: This option allows you to select any number of test cases you want to run from total number of test cases available for execution. After selecting the test cases, scroll-down and click Build to run the selected SEPP test cases.
- In the above screen, When FilterWithTags option is selected as
Yes, GUI offers the following four options, select the required
tags from the different tags list and click Submit.
- Feature_Include_Tags: The features that contain either of the tags available in the Feature_Include_Tags field are considered for tagging.
- Feature_Exclude_Tags: The features that contain neither of the tags available in the Feature_Exclude_Tags field are considered for tagging.
- Scenario_Include_Tags: The scenarios that contain either of the tags available in the Scenario_Include_Tags field are considered.
- Scenario_Exclude_Tags: The features that contain neither of the tags available in the Scenario_Exclude_Tags field are considered.
- Click Abort_Build button to gracefully stop the currently running ATS build.
- Click Build to execute the ATS run.
4.6.3.1 Single Click Job Creation for SEPP New Features
Perform the following steps to create the custom pipeline for the new features:
- Log in to ATS using network function specific log-in credentials.
- Click New Item in the left navigation pane of
the ATS application. The following page appears:
Figure 4-68 New Item Window

- In the Enter an item name text box, enter the job name. Example: <NF-Specific-name>-NewFeatures.
- In the Copy from text box, enter the actual job name for which you need single-click execution functionality. Example: <NF-Specific-name>-NewFeatures.
- Click OK. You are automatically redirected to edit the newly created job's configuration.
- Under the General group, deselect the This Project is Parameterised option.
- Under the Pipeline group, make the corresponding changes to remove the 'Active Choice Parameters' dependency.
- Provide the default values for the TestSuite,
SUT, Select_Option,
Configuration_Type, and other parameters, as required, on
the BuildWithParameters page.
Example: Pipeline without Active Choice Parameter Dependency
node ('built-in'){ //a = SELECTED_NF b = SEPPCONFIGSVCNAME c = CSEPPIGWNAME d = PSEPPIGWNAME //e = SEPPSTUBNAME f = NFINSTANCEID g = PROMSVCIP h = PROMSVCPORT i= PROMSVCURI j = RERUN_COUNT //k = ELK_WAIT_TIME l = ELK_HOSTNAME m = ELK_PORT n = STUB_LOGS o = LOG_TYPE p = GLOBAL_WAIT_TIME withEnv([ 'TestSuite=NewFeatures', 'Execute_Suite=SEPP', 'FilterWithTags=true,false', 'Fetch_Log_Upon_Failure=NO', 'Select_Features_Option=All', 'Configuration_Type=Product_Config' ]){ sh ''' sh /var/lib/jenkins/ocsepp_tests/preTestConfig.sh \ -a SEPP \ -b ocsepp-release-config-mgr-svc.csepp \ -c ocsepp-release-plmn-ingress-gateway.csepp \ -d ocsepp-release-n32-ingress-gateway.csepp \ -e sepp-ats-rel-stubserver.csepp \ -f 9faf1bbc-6e4a-4454-a507-aef01a101a06 \ -g prometheus.cne-infra \ -h 9090 \ -i /api/ \ -j 1 \ -k 10 \ -l occne-elastic-elasticsearch-master.occne-infra \ -m 9200 \ -n yes \ -o kubernetes \ -p 5 ''' if(env.Include_Regression && "${Include_Regression}" == "YES"){ sh '''sh /var/lib/jenkins/common_scripts/merge_jenkinsfile.sh''' load "/var/lib/jenkins/ocsepp_tests/jenkinsData/Jenkinsfile-Merged" } else{ load "/var/lib/jenkins/ocsepp_tests/jenkinsData/Jenkinsfile-NewFeatures" } } } - Click Save. The ATS application is ready to run TestSuite with 'SingleClick' using the newly created job.
- Run the custom pipeline job.
- Click the Build Now in the main page for the Custom pipeline job.
Note:
Value ofj (RERUN_COUNT) = 3 is recommended. But it can be changed as
per operator environment.
4.6.4 NewFeatures - Documentation
To view SEPP functionalities, go to SEPP-NewFeatures pipeline and click the Documentation link in the left navigation pane. The following screen appears:
Figure 4-69 Documentation
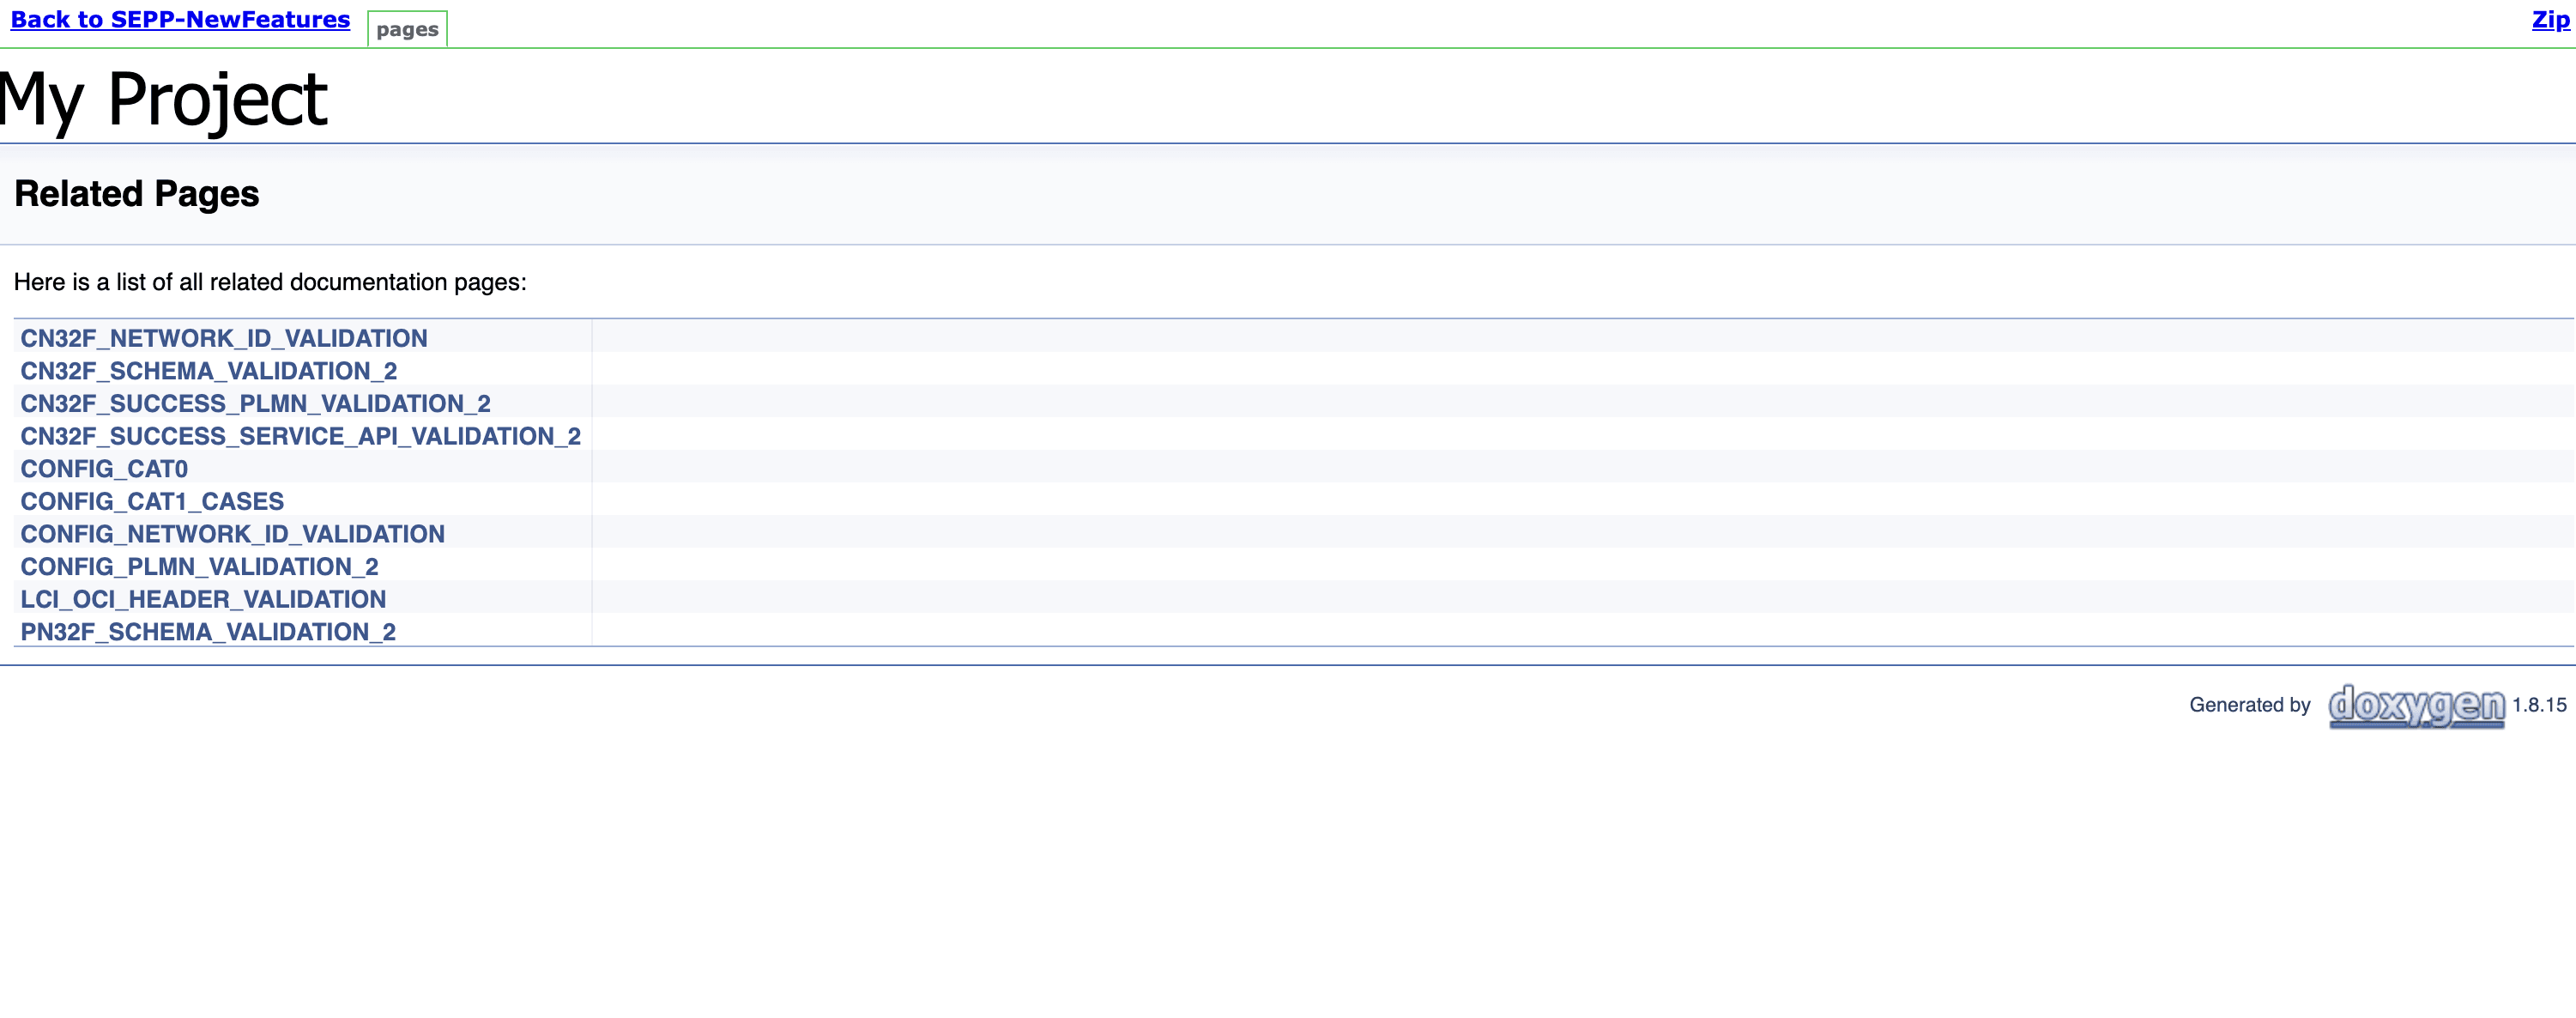
Click any functionality to view its test cases and scenarios of each test case. A sample screen is given below:
Figure 4-70 Test cases and Scenarios
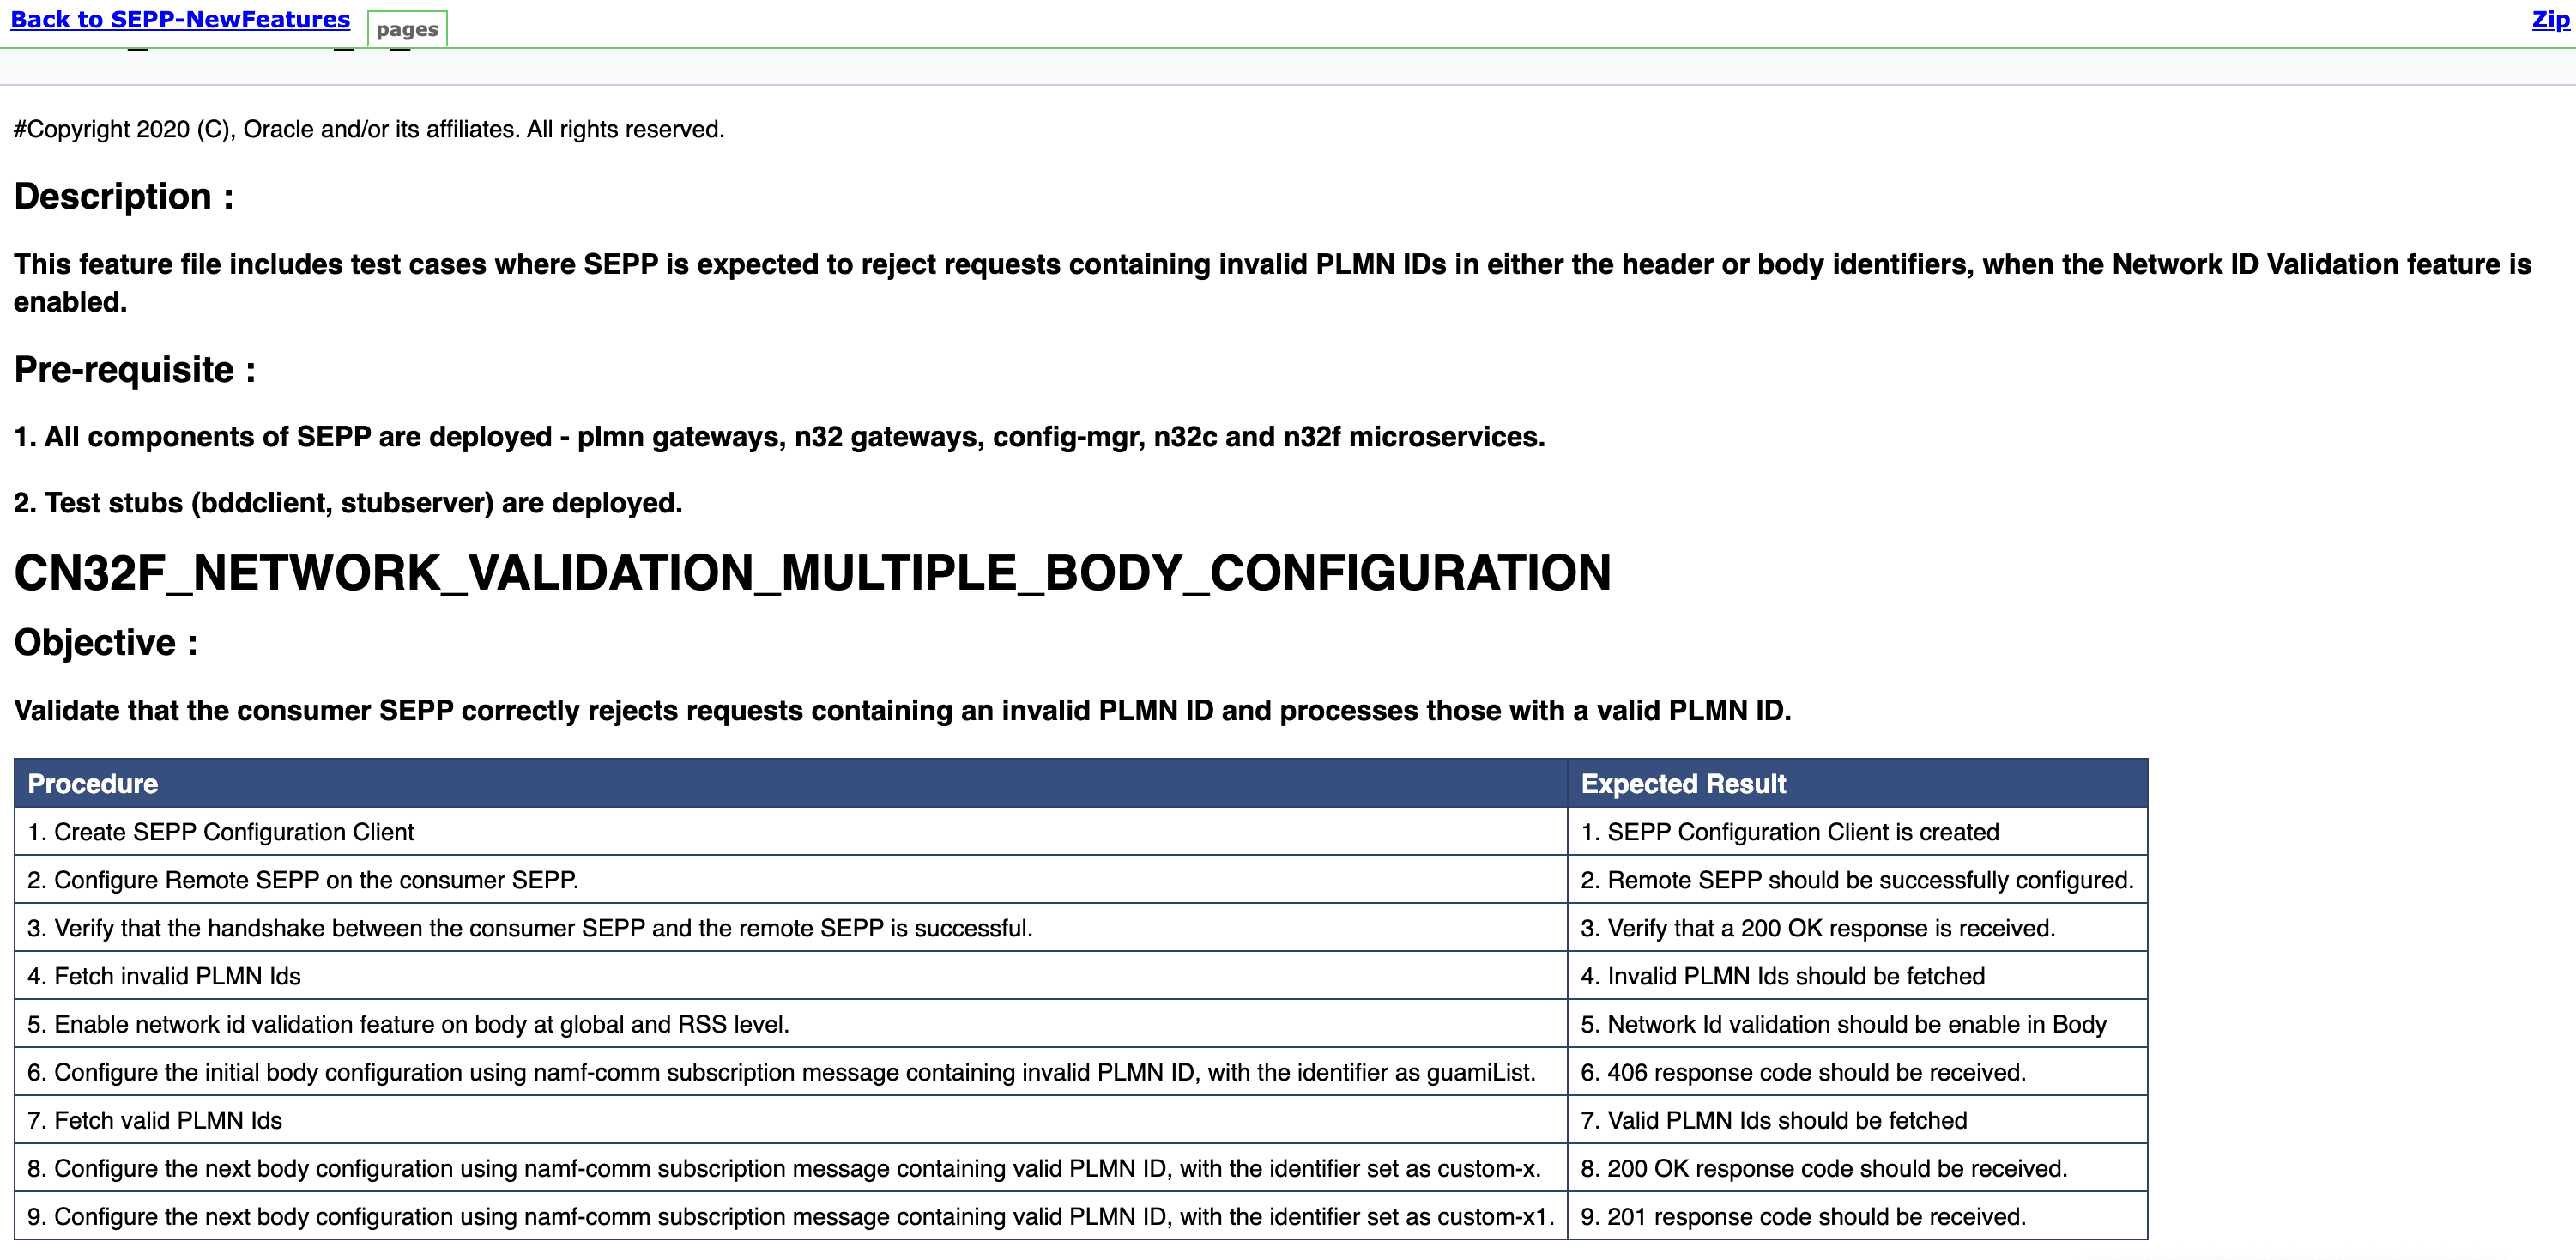
Based on the functionalities covered under the documentation, the build Requires parameter screen displays test cases. To navigate back to the Pipeline SEPP-NewFeatures screen, click the Back to SEPP-NewFeatures link available on top left corner of the screen.
4.6.5 SEPP Regression Pipeline
This section describes how to run test cases for SEPP Regression pipeline.
The SEPP_Regression pipeline is a pre-configured pipeline where all the test cases of previous releases are available. For example, for SEPP 25.1.2xx, this pipeline has all the test cases released till SEPP 25.1.1xx.
- Click SEPP_Regression in the Name
column. The following screen appears:
Figure 4-71 SEPP Regression
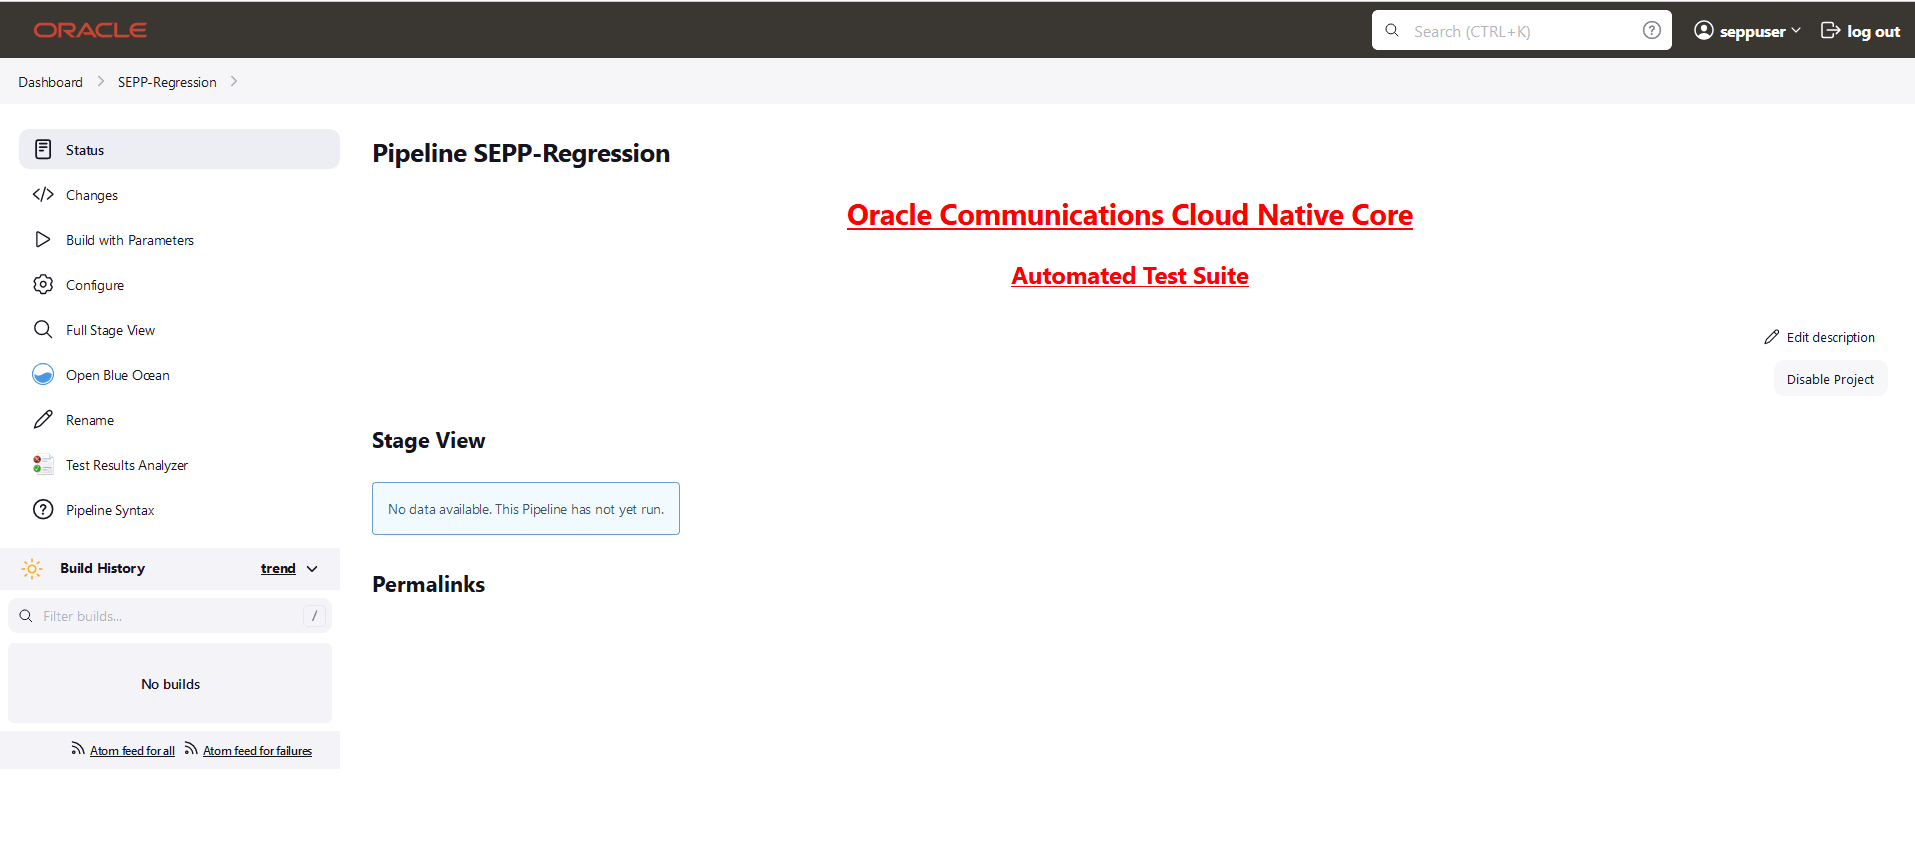
- Click Build with Parameters in the left navigation pane.
- Click Documentation to view the documented test cases which are part of this SEPP release.
- Click blue dots in the Build History box to view the success console logs of the "All" and "Sanity" respectively.
- The Stage View shows pipeline that is already run for the customer reference.
- Click Configure to configure SEPP Regression. Users must wait for the page to load completely. Once the page loads completely.
- click the Pipeline tab to see the Pipeline configuration.
Copy the required test cases that are available in the SEPP folder and place them appropriately within the custom folder for SEPP_Regression. Reload the page to view the test cases available in the custom Regression folder.
The configuration method and parameters are same as the NewFeatures pipeline.
4.6.5.1 Single Click Job Creation for SEPP Regression Features
Perform the following steps to create the custom pipeline for the new features:
- Log in to ATS using network function specific log-in credentials..
- Click New Item in the left navigation pane of
the ATS application. The following page appears:
Figure 4-72 New Item Window
- In the Enter an item name text box, enter the job name. Example: <NF-Specific-name>-NewFeatures.
- In the Copy from text box, enter the actual job name for which you need single-click execution functionality. Example: <NF-Specific-name>-NewFeatures.
- Click OK. You are automatically redirected to edit the newly created job's configuration.
- Under the General group, deselect the This Project is Parameterised option.
- Under the Pipeline group, make the corresponding changes to remove the 'Active Choice Parameters' dependency.
- Provide the default values for the TestSuite,
SUT, Select_Option,
Configuration_Type, and other parameters, as required, on
the BuildWithParameters page.
Example: Pipeline without Active Choice Parameter Dependency
node ('built-in'){ //a = SELECTED_NF b = SEPPCONFIGSVCNAME c = CSEPPIGWNAME d = PSEPPIGWNAME //e = SEPPSTUBNAME f = NFINSTANCEID g = PROMSVCIP h = PROMSVCPORT i= PROMSVCURI j = RERUN_COUNT //k = ELK_WAIT_TIME l = ELK_HOSTNAME m = ELK_PORT n = STUB_LOGS o = LOG_TYPE p = GLOBAL_WAIT_TIME withEnv([ 'TestSuite=Regression', 'Execute_Suite=SEPP', 'FilterWithTags=true,false', 'Fetch_Log_Upon_Failure=NO', 'Select_Features_Option=All', 'Configuration_Type=Custom_Config' ]){ sh ''' sh /var/lib/jenkins/ocsepp_tests/preTestConfig.sh \ -a SEPP \ -b ocsepp-release-config-mgr-svc.csepp \ -c ocsepp-release-plmn-ingress-gateway.csepp \ -d ocsepp-release-n32-ingress-gateway.csepp \ -e sepp-ats-rel-stubserver.csepp \ -f 9faf1bbc-6e4a-4454-a507-aef01a101a06 \ -g prometheus.cne-infra \ -h 9090 \ -i /api/ \ -j 1 \ -k 10 \ -l occne-elastic-elasticsearch-master.occne-infra \ -m 9200 \ -n yes \ -o kubernetes \ -p 5 ''' if(env.Include_NewFeatures && "${Include_NewFeatures}" == "YES"){ sh '''sh /var/lib/jenkins/common_scripts/merge_jenkinsfile.sh''' load "/var/lib/jenkins/ocsepp_tests/jenkinsData/Jenkinsfile-Merged" } else{ load "/var/lib/jenkins/ocsepp_tests/jenkinsData/Jenkinsfile-Regression" } } } - Click Save. The ATS application is ready to run TestSuite with 'SingleClick' using the newly created job.
- Run the custom pipeline job.
- Click the Build Now in the main page for the Custom pipeline job.
Note:
Value ofj (RERUN_COUNT) = 3 is recommended. But it can be changed as
per operator environment.
4.6.6 SEPP Regression Documentation
This section describes the documentation for SEPP-Regression pipeline.
To view the documentation for any of the SEPP features, on the ATS home page, click SEPP-Regression. Then, click Documentation in the left navigation pane.
This page shows features of only those test cases that are released in previous releases.
The following screen shows all the documentation features:
Figure 4-73 SEPP-Regression documentation
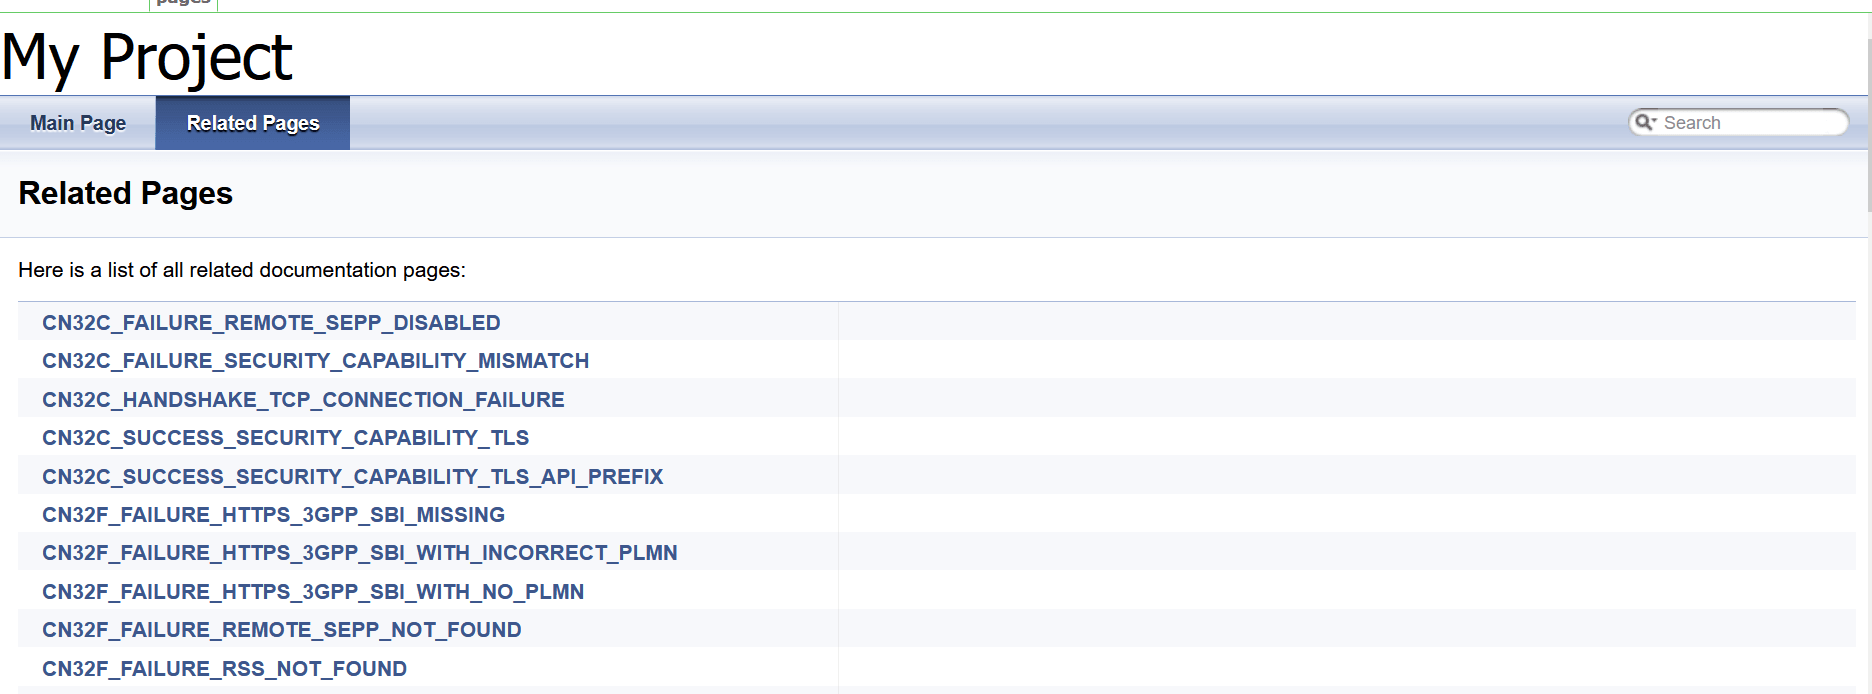
Click any functionality to view its test cases and scenarios of each test case.
The following screen appears if the CN32C_SUCCESS_SECURITY_CAPABILITY_TLS is selected.
Figure 4-74 CN32C_SUCCESS_SECURITY_CAPABILITY_TLS
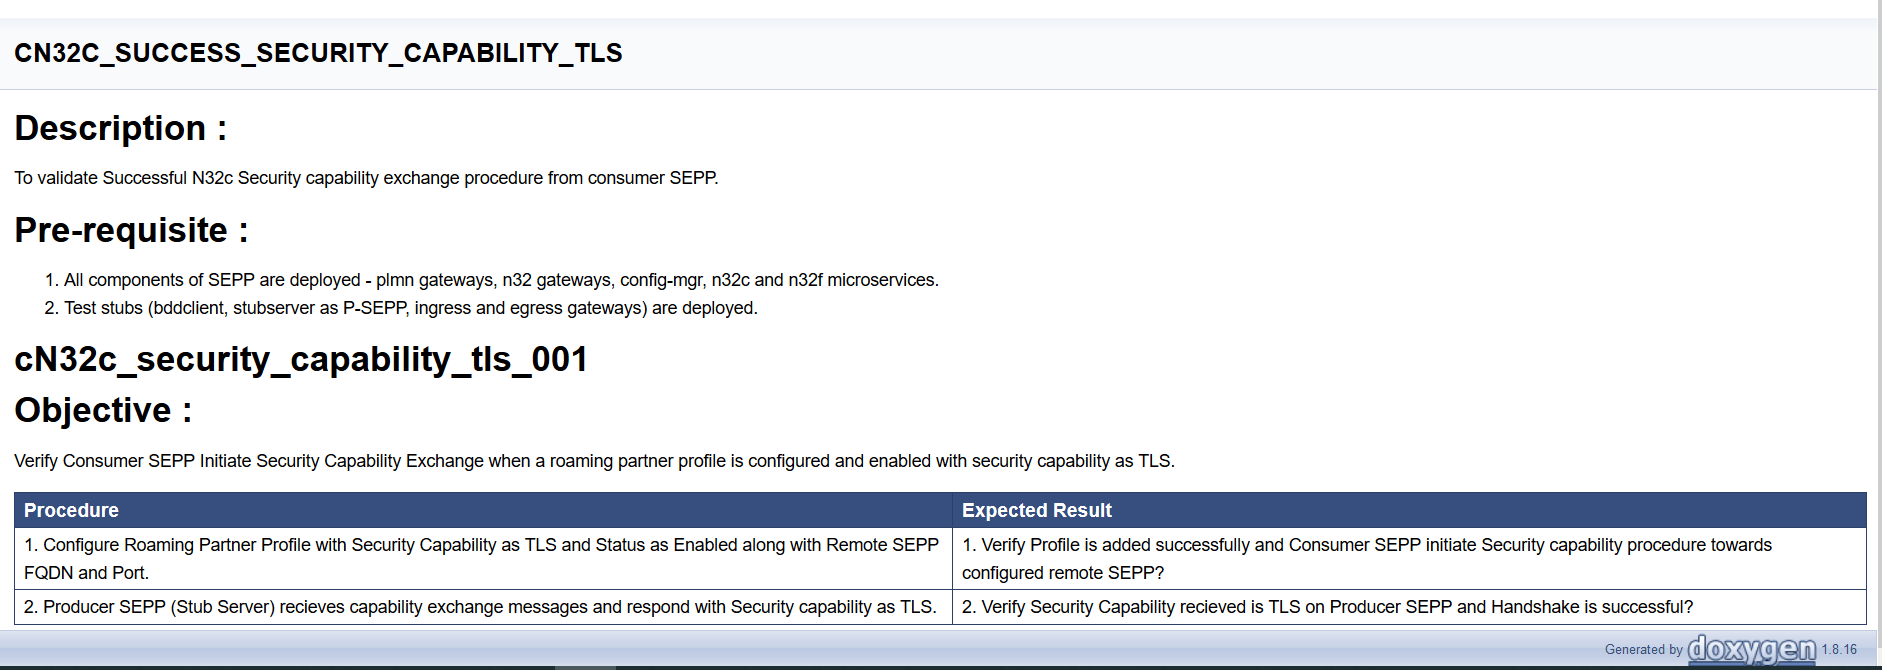
4.6.7 Running SEPP Health Check Pipeline
- Navigate to SEPP-HealthCheck pipeline and click Configure.
- The General tab appears. The user must wait for the page to load completely.
- Click the Advanced Project Options tab.
Scroll-down to reach the Pipeline configuration section
as follows:
Important:
Ensure that the page loads completely before you perform any action on it. Do not modify any configuration except the one discussed below.Figure 4-75 SEPP-HealthCheck
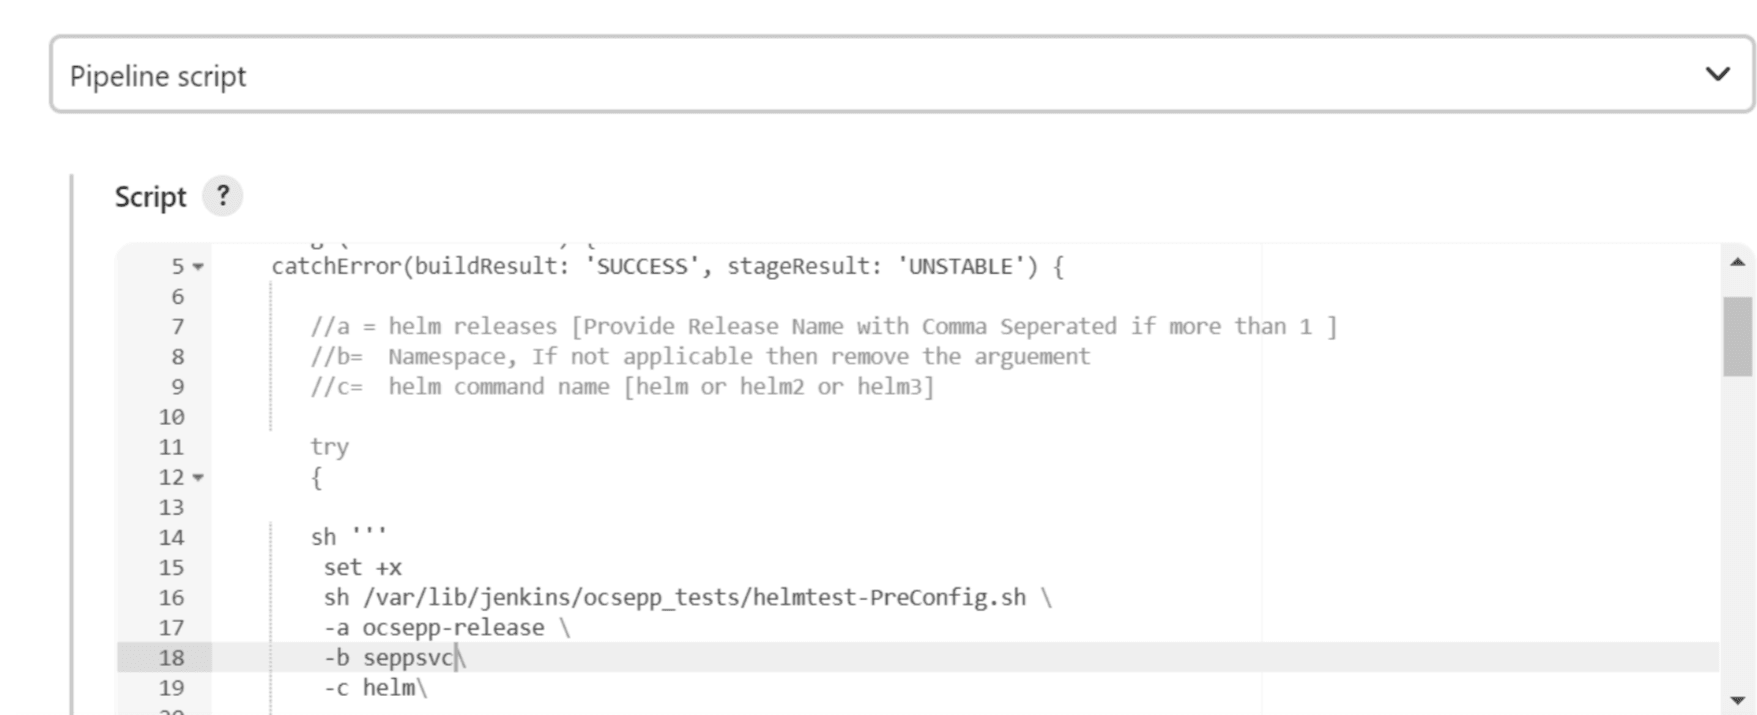
Do not change any value other than line numbers 17, 18, and 19. You can change the parameters marked as "a","b",and "c" as per user requirement. The parameters details are provided as comments in line number 7, 8, and 9. The parameters description is as follows:
- a - helm releases [Provide Release Name with Comma Separated if more than 1 ]
- b - namespace of SUT.
- c - helm version supported
- Click Save. The Pipeline SEPP-HealthCheck page appears.
- Click Build Now. This triggers health check for SUT.
Started by user seppuser
[Pipeline] Start of Pipeline
[Pipeline] node
Running on Jenkins in /var/lib/jenkins/.jenkins/workspace/SEPP-HealthCheck
[Pipeline] {
[Pipeline] stage
[Pipeline] { (Helm-Test-Init)
[Pipeline] catchError
[Pipeline] {
[Pipeline] sh
+ set +x
export HelmTestRelease=ocsepp-release-naman
export HelmTestNamespace=sepp2
export HelmCmd=helm
[Pipeline] sh
+ export NF=SEPP
+ NF=SEPP
+ /env/bin/python3 /env/lib/python3.9/site-packages/ocnftest_lib/helmtest_with_secret.py
[Pipeline] }
[Pipeline] // catchError
[Pipeline] }
[Pipeline] // stage
[Pipeline] stage
[Pipeline] { (Validate-Helm-Test)
[Pipeline] catchError
[Pipeline] {
[Pipeline] echo
2022-08-29 05:14:23,045[32m     INFO LOG.HELM-TEST:108 [0m| [32mhelm test ocsepp-release-naman -n sepp2[0m
2022-08-29 05:14:53,006[32m     INFO LOG.HELM-TEST:120 [0m| [32m
NAME: ocsepp-release-naman
LAST DEPLOYED: Wed Aug 24 10:08:10 2022
NAMESPACE: sepp2
STATUS: deployed
REVISION: 1
TEST SUITE:     ocsepp-release-naman-test
Last Started:   Mon Aug 29 05:14:36 2022
Last Completed: Mon Aug 29 05:15:00 2022
Phase:          Succeeded[0m

[Pipeline] }
[Pipeline] // catchError
[Pipeline] }
[Pipeline] // stage
[Pipeline] }
[Pipeline] // node
[Pipeline] End of Pipeline
Finished: SUCCESS