3 Installing ATS for Different Network Functions
This section describes how to install ATS for different network functions. It includes:
3.1 Installing ATS for BSF
The BSF ATS installation procedure covers two steps:
- Locating and downloading the ATS package for BSF.
- Deploying ATS and stub pods in Kubernetes cluster.
This includes installation of three stubs (nf1stub, nf11stub, and nf12stub), ocdns-bind stub, and BSF ATS in BSF namespace.
3.1.1 Resource Requirements
This section describes the ATS resource requirements for Binding Support Function.
Overview - Total Number of Resources
The following table describes the overall resource usage in terms of CPUs, memory, and storage:
Table 3-1 BSF - Total Number of Resources
| Resource Name | Non-ASM CPU | Non-ASM Memory (GB) | ASM CPU | ASM Memory (GB) |
|---|---|---|---|---|
| BSF Total | 41 | 36 | 73 | 52 |
| ATS Total | 11 | 11 | 23 | 17 |
| cnDBTier Total | 107.1 | 175.2 | 137.1 | 190.2 |
| Grand Total BSF ATS | 159.1 | 222.2 | 233.1 | 259.2 |
BSF Pods Resource Requirements Details
This section describes the resource requirements, which are needed to deploy BSF ATS successfully.
Table 3-2 BSF Pods Resource Requirements Details
| BSF Microservices | Max CPU | Memory (GB) | Max Replica | Isito ASM CPU | Isito ASM Memory (GB) | Non-ASM Total CPU | Non-ASM Memory (GB) | ASM Total CPU | ASM Total Memory (GB) |
|---|---|---|---|---|---|---|---|---|---|
| oc-app-info | 1 | 1 | 1 | 2 | 1 | 1 | 1 | 3 | 2 |
| oc-diam-gateway | 4 | 2 | 1 | 2 | 1 | 4 | 2 | 6 | 3 |
| alternate-route | 2 | 4 | 1 | 2 | 1 | 2 | 4 | 4 | 5 |
| oc-config-server | 4 | 2 | 1 | 2 | 1 | 4 | 2 | 6 | 3 |
| ocegress_gateway | 4 | 6 | 1 | 2 | 1 | 4 | 6 | 6 | 7 |
| ocingress_gateway | 4 | 6 | 1 | 2 | 1 | 4 | 6 | 6 | 7 |
| nrf-client-mngt | 1 | 1 | 2 | 2 | 1 | 2 | 2 | 6 | 4 |
| oc-audit | 2 | 1 | 1 | 2 | 1 | 2 | 1 | 4 | 2 |
| oc-config-mgmt | 4 | 2 | 2 | 2 | 1 | 8 | 4 | 12 | 6 |
| oc-query | 2 | 1 | 2 | 2 | 1 | 4 | 2 | 8 | 4 |
| oc-perf-info | 1 | 1 | 2 | 2 | 1 | 2 | 2 | 6 | 4 |
| bsf-management-service | 4 | 4 | 1 | 2 | 1 | 4 | 4 | 6 | 5 |
| BSF Totals | 41 | 36 | 73 | 52 | |||||
ATS Resource Requirements details for BSF
This section describes the ATS resource requirements, which are needed to deploy BSF ATS successfully.
Table 3-3 ATS Resource Requirements Details
| ATS Microservices | Max CPU | Max Memory (GB) | Max Replica | Isito ASM CPU | Isito ASM Memory (GB) | Non- ASM Total CPU | Non-ASM Total Memory (GB) | ASM Total CPU | ASM Total Memory (GB) |
|---|---|---|---|---|---|---|---|---|---|
| ocstub1-py | 2 | 2 | 1 | 2 | 1 | 2 | 2 | 4 | 3 |
| ocstub2-py | 2 | 2 | 1 | 2 | 1 | 2 | 2 | 4 | 3 |
| ocstub3-py | 2 | 2 | 1 | 2 | 1 | 2 | 2 | 4 | 3 |
| ocats-bsf | 3 | 3 | 1 | 2 | 1 | 3 | 3 | 5 | 4 |
| ocdns-bind | 1 | 1 | 1 | 2 | 1 | 1 | 1 | 3 | 2 |
| ocdiam-sim | 1 | 1 | 1 | 2 | 1 | 1 | 1 | 3 | 2 |
| ATS Totals | 11 | 11 | 23 | 17 | |||||
cnDBTier Resource Requirements Details for BSF ATS
This section describes the cnDBTier resource requirements, which are needed to deploy BSF ATS successfully.
Note:
For cnDBTier pods, a minimum of 4 worker nodes are required.Table 3-4 cnDBTier Resource Requirements Details
| cnDBTier Microservices | Min CPU | Min Memory (GB) | Min Replica | Isito ASM CPU | Isito ASM Memory (GB) | Total CPU | Total Memory (GB) | ASM Total CPU | ASM Total Memory (GB) |
|---|---|---|---|---|---|---|---|---|---|
| db_monitor_svc | 1 | 1 | 1 | 2 | 1 | 1 | 1 | 3 | 2 |
| db_replication_svc | 2 | 12 | 1 | 2 | 1 | 2 | 12 | 4 | 13 |
| db_backup_manager_svc | 0.1 | 0.2 | 1 | 2 | 1 | 0.1 | 0.2 | 2.1 | 1.2 |
| ndbappmysqld | 8 | 10 | 4 | 2 | 1 | 32 | 40 | 40 | 44 |
| ndbmgmd | 4 | 10 | 2 | 2 | 1 | 8 | 20 | 12 | 22 |
| ndbmtd | 10 | 18 | 4 | 2 | 1 | 40 | 72 | 48 | 76 |
| ndbmysqld | 8 | 10 | 2 | 2 | 1 | 16 | 20 | 20 | 22 |
| db_infra_moditor_svc | 8 | 10 | 1 | 2 | 1 | 8 | 10 | 8 | 10 |
| cnDBTier Total | 107.1 | 175.2 | 137.1 | 190.2 | |||||
3.1.2 Downloading the ATS Package
This section provides information on how to locate and download BSF ATS package file from My Oracle Support (MOS).
Locating and Downloading BSF ATS Package
To locate and download the ATS Image from MOS, perform the following steps:
- Log in to My Oracle Support using the appropriate credentials.
- Select the Patches and Updates tab.
- In the Patch Search window, click Product or Family (Advanced).
- Enter Oracle Communications Cloud Native Core - 5G in the Product field.
- Select Oracle Communications Cloud Native Binding Support Function <release_number> from Release drop-down.
- Click Search. The Patch Advanced Search Results list appears.
- Select the required patch from the search results. The Patch Details window appears.
- Click Download. The File Download window appears.
- Click the <p********_<release_number>_Tekelec>.zip file to downlaod the BSF ATS package file.
- Untar the gzip file
ocats-bsf-tools-26.1.201.0.0.tgzto access the following files:ocats-bsf-pkg-26.1.201.0.0.tgz ocdns-pkg-26.1.205.tgz ocstub-pkg-26.1.201.tgz ocdiam-sim-26.1.205.tgzThe contents included in each of these files are as follow:
ocats-bsf-tools-26.1.201.0.0.tgz | |_ _ _ocats-bsf-pkg-26.1.201.tgz | |_ _ _ _ _ _ ocats-bsf-26.1.201.tgz (Helm Charts) | |_ _ _ _ _ _ ocats-bsf-images-26.1.201.tar (Docker Images) | |_ _ _ _ _ _ ocats-bsf-data-26.1.201.tgz (BSF ATS and Jenkins job Data) | |_ _ _ocstub-pkg-26.1.201.0.0.tgz | |_ _ _ _ _ _ ocstub-py-26.1.201.tgz(Helm Charts) | |_ _ _ _ _ _ ocstub-py-image-26.1.201.tar (Docker Images) | |_ _ _ocdns-pkg-26.1.205.0.0.tgz | |_ _ _ _ _ _ ocdns-bind-26.1.205.tgz(Helm Charts) | |_ _ _ _ _ _ ocdns-bind-image-26.1.205.tar (Docker Images) | |_ _ _ocdiam-pkg-26.1.205.0.0.tgz | |_ _ _ _ _ _ ocdiam-sim-26.1.205.tgz(Helm Charts) | |_ _ _ _ _ _ ocdiam-sim-image-26.1.205.tar (Docker Images) - Copy the tar file from the downloaded package to CNE, OCI, or Kubernetes cluster where you want to deploy ATS.
3.1.3 Deploy ATS with TLS Enabled
Note:
- OCATS and Python stubs support both TLS 1.2. and TLS 1.3.
- DiamSim pod do not support secure calls.
Follow the steps in this section to create a Java KeyStore (JKS) file and enable the BSF ATS GUI with HTTPS during installation.
3.1.3.1 Generate JKS File for Jenkins Server
To access Jenkins ATS GUI access through HTTPS, a JKS file should be created.
Perform the following steps to generate the JKS file:
Generate the Root Certificate
- If the user has a Certificate Authority (CA) signed root
certificate such as
caroot.certand key, then the user can use those files. - If the root certificate is not already available, the user can generate one
self signed root certificate. This root certificate created needs to be
added to the
truststoresuch as a Browser like Firefox or Chrome. User can follow the Browser specific documentation to upload the root certificate. The root certificate is used to sign the application, or ATS certificate. - Generate a root key with the following command:
openssl genrsa 2048 > caroot.keyThis will generate a key called
caroot.key - Generate a
carootcertificate with the following command:openssl req -new -x509 -nodes -days 1000 -key <root_key> > <root_certificate>For example,
[cloud-user@platform-bastion-1]$ openssl req -new -x509 -nodes -days 1000 -key caroot.key > caroot.cer
You are about to be asked to enter information that will be incorporated
into your certificate request.
What you are about to enter is what is called a Distinguished Name or a DN.
There are quite a few fields but you can leave some blank
For some fields there will be a default value,
If you enter '.', the field will be left blank.
-----
Country Name (2 letter code) [XX]:IN
State or Province Name (full name) []:KA
Locality Name (eg, city) [Default City]:BLR
Organization Name (eg, company) [Default Company Ltd]:ORACLE
Organizational Unit Name (eg, section) []:CGBU
Common Name (eg, your name or your server's hostname) []:ocats
Email Address []:
[cloud-user@platform-bastion-1]$
Generate Application or Client Certificate
- Create a
ssl.conffile. - Edit the
ssl.conffile. In the "[alt_names]" section, list the IPs that are used to access ATS GUI as shown in the following samplessl.conffile:[ req ] default_bits = 4096 distinguished_name = req_distinguished_name req_extensions = req_ext [ req_distinguished_name ] countryName = Country Name (2 letter code) countryName_default = IN stateOrProvinceName = State or Province Name (full name) stateOrProvinceName_default = KN localityName = Locality Name (eg, city) localityName_default = BLR organizationName = Organization Name (eg, company) organizationName_default = ORACLE commonName = Common Name (e.g. server FQDN or YOUR name) commonName_max = 64 commonName_default = ocats.ocbsf.svc.cluster.local [ req_ext ] keyUsage = critical, digitalSignature, keyEncipherment extendedKeyUsage = serverAuth, clientAuth basicConstraints = critical, CA:FALSE subjectAltName = critical, @alt_names [alt_names] IP.1 = 127.0.0.1 IP.2 = 10.75.217.5 IP.3 = 10.75.217.76 DNS.1 = localhost DNS.2 = ocats.ocbsf.svc.cluster.localNote:
- To access the GUI with DNS, make sure that the
commonName_default is the same as the DNS name being
used.
-
Ensure the DNS is in this format:
<service_name>.<namespace>.svc.cluster.localMultiple DNSs, such as DNS.1, DNS.2, and so on, can be added.
-
- To support the ATS API, it is necessary to add the IP 127.0.0.1 to the list of IPs.
- To access the GUI with DNS, make sure that the
commonName_default is the same as the DNS name being
used.
- Create a Certificate Signing Request (CSR) with the following command:
openssl req -config ssl.conf -newkey rsa:2048 -days 1000 -nodes -keyout rsa_private_key_pkcs1.key > ssl_rsa_certificate.csrOutput:[cloud-user@platform-bastion-1 ocbsf]$ openssl req -config ssl.conf -newkey rsa:2048 -days 1000 -nodes -keyout rsa_private_key_pkcs1.key > ssl_rsa_certificate.csr Ignoring -days; not generating a certificate Generating a RSA private key ...+++++ ........+++++ writing new private key to 'rsa_private_key_pkcs1.key' ----- You are about to be asked to enter information that will be incorporated into your certificate request. What you are about to enter is what is called a Distinguished Name or a DN. There are quite a few fields but you can leave some blank For some fields there will be a default value, If you enter '.', the field will be left blank. ----- Country Name (2 letter code) [IN]: State or Province Name (full name) [KA]: Locality Name (eg, city) [BLR]: Organization Name (eg, company) [ORACLE]: Common Name (e.g. server FQDN or YOUR name) [ocbsf]: [cloud-user@platform-bastion-1 ocbsf]$ - To display all the components of the CSR file and to verify the
configurations run the following command:
openssl req -text -noout -verify -in ssl_rsa_certificate.csr - Sign the CSR file with root certificate by running the following command:
openssl x509 -extfile ssl.conf -extensions req_ext -req -inssl_rsa_certificate.csr -days 1000 -CA ../caroot.cer -CAkey ../caroot.key -set_serial 04 > ssl_rsa_certificate.crtOutput:
[cloud-user@platform-bastion-1 ocbsf]$ openssl x509 -extfile ssl.conf -extensions req_ext -req -in ssl_rsa_certificate.csr -days 1000 -CA ../caroot.cer -CAkey ../caroot.key -set_serial 04 > ssl_rsa_certificate.crt Signature ok subject=C = IN, ST = KA, L = BLR, O = ORACLE, CN = ocbsf Getting CA Private Key [cloud-user@platform-bastion-1 ocbsf]$ - Verify if the certificate is signed by the root certificate by running the
following command:
[cloud-user@platform-bastion-1 ocbsf]$ openssl verify -CAfile caroot.cer ssl_rsa_certificate.crtOutput:
[cloud-user@platform-bastion-1 ocbsf]$ openssl verify -CAfile caroot.cer ssl_rsa_certificate.crt ssl_rsa_certificate.crt: OK - Save the generated application certificate and root certificate.
- Add the
caroot.certo the browser as a trusted author. - The generated application/client certificates cannot be directly
given to the Jenkins server. Hence generate the
.p12
                            keystore
file for the client certificate with the following command:[cloud-user@platform-bastion-1 ocbsf]$ openssl pkcs12 -inkey rsa_private_key_pkcs1.key -inssl_rsa_certificate.crt -export-out certificate.p12 Enter Export Password: Verifying - Enter Export Password: - In the prompt, create a password and save it for future use.
- Convert the .p12 keystore file into a JKS format file using the following command:
[cloud-user@platform-bastion-1 ocbsf]$ keytool -importkeystore -srckeystore ./certificate.p12 -srcstoretype pkcs12 -destkeystore jenkinsserver.jks -deststoretype JKSOutput:
[cloud-user@platform-bastion-1 ocbsf]$ keytool -importkeystore -srckeystore ./certificate.p12 -srcstoretype pkcs12 -destkeystore jenkinsserver.jks -deststoretype JKS Importing keystore ./certificate.p12 to jenkinsserver.jks... Enter destination keystore password: Re-enter new password: Enter source keystore password: Entry for alias 1 successfully imported. Import command completed: 1 entries successfully imported, 0 entries failed or cancelled - In the prompt, use the same password used while creating
.p12 keystorefile.Note:
Ensure that the .p12 keystore and JKS files has the same passwords. - The generated JKS file,
jenkinserver.jksis added to the Jenkins path, where Jenkins server can access it. - Update following values in ATS values.yaml
file
certificates:
  cert_secret_name: "ocats-bsf-tls-secret"
  ca_cert: "caroot.cer"
  client_cert: "ssl_rsa_certificate.crt"
  private_key: "rsa_private_key_pkcs1.key"
  jks_file: "jenkinsserver.jks"  # This parameter is needed when atsGuiTLSEnabled is set to true. This file is necessary for ATS GUI to be opend with secured TLS protocol. The file caroot.pem, used during creation of jks file needs to be passed for Jenkins/ATS API communication.
For more details about the ATS TLS feature, refer to Deploy ATS with TLS Enabled section.
3.1.3.2 Enable TLS on Python Stubs
caroot.cer file.
- Create a
ssl.conffile. - Edit
ssl.conffile. Ensure that the DNS is in the format of*.<namespace>.svcA sample stub_ssl.conf file:[ req ] default_bits = 4096 distinguished_name = req_distinguished_name req_extensions = req_ext [ req_distinguished_name ] countryName = Country Name (2 letter code) countryName_default = IN stateOrProvinceName = State or Province Name (full name) stateOrProvinceName_default = KN localityName = Locality Name (eg, city) localityName_default = BLR organizationName = Organization Name (eg, company) organizationName_default = ORACLE commonName = svc.cluster.local [ req_ext ] keyUsage = critical, digitalSignature, keyEncipherment extendedKeyUsage = serverAuth, clientAuth basicConstraints = critical, CA:FALSE subjectAltName = critical, @alt_names [alt_names] IP.1 = 127.0.0.1 DNS.1 = *.ocats.svc - Create a Certificate Signing Request (CSR) for the stubs using the
following command:
openssl req -config stub_ssl.conf -newkey rsa:2048 -days 1000 -nodes -keyout rsa_private_key_stub_pkcs2.key > stub_ssl_rsa_certificate1.csrOutput:
[cloud-user@platform-bastion-1 stub_certs]$ openssl req -config stub_ssl.conf -newkey rsa:2048 -days 1000 -nodes -keyout rsa_private_key_stub_pkcs2.key > stub_ssl_rsa_certificate1.csr Ignoring -days; not generating a certificate Generating a RSA private key ....................+++++ ...+++++ writing new private key to 'rsa_private_key_stub_pkcs2.key' ----- You are about to be asked to enter information that will be incorporated into your certificate request. What you are about to enter is what is called a Distinguished Name or a DN. There are quite a few fields but you can leave some blank For some fields there will be a default value, If you enter '.', the field will be left blank. ----- Country Name (2 letter code) [IN]: State or Province Name (full name) [KN]: Locality Name (eg, city) [BLR]: Organization Name (eg, company) [ORACLE]: svc.cluster.local []:*.ocbsf.svc - Sign the certificate with the CA root using the following
command:
openssl x509 -extfile stub_ssl.conf -extensions req_ext -req -in stub_ssl_rsa_certificate1.csr -days 1000 -CA ../ocbsf-caroot.cer -CAkey ../ocbsf-caroot.key -set_serial 05 > stub_ssl_rsa_certificate1.crtOutput:
[cloud-user@platform-bastion-1 stub_certs]$ openssl x509 -extfile stub_ssl.conf -extensions req_ext -req -in stub_ssl_rsa_certificate1.csr -days 1000 -CA ../ocbsf-caroot.cer -CAkey ../ocbsf-caroot.key -set_serial 05 > stub_ssl_rsa_certificate1.crt Signature ok subject=C = IN, ST = KN, L = BLR, O = ORACLE, CN = *.ocbsf.svc Getting CA Private Key - Create a secret for the stub and associate it with the namespace
using the following command:
kubectl create secret generic ocats-stub-secret1 --from-file=stub_ssl_rsa_certificate1.crt --from-file=rsa_private_key_stub_pkcs2.key --from-file=../ocbsf-caroot.cer -n ocbsfOutput:
[cloud-user@platform-bastion-1 ocbsf]$ kubectl create secret generic ocbsf-stub-secret1 --from-file=stub_ssl_rsa_certificate1.crt --from-file=rsa_private_key_stub_pkcs2.key --from-file=../ocbsf-caroot.cer -n ocbsf secret/ocats-stub-secret1 created - Update
values.yamlfile of each Python stub in specific NF namespace with following details:NF: "<NF-Name>" cert_secret_name: "ocats-stub-secret" ca_cert: "ocbsf-caroot.cer" client_cert: "ocbsf-stub_ssl_rsa_certificate.crt" private_key: "ocbsf-rsa_private_key_stub_pkcs1.key" expose_tls_service: true CLIENT_CERT_REQ: trueNote:
If the Helm,cert_secret_nameparameter, is null, thenca_cert,client_cert, andprivate_keyvalues are not considered by the TLS. - Ensure to update the deployment of all the Python stubs installed on the setup.
For more details about the ATS TLS feature, refer to Support for Transport Layer Security section.
3.1.3.3 Enable TLS on Diam Sim
caroot.cer and caroot.key files.
Note:
- Use the
caroot.cerandcaroot.keyfiles that are created in the Enable TLS on Python Stubs section. - Replace all occurrences of NAMESPACE with your actual namespace value.
- For diam-sim, the following parameters are exposed in values.yaml to
configure
TLS:
tls: enabled: false secretName: 'dcli-tls-secret' rsaPrivateKeyFileName: 'dcli-key.pem' ecdsaPrivateKeyFileName: 'dcli-ecdsa-private-key.pem' rsaCertificateFileName: 'dcli-cert.crt' ecdsaCertifacateFileName: 'dcli-ecdsa-certificate.crt' caBundleFileName: 'ca-cert.cer' - By default, tls.enabled is false. Set this to true to enable TLS on diam-sim.
- Default secretName is dcli-tls-secret. . You can
change this name as per your requirement. Make sure that name of the secret that
is created should match with the name provided for secretName.
Example Output:
tls: enabled: true secretName: '${NAMESPACE}-dcli-tls-secret' rsaPrivateKeyFileName: '${NAMESPACE}-dcli-key.pem' ecdsaPrivateKeyFileName: 'dcli-ecdsa-private-key.pem' rsaCertificateFileName: '${NAMESPACE}-dcli-cert.crt' ecdsaCertifacateFileName: 'dcli-ecdsa-certificate.crt' caBundleFileName: 'caroot.cer' - Certificate and private key generation:
openssl genrsa -out ${NAMESPACE}-dcli-key.pem 4096 openssl req -new -sha256 -key ${NAMESPACE}-dcli-key.pem -out ${NAMESPACE}-dcli-csr.csr -subj "/CN=ocbsf-occnp-diam-gateway.${NAMESPACE}.svc" openssl x509 -req -sha256 -days 1000 \ -in ${NAMESPACE}-dcli-csr.csr \ -CA caroot.cer \ -CAkey caroot.key \ -out ${NAMESPACE}-dcli-cert.pem \ -CAcreateserial mv ${NAMESPACE}-dcli-cert.pem ${NAMESPACE}-dcli-cert.crt - Creating kubernetes secrets and helm install:
Keep these files in the defined Kubernetes secrets variable defined in secretName parameter of the values.yaml file.
kubectl create secret generic ${NAMESPACE}-dcli-tls-secret --from-file=${NAMESPACE}-dcli-key.pem --from-file=caroot.cer --from-file=${NAMESPACE}-dcli-cert.crt -n ${NAMESPACE}
[cloud-user@platform-bastion-1 Certificates]$ kubectl get secrets -n ocbsf
NAME                                       TYPE                 DATA   AGE
ocbsf-db-pass                              Opaque               2      36h
ocbsf-li-iteration                         Opaque               1      36h
ocbsf-li-iv                                Opaque               1      36h
ocbsf-li-pass                              Opaque               1      36h
ocbsf-li-salt                              Opaque               1      36h
ocbsf-privileged-db-pass                   Opaque               2      36h
sh.helm.release.v1.nf11stub.v1             helm.sh/release.v1   1      33h
sh.helm.release.v1.nf12stub.v1             helm.sh/release.v1   1      33h
sh.helm.release.v1.nf1stub.v1              helm.sh/release.v1   1      33h
sh.helm.release.v1.ocats-bsf.v1         helm.sh/release.v1   1      33h
sh.helm.release.v1.ocdiam-sim.v1           helm.sh/release.v1   1      33h
sh.helm.release.v1.ocdns-stub.v1           helm.sh/release.v1   1      33h
sh.helm.release.v1.bsf.v1                  helm.sh/release.v1   1      34h
[cloud-user@platform-bastion-1 Certificates]$ kubectl create secret generic ocbsf-dcli-tls-secret --from-file=ocbsf-dcli-key.pem --from-file=caroot.cer --from-file=ocbsf-dcli-cert.crt -n ocbsf
secret/dcli-tls-secret created

[cloud-user@platform-bastion-1 Certificates]$ kubectl get secrets -n ocbsf
NAME                                       TYPE                 DATA   AGE
ocbsf-dcli-tls-secret                      Opaque               3      42s
ocbsf-db-pass                              Opaque               2      36h
ocbsf-li-iteration                         Opaque               1      36h
ocbsf-li-iv                                Opaque               1      36h
ocbsf-li-pass                              Opaque               1      36h
ocbsf-li-salt                              Opaque               1      36h
ocbsf-privileged-db-pass                   Opaque               2      36h
sh.helm.release.v1.nf11stub.v1             helm.sh/release.v1   1      33h
sh.helm.release.v1.nf12stub.v1             helm.sh/release.v1   1      33h
sh.helm.release.v1.nf1stub.v1              helm.sh/release.v1   1      33h
sh.helm.release.v1.ocats-bsf.v1         helm.sh/release.v1   1      33h
sh.helm.release.v1.ocdiam-sim.v1           helm.sh/release.v1   1      33h
sh.helm.release.v1.ocdns-stub.v1           helm.sh/release.v1   1      33h
sh.helm.release.v1.bsf.v1                  helm.sh/release.v1   1      34h
3.1.3.4 Enable ATS GUI with HTTPS
Follow the steps to secure or enable TLS on the server.
- Create a Kubernetes secret by adding the above created files:
kubectl create secret generic ocats-tls-secret --from-file=jenkinsserver.jks --from-file=ssl_rsa_certificate.crt --from-file=rsa_private_key_pkcs1.key --from-file=caroot.cer -n ocbsfWhere,
jenkinsserver.jks: This file is needed when
atsGuiTLSEnabledis set to true. This is necessary to open ATS GUI with secured TLS protocol.ssl_rsa_certificate.crt: This is client application certificate.
rsa_private_key_pkcs1.key: This is RSA private key.
caroot.cer: This file used during creation of jks file needs to be passed for Jenkins/ATS API communication.
The sample of created secret:
[cloud-user@platform-bastion-1 ~]$ kubectl describe secret ocats-tls-secret -n ocbsf Name: ocats-tls-secret Namespace: ocats Labels: <none> Annotations: <none> Type: Opaque Data ==== caroot.cer: 1147 bytes ssl_rsa_certificate.crt: 1424 bytes jenkinsserver.jks: 2357 bytes rsa_private_key_pkcs1.key: 1675 bytes - Apply the following changes in
values.yamlfile.
The user can install the ATS, using the helm install command. Change thecertificates: cert_secret_name: "ocats-tls-secret" ca_cert: "caroot.cer" client_cert: "ssl_rsa_certificate.crt" private_key: "rsa_private_key_pkcs1.pem" jks_file: "jenkinsserver.jks" # This parameter is needed when atsGuiTLSEnabled is set to true. This file is necessary for ATS GUI to be opend with secured TLS protocol. jks_password: "123456" #This is the password given to the jks file while creation.atsGuiTLSEnabledHelm parameter value to true for ATS to get the certificates and support HTTPS for GUI. - Upload the
caroot.cerfile to the browser, before accessing it usinghttpsprotocol.For more details about the uploading the file to the browser, refer Adding a Certificate in Browser section in Enable ATS GUI with HTTPS.
- A user can now start ATS with HTTPS the protocol. The link to open
the ATS GUI format is
https://<IP>:<port>, for example,https://10.75.217.25:30301.The lock symbol in the browser indicates that the server is secured or TLS enabled.
3.1.4 Deploy BSF ATS with Authenticated Prometheus communication
#The below section is related to the deployments where prometheus needs authenticated token to request for metrics/alerts
PrometheusAuthEnabled: false  #Set this to true only when prometheus requests require a token in the header for authentication
PrometheusTLSEnabled: false   #Set this to true only when prometheus is a https deployment.
#PrometheusScrapeInterval: "60" #Uncomment this line only when scrapeInterval is any other value than 60 seconds.(ATS will assume 60s as default if no response comes from prometheus config.)
For more information about the above Helm parameters, see Table 2-5.
- Ensure that ClusterRole and ClusterRoleBinding are created with the required permissions.
- Ensure that Prometheus Server IP and Prometheus Server Port are set accordingly. For more information about setting the Prometheus Server IP and Prometheus Server Port, see the Running BSF_NewFeatures Pipeline section.
Note:
- While communicating with Prometheus, ATS currently does not support TLS (certificate-based authentication).
- If Prometheus is deployed over HTTPS, the PrometheusTLSEnabled parameter needs to be set to true which allows ATS to connect to Prometheus using either HTTP or HTTPS as needed. Even when connecting through HTTPS, the connection remains insecure because ATS does not manage any certificates for this communication.
3.1.5 Pushing the Images to Customer Docker Registry
This section describes the pre-deployment steps for deploying ATS and stub pods.
Preparing to deploy ATS and Stub Pods in Kubernetes Cluster
To deploy ATS and Stub pods in a Kubernetes Cluster, perform the following steps:
- Run the following command to extract
the tar file content:
tar -zxvf
                                ocats-bsf-tools-26.1.201.0.0.tgz
The output of this command is:ocats-bsf-pkg-26.1.201.tgz ocstub-pkg-26.1.201.tgz ocdns-pkg-26.1.205.tgz ocdiam-pkg-26.1.205.0.0tgz - Go to the
ocats-bsf-tools-26.1.201.0.0folder and run the following command to extract the helm charts and docker images of ATS:tar -zxvf ocats-bsf-pkg-26.1.201.0.0.tgzThe output of this command is:
ocats-bsf-26.1.201.tgz ocats-bsf-images-26.1.201.tar ocats-bsf-data-26.1.201.tgz - Run the following command in your
cluster to load the ATS docker image:
docker load --input ocats-bsf-images-26.1.201.tar - Run the following commands to tag and push the ATS
images
docker tag ocats-bsf:26.1.201 <registry>/ocats-bsf:26.1.201
docker push <registry>/ocats-bsf:26.1.201
Example:
docker tag ocats-bsf:26.1.201 localhost:5000/ocats-bsf:26.1.201 docker push localhost:5000/ocats-bsf:26.1.201 - Run the following command to untar the
helm charts, in
ocats-bsf-26.1.201.tgztar -zxvf ocats-bsf-26.1.201.tgz - Update the registry name, image name
and tag in the
ocats-bsf/values.yamlfile as required. For this, you need to update theimage.repositoryandimage.tagparameters in theocats-bsf/values.yamlfile. - In the
ocats-bsf/values.yamlfile, theatsFeaturesparameter is configured to control ATS feature deliveries.atsFeatures: ## DO NOT UPDATE this section without My Oracle Support team's support testCaseMapping: true # To display Test cases on GUI along with Features logging: true # To enable feature to collect applogs in case of failure lightWeightPerformance: false # The Feature is not implemented yet executionWithTagging: true # To enable Feature/Scenario execution with Tag scenarioSelection: false # The Feature is not implemented yet parallelTestCaseExecution: true # To run ATS features parallel parallelFrameworkChangesIntegrated: true # To run ATS features parallel mergedExecution: false # To execute ATS Regression and NewFeatures pipelines together in merged manner individualStageGroupSelection: false # The Feature is not implemented yet parameterization: true # When set to false, the Configuration_Type parameter on the GUI will not be available. atsApi: true # To trigger ATS using ATS API healthcheck: true # TO enable/disable ATS Health Check. atsGuiTLSEnabled: false # To run ATS GUI in https mode. atsCommunicationTLSEnabled: false #If set to true, ATS will get necessary variables to communicate with SUT, Stub or other NFs with TLS enabled. It is not required in ASM environment.Note:
It is recommended to avoid alteringatsFeaturesflags.
3.1.6 Configuring ATS
3.1.6.1 Enabling Static Port
ocats-bsf/values.yaml
file under the service section, set the value of staticNodePortEnabled parameter to true and enter a valid
nodePort value for staticNodePort
parameter.service:
customExtension:
labels: {}
annotations: {}
type: LoadBalancer
ports:
http:
port: "8080"
staticNodePortEnabled: false
staticNodePort: ""3.1.6.2 Enable Static API Node Port
service:
  customExtension:
    labels: {}
    annotations: {}
  type: LoadBalancer
  ports:
    api:
      port: "5001"
      staticNodePortEnabled: false
      staticNodePort: ""
3.1.6.3 Service Account Requirements
rules:
- apiGroups: ["extensions"]
  resources: ["deployments", "replicasets"]
  verbs: ["watch", "get", "list", "update"]
- apiGroups: ["apps"]
  resources: ["deployments", "replicasets"]
  verbs: ["watch", "get", "list", "update"]
- apiGroups: [""]
  resources: ["pods", "services", "secrets", "configmaps"]
  verbs: ["watch", "get", "list", "delete", "update", "create"]
- apiGroups: [""]
  resources: ["pods/log"]
  verbs: ["get", "list"]
3.1.6.4 Enabling Aspen Service Mesh
This section provides information on how to enable Aspen service mesh while deploying ATS for Binding Support Function. The configurations mentioned in this section are optional and should be performed only if ASM is required.
To enable service mesh for BSF ATS, perform the following steps:
- In the service section of the
values.yamlfile, the serviceMeshCheck parameter is set to false by default. To enable service mesh, set the value for serviceMeshCheck to true. The following is a snippet of the service section in the yaml file:service: customExtension: labels: {} annotations: {} type: LoadBalancer ports: https: port: "8443" staticNodePortEnabled: false staticNodePort: "" http: port: "8080" staticNodePortEnabled: false staticNodePort: "" api: port: "5001" staticNodePortEnabled: false staticNodePort: "" serviceMeshCheck: true - If the ASM is not enabled on the global level for the namespace,
run the following command to enable it before deploying the
ATS:
kubectl label --overwrite namespace <namespace_name> istio-injection=enabledFor example:kubectl label --overwrite namespace ocbsf istio-injection=enabled - Uncomment and add the following annotation under the
lbDeployments and nonlbDeployments section of the global
section in
values.yamlfile as follows:traffic.sidecar.istio.io/excludeInboundPorts: "9000"traffic.sidecar.istio.io/excludeOutboundPorts: "9000"The following is a snippet from the
values.yamlof BSF:/home/cloud-user/ocats-bsf/ocats-bsf-tools-26.1.201.0.0/ocats-bsf-pkg-26.1.201.0.0/ocats-bsf/ vim values.yaml customExtension: allResources: labels: {} annotations: { #Enable this section for service-mesh based installation traffic.sidecar.istio.io/excludeInboundPorts: "9000", traffic.sidecar.istio.io/excludeOutboundPorts: "9000" }lbDeployments: labels: {} annotations: { traffic.sidecar.istio.io/excludeInboundPorts: "9000", traffic.sidecar.istio.io/excludeOutboundPorts: "9000"} - If service mesh is enabled, then create a
destination rule for fetching the metrics from the Prometheus. In most of the
deployments, Prometheus is kept outside the service mesh so you need a
destination rule to communicate between TLS enabled entity (ATS) and non-TLS
entity (Prometheus). You can create a destination rule using the following
sample yaml
file:
kubectl apply -f - <<EOF

apiVersion: networking.istio.io/v1alpha3
kind: DestinationRule
metadata:
  name: prometheus-dr
  namespace: ocats
spec:
  host: oso-prometheus-server.pcf.svc.cluster.local
  trafficPolicy:
    tls:
      mode: DISABLE
EOF
In the destination rule:- name indicates the name of destination rule.
- namespace indicates where the ATS is deployed.
- host indicates the hostname of the prometheus server.
- Update the
ocbsf_custom_values_servicemesh_config_26.1.201.yamlwith the below additional configuration under virtualService section for Egress Gateway:virtualService: - name: nrfvirtual1 host: ocbsf-ocbsf-egress-gateway destinationhost: ocbsf-ocbsf-egress-gateway port: 8000 exportTo: |- [ "." ] attempts: "0"Where,
host or destination name uses the format - <release_name>-<egress_svc_name>.
You must update the host or destination name as per the deployment.
- For ServerHeader and SessionRetry features, the user
needs to perform the following configurations under the envoyFilters for
nf1stub, nf11stub, and nf12stub in the
ocbsf-servicemesh-config-custom-values-26.1.201.yaml:Note:
occnp_custom_values_servicemesh_config yaml file and helm charts version names would differ based on the deployed BSF NF version. For example, "occnp_custom_values_servicemesh_config_24.3.0.yaml" or "occnp_custom_values_servicemesh_config_24.3.1.yaml".envoyFilters: - name: serverheaderfilter-nf1stub labelselector: "app: nf1stub-ocstub-py" configpatch: - applyTo: NETWORK_FILTER filtername: envoy.filters.network.http_connection_manager operation: MERGE typeconfig: type.googleapis.com/envoy.extensions.filters.network.http_connection_manager.v3.HttpConnectionManager configkey: server_header_transformation configvalue: PASS_THROUGH - name: serverheaderfilter-nf11stub labelselector: "app: nf11stub-ocstub-py" configpatch: - applyTo: NETWORK_FILTER filtername: envoy.filters.network.http_connection_manager operation: MERGE typeconfig: type.googleapis.com/envoy.extensions.filters.network.http_connection_manager.v3.HttpConnectionManager configkey: server_header_transformation configvalue: PASS_THROUGH - name: serverheaderfilter-nf12stub labelselector: "app: nf12stub-ocstub-py" configpatch: - applyTo: NETWORK_FILTER filtername: envoy.filters.network.http_connection_manager operation: MERGE typeconfig: type.googleapis.com/envoy.extensions.filters.network.http_connection_manager.v3.HttpConnectionManager configkey: server_header_transformation configvalue: PASS_THROUGH - Perform helm upgrade on the ocbsf-servicemesh-config release using
the modified
ocbsf_custom_values_servicemesh_config_26.1.201.yamlfile.helm upgrade <helm_release_name_for_servicemesh> -n <namespace> <servicemesh_charts> -f <servicemesh-custom.yaml>For example,helm upgrade ocbsf-servicemesh-config ocbsf-servicemesh-config-26.1.201.tgz -n ocbsf -f ocbsf_custom_values_servicemesh_26.1.201.yaml - Configure DNS for Alternate Route service. For more information, see Post-Installation Steps.
3.1.6.5 Enabling Health Check
This section describes how to enable Health Check for ATS.
To enable Health Check, in the ocats-bsf/values.yaml
file, set the value of healthcheck parameter to
true and enter a valid value to select either Webscale
or OCCNE environment.
envtype to
OCCNE and update the values of the following parameters:
Webscale- Update the value as falseenvtype- T0NDTkU= (i.e envtype=$(echo -n 'OCCNE' | base64))occnehostip- OCCNE Host IP addressoccnehostusername- OCCNE Host Usernameoccnehostpassword- OCCNE Host Password
Webscale- Update the value as trueenvtype- T0NDTkU= (i.e envtype=$(echo -n 'OCCNE' | base64))
After the configurations are done, encrypt the parameters and provide the values as shown in the following snippet:
atsFeatures:  ## DO NOT UPDATE this section without Engineering team's permission
  healthcheck: true                   # TO enable/disable ATS Health Check.

sshDetails:
  secretname: "healthchecksecret"
  envtype: "T0NDTkU="
  occnehostip: "MTAuMTcuMjE5LjY1"
  occnehostusername: "dXNlcm5hbWU"
occnehostpassword: "KioqKg=="Webscale- Update the value as trueenvtype- V0VCU0NBTEU= (i.e envtype=$(echo -n 'WEBSCALE' | base64))
After the configurations are done, encrypt the parameters and provide the values as shown in the following snippet:
atsFeatures:  ## DO NOT UPDATE this section without Engineering team's permission
  healthcheck: true                   # TO enable/disable ATS Health Check.

sshDetails:
  secretname: "healthchecksecret"
  envtype: "V0VCU0NBTEU="
  webscalejumpip: "MTAuNzAuMTE3LjQy"
  webscalejumpusername: "dXNlcm5hbWU="
  webscalejumppassword: "KioqKg=="
  webscaleprojectname: "KioqKg=="
  webscalelabserverFQDN: "KioqKg=="
  webscalelabserverport: "KioqKg=="
  webscalelabserverusername: "KioqKg=="
  webscalelabserverpassword: "KioqKg=="
Note:
Once the ATS is deployed with HealthCheck feature enabled or disabled, then it cannot be changed. To change the configuration, you are required to re-install.3.1.6.6 Enabling Persistent Volume
Note:
The steps provided in this section are optional and required only if Persistent Volume needs be to enabled.ATS supports Persistent storage to retain ATS historical build execution data, test cases and one-time environment variable configurations. With this enhancement, the user can decide whether to use persistent volume based on their resource requirements. By default, the persistent volume feature is not enabled.
To enable persistent storage, perform the following steps:- Create a PVC using PersistentVolumeClaim.yaml file and associate the same
to the ATS pod.
Sample PersistentVolumeClaim.yaml file:
apiVersion: v1 kind: PersistentVolumeClaim metadata: name: <Enter the PVC Name> annotations: spec: storageClassName: <Provide the Storage Class Name> accessModes: - ReadWriteOnce resources: requests: storage: <Provide the size of the PV>- Set PersistentVolumeClaim to the PVC file name.
- Enter the storageClassName to the Storage Class Name.
- Set storage to and size of the persistent volume.
Sample PVC configuration:
apiVersion: v1
kind: PersistentVolumeClaim
metadata:
  name: bsf-pvc-26.1.201
annotations:
spec:
  storageClassName: standard
  accessModes:
    - ReadWriteOnce
  resources:
    requests:
      storage: 1Gi
- Run the following command to create
PVC:
kubectl apply -f <filename> -n <namespace>For example:
kubectl apply -f PersistentVolumeClaim.yaml -n ocbsfOutput:
persistentvolumeclaim/bsf-pvc-26.1.201 created - Once the PVC is created, run the following command to verify that it is
bound to the namespace and is
available.
kubectl get pvc -n <namespace used for pvc creation>For example:
kubectl get pvc -n ocbsfSample output:
NAME              STATUS        VOLUME                                   CAPACITY  ACCESS MODES   STORAGECLASS   AGE
bsf-pvc-26.1.201   Bound    pvc-65484045-3805-4064-9fc3-f9eeeaccc8b8      1Gi        RWO            standard      11s
Verify that the
STATUSisBoundand rest of the parameters likeNAME,CAPACITY,ACCESS MODES, andSTORAGECLASSare as mentioned in thePersistentVolumeClaim.yamlfile.Note:
Do not proceed further with the next step if there is an issue with the PV creation and contact your administrator to get the PV Created.
- Enable PVC:
- Set the PVEnabled flag to true.
- Set PVClaimName to the PVC created in Step
1.
  PVEnabled: true
  PVClaimName: "ocbsf-pvc-26.1.201"
Note:
Make sure that ATS is deployed before proceeding to the further steps. - Copy the
<nf_main_folder>and<jenkins jobs>folders from the tar file to their ATS pod and restart the pod.- Extract the tar file.
tar -xvf ocats-bsf-data-26.1.201.tgz - Run the following commands to copy the desired folder.
kubectl cp ocats-bsf-data-26.1.201/ocbsf_tests <namespace>/<pod-name>:/var/lib/jenkins/kubectl cp ocats-bsf-data-26.1.201/jobs <namespace>/<pod-name>:/var/lib/jenkins/.jenkins/ - Restart the pod.
kubectl delete po <pod-name> -n <namespace>
- Extract the tar file.
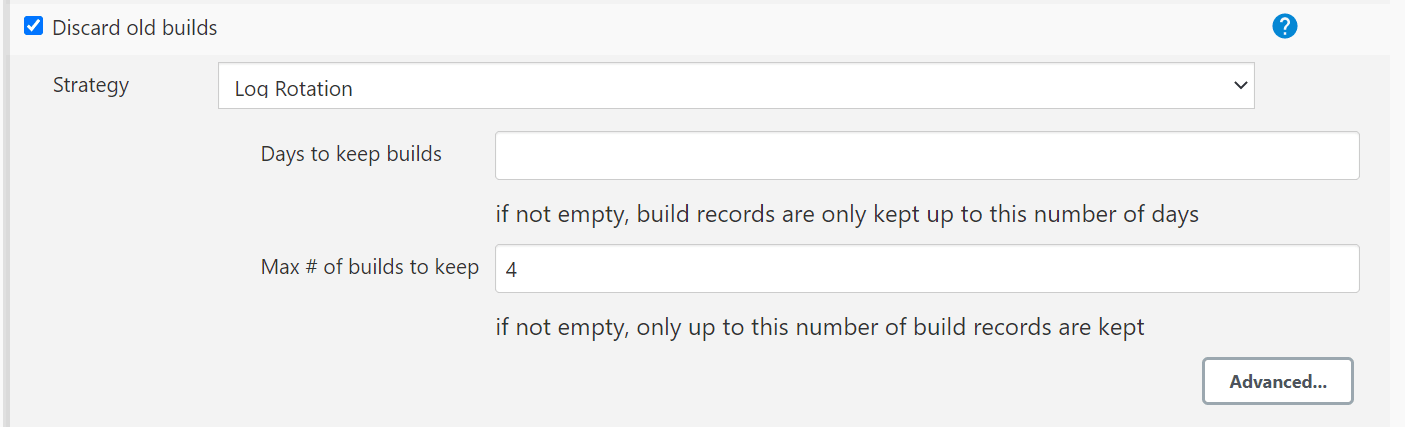
- Once the Pod is up and running, log in to the Jenkins console and configure the
Discard old Builds option to configure the number of Jenkins
builds, which must be retained in the persistent volume.
Figure 3-1 Discarding Old Builds
Note:
If Discard old Builds is not configured, Persistent Volume can get filled when there are huge number of builds.
For more details on Persistent Volume Storage, see Persistent Volume for 5G ATS.
3.1.6.7 ATS-BSF API Extended Support
The ATS application programming interface (API) feature provides APIs, to perform routine ATS tasks such as starting the ATS suite, monitoring and stopping the ATS suite etc.
values.yaml
file.
  atsFeatures:
    atsApi: true
For more details about the ATS API feature, refer to ATS API section.
This ATS feature is extended to provide the ability of running single features, or
scenarios, or stages, or groups, or based on tags execution using the API. This also
allows running of test cases by providing the features, or scenarios, or stages, or
groups, or tags in the curl request to the server.
For more details about the API interfaces, refer to Use the RESTful Interfaces section.
3.1.6.8 Configuration for Dual Stack Support
# Possible values : IPv4, IPv6, IPv4_IPv6,IPv6_IPv4,ClusterPreferred
deploymentMode: ClusterPreferred
To enable IPv6 or Dual Stack configurations for ATS and stubs, see Post-Installation Steps.
3.1.6.9 Configuration of Security Context and Host User
A new setHostUsers configuration is available in ATS and all stub values.yaml files.
setHostUsers is set to false. This setting enables deployments to control whether host user settings are applied based on the target cluster security requirements.setHostUsers: false
# Set setHostUsers to true for security hardening, if the below criteria is met:
# Kubernetes version must be 1.33 or greater
# The hosts running Kubernetes must have Linux Kernel must be set 5.19 or beyond.
# Container runtime version must be 2.0 or greater
# OR
# Cri-o version must be 1.25 or greaterNote:
You must update thesetHostUsers flag value in ATS and all the stubs.
s
3.1.7 Deploying ATS and Pods
3.1.7.1 Deploying ATS in Kubernetes Cluster
Important:
This Procedure is for Backwards porting purpose only and should not be considered as the Subsequent Release POD Deployment Procedure.
Prerequisite: Make sure that the old PVC, which contains the old release POD data is available.
To deploy ATS, perform the following steps:
- Run the following command to deploy ATS
using the updated helm charts:
Note:
Ensure that all the the components, that is, ATS, stub pods and CNC BSF are deployed in the same namespace.Using Helm
helm install -name <release_name> ocats-bsf-26.1.201.tgz --namespace <namespace_name> -f <values-yaml-file>For example:
helm install -name ocats ocats-bsf-26.1.201.tgz --namespace ocbsf -f ocats-bsf/values.yaml - Run the following command to verify ATS
deployment:
helm ls -n ocbsfThe output of the command is as follows:If the deployment is successful, the status is Deployed.NAME REVISION UPDATED STATUS CHART APP VERSION NAMESPACE ocats 1 Mon Nov 14 14:56:11 2020 DEPLOYED ocats-bsf-26.1.201 26.1.201.0.0 ocbsf
Troubleshooting Issues with Logging in to ATS GUI
- Log in to the ATS pod.
- Create a shell script with following commands inside ATS
pod:
USERS_DIR="/var/lib/jenkins/.jenkins/jobs/users" for f in "$USERS_DIR"/*; do base=$(basename "$f") new="${base%%_*}" [ "$base" != "$new" ] && mv "$f" "$USERS_DIR/$new" done ps -ef | grep 8080 | grep jenkins | awk '{ print $2 }' | head -1 | xargs -I {} kill "{}" java -Djava.awt.headless=true -Dhudson.remoting.ClassFilter=org.jenkinsci.plugins.testresultsanalyzer.TestResultsAnalyzerExtension\$DescriptorImpl -Djenkins.install.runSetupWizard=false -Dorg.jenkinsci.plugins.pipeline.modeldefinition.parser.RuntimeASTTransformer.SCRIPT_SPLITTING_TRANSFORMATION=true -Dorg.jenkinsci.plugins.workflow.cps.LoggingInvoker.fieldSetWarning=false -Dorg.jenkinsci.plugins.pipeline.modeldefinition.parser.RuntimeASTTransformer.SCRIPT_SPLITTING_ALLOW_LOCAL_VARIABLES=true -jar /usr/share/java/jenkins.war --httpPort=8080 > /var/lib/jenkins/.jenkins/jenkins.log 2>&1 & - Run the following command to grant execute
permission:
chmod 777 <script>.sh - Run the following command to execute the shell
script:
./<script>.shAfter the execution is complete, ATS restarts automatically.
- Try logging in to the ATS GUI with the given credentials.
3.1.7.2 Deploying ocstub-py Stubs in Kubernetes Cluster
Note:
Enabling pre-defined priming configuration is mandatory for nf1stub and nf11stub only. (Please do not enable it in nf12stub stub.)-
Navigate to
ocats-bsf-tools-26.1.201.0.0folder and run the following command:tar -zxvf ocstub-pkg-26.1.201.0.0.tgzThe output of the command shows:ocstub-py-26.1.201.tgzocstub-py-image-26.1.201.tar
- Deploy the additional stubs required to validate the
session retry feature.
You can use
nf11stubornf12stubas alternte FQDN fornf1stub.- Run the following command to load the stub image.
docker load --input ocstub-py-image-26.1.201.tar - Tag and push the image to your docker registry using below
commands.
docker tag ocstub-py:26.1.201 localhost:5000/ocstub-py:26.1.201 docker push localhost:5000/ocstub-py:26.1.201 - Untar the helm charts
ocstub-py-26.1.201.tgzand update the registry name, image name and tag (if required) inocstub-py/values.yamlfile.tar -zxvf ocstub-py-26.1.201.0.0.tgzNote:
From 24.2.0 onwards, service port names are configurable in ocstub-py. But as per Istio standard, it's advisable to keep the default values as it as.Example:
names: http: "http" h2c: "http2-h2c" h2: "http2-h2" - Configuration for Dual Stack Support:
Use the below configuration to support ipFamilies configuration Dual Stack deployments of ocstub-py:
To enable IPv6 or Dual Stack configurations for ATS and stubs, see Post-Installation Steps.# The below section is to support Dual Stack Deployments of ocstub # ipFamilies : IPv4, IPv6, IPv4_IPv6, IPv6_IPv4, ClusterPreferred deploymentMode: &deploymentMode ClusterPreferred - If required, change
apiVersiontoapps/v1inocstub-py/templates/deployment.yamlfile.apiVersion: apps/v1Note:
If the support for pre-defined priming feature is required, perform the following steps to configure pre-defined priming.
-
Copy
ocstub-py/values.yamlfile to a new file with namepre_priming_values.yaml. - Edit the
ocstub-py/pre_priming_values.yamlfile. - Set the value of
preConfigflag totrueand replace the default configuration with below configurations underpredefined_prime_configurationsection.Pre-defined Priming Configuration:
preConfig:
  enabled: true
  predefined_prime_configuration: |+
    [
      {
        "method": "GET",
        "statuscode": "200",
        "url": "/nnrf-nfm/v1/nf-instances/fe7d992b-0541-4c7d-ab84-c6d70b1b0666",
        "data": "{\"nfInstanceId\": \"fe7d992b-0541-4c7d-ab84-c6d70b1b0666\", \"nfType\": \"BSF\", \"nfStatus\": \"REGISTERED\", \"heartBeatTimer\": 2, \"fqdn\": \"ocbsf1-2-api-gateway.bsf1-2.svc.atlantic.morrisville.us.lab.oracle.com\", \"priority\": 1, \"capacity\": 1, \"load\": 2, \"bsfInfo\": {\"ipv4AddressRanges\": [{\"start\": \"10.0.0.1\", \"end\": \"10.113.255.255\"}], \"ipv6PrefixRanges\": [{\"start\": \"2800:a00:cc03::/64\", \"end\": \"2800:a00:cc04::/64\"}]}, \"nfServices\": [{\"serviceInstanceId\": \"03063893-cf9e-4f7a-9827-111111111111\", \"serviceName\": \"nbsf-management\", \"versions\": [{\"apiVersionInUri\": \"v1\", \"apiFullVersion\": \"1.0.0\"}], \"scheme\": \"http\", \"nfServiceStatus\": \"REGISTERED\", \"fqdn\": \"ocbsf1-2-api-gateway.bsf1-2.svc.atlantic.morrisville.us.lab.oracle.com\", \"interPlmnFqdn\": null, \"ipEndPoints\": [{\"ipv4Address\": \"10.233.22.149\", \"transport\": \"TCP\", \"port\": 80}], \"apiPrefix\": null, \"allowedNfTypes\": [\"PCF\", \"AF\", \"NEF\"], \"priority\": 1, \"capacity\": 1, \"load\": 2}]}",
        "headers": "{\"Content-Type\": \"application/json\"}"
      },
      {
        "method": "PUT",
        "statuscode": "201",
        "url": "/nnrf-nfm/v1/nf-instances/fe7d992b-0541-4c7d-ab84-c6d70b1b0666",
        "data": "{\"nfInstanceId\": \"fe7d992b-0541-4c7d-ab84-c6d70b1b0666\", \"nfType\": \"BSF\", \"nfStatus\": \"REGISTERED\", \"heartBeatTimer\": 30, \"fqdn\": \"ocbsf1-2-api-gateway.bsf1-2.svc.atlantic.morrisville.us.lab.oracle.com\", \"priority\": 1, \"capacity\": 1, \"load\": 2, \"bsfInfo\": {\"ipv4AddressRanges\": [{\"start\": \"10.0.0.1\", \"end\": \"10.113.255.255\"}], \"ipv6PrefixRanges\": [{\"start\": \"2800:a00:cc03::/64\", \"end\": \"2800:a00:cc04::/64\"}]}, \"nfServices\": [{\"serviceInstanceId\": \"03063893-cf9e-4f7a-9827-111111111111\", \"serviceName\": \"nbsf-management\", \"versions\": [{\"apiVersionInUri\": \"v1\", \"apiFullVersion\": \"1.0.0\"}], \"scheme\": \"http\", \"nfServiceStatus\": \"REGISTERED\", \"fqdn\": \"ocbsf1-2-api-gateway.bsf1-2.svc.atlantic.morrisville.us.lab.oracle.com\", \"interPlmnFqdn\": null, \"ipEndPoints\": [{\"ipv4Address\": \"10.233.22.149\", \"transport\": \"TCP\", \"port\": 80}], \"apiPrefix\": null, \"allowedNfTypes\": [\"PCF\", \"AF\", \"NEF\"], \"priority\": 1, \"capacity\": 1, \"load\": 2}]}",
        "headers": "{\"Content-Type\": \"application/json\"}"
      },
      {
        "method": "PATCH",
        "statuscode": "204",
        "url": "/nnrf-nfm/v1/nf-instances/fe7d992b-0541-4c7d-ab84-c6d70b1b0666",
        "data": "{}",
        "headers": "{\"Content-Type\": \"application/json\"}"
      },
      {
        "method": "POST",
        "statuscode": "201",
        "url": "/nnrf-nfm/v1/subscriptions",
        "data": "{\"nfStatusNotificationUri\": \"http://ocbsf-ocbsf-ingress-gateway.ocpcf.svc/nnrf-client/v1/notify\", \"reqNfType\": \"BSF\", \"subscriptionId\": \"2d77e0de-15a9-11ea-8c5b-b2ca002e6839\", \"validityTime\": \"2050-12-26T09:34:30.816Z\"}",
        "headers": "{\"Content-Type\": \"application/json\"}"
     }
    ]
Note:
- The
predefined_prime_configurationcontains variables such asnfInstanceId,nfType, andfqdnin the data's content. Make sure to verify and update the variables based on the payload message that must be included in the response from the NRF on a request. - The default value of
nfInstanceIdvariable isfe7d992b-0541-4c7d-ab84-c6d70b1b0666.
- The
- Run the following command to deploy the
stub:
Install nf1stub and nf11stub with updated ocstub-py/pre_priming_values.yaml file.helm install -name <release_name> ocstub-py --set env.NF=<NF> --set env.LOG_LEVEL=<DEBUG/INFO> --set service.name=<service_name>--set service.appendReleaseName=false --set preConfig.enabled=false --namespace=<namespace_name> -f <values.yaml-file>helm install -name nf1stub ocstub-py --set env.NF=BSF --set env.LOG_LEVEL=DEBUG --set service.name=nf1stub --set service.appendReleaseName=false --set preConfig.enabled=true --namespace=ocbsf -f ocstub-py/values.yamlhelm install -name nf11stub ocstub-py --set env.NF=BSF --set env.LOG_LEVEL=DEBUG --set service.name=nf11stub --set service.appendReleaseName=false --set preConfig.enabled=true --namespace=ocbsf -f ocstub-py/values.yamlInstall nf12stub with the default ocstub-py/pre_priming_values.yaml file
helm install -name nf12stub ocstub-py --set env.NF=BSF --set env.LOG_LEVEL=DEBUG --set service.name=nf12stub --set service.appendReleaseName=false --set preConfig.enabled=false --namespace=ocbsf -f ocstub-py/values.yaml - Run the following command to verify the stub deployment:
helm ls -n ocbsfSample output:
NAME REVISION UPDATED STATUS CHART APP VERSION NAMESPACE nf11stub 1 Thu Jul 29 05:55:48 2024 DEPLOYED ocstub-py-26.1.201 26.1.201.0.0 ocbsf nf12stub 1 Thu Jul 29 05:55:50 2024 DEPLOYED ocstub-py-26.1.201 26.1.201.0.0 ocbsf nf1stub 1 Thu Jul 29 05:55:47 2024 DEPLOYED ocstub-py-26.1.201 26.1.201.0.0 ocbsf - Run the following command to verify the ATS and Stubs
deployment
status:
helm status -n ocbsf - Run the following command to verify if all the services are
installed.
kubectl get po -n ocbsfSample output:
NAME                                                   READY   STATUS    RESTARTS   AGE
nf11stub-ocstub-py-7bffd6dcd7-ftm5f                   1/1     Running   0          3d23h
nf12stub-ocstub-py-547f7cb99f-7mpll                   1/1     Running   0          3d23h
nf1stub-ocstub-py-bdd97cb9-xjrkx                      1/1     Running   0          3d23h
- Run the following command to load the stub image.
- Verify the changes related to stub pre-defined prime
configuration.
- Run the following command to verify the status of all the
config-map.
kubectl get cm -n ocbsfNotice the change in the number of config-map counts. There will be one extra config-maps of nf1stub and nf11stub.
A sample of config-map with pre-defined priming is as follows:
NAME                 DATA   AGE
cm-pystub-nf1stub               1      3h35m
cm-pystub-nf11stub               1      3h35m
- Run the following command to verify the status of all the
config-map.
Updating the Predefined priming configurations
Note:
This procedure is applicable only when Predefined priming configuration is enabled.Post the deployment, there might be the chance to modify some values inside the stub pre-priming configurations, for example, nfInstanceID in the url.
- Run the following command to edit the config-map of
nf1stub:
kubectl get cm -n ocbsfkubectl edit cm cm-pystub-nf1stub -n ocbsf - Edit the configurations as required and save it.
- Restart the nf1stub pod.
- Verify the log to confirm the changes.
- Follow the same procedure for nf11stub pod.
3.1.7.3 Deploying DNS Stub in Kubernetes Cluster
Note:
Ensure there are sufficient resources and limit for DNS Stub. Set the resource request and limit values in the resources section of the values.yaml file as follows:
resources: {}
  # We usually recommend not to specify default resources and to leave this as a conscious
  # choice for the user. This also increases chances charts run on environments with little
  # resources, such as Minikube. If you do want to specify resources, uncomment the following
  # lines, adjust them as necessary, and remove the curly braces after 'resources:'.  # limits:
  #  cpu: 1000m
  #  memory: 1024Mi
  # requests:
  #  cpu: 500m
# memory: 500Mi- Go to the
ocats-bsf-tools-26.1.201.0.0folder and run the following command to extract the ocstub tar file content:tar -zxvf ocdns-pkg-26.1.205.0.0.tgzSample output:
[cloud-user@platform-bastion-1 ocdns-pkg-26.1.205.0.0]$ ls -ltrh total 211M -rw-------. 1 cloud-user cloud-user 211M Mar 14 14:49 ocdns-bind-image-26.1.205.tar -rw-r--r--. 1 cloud-user cloud-user 2.9K Mar 14 14:49 ocdns-bind-26.1.205.tgz - Run the following command in your
cluster to load the DNS STUB image:
docker load --input ocdns-bind-image-26.1.205.tar - Run the following commands to tag and push the DNS STUB
image:
docker tag ocdns-bind:26.1.205 localhost:5000/ocdns-bind:26.1.205 docker push localhost:5000/ocdns-bind:26.1.205 - Run the following command to untar the
helm charts,
ocdns-bind-26.1.205.tgz.tar -zxvf ocdns-bind-26.1.205.tgz - Update the registry name, image name
and tag (if required) in the
ocdns-bind/values.yamlfile as required. For this, open the values.yaml file and update theimage.repositoryandimage.tagparameters. -
Use the below configuration to support ipFamilies configuration Dual Stack deployments of ocdns-bind:
Deployment mode for dual stack support. Possible values : IPv4, IPv6, IPv4_IPv6, IPv6_IPv4, ClusterPreferred deploymentMode: ClusterPreferred - Configure the security context as follows:
- A default pod and container security context are introduced for
dns-bind. These defaults improve the security posture of deployed workloads by enabling non-root execution, disabling privilege escalation, dropping Linux capabilities, and enforcing a read-only root file system where applicable. Use the below configuration to support security context feature.enableContainerSecurityContext: true enablePodSecurityContext: false podSecurityContext: runAsNonRoot: true runAsGroup: 25 runAsUser: 25 containerSecurityContext: runAsNonRoot: true readOnlyRootFilesystem: true allowPrivilegeEscalation: false privileged: false capabilities: drop: - ALL
Note:
You can override these values during installation if the production environment requires different user, group, or security context settings. - A default pod and container security context are introduced for
- Run the following command to deploy the
DNS Stub.
Using Helm:
helm install -name ocdns ocdns-bind-26.1.205.tgz --namespace ocbsf -f ocdns-bind/values.yaml -
Capture the
cluster nameof the deployment,namespacewhere nfstubs are deployed, and the cluster IP of DNS Stub.To capture the DNS Stub cluster IP:kubectl get svc -n ocbsf | grep dnsSample output:
[cloud-user@platform-bastion-1 ocdns-pkg-26.1.205.0.0]$ kubectl get svc -n ocbsf | grep dns
NAME      TYPE           CLUSTER-IP      EXTERNAL-IP     PORT(S)                AGE
ocdns     ClusterIP      10.233.11.45    <none>          53/UDP,6236/TCP        19h
To capture the cluster name:kubectl -n kube-system get configmap kubeadm-config -o yaml | grep clusterNameSample output:clusterName: platform
3.1.7.4 Deploying ocdiam Simulator in Kubernetes Cluster
- Go to the
ocats-bsf-tools-26.1.201.0.0folder and run the following command to extract the ocstub tar file content:tar -zxvf ocdiam-pkg-26.1.205.0.0.tgzSample output:
[cloud-user@platform-bastion-1 ocdiam-pkg-26.1.205.0.0]$ ls -ltrh total 908M -rw-------. 1 cloud-user cloud-user 908M Mar 14 14:49 ocdiam-sim-image-26.1.205.tar -rw-r--r--. 1 cloud-user cloud-user 3.8K Mar 14 14:49 ocdiam-sim-26.1.205.tgz - Run the following command in your cluster to load the Diameter Simulator image:
docker load --input ocdiam-sim-image-26.1.205.tar - Run the following commands to tag and push the Diameter Simulator image:
docker tag ocdiam-sim:26.1.205 localhost:5000/ocdiam-sim:26.1.205 docker push localhost:5000/ocdiam-sim:26.1.205 - Run the following command to untar the helm charts,
ocdiam-sim-26.1.205.tgz.tar -zxvf ocdiam-sim-26.1.205.tgz - Update the registry name, image name and tag (if required) in the
ocdiam-sim/values.yamlfile as required. For this, open the values.yaml file and update theimage.repositoryandimage.tagparameters. -
Use the below configuration to support ipFamilies configuration Dual Stack deployments of ocdiam-sim:
#Deployment mode for dual stack support. Possible values : IPv4, IPv6, IPv4_IPv6, IPv6_IPv4, ClusterPreferred deploymentMode: ClusterPreferred - Configure the security context as follows:
- A default pod and container security context are introduced for
ocdiam-sim. These defaults improve the security posture of deployed workloads by enabling non-root execution, disabling privilege escalation, dropping Linux capabilities, and enforcing a read-only root file system where applicable. Use the below configuration to support security context feature.enableContainerSecurityContext: true enablePodSecurityContext: false podSecurityContext: runAsNonRoot: true runAsUser: 5000 containerSecurityContext: runAsNonRoot: true runAsUser: 5000 readOnlyRootFilesystem: true allowPrivilegeEscalation: false privileged: false capabilities: drop: - ALL
Note:
You can override these values during installation if the production environment requires different user, group, or security context settings. - A default pod and container security context are introduced for
- Run the following command to deploy the Diameter Simulator.
Using Helm:
helm install -name ocdiam-sim ocdiam-sim --namespace ocbcf -f ocdiam-sim/values.yamlOutput:
ocdiam-sim-69968444b6-fg6ks 1/1 Running 0 5h47m
Sample of BSF namespace with BSF and ATS after installation:
[cloud-user@platform-bastion-1 ocstub-pkg-26.1.201.0.0]$ kubectl get po -n ocbsfNAME                                                      READY   STATUS    RESTARTS   AGE
ocbsf-appinfo-6fc99ffb85-f96j2                        1/1     Running   1          3d23h
ocbsf-bsf-management-service-df6b68d75-m77dv          1/1     Running   0          3d23h
ocbsf-oc-config-79b5444f49-7pwzx                      1/1     Running   0          3d23h
ocbsf-oc-diam-connector-77f7b855f4-z2p88              1/1     Running   0          3d23h
ocbsf-oc-diam-gateway-0                               1/1     Running   0          3d23h
ocbsf-ocats-bsf-5d8689bc77-cxdvx                      1/1     Running   0          3d23h
ocbsf-ocbsf-egress-gateway-644555b965-pkxsb           1/1     Running   0          3d23h
ocbsf-ocbsf-egress-gateway-644555b965-txqch           1/1     Running   0          3d23h
ocbsf-ocbsf-ingress-gateway-7558b7d5d4-lfs5s          1/1     Running   4          3d23h
ocbsf-ocbsf-ingress-gateway-7558b7d5d4-wcg9g          1/1     Running   1          3d23h
ocbsf-ocbsf-nrf-client-nfmanagement-d6b955b48-4pptk   1/1     Running   0          3d23h
ocbsf-ocdns-ocdns-bind-75c964648-j5fsd                1/1     Running   0          3d23h
ocbsf-ocpm-cm-service-7775c76c45-xgztj                1/1     Running   0          3d23h
ocbsf-ocpm-queryservice-646cb48c8c-d72x4              1/1     Running   0          3d23h
ocbsf-performance-69fc459ff6-frrvs                    1/1     Running   4          3d23h
ocbsfnf11stub-7bffd6dcd7-ftm5f                        1/1     Running   0          3d23h
ocbsfnf12stub-547f7cb99f-7mpll                        1/1     Running   0          3d23h
ocbsfnf1stub-bdd97cb9-xjrkx                           1/1     Running   0          3d23h
ocdiam-sim-69968444b6		                   1/1     Running   0          3d23h
3.1.8 Post-Installation Steps
The section describes post-installation steps that users should perform after deploying ATS and stub pods.
Enabling IPv6 for ATS
Perform this procedure after ATS for BSF is installed. This procedure creates services with the required IP family configuration.
Below are the prerequisites for this procedure:- Ensure that the Kubernetes cluster supports IPv6 or dual stack networking.
- Do not edit an existing service to change its IP family from IPv4 to IPv6.
- Create a temporary directory to store the service YAML file exported in Step 1.
- Run the following command to export the existing service YAML
file:
kubectl get svc <SERVICE_NAME> -n <NAMESPACE> -o yaml > /tmp/<directory>/<my-svc.yaml>The current service definition is retrieved and written to
/tmp/<directory>/<my-svc.yaml>.Sample output:
kubectl get svc nf11stub -n ocbsf -o yaml > /tmp/ocbsf/svcs/nf11stub.yaml kubectl get svc nf12stub -n ocbsf -o yaml > /tmp/ocbsf/svcs/nf12stub.yaml kubectl get svc nf1stub -n ocbsf -o yaml > /tmp/ocbsf/svcs/nf1stub.yaml kubectl get svc ocats-bsf -n ocbsf -o yaml > /tmp/ocbsf/svcs/ocats-bsf.yaml kubectl get svc ocdiam-sim-1 -n ocbsf -o yaml > /tmp/ocbsf/svcs/ocdiam-sim-1.yaml kubectl get svc ocdiam-sim-2 -n ocbsf -o yaml > /tmp/ocbsf/svcs/ocdiam-sim-2.yaml kubectl get svc ocdiam-sim-3 -n ocbsf -o yaml > /tmp/ocbsf/svcs/ocdiam-sim-3.yaml kubectl get svc ocdiam-sim-4 -n ocbsf -o yaml > /tmp/ocbsf/svcs/ocdiam-sim-4.yaml kubectl get svc ocdns-stub -n ocbsf -o yaml > /tmp/ocbsf/svcs/ocdns-stub.yaml - Run the following command to remove the existing
service:
kubectl delete svc <SERVICE_NAME> -n <NAMESPACE>Sample output:
kubectl delete svc nf11stub -n ocbsf kubectl delete svc nf12stub -n ocbsf kubectl delete svc nf1stub -n ocbsf kubectl delete svc ocats-bsf -n ocbsf kubectl delete svc ocdiam-sim-1 -n ocbsf kubectl delete svc ocdiam-sim-2 -n ocbsf kubectl delete svc ocdiam-sim-3 -n ocbsf kubectl delete svc ocdiam-sim-4 -n ocbsf kubectl delete svc ocdns-stub -n ocbsf - Edit the exported YAML file and remove the value of the following
fields if they
exist:
clusterIP:
clusterIPs:
Unedited YAML file:
spec:
  clusterIP: 10.233.13.190
  clusterIPs:
  - 10.233.13.190
  internalTrafficPolicy: Cluster
  ipFamilies:
  - IPv4
  ipFamilyPolicy: SingleStack
Edited YAML file:
spec:
  clusterIP:
  clusterIPs:
  internalTrafficPolicy: Cluster
  ipFamilies:
  - IPv6
  ipFamilyPolicy: SingleStack
Note:
Do not specify the value ofclusterIPorclusterIPs. These values are automatically assigned by Kubernetes. - Run the following command to recreate the service with the updated
YAML file:
kubectl apply -f my-svc.yamlThe service is created with the required IP family configuration.
Sample output:
[cnpolicy@bastion-1 svcs]$ pwd /tmp/ocbsf/svcs [cnpolicy@bastion-1 svcs]$ ls nf12stub.yaml ocdiam-sim-1.yaml ocdiam-sim-3.yaml ocdns-stub.yaml nf11stub.yaml nf1stub.yaml ocats-bsf.yaml ocdiam-sim-2.yaml ocdiam-sim-4.yaml kubectl apply -f nf11stub.yaml -n ocbsf kubectl apply -f nf12stub.yaml -n ocbsf kubectl apply -f nf1stub.yaml -n ocbsf kubectl apply -f ocats-bsf.yaml -n ocbsf kubectl apply -f ocdiam-sim-1.yaml -n ocbsf kubectl apply -f ocdiam-sim-2.yaml -n ocbsf kubectl apply -f ocdiam-sim-3.yaml -n ocbsf kubectl apply -f ocdiam-sim-4.yaml -n ocbsf kubectl apply -f ocdns-stub.yaml -n ocbsf - To verify if the service has an IPv6 address, run the following
command:
Sample output:kubectl get svc -n <NAMESPACE>NAME TYPE CLUSTER-IP EXTERNAL-IP PORT(S) AGE ------------------------------------------------------------------------------------------------------------------------------ nf11stub ClusterIP fd00:0:0:2::74aa <none> 8080/TCP,8081/TCP 8h nf12stub ClusterIP fd00:0:0:2::10cf <none> 8080/TCP,8081/TCP 8h nf1stub ClusterIP fd00:0:0:2::cea4 <none> 8080/TCP,8081/TCP 8h ocbsf-altsvc-cache ClusterIP None <none> 8000/TCP 9h ocbsf-egw-cache ClusterIP None <none> 8000/TCP 9h ocbsf-igw-cache ClusterIP None <none> 8000/TCP 9h ocbsf-ocbsf-alternate-route ClusterIP fd00:0:0:2::4735 <none> 8000/TCP 9h ocbsf-ocbsf-app-info ClusterIP fd00:0:0:2::7a03 <none> 8000/TCP 9h ocbsf-ocbsf-audit ClusterIP fd00:0:0:2::3be2 <none> 8000/TCP 9h ocbsf-ocbsf-bsf-management ClusterIP fd00:0:0:2::9f7f <none> 5903/TCP,8443/TCP 9h ocbsf-ocbsf-config-mgmt LoadBalancer fd00:0:0:2::bc02 2606:b400:605:b82e::7 8000:31125/TCP 9h ocbsf-ocbsf-config-server ClusterIP fd00:0:0:2::8746 <none> 8000/TCP 9h ocbsf-ocbsf-egress-gateway ClusterIP fd00:0:0:2::c15f <none> 8000/TCP 9h ocbsf-ocbsf-ingress-gateway LoadBalancer fd00:0:0:2::a5a6 2606:b400:605:b82e::8 80:32507/TCP 9h ocbsf-ocbsf-ingress-gateway-intra-nf ClusterIP fd00:0:0:2::1237 <none> 8008/TCP 9h ocbsf-ocbsf-nrf-client-cache ClusterIP None <none> 5907/TCP 9h ocbsf-ocbsf-nrf-client-nfdiscovery ClusterIP fd00:0:0:2::d883 <none> 8000/TCP,9443/TCP 9h ocbsf-ocbsf-nrf-client-nfmanagement ClusterIP fd00:0:0:2::2963 <none> 8000/TCP,9443/TCP 9h ocbsf-ocbsf-oc-diam-gateway LoadBalancer fd00:0:0:2::bf45 2606:b400:605:b82e::12 3868:31695/TCP 9h ocbsf-ocbsf-oc-diam-gateway-coherence-headless ClusterIP None <none> 5801/TCP 9h ocbsf-ocbsf-oc-diam-gateway-headless ClusterIP None <none> 3868/TCP,8000/TCP 9h ocbsf-ocbsf-oc-diam-gateway-internal ClusterIP fd00:0:0:2::26df <none> 8000/TCP 9h ocbsf-ocbsf-perf-info ClusterIP fd00:0:0:2::8e23 <none> 8000/TCP 9h ocbsf-ocbsf-query ClusterIP fd00:0:0:2::5075 <none> 8000/TCP 9h ocats-bsf LoadBalancer fd00:0:0:2::62dc 2606:b400:605:b82e::17 8080:30942/TCP,5001:31901/TCP,3868:32662/TCP 8h ocdiam-sim-1 ClusterIP fd00:0:0:2::a25b <none> 8089/TCP,3868/TCP 8h ocdiam-sim-2 ClusterIP fd00:0:0:2::d3db <none> 8089/TCP,3868/TCP 8h ocdiam-sim-3 ClusterIP fd00:0:0:2::b656 <none> 8089/TCP,3868/TCP 8h ocdiam-sim-4 ClusterIP fd00:0:0:2::d30f <none> 8089/TCP,3868/TCP 8h ocdns-stub ClusterIP fd00:0:0:2::2341 <none> 53/UDP,6236/TCP 8hNote:
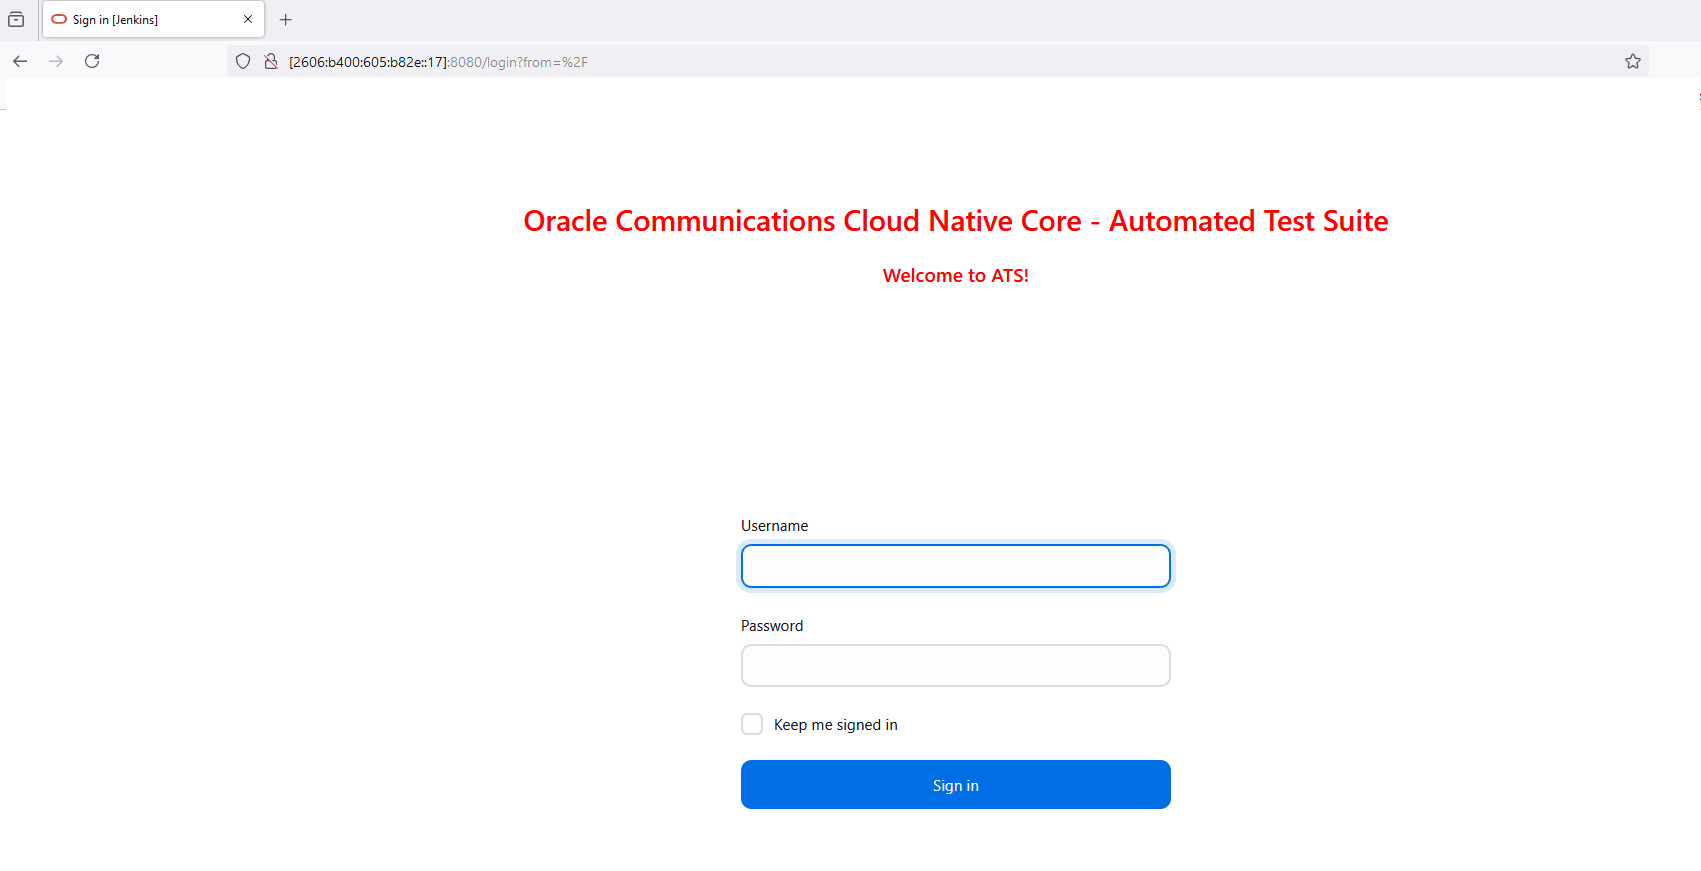
Ensure that only IPv6 addresses are observed. - To access the ATS GUI with an IPv6, the IP in IPv6 of ocats and the
port 8080 are entered in the browser URL of ATS (Jenkins).
Figure 3-2 Accessing ATS GUI using IPv6
Enabling Dual Stack for ATS
Perform the following procedure to enable dual stack support for ATS.
Modify the IP address type to IPv6 dual stack or IPv4 dual stack by following these steps:
Below are the prerequisites for this procedure:- Ensure that the Kubernetes cluster supports IPv6 or dual stack networking.
- Do not edit an existing service to change its IP family from IPv4 to IPv6.
- Create a temporary directory to store the service YAML file exported in Step 1.
- Run the following command to export the existing service YAML
file:
kubectl get svc <SERVICE_NAME> -n <NAMESPACE> -o yaml > /tmp/<directory>/<my-svc.yaml>The current service definition is retrieved and written to
/tmp/<directory>/<my-svc.yaml>.Sample output:
kubectl get svc nf11stub -n ocbsf -o yaml > /tmp/ocbsf/svcs/nf11stub.yaml kubectl get svc nf12stub -n ocbsf -o yaml > /tmp/ocbsf/svcs/nf12stub.yaml kubectl get svc nf1stub -n ocbsf -o yaml > /tmp/ocbsf/svcs/nf1stub.yaml kubectl get svc ocats-bsf -n ocbsf -o yaml > /tmp/ocbsf/svcs/ocats-bsf.yaml kubectl get svc ocdiam-sim-1 -n ocbsf -o yaml > /tmp/ocbsf/svcs/ocdiam-sim-1.yaml kubectl get svc ocdiam-sim-2 -n ocbsf -o yaml > /tmp/ocbsf/svcs/ocdiam-sim-2.yaml kubectl get svc ocdiam-sim-3 -n ocbsf -o yaml > /tmp/ocbsf/svcs/ocdiam-sim-3.yaml kubectl get svc ocdiam-sim-4 -n ocbsf -o yaml > /tmp/ocbsf/svcs/ocdiam-sim-4.yaml kubectl get svc ocdns-stub -n ocbsf -o yaml > /tmp/ocbsf/svcs/ocdns-stub.yaml - Run the following command to remove the existing
service:
kubectl delete svc <SERVICE_NAME> -n <NAMESPACE>Sample output:
kubectl delete svc nf11stub -n ocbsf kubectl delete svc nf12stub -n ocbsf kubectl delete svc nf1stub -n ocbsf kubectl delete svc ocats-bsf -n ocbsf kubectl delete svc ocdiam-sim-1 -n ocbsf kubectl delete svc ocdiam-sim-2 -n ocbsf kubectl delete svc ocdiam-sim-3 -n ocbsf kubectl delete svc ocdiam-sim-4 -n ocbsf kubectl delete svc ocdns-stub -n ocbsf - Edit the exported YAML file and remove the value of the following
fields if they
exist:
clusterIP:
clusterIPs:
Unedited YAML file:
spec:
  clusterIP: 10.233.13.190
  clusterIPs:
  - 10.233.13.190
  internalTrafficPolicy: Cluster
  ipFamilies:
  - IPv4
  ipFamilyPolicy: SingleStack
Add or modify the
specsection for IPv6 or IPv4 dual stack:spec: ipFamilies: - IPv6 - IPv4 ipFamilyPolicy: RequireDualStack or spec: ipFamilies: - IPv4 - IPv6 ipFamilyPolicy: RequireDualStackEdited YAML file:
spec:
  clusterIP:
  clusterIPs:
  internalTrafficPolicy: Cluster
  ipFamilies:
    - IPv6
    - IPv4
  ipFamilyPolicy: RequireDualStack

 or

spec:
  clusterIP:
  clusterIPs:
  internalTrafficPolicy: Cluster
  ipFamilies:
    - IPv4
    - IPv6
  ipFamilyPolicy: RequireDualStack
Note:
Do not specify the value ofclusterIPorclusterIPs. These values are automatically assigned by Kubernetes. - Run the following command to recreate the service with the updated
YAML file:
kubectl apply -f my-svc.yamlThe service is created with the required IP family configuration.
Sample output:
[cnpolicy@bastion-1 svcs]$ pwd /tmp/ocbsf/svcs [cnpolicy@bastion-1 svcs]$ ls nf12stub.yaml ocdiam-sim-1.yaml ocdiam-sim-3.yaml ocdns-stub.yaml nf11stub.yaml nf1stub.yaml ocats-bsf.yaml ocdiam-sim-2.yaml ocdiam-sim-4.yaml kubectl apply -f nf11stub.yaml -n ocbsf kubectl apply -f nf12stub.yaml -n ocbsf kubectl apply -f nf1stub.yaml -n ocbsf kubectl apply -f ocats-bsf.yaml -n ocbsf kubectl apply -f ocdiam-sim-1.yaml -n ocbsf kubectl apply -f ocdiam-sim-2.yaml -n ocbsf kubectl apply -f ocdiam-sim-3.yaml -n ocbsf kubectl apply -f ocdiam-sim-4.yaml -n ocbsf kubectl apply -f ocdns-stub.yaml -n ocbsf - To verify if the service has a dual stack address with the
preference IPv4 or IPv6, run the following
command:
kubectl get svc -n <NAMESPACE>Sample output:
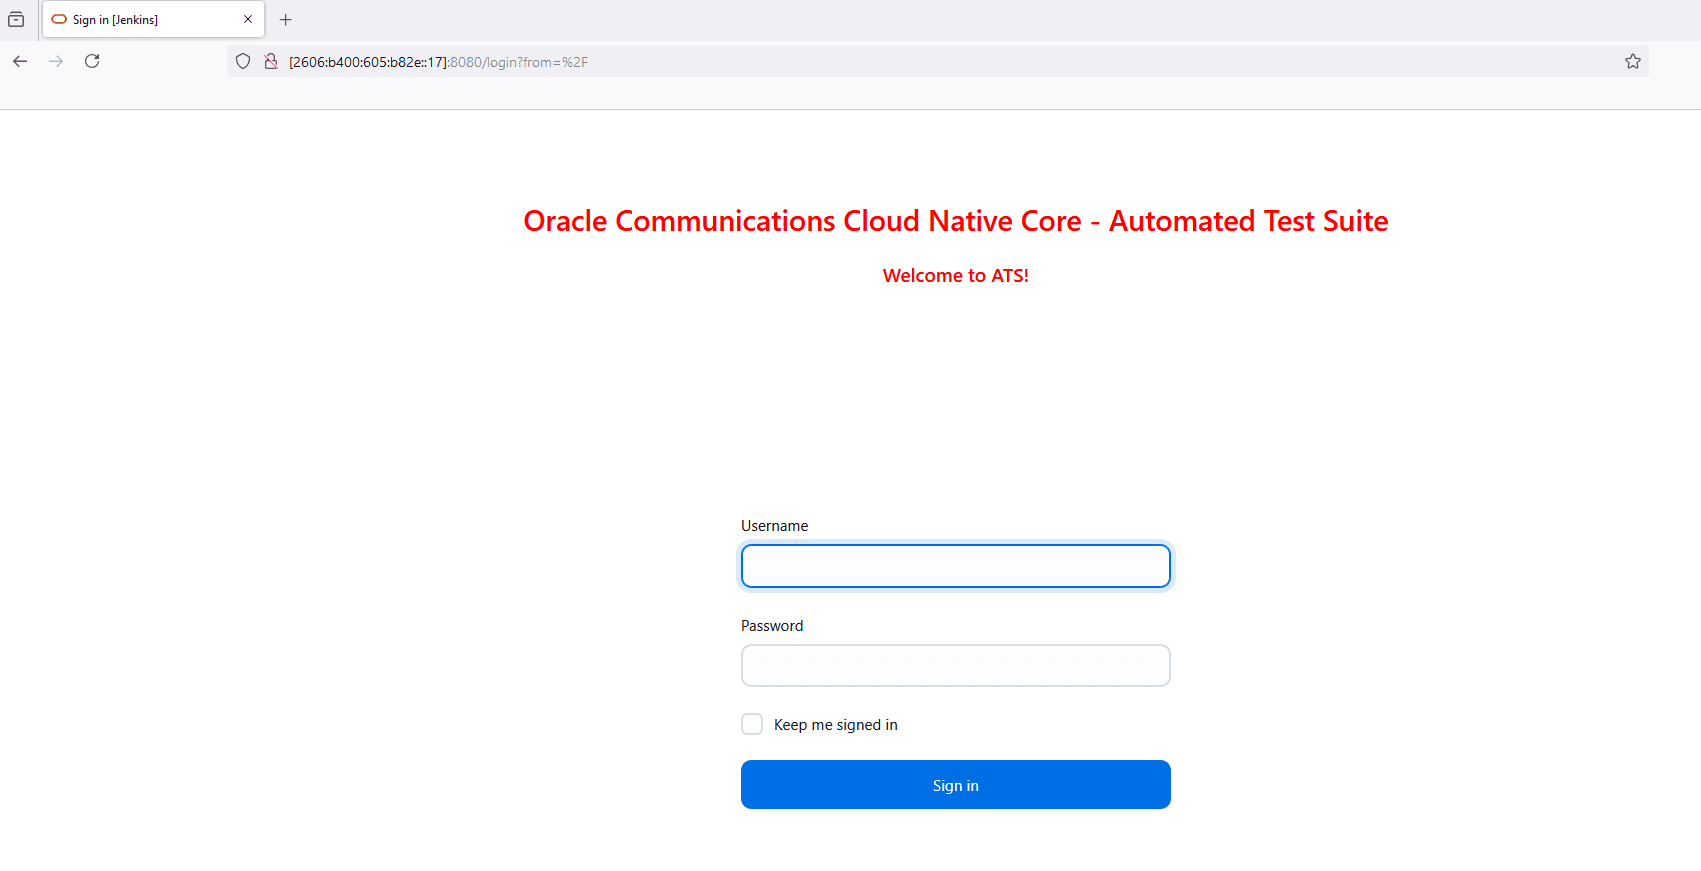
NAME TYPE CLUSTER-IP EXTERNAL-IP PORT(S) AGE ------------------------------------------------------------------------------------------------------------------------------------------------------------------------------- nf11stub ClusterIP fd00:0:0:2::74aa <none> 8080/TCP,8081/TCP 8h nf12stub ClusterIP fd00:0:0:2::10cf <none> 8080/TCP,8081/TCP 8h nf1stub ClusterIP fd00:0:0:2::cea4 <none> 8080/TCP,8081/TCP 8h ocbsf-altsvc-cache ClusterIP None <none> 8000/TCP 9h ocbsf-egw-cache ClusterIP None <none> 8000/TCP 9h ocbsf-igw-cache ClusterIP None <none> 8000/TCP 9h ocbsf-ocbsf-alternate-route ClusterIP fd00:0:0:2::4735 <none> 8000/TCP 9h ocbsf-ocbsf-app-info ClusterIP fd00:0:0:2::7a03 <none> 8000/TCP 9h ocbsf-ocbsf-audit ClusterIP fd00:0:0:2::3be2 <none> 8000/TCP 9h ocbsf-ocbsf-bsf-management ClusterIP fd00:0:0:2::9f7f <none> 5903/TCP,8443/TCP 9h ocbsf-ocbsf-config-mgmt LoadBalancer fd00:0:0:2::bc02 2606:b400:605:b82e::7 8000:31125/TCP 9h ocbsf-ocbsf-config-server ClusterIP fd00:0:0:2::8746 <none> 8000/TCP 9h ocbsf-ocbsf-egress-gateway ClusterIP fd00:0:0:2::c15f <none> 8000/TCP 9h ocbsf-ocbsf-ingress-gateway LoadBalancer fd00:0:0:2::a5a6 10.75.206.211,2606:b400:605:b82e::8 80:32507/TCP 9h ocbsf-ocbsf-ingress-gateway-intra-nf ClusterIP fd00:0:0:2::1237 <none> 8008/TCP 9h ocbsf-ocbsf-nrf-client-cache ClusterIP None <none> 5907/TCP 9h ocbsf-ocbsf-nrf-client-nfdiscovery ClusterIP fd00:0:0:2::d883 <none> 8000/TCP,9443/TCP 9h ocbsf-ocbsf-nrf-client-nfmanagement ClusterIP fd00:0:0:2::2963 <none> 8000/TCP,9443/TCP 9h ocbsf-ocbsf-oc-diam-gateway LoadBalancer fd00:0:0:2::bf45 10.75.206.210,2606:b400:605:b82e::12 3868:31695/TCP 9h ocbsf-ocbsf-oc-diam-gateway-coherence-headless ClusterIP None <none> 5801/TCP 9h ocbsf-ocbsf-oc-diam-gateway-headless ClusterIP None <none> 3868/TCP,8000/TCP 9h ocbsf-ocbsf-oc-diam-gateway-internal ClusterIP fd00:0:0:2::26df <none> 8000/TCP 9h ocbsf-ocbsf-perf-info ClusterIP fd00:0:0:2::8e23 <none> 8000/TCP 9h ocbsf-ocbsf-query ClusterIP fd00:0:0:2::5075 <none> 8000/TCP 9h ocats-bsf LoadBalancer fd00:0:0:2::62dc 10.75.206.199,2606:b400:605:b82e::13 8080:30942/TCP,5001:31901/TCP,3868:32662/TCP 8h ocdiam-sim-1 ClusterIP fd00:0:0:2::a25b <none> 8089/TCP,3868/TCP 8h ocdiam-sim-2 ClusterIP fd00:0:0:2::d3db <none> 8089/TCP,3868/TCP 8h ocdiam-sim-3 ClusterIP fd00:0:0:2::b656 <none> 8089/TCP,3868/TCP 8h ocdiam-sim-4 ClusterIP fd00:0:0:2::d30f <none> 8089/TCP,3868/TCP 8h ocdns-stub ClusterIP fd00:0:0:2::2341 <none> 53/UDP,6236/TCP 8h - To access the ATS GUI with an IPv6, the IP in IPv6 of ocats and the
port 8080 are entered in the browser URL of ATS (Jenkins).
Figure 3-3 Accessing ATS GUI using IPv6 in Dual Stack
Alternate Route Service Configurations
To edit the Alternate Route Service deployment file (ocbcf-ocbsf-alternate-route) that points to DNS Stub, perform the following steps:
- Run the following command to get searches information from dns-bind
pod to enable communication between Alternate Route and dns-bind
service:
The following output is displayed after running the command:kubectl exec -it <dns-bind pod> -n <NAMESPACE> -- /bin/bash -c 'cat /etc/resolv.conf' | grep search | tr ' ' '\n' | grep -v 'search'By default alternate service will point to CoreDNS and you will see following settings in deployment file:Figure 3-4 Sample Output

Figure 3-5 Alternate Route Service Deployment File

- Run the following command to edit the deployment file and add the following
content in alternate service to query DNS
stub:
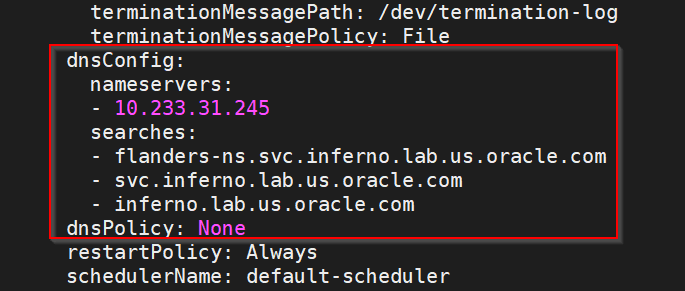
$kubectl edit deployment ocpcf-occnp-alternate-route -n ocpcf- Add the IP Address of the nameserver that you have recorded after installing the DNS stub (cluster IP Address of DNS Stub).
- Add the search information one by one which you recorded earlier.
- Set dnsPolicy to
"None".
dnsConfig:
  nameservers:
  - 10.233.33.169      // cluster IP of DNS Stub
  searches:
  - ocpcf.svc.occne15-ocpcf-ats
  - svc.occne15-ocpcf-ats
  - occne15-ocpcf-ats
dnsPolicy: None
For example:Figure 3-6 Example
NRF client configmap
- In the application-config configmap, configure the following
parameters with the respective values:
primaryNrfApiRoot=nf1stub.<namespace_gostubs_are_deployed_in>.svc:8080Example:
primaryNrfApiRoot=nf1stub.ocats.svc:8080secondaryNrfApiRoot=nf11stub.<namespace_gostubs_are_deployed_in>.svc:8080Example:
secondaryNrfApiRoot=nf11stub.ocats.svc:8080virtualNrfFqdn = nf1stub.<namespace_gostubs_are_deployed_in>.svcExample:
virtualNrfFqdn=nf1stub.ocats.svc
Note:
To get all configmaps in your namespace, run the following command:kubectl get configmaps -n <BSF_namespace> - (Optional) If persistent volume is used, follow the post-installation steps provided in the Persistent Volume for 5G ATS section.
3.2 Installing ATS for NRF
3.2.1 Resource Requirements
This section describes the ATS resource requirements for NRF.
Overview - Total Number of Resources
- NRF SUT
- cnDBTier
- ATS
Table 3-5 NRF - Total Number of Resources
| Resource Name | CPU | Memory (Gi) | Storage (Mi) |
|---|---|---|---|
| NRF SUT Totals | 61 | 69 | 0 |
| DBTier Totals | 40.5 | 50.5 | 720 |
| ATS Totals | 9 | 11 | 0 |
| Grand Total NRF ATS | 110.5 | 130.5 | 720 |
NRF Pods Resource Requirements Details
For NRF Pods resource requirements, see Oracle Communications Cloud Native Core, Network Repository Function Installation, Upgrade, and Fault Recovery Guide.
ATS Resource Requirements details for NRF
This section describes the ATS resource requirements, which are needed to deploy NRF ATS successfully.
Table 3-6 ATS Resource Requirements Details
| Microservice | CPUs Required per Pod | Memory Required per Pod (GB) | Storage PVC Required per Pod (GB) | # Replicas (regular deployment) | # Replicas (ATS deployment) | CPUs Required - Total | Memory Required - Total (GB) | Storage PVC Required - Total (GB) |
|---|---|---|---|---|---|---|---|---|
| ATS Behave | 4 | 6 | 1 | 1 | 1 | 4 | 6 | 0 |
| ATS Stub (Python) | 1 | 1 | 1 | 1 | 5 | 5 | 5 | 0 |
| ATS Totals | 9 | 11 | 0 | |||||
cnDBTier Resource Requirements Details for NRF
This section describes the cnDBTier resource requirements, which are needed to deploy NRF ATS successfully.
Note:
For cnDBTier pods, a minimum of 4 worker nodes are required.Table 3-7 cnDBTier Services Resource Requirements
| Service Name | Min Pod Replica # | Min CPU/Pod | Min Memory/Pod (in Gi) | PVC Size (in Gi) | Min Ephemeral Storage (Mi) |
|---|---|---|---|---|---|
| MGMT (ndbmgmd) | 2 | 4 | 6 | 15 | 90 |
| DB (ndbmtd) | 4 | 5 | 5 | 4 | 90 |
| SQL (ndbmysqld) | 2 | 4 | 5 | 8 | 90 |
| SQL (ndbappmysqld) | 2 | 2 | 3 | 1 | 90 |
| Monitor Service (db-monitor-svc) | 1 | 0.4 | 490 (Mi) | NA | 90 |
| Backup Manager Service (db-backup-manager-svc) | 1 | 0.1 | 130(Mi) | NA | 90 |
| Replication Service - Leader | 1 | 2 | 2 | 2 | 90 |
| Replication Service - Other | 0 | 1 | 2 | 0 | 90 |
3.2.2 Downloading the ATS Package
Locating and Downloading ATS Images
To locate and download the ATS image from MOS:
- Log in to My Oracle Support using the appropriate credentials.
- Select the Patches & Updates tab.
- In the Patch Search window, click Product or Family (Advanced).
- Enter Oracle Communications Cloud Native Core - 5G in the Product field.
- Select Oracle Communications Cloud Native Core Network Repository Function <release_number> from the Release drop-down.
- Click Search. The Patch Advanced Search Results list appears.
- Select the required ATS patch from the list. The Patch Details window appears.
- Click Download. The File Download window appears.
- Click the <p********_<release_number>_Tekelec>.zip file to download the NRF ATS package file.
- Untar the zip file to access all the ATS images. The
<p********_<release_number>_Tekelec>.zip directory has
the following files:
ocats_ocnrf_csar_26_1_201_0_0.zip ocats_ocnrf_csar_26_1_201_0_0.zip.sha256 ocats_ocnrf_csar_mcafee-26.1.201.0.0.log -
Note:
The above zip file contains all the images and custom values required for 26.1.201 release of OCATS-NRF.Theocats_ocnrf_csar_26_1_201_0_0.zipfile has the following files and folders:├── Definitions │ ├── ocats_ocnrf_ats_tests.yaml │ └── ocats_ocnrf.yaml ├── Files │ ├── ChangeLog.txt │ ├── Helm │ │ └── ocats-ocnrf-26.1.201.tgz │ ├── Licenses │ ├── ocats-nrf-26.1.201.tar │ ├── Oracle.cert │ ├── ocstub-py-26.1.201.tar │ └── Tests ├── ocats_ocnrf.mf ├── Scripts │ ├── ocats_ocnrf_custom_serviceaccount_26.1.201.yaml │ ├── ocats_ocnrf_custom_values_26.1.201.yaml │ └── ocats_ocnrf_tests_jenkinsjobs_26.1.201.tgz └── TOSCA-Metadata └── TOSCA.meta - Copy the zip file to Kubernetes cluster where you want to deploy ATS.
3.2.3 Pushing the Images to Customer Docker Registry
Preparing to Deploy ATS and Stub Pod in Kubernetes Cluster
To deploy ATS and Stub Pod in Kubernetes Cluster:
- Run the following command to extract
tar file
content:
unzip ocats_ocnrf_csar_26_1_201_0_0.zipThe following docker image tar files are located at Files folder:- ocats-nrf-26.1.201.tar
- ocstub-py-26.1.201.tar
- Run the following commands in your
cluster to load the ATS docker image, '
ocats-nrf-26.1.201.tar' and Stub docker image 'ocstub-py-26.1.201.tar', and push it to your registry.$ docker load -i ocats-nrf-26.1.201.tar $ docker load -i ocstub-py-26.1.201.tar $ docker tag ocats/ocats-nrf:26.1.201 <local_registry>/ocats/ocats-nrf:26.1.201 $ docker tag ocats/ocstub-py:26.1.201 <local_registry>/ocats/ocstub-py:26.1.201 $ docker push <local_registry>/ocats/ocats-nrf:26.1.201 $ docker push <local_registry>/ocats/ocstub-py:26.1.201 - Create a copy of the custom values located at Scripts/ocats_ocnrf_custom_values_26.1.201.yaml and update it for image name, tag and other parameters as per the requirement.
3.2.4 Configuring ATS
3.2.4.1 Enabling Static Port
- To enable static port:
Note:
ATS supports static port. By default, this feature is not available.- In the ocats-ocnrf-custom-values.yaml file under service
section, set the staticNodePortEnabled parameter value to 'true' and
staticNodePort parameter value with valid
nodePort.
service:
  customExtension:
    labels: {}
    annotations: {}
  type: LoadBalancer
  port: "8080"
  staticNodePortEnabled: true
  staticNodePort: "32385"
- In the ocats-ocnrf-custom-values.yaml file under service
section, set the staticNodePortEnabled parameter value to 'true' and
staticNodePort parameter value with valid
nodePort.
3.2.4.2 Enabling Aspen Service Mesh
To enable service mesh for ATS:
- To enable service mesh, set the value for serviceMeshCheck
to true. The following is a snippet of the service
section in the yaml
file:
ocats-nrf: serviceMeshCheck: true - If the ASM is not enabled on the global level for the namespace,
run the following command to enable it before deploying the
ATS:
kubectl label --overwrite namespace <namespace_name> istio-injection=enabledFor example:kubectl label --overwrite namespace ocnrf istio-injection=enabled - Add the following annotations under the lbDeployments and
nonlbDeployments section of the global section in
ocats-nrf-custom-values.yaml file for ATS deployment as follows:
traffic.sidecar.istio.io/excludeInboundPorts:
                            "8080"
traffic.sidecar.istio.io/excludeOutboundPorts: "9090"For example:
   lbDeployments:
      labels: {}
      annotations:
        traffic.sidecar.istio.io/excludeInboundPorts: "8080"
        traffic.sidecar.istio.io/excludeOutboundPorts: "9090"
lbDeployments: labels: {} annotations: traffic.sidecar.istio.io/excludeInboundPorts: "8090" traffic.sidecar.istio.io/excludeOutboundPorts: "9090" nonlbServices: labels: {} annotations: {} nonlbDeployments: labels: {} annotations: traffic.sidecar.istio.io/excludeInboundPorts: "8090" traffic.sidecar.istio.io/excludeOutboundPorts: "9090" - Add the following annotations in NRF deployment to work with ATS in
service mesh environment:
For example:
oracle.com/cnc: "true"
traffic.sidecar.istio.io/excludeInboundPorts: "9090,8095,8096,7,53"
traffic.sidecar.istio.io/excludeOutboundPorts: "9090,8095,8096,7,53"
lbDeployments: labels: {} annotations: oracle.com/cnc: "true" traffic.sidecar.istio.io/excludeInboundPorts: "9090,8095,8096,7,53" traffic.sidecar.istio.io/excludeOutboundPorts: "9090,8095,8096,7,53" nonlbServices: labels: {} annotations: {} nonlbDeployments: labels: {} annotations: oracle.com/cnc: "true" traffic.sidecar.istio.io/excludeInboundPorts: "9090,8095,8096,7,53" traffic.sidecar.istio.io/excludeOutboundPorts: "9090,8095,8096,7,53"
Note:
If the above annotations are not provided in NRF deployment under lbDeployments and nonlbDeployments, all the metrics and alerts related test cases will fail.
3.2.4.3 Configuring Dual Stack
- coexistence strategy that allows hosts to reach IPv4 and IPv6 simultaneously.
- IPv4 and IPv6 allocation to the Kubernetes clusters during cluster
creation. This allocation is applicable for all the Kubernetes resources unless
explicitly specified during the cluster creation.
To support
dual stack functionality in the ATS Helm charts, the value of the
deploymentModeparameter is defined in the global section ofocats_ocnrf_custom_values_26.1.201.yamlfile.deploymentMode: &deploymentMode "clusterPreferred"The default value of this parameter isFigure 3-7 Global Dual Stack Configuration

ClusterPreferred. The following are the possible values based on the cluster type:
The same variable is referred in the ocats-nrf and ocstub-py sections.Single Stack cluster: IPv4, IPv6 Dual Stack cluster: IPv4, IPv6, IPv4_IPv6, IPv6_IPv4, ClusterPreferredFigure 3-8 ocats-nrf Dual Stack configuration
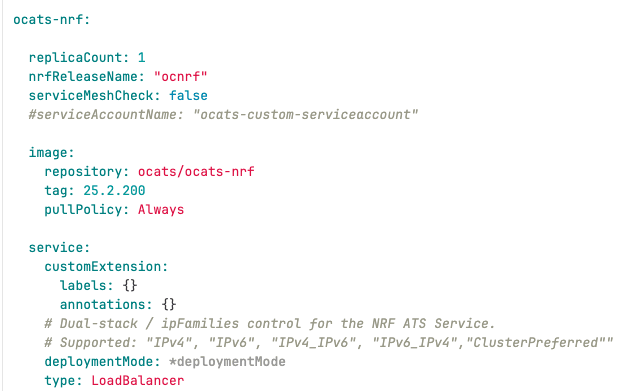
Figure 3-9 nrf_ats Stub Dual Stack Configuration
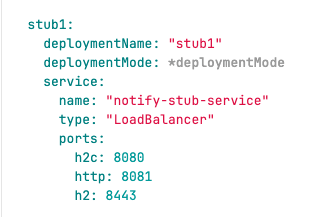
3.2.4.4 Enabling Persistent Volume
ATS supports Persistent storage to retain ATS historical build execution data, test cases, and one-time environment variable configurations.
To enable persistent storage:- Create a PVC and associate the same to the ATS pod.
- Set the PVEnabled flag to true.
- Set PVClaimName to PVC that is created for
ATS.
deployment: customExtension: labels: {} annotations: {} PVEnabled: true PVClaimName: "ocats-nrf-26.1.201-pvc"
For more details on Persistent Volume Storage, you can refer to Persistent Volume for 5G ATS.
3.2.4.5 Enabling NF FQDN Authentication
Note:
This procedure is applicable only if the NF FQDN Authentication feature is being tested else, proceed to the "Deploying ATS and Stub in Kubernetes Cluster" section.You must enable this feature while deploying Service Mesh. For more information on how to enable NF FQDN Authentication feature, see Oracle Communications Cloud Native Core, Network Repository Function User Guide.
- Use previously unzipped file
"ocats-nrf-custom-serviceaccount-26.1.201.yaml" to create
a service account. Add the following annotation in the
"ocats-nrf-custom-serviceaccount-26.1.201.yaml" file where
the kind is
ServiceAccount."certificate.aspenmesh.io/customFields": '{ "SAN": { "DNS": [ "<NF-FQDN>" ] } }'Sample format:
apiVersion: v1 kind: ServiceAccount metadata: name: ocats-custom-serviceaccount namespace: ocnrf annotations: "certificate.aspenmesh.io/customFields": '{ "SAN": { "DNS": [ "AMF.d5g.oracle.com" ] } }'Note:
"AMF.d5g.oracle.com" is the NF FQDN that you must provide in the serviceaccount DNS field. - Run the following command to create a service account:
kubectl apply -f ocats-nrf-custom-serviceaccount-26.1.201.yaml - Update the service account name in the
ocats-ocnrf-custom-values-26.1.201.yaml file as
follows:
ocats-nrf: serviceAccountName: "ocats-custom-serviceaccount"
3.2.5 Deploying ATS and Stub in Kubernetes Cluster
Note:
It is important to ensure that all the three components; ATS, Stub and NRF are in the same namespace.ATS and Stub supports Helm3 for deployment.
ocats-ocnrf-custom-values.yaml file
under
ocats-nrf.nrfReleaseName.
ocats-nrf:
nrfReleaseName: "ocnrf"If the namespace does not exists, run the following command to create a namespace:
kubectl create namespace ocnrf
Using Helm for Deploying ATS:
helm install <release_name> ocats-ocnrf-26.1.201.tgz --namespace <namespace_name> -f <values-yaml-file>
helm install ocats ocats-ocnrf-26.1.201.tgz --namespace ocnrf -f ocats-ocnrf-custom-values.yamlNote:
The abovehelm install command will deploy ATS along with the
stub servers required for ATS executions, which include 1 ATS pod and 5 stub server
pods.
3.2.6 Verifying ATS Deployment
helm status
<release_name>
Checking Pod Deployment:
kubectl get pod -n ocnrf
Checking Service Deployment:
kubectl get service -n ocnrf
Figure 3-10 Checking Pod Deployment without Service Mesh
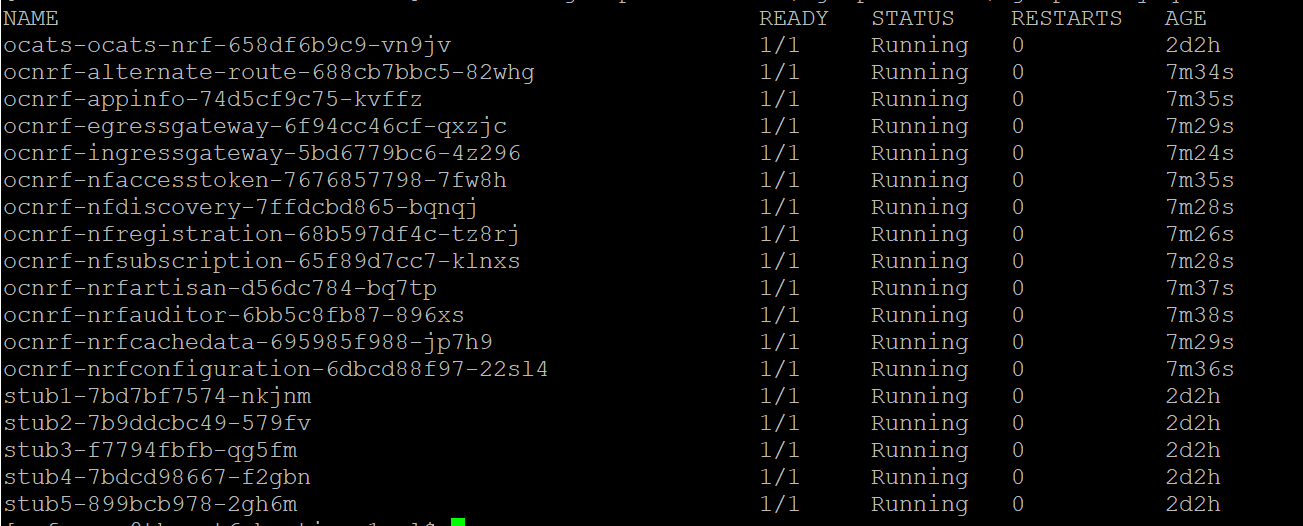
Figure 3-11 Checking Service Deployment without Service Mesh
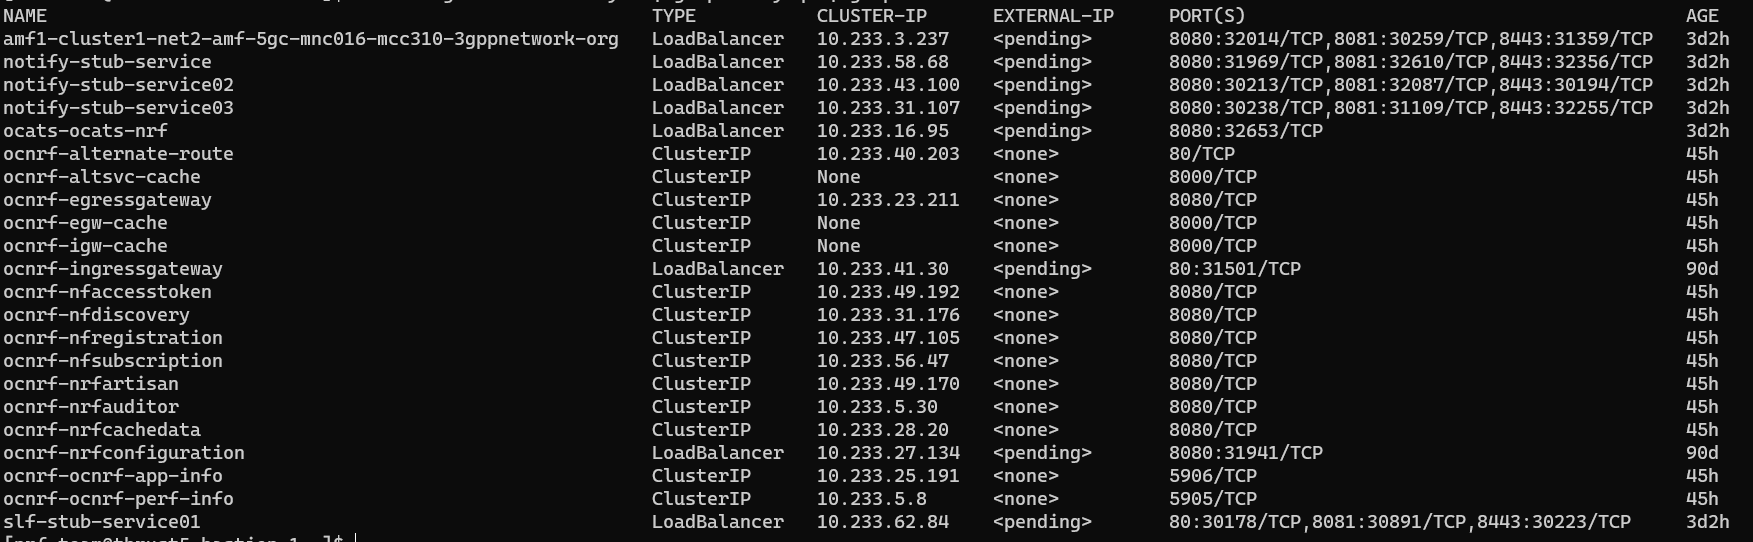
If ATS is deployed with side car of service mesh, ensure that both ATS and Stub pods have two containers in ready state and shows "2/2" as follows:
Figure 3-12 ATS and Stub Deployed with Service Mesh
Figure 3-13 ATS and Stub Deployed with Service Mesh
Figure 3-14 ATS and Stub Deployed with Dual Stack
3.2.7 Post-Installation Steps (if Persistent Volume is Used)
If persistent volume is used, follow the post-installation steps mentioned in the Persistent Volume for 5G ATS section.
3.3 Installing ATS for NSSF
This section describes Automated Testing Suite (ATS) installation procedures for Network Slice Selection Function (NSSF) in a cloud native environment. You must perform ATS installation procedures for NSSF in the same sequence as outlined in the following sections.
3.3.1 Resource Requirements
Total Number of Resources
The total number of resource requirements are as follows:
Table 3-8 Total Number of Resources
| Resource | CPUs | Memory(GB) | Storage(GB) |
|---|---|---|---|
| NSSF SUT Total | 30.2 | 22 | 4 |
| cnDBTier Total | 40 | 40 | 20 |
| ATS Total | 14 | 14 | 0 |
| Grand Total NSSF ATS | 79.2 | 72 | 24 |
Resource Details
The details of resources required to install NSSF-ATS are as follows:
Table 3-9 Resource Details
| Microservice | CPUs Required per Pod | Memory Required per Pod (GB) | Storage PVC Required per Pod (GB) | Replicas (regular deployment) | Replicas (ATS deployment) | CPUs Required - Total | Memory Required - Total (GB) | Storage PVC Required - Total (GB) |
|---|---|---|---|---|---|---|---|---|
| NSSF Pods | ||||||||
| ingressgateway | 4 | 4 | 0 | 2 | 1 | 4 | 4 | 0 |
| egressgateway | 4 | 4 | 0 | 2 | 1 | 4 | 4 | 0 |
| nsselection | 4 | 2 | 0 | 2 | 1 | 4 | 2 | 0 |
| nsavailability | 4 | 2 | 0 | 2 | 1 | 4 | 2 | 0 |
| nsconfig | 2 | 2 | 0 | 1 | 1 | 2 | 2 | 0 |
| nssubscription | 2 | 2 | 0 | 1 | 1 | 2 | 2 | 0 |
| nrf-client-discovery | 1 | 1 | 0 | 2 | 1 | 1 | 1 | 0 |
| nrf-client-management | 1 | 1 | 0 | 1 | 1 | 1 | 1 | 0 |
| appinfo | 0.2 | 1 | 0 | 2 | 1 | 0.2 | 1 | 0 |
| perfinfo | 0.2 | 0.5 | 0 | 1 | 1 | 0.2 | 0.5 | 0 |
| config-server | 0.2 | 0.5 | 0 | 1 | 1 | 0.2 | 0.5 | 0 |
| NSSF SUT Totals | 22.6 CPU | 20 GB | 0 | |||||
| ATS | ||||||||
| ATS Behave | 4 | 4 | 0 | 0 | 1 | 4 | 4 | 0 |
| ATS AMF Stub (Python) | 3 | 3 | 0 | 0 | 1 | 3 | 3 | 0 |
| ATS NRF Stub (Python) | 2 | 2 | 0 | 0 | 1 | 2 | 2 | 0 |
| ATS NRF Stub1 (Python) | 2 | 2 | 0 | 0 | 1 | 2 | 2 | 0 |
| ATS NRF Stub2 (Python) | 2 | 2 | 0 | 0 | 1 | 2 | 2 | 0 |
| OCDNS-BIND | 1 | 1 | 0 | 0 | 1 | 1 | 1 | 0 |
| ATS Totals | 14 | 14 | 0 | |||||
| cnDBTier Pods (minimum of 4 worker nodes required) | ||||||||
| vrt-launcher-dt-1.cluster.local | 4 | 4 | 2 | 2 | 1 | 4 | 4 | 2 |
| vrt-launcher-dt-2.cluster.local | 4 | 4 | 2 | 2 | 1 | 4 | 4 | 2 |
| vrt-launcher-dt-3.cluster.local | 4 | 4 | 2 | 2 | 1 | 4 | 4 | 2 |
| vrt-launcher-dt-4.cluster.local | 4 | 4 | 2 | 2 | 1 | 4 | 4 | 2 |
| vrt-launcher-mt-1.cluster.local | 4 | 4 | 2 | 2 | 1 | 4 | 4 | 2 |
| vrt-launcher-mt-2.cluster.local | 4 | 4 | 2 | 2 | 1 | 4 | 4 | 2 |
| vrt-launcher-mt-3.cluster.local | 4 | 4 | 2 | 2 | 1 | 4 | 4 | 2 |
| vrt-launcher-sq-1.cluster.local | 4 | 4 | 2 | 2 | 1 | 4 | 4 | 2 |
| vrt-launcher-sq-2.cluster.local | 4 | 4 | 2 | 2 | 1 | 4 | 4 | 2 |
| vrt-launcher-db-installer.cluster.local | 4 | 4 | 2 | 2 | 1 | 4 | 4 | 2 |
| cnDBTier Totals | 40 | 40 | 20 | |||||
3.3.2 Locating and Downloading ATS and Simulator Images
To locate and download the ATS Image from MOS:
- Log in to My Oracle Support using the appropriate credentials.
- Select the Patches and Updates tab.
- In the Patch Search window, click Product or Family (Advanced).
- Enter Oracle Communications Cloud Native Core - 5G in the Product field.
- Select Oracle Communications Cloud Native Core Network Slice Selection Function <release_number> from Release drop-down.
- Click Search. The Patch Advanced Search Results list appears.
- Select the required ATS patch from the search results. The Patch Details window appears.
- Click Download. The File Download window appears.
- Click the <p********_<release_number>_Tekelec>.zip file to download the NSSF ATS package file.
- Untar the zip file to get
ocats-nssfdirectory, which consists of all the ATS Images. Theocats-nssfdirectory has the following files:Note:
Prerequisites:- To run oauth test cases for NSSF, oauth secrets needs to be generated. For more information, see "Configuring Secrets to Enable Access Token " section in Oracle communications Cloud Native Core, Network Slice Selection Function Installation, Upgrade, Fault Recovery Guide.
- To ensure the functionality of the
Virtual_Host_NRF_Resolution_By_NSSF_Using_DNSSRVATS feature, the following configuration must be enabled as per the engineering team's guidance:nrf-client: # This config map is for providing inputs to NRF-Client configmapApplicationConfig: enableVirtualNrfResolution=true virtualNrfFqdn=nrfstub.changeme-ocats.svc virtualNrfScheme=https - The necessary changes to the NSSF custom-values.yaml file are outlined
below.
For instance, if the NSSF ATS is deployed in the "
ocnssfats" namespace, thevirtualNrfFqdnconfiguration must be updated as follows:nrf-client: # This config map is for providing inputs to NRF-Client configmapApplicationConfig: enableVirtualNrfResolution=true virtualNrfFqdn=nrfstub.ocnssfats.svc virtualNrfScheme=https - If the NSSF is installed with a HELM release name different from
"
ocnssf" (for example, the HELM release name is "ocnssfats"), the following parameter must be updated accordingly.If the HELM release name is "ocnssf", no changes are required.# Alternate Route Service Host Value # Replace ocnssf with Release Name alternateRouteServiceHost: ocnssf-alternate-route - If the HELM release name for NSSF is
"
ocnssfats", the following parameter must be updated accordingly.# Alternate Route Service Host Value # Replace ocnssf with Release Name alternateRouteServiceHost: ocnssfats-alternate-routeocats-nssf ├── ocats-nssf-custom-configtemplates-26.1.201-README.txt - file contains all the information required for the package. ├── ocats-nssf-custom-configtemplates-26.1.201.zip - contains serviceaccount,PVC File and Custom values file ├── ocats-nssf-tools-pkg-26.1.201-README.txt - file contains all the information required for the package. └── ocats-nssf-tools-pkg-26.1.201.tgz - file has the following images and charts packaged as tar files
- Untar the
ocats-nssf-tools-pkg-26.1.201.tgztar fileThe structure of the file looks as given below:ocats-nssf-tools-pkg-26.1.201 ├── amfstub-26.1.201.tar - AMF Stub Server Docker image ├── amfstub-26.1.201.tar.sha256 ├── ats_data-26.1.201.tar - ATS data, After untar "ocnssf_tests" folder will gets created in which ATS feature files present ├── ats_data-26.1.201.tar.sha256 ├── ocats-nssf-26.1.201.tar - NSSF ATS Docker Image ├── ocats-nssf-26.1.201.tar.sha256 ├── ocats-nssf-26.1.201.tgz - ATS Helm Charts, after untar "ocats-nssf" ats charts folder gets created. ├── ocats-nssf-26.1.201.tgz.sha256 ├── ocdns-bind-26.1.201.tar. - NSSF DNS Stub Server Docker Image ├── ocdns-bind-26.1.201.tar.sha256 └── README.md - Copy the
ocats-nssf-tools-pkg-26.1.201.tgztar file to the CNE or Kubernetes cluster where you want to deploy ATS. - Along with the above packages, there is
ocats-nssf-custom-configtemplates-26.1.201.zipat the same location.The readme file
ocats-nssf-custom-configtemplates-26.1.201-README.txtcontains information about the content of this zip file.Content ofocats-nssf-custom-configtemplates-26.1.201.zipis as below:Archive: ocats-nssf-custom-configtemplates-26.1.201.zip inflating: nssf_ats_pvc_26.1.201.yaml inflating: ocats_nssf_custom_values_26.1.201.yaml inflating: ocats_ocnssf_custom_serviceaccount_26.1.201.yamlCopy these files to CNE or Kubernetes cluster where you want to deploy ATS.ocats-nssf-tools-pkg-26.1.201 ├── amfstub-26.1.201.tar - AMF Stub Server Docker image ├── ats_data-26.1.201.tar - ATS data, After untar "ocnssf_tests" folder will gets created in which ATS feature files present ├── ocats-nssf-26.1.201.tar - NSSF ATS Docker Image ├── ocats-nssf-26.1.201.tgz - ATS Helm Charts, after untar "ocats-nssf" ats charts folder gets created. ├── ocdns-bind-26.1.201.tar. - NSSF DNS Stub Server Docker Image
3.3.3 Deploying ATS in Kubernetes Cluster
To deploy ATS in Kubernetes Cluster:
- Verify checksums of the tarballs mentioned in the file
Readme.txt. - Run the following commands to extract tar file content, Helm charts, and
Docker images of ATS:
tar -xvzf ocats-nssf-tools-pkg-26.1.201.tgzThe output of this command will return the following files:ocats-nssf-tools-pkg-26.1.201 ├── amfstub-26.1.201.tar - AMF Stub Server Docker image ├── amfstub-26.1.201.tar.sha256 ├── ats_data-26.1.201.tar - ATS data, After untar "ocnssf_tests" folder will gets created in which ATS feature files present ├── ats_data-26.1.201.tar.sha256 ├── ocats-nssf-26.1.201.tar - NSSF ATS Docker Image ├── ocats-nssf-26.1.201.tar.sha256 ├── ocats-nssf-26.1.201.tgz - ATS Helm Charts, after untar "ocats-nssf" ats charts folder gets created. ├── ocats-nssf-26.1.201.tgz.sha256 ├── ocdns-bind-26.1.201.tar. - NSSF DNS Stub Server Docker Image ├── ocdns-bind-26.1.201.tar.sha256 └── README.md - NSSF-ATS and Stub Images Load and Push: Run the following
commands in your cluster to load the
ocatsimage andamf stubserverimage:Docker Commands:
docker load -i ocats-nssf-<version>.tardocker load -i amfstub-<version>.tardocker load -i ocdns-bind-<version>.tarExamples:
docker load -i ocats-nssf-26.1.201.tardocker load -i amfstub-26.1.201.tardocker load -i ocdns-bind-26.1.201.tarPodman Commands:
podman load -i ocats-nssf-<version>.tarpodman load -i amfstub-<version>.tarpodman load -i ocdns-bind-<version>.tarExamples:
podman load -i ocats-nssf-26.1.201.tarpodman load -i amfstub-26.1.201.tarpodman load -i ocdns-bind-26.1.201.tar - Run the following commands to tag and push the ATS image registry.
- Run the following commands to grep the
image:
docker images | grep ocats-nssfdocker images | grep amfstubdocker images | grep ocdns - Copy the Image ID from the output of the grep command and
change the tag (version number) to your registry.
Docker Commands:
docker tag <Image_ID> <your-registry-name/ocats-nssf:<tag>>docker push <your-registry-name/ocats-nssf:<tag>>docker tag <Image_ID> <your-registry-name/amfstub:<tag>>docker push <your-registry-name/amfstub:<tag>>docker tag <Image_ID> <your-registry-name/ocdns-bind:<tag>>docker push <your-registry-name/ocdns-bind:<tag>>Podman Commands:
podman tag <Image_ID> <your-registry-name/ats/ocats-nssf:<tag>>podman push <your-registry-name/ocats-nssf:<tag>>podman tag <Image_ID> <your-registry-name/amfstub:<tag>>podman push <your-registry-name/amfstub:<tag>>docker tag <Image_ID> <your-registry-name/ocdns-bind:<tag>>docker push <your-registry-name/ocdns-bind:<tag>>
- Run the following commands to grep the
image:
- ATS Helm Charts : Run the following command to get "ATS" Helm
charts as shown
below:
tar -xvzf ocats-nssf-26.1.201.tgzThe above command creates "ocats-nssf" helm charts of ATS.
- ATS Data: Run the following command to get ATS data, which
contains feature files and
data:
tar -xvf ats_data-26.1.201.tarThe above command creates "ocnssf_tests" and "jobs" folders, which are copied inside after the ATS installation is complete.
- Copy the
ocnssf_testsfolder under NSSF ATS pod as shown below:kubectl cp ocnssf_tests <namespace>/<nssf ats podname>:/var/lib/jenkins/Example:
kubectl cp ocnssf_tests cicdnssf-241204053638/ocats-nssf-8566d64cfb-cgmvc:/var/lib/jenkins/ - Copy the jobs folder under NSSF ATS pod as shown
below:
kubectl cp jobs <namespace>/<nssf ats podname>:/var/lib/jenkins/.jenkins/Example:kubectl cp jobs cicdnssf-241204053638/ocats-nssf-8566d64cfb-cgmvc:/var/lib/jenkins/.jenkins/
- Copy the
- <Optional> Go to certificate folder inside ocats-nssf and run the
following
command:
kubectl create secret generic ocnssf-secret --from-file=certificates/rsa_private_key_pkcs1.pem --from-file=certificates/trust.txt --from-file=certificates/key.txt --from-file=certificates/ocnssf.cer --from-file=certificates/caroot.cer -n ocnssf - ATS Custom Values File Changes: Update the image name and tag in
the
ocats_nssf_custom_values_26.1.201.yamlfile as required.- For this, open the
ocats_nssf_custom_values_26.1.201.yamlfile. - Update the
image.repositoryandimage.tagparameters forocats-nssf,ocats-amf-stubserver,ocats-nrf-stubserver,ocats-nrf-stubserver1,ocats-nrf-stubserver2, andocdns-bind. - Save and close the file after making the updates.
- For this, open the
- <Optional>To enable static port: ATS supports static port.
By default, this feature is not available.
In the
ocats-nssf/values.yamlfile under service section, set the value ofstaticNodePortEnabledparameter as 'true' and provide a validnodePortvalue forstaticNodePort. - ATS Service Account Creation: In
ocats-nssf-custom-serviceaccount_.yaml, change namespace as below:sed -i "s/changeme-ocats/${namespace}/g" ocats_ocnssf_custom_serviceaccount_.yaml - Run the following command to apply
ocats-nssf-custom-serviceaccount_.yamlfile:kubectl apply -f <serviceaccount.yaml file> -n <namespace_name>For example:
kubectl apply -f ocats-nssf-custom-serviceaccount_.yaml -n ocnssf - NSSF ATS PVC Creation — Ordered ListYou can create the NSSF ATS PVC using either of the two available methods:
- Apply the NSSF ATS PVC YAML file manually after updating the namespace.
- Enable PVC creation directly from the NSSF ATS CV file.
- To create the PVC manually:
- Update the namespace in the
nssf_ats_pvc_26.1.201.yamlfile using:sed -i "s/ocnssf/${namespace}/g" nssf_ats_pvc_26.1.201.yaml - Apply the updated PVC YAML
using:
kubectl apply -f <nssfatspvc.yaml file> -n <namespace_name>Example:
kubectl apply -f nssf_ats_pvc_26.1.201.yaml
- Update the namespace in the
- To enable PVC creation in the NSSF ATS CV file:
- Update the following parameters in the CV
file:
#The below section is related to the deployment of ATS with persistant volume #To enable PV set PVEnabled to true #To use an already existing pvc in the namespace, set the flag useExistingPVC to true, the name of it will be PVClaimName value. #retainPVC is to not delete the pvc even after un-installation of ATS. Make this true for this behavior, or leave it false for default behavior PVEnabled: false PVClaimName: "ocats-nssf-pvc" PVStorageClassName: "standard" PVStorage: "1Gi" RetainPVC: falseWhen
PVEnabledis set totrue, a PVC is automatically created in the namespace using the name specified inPVClaimName(for example,ocats-nssf-pvc).- PVC behavior after ATS uninstallation depends on the value of RetainPVC:
- If
RetainPVCisfalse, the PVC will be deleted when ATS is uninstalled. - If
RetainPVCistrue, the PVC will be retained even after ATS is uninstalled.
- If
For example:
PVEnabled: trueandRetainPVC: false- Example
1:
PVEnabled: true PVClaimName: "<pvc_name>" PVStorageClassName: "<storage_class>" PVStorage: "<storage_size>" RetainPVC: falseBefore installation, no PVC exists:
kubectl get pvc -n <namespace> NAME STATUS VOLUME CAPACITY ACCESS MODES STORAGECLASS AGEInstall ATS:
helm install <release_name> <chart_name> -n <namespace> -f <ats_cv_file>Check PVC after installation:
kubectl get pvc -n <namespace> NAME STATUS VOLUME CAPACITY ACCESS MODES STORAGECLASS AGE <pvc_name> Bound <pvc_volume_id> 1Gi RWO <storage_class> <age>Since
RetainPVCis set tofalse, the PVC will be deleted after the uninstallation of ATS.helm uninstall <release_name> -n <namespace> release "<release_name>" uninstalledAfter uninstallation, check the PVC status (PVC is deleted because
RetainPVC: false):kubectl get pvc -n <namespace> NAME STATUS VOLUME CAPACITY ACCESS MODES STORAGECLASS AGE <pvc_name> Terminating <pvc_volume_id> 1Gi RWO <storage_class> <age> - Example 2:
PVEnabled: trueandRetainPVC: truePVEnabled: true PVClaimName: "ocats-nssf-pvc" PVStorageClassName: "standard" PVStorage: "1Gi" RetainPVC: trueBefore installation, no PVC exists:
kubectl get pvc -n <namespace> NAME STATUS VOLUME CAPACITY ACCESS MODES STORAGECLASS AGEInstall ATS:
helm install <release_name> <chart_name> -n <namespace> -f <ats_cv_file>After installation, the PVC is created (because
PVEnabled: true):kubectl get pvc -n <namespace> NAME STATUS VOLUME CAPACITY ACCESS MODES STORAGECLASS AGE <pvc_name> Bound <pvc_volume_id> 1Gi RWO <storage_class> <age>Since
RetainPVCis set totrue, the PVC will be retained after the uninstallation of ATS.helm uninstall <release_name> -n <namespace>IfRetainPVC: true, the PVC is not deleted and will be retained. The CLI output will indicate that the PVC is kept due to the resource policy. Check the PVC status after uninstallation:kubectl get pvc -n <namespace> NAME STATUS VOLUME CAPACITY ACCESS MODES STORAGECLASS AGE <pvc_name> Bound <pvc_volume_id> 1Gi RWO <storage_class> <age>
- PVC behavior after ATS uninstallation depends on the value of RetainPVC:
- Update the following parameters in the CV
file:
- Pointing NSSF to Stub Servers: Follow this step to point out NSSF to
NRF-Stubserver and AMF-Stubserver in NSSF custom values
file:
sed -i "s/changeme-ocats/${namespace}/g" $NSSF_CUSTOM_DEPLOY_FILEFor example:sed -i "s/changeme-ocats/${namespace}/g" ocnssf_custom_values_26.1.201.yamlThe NSSF custom values snippet is as follows:nrf-client: # This config map is for providing inputs to NRF-Client configmapApplicationConfig: &configRef profile: |- [appcfg] primaryNrfApiRoot=nrf-stubserver.changeme-ocats:8080 secondaryNrfApiRoot=nrf-stubserver.changeme-ocats:8080 # ARS Helm Configuration staticVirtualFqdns: - name: https://abc.test.com alternateFqdns: - target: amf-stubserver.changeme-ocats port: 8080 priority: 10 - target: nrf-stubserver.changeme-ocats port: 8080 priority: 20 - name: http://xyz.test.com alternateFqdns: - target: amf-stubserver.changeme-ocats port: 8080 priority: 10 - target: nrf-stubserver.changeme-ocats port: 8080 priority: 20 - Deploy ATS as shown below. NSSF ATS Helm release name should be
"ocats".
helm install <release_name> <charts> -n <namespace_name> -f <custom_values file> –-version <helm-chart-version>For example:
helm install ocats ocats-nssf -n ocnssf -f ocats_nssf_custom_values_26.1.201.yaml --version 26.1.201Running the above command creates the following pods:
ocats-nssfocats-amf-stubserverocats-nrf-stubserverocats-nrf-stubserver1ocats-nrf-stubserver2ocats-ocdns-bindFor example:$ kubectl get pods -n cicdnssf-241204053638 NAME READY STATUS RESTARTS AGE ocats-amf-stubserver-5c5775dcb5-n9hlw 2/2 Running 0 3h22m ocats-nrf-stubserver-6bc6ff5ccc-6wkv7 2/2 Running 0 3h22m ocats-nrf-stubserver1-567f55488c-7bdxk 2/2 Running 0 3h22m ocats-nrf-stubserver2-697d4cffd9-c7dvr 2/2 Running 0 3h22m ocats-nssf-8566d64cfb-cgmvc 2/2 Running 0 3h22m ocats-ocdns-bind-967bd4bc8-hpcjn 2/2 Running 0 3h22m$ kubectl get svc -n cicdnssf-241204053638 NAME TYPE CLUSTER-IP EXTERNAL-IP PORT(S) AGE amf-stubserver LoadBalancer 10.96.27.125 <pending> 8080:31064/TCP 5h34m dnssim ClusterIP 10.96.99.119 <none> 53/UDP,6236/TCP 5h34m nrf-stubserver LoadBalancer 10.96.192.123 <pending> 8080:30409/TCP 5h34m nrf-stubserver1 LoadBalancer 10.96.235.187 <pending> 8080:31157/TCP 5h34m nrf-stubserver2 LoadBalancer 10.96.77.69 <pending> 8080:31056/TCP 5h34m ocats-nssf LoadBalancer 10.96.14.30 <pending> 8080:31995/TCP 5h34m - Run the following command to verify the ATS deployment:
helm status <release_name>The following screenshot is an example of a successful ATS deployment, where
STATUS:DEPLOYEDis an indicator of the same.$ helm status ocats -n cicdnssf-241204053638 NAME: ocats LAST DEPLOYED: Wed Dec 4 05:37:54 2024 NAMESPACE: <namespace> STATUS: deployed REVISION: 1 TEST SUITE: None
Virtual_Host_NRF_Resolution_By_NSSF_Using_DNSSRV ATS Feature
nrf-client:
# Configuration map for providing inputs to the NRF-Client
configmapApplicationConfig:
enableVirtualNrfResolution: true
virtualNrfFqdn: nrfstub.changeme-ocats.svc
virtualNrfScheme: http
The necessary changes to the NSSF
custom-values.yaml file are outlined below:
Example Configuration for Namespace "ocnssfats"
ocnssfats namespace, update the
virtualNrfFqdn configuration as
follows:nrf-client:
# Configuration map for providing inputs to the NRF-Client
configmapApplicationConfig:
enableVirtualNrfResolution: true
virtualNrfFqdn: nrfstub.ocnssfats.svc
virtualNrfScheme: http
Configuration for Different HELM Release Names
- Default Release Name (
ocnssf): No changes are required. - Alternate Release Name: If the HELM release name is different (e.g.,
ocnssfats), update the following parameter:# Alternate Route Service Host Value # Replace 'ocnssf' with the HELM release name alternateRouteServiceHost: ocnssfats-alternate-route
Steps to Integrate DNS Stub with NSSF
- Enable virtual FQDN resolution in the nrf-client management app profile
configuration.
Example:
nrf-client: profile: |- [appcfg] primaryNrfApiRoot=nrf-stubserver.changeme-ocats:8080 secondaryNrfApiRoot=nrf-stubserver.changeme-ocats:8080 nrfScheme=http retryAfterTime=PT120S nrfClientType=NSSF nrfClientSubscribeTypes= appProfiles=[{"nfInstanceId":"9faf1bbc-6e4a-4454-a507-aef01a101a01","nfType":"NSSF","nfStatus":"REGISTERED","heartBeatTimer":30,"fqdn":"ocnssf-nsgateway.ocnssf.svc","priority":1,"capacity":1,"load":2,"plmnList":[{"mcc":"311","mnc":"480"}],"nfSetIdList":["setEast.nssfset.5gc.mnc480.mcc311"],"locality":"rcnltxekloc1","nfServices":[{"serviceInstanceId":"92d59bfc-e5d6-47f5-a26b-3a03facdebcc","serviceName":"nnssf-nsselection","versions":[{"expiry":null,"apiFullVersion":"1.0.0","apiVersionInUri":"v1"}],"scheme":"http","nfServiceStatus":"REGISTERED","fqdn":"ocnssf1-ingress-gateway.ocnssf.svc","interPlmnFqdn":null,"ipEndPoints":[{"ipv4Address":"10.224.45.178","transport":"TCP","port":80}],"allowedNfTypes":["AMF","NSSF"],"priority":1,"capacity":1,"load":2},{"serviceInstanceId":"d33728cd-6e21-434b-bc5a-ed69bc612377","serviceName":"nnssf-nssaiavailability","versions":[{"expiry":null,"apiFullVersion":"1.0.0","apiVersionInUri":"v1"}],"scheme":"http","nfServiceStatus":"REGISTERED","fqdn":"ocnssf2-ingress-gateway.ocnssf.svc","interPlmnFqdn":null,"ipEndPoints":[{"ipv4Address":"10.224.45.179","transport":"TCP","port":80}],"allowedNfTypes":["AMF","NSSF"],"priority":1,"capacity":1,"load":2}]}] enableF3=true enableF5=true renewalTimeBeforeExpiry=3600 validityTime=30 enableSubscriptionAutoRenewal=true nfHeartbeatRate=80 acceptAdditionalAttributes=false retryForCongestion=5 enableVirtualNrfResolution=true virtualNrfFqdn=nrfstub.changeme-ocats.svc virtualNrfScheme=https - In the above configuration, since "
enableVirtualNrfResolution=true" and "virtualNrfFqdn=nrfstub.changeme-ocats.svc" have been set, the NRF client management attempts to contact the Egress Gateway, and Egress Gateway attempts to connect Alternate Route Service for virtual FQDN Resolution. In this service, we configure static settings related to the FQDN, as shown below:#Static virtual FQDN Config staticVirtualFqdns: - name: https://abc.test.com alternateFqdns: - target: amf-stubserver.changeme-ocats port: 8080 priority: 10 - target: nrf-stubserver.changeme-ocats port: 8080 priority: 20 - name: http://xyz.test.com alternateFqdns: - target: amf-stubserver.changeme-ocats port: 8080 priority: 10 - target: nrf-stubserver.changeme-ocats port: 8080 priority: 20According to the static virtual FQDN configuration under ARS, there is no record for the FQDN "
virtualNrfFqdn=nrfstub.changeme-ocats.svc". As a result, ARS will attempt to resolve this FQDN by contacting the default CoreDNS server (the default Kubernetes cluster DNS server). To ensure proper resolution, we need to point ARS to the DNS stub we installed by editing the ARS deployment file after deploying NSSF. - Before running ATS Test suite, nrf-client-nfdiscovery and nrf-client-nfmanagement pods
has to be restarted. Here are the steps to edit the "alternate route service" deployment
pointing towards DNS Stub:
- Run the follwing command to get the list of
pods:
$ kubectl get pods -n <namespace>For example:
$ kubectl get pods -n ocnssfExpected sample response:NAME READY STATUS RESTARTS AGE ocats-amf-stubserver-6f57f7f57f-bk75w 2/2 Running 0 64m ocats-nrf-stubserver-5f89cdb74c-649kx 2/2 Running 0 64m ocats-nssf-76cf4fc678-vrl24 2/2 Running 0 64m ocdns-bind-5975fc59c8-6vllx 2/2 Running 0 41m ocnssf-alternate-route-5f857d94bb-dm5vl 2/2 Running 0 40m 0/1 Completed 0 30m - Run following command to get searches information from dns-bind pod to
enable communication between Alternate Route and dns-bind
service:
kubectl exec -it <dnsbind-pod> -n <NAMESPACE> -- /bin/bash -c 'cat /etc/resolv.conf' | grep search | tr ' ' '\n' | grep -v 'search'For example:$ kubectl exec -it ocdns-bind-5975fc59c8-6vllx -n ocnssf -- /bin/bash -c 'cat /etc/resolv.conf' | grep search | tr ' ' '\n' | grep -v 'search'Expected sample response:ocnssf.svc.cluster.local svc.cluster.local cluster.local gbucdsint02phx.oraclevcn.com snphxprshared1.gbucdsint02phx.oraclevcn.com - By default alternate service will point to CoreDNS and you will see
following settings in deployment file. Now, edit alternate route service deployment
and add configuration as
below:
$ kubectl edit deployment ocnssf-alternate-route -n <NAMESPACE>For example:
$ kubectl edit deployment ocnssf-alternate-route -n ocnssfterminationMessagePath: /dev/termination-log terminationMessagePolicy: File dnsPolicy: ClusterFirst restartPolicy: Always - Edit the deployment file to add following content in alternate service
to query DNS stub:
- Add the nameservers IPaddress which you recorded after installing the DNS stub (cluster IP of DNS Stub)
- Add all the search information one by one which you recorded earlier.
- Set dnsPolicy to "None"
dnsConfig: nameservers: - <dns_stub_cluster_ip_address> searches: - dns-bind search - dns-bind search - dns-bind search dnsPolicy: None$ kubectl get svc -n ocnssfExpected sample response:
NAME TYPE CLUSTER-IP EXTERNAL-IP PORT(S) AGE dnssim ClusterIP 10.96.65.56 <none> 53/UDP,6236/TCP 48mFor example:
terminationMessagePath: /dev/termination-log terminationMessagePolicy: File dnsConfig: nameservers: - 10.96.65.56 searches: - ocnssf.svc.cluster.local - svc.cluster.local - cluster.local - gbucdsint02phx.oraclevcn.com - snphxprshared1.gbucdsint02phx.oraclevcn.com dnsPolicy: None restartPolicy: Always
- Run the follwing command to get the list of
pods:
Verification
Use the following curl command to verify the setup:
curl -v --http2-prior-knowledge -X GET "http://ocnssf-alternate-route:80/lookup?fqdn=nf1stub.ocnssf.svc&scheme=h
ttp"Note: Unnecessary use of -X or --request, GET is already inferred.
* Trying 10.96.194.219...
* TCP_NODELAY set
* Connected to ocnssf-alternate-route (10.96.194.219) port 80 (#0)
* Using HTTP2, server supports multi-use
* Connection state changed (HTTP/2 confirmed)
* Copying HTTP/2 data in stream buffer to connection buffer after upgrade: len=0
* Using Stream ID: 1 (easy handle 0x55b19b19c6f0)
> GET /lookup?fqdn=nf1stub.ocnssf.svc&scheme=http HTTP/2
> Host: ocnssf-alternate-route
> User-Agent: curl/7.61.1
> Accept: */*
>
* Connection state changed (MAX_CONCURRENT_STREAMS == 2147483647)!
< HTTP/2 200
< content-type: application/json
< date: Tue, 08 Oct 2024 05:48:02 GMT
< x-envoy-upstream-service-time: 5
<
* Connection #0 to host ocnssf-alternate-route left intact
[{"target":"ocats-amf-stubserver.ocnssf.svc","port":8080,"ttl":86400,"type":"SRV","dclass":"IN","priority":1,"weight":60},{"target":"ocats-nrf-stubserver.ocnssf.svc","port":8080,"ttl":86400,"type":"SRV","dclass":"IN","priority":20,"weight":20},{"target":"ocats-nrf-stubserver1.ocnssf.svc","port":8080,"ttl":86400,"type":"SRV","dclass":"IN","priority":30,"weight":20}][ocnrfusr@ocnssf-ocnssf-nrf-client-nfmanagement-744ff58956-tfr5g app]$Prometheus TLS Warning in ATS
To avoid the following warning in ATS logs:
Request returned with status code 503
upstream connect error or disconnect/reset before headers.
reset reason: connection failure,
transport failure reason: TLS error:
268435703:SSL routines:OPENSSL_internal:WRONG_VERSION_NUMBER
Configure the Istio DestinationRule for the Prometheus service to disable TLS communication:
apiVersion: networking.istio.io/v1beta1
kind: DestinationRule
metadata:
name: occne-prometheus-server-dr
namespace: <nssf-ats-namespace>
spec:
host: occne-prometheus-server.occne-infra.svc.cluster.local
trafficPolicy:
tls:
mode: DISABLE
3.4 Installing ATS for SCP
This section describes Automated Testing Suite (ATS) installation procedures for Service Communication Proxy (SCP) in a cloud native environment.
You must perform ATS installation procedures for SCP in the same sequence as outlined in the following sections.
3.4.1 Prerequisites
To run SCP test cases, the following prerequisites are required.
3.4.1.1 Software Requirements
This section lists the software that must be installed before installing ATS.
Table 3-10 Preinstalled Software
| Software | Version |
|---|---|
| Kubernetes | 1.35.2, 1.34.1 |
| Helm | 3.20.0 |
| Podman | 5.6.0 |
To check the versions of the preinstalled software in the cloud native environment, run the following commands:
kubectl versionhelm versionpodman version3.4.1.2 Environment Setup Requirements
This section describes the requirements for the client machine, that is, the machine used by the user to run deployment commands.
- Helm repository configured.
- Network access to the Helm repository and Docker image repository.
- Network access to the Kubernetes cluster.
- Required environment settings to run
kubectl,docker, andpodmancommands. The environment should have privileges to create a namespace in the Kubernetes cluster. - Helm client is installed with the push plugin. Configure the
environment in such a manner that the
helm installcommand deploys the software in the Kubernetes cluster.
3.4.1.3 Resource Requirements
Overview - Total Number of Resources
- SCP SUT
- cnDB Tier
- ATS
Table 3-11 SCP - Total Number of Resources
| Resource Name | CPU | Memory (GB) | Storage (GB) |
|---|---|---|---|
| SCP SUT Totals | 61 | 66 | 0 |
| cnDBTier Totals | 40 | 40 | 20 |
| ATS Totals | 91 | 97 | 10 |
| Grand Total SCP ATS | 192 | 203 | 30 |
SCP Pods Resource Requirements
This section describes the resources required to deploy SCP ATS.
Table 3-12 SCP Pods Resource Requirements for a Non ASM Setup
| Microservice | CPUs Required per Pod | Memory Required per Pod (GB) | Storage PVC Required per Pod (GB) | # Replicas (ATS deployment) | CPUs Required (ATS) - Total | Memory Required (ATS) - Total (GB) | Storage PVC Required - Total (GB) |
|---|---|---|---|---|---|---|---|
| SCP Pods | |||||||
| scpc-subscription | 2 | 2 | 0 | 1 | 2 | 2 | 0 |
| scpc-notification | 4 | 4 | 0 | 1 | 4 | 4 | 0 |
| scpc-audit | 3 | 4 | 0 | 1 | 3 | 4 | 0 |
| scpc-configuration | 2 | 2 | 0 | 1 | 2 | 2 | 0 |
| scp-worker | 8 | 12 | 0 | 1 | 8 | 12 | 0 |
| scpc-alternate-resolution | 2 | 2 | 0 | 1 | 2 | 2 | 0 |
| scp-nrfproxy | 8 | 8 | 0 | 1 | 8 | 8 | 0 |
| scp-cache | 8 | 8 | 0 | 1 | 8 | 8 | 0 |
| scp-mediation | 8 | 8 | 0 | 1 | 8 | 8 | 0 |
| scp-load-manager | 8 | 8 | 0 | 1 | 8 | 8 | 0 |
| scp-oauth-nrfproxy | 8 | 8 | 0 | 1 | 8 | 8 | 0 |
| SCP SUT Totals | 61 | 66 | 0 | ||||
Table 3-13 SCP Pods Resource Requirements for an ASM Setup
| Microservice | CPUs Required per Pod | vCPUs(Sidecar) | Memory Required per Pod (GB) | Memory(required by sidecar) | Storage PVC Required per Pod (GB) | # Replicas (ATS deployment) | CPUs Required (ATS) - Total | Memory Required (ATS) - Total (GB) | Storage PVC Required - Total (GB) |
|---|---|---|---|---|---|---|---|---|---|
| SCP Pods | |||||||||
| scpc-subscription | 2 | 2 | 2 | 1 | 0 | 1 | 4 | 3 | 0 |
| scpc-notification | 4 | 2 | 4 | 1 | 0 | 1 | 6 | 5 | 0 |
| scpc-audit | 3 | 2 | 4 | 1 | 0 | 1 | 5 | 5 | 0 |
| scpc-configuration | 2 | 2 | 2 | 1 | 0 | 1 | 4 | 3 | 0 |
| scp-worker | 8 | 2 | 12 | 1 | 0 | 1 | 10 | 13 | 0 |
| scpc-alternate-resolution | 2 | 2 | 2 | 1 | 0 | 1 | 4 | 3 | 0 |
| scp-nrfproxy | 8 | 2 | 8 | 1 | 0 | 1 | 10 | 9 | 0 |
| scp-cache | 8 | 2 | 8 | 1 | 0 | 1 | 10 | 9 | 0 |
| scp-mediation | 8 | 2 | 8 | 1 | 0 | 1 | 10 | 9 | 0 |
| scp-load-manager | 8 | 2 | 8 | 1 | 0 | 1 | 10 | 9 | 0 |
| scp-oauth-nrfproxy | 8 | 2 | 8 | 1 | 0 | 1 | 10 | 9 | 0 |
| SCP SUT Totals | 83 | 77 | 0 | ||||||
ATS Resource Requirements for SCP
This section describes the ATS resources required to deploy SCP-ATS.
Table 3-14 ATS Resource Requirements for a Non ASM Setup
| Microservice | CPUs Required per Pod | Memory Required per Pod (GB) | Storage PVC Required per Pod (GB) | # Replicas (ATS deployment) | CPUs Required - Total | Memory Required - Total (GB) | Storage PVC Required - Total (GB) |
|---|---|---|---|---|---|---|---|
| ATS Behave | 6 | 12 | - | 1 | 6 | 12 | 10 (if debug applog collection is enabled, PVC needs to be 50GB) |
| ATS pystub | 1 | 1 | - | 82 | 82 | 82 | 0 |
| DNS Stub | 1 | 1 | - | 1 | 1 | 1 | 0 |
| Global Egress Rate Limiting Stub | 1 | 1 | - | 1 | 1 | 1 | 0 |
| ATS DD Client stub | 1 | 1 | - | 1 | 1 | 1 | 0 |
| ATS Totals | 91 | 97 | 4 | ||||
Table 3-15 ATS Resource Requirements for an ASM Setup
| Microservice | CPUs Required per Pod | vCPUs(required by sidecar) | Memory Required per Pod (GB) | Memory(required by sidecar) | Storage PVC Required per Pod (GB) | # Replicas (ATS deployment) | CPUs Required - Total | Memory Required - Total (GB) | Storage PVC Required - Total (GB) |
|---|---|---|---|---|---|---|---|---|---|
| ATS Behave | 6 | 2 | 12 | 1 | 4 | 1 | 8 | 13 | 4 |
| ATS pystub | 1 | 2 | 1 | 1 | - | 91 | 273 | 182 | 0 |
| DNS Stub | 1 | 2 | 1 | 1 | - | 1 | 3 | 2 | 0 |
| Global Egress Rate Limiting Stub | 1 | 2 | 1 | 1 | - | 1 | 3 | 2 | 0 |
| ATS DD Client stub | 1 | 2 | 1 | 1 | - | 1 | 3 | 2 | 0 |
| ATS Totals | 290 | 201 | 4 | ||||||
3.4.1.4 Downloading the ATS Package
This section provides information about how to download the ATS package.
To locate and download the ATS Image from MOS:
- Log in to My Oracle Support using the appropriate login credentials.
- Click the Patches & Updates tab.
- In the Patch Search section, click Product or Family (Advanced).
- Enter Oracle Communications Cloud Native Core - 5G in the Product field.
- Select Oracle Communications Cloud Native Core Service Communication Proxy <release_number> from the Release drop-down list.
- Click Search.
The Patch Advanced Search Results list appears.
- Select the required ATS patch from the
list.
The Patch Details window appears.
- Click Download.
The File Download window appears.
- Click the
ocats_ocscp_csar_26_1_202_0_0.pkgfile to download the CNC SCP ATS package file.The
ocats_ocscp_csar_26_1_202_0_0.pkgpackage contains the following files:ocats_ocscp_csar_26_1_202_0_0.zip mcafee-gen-ats-csar-26.1.202.logNote:
The above zip file contains all the images and custom values required for 26.1.202 release of OCATS-OCSCP.Unzip the
ocats_ocscp_csar_26_1_202_0_0.zipfile to get the following files and folders:. |-- Definitions | |-- ocats_ocscp_ats_tests.yaml | |-- ocats_ocscp_cne_compatibility.yaml | `-- ocats_ocscp.yaml |-- Files | |-- ChangeLog.txt | |-- Helm | | `-- ocats-ocscp-26.1.202.tgz | |-- Licenses | |-- ocats-ddclientstub-26.1.202.tar | |-- ocats-dnsstub-26.1.202.tar (Docker Image) | |-- ocats-pystub-26.1.202.tar (Docker Image) | |-- ocats-scp-26.1.202.tar (Docker Image) | |-- ocats-scpglbratelimitstub-26.1.202.tar (Docker Image) | |-- Oracle.cert | `-- Tests |-- ocats_ocscp_csar_26_1_202_0_0.zip |-- ocats_ocscp.mf |-- Scripts | |-- ocats_ocscp_custom_serviceaccount_26.1.202.yaml (Template to create custom service account) | |-- ocats_ocscp_tests_jenkinsjobs_26.1.202.tgz. ( ocscp_tests and jenkins jobs folder to be copied if persistent volume is deployed) | `-- ocats_ocscp_values_26.1.202.yaml (Custom values file for installation) `-- TOSCA-Metadata `-- TOSCA.meta - Copy the umbrella Helm chart
ocats-ocscp-26.1.202.tgzfile from the Files folder to Kubernetes cluster where you want to deploy ATS.The following table describes ATS parameters in the
ocats_ocscp_values_26.1.202.yamlfile:Table 3-16 ATS Parameters of the YAML File
Parameter Default Value Possible Values Description ocatsdnsstubServicetrue true, false Set it to true or false depending on the need of user. Setting these values to true to deploy ocats-dnsstub, ocats-scp stub, ocats-scpglbratelimitstub, ocats-ddclientStub, ocats-pystubs (ausf1, udm3 etc.)
ocatsscpServicetrue true, false Set it to true or false depending on the requirement. Setting these values to true to deploy ocats-dnsstub, ocats-scp stub, ocats-scpglbratelimitstub, ocats-ddclientStub, ocats-pystubs (ausf1, udm3, and so on)
ocatsscpglbratelimitstubServicetrue true, false Set it to true or false depending on the requirement. Setting these values to true to deploy ocats-dnsstub, ocats-scp stub, ocats-scpglbratelimitstub, ocats-ddclientStub, ocats-pystubs (ausf1, udm3, and so on.)
ocatsddclientstubServicetrue true, false Set it to true or false depending on the requirement. Setting these values to true to deploy ocats-dnsstub, ocats-scp stub, ocats-scpglbratelimitstub, ocats-ddclientStub, ocats-pystubs (ausf1, udm3,and so on.)
ausf1Stubstrue true, false Set it to true or false depending on the requirement. Setting these values to true to deploy all the ocats-pystubs (ausf1, udm3, chf1, scp3, and so on.)
sutScpIPFamiliesforATSRun[IPv4] [IPv4], [IPv6], [IPv4,IPv6], [IPv6,IPv4] The parameter is used to specify the IP families that ATS will consider when running test cases. Note: If any value other than those specified is provided, ATS will proceed with the assumption that the deployment supports IPv4 only.
traffic.sidecar.istio.io/excludeOutboundPorts"8091" - This annotation under lbDeployment is required for fetching metrics from soothsayer pods, which are required for a few FT's of ATS. When ATS runs in an ASPEN MESH environment, do not change this port. traffic.sidecar.istio.io/excludeInboundPorts"8080","8443","5001" - This annotation under lbDeployment is required for fetching metrics from soothsayer pods, which are required for a few FT's of ATS. When ATS runs in an ASPEN MESH environment, do not change this port. tokenConsumptionIntervalInMillis50 Count in millliseconds Token Consumption Simulation Parameters. scpStubNfInstanceId2faf1bbc-6e4a-4454-a507-a14ef8e1bc22 nfInstanceID of SCP NF Instance ID of SCP. rateDataReporterStartingOffset3 Value in milliseconds - coherence.clusterNamescpstub-coherence-cluster Local Coherence Cluster name, size not more than 66 characters Local Coherence Cluster name size must not be more than 66 characters. coherence.clusterName.federation.remoteScpOne.fqdnOrIpocscp-scp-cache.scpsvc.svc.cluster.local - FQDN or IP of federation configuration. coherence.clusterName.federation.remoteScpOne.port30001 - Port number of federation configuration. coherence.clusterName.federation.remoteScpOne.clusterNamescp-coherence-cluster Ensure that the cluster name is unique among all participants. Size not more than 66 characters. remoteScpOne Coherence Cluster name. serviceIpFamilyPolicy.ocatsdnsstubServiceserviceIpFamilyPolicy.ocatsscpServiceserviceIpFamilyPolicy.ocatsscpglbratelimitstubServiceserviceIpFamilyPolicy.ocatsddclientstubServiceserviceIpFamilyPolicy.stubServiceSingleStack SingleStack, PreferDualStack, RequireDualStack IpFamilyPolicy of ocatsdnsstubService, ocatsscpService, ocatsscpglbratelimitstubService, ocatsddclientstubService and pyStubs. Note: PreferDualStack and RequireDualStack values can only be used if the setup is dual stack.
serviceIpFamilies.ocatsdnsstubServiceserviceIpFamilies.ocatsscpServiceserviceIpFamilies.ocatsscpglbratelimitstubServiceserviceIpFamilies.ocatsddclientstubServiceserviceIpFamilies.stubService[IPv4] [IPv4], [IPv6], [IPv4,IPv6], [IPv6,IPv4] IpFamilies of ocatsdnsstubService, ocatsscpService, ocatsscpglbratelimitstubService, ocatsddclientstubService and pyStubs. Note: If serviceIpFamilyPolicy is SingleStack, then serviceIpFamilies can be [IPv4] or [IPv6]. If serviceIpFamilyPolicy is PreferDualStack or RequireDualStack, then serviceIpFamilies can be [IPv4,IPv6] or [IPv6, IPv4].
PVEnabledfalse true, false Enabling persistent volume. PVClaimNameocats-ocscp-pvc Name Persistent volume claim name. PVStorageClassNamestandard - Persistent volume storage class name. PVStorage4Gi Allocated storage value Persistent volume storage. retainPVCfalse true, false Enables or disables the PVC deletion after the uninstallation of ATS. atsGuiTLSEnabledfalse true, false Enabling Https in Jenkins GUI. atsCommunicationTLSEnabledfalse true, false Enabling Https communication for ATS and stubs. ocats-scp.image.repository<docker-registryIP:docker-registryport>/ocats/ocats-scp <Image repository name:port>/ocats/ocats-scp Image repository and port of ocats scp image. ocats-scp.image.taghelm-tag Value of tag to be deployed Tag of ocats-scp image. ocats-scp.image.pullPolicyAlways Always, IfNotPresent, Never Tag of ocats-scp image. ocats-scp.replicaCount1 Positive integers Replica count of ocats-scp stub. ocats-scp.resources.limits.cpu6 CPU value that is allocated Limit to CPU allocated to ocats-scp pod. ocats-scp.resources.limits.memory12Gi Memory values that is allocated (in Gi or mi) Limit to memory allocated to ocats-scp pod . ocats-scp.resources.requests.cpu6 CPU value that is allocated (must be less than or equal to limits) Request of CPU allocation for ocats-scp. ocats-scp.resources.requests.memory12Gi Memory value that is allocated (in Gi or mi) (must be less than or equal to limits) Request of memory allocation for ocats-scp. ocats-scp.service.customExtension.labels{} Label of node Node labels for node allocation during deployment. ocats-scp.service.customExtension.typeLoadBalancer ClusterIP, NodePort, LoadBalancer Service type of ocats-scp pod ocats-scp.service.customExtension.port8080 Port number Port number of ocats-scp service. ocats-scp.service.customExtension.staticNodePortEnabledfalse true, false Enabling of static node port. ocats-scp.service.customExtension.staticNodePortfalse Port number Port number of static node port. ocats-scp.service.ports.http.port8080 Port number Port number of the ocats-scp service if https is not enabled. ocats-scp.service.ports.http.staticNodePortEnabledfalse true, false Enabling of static node port. ocats-scp.service.ports.http.staticNodePortfalse Port number Port number of static node port. ocats-scp.service.ipFamilyPolicySingleStack SingleStack, PreferDualStack, RequireDualStack ipFamilyPolicy to be allocated to the ocats-scp service.
This value will be referred to as whatever is defined at serviceIpFamilyPolicy.ocatsscpService under global parameters.
ocats-scp.service.ipFamilies[IPv4] [IPv4], [IPv6], [IPv4,IPv6], [IPv6,IPv4] ipFamilies to be allocated to the ocats-scp service.
This value will be referred to as the value defined at serviceIpFamilies.ocatsscpService under global parameters.
SELECTED_NFSCP NF name ATS parameters are set with default values in ocats_ocscp_values_26.1.202.yamlfile. You must update the ATS parameters with the actual value based on the deployment environment, and then deploy the OCATS_OCSCP chart using thisocats_ocscp_values_26.1.202.yamlfile. The updated ATS parameters are automatically applied during the deployment process, and ATS is installed with the configuration as mentioned in this file.NFNAMESPACEscpsvc Update the SCP namespace CLUSTERDOMAINcluster.local Cluster Domain where SCP is Deployed DESTNAMESPACEscpsvc Test stubs NameSpace same as the SCP Namespace PrometheusAuthEnabledfalse false, true Set this parameter to true when Prometheus requests require a token in the header for authentication. For more information about token-based authentication for Prometheus, see Table 2-5.
PrometheusTLSEnabledfalse false, true Set this parameter to true when Prometheus has HTTPS deployment. Note: When the connection is established using HTTPS, it remains insecure because no certificates are maintained with ATS for this connection.
PrometheusScrapeInterval60 seconds (commented out) According to setup Prometheus scrape interval Uncomment this parameter only if this value is other value than 60 seconds. ATS assumes 60s as the default value if no response comes from the Prometheus config.
prometheusClusterRole.rules[ ] Default rules when rules are empty in the values.yaml files. - apiGroups: [""] resources: ["namespaces"] verbs: ["get"] - apiGroups: ["monitoring.coreos.com"] resources: ["prometheuses/api"] resourceNames: ["k8s"] verbs: ["get", "create", "update"] - nonResourceURLs: - /* verbs: - get
If PrometheusAuthEnabled is true, override the ClusterRole rules. ocats-dnsstub.service.ipFamilyPolicySingleStack SingleStack, PreferDualStack, RequireDualStack ipFamilyPolicy to be allocated to the ocats-dnsstub service.
This value will be referred to as whatever is defined at serviceIpFamilyPolicy.ocatsdnsstubService under global parameters.
ocats-dnsstub.service.ipFamilies[IPv4] [IPv4], [IPv6], [IPv4,IPv6], [IPv6,IPv4] ipFamilies to be allocated to the ocats-dnsstub service.
This value will be referred to as whatever is defined at serviceIpFamilies.ocatsdnsstubService under global parameters.
prometheusClusterRole.rules[ ] Default rules when rules are empty in cv files.
-
apiGroups: [""]
resources: ["namespaces"]
verbs: ["get"]
-
apiGroups: ["monitoring.coreos.com"]
resources: ["prometheuses/api"]
resourceNames: ["k8s"]
verbs: ["get", "create", "update"]
- nonResourceURLs:
-
/*
verbs:
- get
-
Optionally override ClusterRole rules used when PrometheusAuthEnabled is set to true. ocats-dnsstub.image.repository<docker-registry IP:docker-registry port>/ocats/ocats-dnsstub <Image repository name:port>/ocats/ocats-dnsstub Image repository and port of ocats-dnsstub. ocats-dnsstub.image.taghelm-tag Value of tag to be deployed Tag of ocats-dnsstub image. ocats-dnsstub.image.pullPolicyAlways Always, IfNotPresent, Never Image pull policy of ocats-dnsstub image. ocats-dnsstub.replicaCount1 Positive integers Replica count of ocats-dnsstub. ocats-dnsstub.service.customExtension.typeClusterIP ClusterIP, NodePort, LoadBalancer Service type of ocats-dnsstub pod. ocats-dnsstub.service.customExtension.port53 Port Port of ocats-dnsstub. ocats-dnsstub.service.ipFamilyPolicySingleStack SingleStack, PreferDualStack, RequireDualStack ipFamilyPolicy to be allocated to ocats-dnsstub service. This value is referred from whatever is defined at serviceIpFamilyPolicy.ocatsdnsstubService under global parameters.
ocats-dnsstub.resources.limits.cpu1 CPU value that is allocated Limit to CPU allocated to ocats-dnsstub pod. ocats-dnsstub.resources.limits.memory1Gi Memory value that is allocated (in Gi or mi) Limit to memory allocated to ocats-dnsstub pod . ocats-dnsstub.resources.requests.cpu1 CPU value that is allocated (must be less than or equal to limits) Request of CPU allocation for ocats-dnsstub. ocats-dnsstub.resources.requests.memory1Gi Memory values that is allocated (in Gi or mi) (must be less than or equal to limits) Request of memory allocation for ocats-dnsstub. ocats-ddclientstub.image.repository<docker-registryIP:docker-registryport>/ocats/ocats-ddclientstub <Image repository name:port>/ocats/ocats-ddclientstub Image repository and port of ocats-ddclientstub. ocats-ddclientstub.image.taghelm-tag Value of tag to be deployed Tag of ocats-ddclientstub image. ocats-ddclientstub.image.pullPolicyAlways Always, IfNotPresent, Never Image pull policy of ocats-ddclientstub image. ocats-ddclientstub.replicaCount1 Positive integers Replica count of ocats-ddclientstub. ocats-ddclientstub.service.typeLoadBalancer ClusterIP, NodePort, LoadBalancer Service type of ocats-ddclientstub. ocats-ddclientstub.ipFamilyPolicySingleStack SingleStack, PreferDualStack, RequireDualStack ipFamilyPolicy to be allocated to the ocatsddclientstubService service.
This value will be referred to as whatever is defined at serviceIpFamilyPolicy.ocatsddclientstubService under global parameters.
ocats-ddclientstub.ipFamilies[IPv4] [IPv4], [IPv6], [IPv4,IPv6], [IPv6,IPv4] ipFamilies to be allocated to the ocatsddclientstubService service. This value will be referred to as whatever is defined at serviceIpFamilies.ocatsddclientstubService under global parameters.
ocats-ddclientstub.resources.limits.cpu1 CPU value that is allocated Limit to CPU allocated to ocats-ddclientstub pod. ocats-ddclientstub.resources.limits.memory1Gi Memory value that is allocated (in Gi or mi) Limit to memory allocated to ocats-ddclientstub pod. ocats-ddclientstub.resources.requests.cpu1 CPU value that is allocated (should be less than or equal to limits) Request of CPU allocation for ocats-ddclientstub. ocats-ddclientstub.resources.requests.memory1Gi Memory value that is allocated (in Gi or mi) (should be less than or equal to limits) Request of memory allocation for ocats-ddclientstub. ocats-ddclientstub.log.levelINFO INFO, WARN, DEBUG Log level of ddclientstub pod. ocats-ddclientstub.kafka_broker"kafka-broker-0.kafka-broker.ddkafkanamespace.svc.cluster.local:9092" Kafka broker fqdn and port Kafka broker fqdn or port for ddClientStub. ocats-ddclientstub.string_topic_name"string_topic" String topic ddClientStub string topic name. ocats-ddclientstub.json_topic_name"json_topic" Json topic ddClientStub json topic name. ocats-scpglbratelimitstub.image.repository<docker-registry IP:docker-registry port>/ocats/ocats-scpglbratelimitstub <Image repository name:port>/ocats/ocats-scpglbratelimitstub Image repository and port of ocats-scpglbratelimitstub. ocats-scpglbratelimitstub.image.taghelm-tag Value of tag to be deployed Tag of ocats-scpglbratelimitstub. ocats-scpglbratelimitstub.image.pullPolicyAlways Always, IfNotPresent, Never Image pull policy of ocats-scpglbratelimitstub. ocats-scpglbratelimitstub.replicaCount1 Positive integers Replica count of ocats-scpglbratelimitstub. ocats-scpglbratelimitstub.service.typeClusterIP ClusterIP, NodePort, LoadBalancer Service type of ocats-scpglbratelimitstub. ocats-scpglbratelimitstub.service.ipFamilyPolicySingleStack SingleStack, PreferDualStack, RequireDualStack ipFamilyPolicy to be allocated to the ocatsscpglbratelimitstubService service.
This value will be referred to as whatever is defined at serviceIpFamilyPolicy.ocatsscpglbratelimitstubService under global parameters.
ocats-scpglbratelimitstub.service.ipFamilies[IPv4] [IPv4], [IPv6], [IPv4,IPv6], [IPv6,IPv4] ipFamilies to be allocated to the ocatsscpglbratelimitstubService service.
This value will be referred to as whatever is defined at serviceIpFamilies.ocatsscpglbratelimitstubService under global parameters.
ocats-scpglbratelimitstub.deployment.customExtension.labels{} Label of node Node labels for node allocation during deployment. ocats-scpglbratelimitstub.resources.limits.cpu1 CPU value that is allocated Limit to CPU allocated to ocats-scpglbratelimitstub. ocats-scpglbratelimitstub.resources.limits.memory1Gi Memory values that is allocated (in Gi or mi) Limit to memory allocated to ocats-scpglbratelimitstub. ocats-scpglbratelimitstub.resources.requests.cpu1 CPU value that is allocated (should be less than or equal to limits) Request of CPU allocation for ocats-scpglbratelimitstub. ocats-scpglbratelimitstub.resources.requests.memory1Gi Memory value that is allocated (in Gi or mi) (should be less than or equal to limits) Request of memory allocation for ocats-scpglbratelimitstub. ocats-scpglbratelimitstub.minreplicas1 Positive integer Minimum replicas of ocats-scpglbratelimitstub. ocats-scpglbratelimitstub.maxreplicas1 Positive integer Maximum replicas of ocats-scpglbratelimitstub. ocats-scpglbratelimitstub.maxPdbUnavailable1 Positive integer - ocats-scpglbratelimitstub.log.levelINFO INFO, WARN, DEBUG Log level of ocats-scpglbratelimitstub. ocats-pystub.image.repository<docker-registry IP:docker-registry port>/ocats/ocats-pystub <Image repository name:port>/ocats/ocats-pystub Image repository and port of ocats-pystub. ocats-pystub.image.taghelm-tag Value of tag to be deployed Tag of ocats-pystub. ocats-pystub.image.pullPolicyAlways Always, IfNotPresent, Never Image pull policy of ocats-pystub. ocats-pystub.replicaCount1 Positive integers Replica count of ocats-pystub. ocats-pystub.service.typeClusterIP ClusterIP, NodePort, LoadBalancer Service type of ocats-pystub ocats-pystub.service.ports.https.port8443 port number Indicates the port number to allocate for HTTPS to ocats-pystub. ocats-pystub.service.ports.http.port8080 port number Indicates the port number to allocate for HTTP to ocats-pystub. ocats-pystub.service.ipFamilyPolicySingleStack SingleStack, PreferDualStack, RequireDualStack Indicates the allocation of "ipFamilyPolicy" to pystub services. This value will be referenced from whatever is defined under " serviceIpFamilyPolicy.stubService" within global parameters. ocats-pystub.service.ipFamilies[IPv4] [IPv4], [IPv6], [IPv4,IPv6], [IPv6,IPv4] Indicates the allocation of "ipFamilies" to pystub services. This value will be referenced from whatever is defined under "serviceIpFamilies.stubService" within global parameters. RESPONSE_FROM_HEADERtrue true, false When true pystub returns podname. ocats-pystub.resources.limits.cpu1 CPU value that is allocated Indicates the CPU allocation limit for ocats-pystub. ocats-pystub.resources.limits.memory1Gi Memory values allocated in Gi or Mi. Indicates the memory allocation limit for ocats-pystub. ocats-pystub.resources.requests.cpu1 CPU value allocated (should be less than or equal to limits). Indicates the CPU allocation request for ocats-pystub. ocats-pystub.resources.limits.memory1Gi Memory value allocated (in Gi or Mi) should be less than or equal to limits. Indicates the memory allocation request for ocats-pystub. ausf1.service.name:*ausf1svc Service name of ausf1 Indicates the service name allocated to ausf1. ausf1.deploymentName:*ausf1 Deployment name of ausf1 Indicates the deployment name allocated to ausf1. Note:
"*" indicates that all NF stubs will follow the same pattern. -
3.4.1.5 Pushing the Images to Customer Docker Registry
Preparing to Deploy ATS and Stub Pod in Kubernetes Cluster
To deploy ATS and Stub Pods in the Kubernetes Cluster:
- Click the file to download the CNC SCP
ATS package
file:
ocats_ocscp_csar_26_1_202_0_0.pkgThe package contains the following files:ocats_ocscp_csar_26_1_202_0_0.zip mcafee-gen-ats-csar-26.1.202.logUnzip the
ocats_ocscp_csar_26_1_202_0_0.zipfile to get the following files and folders:The output of this command is:
. |-- Definitions | |-- ocats_ocscp_ats_tests.yaml | |-- ocats_ocscp_cne_compatibility.yaml | `-- ocats_ocscp.yaml |-- Files | |-- ChangeLog.txt | |-- Helm | | `-- ocats-ocscp-26.1.202.tgz | |-- Licenses | |-- ocats-ddclientstub-26.1.202.tar | |-- ocats-dnsstub-26.1.202.tar (Docker Image) | |-- ocats-pystub-26.1.202.tar (Docker Image) | |-- ocats-scp-26.1.202.tar (Docker Image) | |-- ocats-scpglbratelimitstub-26.1.202.tar (Docker Image) | |-- Oracle.cert | `-- Tests |-- ocats_ocscp_csar_26_1_202_0_0.zip |-- ocats_ocscp.mf |-- Scripts | |-- ocats_ocscp_custom_serviceaccount_26.1.202.yaml (Template to create custom service account) | |-- ocats_ocscp_tests_jenkinsjobs_26.1.202.tgz. ( ocscp_tests and jenkins jobs folder to be copied if persistent volume is deployed) | `-- ocats_ocscp_values_26.1.202.yaml (Custom values file for installation) `-- TOSCA-Metadata `-- TOSCA.meta - Run the following commands in your cluster to load the ATS and stubs
docker images,
ocats-scp-image-26.1.202.tar, and push it to your registry:docker load --input ocats-scp-26.1.202.tar docker load --input ocats-dnsstub-26.1.202.tar docker load --input ocats-pystub-26.1.202.tar docker load --input ocats-scpglbratelimitstub.tar docker load --input ocats-ddclientstub-26.1.202.tar - Run the following command in your cluster to load the ATS
image:
docker load --input ocats-scp-images-26.1.202.tar - Run the following commands to push the ATS image to the
registry:
docker tag ocats/ocats-scp:26.1.202 <local_registry>/ocats/ocatsscp:26.1.202 docker push <local_registry>/ocats/ocats-scp:26.1.202Where,
<local_registry>indicates the registry where you can push the downloaded images. - Run the following commands to push the Stub image to the
registry:
docker tag ocats/ocats-pystub:26.1.202 <local_registry>/ocats/ocats-pystub:26.1.202 docker push <local_registry>/ocats/ocats-pystub:26.1.202 - Run the following command to push the DNS Stub Image to the
registry:
docker tag ocats/ocats-dnsstub:26.1.202 <local_registry>/ocats/ocats-dnsstub:26.1.202 docker push <local_registry>/ocats/ocats-dnsstub:26.1.202 - Run the following command to push the Global Rate Limiting Stub
Image to the
registry:
docker tag ocats/ocats-scpglbratelimitstub:26.1.202 <local_registry>/ocats/ocats-scpglbratelimitstub:26.1.202 docker push <local_registry>/ocats/ocats-scpglbratelimitstub:26.1.202 - Run the following command to push the Data Director Stub Image to
the
registry:
docker tag ocats/ocats-ddclientstub:26.1.202 <local_registry>/ocats/ocats-ddclientstub:26.1.202 docker push <local_registry>/ocats/ocats-ddclientstub:26.1.202 - In the Scripts folder,
extract the following
content:
ocats-ocscp-values-26.1.202.yaml ocats-ocscp-custom-serviceaccount-26.1.202.yaml ocats-ocscp-tests-jenkinsjobs-26.1.202.tgz - Update the image name and tag in the
ocats-ocscp-values-26.1.202.yamlfile as required.
3.4.1.6 Preinstall Preparation of SCP for SCP-ATS
- When deploying default ATS with role binding, deploy ATS and test stubs in the same namespace as SCP.
- The SCP stub for the Global Egress Rate Limiting feature must be deployed by setting the required Helm parameters as described in Oracle Communications Cloud Native Core, Service Communication Proxy Installation, Upgrade, and Fault Recovery Guide to support the Global Egress Rate Limiting test cases.
- In the
ocats_ocscp_values_26.1.202.yaml, add the following for Prometheus that is required for alert test case:traffic.sidecar.istio.io/excludeInboundPorts: "9090" - If ASM is adding additional XFCC headers, the
certExtractIndexandextractIndexof thexfccHeaderDecodevalue must be -1, otherwisecertExtractIndexandextractIndexofxfccHeaderDecodevalue must be 0. - If ASM is enabled, for fetching the metrics from
Prometheus, a destination rule must be created. In most deployments, Prometheus
is kept outside of the service mesh, so a destination rule is required to
communicate between a TLS enabled entity (ATS) and a non-TLS entity
(Prometheus). The rule can be created as
follows:
kubectl apply -f - <<EOF apiVersion:networking.istio.io/v1alpha3 kind:DestinationRule metadata: name:prometheus-dr namespace:ocscp spec: host:oso-prometheus-server.ocscp.svc.cluster.local trafficPolicy: tls: mode:DISABLE EOFWhere,nameindicates the name of the destination rule.namespaceindicates where ATS is deployed.hostindicates the hostname of the Prometheus server.
- FQDN and interPlmnFqdn must be the same for both nfServices for NRF
profile NRF1.
Sample
# NRF profiles for primary(Priority=0) and secondry(Priority=1) NRF. Note that these NRFs needs to be backend DB Synced. # For Secondary NRF profile always make it priority lesser than First priority NRF, currently we set secondary NRF priority to 1. # In case of no secondry NRF user can comment the secondary NRF Profile. # Service level FQDN's of NRF are from the same namespace as that of SCP, this is put for SCP ATS cases. Otherwise, NRF's can be part of other namespaces or even other k8s clusters. nrfProfiles: - capacity: 10000 locality: USEast nfInstanceId: 6faf1bbc-6e4a-2828-a507-a14ef8e1bc5a nfStatus: REGISTERED nfType: NRF priority: '0' # with rel15 flag is enabled, below mentioned NRF region to be specified. # nfSetIdList: ["Reg1"] # with rel16 flag is enabled, below mentioned NRF set Id to be specified. nfSetIdList: ["setnrfl1.nrfset.5gc.mnc012.mcc345"] #Uncomment below section to configure interPlmnFqdn, plmnList or snpnList #NRF-Change-3 interPlmnFqdn: nrf1.5gc.mnc213.mcc410.3gppnetwork.org plmnList: - mcc: 410 mnc: 213 - mcc: 410 mnc: 214 #snpnList: #- mcc: 345 # mnc: 445 # nid: 000007ed9d5 customInfo: preferredNrfForOnDemandDiscovery: true nfServices: - capacity: 5000 #apiPrefix: USEast #NRF-Change-4 fqdn: nrf1svc.scpsvc.svc.cluster.local interPlmnFqdn: nrf1svc.scpsvc.svc.cluster.local # Sample IPEndpoint with all the fields and it is commented out. #NRF-Change-5 #ipEndPoints: [{"ipv4Address": "NRF-IP", "port": "NRF-PORT"}] #ipEndPoints: [{"ipv4Address": "10.75.213.56", "port": "31014"}] # ATS test cases need 8080 port with FQDN. Hence, in order to run ATS cases, below "ipEndPoints" field is left uncommented. #NRF-Change-6 ipEndPoints: [{"port": "8080"}] load: 0 nfServiceStatus: REGISTERED scheme: http serviceInstanceId: fe137ab7-740a-46ee-aa5c-951806d77b01 serviceName: nnrf-nfm priority: 0 versions: - apiFullVersion: 1.0.0 apiVersionInUri: v1 - capacity: 5000 #apiPrefix: USEast #NRF-Change-4 fqdn: nrf1svc.scpsvc.svc.cluster.local interPlmnFqdn: nrf1svc.scpsvc.svc.cluster.local # Sample IPEndpoint with all the fields and it is commented out. #NRF-Change-5 #ipEndPoints: [{"ipv4Address": "NRF-IP", "port": "NRF-PORT"}] #ipEndPoints: [{"ipv4Address": "10.75.213.56", "port": "31014"}] # ATS test cases need 8080 port with FQDN. Hence, in order to run ATS cases, below "ipEndPoints" field is left uncommented. #NRF-Change-6 ipEndPoints: [{"port": "8080"}] load: 0 nfServiceStatus: REGISTERED scheme: http serviceInstanceId: fe137ab7-740a-46ee-aa5c-951806d77b02 serviceName: nnrf-disc priority: 0 versions: - apiFullVersion: 1.0.0 apiVersionInUri: v1 - capacity: 5000 #apiPrefix: USEast #NRF-Change-4 fqdn: nrf1svc.scpsvc.svc.cluster.local interPlmnFqdn: nrf1.5gc.mnc213.mcc410.3gppnetwork.org # Sample IPEndpoint with all the fields and it is commented out. #NRF-Change-5 #ipEndPoints: [{"ipv4Address": "NRF-IP", "port": "NRF-PORT"}] #ipEndPoints: [{"ipv4Address": "10.75.213.56", "port": "31014"}] # ATS test cases need 8080 port with FQDN. Hence, in order to run ATS cases, below "ipEndPoints" field is left uncommented. #NRF-Change-6 ipEndPoints: [{"port": "8080"}] load: 0 nfServiceStatus: REGISTERED scheme: http serviceInstanceId: fe137ab7-740a-46ee-aa5c-951806d77b03 serviceName: nnrf-oauth2 priority: 0 versions: - apiFullVersion: 1.0.0 apiVersionInUri: v1 - To run SCP ATS under the
scp values.yaml, ensure thatdnsSrvSchemeConfig.defaultSchemeis set to ‘https’. - To run ATS, the SCP deployment file should have the
sNssaisparameter underscpProfileInfo. - Ensure SCP is deployed with the following
parameters:
- Make sure that while providing NRF
information at the time of SCP deployment, stub NRF details like
nrf1svc and nrf2svc should also be provided at the
time of ATS deployment before running these test cases. For example, if
the teststub namespace is scpsvc, then SCP should have been deployed
with primary NRF as
nrf1svc.scpsvc.svc.<clusterDomain>and secondary NRF asnrf2svc.scpsvc.svc.<clusterDomain>for NRF test cases to work. - Ensure the
defaultTopologySourceparameter is set to NRF in theocscp_values.yamlfile. - Ensure the
preventiveAuditOnLastNFInstanceDeletionparameter is set to false in theocscp_values.yamlfile. - Deploy SCP with max replica count as 1 unless specified.
- When you deploy, make sure to define
the additional NRF stubs needed for InterSCP cases as
nrfr2l1svc(preferred NRF of Reg2),nrfr2l2svc(non-preferred NRF of Reg2),nrfr3l1svc(non-preferred NRF of Reg3), andnrfr3l2svc(preferred NRF of Reg3), which are provided in the default custom value file. Also, in the SCP deployment file, ensure that the namespace of all these NRFs is the same as the deployed SCP namespace. Reg1, Reg2, and Reg3 are replaced withsetnrfl1.nrfset.5gc.mnc012.mcc345,setnrfr1.nrfset.5gc.mnc012.mcc345, andsetnrfr2.nrfset.5gc.mnc012.mcc345for Release 16 SCP deployment. - Ensure the
supportedNRFRegionOrSetIdListmust have Reg1, Reg2, and Reg3 for Release 15 SCP deployment orsetnrfl1.nrfset.5gc.mnc012.mcc345,setnrfr1.nrfset.5gc.mnc012.mcc345, andsetnrfr2.nrfset.5gc.mnc012.mcc345for Release 16 SCP deployment. - Ensure only Loc7, Loc8, Loc9, and
USEast should be part of the
servingLocalitiesfor Release 15 SCP deployment and theservingScopefor Release 16 SCP deployment. - Recommended
auditIntervalis 60 seconds andguardTimeis 10 seconds in the SCP deployment file. - The regions such as
Reg2andReg3are the corresponding values for Release 15 SCP deployment, while NRF setIDS such asservingLocalitiesandsetnrfr2.nrfset.5gc.mnc012.mcc345are the corresponding values for Release 16 SCP deployment. The NRF belonging to either regions or the NRF set IDS's localities must not match with the SCPservingLocalitiesor SCP serving scope. - SCP deployment file should have the
attribute
scpToRegisterWithNrfRegionsset toReg1for Release 15 SCP deployment andsetnrfl1.nrfset.5gc.mnc012.mcc345for Release 16 SCP deployment. For information about Release 15 and Release 16, see 3GPP TS 23.501. - To run CCA Validation feature tests, refer to Configuring ATS for CCA Test Cases section.
- To enable OAuth support while deploying SCP, refer Configuring SCP to Run OAuth Test Cases in ATS section.
- To enable alternate resolution service support while deploying SCP, refer to Configuring SCP to Run DNS SRV Test Cases in ATS section.
- To enable mediation support while deploying SCP, refer to Configuring SCP to Run Mediation Test Cases in ATS section.
- To enable nrfproxy support, refer to Configuring SCP to Run Model D Test Cases in ATS section.
- To enable load manager support, refer to Configuring SCP to Run LCI Test Cases in ATS section.
- To enable the Global Egress Rate Limiting feature for ATS environment, refer to Updating the Global Egress Rate Limiting Changes in the SCP Deployment File for ATS section.
- By default, the ATS suite runs HTTPS test cases if the "ALL" option is selected, and SCP must be deployed with HTTPS
support enabled to support the same. To enable HTTPs for ATS, refer to
Enabling HTTPs for ATS, pystubs and Jenkins
# If ingress gateway is available then set ingressGWAvailable flag to true # and provide ingress gateway IP and Port in publicSignalingIP and publicSignalingPort respectively. publicSignalingPort: &publicSignalingPort 8000 #Signaling PORT publicSignalingPortHttps: &publicSignalingPortHttps 9443 #Signaling PORT for HTTPS # uncomment below lines when deployed with release 16. Also, take a note that http port for SCP should be same as "publicSignalingPort" of SCP mentioned above. scpInfo: scpPrefix: scpPrefix scpPorts: http: *publicSignalingPort #Uncomment below key-value(https) to enable https for ingress connections for rel16 deployment. this port should be same as "publicSignalingPortHttps" of SCP mentioned above. # https: *publicSignalingPortHttps # Note: If this flag is false, then by default all connections to PNF will be made using http protocol. nativeEgressHttpsSupport: falseIf SCP is deployed with HTTP support, either the single or multiple feature execution option must be selected, excluding all https test cases. Otherwise, make sure in an ASM environment where HTTPS is not enabled; in that case, manually remove the HTTPS-related test cases from the features directory on the ATS pod.
- Make sure that while providing NRF
information at the time of SCP deployment, stub NRF details like
nrf1svc and nrf2svc should also be provided at the
time of ATS deployment before running these test cases. For example, if
the teststub namespace is scpsvc, then SCP should have been deployed
with primary NRF as
3.4.1.7 Preinstallation Preparation for SCP-ATS
Complete the following steps before performing an installation of SCP-ATS.
3.4.1.7.1 Enabling Aspen Service Mesh
Note:
By default, this feature is disabled.- If ASM is not enabled on the global level for the
namespace, run the following command before deploying
ATS:
kubectl label --overwrite namespace <namespace_name> istio-injection=enabledExample:
kubectl label --overwrite namespace scpsvc istio-injection=enabled - Add the following annotations in the lbDeployments
section of the global section in the
ocats_scp_values_26.1.202.yamlfile:traffic.sidecar.istio.io/excludeOutboundPorts: "8091" traffic.sidecar.istio.io/excludeInboundPorts: "8080,8443,5001"Sample file with annotations:
lbDeployments: labels: {} annotations: traffic.sidecar.istio.io/excludeOutboundPorts: "8091" traffic.sidecar.istio.io/excludeInboundPorts: "8080,8443,5001" - Add Envoy Filter to enable the XFCC header forwarding
by ASM sidecar.
Envoy Filter for ATS:
apiVersion: networking.istio.io/v1alpha3 kind: EnvoyFilter metadata: name: <name> namespace: <namespace> spec: workloadSelector: labels: app: ocats-scp configPatches: - applyTo: NETWORK_FILTER match: listener: filterChain: filter: name: "envoy.http_connection_manager" patch: operation: MERGE value: typed_config: '@type': type.googleapis.com/envoy.config.filter.network.http_connection_manager.v2.HttpConnectionManager forward_client_cert_details: ALWAYS_FORWARD_ONLY use_remote_address: true xff_num_trusted_hops: 1Envoy filter to enable the XFCC header forwarding on the application sidecar:
apiVersion: networking.istio.io/v1alpha3 kind: EnvoyFilter metadata: name: <name> namespace: <namespace> spec: workloadSelector: labels: app.kubernetes.io/instance: ocscp configPatches: - applyTo: NETWORK_FILTER match: listener: filterChain: filter: name: "envoy.http_connection_manager" patch: operation: MERGE value: typed_config: '@type': type.googleapis.com/envoy.config.filter.network.http_connection_manager.v2.HttpConnectionManager forward_client_cert_details: ALWAYS_FORWARD_ONLY use_remote_address: true xff_num_trusted_hops: 1Envoy filter to enable server header pass through on sidecar:
apiVersion: networking.istio.io/v1alpha3 kind: EnvoyFilter metadata: name: <name> namespace: <namespace> spec: configPatches: - applyTo: NETWORK_FILTER match: listener: filterChain: filter: name: envoy.filters.network.http_connection_manager patch: operation: MERGE value: typed_config: '@type': type.googleapis.com/envoy.config.filter.network.http_connection_manager.v2.HttpConnectionManager server_header_transformation: PASS_THROUGH
Updating Virtual Services
Note:
- The sidecar configuration for response timeout or stream timeout should not be applied for any of the SCP microservices.
- For virtual service CRD, :
- when the destinationhost is any SCP microservice, do not configure the timeout value.
- SCP producer NFs as destinationhosts can be configured with a timeout value of more than 50 seconds, or it should not be configured.
Disabling retry attempts in virtual services:
retries:
attempts: 03.4.1.7.2 Enabling Persistent Volume
Note:
The steps provided in this section are optional and required only if Persistent Volume needs be to enabled.To enable persistent storage, perform the following procedure:
- PVC creation is part of Helm charts. To create the PVC, configure
the following set of parameters in
ocats_ocscp_values_26.1.202.yamlfile.PVEnabled: Indicates whether to enable PVC or not.PVClaimName: Indicates the name of persistent volume.PVStorageClassName: Indicates the storage class name.PVStorage: Indicates the size of the persistent volume.retainPVC: Iindicates whether to delete or retain created PVC during uninstallation of ATS.A sample edited
26.1.202.yamlfile for enabling PVC:PVEnabled: true PVClaimName: "ocats-scp-26.1.202-pvc" PVStorageClassName: "standard" PVStorage:"4Gi" retainPVC: falseNote:
- The value of
PVClaimNameparameter to be suffixed with the release version to avoid confusion during the subsequent releases. - To use already existing PVC, update the
PVClaimNamewith existing name, ATS will use it. If not, a new PVC will be created with given properties. - The
retainPVCparameter if set totrue, then deletes the PVC after uninstallation of ATS. Set it false for default behavior.
- The value of
- Run the following command to verify if the created PVC is bound to
the Persistent Volume and available for
use:
kubectl get pvc -n <namespace used for pvc creation>kubectl get pvc -n ocats-scpSample Output:
kubectl get pvc -n ocats-scp NAME STATUS VOLUME CAPACITY ACCESS MODES STORAGECLASS AGE ocats-scp-26.1.202-pvc Bound pvc-65484045-3805-4064-9fc3-f9eeeaccc8b8 1Gi RWO standard 11sNote:
- Do not proceed further with the next step if there is an issue with the PV creation and contact your administrator to get the PV created.
- Ensure that ATS is deployed before proceeding to the further steps.
- Copy the
<nf_main_folder>and<jenkins jobs>folders from the tar file to their ATS pod and restart the pod.- Extract the tar file.
tar -xvf ocats-scp-26.1.202.tgz - Run the following commands to copy the desired folder.
kubectl cp ocats-scp-26.1.202/ocscp_tests <namespace>/<pod-name>:/var/lib/jenkins/kubectl cp ocats-scp-26.1.202/jobs <namespace>/<pod-name>:/var/lib/jenkins/.jenkins/ - Restart the pod.
kubectl delete po <pod-name> -n <namespace>
- Extract the tar file.
- When the Pod is up and running, log in to the Jenkins console and
configure the Discard old Builds option to configure the
number of Jenkins builds, which must be retained in the persistent volume.
Figure 3-15 Discarding Old Builds
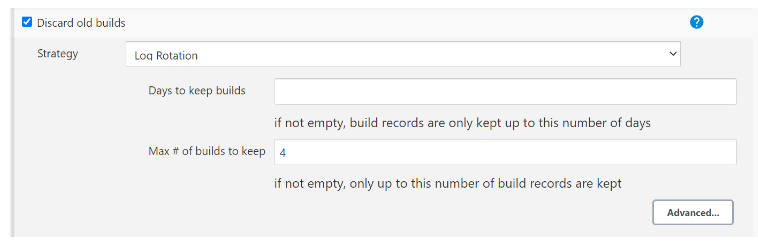
Note:
If Discard old Builds is not configured, Persistent Volume can get filled when there are huge number of builds.
For more information about Persistent Volume Storage, see Persistent Volume for 5G ATS.
3.4.2 Configuring SCP-ATS and SCP
Note:
Make sure to follow the steps mentioned in the Preinstall Preparation of SCP for SCP-ATS to deploy SCP. For more information on SCP deployment, refer to the Oracle Communications Cloud Native Core, Service Communication Proxy Installation, Upgrade, and Fault Recovery Guide.3.4.2.1 Updating ATS Configuration
The following section covers updating the ATS deployment configuration and ATS input parameter configuration.
3.4.2.1.1 Updating ATS Deployment Configuration
Previously, manual modification of the ATS configuration parameters for New
feature and Regression jobs was required in the ATS graphical user interface
(GUI). Now, with the introduction of a section "ATS_Config" in the
ocats_ocscp_values_26.1.202.yaml file, you can update the values for ATS
parameters and then deploy the OCATS_OCSCP charts using this modified
ocats_ocscp_values_26.1.202.yaml file. The updated ATS parameters are
automatically applied during the deployment process, and the ATS will come
up with the configuration as mentioned in the
ocats_ocscp_values_26.1.202.yaml file.
ocats_ocscp_values_26.1.202.yaml file can be modified to update
the ATS parameters according to their environment. To illustrate this,
here's an example of how you can update the ATS parameters in the
ocats_ocscp_values_26.1.202.yaml file:
Figure 3-16 ATS Deployment Configuration
Note:
Initially, at the time of deployment, you can configure or modify the
parameter in the ocats_ocscp_values_26.1.202.yamlfile or you can also update or modify the
parameters post deployment by following the process described in the
Configuring New Feature Pipelines section.
3.4.2.1.2 Configuring SCP-ATS for OCI Setup
To leverage the existing infrastructure of Oracle Cloud, SCP which was only deployed on CNE, can now be integrated on the Oracle Cloud Infrastructure (OCI).
Creating Secret for Alarm(Alerts)
user="<your user ocid>"
tenancy="<your tenancy ocid>"
region="<your oci region>"
fingerprint="<fingerprint of your public key>"
key_file="<full path to your private key>"
metric_namespace="<metric_namespace under which all the metrics and alarms of SUT NF will be captured>"
nf_compartment_id="<Compartment Id of SUT NF>"kubectl
create secret generic ocats-oci-secret --from-literal=user='<your_user_ocid>'--from-literal=tenancy='<your_tenancy_ocid>'--from-literal=region='<your_oci_region>'--from-literal=fingerprint='<fingerprint_of_your_oci_api_public_key>'--from-literal=metric_namespace='<metric_namespace under which all the metrics and alarms of SUT NF will be
captured>'--from-literal=nf_compartment_id='Compartment Id of SUT NF'--from-file=key_file='<full_path_to_your_oci_api_private_key
on_the_host_machine_where_you_are_running_this_command>'-n <namespace>kubectl
create secret generic ocats-oci-secret --from-literal=user='ocid1.user.oc1..aaaaaaaajjxlzewn3e76aufhdjfhdkfjkl6ea3aaazgzx7cxg74ljs5an3a'--from-literal=tenancy='ocid1.tenancy.oc1..aaaaaaaa5oqwziy4bngiebry6letze4hdjskjksdkdlksurhc6pojwe4wxe34a'--from-literal=region='us-ashburn-1'--from-literal=fingerprint='79:17:f2:89:76:d6:82:b2:13:b9:1d:9f:ff:92:28:3b'--from-literal=metric_namespace=scpdemons
--from-literal=nf_compartment_id='ocid1.compartment.oc1..aaaaaaaa6crdjhjkkdjkldlxbi7erwtmo3wa7jy6q6ldjjskkdnnmitot4smcczgq'--from-file=key_file='/tmp/oci_api_key.pem'-n scpsvcATS Deployment Configuration in OCI Setup
Update the values for ATS parameters and then deploy the OCATS_OCSCP charts using
this modified ocats_ocscp_values_26.1.202.yaml file. To update the ATS parameters in the
ocats_ocscp_values_26.1.202.yaml file, see the Updating ATS Deployment Configuration section.
Modify the scpMetricVersion parameter to "v2" in the
ocats_ocscp_values_26.1.202.yaml file. For more information, see Oracle Communications Cloud Native Core, Service Communication Proxy
Installation, Upgrade, and Fault Recovery Guide.
3.4.2.1.3 Updating ATS Input Parameter Configuration
This section provides information about how to modify different services in SCP and configure SCP test cases in ATS.
3.4.2.1.3.1 Enabling or Disabling Stubs
Note:
Deploy NRF stubs with port 8080. NRF details of SCP should specify the ipEndPoints port as 8080 without any ipv4Address field. For example, ipEndPoints: [{"port": "8080"}]).To enable or disable the stubs or pods, set the variable to
true or false, respectively. You can
install the required stubs or pods during ocats-ocscp deployments.
ocats_ocscp_values_26.1.202.yaml file:global:
# ******** Sub-Section Start: Custom Extension Global Parameters ********
#**************************************************************************
ausf1Stubs: true
ausf2Stubs: true
ausf3Stubs: true
ausf4Stubs: true
ausf5Stubs: true
ausf6Stubs: true
ausf11Stubs: true
ausf12Stubs: true
ausf13Stubs: true
ausf14Stubs: true
ausf15Stubs: true
ausf16Stubs: true
ausf21Stubs: true
ausf22Stubs: true
ausf23Stubs: true
chf1Stubs: true
chf2Stubs: true
nrf1Stubs: true
nrf2Stubs: true
nrfr2l1Stubs: true
nrfr2l2Stubs: true
nrfr3l1Stubs: true
nrfr3l2Stubs: true
pcf1Stubs: true
pcf2Stubs: true
pcf3Stubs: true
pcf4Stubs: true
pcf5Stubs: true
pcf6Stubs: true
pcf7Stubs: true
pcf8Stubs: true
pcf11Stubs: true
pcf12Stubs: true
pcf13Stubs: true
pcf14Stubs: true
pcf15Stubs: true
pcf16Stubs: true
pcf21Stubs: true
pcf22Stubs: true
pcf23Stubs: true
pcf24Stubs: true
pcf25Stubs: true
pcf26Stubs: true
pcf27Stubs: true
scp1Stubs: true
scp2Stubs: true
scp3Stubs: true
scp11Stubs : true
scp12Stubs: true
scp51Stubs: true
scp52Stubs: true
scp61Stubs: true
smf1Stubs: true
smf2Stubs: true
smf3Stubs: true
smf4Stubs: true
smf5Stubs: true
udm1Stubs: true
udm2Stubs: true
udm3Stubs: true
udm4Stubs: true
udm5Stubs: true
udm22Stubs: true
udm23Stubs: true
udm33Stubs: true
udm21Stubs: true
udm31Stubs: true
udm32Stubs: true
udr1Stubs: true
udr2Stubs: true
sepp1Stubs: true
sepp2Stubs: true
sepp3Stubs: true
nef1Stubs: true
nef2Stubs: true
nef3Stubs: true
nef4Stubs: true
nef5Stubs: true
gen1Stubs: true
gen2Stubs: true
custom5gnif1Stubs: true
custom5gnif2Stubs: true 3.4.2.1.3.1.1 Modifying IpFamilyPolicy or IpFamilies of Stubs
- If IpFamilyPolicy is set to "SingleStack," then the value of IpFamilies can either be [IPv4] or [IPv6] only.
- If IpFamilyPolicy is set as "PreferDualStack" or "RequireDualStack", then the
values of IpFamilies can either be [IPv4,IPv6] or [IPv6,IPv4] only.
Note:
All the pyStubs should be deployed with the same combination of IpFamilyPolicy and IpFamilies.
3.4.2.1.3.2 Configuring ATS YAML File for Deployment
Umbrella Chart
Helm charts contain different charts that are referred to as subcharts
through their dependencies section in the requirements.yaml file. When
a chart is created for the purpose of grouping related subcharts or services, such as
composing a whole application or deployment, it is known as umbrella chart.
Perform the following procedure to create umbrella charts and add stubs to the umbrella charts:
- To add stubs to the umbrella chart, do the following:
- Below parameters can be updated to
ocats_ocscp_values_26.1.202.yamlfile:ocats-scp
ocats-scp: image: repository: cgbu-ocscp-dev-docker.dockerhub-phx.oci.oraclecorp.com/ocats/ocats-scp tag: 26.1.202 pullPolicy: Always replicaCount: 1 resources: limits: cpu: 3 memory:23Gi #ephemeral-storage: 4Gi requests: cpu: 3 memory: 3Giocats-dnsstubocats-dnsstub: image: repository: cgbu-ocscp-dev-docker.dockerhub-phx.oci.oraclecorp.com/ocats/ocats-dnsstub tag: helm-tag pullPolicy: Always replicaCount: 1 service: customExtension: labels: {} annotations: {} type: ClusterIP port: 53 deployment: customExtension: labels: {} annotations: {} resources: limits: cpu: 1 memory: 1Gi requests: cpu: 1 memory: 1Giocats-pystub
ocats-pystub: image: repository: cgbu-ocscp-dev-docker.dockerhub-phx.oci.oraclecorp.com/ocats/ocats-pystub tag: helm-tag pullPolicy: Always replicaCount: 1 resources: limits: cpu: 1 memory: 1Gi requests: cpu: 1 memory: 1Gi ausf1: service: name: ausf1svc type: ClusterIP ports: port: 8080 deploymentName: ausf1 ausf2: service: name: ausf2svc type: ClusterIP ports: port: 8080 deploymentName: ausf2ocats-scpglbratelimitstub
ocats-scpglbratelimitstub: image: repository: <docker-registry IP:docker-registry port>/ocats/ocats-scpglbratelimitstub tag: helm-tag pullPolicy: Always replicaCount: 1 service: type: ClusterIP deployment: customExtension: labels: {} annotations: {} resources: limits: cpu: 1 memory: 1Gi requests: cpu: 1 memory: 1Gi minreplicas: 1 maxreplicas: 1 maxPdbUnavailable: 11:27 ocats-ddclientstub: image: repository: <docker-registry IP:docker-registry port>/ocats/ocats-ddclientstub tag: helm-tag pullPolicy: Always replicaCount: 1 service: type: LoadBalancer resources: limits: cpu: 1 memory: 1Gi #ephemeral-storage: 55Mi requests: cpu: 1 memory: 1Gi #ephemeral-storage: 55Mi log: level: INFO extraContainers: USE_GLOBAL_VALUE kafka_broker: "kafka-broker1-0.kafka-broker1.ddkafkanamespace.svc.cluster.local:9092" string_topic_name: "string_topic" json_topic_name: "json_topic"ocats-dnsstub
ocats-dnsstub: image: repository: <docker-registry IP:docker-registry port>/ocats/ocats-dnsstub tag: helm-tag pullPolicy: Always replicaCount: 1 service: customExtension: labels: {} annotations: {} type: ClusterIP port: 53 deployment: customExtension: labels: {} annotations: {} resources: limits: cpu: 1 memory: 1Gi requests: cpu: 1 memory: 1Gi extraContainers: USE_GLOBAL_VALUE
- Below parameters can be updated to
3.4.2.1.3.3 Dual Stack Support
Using the dual stack mechanism, applications or NFs can establish connections with pods and services in a Kubernetes cluster using IPv4 or IPv6 or both simultaneously.
With the introduction of the Dual Stack IPv6 support feature, there will be two categories of features performing the same tests. However, they are categorized differently based on the type of endpoint the stack supports (single endpoint or multiple endpoints). It is important to consider the IP endpoint support of the stack while running these tests.
For example:
- SCP_22.3.0_BugFixes_MultipleIpEndpoint_P0.feature: Shall run on stacks supporting multiple endpoints (IPv4 and IPv6)
- SCP_22.3.0_BugFixes_SingleIpEndpoint_P0.feature: Shall run on stacks supporting single endpoints (IPv4 or IPv6)
Feature files with "SingleIpEndpoint" in the name:
These test cases run on a single IP stack setup or a dual IP stack setup, where ipFamilies should be [IPv4] or [IPv6] in the ATS deployment file.
Feature files with "MultipleIpEndpoint" in name:
These test cases run only on a dual IP stack setup, where ipFamilies should be [IPv4, IPv6] or [IPv6, IPv4] in the ATS deployment file.
All other feature files can run on both setups.
3.4.2.1.3.4 Enabling HTTPs for ATS, pystubs and Jenkins
Perform the following procedure to enable HTTPs for ATS. These steps can be avoided if your environment does not require HTTPS by adhering to the Preinstall Preparation of SCP for SCP-ATS.
Ensure that you have the below file generated before you proceed with deployment:
- Private key
- Client certificate
- Certificate Authority Root certificate
3.4.2.1.3.5 Configuring SCP to Run OAuth Test Cases in ATS
# Enable nrfproxy-oauth service (only for Rel16)
nrfProxyOauthService: trueIf SCP is deployed without oauth support, either the single or multiple feature execution option must be selected, excluding all oauth test cases, or these options must be manually removed from the feature directory on the ATS pod.
3.4.2.1.3.6 Configuring ATS for CCA Test Cases
- Enable HTTPs to run these feature tests.
- Generate 9 client certificates (using the gen_certificates.sh
script) before running the feature tests and write these certificates inside the
ocats-scp-secret kubernetes secret. This script is to be executed when SCP-ATS
deployments have IP families such as [IPv4] or [IPv4, IPv6].
The following lists the sample SANs that must be used while creating certificates:
- client2.pem
[alt_names] IP = 10.75.213.1 DNS.1 = chf1svc.${NAMESPACE}.${COMMON_NAME} URI.1 = urn:uuid:11111111-aaaa-aaaa-aaaa-111111111177 URI.2 = https://chf1svc.${NAMESPACE}.${COMMON_NAME}:443 URI.3 = https://10.75.213.1:443 - client3.pem
[alt_names] URI.1 = urn:uuid:11111111-aaaa-aaaa-aaaa-111111111177 - client4.pem
[ alt_names] DNS.1 = chf1svc.${NAMESPACE}.${COMMON_NAME} - client5.pem
[alt_names] IP = 10.75.213.1 - client6.pem
[alt_names] URI.1 = https://chf1svc.${NAMESPACE}.${COMMON_NAME}:443 - client7.pem
[alt_names] URI.1 = https://10.75.213.1:443 - client8.pem
[alt_names] IP = 10.75.213.1 DNS.1 = chf1svc.${NAMESPACE}.${COMMON_NAME} URI.1 = https://chf1svc.${NAMESPACE}.${COMMON_NAME}:443 URI.2 = https://10.75.213.1:443 - client9.pem
[alt_names] IP.1 = 10.75.213.2 IP.2 = 10.75.213.3 IP.3 = 10.75.213.4 IP.4 = 10.75.213.5 IP.5 = 10.75.213.6 IP.6 = 10.75.213.7 IP.7 = 10.75.213.8 IP.8 = 10.75.213.9 IP.9 = 10.75.213.10 IP.10 = 10.75.213.11 IP.11 = 10.75.213.1 DNS.1 = chf1svc.${NAMESPACE}.${COMMON_NAME} URI.1 = urn:uuid:11111111-aaaa-aaaa-aaaa-111111111177 URI.2 = https://chf1svc.${NAMESPACE}.${COMMON_NAME}:443 URI.3 = https://10.75.213.10:443 - client10.pem
[alt_names] IP = 10.75.213.1 DNS.1 = chf1svc.${NAMESPACE}.${COMMON_NAME} URI.1 = urn:uuid:11111111-aaaa-aaaa-aaaa-111111111177 URI.2 = https://chf1svc.${NAMESPACE}.${COMMON_NAME}:443 URI.3 = https://10.75.213.10:443 URI.4 = https://10.75.213.2:443 URI.5 = https://10.75.213.3:443 URI.6 = https://10.75.213.4:443 URI.7 = https://10.75.213.5:443 URI.8 = https://10.75.213.6:443 URI.9 = https://10.75.213.7:443 URI.10 = https://10.75.213.8:443 URI.11 = https://10.75.213.1:443
- client2.pem
- Generate 9 client certificates before running the feature tests,
and write these certificates inside the ocats-scp-secret Kubernetes secret. Run
the gen_certificates_ipv6.sh script when SCP-ATS deployment is either [IPv6] or
[IPv6,IPv4].
The following lists the sample SANs that must be used while creating certificates:
- client2.pem
[alt_names] IP = 2001:db8:85a3:0:0:8a2e:370:7334 DNS.1 = chf1svc.${NAMESPACE}.${COMMON_NAME} URI.1 = urn:uuid:11111111-aaaa-aaaa-aaaa-111111111177 URI.2 = https://chf1svc.${NAMESPACE}.${COMMON_NAME}:443 URI.3 = https://[2001:db8:85a3:0:0:8a2e:370:7334]:443 - client3.pem
[alt_names] URI.1 = urn:uuid:11111111-aaaa-aaaa-aaaa-111111111177 - client4.pem
[ alt_names] DNS.1 = chf1svc.${NAMESPACE}.${COMMON_NAME} - client5.pem
[alt_names] IP = 2001:db8:85a3:0:0:8a2e:370:7334 - client6.pem
[alt_names] URI.1 = https://chf1svc.${NAMESPACE}.${COMMON_NAME}:443 - client7.pem
[alt_names] URI.1 =https://[2001:db8:85a3:0:0:8a2e:370:7334]:443 - client8.pem
[alt_names] IP = 2001:db8:85a3:0:0:8a2e:370:7334 DNS.1 = chf1svc.${NAMESPACE}.${COMMON_NAME} URI.1 = https://chf1svc.${NAMESPACE}.${COMMON_NAME}:443 URI.2 = https://[2001:db8:85a3:0:0:8a2e:370:7334]:443 - client9.pem
[alt_names] IP.1 = 2002:db8:85a3:0:0:8a2e:370:7334 IP.2 = 2003:db8:85a3:0:0:8a2e:370:7334 IP.3 = 2004:db8:85a3:0:0:8a2e:370:7334 IP.4 = 2005:db8:85a3:0:0:8a2e:370:7334 IP.5 = 2006:db8:85a3:0:0:8a2e:370:7334 IP.6 = 2007:db8:85a3:0:0:8a2e:370:7334 IP.7 = 2008:db8:85a3:0:0:8a2e:370:7334 IP.8 = 2009:db8:85a3:0:0:8a2e:370:7334 IP.9 = 2010:db8:85a3:0:0:8a2e:370:7334 IP.10 = 2011:db8:85a3:0:0:8a2e:370:7334 IP.11 = 2001:db8:85a3:0:0:8a2e:370:7334 DNS.1 = chf1svc.${NAMESPACE}.${COMMON_NAME} URI.1 = urn:uuid:11111111-aaaa-aaaa-aaaa-111111111177 URI.2 = https://chf1svc.${NAMESPACE}.${COMMON_NAME}:443 URI.3 = https://[2010:db8:85a3:0:0:8a2e:370:7334]:443 - client10.pem
[alt_names] IP = 2001:db8:85a3:0:0:8a2e:370:7334 DNS.1 = chf1svc.${NAMESPACE}.${COMMON_NAME} URI.1 = urn:uuid:11111111-aaaa-aaaa-aaaa-111111111177 URI.2 = https://chf1svc.${NAMESPACE}.${COMMON_NAME}:443 URI.3 = https://[2010:db8:85a3:0:0:8a2e:370:7334]:443 URI.4 = https://[2002:db8:85a3:0:0:8a2e:370:7334]:443 URI.5 = https://[2003:db8:85a3:0:0:8a2e:370:7334]:443 URI.6 = https://[2004:db8:85a3:0:0:8a2e:370:7334]:443 URI.7 = https://[2005:db8:85a3:0:0:8a2e:370:7334]:443 URI.8 = https://[2006:db8:85a3:0:0:8a2e:370:7334]:443 URI.9 = https://[2007:db8:85a3:0:0:8a2e:370:7334]:443 URI.10 = https://[2008:db8:85a3:0:0:8a2e:370:7334]:443 URI.11 = https://[2001:db8:85a3:0:0:8a2e:370:7334]:443
- client2.pem
3.4.2.1.3.7 Updating the Global Egress Rate Limiting Changes in the SCP Deployment File for ATS
Perform the following procedure to enable the Global Egress Rate Limiting feature for ATS environment.
- In the SCP
custom-values.yamlfile, update the following:federation.remoteScpOne.fqdnOrIp: FQDN of thescpglbratelimitstubpod.federation.remoteScpOne.clusterName: Coherence Cluster Name of global rate limit Stub [Example:scpstub-coherence-cluster].federation.remoteScpOne.nfInstanceId: NFInstanceID of global rate limit Stub [Example:2faf1bbc-6e4a-4454-a507-a14ef8e1bc22].
3.4.2.1.3.8 Configuring SCP to Run DNS SRV Test Cases in ATS
# Enable DNS SRV Alternate Routing Feature
dnsSRVAlternateRouting: falseIf SCP is deployed without alternate resolution support, either single or multiple feature execution options must be selected, excluding all DNS SRV test cases, or these options must be manually removed from the feature directory on the ATS pod.
3.4.2.1.3.9 Configuring SCP to Run Mediation Test Cases in ATS
# Enable mediation service
mediationService: false3.4.2.1.3.10 Configuring SCP to Run Model D Test Cases in ATS
# Enable Nrf Proxy service (only for Rel16)
nrfProxyService: falseIf SCP is deployed without nrfproxy support, either single or multiple feature execution options must be selected, excluding all Model D test cases, or these options must be manually removed from the feature directory on the ATS pod.
3.4.2.1.3.11 Configuring ATS for Traffic Feed Test Cases
- To run Traffic Feed ATS testcases, install the kafka broker.
- In the ATS deployment file, update the following parameters:
- kafka_broker: <kafka broker host>:<kafka broker host> (Example, “kafka-broker-0.kafka-broker.scpsvc.svc.cluster.local:9092”)
- string_topic_name: <topic name for string serialization> (Example, “string_topic”)
- json_topic_name: <topic name for json serialization> (Example, “json_topic”)
- In the
global.yamlfile, update the following parameters:- global_traffic_feed_key_Serializer: <key serialization> (Example, string)
- global_traffic_feed_value_Serializer: <value serialization> (Example, string)
- global_traffic_feed_topic_name: <topic name for selected serialization> (Example, string_topic)
- global_traffic_feed_bootstrap_server_host: <kafka broker host> (Example, kafka-broker1-0.kafka-broker1.scpsvc.svc.cluster.local)
- global_traffic_feed_bootstrap_server_port: <kafka broker
port> (Example, 9092)
For more information on
global.yamlfile, see ATS Testcase Parametrization on User Input.
For installation of the Data Director Kafka broker, perform the following:- Update the
ocnadd-custom-values.yamlas documented in the Data Director Installation and Upgrade Guide. - Disable all services apart from
ocnaddkafkaby marking them as false. - Keep
ocnaddkafkaas true.
Note:
Kafka broker should be deployed with 3 partitions under string_topic.
3.4.2.1.3.12 Configuring SCP to Run LCI Test Cases in ATS
# Enable load-manager service (only for Rel16)
loadManagerService: trueIf SCP is deployed without load manager support, either the single or multiple feature execution option must be selected, excluding all load manager test cases, or these options must be manually removed from the feature directory on the ATS pod.
3.4.3 Deploying ATS and Stub in the Kubernetes Cluster
This section provides information about how to deploy ATS and stubs.
To deploy ATS in the Kubernetes Cluster:
Note:
Deploy ATS, SCP, and stubs in the same namespace.- Ensure the
ocats_ocscp_values_26.1.202.yamlfile has been updated with correct repository, image tag, and parameters as per requirements. - In the Files or Helm folder, find the ocats-ocscp charts for version 23.3.0, which have to be used for installation.
- Run the following command to deploy
ATS:
helm install ocats-ocscp-26.1.202.tgz --name <release_name> --namespace <namespace_name> -f ocats-ocscp-values-26.1.202.yamlExample:
helm install ocats-ocscp-26.1.202.tgz --name ocats-ocscp --namespace scpsvc-f ocats-ocscp-values-26.1.202.yamlNote:
Update image name, tag, service name, and deployment name in ocats-pystub of theocats_pystub_values_26.1.202.yamlfile before deploying. - Verify whether all stub pods are up and running in
the deployed namespace as updated in the
ocats_ocscp_values_26.1.202.yaml.
3.4.4 Post Installation and Deployment Steps
This section describes the post-installation steps for SCP.
3.4.4.1 Verifying ATS Deployment
helm status <release_name>Note:
If ATS is deployed in the service mesh environment, the Ready field for pods displays 2/2.Figure 3-17 Checking ATS Helm Release and ATS related Pod Status
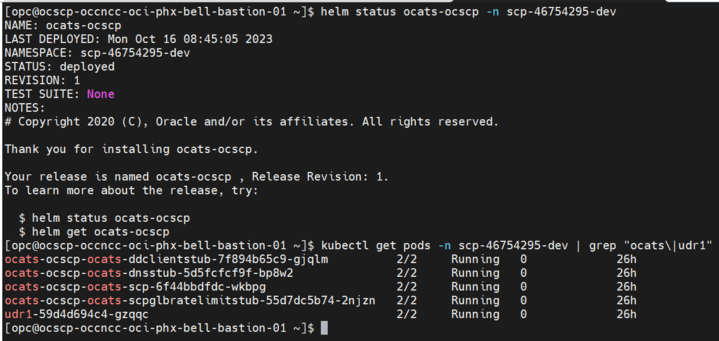
3.4.4.2 Modifying the scpc-alternate-resolution Microservice
- Capture the cluster IP of DNS Stub service.
By default, scpc-alternate-resolution points to CoreDNS and displays the following settings in the
ocscp_values.yamldeployment file.Figure 3-18 CoreDNS

3.4.4.3 ATS Testcase Parametrization on User Input
Parameterization is an approach to decoupling the data from the feature
files in ATS so that ATS test cases can be run against some predefined configuration
that contains customer-specific data and service configurations. Parametrization
allows you to provide or adjust values for the input and output parameters needed
for the test cases to be compatible with the SUT configuration. You can update or
adjust the key-value pair values in the global.yaml and
feature.yaml files for each of the feature files so that
they are compatible with SUT configuration. For more information, see the Parameterization
section.
Three new folders "cust_data", "product_config" and "custom_config"
are added to the base path inside ATS pod
/var/lib/jenkins/ocscp_tests. Where the cust_data folder is a replica
of the already existing data folder, the product_config folder contains
configuration files that are compatible with the default product configurations, and
the cust_config folder is a replica of the product_config folder. You can update the
custom folders, such as cust_data and custom_config.
The product config folder contains two types of YAML files:
global.yaml and feature_name>. yaml
(feature file-specific yaml).
Global File
The global.yaml contains global variable names and their
corresponding default values that can be used across all the feature files. The
variable name declared in global.yaml should start with
global_Var_ as prefix.
#START_GLOBAL
global:
File_Parameters:
global_Var_SUT_apiPrefix1: &global_Var_SUT_apiPrefix1 USEast
global_Var_SUT_ServingLocality1: &global_Var_SUT_ServingLocality1 USEast
global_Var_localNrfSetId1: &global_Var_localNrfSetId1 setnrfl1.nrfset.5gc.mnc012.mcc345
global_Var_stubPort: &global_Var_stubPort 8080
#END_GLOBAL#START_GLOBAL
global:
File_Parameters:
global_Var_SUT_apiPrefix1: &global_Var_SUT_apiPrefix1 USEast
# Following Serving Localities if needs to be changed are also to be changed while deploying SCP before running ATS
global_Var_SUT_ServingLocality1: &global_Var_SUT_ServingLocality1 USEast
global_Var_SUT_ServingLocality2: &global_Var_SUT_ServingLocality2 Loc7
global_Var_SUT_ServingLocality3: &global_Var_SUT_ServingLocality3 Loc8
global_Var_SUT_ServingLocality4: &global_Var_SUT_ServingLocality4 Loc9
# Following SetId's if needs to be changed are also to be changed while deploying SCP before running ATS
global_Var_localNrfSetId1: &global_Var_localNrfSetId1 setnrfl1.nrfset.5gc.mnc012.mcc345
global_Var_remoteNrfSetId1: &global_Var_remoteNrfSetId1 setnrfr1.nrfset.5gc.mnc012.mcc345
global_Var_remoteNrfSetId2: &global_Var_remoteNrfSetId2 setnrfr2.nrfset.5gc.mnc012.mcc345
# If stubPort has to be changed then stub has to be deployed with the same port number before running ATS
global_Var_stubPort: &global_Var_stubPort 8080
global_Var_stubErrorCode: &global_Var_stubErrorCode 404
global_Var_udm_nfSetIdList1: &global_Var_udm_nfSetIdList1 set1.udmset.5gc.mnc012.mcc345
global_Var_udm_nfSetIdList2: &global_Var_udm_nfSetIdList2 set2.udmset.5gc.mnc012.mcc345
global_Var_udm_nfSetIdList3: &global_Var_udm_nfSetIdList3 set3.udmset.5gc.mnc012.mcc345
global_Var_smf_nfSetIdList1: &global_Var_smf_nfSetIdList1 set1.smfset.5gc.mnc012.mcc345
global_Var_smf_nfSetIdList2: &global_Var_smf_nfSetIdList2 set2.smfset.5gc.mnc012.mcc345
global_Var_smf_nfSetIdList3: &global_Var_smf_nfSetIdList3 set3.smfset.5gc.mnc012.mcc345
global_Var_pcf_nfSetIdList1: &global_Var_pcf_nfSetIdList1 set1.pcfset.5gc.mnc012.mcc345
global_Var_pcf_nfSetIdList2: &global_Var_pcf_nfSetIdList2 set2.pcfset.5gc.mnc012.mcc345
global_Var_pcf_nfSetIdList3: &global_Var_pcf_nfSetIdList3 set3.pcfset.5gc.mnc012.mcc345
global_Var_udm1_nfInstanceId: &global_Var_udm1_nfInstanceId 11111111-aaaa-aaaa-aaaa-111111111111
global_Var_udm2_nfInstanceId: &global_Var_udm2_nfInstanceId 21111111-aaaa-aaaa-aaaa-111111111111
global_Var_udm3_nfInstanceId: &global_Var_udm3_nfInstanceId 11111111-aaaa-aaaa-aaaa-111111111122
global_Var_smf1_nfInstanceId: &global_Var_smf1_nfInstanceId 11111111-aaaa-aaaa-aaaa-111111111111
global_Var_smf2_nfInstanceId: &global_Var_smf2_nfInstanceId 11111111-aaaa-aaaa-aaaa-111111111122
global_Var_smf3_nfInstanceId: &global_Var_smf3_nfInstanceId 11111111-aaaa-aaaa-aaaa-111111111133
global_Var_smf4_nfInstanceId: &global_Var_smf4_nfInstanceId 11111111-aaaa-aaaa-aaaa-111111111144
global_Var_smf5_nfInstanceId: &global_Var_smf5_nfInstanceId 11111111-aaaa-aaaa-aaaa-111111111155
global_Var_pcf1_nfInstanceId: &global_Var_pcf1_nfInstanceId 1faf1bbc-6e4a-3994-a507-a14ef8e1bc5a
global_Var_pcf2_nfInstanceId: &global_Var_pcf2_nfInstanceId 1faf1bbc-6e4a-3994-a507-a14ef8e1bc6b
global_Var_scp51_nfInstanceId: &global_Var_scp51_nfInstanceId 2fbf1bbc-6e4b-3994-b507-b14ef8e1bc51
global_Var_scp61_nfInstanceId: &global_Var_scp61_nfInstanceId 2fbf1bbc-6e4b-3994-b507-b14ef8e1bc61
# If svc name has to be changed then stub has to be deployed with the same svc name before running ATS
global_Var_udm1_svc_name: &global_Var_udm1_svc_name udm1svc
global_Var_udm2_svc_name: &global_Var_udm2_svc_name udm2svc
global_Var_udm3_svc_name: &global_Var_udm3_svc_name udm3svc
global_Var_smf1_svc_name: &global_Var_smf1_svc_name smf1svc
global_Var_smf2_svc_name: &global_Var_smf2_svc_name smf2svc
global_Var_smf3_svc_name: &global_Var_smf3_svc_name smf3svc
global_Var_smf4_svc_name: &global_Var_smf4_svc_name smf4svc
global_Var_smf5_svc_name: &global_Var_smf5_svc_name smf5svc
global_Var_pcf1_svc_name: &global_Var_pcf1_svc_name pcf1svc
global_Var_pcf2_svc_name: &global_Var_pcf2_svc_name pcf2svc
global_Var_scp51_svc_name: &global_Var_scp51_svc_name scp51svc
global_Var_scp61_svc_name: &global_Var_scp61_svc_name scp61svc
global_Var_nrf1_svc_name: &global_Var_nrf1_svc_name nrf1svc
#END_GLOBALFeature File
The <Feature_name>.yaml file contains feature-specific
variables that can be parameterized. For example, if the name of the feature file
that needs to be parameterized is "ModelC_NF_Set.feature", then the YAML file
corresponding to it will be namedModelC_NF_Set.yaml. This yaml
file contains the #START_GLOBAL and #END_GLOBAL
tags without any data in between, as the data is copied over from the
global.yaml file to this section during test execution. The variable
name in feature.yaml should have feature_Var_
as prefix.
For example:- <key_name>: &<variable_name> <default_value_of_variable>
#START_GLOBAL
#END_GLOBAL
ModelC_NF_Set.feature:
File_Parameters:
feature_Var_udm1_Priority: &feature_Var_udm1_Priority 0
feature_Var_smf1_Priority: &feature_Var_smf1_Priority 0
feature_Var_traffic_rate: &feature_Var_traffic_rate 100Scenario
The variables are referenced under the scenario tag to use in the feature file; for
this, the scenario tag has to be concatenated with Scenario_ and
enclosed within double commas.
The variables defined under the scenario tag should have sc_ as its
prefix.
"Scenario_Scenario-1- <Scenario_tag>":
Input:
File_Parameters:
sc_http_requests_total_udm1: 100#START_GLOBAL
#END_GLOBAL
ModelC_NFSet.feature:
File_Parameters:
# The priorities can be changed without having the impact on the order of the priorities
feature_Var_udm1_Priority: &feature_Var_udm1_Priority 0
feature_Var_udm2_Priority: &feature_Var_udm2_Priority 1
feature_Var_udm3_Priority: &feature_Var_udm3_Priority 1
feature_Var_smf1_Priority: &feature_Var_smf1_Priority 0
feature_Var_smf2_Priority: &feature_Var_smf2_Priority 0
feature_Var_smf3_Priority: &feature_Var_smf3_Priority 1
feature_Var_smf4_Priority: &feature_Var_smf4_Priority 3
feature_Var_smf5_Priority: &feature_Var_smf5_Priority 4
feature_Var_pcf1_Priority: &feature_Var_pcf1_Priority 0
feature_Var_pcf2_Priority: &feature_Var_pcf2_Priority 0
feature_Var_supiOfPathURI: &feature_Var_supiOfPathURI imsi-100000001
feature_Var_traffic_rate: &feature_Var_traffic_rate 100
# The traffic for the below metrics to be configured in the same proportionate as the traffice sent
feature_Var_scp_http_rx_req_total_cnt: *feature_Var_traffic_rate
feature_Var_scp_http_tx_req_total_cnt: *feature_Var_traffic_rate
feature_Var_scp_http_tx_req_total_cnt_alternate_route: &feature_Var_scp_http_tx_req_total_cnt_alternate_route 200
feature_Var_http_requests_total_udm1: &feature_Var_http_requests_total_udm1 0
feature_Var_http_requests_total_udm2: &feature_Var_http_requests_total_udm2 0
feature_Var_http_requests_total_udm3: &feature_Var_http_requests_total_udm3 0
feature_Var_http_requests_total_smf1: &feature_Var_http_requests_total_smf1 0
feature_Var_http_requests_total_smf2: &feature_Var_http_requests_total_smf2 0
feature_Var_http_requests_total_smf3: &feature_Var_http_requests_total_smf3 0
feature_Var_http_requests_total_smf4: &feature_Var_http_requests_total_smf4 0
feature_Var_http_requests_total_pcf1: &feature_Var_http_requests_total_pcf1 0
feature_Var_scp_http_rx_res_total_cnt: *feature_Var_traffic_rate
feature_Var_scp_http_tx_res_total_cnt: *feature_Var_traffic_rate
"Scenario_Scenario-1- Forward route initial UECM AMF Registration messages with 3gpp-Sbi-Target-apiRoot and 3GPP-Sbi-Disocvery-target-NfSetid Header":
Input:
File_Parameters:
sc_http_requests_total_udm1: 100 #To be configured in the same proportionate as the traffice sent
"Scenario_Scenario-2- Alternate route initial UECM AMF Registration messages with 3gpp-Sbi-Target-apiRoot and 3GPP-Sbi-Discovery-target-NfSetid Header":
Input:
File_Parameters:
sc_http_requests_total_udm1: 100 #To be configured in the same proportionate as the traffice sent
sc_http_requests_total_udm2: 100 #To be configured in the same proportionate as the traffice sent
"Scenario_Scenario-3- Load Balance initial UECM AMF Registration messages with 3gpp-Sbi-Target-apiRoot and 3GPP-Sbi-Disocvery-target-NfSetid Header":
Input:
File_Parameters:
sc_http_requests_total_udm1: 100 #To be configured in the same proportionate as the traffice sent
sc_http_requests_total_udm2: 50 #To be configured in the same proportionate as the traffice sent
sc_http_requests_total_udm3: 50 #To be configured in the same proportionate as the traffice sent
"Scenario_Scenario-4- Alternate route initial UECM AMF Registration messages with 3gpp-Sbi-Target-apiRoot missing and 3GPP-Sbi-Disocvery-target-NfSetid Header present":
Input:
File_Parameters:
sc_http_requests_total_udm1: 100 #To be configured in the same proportionate as the traffice sent
"Scenario_Scenario-5- Forward route subsequent UECM AMF Registration messages with 3gpp-Sbi-Target-apiRoot and 3gpp-sbi-routing-binding Header with bl=nfset":
Input:
File_Parameters:
sc_http_requests_total_udm1: 100 #To be configured in the same proportionate as the traffice sent
"Scenario_Scenario-6- Alternate route subsequent UECM AMF Registration messages with 3gpp-Sbi-Target-apiRoot and 3gpp-sbi-routing-binding Header with bl=nfset":
Input:
File_Parameters:
sc_udm3_Priority: 30 #Priority can be changed without having the impact on the order of the priorities
sc_http_requests_total_udm1: 100 #To be configured in the same proportionate as the traffice sent
sc_http_requests_total_udm2: 100 #To be configured in the same proportionate as the traffice sent
"Scenario_Scenario-7- Load Balance subsequent UECM AMF Registration messages with 3gpp-Sbi-Target-apiRoot and 3gpp-sbi-routing-binding Header with bl=nfset":
Input:
File_Parameters:
sc_http_requests_total_udm1: 100 #To be configured in the same proportionate as the traffice sent
sc_http_requests_total_udm2: 50 #To be configured in the same proportionate as the traffice sent
sc_http_requests_total_udm3: 50 #To be configured in the same proportionate as the traffice sent
"Scenario_Scenario-8- Alternate route subsequent UECM AMF Registration messages with 3gpp-Sbi-Target-apiRoot missing and 3gpp-sbi-routing-binding Header with bl=nfset is present":
Input:
File_Parameters:
sc_http_requests_total_udm1: 100 #To be configured in the same proportionate as the traffice sent
"Scenario_Scenario-9- To test when Forward route for notification request UECM AMF Registration messages with 3gpp-Sbi-Target-apiRoot and 3gpp-sbi-routing-binding header bl=nfset":
Input:
File_Parameters:
sc_http_requests_total_udm1: 100 #To be configured in the same proportionate as the traffice sent
"Scenario_Scenario-10- To test when Forward route fails for notification request UECM AMF Registration messages with 3gpp-Sbi-Target-apiRoot and 3gpp-sbi-routing-binding header,alternate route should happen on NfSet":
Input:
File_Parameters:
sc_http_requests_total_udm1: 100 #To be configured in the same proportionate as the traffice sent
sc_http_requests_total_udm2: 100 #To be configured in the same proportionate as the traffice sent
"Scenario_Scenario-11- To test Forward route for notification request UECM AMF Registration messages with 3gpp-Sbi-Discovery-target-nf-set-id,3gpp-Sbi-Target-apiRoot":
Input:
File_Parameters:
sc_http_requests_total_udm1: 100 #To be configured in the same proportionate as the traffice sent
"Scenario_Scenario-12- To test when Forward route fails for notification request UECM AMF Registration messages with 3gpp-Sbi-Discovery-target-nf-set-id and 3gpp-Sbi-Target-apiRoot,alternate route should happen on NfSet":
Input:
File_Parameters:
sc_http_requests_total_udm1: 100 #To be configured in the same proportionate as the traffice sent
sc_http_requests_total_udm2: 100 #To be configured in the same proportionate as the traffice sent
"Scenario_Scenario-13- To test when Forward route fails for notification request UECM AMF Registration messages with 3gpp-Sbi-Discovery-target-nf-set-id and 3gpp-Sbi-Target-apiRoot,load balancing should happen on NfSet on NFs with similar priority":
Input:
File_Parameters:
sc_http_requests_total_udm1: 100 #To be configured in the same proportionate as the traffice sent
sc_http_requests_total_udm2: 50 #To be configured in the same proportionate as the traffice sent
sc_http_requests_total_udm3: 50 #To be configured in the same proportionate as the traffice sent
"Scenario_Scenario-14- Forward route initial SMF PduSession sm-contexts create messages with 3gpp-Sbi-Target-apiRoot and 3GPP-Sbi-Disocvery-target-NfSetid Header":
Input:
File_Parameters:
sc_http_requests_total_smf1: 100 #To be configured in the same proportionate as the traffice sent
"Scenario_Scenario-15- Alternate route SMF PduSession sm-contexts create messages with 3gpp-Sbi-Target-apiRoot and 3GPP-Sbi-Disocvery-target-NfSetid Header":
Input:
File_Parameters:
sc_http_requests_total_smf1: 100 #To be configured in the same proportionate as the traffice sent
sc_http_requests_total_smf2: 100 #To be configured in the same proportionate as the traffice sent
"Scenario_Scenario-16- Error response code received when SMF PduSession sm-contexts create message is sent with missing information in 3gpp-sbi-routing-binding header and 3gpp-Sbi-Target-apiRoot header is missing":
Input:
File_Parameters:
sc_scp_http_tx_req_total_cnt: 0 #To be configured in the same proportionate as the traffice sent
sc_ocscp_metric_scp_generated_response_total: 100 #To be configured in the same proportionate as the traffice sent
"Scenario_Scenario-17-Error response code received when SMF PduSession sm-contexts create message is sent with missing information in 3gpp-Sbi-Discovery-target-nf-set-id header and 3gpp-Sbi-Target-apiRoot header":
Input:
File_Parameters:
sc_targetNfSetId_Send: 1
sc_http_requests_total_smf1: 100 #To be configured in the same proportionate as the traffice sent
"Scenario_Scenario-18- Alternate route SMF PduSession sm-contexts create messages with 3gpp-Sbi-Target-apiRoot and 3GPP-Sbi-Disocvery-target-NfSetid Header":
Input:
File_Parameters:
sc_smf1_Priority: 2 #Priority can be changed without having the impact on the order of the priorities
sc_scp_http_tx_req_total_cnt_alternate_route: 400 #To be configured in the same proportionate as the traffice sent
sc_http_requests_total_smf1: 100 #To be configured in the same proportionate as the traffice sent
sc_http_requests_total_smf4: 100 #To be configured in the same proportionate as the traffice sent
"Scenario_Scenario-19- No Alternate route for initial UECM AMF Registration messages with 3gpp-Sbi-Target-apiRoot and 3GPP-Sbi-Discovery-target-NfSetid Header as reroute Policy is disabled":
Input:
File_Parameters:
sc_http_requests_total_udm1: 100 #To be configured in the same proportionate as the traffice sent
sc_scp_http_rx_res_total_cnt: 0 #To be configured in the same proportionate as the traffice sent
"Scenario_Scenario-20- Forward route PCF SMPolicyControl Create SMPolicyAssociation with 3gpp-Sbi-Target-apiRoot and 3GPP-Sbi-Disocvery-target-NfSetid Header and verify that 3gpp-Sbi-Target-apiRoot and 3gpp-sbi-producer-id headers are not present in response":
Input:
File_Parameters:
sc_pcf1_Service_Priority: 80 #Priority can be changed without having the impact on the order of the priorities
sc_http_requests_total_pcf1: 100 #To be configured in the same proportionate as the traffice sent
"Scenario_Scenario-21- Alternate route PCF SMPolicyControl Create SMPolicyAssociation messages with 3gpp-Sbi-Target-apiRoot and 3GPP-Sbi-Disocvery-target-NfSetid Header and verify that 3gpp-Sbi-Target-apiRoot and 3gpp-sbi-producer-id headers are present in response":
Input:
File_Parameters:
sc_pcf1_Priority: 2 #Priority can be changed without having the impact on the order of the priorities
sc_http_requests_total_pcf2: 100 #To be configured in the same proportionate as the traffice sent
"Scenario_Scenario-22- Alternate route initial UECM AMF Registration messages with 3gpp-Sbi-Target-apiRoot missing and 3GPP-Sbi-Disocvery-target-NfSetid Header present and verify that only 3gpp-sbi-producer-id header is present in response since location header is present":
Input:
File_Parameters:
sc_http_requests_total_udm1: 100 #To be configured in the same proportionate as the traffice sent
"Scenario_Scenario-23- Alternate route PCF SMPolicyControl Create messages with 3gpp-Sbi-Target-apiRoot and 3GPP-Sbi-Disocvery-target-NfSetid Header and verify that 3gpp-Sbi-Target-apiRoot and 3gpp-sbi-producer-id headers are present in response":
Input:
File_Parameters:
sc_pcf1_Priority: 2 #Priority can be changed without having the impact on the order of the priorities
sc_http_requests_total_pcf2: 100 #To be configured in the same proportionate as the traffice sent
"Scenario_Scenario-24- Alternate route PCF SMPolicyControl Create messages with 3gpp-Sbi-Target-apiRoot and 3gpp-sbi-routing-binding Header and verify that 3gpp-Sbi-Target-apiRoot and 3gpp-sbi-producer-id headers are present in response":
Input:
File_Parameters:
sc_Var_pcf1_Priority: 2 #Priority can be changed without having the impact on the order of the priorities
sc_http_requests_total_pcf2: 100 #To be configured in the same proportionate as the traffice sent Figure 3-19 Feature File without Parameterization

Figure 3-20 Feature File when it is Parameterized

The changes are made in the product config folder,
so the same configuration type can be chosen from the Jenkins UI and the test case can be
run, and in the logs, it can be seen that the values of variables are being replaced with
the ones that are provided in global.yaml or
<feature_name>.yaml.
Note:
Only variables that bring in some value addition require parameterization, and a change
in the value of those variables does not affect the test case. A variable that can have an
effect across all the feature files should be kept under global.yaml,
a variable that is specific to a feature file has to be kept under
<feature_name>.yaml, and a variable that is related to a
specific scenario must be kept under scenario level.
3.4.4.4 ATS Tagging Support for SCP
The ATS Tagging Support feature allows you to select features and scenarios based on specific tags. There are two types of tags, Feature tag and Scenario tag. For more information about this feature, see ATS Tagging Support. The following tags are supported by SCP:
- @asmonly: Any feature file with this tag should run only on an ASM setup.
- @non_asm: This tag is for all test cases that should not run on an ASM setup.
- @https: This tag is for all https test cases.
- @multiple_ip_endpoint: This tag is for all test cases that should run only on multiple IP endpoint setups, such as IPv4 or IPv6 preferred dual stack setups.
- @single_ip_endpoint: This tag is for all test cases that should run only on single IP endpoint setups, such as IPv4 or IPv6.
- @alert: This tag is for all test cases with alert scenarios.
- @api: This tag is for all test cases with API scenarios.
- @sanity: This tag is for all the SCP sanity test cases.
Tags are available at Feature and Scenario levels. You can create tags by appending "@" as a prefix to the feature or scenario name.
- @SCP_InterSCP_PCF_HTTPS_P0 @https
- @S1_To_test_alert_for_SCP_Observability @alert
3.4.4.5 Accessing Collected Logs
Perform the following procedure to access the collected logs:
- Access the ATS pod.
- Navigate to the Jenkins job directory that applies to the following feature type:
-
For regression features, go to
/var/lib/jenkins/.jenkins/jobs/SCP-Regression/builds. -
For new features, go to
/var/lib/jenkins/.jenkins/jobs/SCP-NewFeatures/builds.
-
- Select the required build number, then open its directory.
- Locate the log archive. For "AppLog", the archive is named
applogs.zip. - Extract the archive and open the extracted directory.
- Review the logs for failed scenarios. Log files use names such as
Initial_Run_<scenario_name>.log,1stRerun_<scenario_name>.log, and2ndRerun_<scenario_name>.log.The logs are organized as follows:
- "Initial_Run" logs are the default logs for scenarios that failed during the initial run.
- When the rerun count is greater than zero, numbered rerun logs, such as "1stRerun" and "2ndRerun", are also available. These logs correspond to the selected "Log_Level".
Note:
When a scenario passes during a rerun, logs are available only for the failed runs before the passing rerun. For example, if a scenario fails during the initial run and the first rerun but passes during the second rerun, only the "Initial_Run" and "1stRerun" logs are available. No "2ndRerun" or subsequent rerun logs are generated, even if the configured rerun count is three.
3.4.4.6 Enabling PCAP Logs
Perform the following procedure to enable Packet Capture (PCAP) logs for ATS functional test execution:
- In
ocscp_values.yaml, enable extra containers:extraContainers: ENABLED - Add the required debug-tools image/tag and update
runAsUser, for example value,2). - Deploy the updated configuration.
- In the ATS screen:
- Set Fetch Logs Upon Failure to Yes.
- Enable PCAP Logs.
- Run the Functional Test (FT).
- Navigate to the Jenkins job directory:
- For regression features:
/var/lib/jenkins/.jenkins/jobs/SCP-Regression/builds. - For new features:
/var/lib/jenkins/.jenkins/jobs/SCP-NewFeatures/builds.
- For regression features:
3.4.4.7 Data Collection after Feature File Failure
After a feature file fails, dumps are collected at /tmp/scale_logs. For 50 scenarios, the observed folder size is approximately 57 MB. By default, /tmp/scale_logs is automatically cleaned up after 5 days (default LOG_RETENTION_DAYS). This retention period can be modified by updating the LOG_RETENTION_DAYS variable in the CNCATS custom_values.yaml file.
/tmp/scale_logs:
- DB dump
- Metric dump
- Worker routing rules
3.4.5 Appendix
This section provides supplementary information that may be helpful for a more comprehensive understanding of installing and running SCP test cases in ATS.
3.4.5.1 Creating Custom Service Account
By default, ATS will create a service account with the below rules. If the user does
not want to use the default service account, then the service account needs to be manually
created with the below permission, and the created custom service account name needs to be
specified in the ocats_ocscp_values_26.1.202.yaml file.
rules:
- apiGroups: ["apps"]
resources: ["deployments", "replicasets"]
verbs: ["watch", "get", "list", "create", "delete", "update" ,"patch"]
- apiGroups: [""]
resources: ["pods", "services", "pod/logs"]
verbs: ["watch", "get", "list", "create", "delete"]
- apiGroups: [""]
resources: ["secrets"]
verbs: ["get", "list"]
- apiGroups: [""]
resources: ["configmaps"]
verbs: ["watch", "get", "list", "create", "delete", "update", "patch"]3.4.5.2 Adding New Stubs to SCP-ATS
ocats-pystub charts and update the
deployment name in the stub deployment file as
follows:name- .Values.ausf11.deploymentName
app- .Values.ausf11.deploymentNameservice.yaml
file.name: {{ .Values.ausf11.service.name }}
app: {{ .Values.ausf11.deploymentName }}
port: {{ .Values.ausf11.service.ports.port }}ocats_ocscp_values_26.1.202.yaml file with new
information:
ausf1:
service:
name: ausf1svc
type: ClusterIP
ports:
port: 8080The images represent pystub service and deployment files for each stubs:
Figure 3-21 Sample Deployment File

3.5 Installing ATS for Policy
Installing ATS for Policy procedure consists of the following two steps:
- Locating and downloading the ATS package
- Deploying ATS and stub pods in Kubernetes cluster
This includes installation of nine stubs (nf1stub, nf11stub, nf12stub, nf2stub, nf21stub, nf22stub, nf3stub, nf31stub, nf32stub), ocamf stub, ocdns-bind stub, ocldap-stub, and Policy ATS in the namespace where CNC Policy is deployed.
3.5.1 Resource Requirements
This section describes the ATS resource requirements for CNC Policy.
Overview - Total Number of Resources
- PCF SUT
- cnDBTier
- ATS
Table 3-17 PCF - Total Number of Resources
| Resource Name | Non-ASM CPU | Non-ASM Memory (GB) | ASM CPU | ASM Memory (GB) |
|---|---|---|---|---|
| PCF SUT Total | 219 | 197 | 293 | 244 |
| ATS Total | 26 | 28 | 54 | 42 |
| CnDBTier Total | 107.1 | 175.2 | 137.1 | 190.2 |
| Grand Total PCF ATS | 352.1 | 400.2 | 484.1 | 476.2 |
PCF Pods Resource Requirements Details
This section describes the resource requirements, which are needed to deploy Policy ATS successfully.
Table 3-18 PCF Pods Resource Requirements Details
| Policy Microservices | Max CPU | Memory (GB) | Max Replica | Non-ASM Total CPU | Non-ASM Memory (GB) | ASM Total CPU | ASM Total Memory (GB) | Isito ASM CPU | Isito ASM Memory (GB) |
|---|---|---|---|---|---|---|---|---|---|
| oc-app-info | 2 | 2 | 1 | 2 | 2 | 4 | 3 | 2 | 1 |
| oc-bulwark | 8 | 6 | 2 | 16 | 12 | 20 | 14 | 2 | 1 |
| oc-diam-connector | 4 | 2 | 2 | 8 | 4 | 12 | 6 | 2 | 1 |
| oc-diam-gateway | 4 | 2 | 1 | 4 | 2 | 6 | 3 | 2 | 1 |
| alternate-route | 2 | 4 | 1 | 2 | 4 | 4 | 5 | 2 | 1 |
| oc-config-server | 4 | 2 | 1 | 4 | 2 | 6 | 3 | 2 | 1 |
| ocegress_gateway | 4 | 6 | 1 | 4 | 6 | 6 | 7 | 2 | 1 |
| ocingress_gateway | 5 | 6 | 1 | 5 | 6 | 7 | 7 | 2 | 1 |
| nrf-client-disc | 4 | 2 | 2 | 8 | 4 | 12 | 6 | 2 | 1 |
| nrf-client-mngt | 1 | 1 | 2 | 2 | 2 | 6 | 4 | 2 | 1 |
| oc-audit | 2 | 4 | 1 | 2 | 4 | 4 | 5 | 2 | 1 |
| oc-config-mgmt | 4 | 2 | 2 | 8 | 4 | 12 | 6 | 2 | 1 |
| oc-ldap-gateway | 4 | 2 | 2 | 8 | 8 | 12 | 10 | 2 | 1 |
| oc-policy-ds | 7 | 8 | 2 | 14 | 16 | 18 | 18 | 2 | 1 |
| oc-pre | 4 | 4 | 2 | 8 | 8 | 12 | 10 | 2 | 1 |
| oc-query | 2 | 1 | 2 | 4 | 2 | 8 | 4 | 2 | 1 |
| oc-soap-connector | 4 | 4 | 2 | 8 | 8 | 12 | 10 | 2 | 1 |
| oc-pcf-am | 8 | 8 | 2 | 16 | 16 | 20 | 18 | 2 | 1 |
| oc-pcf-sm | 7 | 10 | 2 | 14 | 20 | 18 | 22 | 2 | 1 |
| oc-pcf-ue | 8 | 6 | 2 | 16 | 12 | 20 | 24 | 2 | 1 |
| oc-pcrf-core | 8 | 8 | 2 | 16 | 16 | 0 | 18 | 2 | 1 |
| oc-perf-info | 2 | 2 | 2 | 4 | 4 | 8 | 6 | 2 | 1 |
| oc-binding | 6 | 8 | 1 | 6 | 8 | 8 | 9 | 2 | 1 |
| oc-udr-connector | 6 | 4 | 2 | 12 | 8 | 16 | 10 | 2 | 1 |
| oc-chf-connector | 6 | 4 | 2 | 12 | 8 | 16 | 10 | 2 | 1 |
| usage-mon | 5 | 4 | 2 | 10 | 8 | 14 | 10 | 2 | 1 |
| nwdaf-agent | 2 | 1 | 1 | 2 | 1 | 4 | 2 | 2 | 1 |
| notifier | 2 | 1 | 2 | 4 | 2 | 8 | 4 | 2 | 1 |
| Policy Totals | 219 | 197 | 293 | 244 | |||||
ATS Resource Requirements details for Policy
This section describes the ATS resource requirements, which are needed to deploy Policy ATS successfully.
Table 3-19 ATS Resource Requirements Details
| ATS Microservices | Max CPU | Max Memory (GB) | Max Replica | Non-ASM Total CPU | Non-ASM Total Memory (GB) | ASM Total CPU | ASM Total Memory (GB) | Isito ASM CPU | Isito ASM Memory (GB) |
|---|---|---|---|---|---|---|---|---|---|
| ocstub1-py | 2 | 2 | 1 | 2 | 2 | 4 | 3 | 2 | 1 |
| ocstub2-py | 2 | 2 | 1 | 2 | 2 | 4 | 3 | 2 | 1 |
| ocstub3-py | 2 | 2 | 1 | 2 | 2 | 4 | 3 | 2 | 1 |
| ocstub11-py | 2 | 2 | 1 | 2 | 2 | 4 | 3 | 2 | 1 |
| ocstub12-py | 2 | 2 | 1 | 2 | 2 | 4 | 3 | 2 | 1 |
| ocstub21-py | 2 | 2 | 1 | 2 | 2 | 4 | 3 | 2 | 1 |
| ocstub22-py | 2 | 2 | 1 | 2 | 2 | 4 | 3 | 2 | 1 |
| ocstub31-py | 2 | 2 | 1 | 2 | 2 | 4 | 3 | 2 | 1 |
| ocstub32-py | 2 | 2 | 1 | 2 | 2 | 4 | 3 | 2 | 1 |
| ocamf-stub | 1 | 1 | 1 | 1 | 1 | 3 | 2 | 2 | 1 |
| ocats-policy | 4 | 6 | 1 | 4 | 6 | 6 | 7 | 2 | 1 |
| ocdns-bind | 1 | 1 | 1 | 1 | 1 | 3 | 2 | 2 | 1 |
| oc-ldap-org1 | 1 | 1 | 1 | 1 | 1 | 3 | 2 | 2 | 1 |
| ocdiam-sim | 1 | 1 | 1 | 1 | 1 | 3 | 2 | 2 | 1 |
| ATS Totals | 26 | 28 | 54 | 42 | |||||
cnDBTier Resource Requirements Details for Policy ATS
This section describes the cnDBTier resource requirements, which are needed to deploy Policy ATS successfully.
Note:
For cnDBTier pods, a minimum of 4 worker nodes are required.
Table 3-20 cnDBTier Resource Requirements Details
| cnDBTier Microservices | Min CPU | Min Memory (GB) | Min Replica | Total CPU | Total Memory (GB) | ASM Total CPU | ASM Total Memory (GB) | Isito ASM CPU | Isito ASM Memory (GB) |
|---|---|---|---|---|---|---|---|---|---|
| db_monitor_svc | 1 | 1 | 1 | 1 | 1 | 3 | 2 | 2 | 1 |
| db_replication_svc | 2 | 12 | 1 | 2 | 12 | 4 | 13 | 2 | 1 |
| db_backup_manager_svc | 0.1 | 0.2 | 1 | 0.1 | 0.2 | 2.1 | 1.2 | 2 | 1 |
| ndbappmysqld | 8 | 10 | 4 | 32 | 40 | 40 | 44 | 2 | 1 |
| ndbmgmd | 4 | 10 | 2 | 8 | 20 | 12 | 22 | 2 | 1 |
| ndbmtd | 10 | 18 | 4 | 40 | 72 | 48 | 76 | 2 | 1 |
| ndbmysqld | 8 | 10 | 2 | 16 | 20 | 20 | 22 | 2 | 1 |
| db_infra_moditor_svc | 8 | 10 | 1 | 8 | 10 | 8 | 10 | ||
| DB Tier Total | 107.1 | 175.2 | 137.1 | 190.2 | |||||
Note:
The requirements shown in the above table for CnDBTier are the default numbers and must be changed as per the deployment requirements.
3.5.2 Downloading the ATS Package
This section provides information on how to locate and download the Policy ATS package file from My Oracle Support (MOS).
Locating and Downloading Policy ATS Package
To locate and download the ATS package from MOS, perform the following steps:
- Log in to My Oracle Support using the valid credentials.
- Select the Patches & Updates tab.
- In the Patch Search window, click Product or Family (Advanced).
- Enter Oracle Communications Cloud Native Core - 5G in the Product field.
- Select Oracle Communications Cloud Native Core Policy <release_number> using the drop-down menu of the Release field.
- Click Search. The list of Patch Advanced Search Results appears.
- Select the required ATS patch from the list. The Patch Details window appears.
- Click Download. The File Download window appears.
- Click the <p********_<release_number>_Tekelec>.zip file to downlaod the CNC Policy ATS package file.
- Untar the gzip file
ocats-policy-tools-26.1.201.0.0.tgzto access the following files:ocats-policy-pkg-26.1.201.0.0.tgz ocdns-pkg-26.1.205.0.0.tgz ocamf-pkg-26.1.205.0.0.tgz oc-ldap-org1-pkg-26.1.205.0.0.tgz ocstub-pkg-26.1.201.0.0.tgz ocdiam-pkg-26.1.205.0.0tgzThe contents included in each of these files are as follow:
| |_ _ _ocats-policy-pkg-26.1.201.0.0.tgz | |_ _ _ _ _ _ ocats-policy-26.1.201.tgz (Helm Charts) | |_ _ _ _ _ _ ocats-policy-image-26.1.201.tar (Docker Images) | |_ _ _ _ _ _ ocats-policy-data-26.1.201.tgz (Policy ATS and Jenkins job Data) | |_ _ _ocstub-pkg-26.1.201.0.0.tgz | |_ _ _ _ _ _ ocstub-py-26.1.201.tgz(Helm Charts) | |_ _ _ _ _ _ ocstub-py-image-26.1.201.tar (Docker Images) | |_ _ _ocdns-pkg-26.1.205.0.0.tgz | |_ _ _ _ _ _ ocdns-bind-26.1.205.tgz(Helm Charts) | |_ _ _ _ _ _ ocdns-bind-image-26.1.205.tar (Docker Images) | |_ _ _ocamf-pkg-26.1.205.0.0.tgz | |_ _ _ _ _ _ ocamf-stub-26.1.205.tgz(Helm Charts) | |_ _ _ _ _ _ ocamf-stub-image-26.1.205.tar (Docker Images) | |_ _ _oc-ldap-org1-pkg-26.1.205.0.0.tgz | |_ _ _ _ _ _ oc-ldap-org1-26.1.205.tgz(Helm Charts) | |_ _ _ _ _ _ oc-ldap-org1-image-26.1.205.tar (Docker Images) | |_ _ __ocdiam-pkg-26.1.205.0.0.tgz | |_ _ _ _ _ _ ocdiam-sim-26.1.205.tgz(Helm Charts) | |_ _ _ _ _ _ ocdiam-sim-image-26.1.205.tar (Docker Images) - Copy the tar file from the downloaded package to CNE, OCI, or Kubernetes cluster where you want to deploy ATS.
3.5.3 Deploy Policy ATS with TLS enabled
3.5.3.1 Generate JKS File for Jenkins Server
To access Jenkins ATS GUI access through HTTPS, a JKS file should be created.
Perform the following steps to generate the JKS file:
Generate the Root Certificate
- If the user has a Certificate Authority (CA) signed root
certificate such as
caroot.certand key, then the user can use those files. - If the root certificate is not already available, the user can
generate one self signed root certificate. This root certificate created
needs to be added to the
truststoresuch as a Browser like Firefox or Chrome. User can follow the Browser specific documentation to upload the root certificate. The root certificate is used to sign the application, or ATS certificate. - Generate a root key with the following command:
openssl genrsa 2048 > caroot.keyThis will generate a key called
caroot.key - Generate a
carootcertificate with the following command:openssl req -new -x509 -nodes -days 1000 -key <root_key> > <root_certificate>For example,
[cloud-user@platform-bastion-1]$ openssl req -new -x509 -nodes -days 1000 -key caroot.key > caroot.cer You are about to be asked to enter information that will be incorporated into your certificate request. What you are about to enter is what is called a Distinguished Name or a DN. There are quite a few fields but you can leave some blank For some fields there will be a default value, If you enter '.', the field will be left blank. ----- Country Name (2 letter code) [XX]:IN State or Province Name (full name) []:KA Locality Name (eg, city) [Default City]:BLR Organization Name (eg, company) [Default Company Ltd]:ORACLE Organizational Unit Name (eg, section) []:CGBU Common Name (eg, your name or your server's hostname) []:ocats Email Address []: [cloud-user@platform-bastion-1]$
Generate Application or Client Certificate
- Create a
ssl.conffile. - Edit the
ssl.conffile. In the "[alt_names]" section, list the IPs that are used to access ATS GUI as shown in the following samplessl.conffile:[ req ] default_bits = 4096 distinguished_name = req_distinguished_name req_extensions = req_ext [ req_distinguished_name ] countryName = Country Name (2 letter code) countryName_default = IN stateOrProvinceName = State or Province Name (full name) stateOrProvinceName_default = KN localityName = Locality Name (eg, city) localityName_default = BLR organizationName = Organization Name (eg, company) organizationName_default = ORACLE commonName = Common Name (e.g. server FQDN or YOUR name) commonName_max = 64 commonName_default = ocats.ocpcf.svc.cluster.local [ req_ext ] keyUsage = critical, digitalSignature, keyEncipherment extendedKeyUsage = serverAuth, clientAuth basicConstraints = critical, CA:FALSE subjectAltName = critical, @alt_names [alt_names] IP.1 = 127.0.0.1 IP.2 = 10.75.217.5 IP.3 = 10.75.217.76 DNS.1 = localhost DNS.2 = ocats.ocpcf.svc.cluster.localNote:
- To access the GUI with DNS, make sure that the
commonName_default is the same as the DNS name being
used.
-
Ensure the DNS is in this format:
<service_name>.<namespace>.svc.cluster.localMultiple DNSs, such as DNS.1, DNS.2, and so on, can be added.
-
- To support the ATS API, it is necessary to add the IP 127.0.0.1 to the list of IPs.
- To access the GUI with DNS, make sure that the
commonName_default is the same as the DNS name being
used.
- Create a Certificate Signing Request (CSR) with the following
command:
openssl req -config ssl.conf -newkey rsa:2048 -days 1000 -nodes -keyout rsa_private_key_pkcs1.key > ssl_rsa_certificate.csrOutput:[cloud-user@platform-bastion-1 ocpcf]$ openssl req -config ssl.conf -newkey rsa:2048 -days 1000 -nodes -keyout rsa_private_key_pkcs1.key > ssl_rsa_certificate.csr Ignoring -days; not generating a certificate Generating a RSA private key ...+++++ ........+++++ writing new private key to 'rsa_private_key_pkcs1.key' ----- You are about to be asked to enter information that will be incorporated into your certificate request. What you are about to enter is what is called a Distinguished Name or a DN. There are quite a few fields but you can leave some blank For some fields there will be a default value, If you enter '.', the field will be left blank. ----- Country Name (2 letter code) [IN]: State or Province Name (full name) [KA]: Locality Name (eg, city) [BLR]: Organization Name (eg, company) [ORACLE]: Common Name (e.g. server FQDN or YOUR name) [ocpcf]: [cloud-user@platform-bastion-1 ocpcf]$ - To display all the components of the CSR file and to verify the
configurations run the following command:
openssl req -text -noout -verify -in ssl_rsa_certificate.csr - Sign the CSR file with root certificate by running the following
command:
openssl x509 -extfile ssl.conf -extensions req_ext -req -inssl_rsa_certificate.csr -days 1000 -CA ../caroot.cer -CAkey ../caroot.key -set_serial 04 > ssl_rsa_certificate.crtOutput:
[cloud-user@platform-bastion-1 ocpcf]$ openssl x509 -extfile ssl.conf -extensions req_ext -req -in ssl_rsa_certificate.csr -days 1000 -CA ../caroot.cer -CAkey ../caroot.key -set_serial 04 > ssl_rsa_certificate.crt Signature ok subject=C = IN, ST = KA, L = BLR, O = ORACLE, CN = ocpcf Getting CA Private Key [cloud-user@platform-bastion-1 ocpcf]$ - Verify if the certificate is signed by the root certificate by
running the following command:
[cloud-user@platform-bastion-1 ocpcf]$ openssl verify -CAfile caroot.cer ssl_rsa_certificate.crtOutput:
[cloud-user@platform-bastion-1 ocpcf]$ openssl verify -CAfile caroot.cer ssl_rsa_certificate.crt ssl_rsa_certificate.crt: OK - Save the generated application certificate and root certificate.
- Add the
caroot.certo the browser as a trusted author. - The generated application/client certificates cannot be directly
given to the Jenkins server. Hence generate the
.p12 keystorefile for the client certificate with the following command:[cloud-user@platform-bastion-1 ococf]$ openssl pkcs12 -inkey rsa_private_key_pkcs1.key -inssl_rsa_certificate.crt -export-out certificate.p12 Enter Export Password: Verifying - Enter Export Password: - In the prompt, create a password and save it for future use.
- Convert the .p12 keystore file into a JKS format file using the
following command:
[cloud-user@platform-bastion-1 ocpcf]$ keytool -importkeystore -srckeystore ./certificate.p12 -srcstoretype pkcs12 -destkeystore jenkinsserver.jks -deststoretype JKSOutput:
[cloud-user@platform-bastion-1 ocpcf]$ keytool -importkeystore -srckeystore ./certificate.p12 -srcstoretype pkcs12 -destkeystore jenkinsserver.jks -deststoretype JKS Importing keystore ./certificate.p12 to jenkinsserver.jks... Enter destination keystore password: Re-enter new password: Enter source keystore password: Entry for alias 1 successfully imported. Import command completed: 1 entries successfully imported, 0 entries failed or cancelled - In the prompt, use the same password used while creating
.p12 keystorefile.Note:
Ensure that the .p12 keystore and JKS files has the same passwords. - The generated JKS file,
jenkinserver.jksis added to the Jenkins path, where Jenkins server can access it. - Update following values in the ATS values.yaml
file:
certificates: cert_secret_name: "ocats-policy-tls-secret" ca_cert: "caroot.cer" client_cert: "ssl_rsa_certificate.crt" private_key: "rsa_private_key_pkcs1.key" jks_file: "jenkinsserver.jks" # This parameter is needed when atsGuiTLSEnabled is set to true. This file is necessary for ATS GUI to be opend with secured TLS protocol. The file caroot.pem, used during creation of jks file needs to be passed for Jenkins/ATS API communication.
For more details about the ATS TLS feature, refer to Deploy ATS with TLS Enabled section.
3.5.3.2 Enable TLS on Python Stubs
caroot.cer file.
- Create a
ssl.conffile. - Edit
ssl.conffile. Ensure that the DNS is in the format of*.<namespace>.svcA Sample stub_ssl.conf file:[ req ] default_bits = 4096 distinguished_name = req_distinguished_name req_extensions = req_ext [ req_distinguished_name ] countryName = Country Name (2 letter code) countryName_default = IN stateOrProvinceName = State or Province Name (full name) stateOrProvinceName_default = KN localityName = Locality Name (eg, city) localityName_default = BLR organizationName = Organization Name (eg, company) organizationName_default = ORACLE commonName = svc.cluster.local [ req_ext ] keyUsage = critical, digitalSignature, keyEncipherment extendedKeyUsage = serverAuth, clientAuth basicConstraints = critical, CA:FALSE subjectAltName = critical, @alt_names [alt_names] IP.1 = 127.0.0.1 DNS.1 = *.ocats.svc - Create a Certificate Signing Request (CSR) for the stubs using the
following command:
$ openssl req -config stub_ssl.conf -newkey rsa:2048 -days 1000 -nodes -keyout rsa_private_key_stub_pkcs2.key > stub_ssl_rsa_certificate1.csrOutput:
$ openssl req -config stub_ssl.conf -newkey rsa:2048 -days 1000 -nodes -keyout rsa_private_key_stub_pkcs2.key > stub_ssl_rsa_certificate1.csr Ignoring -days; not generating a certificate Generating a RSA private key ....................+++++ ...+++++ writing new private key to 'rsa_private_key_stub_pkcs2.key' ----- You are about to be asked to enter information that will be incorporated into your certificate request. What you are about to enter is what is called a Distinguished Name or a DN. There are quite a few fields but you can leave some blank For some fields there will be a default value, If you enter '.', the field will be left blank. ----- Country Name (2 letter code) [IN]: State or Province Name (full name) [KN]: Locality Name (eg, city) [BLR]: Organization Name (eg, company) [ORACLE]: svc.cluster.local []:*.ocats.svc - Sign the certificate with the CA root using the following
command:
openssl x509 -extfile stub_ssl.conf -extensions req_ext -req -in stub_ssl_rsa_certificate1.csr -days 1000 -CA ../ocats-caroot.cer -CAkey ../ocats-caroot.key -set_serial 05 > stub_ssl_rsa_certificate1.crtOutput:
$ openssl x509 -extfile stub_ssl.conf -extensions req_ext -req -in stub_ssl_rsa_certificate1.csr -days 1000 -CA ../ocats-caroot.cer -CAkey ../ocats-caroot.key -set_serial 05 > stub_ssl_rsa_certificate1.crt Signature ok subject=C = IN, ST = KN, L = BLR, O = ORACLE, CN = *.ocats.svc Getting CA Private Key - Create a secret for the stub and associate it with the namespace
using the following command:
$ kubectl create secret generic ocats-stub-secret1 --from-file=stub_ssl_rsa_certificate1.crt --from-file=rsa_private_key_stub_pkcs2.key --from-file=../ocats-caroot.cer -n ocpcfOutput:
kubectl create secret generic ocats-stub-secret1 --from-file=stub_ssl_rsa_certificate1.crt --from-file=rsa_private_key_stub_pkcs2.key --from-file=../ocats-caroot.cer -n ocats secret/ocats-stub-secret1 created - Update
values.yamlfile of each Python stub in specific NF namespace with following details:NF: "<NF-Name>" cert_secret_name: "ocats-stub-secret" ca_cert: "ocats-caroot.cer" client_cert: "ocats-stub_ssl_rsa_certificate.crt" private_key: "ocats-rsa_private_key_stub_pkcs1.key" expose_tls_service: true CLIENT_CERT_REQ: true BYPASS_APACHE: trueNote:
If the Helm,cert_secret_nameparameter, is null, thenca_cert,client_cert, andprivate_keyvalues are not considered by the TLS. - Ensure to update the deployment of all the Python stubs installed on the setup.
For more details about the ATS TLS feature, refer to Support for Transport Layer Security section.
3.5.3.3 Enable TLS on ocamf Stubs
Before starting the creation of certificate, user should have the path details of
ocats-caroot.cer and ocats-caroot.keyfile.
- In the
values.yamlfile the following parameters are provided to configure the TLS for ocamf stub:tls: enabled: false version: "TLSv1.2,TLSv1.3" appPort: 8443 initialAlgorithm: 'RS256' secretName: 'app-tls-secret' rsaPrivateKeyFileName: 'app-key.pem' ecdsaPrivateKeyFileName: 'app-ecdsa-private-key.pem' rsaCertificateFileName: 'app-cert.crt' ecdsaCertifacateFileName: 'app-ecdsa-certificate.crt' caBundleFileName: 'ocats-caroot.cer' certReloadEnabled: true certReloaderDelay: 15000 cipherSuites: - TLS_ECDHE_ECDSA_WITH_AES_256_GCM_SHA384 - TLS_ECDHE_RSA_WITH_AES_256_GCM_SHA384 - TLS_ECDHE_RSA_WITH_CHACHA20_POLY1305_SHA256 - TLS_ECDHE_ECDSA_WITH_AES_128_GCM_SHA256 - TLS_ECDHE_RSA_WITH_AES_128_GCM_SHA256 - TLS_AES_256_GCM_SHA384 - TLS_AES_128_GCM_SHA256 - TLS_CHACHA20_POLY1305_SHA256- Configure the following parameters to enable TLS for ocamf stub
tls.enabled to
true, tls.version to (either TLSv1.2 or TLSv1.3), tls.appPort, tls.initialAlgorithm, and tls.secretName parameters. - It is not mandatory to provide both tls.rsaPrivateKey and tls.ecdsaPrivateKeyFile files. You can either provide both or any one of them.
- Configure the tls.cipherSuites parameter to test compatibility of different ciphers based on TLS versions.
-
A Sample
values.yamlfile configured for enabling TLS on ocamf stub:tls: enabled: true version: "TLSv1.3" appPort: 8443 initialAlgorithm: 'RS256' secretName: '${NAMESPACE}-ocamf-app-tls-secret' rsaPrivateKeyFileName: '${NAMESPACE}-ocamf-app-key.pem' ecdsaPrivateKeyFileName: 'app-ecdsa-private-key.pem' rsaCertificateFileName: '${NAMESPACE}-ocamf-app-cert.crt' ecdsaCertifacateFileName: 'app-ecdsa-certificate.crt' caBundleFileName: 'ocats-caroot.cer' certReloadEnabled: true certReloaderDelay: 15000 cipherSuites: - TLS_ECDHE_ECDSA_WITH_AES_256_GCM_SHA384 - TLS_ECDHE_RSA_WITH_AES_256_GCM_SHA384 - TLS_ECDHE_RSA_WITH_CHACHA20_POLY1305_SHA256 - TLS_ECDHE_ECDSA_WITH_AES_128_GCM_SHA256 - TLS_ECDHE_RSA_WITH_AES_128_GCM_SHA256 - TLS_AES_256_GCM_SHA384 - TLS_AES_128_GCM_SHA256 - TLS_CHACHA20_POLY1305_SHA256
- Configure the following parameters to enable TLS for ocamf stub
tls.enabled to
- Create certificate and private key generation for ocamf application
by using the following steps.
- Run the following command to create private
key:
openssl genrsa -out ${NAMESPACE}-ocamf-app-key.pem 4096 - Run the following command to generate a certificate request for the
generated private
key:
openssl req -new -sha256 -key ${NAMESPACE}-ocamf-app-key.pem -out ${NAMESPACE}-ocamf-app-csr.csr -subj "/CN=ocamf2.${NAMESPACE}.svc.cluster.local" - Run the following command to generate a self signed root
certificate:
openssl x509 -req -sha256 -days 1000 \ -in ${NAMESPACE}-ocamf-app-csr.csr \ -CA ocats-caroot.cer \ -CAkey ocats-caroot.key \ -out ${NAMESPACE}-ocamf-app-cert.pem\ -CAcreateserial - Run the following command to convert pem file to crt
file:
mv ${NAMESPACE}-ocamf-app-cert.pem ${NAMESPACE}-ocamf-app-cert.crt
- Run the following command to create private
key:
- Create a secret for the stub and associate it with the namespace
using the following command:
kubectl create secret generic ${NAMESPACE}-ocamf-tls-secret --from-file=${NAMESPACE}-ocamf-app-key.pem --from-file=ocats-caroot.cer --from-file=${NAMESPACE}-ocamf-app-cert.crt -n ${NAMESPACE}Example:
kubectl create secret generic altair-ns11-ocamf-tls-secret --from-file=altair-ns11-ocamf-app-key.pem --from-file=ocats-caroot.cer --from-file=altiar-ns11-ocamf-app-cert.crt -n altair-ns11secret/altair-ns11-ocamf-tls-secret created
3.5.3.4 Enable TLS on Diam-Sim
Before starting the creation of certificate, user should have the path
details of ocats-caroot.cer and ocats-caroot.key
file.
- In the
values.yamlfile the following parameters are provided to configure the TLS for diam-sim stub:tls: enabled: false secretName: 'dcli-tls-secret' rsaPrivateKeyFileName: 'dcli-key.pem' ecdsaPrivateKeyFileName: 'dcli-ecdsa-private-key.pem' rsaCertificateFileName: 'dcli-cert.crt' ecdsaCertifacateFileName: 'dcli-ecdsa-certificate.crt' caBundleFileName: 'ca-cert.cer'- By default, tls.enabled parameter is false. Set this to true to enable TLS on diam-sim.
- By default secretName will be dcli-tls-secret. User can change this name, but ensure that name of the secret created should match with the name provided for secretName.
-
A Sample
values.yamlfile configured for enabling TLS on diam-sim stub:tls: enabled: true secretName: '${NAMESPACE}-dcli-tls-secret' rsaPrivateKeyFileName: '${NAMESPACE}-dcli-key.pem' ecdsaPrivateKeyFileName: 'dcli-ecdsa-private-key.pem' rsaCertificateFileName: '${NAMESPACE}-dcli-cert.crt' ecdsaCertifacateFileName: 'dcli-ecdsa-certificate.crt' caBundleFileName: 'ocats-caroot.cer'
- Create certificate and private key generation for Diameter
Simulaltor by using the following steps.
- Run the following command to create private
key:
openssl genrsa -out ${NAMESPACE}-dcli-key.pem 4096 - Run the following command to generate a certificate request for the
generated private
key:
openssl req -new -sha256 -key ${NAMESPACE}-dcli-key.pem -out ${NAMESPACE}-dcli-csr.csr -subj "/CN=occnp-occnp-diam-gateway.${namespace}.svc" - Run the following command to generate a self signed root
certificate:
openssl x509 -req -sha256 -days 1000 \ -in ${NAMESPACE}-dcli-csr.csr \ -CA ocats-caroot.cer \ -CAkey ocats-caroot.key \ -out ${NAMESPACE}-dcli-cert.pem \ -CAcreateserial - Run the following command to convert pem file to crt
file:
mv ${NAMESPACE}-dcli-cert.pem ${NAMESPACE}-dcli-cert.crt
- Run the following command to create private
key:
- Create a secret for the stub and associate it with the namespace using the
following command:
kubectl create secret generic ${NAMESPACE}-dcli-tls-secret --from-file=${NAMESPACE}-dcli-key.pem --from-file=ocats-caroot.cer --from-file=${NAMESPACE}-dcli-cert.crt -n ${NAMESPACE}Example:
kubectl create secret generic u-ns1-dcli-tls-secret --from-file=u-ns1-dcli-key.pem --from-file=ocats-caroot.cer --from-file=u-ns1-dcli-cert.crt -n u-ns1 secret/dcli-tls-secretcreated
3.5.3.5 Enable ATS GUI with HTTPS
Follow the steps to secure or enable TLS on the server.
- Create a Kubernetes secret by adding the above created files:
kubectl create secret generic ocats-tls-secret --from-file=jenkinsserver.jks --from-file=ssl_rsa_certificate.crt --from-file=rsa_private_key_pkcs1.key --from-file=caroot.cer -n ocpcfWhere,
jenkinsserver.jks: This file is needed when
atsGuiTLSEnabledis set to true. This is necessary to open ATS GUI with secured TLS protocol.ssl_rsa_certificate.crt: This is client application certificate.
rsa_private_key_pkcs1.key: This is RSA private key.
caroot.cer: This file used during creation of jks file needs to be passed for Jenkins/ATS API communication.
The sample of created secret:
[cloud-user@platform-bastion-1 ~]$ kubectl describe secret ocats-tls-secret -n ocpcf Name: ocats-tls-secret Namespace: ocats Labels: <none> Annotations: <none> Type: Opaque Data ==== caroot.cer: 1147 bytes ssl_rsa_certificate.crt: 1424 bytes jenkinsserver.jks: 2357 bytes rsa_private_key_pkcs1.key: 1675 bytes - Apply the following changes in
values.yamlfile.
The user can install the ATS, using the helm install command. Change thecertificates: cert_secret_name: "ocats-tls-secret" ca_cert: "caroot.cer" client_cert: "ssl_rsa_certificate.crt" private_key: "rsa_private_key_pkcs1.pem" jks_file: "jenkinsserver.jks" # This parameter is needed when atsGuiTLSEnabled is set to true. This file is necessary for ATS GUI to be opend with secured TLS protocol. jks_password: "123456" #This is the password given to the jks file while creation.atsGuiTLSEnabledHelm parameter value to true for ATS to get the certificates and support HTTPS for GUI. - Upload the
caroot.cerfile to the browser, before accessing it usinghttpsprotocol.For more details about the uploading the file to the browser, refer to Adding a Certificate in Browser section in Enable ATS GUI with HTTPS.
- A user can now start ATS with HTTPS the protocol. The link to open
the ATS GUI format is
https://<IP>:<port>, for example,https://10.75.217.25:30301.The lock symbol in the browser indicates that the server is secured or TLS enabled.
3.5.4 Deploy Policy ATS with Authenticated Prometheus communication
#The below section is related to the deployments where prometheus needs authenticated token to request for metrics/alerts
PrometheusAuthEnabled: false #Set this to true only when prometheus requests require a token in the header for authentication
PrometheusTLSEnabled: false #Set this to true only when prometheus is a https deployment.
#PrometheusScrapeInterval: "60" #Uncomment this line only when scrapeInterval is any other value than 60 seconds.(ATS will assume 60s as default if no response comes from prometheus config.)For more information about the above Helm parameters, see Table 2-5.
- Ensure that ClusterRole and ClusterRoleBinding are created with the required permissions.
- Ensure that Prometheus Server IP and Prometheus Server Port are set accordingly. For more information about setting the Prometheus Server IP and Prometheus Server Port, see the Running Policy-NewFeatures Pipeline section.
Note:
- While communicating with Prometheus, ATS currently does not support TLS (certificate-based authentication).
- If Prometheus is deployed over HTTPS, the PrometheusTLSEnabled parameter needs to be set to true which allows ATS to connect to Prometheus using either HTTP or HTTPS as needed. Even when connecting through HTTPS, the connection remains insecure because ATS does not manage any certificates for this communication.
3.5.5 Pushing the Images to Customer Docker Registry
Preparing to deploy ATS and Stub Pods in Kubernetes Cluster
To deploy ATS and stub pods in Kubernetes Cluster, perform the following steps:
- Run the following command to extract
tar file content.
tar -zxvf ocats-policy-tools-26.1.201.0.0.tgzThe following is the output of this command:ocats-policy-pkg-26.1.201.0.0.tgz ocstub-pkg-26.1.201.0.0.tgz ocdns-pkg-26.1.205.0.0.tgz ocamf-stub-26.1.205.0.0.tgz oc-ldap-org1-26.1.205.tgz ocdiam-pkg-26.1.205.0.0tgz - Run the following command to extract
the helm charts and docker images of Policy ATS:
tar -zxvf ocats-policy-pkg-26.1.201.0.0.tgzThe following is the output:ocats-policy-26.1.201.tgz ocats-policy-images-26.1.201.tar ocats-policy-data-26.1.201.tgz - Run the following command to load the ATS docker image:
docker load --input ocats-policy-images-26.1.201.tar - Run the following commands to tag and push the ATS
images:
docker tag ocats-policy:26.1.201 <registry>/ocats-policy:26.1.201 docker push <registry>/ocats-policy:26.1.201Example:
docker tag ocats-policy:26.1.201 localhost:5000/ocats-policy:26.1.201 docker push localhost:5000/ocats-policy:26.1.201Note:
If you are using Podman instead of Docker, replace docker with podman in all the docker commands given in this document. - Run the following command to untar the
helm charts – 26.1.201.
tar -zxvf ocats-policy-26.1.201.tgzNote:
atsFeatures section is newly introduced in values.yaml which helps Engineering team to control feature deliveries over the releases. It is not advisable to update any of the following flags without Engineering team's permission.
atsFeatures: ## DO NOT UPDATE this section without Engineering team's permission testCaseMapping: true # To display Test cases on GUI along with Features logging: true # To enable feature to collect applogs in case of failure lightWeightPerformance: false # The Feature is not implemented yet executionWithTagging: true # To enable Feature/Scenario execution with Tag scenarioSelection: false # The Feature is not implemented yet parallelTestCaseExecution: true # To run ATS features parallel parallelFrameworkChangesIntegrated: true # To run ATS features parallel mergedExecution: false # To execute ATS Regression and NewFeatures pipelines together in merged manner individualStageGroupSelection: false # The Feature is not implemented yet parameterization: true # When set to false, the Configuration_Type parameter on the GUI will not be available. atsApi: true # To trigger ATS using ATS API healthcheck: true # TO enable/disable ATS Health Check. atsGuiTLSEnabled: false # To run ATS GUI in https mode. atsCommunicationTLSEnabled: false #If set to true, ATS will get necessary variables to communicate with SUT, Stub or other NFs with TLS enabled. It is not required in ASM environment. - Update the registry name, image name
and tag in the
ocats-policy/values.yamlfile as required. For this, you need to update theimage.repositoryandimage.tagparameters in theocats-policy/values.yamlfile.
3.5.6 Configuring ATS
3.5.6.1 Enabling Static Port
ocats-policy/values.yaml
file under the service section, set the value of staticNodePortEnabled parameter to true and enter a valid
nodePort value for staticNodePort parameter.service:
customExtension:
labels: {}
annotations: {}
type: LoadBalancer
ports:
http:
port: "8080"
staticNodePortEnabled: false
staticNodePort: ""3.5.6.2 Enabling Static API Node Port
To enable static API node port, in the ocats-policy/values.yaml file under the service section, set the value of staticAPINodePortEnabled parameter to true and enter a valid nodePort value for staticAPINodePortEnabled parameter.
service:
customExtension:
labels: {}
annotations: {}
type: LoadBalancer
ports:
api:
port: "5001"
staticNodePortEnabled: false
staticNodePort: ""3.5.6.3 Service Account Requirements
rules:
- apiGroups: ["extensions"]
resources: ["deployments", "replicasets", "statefulsets"]
verbs: ["watch", "get", "list", "update"]
- apiGroups: ["apps"]
resources: ["deployments", "replicasets", "statefulsets"]
verbs: ["watch", "get", "list", "update"]
- apiGroups: [""]
resources: ["pods", "services", "secrets", "configmaps"]
verbs: ["watch", "get", "list", "delete", "update", "create"]
- apiGroups: [""]
resources: ["pods/log"]
verbs: ["get", "list"]PolicyRule:
Resources Non-Resource URLs Resource Names Verbs
--------- ----------------- -------------- -----
deployments.apps [] [rc1-oc-ldap-org1] [get list watch create update patch delete]
deployments.extensions [] [rc1-oc-ldap-org1] [get list watch create update patch delete]
podsecuritypolicies.policy [] [1org1-rc1] [use]Note:
For information about creating service account, see the Oracle Communications Cloud Native Core, Converged Policy Installation, Upgrade, and Fault Recovery Guide available on MOS.3.5.6.4 Enabling Aspen Service Mesh
This section provides information on how to enable Aspen service mesh while deploying ATS for CNC Policy. The configurations mentioned in this section are optional and should be performed only if ASM is required.
To enable service mesh for CNC Policy ATS, perform the following steps:
- If the ASM is not enabled on the global level for the namespace, run the
following command before deploying the
ATS:
kubectl label --overwrite namespace <namespace_name> istio-injection=enabledFor example:kubectl label --overwrite namespace ocpcf istio-injection=enabled - In the service section of the
values.yamlfile, the ASMEnabled parameter is set to false (default configuration). To enable service mesh, set the value for ASMEnabled to true. The following is a snippet of the service section in the yaml file:service: customExtension: labels: {} annotations: {} type: LoadBalancer ports: https: port: "8443" staticNodePortEnabled: false staticNodePort: "" http: port: "8080" staticNodePortEnabled: false staticNodePort: "" api: port: "5001" staticNodePortEnabled: false staticNodePort: "" #####set ASMEnabled value to true for service-mesh based installation ASMEnabled: false - Uncomment and add the following annotation under the customExtension
section of the global section in values.yaml file and deploy the ATS
Pods:
customExtension: allResources: labels: {} annotations: { #Enable this section for service-mesh based installation traffic.sidecar.istio.io/excludeInboundPorts: "9000", traffic.sidecar.istio.io/excludeOutboundPorts: "9000" }After making this update in the values.yaml file, make sure that all the ATS and stub pods come up with istio container.
- For ServerHeader and SessionRetry features, the user needs to perform the following configurations under the envoyFilters for nf1stub, nf11stub, nf12stub, nf2stub, nf21stub, nf22stub, nf3stub, nf31stub, and nf32stub in the
occnp-servicemesh-config-custom-values-26.1.201.yaml:Note:
occnp_custom_values_servicemesh_config yaml file and helm charts version names would differ based on the deployed Policy NF version. For example, "occnp_custom_values_servicemesh_config_24.2.0.yaml" or "occnp_custom_values_servicemesh_config_24.2.1.yaml".envoyFilters: - name: serverheaderfilter-nf1stub labelselector: "app: nf1stub-ocstub-py" configpatch: - applyTo: NETWORK_FILTER filtername: envoy.filters.network.http_connection_manager operation: MERGE typeconfig: type.googleapis.com/envoy.extensions.filters.network.http_connection_manager.v3.HttpConnectionManager configkey: server_header_transformation configvalue: PASS_THROUGH - name: serverheaderfilter-nf11stub labelselector: "app: nf11stub-ocstub-py" configpatch: - applyTo: NETWORK_FILTER filtername: envoy.filters.network.http_connection_manager operation: MERGE typeconfig: type.googleapis.com/envoy.extensions.filters.network.http_connection_manager.v3.HttpConnectionManager configkey: server_header_transformation configvalue: PASS_THROUGH - name: serverheaderfilter-nf12stub labelselector: "app: nf12stub-ocstub-py" configpatch: - applyTo: NETWORK_FILTER filtername: envoy.filters.network.http_connection_manager operation: MERGE typeconfig: type.googleapis.com/envoy.extensions.filters.network.http_connection_manager.v3.HttpConnectionManager configkey: server_header_transformation configvalue: PASS_THROUGH - name: serverheaderfilter-nf2stub labelselector: "app: nf2stub-ocstub-py" configpatch: - applyTo: NETWORK_FILTER filtername: envoy.filters.network.http_connection_manager operation: MERGE typeconfig: type.googleapis.com/envoy.extensions.filters.network.http_connection_manager.v3.HttpConnectionManager configkey: server_header_transformation configvalue: PASS_THROUGH - name: serverheaderfilter-nf21stub labelselector: "app: nf21stub-ocstub-py" configpatch: - applyTo: NETWORK_FILTER filtername: envoy.filters.network.http_connection_manager operation: MERGE typeconfig: type.googleapis.com/envoy.extensions.filters.network.http_connection_manager.v3.HttpConnectionManager configkey: server_header_transformation configvalue: PASS_THROUGH - name: serverheaderfilter-nf22stub labelselector: "app: nf22stub-ocstub-py" configpatch: - applyTo: NETWORK_FILTER filtername: envoy.filters.network.http_connection_manager operation: MERGE typeconfig: type.googleapis.com/envoy.extensions.filters.network.http_connection_manager.v3.HttpConnectionManager configkey: server_header_transformation configvalue: PASS_THROUGH - name: serverheaderfilter-nf3stub labelselector: "app: nf3stub-ocstub-py" configpatch: - applyTo: NETWORK_FILTER filtername: envoy.filters.network.http_connection_manager operation: MERGE typeconfig: type.googleapis.com/envoy.extensions.filters.network.http_connection_manager.v3.HttpConnectionManager configkey: server_header_transformation configvalue: PASS_THROUGH - name: serverheaderfilter-nf31stub labelselector: "app: nf31stub-ocstub-py" configpatch: - applyTo: NETWORK_FILTER filtername: envoy.filters.network.http_connection_manager operation: MERGE typeconfig: type.googleapis.com/envoy.extensions.filters.network.http_connection_manager.v3.HttpConnectionManager configkey: server_header_transformation configvalue: PASS_THROUGH - name: serverheaderfilter-nf32stub labelselector: "app: nf32stub-ocstub-py" configpatch: - applyTo: NETWORK_FILTER filtername: envoy.filters.network.http_connection_manager operation: MERGE typeconfig: type.googleapis.com/envoy.extensions.filters.network.http_connection_manager.v3.HttpConnectionManager configkey: server_header_transformation configvalue: PASS_THROUGH - Perform helm upgrade on the occnp-servicemesh-config release using
the modified
occnp-servicemesh-config-custom-values-26.1.201.yaml.helm upgrade <helm_release_name_for_servicemesh> -n <namespace> <servicemesh_charts> -f <servicemesh-custom.yaml>Examplehelm upgrade occnp-servicemesh-config occnp-servicemesh-config-26.1.201.tgz -n <namespace> -f occnp-servicemesh-config-custom-values-26.1.201.yaml - Configure DNS for Alternate Route service. For more information, see Post-Installation Steps.
3.5.6.5 Enabling Persistent Volume
Note:
The steps provided in this section are optional and required only if Persistent Volume needs be to enabled.To enable persistent storage, perform the following steps:
- PVC creation is part of helm charts. To create the PVC, configure the following set of
parameters in
values.yamlfile.PVEnabled: This indicates whether to enable PVC or not.PVClaimName: This indicates the name of persistent volume.PVStorageClassName: This indicates the storage classname.PVStorage: This indicates the size of the persistent volume.retainPVC: This indicates whether to delete or retain created PVC during uninstallation of ATS.A sample edited
values.yamlfile for enabling PVC:PVEnabled: true truePVClaimName: "policy-pvc-26.1.201" PVStorageClassName: "standard" PVStorage:"5Gi" retainPVC: trueNote:
- The value of
truePVClaimNameparameter to be suffixed with the release version to avoid confusion during the subsequent releases. - To use already existing PVC, update the
PVClaimNamewith existing name, ATS will use it. If not, a new PVC will be created with given properties. - The
retainPVCparameter if set totrue, then deletes the PVC after uninstallation of ATS. Set it false for default behavior.
- The value of
- Verify the created PVC is bound to the Persistent Volume and available for use, by
running:
kubectl get pvc -n <namespace used for pvc creation>kubectl get pvc -n ocpcfSample Output:
kubectl get pvc -n ocpcf NAME STATUS VOLUME CAPACITY ACCESS MODES STORAGECLASS AGE policy-pvc-26.1.201 Bound pvc-65484045-3805-4064-9fc3-f9eeeaccc8b8 1Gi RWO standard 11sNote:
- Do not proceed further with the next step if there is in issue with the PV creation and contact your administrator to get the PV Created
- Make sure that ATS is deployed before proceeding to the further steps.
- Copy the
<nf_main_folder>and<jenkins jobs>folders from the tar file to their ATS pod and restart the pod.- Extract the tar file.
tar -xvf ocats-policy-data-26.1.201.tgz - Run the following commands to copy the desired folder.
kubectl cp ocats-policy-data-26.1.201/ocpcf_tests <namespace>/<pod-name>:/var/lib/jenkins/kubectl cp ocats-policy-data-26.1.201/jobs <namespace>/<pod-name>:/var/lib/jenkins/.jenkins/ - Restart the pod.
kubectl delete po <pod-name> -n <namespace>
- Extract the tar file.
- Once the Pod is up and running, log in to the Jenkins console and
configure the Discard old Builds option to configure the number
of Jenkins builds, which must be retained in the persistent volume.
Figure 3-22 Discarding Old Builds
Note:
If Discard old Builds is not configured, Persistent Volume can get filled when there are huge number of builds.
For more details on Persistent Volume Storage, see Persistent Volume for 5G ATS.
3.5.6.6 Enabling Health Check
This section describes how to enable Health Check for ATS.
To enable Health Check, in the ocats-policy/values.yaml
file, set the value of healthcheck parameter to
true and enter a valid value to select the environment.
sshDetails:
secretname: "healthchecksecret"
envtype: ""
occnehostip: ""
occnehostusername: ""
occnehostpassword: ""
webscalejumpserverip: ""
webscalejumpserverusername: ""
webscalejumpserverpassword: ""
webscaleprojectname: ""
webscalelabserverFQDN: ""
webscalelabserverport: ""
webscalelabserverusername: ""
webscalelabserverpassword: ""
ociHealthCheck:
passwordAuthenticationEnabled: false
bastion:
ip: ""
username: ""
password: ""
operatorInstance:
ip: ""
username: ""
password: ""Webscale- Update the value as falseenvtype- T0NDTkU= (i.e envtype=$(echo -n 'OCCNE' | base64))occnehostip- OCCNE Host IP addressoccnehostusername- OCCNE Host Usernameoccnehostpassword- OCCNE Host Password
atsFeatures: ## DO NOT UPDATE this section without Engineering team's permission
healthcheck: true # TO enable/disable ATS Health Check.
sshDetails:
secretname: "healthchecksecret"
envtype: "T0NDTkU="
occnehostip: "MTAuMTcuMjE5LjY1"
occnehostusername: "dXNlcm5hbWU"
occnehostpassword: "KioqKg=="Webscale- Update the value as trueenvtype- V0VCU0NBTEU= (i.e envtype=$(echo -n 'WEBSCALE' | base64))
After the configurations are done, encrypt below parameters and provide the values as shown in the following snippet:
atsFeatures: ## DO NOT UPDATE this section without Engineering team's permission
healthcheck: true # TO enable/disable ATS Health Check.
sshDetails:
secretname: "healthchecksecret"
envtype: "V0VCU0NBTEU="
webscalejumpip: "MTAuNzAuMTE3LjQy"
webscalejumpusername: "dXNlcm5hbWU="
webscalejumppassword: "KioqKg=="
webscaleprojectname: "KioqKg=="
webscalelabserverFQDN: "KioqKg=="
webscalelabserverport: "KioqKg=="
webscalelabserverusername: "KioqKg=="
webscalelabserverpassword: "KioqKg=="Note:
Once the ATS is deployed with HealthCheck feature enabled or disabled, then it cannot be changed. To change the configuration, you are required to re-install.3.5.6.7 ATS-Policy API Extended Support
The ATS application programming interface (API) feature provides APIs, to perform routine ATS tasks such as starting the ATS suite, monitoring and stopping the ATS suite etc.
values.yaml
file.
atsFeatures:
atsApi: trueFor more details about the ATS API feature, refer to ATS API section.
This ATS feature is extended to provide the ability of running single features, or
scenarios, or stages, or groups, or based on tags execution using the API. This also
allows running of test cases by providing the features, or scenarios, or stages, or
groups, or tags in the curl request to the server.
For more details about the API interfaces, refer to Use the RESTful Interfaces section.
3.5.6.8 Configuration for Dual Stack Support
# Possible values : IPv4, IPv6, IPv4_IPv6,IPv6_IPv4,ClusterPreferred
deploymentMode: ClusterPreferredTo enable IPv6 or Dual Stack configurations for ATS and stubs, see Post-Installation Steps.
3.5.6.9 Configuration of Security Context and Host User
A new setHostUsers configuration is available in ATS and all stub values.yaml files.
setHostUsers is set to false. This setting enables deployments to control whether host user settings are applied based on the target cluster security requirements.setHostUsers: false
# Set setHostUsers to true for security hardening, if the below criteria is met:
# Kubernetes version must be 1.33 or greater
# The hosts running Kubernetes must have Linux Kernel must be set 5.19 or beyond.
# Container runtime version must be 2.0 or greater
# OR
# Cri-o version must be 1.25 or greaterNote:
You must update thesetHostUsers flag value in ATS and all the stubs.
s
3.5.7 Deploying ATS and Pods
3.5.7.1 Deploying ATS in Kubernetes Cluster
To deploy ATS, perform the following steps:
- Run the following command using the updated
helm charts.
Note:
Ensure that all the components, ATS, go-Stub, dns-bind, ocamf, and CNC Policy are deployed in the same namespace.Using Helm
helm install -name <release_name> ocats-policy-26.1.201.tgz --namespace <namespace_name> -f <values-yaml-file>Example:
helm install -name ocats ocats-policy-26.1.201.tgz --namespace ocpcf -f ocats-policy/values.yaml - Run the following command to verify ATS
deployment:
helm ls -n ocpcfThe sample output is as follows:The status appears as DEPLOYED after the deployment is successful.NAME REVISION UPDATED STATUS CHART APP VERSION NAMESPACE ocats 1 Mon November 6 14:56:11 2023 DEPLOYED ocats-policy-26.1.201 1.0 ocpcf
Troubleshooting Issues with Logging in to ATS GUI
- Log in to the ATS pod.
- Create a shell script with following commands inside ATS
pod:
USERS_DIR="/var/lib/jenkins/.jenkins/jobs/users" for f in "$USERS_DIR"/*; do base=$(basename "$f") new="${base%%_*}" [ "$base" != "$new" ] && mv "$f" "$USERS_DIR/$new" done ps -ef | grep 8080 | grep jenkins | awk '{ print $2 }' | head -1 | xargs -I {} kill "{}" java -Djava.awt.headless=true -Dhudson.remoting.ClassFilter=org.jenkinsci.plugins.testresultsanalyzer.TestResultsAnalyzerExtension\$DescriptorImpl -Djenkins.install.runSetupWizard=false -Dorg.jenkinsci.plugins.pipeline.modeldefinition.parser.RuntimeASTTransformer.SCRIPT_SPLITTING_TRANSFORMATION=true -Dorg.jenkinsci.plugins.workflow.cps.LoggingInvoker.fieldSetWarning=false -Dorg.jenkinsci.plugins.pipeline.modeldefinition.parser.RuntimeASTTransformer.SCRIPT_SPLITTING_ALLOW_LOCAL_VARIABLES=true -jar /usr/share/java/jenkins.war --httpPort=8080 > /var/lib/jenkins/.jenkins/jenkins.log 2>&1 & - Run the following command to grant execute
permission:
chmod 777 <script>.sh - Run the following command to execute the shell
script:
./<script>.shAfter the execution is complete, ATS restarts automatically.
- Try logging in to the ATS GUI with the given credentials.
3.5.7.2 Deploying ocstub-py Stubs in Kubernetes Cluster
Note:
Enabling pre-defined priming configuration is mandatory for nf1stub only. (Please do not enable it in other stubs. For example, nf2stub, nf3stub, and so on.)To deploy ocstub-py stubs with pre-defined priming configurations, perform the following steps:
- Navigate to the
ocats-policy-tools-26.1.201.0.0folder and run the following command to extract the ocstub tar file content.tar -zxvf ocstub-pkg-26.1.201.0.0.tgzThe output of this command is:- ocstub-py-26.1.201.tgz
- ocstub-py-image-26.1.201.tar
Note:
To deploy additional stubs required for session retry feature validation:- nf11stub, nf12stub → Alternate FQDN for nf1stub
- nf21stub, nf22stub → Alternate FQDN for nf2stub
- nf31stub, nf32stub → Alternate FQDN for nf3stub
- Run the following command in your cluster
to load the STUB image:
docker load --input ocstub-py-image-26.1.201.tar - Run the following commands to tag and push the STUB image:
docker tag ocstub-py:26.1.201 <registry>/ocstub-py:26.1.201 docker push <registry>/ocstub-py:26.1.201 - Run the following command to untar the helm charts,
ocstub-py-26.1.201.tgz:tar -zxvf ocstub-py-26.1.201.tgz - Update the registry name, image name, and
tag (if required) in the
ocstub-py/values.yamlfile as required. For this, open the values.yaml file and update theimage.repositoryandimage.tagparameters.Note:
From 24.2.0 onwards, service port names are configurable in ocstub-py. But as per Istio standard, it's advisable to keep the default values as it as.Example:
names: http: "http" h2c: "http2-h2c" h2: "http2-h2" - If required, change the
apiVersiontoapps/v1in the ocstub-py/templates/deployment.yaml file as follows:apiVersion: apps/v1 - Configuration for Dual Stack Support:
Edit the ocstub-py and
values.yamlfiles and update the below configuration to support ipFamilies configuration for Dual Stack deployments of ocstub-py:# The below section is to support Dual Stack Deployments of ocstub # ipFamilies : IPv4, IPv6, IPv4_IPv6, IPv6_IPv4, ClusterPreferred deploymentMode: &deploymentMode ClusterPreferred - If the support for pre-defined priming feature is required, perform the
following steps to configure pre-defined priming:
- Copy
ocstub-py/values.yamlfile to a new file with namepre_priming_values.yaml. - Edit the
ocstub-py/pre_priming_values.yamlfile. - Set the value of
preConfigflag totrueand replace the default configuration with below configurations underpredefined_prime_configurationsection.Sample Predefined_priming configuration:
enabled: true predefined_prime_configuration: |+ [ { "method": "GET", "statuscode": "200", "url": "/nnrf-nfm/v1/nf-instances/${nfInstanceId}", "data": "{\"nfInstanceId\": \"${nfInstanceId}\"}", "headers": "{\"Content-Type\":\"application/json\"}" }, { "method": "PUT", "statuscode": "201", "url": "/nnrf-nfm/v1/nf-instances/${nfInstanceId}", "data": "{\"nfInstanceId\": \"${nfInstanceId}\", \"nfType\": \"PCF\", \"nfStatus\": \"REGISTERED\", \"heartBeatTimer\": 300, \"capacity\": 100, \"load\": 0, \"pcfInfo\": {\"dnnList\": [\"dnn1\", \"dnn2\"], \"supiRanges\": [{\"start\": \"12123444444\", \"end\": \"232332323323232\"}]}, \"nfServices\": [{\"serviceInstanceId\": \"03063893-cf9e-4f7a-9827-067f6fa9dd01\", \"serviceName\": \"npcf-am-policy-control\", \"versions\": [{\"apiVersionInUri\": \"v1\", \"apiFullVersion\": \"1.R15.1.0\", }], \"scheme\": \"http\", \"nfServiceStatus\": \"REGISTERED\", \"fqdn\": \"ocpcf-pcf-ingress-gateway.ocpcf.svc\", \"allowedNfTypes\": [\"AMF\", \"NEF\"], \"capacity\": 100, \"load\": 0}, {\"serviceInstanceId\": \"03063893-cf9e-4f7a-9827-067f6fa9dd02\", \"serviceName\": \"npcf-smpolicycontrol\", \"versions\": [{\"apiVersionInUri\": \"v1\", \"apiFullVersion\": \"1.R15.1.0\", \"expiry\": \"2019-08-03T18:55:08.871+0000\"}], \"scheme\": \"http\", \"nfServiceStatus\": \"REGISTERED\", \"fqdn\": \"ocpcf-api-gateway.occ-demo-pcf.svc\", \"allowedNfTypes\": [\"SMF\", \"NEF\", \"AF\"], \"capacity\": 100, \"load\": 0}]}", "headers": "{\"Content-Type\":\"application/json\"}" }, { "method": "PATCH", "statuscode": "204", "url": "/nnrf-nfm/v1/nf-instances/${nfInstanceId}", "data": "{}", "headers": "{\"Content-Type\":\"application/json\"}" }, { "method": "POST", "statuscode": "201", "url": "/nnrf-nfm/v1/subscriptions", "data": "{\"nfStatusNotificationUri\": \"http://ocpcf-pcf-ingress-gateway.ocpcf.svc/nnrf-client/v1/notify\", \"reqNfType\": \"PCF\", \"subscriptionId\": \"2d77e0de-15a9-11ea-8c5b-b2ca002e6839\", \"validityTime\": \"2050-12-26T09:34:30.816Z\"}", "headers": "{\"Content-Type\": \"application/json\"}" } ]Note:
- The
predefined_prime_configurationcontains variables such asnfInstanceId,nfType, andfqdnin the data's content. Ensure to verify and update the variables based on the payload message that must be included in the response from the NRF on a request. - The default value of
nfInstanceIdvariable isfe7d992b-0541-4c7d-ab84-c6d70b1b0123.
- The
- Copy
- Run the following command to deploy
additional
stubs:
helm install -name <release_name> ocstub-py --set env.NF=<NF> --set env.LOG_LEVEL=<DEBUG/INFO> --set service.name=<service_name>--set service.appendReleaseName=false --set preConfig.enabled=false --namespace=<namespace_name> -f <values.yaml-file>Install only nf1stub by setting the preConfig.enabled as true using the updatedocstub-py/pre_priming_values.yamlfile.helm install -name nf1stub ocstub-py --set env.NF=PCF --set env.LOG_LEVEL=DEBUG --set service.name=nf1stub --set service.appendReleaseName=false --set preConfig.enabled=true --namespace=ocpcf -f ocstub-py/values.yamlInstall rest of the stubs (that is, nf12stub, nf11stub, and so on) by setting the preConfig.enabled as false using the sameocstub-py/pre_priming_values.yamlfile.helm install -name nf12stub ocstub-py --set env.NF=PCF --set env.LOG_LEVEL=DEBUG --set service.name=nf12stub --set service.appendReleaseName=false --set preConfig.enabled=false --namespace=ocpcf -f ocstub-py/values.yamlExample:
helm install -name nf2stub ocstub-py --set env.NF=PCF --set env.LOG_LEVEL=DEBUG --set service.name=nf2stub --set service.appendReleaseName=false --set preConfig.enabled=false --namespace=ocpcf -f ocstub-py/values.yamlhelm install -name nf3stub ocstub-py --set env.NF=PCF --set env.LOG_LEVEL=DEBUG --set service.name=nf3stub --set service.appendReleaseName=false --set preConfig.enabled=false --namespace=ocpcf -f ocstub-py/values.yamlhelm install -name nf11stub ocstub-py --set env.NF=PCF --set env.LOG_LEVEL=DEBUG --set service.name=nf11stub --set service.appendReleaseName=false --set preConfig.enabled=false --namespace=ocpcf -f ocstub-py/values.yamlhelm install -name nf21stub ocstub-py --set env.NF=PCF --set env.LOG_LEVEL=DEBUG --set service.name=nf21stub --set service.appendReleaseName=false --set preConfig.enabled=false --namespace=ocpcf -f ocstub-py/values.yamlhelm install -name nf22stub ocstub-py --set env.NF=PCF --set env.LOG_LEVEL=DEBUG --set service.name=nf22stub --set service.appendReleaseName=false --set preConfig.enabled=false --namespace=ocpcf -f ocstub-py/values.yamlhelm install -name nf31stub ocstub-py --set env.NF=PCF --set env.LOG_LEVEL=DEBUG --set service.name=nf31stub --set service.appendReleaseName=false --set preConfig.enabled=false --namespace=ocpcf -f ocstub-py/values.yamlhelm install -name nf32stub ocstub-py --set env.NF=PCF --set env.LOG_LEVEL=DEBUG --set service.name=nf32stub --set service.appendReleaseName=false --set preConfig.enabled=false --namespace=ocpcf -f ocstub-py/values.yaml - Run the following command to verify stub deployment.
[cloud-user@platform-bastion-1 ocstub-pkg-25.2.200.0.0]$ helm ls -n ocpcfThe sample output is as follows:The status changes to DEPLOYED after the deployment is successful.NAME REVISION UPDATED STATUS CHART APP VERSION NAMESPACE nf11stub 1 Tue March 14 10:05:59 2024 DEPLOYED ocstub-py-26.1.201 1.0 ocpcf nf12stub 1 Tue March 14 10:06:00 2024 DEPLOYED ocstub-py-26.1.201 1.0 ocpcf nf1stub 1 Tue March 14 10:05:57 2024 DEPLOYED ocstub-py-26.1.201 1.0 ocpcf nf21stub 1 Tue March 14 10:06:01 2024 DEPLOYED ocstub-py-26.1.201 1.0 ocpcf nf22stub 1 Tue March 14 10:06:02 2024 DEPLOYED ocstub-py-26.1.201 1.0 ocpcf nf2stub 1 Tue March 14 10:05:58 2024 DEPLOYED ocstub-py-26.1.201 1.0 ocpcf nf31stub 1 Tue March 14 10:06:03 2024 DEPLOYED ocstub-py-26.1.201 1.0 ocpcf nf32stub 1 Tue March 14 10:06:11 2024 DEPLOYED ocstub-py-26.1.201 1.0 ocpcf nf3stub 1 Tue March 14 10:05:59 2024 DEPLOYED ocstub-py-26.1.201 1.0 ocpcf - Run the following command to check the
status of status after installation:
[cloud-user@platform-bastion-1 ocstub-pkg-25.2.200.0.0]$ helm status <release_name> -n ocpcfThe sample output is as follows:NAME READY STATUS RESTARTS AGE nf11stub-ocstub-py-66449ddb94-qg2j9 1/1 Running 0 19h nf12stub-ocstub-py-6b8575487-l8pxv 1/1 Running 0 19h nf1stub-ocstub-py-5ff485954c-prc2x 1/1 Running 0 19h nf21stub-ocstub-py-56cf5b77fc-x8wkr 1/1 Running 0 19h nf22stub-ocstub-py-547dfdf476-4j2sn 1/1 Running 0 19h nf2stub-ocstub-py-6fb6f786d6-bc9fr 1/1 Running 0 19h nf31stub-ocstub-py-c6c6d5584-5m48z 1/1 Running 0 19h nf32stub-ocstub-py-848dfc7757-q797z 1/1 Running 0 19h nf3stub-ocstub-py-6cb769ccd9-4fv9b 1/1 Running 0 19h - Run the following command to verify if all the services are installed.
kubectl get po -n ocpcfA sample output of Policy namespace with Policy and ATS after installation is as follows:NAME READY STATUS RESTARTS AGE ocpcf-appinfo-6c74cccd47-zsbb2 1/1 Running 0 155m ocpcf-oc-binding-77fbb9b79c-jv7kd 1/1 Running 0 155m ocpcf-oc-diam-connector-6c6fd868bd-4zfrn 1/1 Running 0 155m ocpcf-oc-diam-gateway-0 1/1 Running 0 147m ocpcf-oc-oc-stub-595bb858d4-smzj8 1/1 Running 0 147m ocpcf-ocats-ocats-policy-667d8cf78-b8bc8 1/1 Running 0 147m ocpcf-occnp-alternate-route-75455c858d-f6qs8 1/1 Running 0 146m ocpcf-occnp-alternate-route-75455c858d-sqvlg 1/1 Running 0 147m ocpcf-occnp-chf-connector-6b8b8bfcd6-jjch6 1/1 Running 0 155m ocpcf-occnp-config-server-77bd99f96-mpscn 1/1 Running 0 155m ocpcf-occnp-egress-gateway-59c4b784cc-6dx4w 1/1 Running 0 16m ocpcf-occnp-ingress-gateway-75c47c57bc-pljtc 1/1 Running 0 39m ocpcf-occnp-nrf-client-nfdiscovery-74b854956b-s6blq 1/1 Running 0 155m ocpcf-occnp-nrf-client-nfmanagement-76cb55b8b8-tdjkj 1/1 Running 0 49m ocpcf-occnp-udr-connector-75ffb9db9b-7xz9v 1/1 Running 0 155m ocpcf-ocdns-ocdns-bind-57fbcd95dc-h4dtl 1/1 Running 0 147m ocpcf-ocpm-audit-service-5cc46665c4-j6vhh 1/1 Running 0 155m ocpcf-ocpm-cm-service-7795bb4c6c-446rb 1/1 Running 0 155m ocpcf-ocpm-policyds-75cbc9fc9d-7lbl5 1/1 Running 0 155m ocpcf-ocpm-pre-59b94d979-jzkv4 1/1 Running 0 155m ocpcf-ocpm-pre-test-84d9c89dd8-fqlpg 1/1 Running 0 155m ocpcf-ocpm-queryservice-94895bf88-bhwcc 1/1 Running 0 155m ocpcf-pcf-amservice-56cdbb75c9-ph7tt 1/1 Running 0 155m ocpcf-pcf-smservice-64b899d766-jfhjm 1/1 Running 0 155m ocpcf-pcf-ueservice-7c6bd7ccc9-mrnxn 1/1 Running 0 155m ocpcf-pcrf-core-7594dbb7f8-z95vt 1/1 Running 0 155m ocpcf-performance-689dd556b-7vblc 1/1 Running 0 155m ocpcfnf11stub-5bb6b4f95d-v6fbb 1/1 Running 0 147m ocpcfnf12stub-59fb974f5d-2qr42 1/1 Running 0 147m ocpcfnf1stub-5bdf545fcb-zgbjb 1/1 Running 0 147m ocpcfnf21stub-ff6db9d86-5hvj6 1/1 Running 0 147m ocpcfnf22stub-794456fd66-sxq8q 1/1 Running 0 147m ocpcfnf2stub-656755dc46-hnr8m 1/1 Running 0 147m ocpcfnf31stub-68c6596b6-jdsgj 1/1 Running 0 147m ocpcfnf32stub-f49b57d86-rklc8 1/1 Running 0 147m ocpcfnf3stub-6c4c697648-lj6q7 1/1 Running 0 147m ocpcf-ocpm-ldap-gateway-5fd489b8fd-52dqn 1/1 Running 0 147m - Verify the changes related to stub pre-defined prime configurations.
Run the following command to verify the status of all the config-map.
kubectl get cm -n ocpcfNotice the change in the number of config-map counts. There will be one extra config-map of stub.
A sample of config-map with pre-defined priming is as follows:
NAME DATA AGE cm-pystub-nf1stub 1 3h35m
Updating the Predefined priming configurations
Note:
This procedure is applicable only when Predefined priming configuration is enabled.Post the deployment, there might be the chance to modify some values inside the stub pre-priming configurations, for example, nfInstanceID in the url.
- Run the following command to edit the config-map of
nf1stub:
kubectl get cm -n ocpcfkubectl edit cm cm-pystub-nf1stub -n ocpcf - Edit the configurations as required, save it.
- Restart the nf1stub pod.
- Verify the logs to confirm the changes.
3.5.7.3 Deploying DNS Stub in Kubernetes Cluster
Note:
Ensure there is sufficient resource requests and limit is configured for DNS Stub. Set the resource request and limit values in the resources section in the values.yaml file as follows:
resources: {}
# We usually recommend not to specify default resources and to leave this as a conscious
# choice for the user. This also increases chances charts run on environments with little
# resources, such as Minikube. If you do want to specify resources, uncomment the following
# lines, adjust them as necessary, and remove the curly braces after 'resources:'. # limits:
# cpu: 1000m
# memory: 1024Mi
# requests:
# cpu: 500m
# memory: 500Mi- Go to the ocats-policy-tools-26.1.201.0.0 folder and run the following command:
tar -zxvf ocdns-pkg-26.1.205.0.0.tgzThe output of this command is:
[cloud-user@platform-bastion-1 ocdns-pkg-26.1.205.0.0]$ ls -ltrh total 211M -rw-------. 1 cloud-user cloud-user 211M Mar 14 14:49 ocdns-bind-image-26.1.205.tar -rw-r--r--. 1 cloud-user cloud-user 2.9K Mar 14 14:49 ocdns-bind-26.1.205.tgz - Run the following command in your cluster to load the DNS Stub
image:
docker load --input ocdns-bind-image-26.1.205.tar - Run the following commands to tag and push the DNS stub to the
registry:
docker tag ocdns-bind:26.1.205 localhost:5000/ocdns-bind:26.1.205 docker push localhost:5000/ocdns-bind:26.1.205 - Run the following command to untar the helm charts (ocdns-bind-26.1.205.tgz):
tar -zxvf ocdns-bind-26.1.205.tgz - Update the registry name, image name and tag (if required) in the
ocdns-bind/values.yamlfile as required. Open the values.yaml file and update theimage.repositoryandimage.tagparameters. - Configure the security context as follows:
- A default pod and container security context are introduced for
dns-bind. These defaults improve the security posture of deployed workloads by enabling non-root execution, disabling privilege escalation, dropping Linux capabilities, and enforcing a read-only root file system where applicable. Use the below configuration to support security context feature.enableContainerSecurityContext: true enablePodSecurityContext: false podSecurityContext: runAsNonRoot: true runAsGroup: 25 runAsUser: 25 containerSecurityContext: runAsNonRoot: true readOnlyRootFilesystem: true allowPrivilegeEscalation: false privileged: false capabilities: drop: - ALL
Note:
You can override these values during installation if the production environment requires different user, group, or security context settings. - A default pod and container security context are introduced for
-
Use the below configuration to support ipFamilies configuration Dual Stack deployments of ocdns-bind:
# Possible values : IPv4, IPv6, IPv4_IPv6,IPv6_IPv4,ClusterPreferred deploymentMode: ClusterPreferred - Run the following command to install DNS
Stub:
helm : [cloud-user@platform-bastion-1 ocdns-bind]$ helm install -name ocdns ocdns-bind-26.1.205.tgz --namespace ocpcf -f ocdns-bind/values.yaml - Run the following command to capture the cluster name of the pcf
deployment, namespace where nfstubs are deployed and cluster IP of DNS Stub.
kubectl get svc -n ocpcf | grep dnsNAME TYPE CLUSTER-IP EXTERNAL-IP PORT(S) AGE ocdns ClusterIP 10.233.11.45 <none> 53/UDP,6236/TCP 19hNote:
This information is required to configure DNS stub.Figure 3-23 Cluster Name
kubectl -n kube-system get configmap kubeadm-config -o yaml | grep clusterName clusterName: platform
3.5.7.4 Deploying AMF Stub in Kubernetes Cluster
- Go to the ocats-policy-tools-26.1.201.0.0 folder and run the following command:
tar -zxvf ocamf-pkg-26.1.205.0.0.tgzThe output of this command is:[cloud-user@platform-bastion-1 ocamf-pkg-26.1.205.0.0]$ ls -ltrh total 211M -rw-------. 1 cloud-user cloud-user 211M Mar 14 14:49 ocamf-stub-image-26.1.205.tar -rw-r--r--. 1 cloud-user cloud-user 2.9K Mar 14 14:49 ocamf-stub-26.1.205.tgz - Run the following command in your cluster to load the AMF Stub
image:
docker load --input ocamf-stub-image-26.1.205.tar - Run the following command to tag and push the DNS stub to the
registry:
docker tag ocamf-stub:26.1.205 localhost:5000/ocamf-stub:26.1.205 docker push localhost:5000/ocamf-stub:26.1.205 - Run the following command to untar the helm charts (ocamf-stub-26.1.205.tgz):
tar -zxvf ocamf-stub-26.1.205.tgz - Update the registry name, image name and tag (if required) in the
ocamf-stub/values.yamlfile as required. Open the values.yaml file and update the registry name, image name, and tag (if required) in the file. -
Use the below configuration to support ipFamilies configuration Dual Stack deployments of ocamf-stub:
# Possible values : IPv4, IPv6, IPv4_IPv6,IPv6_IPv4,ClusterPreferred deploymentMode: ClusterPreferred - Configure the security context as follows:
- A default pod and container security context are introduced for
ocamf-stub. These defaults improve the security posture of deployed workloads by enabling non-root execution, disabling privilege escalation, dropping Linux capabilities, and enforcing a read-only root file system where applicable. Use the below configuration to support security context feature.enableContainerSecurityContext: true enablePodSecurityContext: false podSecurityContext: runAsUser: 1000 containerSecurityContext: runAsNonRoot: true runAsUser: 1000 readOnlyRootFilesystem: true allowPrivilegeEscalation: false privileged: false capabilities: drop: - ALL
Note:
You can override these values during installation if the production environment requires different user, group, or security context settings. - A default pod and container security context are introduced for
- Run the following command to install AMF Stub:
Using Helm:
[cloud-user@platform-bastion-1 ocamf-stub]$ helm install -name ocamf2 ocamf-stub-26.1.205.tgz --set service.name=ocamf2 --namespace ocpcf -f ocamf-stub/values.yaml
The status changes to RUNNING after the deployment is successful.
ocamf2-ocamf-ocamf-stub-79c8fbd6f7-qp5cl 1/1 Running 0 5h47mNote:
Do not deploy ocamf-stub when TLS communication is enabled. Temporarily, ATS features for AM are disabled until ocamf-stub supports TLS communication. Even if the AM related ATS features are populated on the ATS UI, it will not be executed
3.5.7.5 Deploying LDAP Stub in Kubernetes Cluster
- Go to the ocats-policy-tools-26.1.201.0.0 folder and run the following command:
tar -zxvf oc-ldap-org1-pkg-26.1.205.0.0The following is the output:[cloud-user@platform-bastion-1 oc-ldap-org1-pkg-26.1.205.0.0]$ ls -ltrh total 211M -rw-------. 1 cloud-user cloud-user 211M Mar 14 14:49 oc-ldap-org1-image-26.1.205.tar -rw-r--r--. 1 cloud-user cloud-user 2.9K Mar 14 14:49 oc-ldap-org1-26.1.205.tgz - Run the following command in your cluster to load the LDAP Stub
image:
docker load --input oc-ldap-org1-image-26.1.205.tar - Run the following command to tag and push the DNS stub to the
registry:
docker tag oc-ldap-org1:26.1.205 localhost:5000/oc-ldap-org1:26.1.205 docker push localhost:5000/oc-ldap-org1:26.1.205 - Run the following command to untar the helm charts
(oc-ldap-org1-26.1.205.tgz):
tar -zxvf oc-ldap-org1-26.1.205.tgz - Update the registry name, image name and tag (if required) in the
oc-ldap-org1/values.yamlfile as required. Open the values.yaml file and update the registry name, image name, and tag (if required) in the file. -
Use the below configuration to support ipFamilies configuration Dual Stack deployments of ldap-stub:
# Possible values : IPv4, IPv6, IPv4_IPv6,IPv6_IPv4,ClusterPreferred deploymentMode: ClusterPreferred - Configure the security context as follows:
- A default pod and container security context are introduced for
ldap-stub. These defaults improve the security posture of deployed workloads by enabling non-root execution, disabling privilege escalation, dropping Linux capabilities, and enforcing a read-only root file system where applicable. Use the below configuration to support security context feature.enableContainerSecurityContext: true enablePodSecurityContext: false podSecurityContext: runAsGroup: 55 runAsUser: 55 containerSecurityContext: allowPrivilegeEscalation: false capabilities: drop: - ALL runAsGroup: 55 runAsUser: 55
Note:
You can override these values during installation if the production environment requires different user, group, or security context settings. - A default pod and container security context are introduced for
- Run the following command to install LDAP Stub:
Using Helm:
[cloud-user@platform-bastion-1 oc-ldap-org1]$ helm upgrade --install --namespace ocpcf --set deploymentMode=ClusterPreferred --set image.repository=localhost:5000/occnp/oc-ldap-org1 oc-ldap-org1 oc-ldap-org1-26.1.205.tgz
The status changes to RUNNING after the deployment is successful.
ocpcf-oc-ldap-org1-7b9d957bc6-ngtrl 1/1 Running 0 5h47mNote:
oc-ldap-org1-secret of the OC-LDAP Stub is being created by Helm chart that comes with ATS package.3.5.7.6 Deploying ocdiam Simulator in Kubernetes Cluster
- Go to the ocats-policy-tools-26.1.201.0.0 folder and run the following
command:
tar -zxvf ocdiam-pkg-26.1.205.0.0The following is the output:
[cloud-user@platform-bastion-1 ocdiam-pkg-26.1.205.0.0]$ ls -ltrh total 908M -rw-------. 1 cloud-user cloud-user 908M Mar 14 14:49 ocdiam-sim-image-26.1.205.tar -rw-r--r--. 1 cloud-user cloud-user 3.8K Mar 14 14:49 ocdiam-sim-26.1.205.tgz - Run the following command in your cluster to load the Diameter
Simulator Image using the command
:
docker load --input ocdiam-sim-image-26.1.205.tar - Run the following command to tag and push the DNS stub to the
registry:
docker tag ocdiam-sim:26.1.205 localhost:5000/ocdiam-sim:26.1.205 docker push localhost:5000/ocdiam-sim:26.1.205 - Run the following command to untar the helm charts (ocdiam-sim-26.1.205.tgz):
tar -zxvf ocdiam-sim-26.1.205.tgz - Update the registry name, image name and tag (if required) in the
ocdiam-sim/values.yamlfile as required. Open the values.yaml file and update the registry name, image name, and tag (if required) in the file. -
Use the below configuration to support ipFamilies configuration Dual Stack deployments of ocdiam-sim:
# Possible values : IPv4, IPv6, IPv4_IPv6,IPv6_IPv4,ClusterPreferred deploymentMode: ClusterPreferred - Configure the security context as follows:
- A default pod and container security context are introduced for
ocdiam-sim. These defaults improve the security posture of deployed workloads by enabling non-root execution, disabling privilege escalation, dropping Linux capabilities, and enforcing a read-only root file system where applicable. Use the below configuration to support security context feature.enableContainerSecurityContext: true enablePodSecurityContext: false podSecurityContext: runAsNonRoot: true runAsUser: 5000 containerSecurityContext: runAsNonRoot: true runAsUser: 5000 readOnlyRootFilesystem: true allowPrivilegeEscalation: false privileged: false capabilities: drop: - ALL
Note:
You can override these values during installation if the production environment requires different user, group, or security context settings. - A default pod and container security context are introduced for
- Run the following command to install Diameter Simulator:
Using Helm:
[cloud-user@platform-bastion-1 ocdiam-sim]$ helm install -name ocdiam-sim ocdiam-sim --namespace ocpcf -f ocdiam-sim/values.yaml
The status changes to RUNNING after the deployment is successful.
The following is a sample output for a successful deployment:
ocdiam-sim-69968444b6-fg6ks 1/1 Running 0 5h47m[cloud-user@platform-bastion-1 ocstub-pkg-26.1.201.0.0]$ kubectl get po -n ocpcf
NAME READY STATUS RESTARTS AGE
ocpcf-appinfo-6c74cccd47-zsbb2 1/1 Running 0 155m
ocpcf-oc-binding-77fbb9b79c-jv7kd 1/1 Running 0 155m
ocpcf-oc-diam-connector-6c6fd868bd-4zfrn 1/1 Running 0 155m
ocpcf-oc-diam-gateway-0 1/1 Running 0 147m
ocamf2-ocamf-stub-595bb858d4-smzj8 1/1 Running 0 147m
ocpcf-ocats-ocats-policy-667d8cf78-b8bc8 1/1 Running 0 147m
ocpcf-occnp-alternate-route-75455c858d-f6qs8 1/1 Running 0 146m
ocpcf-occnp-alternate-route-75455c858d-sqvlg 1/1 Running 0 147m
ocpcf-occnp-chf-connector-6b8b8bfcd6-jjch6 1/1 Running 0 155m
ocpcf-occnp-config-server-77bd99f96-mpscn 1/1 Running 0 155m
ocpcf-occnp-egress-gateway-59c4b784cc-6dx4w 1/1 Running 0 16m
ocpcf-occnp-ingress-gateway-75c47c57bc-pljtc 1/1 Running 0 39m
ocpcf-occnp-nrf-client-nfdiscovery-74b854956b-s6blq 1/1 Running 0 155m
ocpcf-occnp-nrf-client-nfmanagement-76cb55b8b8-tdjkj 1/1 Running 0 49m
ocpcf-occnp-udr-connector-75ffb9db9b-7xz9v 1/1 Running 0 155m
ocpcf-ocdns-ocdns-bind-57fbcd95dc-h4dtl 1/1 Running 0 147m
ocpcf-ocpm-audit-service-5cc46665c4-j6vhh 1/1 Running 0 155m
ocpcf-ocpm-cm-service-7795bb4c6c-446rb 1/1 Running 0 155m
ocpcf-ocpm-policyds-75cbc9fc9d-7lbl5 1/1 Running 0 155m
ocpcf-ocpm-pre-59b94d979-jzkv4 1/1 Running 0 155m
ocpcf-ocpm-pre-test-84d9c89dd8-fqlpg 1/1 Running 0 155m
ocpcf-ocpm-queryservice-94895bf88-bhwcc 1/1 Running 0 155m
ocpcf-pcf-amservice-56cdbb75c9-ph7tt
ocpcf-pcf-smservice-64b899d766-jfhjm 1/1 Running 0 155m
ocpcf-pcf-ueservice-7c6bd7ccc9-mrnxn 1/1 Running 0 155m
ocpcf-pcrf-core-7594dbb7f8-z95vt 1/1 Running 0 155m
ocpcf-performance-689dd556b-7vblc 1/1 Running 0 155m
ocpcfnf11stub-5bb6b4f95d-v6fbb 1/1 Running 0 147m
ocpcfnf12stub-59fb974f5d-2qr42 1/1 Running 0 147m
ocpcfnf1stub-5bdf545fcb-zgbjb 1/1 Running 0 147m
ocpcfnf21stub-ff6db9d86-5hvj6 1/1 Running 0 147m
ocpcfnf22stub-794456fd66-sxq8q 1/1 Running 0 147m
ocpcfnf2stub-656755dc46-hnr8m 1/1 Running 0 147m
ocpcfnf31stub-68c6596b6-jdsgj 1/1 Running 0 147m
ocpcfnf32stub-f49b57d86-rklc8 1/1 Running 0 147m
ocpcfnf3stub-6c4c697648-lj6q7 1/1 Running 0 147m
ocpcf-ocpm-ldap-gateway-5fd489b8fd-52dqn 1/1 Running 0 147m
ocdiam-sim-69968444b6 1/1 Running 0 147m3.5.8 Post-Installation Steps
This section describes the post-installation steps for Policy.
Enabling IPv6 for ATS
Perform this procedure after ATS for Policy is installed. This procedure creates services with the required IP family configuration.
Below are the prerequisites for this procedure:- Ensure that the Kubernetes cluster supports IPv6 or dual stack networking.
- Do not edit an existing service to change its IP family from IPv4 to IPv6.
- Create a temporary directory to store the service YAML file exported in Step 1.
- Run the following command to export the existing service YAML
file:
kubectl get svc <SERVICE_NAME> -n <NAMESPACE> -o yaml > /tmp/<directory>/<my-svc.yaml>The current service definition is retrieved and written to
/tmp/<directory>/<my-svc.yaml>.Sample output:
kubectl get svc ocpcf-oc-ldap-org1-service -n ocpcf -o yaml > /tmp/ocpcf/svcs/ocpcf-oc-ldap-org1-service.yaml kubectl get svc nf11stub -n ocpcf -o yaml > /tmp/ocpcf/svcs/nf11stub.yaml kubectl get svc nf12stub -n ocpcf -o yaml > /tmp/ocpcf/svcs/nf12stub.yaml kubectl get svc nf1stub -n ocpcf -o yaml > /tmp/ocpcf/svcs/nf1stub.yaml kubectl get svc nf21stub -n ocpcf -o yaml > /tmp/ocpcf/svcs/nf21stub.yaml kubectl get svc nf22stub -n ocpcf -o yaml > /tmp/ocpcf/svcs/nf22stub.yaml kubectl get svc nf2stub -n ocpcf -o yaml > /tmp/ocpcf/svcs/nf2stub.yaml kubectl get svc nf31stub -n ocpcf -o yaml > /tmp/ocpcf/svcs/nf31stub.yaml kubectl get svc nf32stub -n ocpcf -o yaml > /tmp/ocpcf/svcs/nf32stub.yaml kubectl get svc nf3stub -n ocpcf -o yaml > /tmp/ocpcf/svcs/nf3stub.yaml kubectl get svc ocamf2 -n ocpcf -o yaml > /tmp/ocpcf/svcs/ocamf2.yaml kubectl get svc ocats-policy -n ocpcf -o yaml > /tmp/ocpcf/svcs/ocats-policy.yaml kubectl get svc ocdiam-sim-1 -n ocpcf -o yaml > /tmp/ocpcf/svcs/ocdiam-sim-1.yaml kubectl get svc ocdiam-sim-2 -n ocpcf -o yaml > /tmp/ocpcf/svcs/ocdiam-sim-2.yaml kubectl get svc ocdiam-sim-3 -n ocpcf -o yaml > /tmp/ocpcf/svcs/ocdiam-sim-3.yaml kubectl get svc ocdiam-sim-4 -n ocpcf -o yaml > /tmp/ocpcf/svcs/ocdiam-sim-4.yaml kubectl get svc ocdns-stub -n ocpcf -o yaml > /tmp/ocpcf/svcs/ocdns-stub.yaml - Run the following command to remove the existing
service:
kubectl delete svc <SERVICE_NAME> -n <NAMESPACE>Sample output:
kubectl delete svc ocpcf-oc-ldap-org1-service -n ocpcf kubectl delete svc nf11stub -n ocpcf kubectl delete svc nf12stub -n ocpcf kubectl delete svc nf1stub -n ocpcf kubectl delete svc nf21stub -n ocpcf kubectl delete svc nf22stub -n ocpcf kubectl delete svc nf2stub -n ocpcf kubectl delete svc nf31stub -n ocpcf kubectl delete svc nf32stub -n ocpcf kubectl delete svc nf3stub -n ocpcf kubectl delete svc ocamf2 -n ocpcf kubectl delete svc ocats-policy -n ocpcf kubectl delete svc ocdiam-sim-1 -n ocpcf kubectl delete svc ocdiam-sim-2 -n ocpcf kubectl delete svc ocdiam-sim-3 -n ocpcf kubectl delete svc ocdiam-sim-4 -n ocpcf kubectl delete svc ocdns-stub -n ocpcf - Edit the exported YAML file and remove the value of the following
fields if they exist:
clusterIP: clusterIPs:Unedited YAML file:
spec: clusterIP: 10.233.13.190 clusterIPs: - 10.233.13.190 internalTrafficPolicy: Cluster ipFamilies: - IPv4 ipFamilyPolicy: SingleStackEdited YAML file:
spec: clusterIP: clusterIPs: internalTrafficPolicy: Cluster ipFamilies: - IPv6 ipFamilyPolicy: SingleStackNote:
Do not specify the value ofclusterIPorclusterIPs. These values are automatically assigned by Kubernetes. - Run the following command to recreate the service with the updated
YAML file:
kubectl apply -f my-svc.yamlThe service is created with the required IP family configuration.
Sample output:
[cnpolicy@bastion-1 svcs]$ pwd /tmp/ocpcf/svcs [cnpolicy@bastion-1 svcs]$ ls ocpcf-oc-ldap-org1-service.yaml nf12stub.yaml nf21stub.yaml nf2stub.yaml nf32stub.yaml ocamf2.yaml ocdiam-sim-1.yaml ocdiam-sim-3.yaml ocdns-stub.yaml nf11stub.yaml nf1stub.yaml nf22stub.yaml nf31stub.yaml nf3stub.yaml ocats-policy.yaml ocdiam-sim-2.yaml ocdiam-sim-4.yaml kubectl apply -f ocpcf-oc-ldap-org1-service.yaml -n ocpcf kubectl apply -f nf11stub.yaml -n ocpcf kubectl apply -f nf12stub.yaml -n ocpcf kubectl apply -f nf1stub.yaml -n ocpcf kubectl apply -f nf21stub.yaml -n ocpcf kubectl apply -f nf22stub.yaml -n ocpcf kubectl apply -f nf2stub.yaml -n ocpcf kubectl apply -f nf31stub.yaml -n ocpcf kubectl apply -f nf32stub.yaml -n ocpcf kubectl apply -f nf3stub.yaml -n ocpcf kubectl apply -f ocamf2.yaml -n ocpcf kubectl apply -f ocats-policy.yaml -n ocpcf kubectl apply -f ocdiam-sim-1.yaml -n ocpcf kubectl apply -f ocdiam-sim-2.yaml -n ocpcf kubectl apply -f ocdiam-sim-3.yaml -n ocpcf kubectl apply -f ocdiam-sim-4.yaml -n ocpcf kubectl apply -f ocdns-stub.yaml -n ocpcf - To verify if the service has an IPv6 address, run the following
command:
kubectl get svc -n <NAMESPACE>Sample output:Ensure that only IPv6 addresses are observed.NAME TYPE CLUSTER-IP EXTERNAL-IP PORT(S) AGE -------------------------------------------------------------------------------------------------------------------------------------------------------------------- ocpcf-oc-ldap-org1-service ClusterIP fd00:0:0:2::74aa <none> 8080/TCP,8081/TCP 19s nf11stub ClusterIP fd00:0:0:2::10cf <none> 8080/TCP,8081/TCP 62m nf12stub ClusterIP fd00:0:0:2::cea4 <none> 8080/TCP,8081/TCP 18s nf1stub ClusterIP fd00:0:0:2::4c32 <none> 8080/TCP,8081/TCP 18s nf21stub ClusterIP fd00:0:0:2::b0a9 <none> 8080/TCP,8081/TCP 17s nf22stub ClusterIP fd00:0:0:2::c462 <none> 8080/TCP,8081/TCP 17s nf2stub ClusterIP fd00:0:0:2::d45d <none> 8080/TCP,8081/TCP 16s nf31stub ClusterIP fd00:0:0:2::94be <none> 8080/TCP,8081/TCP 16s nf32stub ClusterIP fd00:0:0:2::f8da <none> 8080/TCP,8081/TCP 15s nf3stub ClusterIP fd00:0:0:2::d371 <none> 8080/TCP,8081/TCP 15s ocamf2 ClusterIP fd00:0:0:2::7e56 <none> 8086/TCP,8091/TCP,8443/TCP 14s ocats-policy LoadBalancer fd00:0:0:2::d86b 2606:b400:605:b82e::13 8080:30476/TCP,5001:31499/TCP 13s ocdiam-sim-1 ClusterIP fd00:0:0:2::caca <none> 8089/TCP,3868/TCP 13s ocdiam-sim-2 ClusterIP fd00:0:0:2::5089 <none> 8089/TCP,3868/TCP 12s ocdiam-sim-3 ClusterIP fd00:0:0:2::399c <none> 8089/TCP,3868/TCP 12s ocdiam-sim-4 ClusterIP fd00:0:0:2::d017 <none> 8089/TCP,3868/TCP 11s ocdns-stub ClusterIP fd00:0:0:2::7d99 <none> 53/UDP,6236/TCP 11s ocpcf-altsvc-cache ClusterIP None <none> 8000/TCP 121m ocpcf-egw-cache ClusterIP None <none> 8000/TCP 121m ocpcf-igw-cache ClusterIP None <none> 8000/TCP 121m ocpcf-occnp-alternate-route ClusterIP fd00:0:0:2::4735 <none> 8000/TCP 3h24m ocpcf-occnp-app-info ClusterIP fd00:0:0:2::7a03 <none> 8000/TCP 3h24m ocpcf-occnp-audit ClusterIP fd00:0:0:2::3be2 <none> 8000/TCP 3h24m ocpcf-occnp-binding ClusterIP fd00:0:0:2::9f7f <none> 8000/TCP,9443/TCP 3h24m ocpcf-occnp-bulwark ClusterIP fd00:0:0:2::8746 <none> 8000/TCP 3h24m ocpcf-occnp-bulwark-coherence-headless ClusterIP None <none> 6801/TCP 121m ocpcf-occnp-chf-connector ClusterIP fd00:0:0:2::a5a6 <none> 8000/TCP,9443/TCP 3h24m ocpcf-occnp-config-mgmt LoadBalancer fd00:0:0:2::bc02 2606:b400:605:b82e::7 8000:30492/TCP 3h24m ocpcf-occnp-config-server ClusterIP fd00:0:0:2::a144 <none> 8000/TCP 3h24m ocpcf-occnp-diameter-connector ClusterIP fd00:0:0:2::c15f <none> 8000/TCP,3868/TCP 3h24m ocpcf-occnp-egress-gateway ClusterIP fd00:0:0:2::1237 <none> 8000/TCP 3h24m ocpcf-occnp-ingress-gateway LoadBalancer fd00:0:0:2::d883 2606:b400:605:b82e::8 80:32239/TCP 3h24m ocpcf-occnp-ldap-gateway ClusterIP fd00:0:0:2::2963 <none> 8000/TCP,9443/TCP 3h24m ocpcf-occnp-notifier ClusterIP fd00:0:0:2::bf45 <none> 8000/TCP 3h24m ocpcf-occnp-nrf-client-cache ClusterIP None <none> 5907/TCP 121m ocpcf-occnp-nrf-client-nfdiscovery ClusterIP fd00:0:0:2::26df <none> 8000/TCP,9443/TCP 3h24m ocpcf-occnp-nrf-client-nfmanagement ClusterIP fd00:0:0:2::8e23 <none> 8000/TCP,9443/TCP 3h24m ocpcf-occnp-nwdaf-agent ClusterIP fd00:0:0:2::5075 <none> 8000/TCP 3h24m ocpcf-occnp-oc-diam-gateway LoadBalancer fd00:0:0:2::62dc 2606:b400:605:b82e::12 3868:31205/TCP 3h24m ocpcf-occnp-oc-diam-gateway-coherence-headless ClusterIP None <none> 5801/TCP 121m ocpcf-occnp-oc-diam-gateway-headless ClusterIP None <none> 3868/TCP,8000/TCP 121m ocpcf-occnp-oc-diam-gateway-internal ClusterIP fd00:0:0:2::a25b <none> 8000/TCP 3h24m ocpcf-occnp-pcf-am ClusterIP fd00:0:0:2::d3db <none> 8000/TCP,9443/TCP 3h24m ocpcf-occnp-pcf-sm ClusterIP fd00:0:0:2::b656 <none> 8000/TCP,9443/TCP 3h24m ocpcf-occnp-pcf-ue ClusterIP fd00:0:0:2::d30f <none> 8000/TCP,9443/TCP 3h24m ocpcf-occnp-pcrf-core ClusterIP fd00:0:0:2::2341 <none> 8000/TCP,9443/TCP,3868/TCP 3h24m ocpcf-occnp-pcrf-core-headless ClusterIP None <none> 8000/TCP,9443/TCP,3868/TCP 121m ocpcf-occnp-perf-info ClusterIP fd00:0:0:2::4100 <none> 8000/TCP 3h24m ocpcf-occnp-policy-ds ClusterIP fd00:0:0:2::a75a <none> 8000/TCP,8443/TCP 3h24m ocpcf-occnp-pre ClusterIP fd00:0:0:2::9d20 <none> 8000/TCP 3h24m ocpcf-occnp-query ClusterIP fd00:0:0:2::c91e <none> 8000/TCP 3h24m ocpcf-occnp-soap-connector ClusterIP fd00:0:0:2::81c9 <none> 8000/TCP,8443/TCP 3h24m ocpcf-occnp-udr-connector ClusterIP fd00:0:0:2::d4bb <none> 8000/TCP,9443/TCP 3h24m ocpcf-occnp-usage-mon ClusterIP fd00:0:0:2::e212 <none> 8000/TCP,8443/TCP 3h24m - To access the ATS GUI with an IPv6, the IP in IPv6 of ocats and the
port 8080 are entered in the browser URL of ATS (Jenkins).
Figure 3-24 Accessing ATS GUI using IPv6
Enabling Dual Stack for ATS
Perform the following procedure to enable dual stack support for ATS.
When ATS is installed, the svc corresponding to ATS is observed in IPv4 single stack as follows:
[cnpolicy@bastion-1 ocpcf]$ kubectl get svc -n ocpcf
NAME TYPE CLUSTER-IP EXTERNAL-IP PORT(S) AGE
ocpcf-oc-ldap-org1-service ClusterIP 10.233.13.190 <none> 8080/TCP,8081/TCP 27h
nf11stub ClusterIP 10.233.25.52 <none> 8080/TCP,8081/TCP 27h
nf12stub ClusterIP 10.233.54.94 <none> 8080/TCP,8081/TCP 27h
nf1stub ClusterIP 10.233.20.107 <none> 8080/TCP,8081/TCP 27h
nf21stub ClusterIP 10.233.36.86 <none> 8080/TCP,8081/TCP 27h
nf22stub ClusterIP 10.233.24.134 <none> 8080/TCP,8081/TCP 27h
nf2stub ClusterIP 10.233.47.216 <none> 8080/TCP,8081/TCP 27h
nf31stub ClusterIP 10.233.10.71 <none> 8080/TCP,8081/TCP 27h
nf32stub ClusterIP 10.233.33.164 <none> 8080/TCP,8081/TCP 27h
nf3stub ClusterIP 10.233.24.49 <none> 8080/TCP,8081/TCP 27h
ocamf2 ClusterIP 10.233.9.153 <none> 8091/TCP,8086/TCP 27h
ocats-policy LoadBalancer 10.233.21.169 10.75.206.199 8080:31931/TCP,5001:30343/TCP 27h
ocdiam-sim-1 ClusterIP 10.233.14.93 <none> 8089/TCP,3868/TCP 27h
ocdiam-sim-2 ClusterIP 10.233.35.191 <none> 8089/TCP,3868/TCP 27h
ocdiam-sim-3 ClusterIP 10.233.18.45 <none> 8089/TCP,3868/TCP 27h
ocdiam-sim-4 ClusterIP 10.233.46.225 <none> 8089/TCP,3868/TCP 27h
ocdns-stub ClusterIP 10.233.44.184 <none> 53/UDP,6236/TCP 27h
pcf-dual-altsvc-cache ClusterIP None <none> 8000/TCP 6d3h
pcf-dual-egw-cache ClusterIP None <none> 8000/TCP 6d3h
pcf-dual-igw-cache ClusterIP None <none> 8000/TCP 6d3h
pcf-dual-occnp-alternate-route ClusterIP fd00:0:0:2::6f05 <none> 8000/TCP 6d3h
pcf-dual-occnp-app-info ClusterIP fd00:0:0:2::ce38 <none> 8000/TCP 6d3h
pcf-dual-occnp-audit ClusterIP fd00:0:0:2::8afd <none> 8000/TCP 6d3h
pcf-dual-occnp-binding ClusterIP fd00:0:0:2::bfde <none> 8000/TCP,9443/TCP 6d3h
pcf-dual-occnp-bulwark ClusterIP fd00:0:0:2::eb5a <none> 8000/TCP 6d3h
pcf-dual-occnp-bulwark-coherence-headless ClusterIP None <none> 6801/TCP 6d3h
pcf-dual-occnp-chf-connector ClusterIP fd00:0:0:2::a5cf <none> 8000/TCP,9443/TCP 6d3h
pcf-dual-occnp-config-mgmt LoadBalancer fd00:0:0:2::3754 2606:b400:605:b82e::e 8000:30852/TCP 6d3h
pcf-dual-occnp-config-server ClusterIP fd00:0:0:2::4c8f <none> 8000/TCP 6d3h
pcf-dual-occnp-diameter-connector ClusterIP fd00:0:0:2::4e58 <none> 8000/TCP,3868/TCP 6d3h
pcf-dual-occnp-egress-gateway ClusterIP fd00:0:0:2::d099 <none> 8000/TCP 6d3h
pcf-dual-occnp-ingress-gateway LoadBalancer fd00:0:0:2::21a5 10.75.206.211,2606:b400:605:b82e::11 80:32447/TCP 6d3h
pcf-dual-occnp-ldap-gateway ClusterIP fd00:0:0:2::e9e8 <none> 8000/TCP,9443/TCP 6d3h
pcf-dual-occnp-notifier ClusterIP fd00:0:0:2::cca <none> 8000/TCP 6d3h
pcf-dual-occnp-nrf-client-cache ClusterIP None <none> 5907/TCP 6d3h
pcf-dual-occnp-nrf-client-nfdiscovery ClusterIP fd00:0:0:2::d9c5 <none> 8000/TCP,9443/TCP 6d3h
pcf-dual-occnp-nrf-client-nfmanagement ClusterIP fd00:0:0:2::2cfe <none> 8000/TCP,9443/TCP 6d3h
pcf-dual-occnp-nwdaf-agent ClusterIP fd00:0:0:2::1f36 <none> 8000/TCP 6d3h
pcf-dual-occnp-oc-diam-gateway LoadBalancer fd00:0:0:2::1a57 10.75.206.210,2606:b400:605:b82e::10 3868:30449/TCP 6d3h
pcf-dual-occnp-oc-diam-gateway-coherence-headless ClusterIP None <none> 5801/TCP 6d3h
pcf-dual-occnp-oc-diam-gateway-headless ClusterIP None <none> 3868/TCP,8000/TCP 6d3h
pcf-dual-occnp-oc-diam-gateway-internal ClusterIP fd00:0:0:2::d3a2 <none> 8000/TCP 6d3h
pcf-dual-occnp-pcf-am ClusterIP fd00:0:0:2::7fde <none> 8000/TCP,9443/TCP 6d3h
pcf-dual-occnp-pcf-sm ClusterIP fd00:0:0:2::b43d <none> 8000/TCP,9443/TCP 6d3h
pcf-dual-occnp-pcf-ue ClusterIP fd00:0:0:2::3beb <none> 8000/TCP,9443/TCP 6d3h
pcf-dual-occnp-perf-info ClusterIP fd00:0:0:2::4df3 <none> 8000/TCP 6d3h
pcf-dual-occnp-policy-ds ClusterIP fd00:0:0:2::ea79 <none> 8000/TCP,8443/TCP 6d3h
pcf-dual-occnp-pre ClusterIP fd00:0:0:2::a9d5 <none> 8000/TCP 6d3h
pcf-dual-occnp-query ClusterIP fd00:0:0:2::869c <none> 8000/TCP 6d3h
pcf-dual-occnp-udr-connector ClusterIP fd00:0:0:2::fb36 <none> 8000/TCP,9443/TCP 6d3h
pcf-dual-occnp-usage-mon ClusterIP fd00:0:0:2::4dca <none> 8000/TCP,8443/TCP 6d3h
Modify the IP address type to IPv6 dual stack or IPv4 dual stack by following these steps:
Note:
- Ensure that the Kubernetes cluster supports IPv6 or dual stack networking.
- Do not edit an existing service to change its IP family from IPv4 to IPv6.
- Create a temporary directory to store the service YAML file exported in Step 1.
- Run the following command to export the existing service YAML
file:
kubectl get svc <SERVICE_NAME> -n <NAMESPACE> -o yaml > /tmp/<directory>/<my-svc.yaml>The current service definition is retrieved and written to
/tmp/<directory>/<my-svc.yaml>.Sample output:
kubectl get svc ocpcf-oc-ldap-org1-service -n ocpcf -o yaml > /tmp/ocpcf/svcs/ocpcf-oc-ldap-org1-service.yaml kubectl get svc nf11stub -n ocpcf -o yaml > /tmp/ocpcf/svcs/nf11stub.yaml kubectl get svc nf12stub -n ocpcf -o yaml > /tmp/ocpcf/svcs/nf12stub.yaml kubectl get svc nf1stub -n ocpcf -o yaml > /tmp/ocpcf/svcs/nf1stub.yaml kubectl get svc nf21stub -n ocpcf -o yaml > /tmp/ocpcf/svcs/nf21stub.yaml kubectl get svc nf22stub -n ocpcf -o yaml > /tmp/ocpcf/svcs/nf22stub.yaml kubectl get svc nf2stub -n ocpcf -o yaml > /tmp/ocpcf/svcs/nf2stub.yaml kubectl get svc nf31stub -n ocpcf -o yaml > /tmp/ocpcf/svcs/nf31stub.yaml kubectl get svc nf32stub -n ocpcf -o yaml > /tmp/ocpcf/svcs/nf32stub.yaml kubectl get svc nf3stub -n ocpcf -o yaml > /tmp/ocpcf/svcs/nf3stub.yaml kubectl get svc ocamf2 -n ocpcf -o yaml > /tmp/ocpcf/svcs/ocamf2.yaml kubectl get svc ocats-policy -n ocpcf -o yaml > /tmp/ocpcf/svcs/ocats-policy.yaml kubectl get svc ocdiam-sim-1 -n ocpcf -o yaml > /tmp/ocpcf/svcs/ocdiam-sim-1.yaml kubectl get svc ocdiam-sim-2 -n ocpcf -o yaml > /tmp/ocpcf/svcs/ocdiam-sim-2.yaml kubectl get svc ocdiam-sim-3 -n ocpcf -o yaml > /tmp/ocpcf/svcs/ocdiam-sim-3.yaml kubectl get svc ocdiam-sim-4 -n ocpcf -o yaml > /tmp/ocpcf/svcs/ocdiam-sim-4.yaml kubectl get svc ocdns-stub -n ocpcf -o yaml > /tmp/ocpcf/svcs/ocdns-stub.yaml - Run the following command to remove the existing
service:
kubectl delete svc <SERVICE_NAME> -n <NAMESPACE>Sample output:
kubectl delete svc ocpcf-oc-ldap-org1-service -n ocpcf kubectl delete svc nf11stub -n ocpcf kubectl delete svc nf12stub -n ocpcf kubectl delete svc nf1stub -n ocpcf kubectl delete svc nf21stub -n ocpcf kubectl delete svc nf22stub -n ocpcf kubectl delete svc nf2stub -n ocpcf kubectl delete svc nf31stub -n ocpcf kubectl delete svc nf32stub -n ocpcf kubectl delete svc nf3stub -n ocpcf kubectl delete svc ocamf2 -n ocpcf kubectl delete svc ocats-policy -n ocpcf kubectl delete svc ocdiam-sim-1 -n ocpcf kubectl delete svc ocdiam-sim-2 -n ocpcf kubectl delete svc ocdiam-sim-3 -n ocpcf kubectl delete svc ocdiam-sim-4 -n ocpcf kubectl delete svc ocdns-stub -n ocpcf - Edit the exported YAML file and remove the value of the following fields if they
exist:
clusterIP: clusterIPs:Unedited YAML file:
spec: clusterIP: 10.233.13.190 clusterIPs: - 10.233.13.190 internalTrafficPolicy: Cluster ipFamilies: - IPv4 ipFamilyPolicy: SingleStackAdd or modify the
specsection for IPv6 or IPv4 dual stack:spec: ipFamilies: - IPv6 - IPv4 ipFamilyPolicy: RequireDualStack or spec: ipFamilies: - IPv4 - IPv6 ipFamilyPolicy: RequireDualStackEdited YAML file:
spec: clusterIP: clusterIPs: internalTrafficPolicy: Cluster ipFamilies: - IPv6 - IPv4 ipFamilyPolicy: RequireDualStack or spec: clusterIP: clusterIPs: internalTrafficPolicy: Cluster ipFamilies: - IPv4 - IPv6 ipFamilyPolicy: RequireDualStackNote:
Do not specify the value ofclusterIPorclusterIPs. These values are automatically assigned by Kubernetes. - Run the following command to recreate the service with the updated
YAML file:
kubectl apply -f my-svc.yamlThe service is created with the required IP family configuration.
Sample output:
[cnpolicy@bastion-1 svcs]$ pwd /tmp/ocpcf/svcs [cnpolicy@bastion-1 svcs]$ ls ocpcf-oc-ldap-org1-service.yaml nf12stub.yaml nf21stub.yaml nf2stub.yaml nf32stub.yaml ocamf2.yaml ocdiam-sim-1.yaml ocdiam-sim-3.yaml ocdns-stub.yaml nf11stub.yaml nf1stub.yaml nf22stub.yaml nf31stub.yaml nf3stub.yaml ocats-policy.yaml ocdiam-sim-2.yaml ocdiam-sim-4.yaml kubectl apply -f ocpcf-oc-ldap-org1-service.yaml -n ocpcf kubectl apply -f nf11stub.yaml -n ocpcf kubectl apply -f nf12stub.yaml -n ocpcf kubectl apply -f nf1stub.yaml -n ocpcf kubectl apply -f nf21stub.yaml -n ocpcf kubectl apply -f nf22stub.yaml -n ocpcf kubectl apply -f nf2stub.yaml -n ocpcf kubectl apply -f nf31stub.yaml -n ocpcf kubectl apply -f nf32stub.yaml -n ocpcf kubectl apply -f nf3stub.yaml -n ocpcf kubectl apply -f ocamf2.yaml -n ocpcf kubectl apply -f ocats-policy.yaml -n ocpcf kubectl apply -f ocdiam-sim-1.yaml -n ocpcf kubectl apply -f ocdiam-sim-2.yaml -n ocpcf kubectl apply -f ocdiam-sim-3.yaml -n ocpcf kubectl apply -f ocdiam-sim-4.yaml -n ocpcf kubectl apply -f ocdns-stub.yaml -n ocpcf - To verify if the service has a dual stack address with the
preference IPv4 or IPv6, run the following
command:
kubectl get svc -n <NAMESPACE>Sample output:
NAME TYPE CLUSTER-IP EXTERNAL-IP PORT(S) AGE -------------------------------------------------------------------------------------------------------------------------------------------------------------------------- ocpcf-oc-ldap-org1-service ClusterIP fd00:0:0:2::535c <none> 8080/TCP,8081/TCP 27h nf11stub ClusterIP fd00:0:0:2::6d99 <none> 8080/TCP,8081/TCP 27h nf12stub ClusterIP fd00:0:0:2::989b <none> 8080/TCP,8081/TCP 27h nf1stub ClusterIP fd00:0:0:2::c185 <none> 8080/TCP,8081/TCP 27h nf21stub ClusterIP fd00:0:0:2::d897 <none> 8080/TCP,8081/TCP 27h nf22stub ClusterIP fd00:0:0:2::806b <none> 8080/TCP,8081/TCP 27h nf2stub ClusterIP fd00:0:0:2::b9f6 <none> 8080/TCP,8081/TCP 27h nf31stub ClusterIP fd00:0:0:2::81b3 <none> 8080/TCP,8081/TCP 27h nf32stub ClusterIP fd00:0:0:2::f307 <none> 8080/TCP,8081/TCP 27h nf3stub ClusterIP fd00:0:0:2::4d15 <none> 8080/TCP,8081/TCP 27h ocamf2 ClusterIP fd00:0:0:2::9392 <none> 8091/TCP,8086/TCP 27h ocats-policy LoadBalancer fd00:0:0:2::ac02 10.75.206.199,2606:b400:605:b82e::17 8080:31931/TCP,5001:30343/TCP 27h ocdiam-sim-1 ClusterIP fd00:0:0:2::9595 <none> 8089/TCP,3868/TCP 27h ocdiam-sim-2 ClusterIP fd00:0:0:2::95a9 <none> 8089/TCP,3868/TCP 27h ocdiam-sim-3 ClusterIP fd00:0:0:2::72a8 <none> 8089/TCP,3868/TCP 27h ocdiam-sim-4 ClusterIP fd00:0:0:2::9d47 <none> 8089/TCP,3868/TCP 27h ocdns-stub ClusterIP fd00:0:0:2::3e80 <none> 53/UDP,6236/TCP 27h ocpcf-altsvc-cache ClusterIP None <none> 8000/TCP 6d3h ocpcf-egw-cache ClusterIP None <none> 8000/TCP 6d3h ocpcf-igw-cache ClusterIP None <none> 8000/TCP 6d3h ocpcf-occnp-alternate-route ClusterIP fd00:0:0:2::6f05 <none> 8000/TCP 6d3h ocpcf-occnp-app-info ClusterIP fd00:0:0:2::ce38 <none> 8000/TCP 6d3h ocpcf-occnp-audit ClusterIP fd00:0:0:2::8afd <none> 8000/TCP 6d3h ocpcf-occnp-binding ClusterIP fd00:0:0:2::bfde <none> 8000/TCP,9443/TCP 6d3h ocpcf-occnp-bulwark ClusterIP fd00:0:0:2::eb5a <none> 8000/TCP 6d3h ocpcf-occnp-bulwark-coherence-headless ClusterIP None <none> 6801/TCP 6d3h ocpcf-occnp-chf-connector ClusterIP fd00:0:0:2::a5cf <none> 8000/TCP,9443/TCP 6d3h ocpcf-occnp-config-mgmt LoadBalancer fd00:0:0:2::3754 2606:b400:605:b82e::e 8000:30852/TCP 6d3h ocpcf-occnp-config-server ClusterIP fd00:0:0:2::4c8f <none> 8000/TCP 6d3h ocpcf-occnp-diameter-connector ClusterIP fd00:0:0:2::4e58 <none> 8000/TCP,3868/TCP 6d3h ocpcf-occnp-egress-gateway ClusterIP fd00:0:0:2::d099 <none> 8000/TCP 6d3h ocpcf-occnp-ingress-gateway LoadBalancer fd00:0:0:2::21a5 10.75.206.211,2606:b400:605:b82e::11 80:32447/TCP 6d3h ocpcf-occnp-ldap-gateway ClusterIP fd00:0:0:2::e9e8 <none> 8000/TCP,9443/TCP 6d3h ocpcf-occnp-notifier ClusterIP fd00:0:0:2::cca <none> 8000/TCP 6d3h ocpcf-occnp-nrf-client-cache ClusterIP None <none> 5907/TCP 6d3h ocpcf-occnp-nrf-client-nfdiscovery ClusterIP fd00:0:0:2::d9c5 <none> 8000/TCP,9443/TCP 6d3h ocpcf-occnp-nrf-client-nfmanagement ClusterIP fd00:0:0:2::2cfe <none> 8000/TCP,9443/TCP 6d3h ocpcf-occnp-nwdaf-agent ClusterIP fd00:0:0:2::1f36 <none> 8000/TCP 6d3h ocpcf-occnp-oc-diam-gateway LoadBalancer fd00:0:0:2::1a57 10.75.206.210,2606:b400:605:b82e::10 3868:30449/TCP 6d3h ocpcf-occnp-oc-diam-gateway-coherence-headless ClusterIP None <none> 5801/TCP 6d3h ocpcf-occnp-oc-diam-gateway-headless ClusterIP None <none> 3868/TCP,8000/TCP 6d3h ocpcf-occnp-oc-diam-gateway-internal ClusterIP fd00:0:0:2::d3a2 <none> 8000/TCP 6d3h ocpcf-occnp-pcf-am ClusterIP fd00:0:0:2::7fde <none> 8000/TCP,9443/TCP 6d3h ocpcf-occnp-pcf-sm ClusterIP fd00:0:0:2::b43d <none> 8000/TCP,9443/TCP 6d3h ocpcf-occnp-pcf-ue ClusterIP fd00:0:0:2::3beb <none> 8000/TCP,9443/TCP 6d3h ocpcf-occnp-perf-info ClusterIP fd00:0:0:2::4df3 <none> 8000/TCP 6d3h ocpcf-occnp-policy-ds ClusterIP fd00:0:0:2::ea79 <none> 8000/TCP,8443/TCP 6d3h ocpcf-occnp-pre ClusterIP fd00:0:0:2::a9d5 <none> 8000/TCP 6d3h ocpcf-occnp-query ClusterIP fd00:0:0:2::869c <none> 8000/TCP 6d3h ocpcf-occnp-udr-connector ClusterIP fd00:0:0:2::fb36 <none> 8000/TCP,9443/TCP 6d3h ocpcf-occnp-usage-mon ClusterIP fd00:0:0:2::4dca <none> 8000/TCP,8443/TCP 6d3h - To access the ATS GUI with an IPv6, the IP in IPv6 of ocats and the port 8080
are entered in the browser URL of ATS (Jenkins).
Figure 3-25 Accessing ATS GUI using IPv6 in Dual Stack
Alternate Route Service Configurations
To edit the Alternate Route Service deployment file (ocpcf-occnp-alternate-route) that points to DNS Stub, perform the following steps:
- Run the following command to get searches information from dns-bind
pod to enable communication between Alternate Route and dns-bind
service:
The following output is displayed after running the command:kubectl exec -it <dns-bind pod> -n <NAMESPACE> -- /bin/bash -c 'cat /etc/resolv.conf' | grep search | tr ' ' '\n' | grep -v 'search'By default alternate service will point to CoreDNS and you will see following settings in deployment file:Figure 3-26 Sample Output
Figure 3-27 Alternate Route Service Deployment File
- Run the following command to edit the deployment file and add the following
content in alternate service to query DNS
stub:
$kubectl edit deployment ocpcf-occnp-alternate-route -n ocpcf- Add the IP Address of the nameserver that you have recorded after installing the DNS stub (cluster IP Address of DNS Stub).
- Add the search information one by one which you recorded earlier.
- Set dnsPolicy to
"None".
dnsConfig: nameservers: - 10.233.33.169 // cluster IP of DNS Stub searches: - ocpcf.svc.occne15-ocpcf-ats - svc.occne15-ocpcf-ats - occne15-ocpcf-ats dnsPolicy: None
For example:Figure 3-28 Example
NRF client configmap
In the-application-config
configmap, configure the following parameters with the respective values:
primaryNrfApiRoot=nf1stub.<namespace_gostubs_are_deployed_in>.svc:8080Example:
primaryNrfApiRoot=nf1stub.ocats.svc:8080secondaryNrfApiRoot=nf1stub.ocats.svc:8080 (Remove the secondaryNrfApiRoot)- nrfClientSubscribeTypes=UDR, CHF, NWDAF
- supportedDataSetId=POLICY (Remove the supportedDataSetId )
Note:
Configure these values at the time of Policy deployment.Note:
To get all configmaps in your namespace, execute the following command:kubectl get configmaps -n
<Policy_namespace>
Persistent Volume (Optional)
If persistent volume is used, follow the post-installation steps provided in the Persistent Volume for 5G ATS section.
3.6 Installing ATS for SEPP
This section describes Automated Testing Suite (ATS) installation procedures for Security Edge Protection Proxy (SEPP) in a cloud native environment.
3.6.1 Resource Requirements
Total Number of Resources
The resources required to install SEPP-ATS are as follows:
Table 3-21 Total Number of Resources
| Resource | CPUs | Memory(GB) | Storage(GB) |
|---|---|---|---|
| SEPP SUT Total | 15.1 | 29.128 | 0 |
| cnDBTier Total | 40 | 40 | 20 |
| ATS Total | 5 | 5 | 1 |
| Grand Total SEPP ATS | 60.1 | 74.128 | 21 |
Resource Details
The details of resources required to install SEPP-ATS are as follows:
Table 3-22 Resource Details
| Microservice | CPUs Required per Pod | Memory Required per Pod (GB) | Storage PVC Required per Pod (GB) | # Replicas (regular deployment) | # Replicas (ATS deployment) | CPUs Required - Total | Memory Required - Total (GB) | Storage PVC Required - Total (GB) |
|---|---|---|---|---|---|---|---|---|
| SEPP Pods | ||||||||
| n32-ingress-gateway | 1.5 | 2 | 0 | 1 | 1 | 1.5 | 2 | 0 |
| n32-egress-gateway | 1.5 | 2 | 0 | 1 | 1 | 1.5 | 2 | 0 |
| plmn-ingress-gateway | 1.5 | 2 | 0 | 1 | 1 | 1.5 | 2 | 0 |
| plmn-egress-gateway | 1.5 | 2 | 0 | 1 | 1 | 1.5 | 2 | 0 |
| pn32f-svc | 1 | 2 | 0 | 1 | 1 | 1 | 2 | 0 |
| cn32f-svc | 1 | 2 | 0 | 1 | 1 | 1 | 2 | 0 |
| cn32c-svc | 0.5 | 1 | 0 | 1 | 1 | 0.5 | 1 | 0 |
| pn32c-svc | 0.5 | 1 | 0 | 1 | 1 | 0.5 | 1 | 0 |
| config-mgr-svc | 1 | 2 | 0 | 1 | 1 | 1 | 2 | 0 |
| nrf-client-nfdiscovery | 1 | 2 | 0 | 1 | 1 | 1 | 2 | 0 |
| nrf-client-nfmanagement | 1 | 1 | 0 | 1 | 1 | 1 | 1 | 0 |
| ocpm-config-server | 0.5 | 1 | 0 | 1 | 1 | 0.5 | 1 | 0 |
| appinfo | 0.5 | 2 | 0 | 1 | 1 | 0.5 | 2 | 0 |
| perfinfo | 0.1 | 0.128 | 0 | 1 | 1 | 0.1 | 0.128 | 0 |
| nf-mediation | 1 | 1 | 0 | 1 | 1 | 1 | 1 | 0 |
| alternate-route | 1 | 1 | 0 | 1 | 1 | 1 | 1 | 0 |
| coherence-svc | 1 | 2 | 0 | 1 | 1 | 1 | 2 | 0 |
| SEPP SUT Totals | 15.1 CPU | 25.128 GB | 0 | |||||
| ATS | ||||||||
| ATS Behave | 3 | 3 | 1 (Optional) | 1 | 1 | 3 | 3 | 1 |
| ATS Stub (Python) | .5 | .5 | 0 | 1 | 1 | .5 | .5 | 0 |
| ATS Stub-2 (Python) | .5 | .5 | 0 | 1 | 1 | .5 | .5 | 0 |
| ATS Stub-3 (Python) | .5 | .5 | 0 | 1 | 1 | .5 | .5 | 0 |
| ATS Stub-4 (Python) | .5 | .5 | 0 | 1 | 1 | .5 | .5 | 0 |
| ATS Totals | 5 | 5 | 1 | |||||
| DB Tier Pods (minimum of 4 worker nodes required) | ||||||||
| vrt-launcher-dt-1.cluster.local | 4 | 4 | 2 | 2 | 1 | 4 | 4 | 2 |
| vrt-launcher-dt-2.cluster.local | 4 | 4 | 2 | 2 | 1 | 4 | 4 | 2 |
| vrt-launcher-dt-3.cluster.local | 4 | 4 | 2 | 2 | 1 | 4 | 4 | 2 |
| vrt-launcher-dt-4.cluster.local | 4 | 4 | 2 | 2 | 1 | 4 | 4 | 2 |
| vrt-launcher-mt-1.cluster.local | 4 | 4 | 2 | 2 | 1 | 4 | 4 | 2 |
| vrt-launcher-mt-2.cluster.local | 4 | 4 | 2 | 2 | 1 | 4 | 4 | 2 |
| vrt-launcher-mt-3.cluster.local | 4 | 4 | 2 | 2 | 1 | 4 | 4 | 2 |
| vrt-launcher-sq-1.cluster.local | 4 | 4 | 2 | 2 | 1 | 4 | 4 | 2 |
| vrt-launcher-sq-2.cluster.local | 4 | 4 | 2 | 2 | 1 | 4 | 4 | 2 |
| vrt-launcher-db-installer.cluster.local | 4 | 4 | 2 | 2 | 1 | 4 | 4 | 2 |
| DB Tier Totals | 40 | 40 | 20 | |||||
3.6.1.1 SEPP ATS Compatibility Matrix
The following table lists the versions SEPP ATS and the comapability with the SEPP and ATS framework:
Table 3-23 SEPP ATS Compatibility Matrix
| SEPP ATS Release | SEPP Release | ATS Framework version |
|---|---|---|
| 26.1.200 | 26.1.200 | 26.1.201 |
| 25.2.200 | 25.2.200 | 25.2.204 |
| 25.2.100 | 25.2.100 | 25.2.100 |
| 25.1.201 | 25.1.200 | 25.1.202 |
| 25.1.200 | 25.1.200 | 25.1.202 |
3.6.2 Downloading the ATS Package
Locating and Downloading ATS and Simulator Images
To locate and download the ATS Image from MOS:
- Log in to My Oracle Support with your credentials.
- Select the Patches and Updates tab to locate the patch.
- In the Patch Search window, click Product or Family (Advanced).
- Enter Oracle Communications Cloud Native Core - 5G in the Product field.
- Select Oracle Communications Cloud Native Core Security Edge Protection Proxy <release_number> from Release drop-down.
- Click Search. The Patch Advanced Search Results list appears.
- Select the required ATS patch from the search results. The Patch Details window appears.
- Click Download. The File Download window appears.
- Click the <p********_<release_number>_Tekelec>.zip file to downlaod the CNC SEPP ATS package file.
- Untar the zip file to access all the ATS Images. The ocsepp-ats
directory has the following files:
The
csardirectory has following files:ocats_ocsepp_csar_26.1.201_0_0.zip ocats_ocsepp_csar_26.1.201_0_0.zip.sha256Note:
The above zip file contains all the images and custom values required for 26.1.201 release of OCATS-OCSEPP. - The
ocats_ocsepp_csar_26.1.201_0_0.zipfile has following definitions:├── Definitions │ ├── ocats_ocsepp_cne_compatibility.yaml │ └── ocats_ocsepp.yaml ├── Files │ ├── ChangeLog.txt │ ├── Helm │ │ └── ocats-sepp-26.1.201.tgz (Helm Charts) │ ├── Licenses │ ├── ocats-sepp-26.1.201.tar (BDD client image) │ ├── Oracle.cert │ ├── seppstub-26.1.201.tar (Stub server image) │ └── Tests ├── Scripts/ │ ├── ocats_ocsepp_tests_jenkinsjobs_26.1.201.tgz │ ├── ├──jobs (For Persistent Volume) │ └── ├──ocsepp_tests (For Persistent Volume) │ └── ocats_ocsepp_values_26.1.201.yaml (Custom values file for installation) ├── ocats_ocsepp.mf └── TOSCA-Metadata └── TOSCA.meta - Copy the zip file to Kubernetes cluster where you want to deploy ATS
3.6.3 Pushing the Images to Customer Docker Registry
Preparing to Deploy ATS and Stub Pod in Kubernetes Cluster
To deploy ATS and Stub Pod in Kubernetes Cluster:
- Run the following command to extract tar file content:
unzip ocats_ocsepp_csar_26_1_201_0_0.zipThe following docker image tar files are located at Files folder:- ocats-sepp-26.1.201.tar
- seppstub-26.1.201.tar
- Run the following commands in your cluster to load the ATS docker image, '
ocats-sepp-26.1.201.tar'' and Stub docker imageseppstub-26.1.201.tar, and push it to your registry.$ docker load -i ocats-sepp-26.1.201.tar $ docker load -i seppstub-26.1.201.tar $ docker tag ocats/ocats-sepp:26.1.201 <local_registry>/ocats/ocats-sepp:26.1.201 $ docker tag ocats/seppstub:26.1.201 <local_registry>/ocats/seppstub:26.1.201 $ docker push <local_registry>/ocats/ocats-sepp:26.1.201 $ docker push <local_registry>/ocats/seppstub:26.1.201 - Run the following command to get the helm charts are located in Helm directory of files folder:
The output of this command is:tar -xvf ocats-sepp-26.1.201.tgzocats-sepp/ ocats-sepp/Chart.yaml ocats-sepp/charts/ ocats-sepp/values.yaml - Create a copy of the custom values located at Scripts/ocats_ocsepp_values_26.1.201.yaml and update it for image name, tag and other parameters as per the requirement.
3.6.4 Creating Secrets and Supporting TLS 1.2 and TLS 1.3
Note:
If SEPP ATS is deploying in ASM, the following procedures are not required.3.6.4.1 Configuring Root Certificate
The following are the steps to configure the root certificate (caroot.cer):
Note:
- Use the same root certificate (
caroot.cer) and key which is used for creating the SEPP certificates. - If the user has already generated the
caroot.cerandcakey.pemfile while deploying SEPP then user can skip to Generate ATS certificate step and also note down the {PEM_PHRASE} which was used to create cakey.pem file for further ats certificate creation steps. - Both the ATS and SEPP must have same root certificate.
- In case
caroot.ceris not available for SEPP, createssl.conf filefor SEPP using the following format:# Creation of CSEPP Certs, Fqdn should be changed #ssl.conf [ req ]default_bits = 4096 distinguished_name = req_distinguished_namereq_extensions = req_ext [ req_distinguished_name ] countryName = Country Name (2 letter code) countryName_default = IN stateOrProvinceName = State or Province Name (full name) stateOrProvinceName_default = Karnataka localityName = Locality Name (eg, city) localityName_default = Bangalore organizationName = Organization Name (eg, company) organizationName_default = Oracle commonName = sepp1.inter.oracle.com commonName_max = 64 commonName_default = sepp1.inter.oracle.com [ req_ext ] subjectAltName = @alt_names [ v3_ca ] basicConstraints = critical,CA:TRUE,pathlen:0 keyUsage = critical,keyCertSign,cRLSign subjectKeyIdentifier = hash authorityKeyIdentifier = keyid:always,issuer [ server_ext ] basicConstraints = critical,CA:FALSE keyUsage = critical,digitalSignature,keyEncipherment extendedKeyUsage = serverAuth subjectAltName = @alt_names [ client_ext ] basicConstraints = critical,CA:FALSE keyUsage = critical,digitalSignature,keyEncipherment extendedKeyUsage = clientAuth subjectAltName = @alt_names [ mtls_ext ] basicConstraints = critical,CA:FALSE keyUsage = critical,digitalSignature,keyEncipherment extendedKeyUsage = serverAuth,clientAuth subjectAltName = @alt_names [alt_names] IP = 127.0.0.1 DNS.1 = sepp1.inter.oracle.com - Set the following environment variables:
export PEM_PHRASE=NextGen1 export DEPLOYMENT_NAMESPACE=sepp1 export SEPP_FQDN="${DEPLOYMENT_NAMESPACE}.inter.oracle.com" - Run the following command to create the required files:
# Generate the Root CA: openssl genrsa -out cakey.pem 4096 openssl req -new -key cakey.pem -out careq.pem \ -passout pass:${PEM_PHRASE} \ -subj "/C=IN/ST=Karnataka/L=Bangalore/O=Oracle/CN=sepp1.inter.oracle.com" openssl x509 -signkey cakey.pem \ -req \ -days 3650 \ -in careq.pem \ -out caroot.cer \ -sha256 \ -extensions v3_ca \ -extfile ssl.conf # Generate RSA certificates: openssl genrsa -out rsa_private_key 2048 openssl rsa -in rsa_private_key \ -outform PEM \ -out rsa_private_key_pkcs1.pem openssl req -new \ -key rsa_private_key \ -out rsa_certificate.csr \ -config ssl.conf \ -subj "/C=IN/ST=Karnataka/L=Bangalore/O=Oracle/CN=${SEPP_FQDN}" openssl x509 -req \ -in rsa_certificate.csr \ -CA caroot.cer \ -CAkey cakey.pem \ -CAcreateserial \ -out rsa_certificate.crt \ -days 365 \ -sha256 \ -extfile ssl.conf \ -extensions mtls_ext openssl req -new \ -key rsa_private_key \ -out ocsepp.csr \ -config ssl.conf \ -subj "/C=IN/ST=Karnataka/L=Bangalore/O=Oracle/CN=${SEPP_FQDN}" openssl x509 -req \ -in ocsepp.csr \ -CA caroot.cer \ -CAkey cakey.pem \ -CAserial caroot.srl \ -out ocsepp.cer \ -days 365 \ -sha256 \ -extfile ssl.conf \ -extensions mtls_ext # Generate ECDSA certificates: openssl ecparam -genkey -name prime256v1 -out host.key openssl req -new \ -sha256 \ -key host.key \ -nodes \ -out ecdsa_certificate.csr \ -config ssl.conf \ -subj "/C=IN/ST=Karnataka/L=Bangalore/O=Oracle/CN=${SEPP_FQDN}" openssl x509 -req \ -in ecdsa_certificate.csr \ -CA caroot.cer \ -CAkey cakey.pem \ -CAserial caroot.srl \ -extfile ssl.conf \ -extensions mtls_ext \ -out ssl_ecdsa_certificate.crt \ -days 730 \ -sha256 openssl pkcs8 -topk8 \ -in host.key \ -out ssl_ecdsa_private_key.pem \ -nocrypt echo "${PEM_PHRASE}" > trust.txt echo "${PEM_PHRASE}" > key.txt echo 1234 > serial.txtNote:
Both ATS and SEPP must have same root certificate.
3.6.4.2 Generating ATS Certificate
The following are the steps to configure the ATS certificate:
- Create and edit the
ssl.conffile as follows:Note:
- While trying to access the GUI with DNS, ensure that the common Name_default is the same as the DNS name being used.
- Ensure that the DNS is in the format
<service_name>.<namespace>.<cluster_domain> - The user can add multiple DNS like DNS.1, DNS.2 so on.
- The ATS_HELM_RELEASE_NAME is the release name which will be used to deploy ATS.
- In the alt_names section of the
ssl.conf, IPs has to be listed down through which ATS GUI will be opened. We can add multiple IPs like IP.1, IP.2 so on. - All stubserver service names (
({ATS_HELM_RELEASE_NAME}-stubserver.{ats-namespace},{ATS_HELM_RELEASE_NAME}-stubserver-2.{ats-namespace}, {ATS_HELM_RELEASE_NAME}-stubserver-3.{ats-namespace})must be in Subject Alternative Name in certificate. - Update ocats service name (
${ATS_HELM_RELEASE_NAME}-ocats.${DEPLOYMENT_NAMESPACE}.svc.cluster.local) in the commonName, commonName_default and DNS name in alt_names section.
#ssl.conf [ req ] default_bits = 4096 distinguished_name = req_distinguished_name req_extensions = req_ext [ req_distinguished_name ] countryName = Country Name (2 letter code) countryName_default = IN stateOrProvinceName = State or Province Name (full name) stateOrProvinceName_default = Karnataka localityName = Locality Name (eg, city) localityName_default = Bangalore organizationName = Organization Name (eg, company) organizationName_default = Oracle commonName = ${ATS_HELM_RELEASE_NAME}-ocats.${DEPLOYMENT_NAMESPACE}.svc.cluster.local commonName_max = 64 commonName_default = ${ATS_HELM_RELEASE_NAME}-ocats.${DEPLOYMENT_NAMESPACE}.svc.cluster.local [ req_ext ] subjectAltName = @alt_names [alt_names] IP.1 = 127.0.0.1 IP.2 = 10.75.217.5 #Mandtory values DNS.1 = ${ATS_HELM_RELEASE_NAME}-ocats.${DEPLOYMENT_NAMESPACE}.svc.cluster.local DNS.2 = ${ATS_HELM_RELEASE_NAME}-stubserver.${DEPLOYMENT_NAMESPACE} DNS.3 = ${ATS_HELM_RELEASE_NAME}-stubserver-2.${DEPLOYMENT_NAMESPACE} DNS.4 = ${ATS_HELM_RELEASE_NAME}-stubserver-3.${DEPLOYMENT_NAMESPACE} DNS.5 = ${ATS_HELM_RELEASE_NAME}-stubserver-4.${DEPLOYMENT_NAMESPACE} DNS.6 = localhost - Run the following command to create a
certificate signing requestor csr:[cloud-user@star23-bastion-1 ocats]$ openssl req -config ssl.conf -newkey rsa:2048 -days 1000 -nodes -keyout rsa_private_key_pkcs1.key > ssl_rsa_certificate.csrOutput:Ignoring -days; not generating a certificate Generating a RSA private key ...+++++ ........+++++ writing new private key to 'rsa_private_key_pkcs1.key' ----- You are about to be asked to enter information that will be incorporated into your certificate request. What you are about to enter is what is called a Distinguished Name or a DN. There are quite a few fields but you can leave some blank For some fields there will be a default value, If you enter '.', the field will be left blank. ----- Country Name (2 letter code) [IN]: State or Province Name (full name) [KA]: Locality Name (eg, city) [BLR]: Organization Name (eg, company) [ORACLE]: Common Name (e.g. server FQDN or YOUR name) [ocats]: [cloud-user@star23-bastion-1 ocats]$ openssl rsa -in rsa_private_key_pkcs1.key -outform PEM -out rsa_private_key_pkcs1.pem [cloud-user@star23-bastion-1 ocats]$ openssl req -new -key rsa_private_key -out ocats.csr -config ssl.conf -subj '/C=IN/ST=Karnataka/L=Bangalore/O=Oracle/CN=sepp1.inter.oracle.com/emailAddress=xyz@oracle.com' [cloud-user@star23-bastion-1 ocats]$ openssl x509 -CA caroot.cer -CAkey cakey.pem -CAserial serial.txt -req -in ocats.csr -out ocats.cer -days 365 -extfile ssl.conf -extensions req_ext -passin pass:${PEM_PHRASE} [cloud-user@star23-bastion-1 ocats]$ openssl ecparam -genkey -name prime256v1 -out host.key [cloud-user@star23-bastion-1 ocats]$ openssl req -new -sha256 -key host.key -nodes -out ecdsa_certificate.csr -config ssl.conf -subj "/C=IN/ST=Karnataka/L=Bangalore/O=Oracle/CN='${HELM_ATS_RELEASE_NAME}'-ocats.'${DEPLOY_NAMESPACE}'.'${DOMAIN}'" [cloud-user@star23-bastion-1 ocats]$ openssl x509 -CA caroot.cer -req -sha256 -days 730 -in ecdsa_certificate.csr -CAkey cakey.pem -CAcreateserial -extfile ssl.conf -extensions req_ext -out ssl_ecdsa_certificate.crt -passin pass:${PEM_PHRASE} [cloud-user@star23-bastion-1 ocats]$ openssl pkcs8 -topk8 -in host.key -out ssl_ecdsa_private_key.pem -nocrypt [cloud-user@star23-bastion-1 ocats]$ echo ${PEM_PHRASE} > trust.txt [cloud-user@star23-bastion-1 ocats]$ echo ${PEM_PHRASE} > key.txt - Run the following command to verify whether all configurations are
done:
openssl req -text -noout -verify -in ssl_rsa_certificate.csr - Run the following command to sign the certificate signing request or csr file with root certificate:
[cloud-user@star23-bastion-1 ocats]$ openssl x509 -extfile ssl.conf -extensions req_ext -req -in ssl_rsa_certificate.csr -days 1000 -CA caroot.cer -CAkey cakey.pem -set_serial 04 > ssl_rsa_certificate.crtOutput:Signature ok subject=C = IN, ST = KA, L = BLR, O = ORACLE, CN = sepp-ats-rel-ocats.testns.svc.cluster.local Getting CA Private Key [cloud-user@star23-bastion-1 ocats]$Note:
When the output prompts for the current password, enter the password was used to createcakey.pemfile. - Verify whether the certificate is properly signed by root certificate:
[cloud-user@star23-bastion-1 ocats]$ openssl verify -CAfile caroot.cer ssl_rsa_certificate.crtOutput:
ssl_rsa_certificate.crt: OK - For then jenkins to support GUI access through https, a jks file has
to be created. Perform the following steps to generate jks file for Jenkins
Server:
- Run the following command to generate the
.p12 keystorefile:[cloud-user@star23-bastion-1 ocats]$ openssl pkcs12 -inkey rsa_private_key_pkcs1.key -in ssl_rsa_certificate.crt -export -out certificate.p12Output:Enter Export Password: Verifying - Enter Export Password:Note:
When the output prompts for the password, enter the password and note it down, as it is required for creating the jks file.
- Run the following command to generate the
- Run the following command to convert
.p12file in jks format file to be used in Jenkins Server:Note:
- Esure to use the same password used for creating jks file and for creating the .p12 file.
- Java should be pre-installed to run the keytool utility.
[cloud-user@star23-bastion-1 ocats]$ keytool -importkeystore -srckeystore ./certificate.p12 -srcstoretype pkcs12 -destkeystore jenkinsserver.jks -deststoretype JKSOutput:The generated file,Importing keystore ./certificate.p12 to jenkinsserver.jks... Enter destination keystore password: Re-enter new password: Enter source keystore password: Entry for alias 1 successfully imported. Import command completed: 1 entries successfully imported, 0 entries failed or cancelledjenkinserver.jksmust be given to the jenkins server.
3.6.4.3 Creating ATS Secret and Configuring Helm chart
Note:
The user can decide whether to use the generated CA signed certificate or self-signed certificate.- Run the following command to create secret:
kubectl create secret generic ocats-sepp-secret --from-file=jenkinsserver.jks --from-file=ssl_rsa_certificate.crt --from-file=rsa_private_key_pkcs1.key --from-file=caroot.cer --from-literal=jks_password=${JKS_PASS} -n <deployment_namespace>Note:
Use the same password forJKS_PASSthat was used during the creation of the jenkinserver.jksfile. - Run the following command to verify the secret:
[cloud-user@star23-bastion-1 ~]$ kubectl describe secret ocats-sepp-secret -n testnsOutput:Name: ocats-sepp-secret Namespace: seppsvc Labels: <none> Annotations: <none> Type: Opaque Data ==== caroot.cer: 1147 bytes ssl_rsa_certificate.crt: 1424 bytes jenkinsserver.jks: 2357 bytes rsa_private_key_pkcs1.key: 1675 bytes
Changes to the Helm charts:
The following changes must be updated in the
ocats_ocsepp_values_<version>.yaml file:
- The Helm parameter
atsGuiTLSEnabledmust set to true for ATS to get the certificates and support HTTPS for GUI. If the user does not want to open ATS GUI in HTTPS mode, thenatsGuiTLSEnabledflag should be set to false.atsGuiTLSEnabled: false - The Helm parameter
atsCommunicationTLSEnabledmust set to true for for necessary context variable to be created which can be later used to communicate with other services in HTTPS.- For non-asm deployment
atsCommunicationTLSEnabledflag should be set to true. - For asm deployment
atsCommunicationTLSEnabledflag should be set to false.
atsCommunicationTLSEnabled: true #If set to true, ATS will get necessary variables to communicate with SUT, Stub or other NFs with TLS enabled. It is not required in ASM environment. - For non-asm deployment
- The certificates section of the ocats and stubserver section of the ats custom values file must be updated as follows:
Add caroot certificate in browser to access the ATS GUI. Thecertificates: cert_secret_name: "ocats-sepp-secret" ca_cert: "caroot.cer" client_cert: "ssl_rsa_certificate.crt" private_key: "rsa_private_key_pkcs1.key" # This parameter is needed when atsGuiTLSEnabled is set to true. This file is necessary for ATS GUI to be opend with secured TLS protocol. The file caroot.pem, used during creation of jks file needs to be passed for Jenkins/ATS API communication. jks_file: "jenkinsserver.jks"caroot.cerfile certificate created by us will be added to Truststore, in this case the browser.
Note:
Future versions of these browsers may involve different menu options. For more information on importing root certificate, see the browser documentation to add a self-signed certificate to the browser as a trusted certificate.- In the Chrome browser, navigate to the settings and search for certificates.
- Click the security option that appears next to search.
- Click the Manage Device Certificate option. The Keychain Access window opens.
- Search the tab certificate and drag and drop the downloaded caroot certificate.
- Find the uploaded certificate in the list, usually listed by a temporary name.
- Double click the certificate and expand the Trust option.
- In When using this certificate option, assign it to "always trust".
- Close the window and validate if it asks for the password.
- Save and restart the browser.
- In the Mozilla Firefox browser, navigate to the settings and search for certificates.
- Click the View Certificate that appears next to search. This opens a Certificate Manager window.
- Navigate to the Authorities section, click the
Import button, and upload the
carootcertificate. - Click the Trust options in the pop-up window and click OK.
- Save and restart the browser.
3.6.5 Generating Hosted SEPP multi-fqdn Certificates and Secrets
Note:
The following steps are steps are only required for Hosted SEPP deployment.This section provides the steps for generating the Hosted SEPP multi-fqdn certificates and secrets.
- Both ATS and SEPP certificates must be created before generating Hosted SEPP certificate.
- Create a separate directory to keep the Hosted SEPP multi-FQDN certificates.
$ mkdir hs-multifqdn-certs - Copy the following default SEPP certificate files generated in the SEPP certificate generation section into this directory:
caroot.cer rsa_private_key rsa_private_key_pkcs1.pem rsa_certificate.crt ocsepp.cer host.key ssl_ecdsa_certificate.crt ssl_ecdsa_private_key.pem trust.txt key.txt ssl.conf - Run the following command to copy these into the new directory:
cp <default-sepp-cert-file> hs-multifqdn-certs/<default-sepp-cert-file> - Copy the ATS certificate files generated in the ATS certificate generation section into the Hosted SEPP multi-FQDN certificate directory with ats_certs_ prefix:
cp caroot.cer hs-multifqdn-certs/ats_certs_caroot.cer cp ssl_rsa_certificate.crt hs-multifqdn-certs/ats_certs_ssl_rsa_certificate.crt cp ocats.cer hs-multifqdn-certs/ats_certs_ocats.cer cp ssl_ecdsa_certificate.crt hs-multifqdn-certs/ats_certs_ssl_ecdsa_certificate.crt cp rsa_private_key_pkcs1.key hs-multifqdn-certs/ats_certs_rsa_private_key_pkcs1.key cp rsa_private_key_pkcs1.pem hs-multifqdn-certs/ats_certs_rsa_private_key_pkcs1.pem cp host.key hs-multifqdn-certs/ats_certs_host.key cp ssl_ecdsa_private_key.pem hs-multifqdn-certs/ats_certs_ssl_ecdsa_private_key.pem cp ssl.conf hs-multifqdn-certs/ats_certs_ssl.conf cp certificate.p12 hs-multifqdn-certs/ats_certs_certificate.p12 cp jenkinsserver.jks hs-multifqdn-certs/ats_certs_jenkinsserver.jks - Change directory to hs-multifqdn-certs:
cd hs-multifqdn-certs - Hosted SEPP Multi-FQDN support requires separate certificate material per Hosted SEPP FQDN. The deployment does not rely on a single shared server certificate covering all Hosted SEPP FQDNs. Instead, each FQDN is configured with its own certificate chain, and all corresponding CA certificates are added to the ATS trust bundle. The Hosted SEPP FQDNs are:
ocats.hp1.inter.oracle.com ocats.hp2.inter.oracle.com ocats.rp1.inter.oracle.com ocats.rp2.inter.oracle.com - Repeat the following steps a to f for certificate-generation and configuration steps for each of the above FQDNs:
- Start with one FQDN, for example "ocats.hp1.inter.oracle.com". Then repeat steps for remaining fqdns.
- Set the following environment variables:
export PEM_PHRASE=NextGen1 export DEPLOYMENT_NAMESPACE=<DEPLOYMENT_NAMESPACE> - Create the SSL config file (Replace <HS_FQDN> with one of the FQDNs mentioned above for example "ocats.hp1.inter.oracle.com"):
Output:cat > "${HS_FQDN}_ssl.conf" << EOF#ssl.conf [ req ] default_bits = 4096 distinguished_name = req_distinguished_name req_extensions = req_ext [ req_distinguished_name ] countryName = Country Name (2 letter code) countryName_default = IN stateOrProvinceName = State or Province Name (full name) stateOrProvinceName_default = Karnataka localityName = Locality Name (eg, city) localityName_default = Bangalore organizationName = Organization Name (eg, company) organizationName_default = Oracle commonName = ${HS_FQDN} commonName_max = 64 commonName_default = ${HS_FQDN} [ req_ext ] subjectAltName = @alt_names [alt_names] IP.1 = 127.0.0.1 DNS.1 = ${HS_FQDN} EOF - Create the CA config file:
cat > "${HS_FQDN}_ca_ssl.conf" << EOF#ca_ssl.conf [v3_ca] basicConstraints = critical,CA:TRUE keyUsage = critical,keyCertSign,cRLSign subjectKeyIdentifier = hash authorityKeyIdentifier = keyid:always,issuer EOF - Run the following commands after exporting the prefix:
Output:export prefix=ocats.hp1.inter.oracle.comopenssl req -new -newkey rsa:4096 -nodes -keyout "${prefix}_cakey.pem" -out "${prefix}_careq.pem" -subj "/C=IN/ST=Karnataka/L=Bangalore/O=Oracle/CN=${prefix}" openssl x509 -signkey "${prefix}_cakey.pem" -req -days 3650 -in "${prefix}_careq.pem" -out "${prefix}_caroot.cer" -extfile "${prefix}_ca_ssl.conf" -extensions v3_ca openssl req -x509 -nodes -sha256 -days 365 -newkey rsa:2048 -keyout "${prefix}_rsa_private_key" -out "${prefix}_rsa_certificate.crt" -subj "/C=IN/ST=Karnataka/L=Bangalore/O=Oracle/CN=${prefix}" openssl rsa -in "${prefix}_rsa_private_key" -outform PEM -out "${prefix}_rsa_private_key_pkcs1.pem" openssl req -new -key "${prefix}_rsa_private_key" -out "${prefix}_ocsepp.csr" -config "${prefix}_ssl.conf" -subj "/C=IN/ST=Karnataka/L=Bangalore/O=Oracle/CN=${prefix}" echo 1234 > "${prefix}_serial.txt" openssl x509 -CA "${prefix}_caroot.cer" -CAkey "${prefix}_cakey.pem" -CAserial "${prefix}_serial.txt" -req -in "${prefix}_ocsepp.csr" -out "${prefix}_ocsepp.cer" -days 365 -extfile "${prefix}_ssl.conf" -extensions req_ext -passin pass:${PEM_PHRASE} openssl ecparam -genkey -name prime256v1 -out "${prefix}_host.key" openssl req -new -sha256 -key "${prefix}_host.key" -nodes -out "${prefix}_ecdsa_certificate.csr" -config "${prefix}_ssl.conf" -subj "/C=IN/ST=Karnataka/L=Bangalore/O=Oracle/CN=${prefix}" openssl x509 -CA "${prefix}_caroot.cer" -req -sha256 -days 730 -in "${prefix}_ecdsa_certificate.csr" -CAkey "${prefix}_cakey.pem" -CAcreateserial -extfile "${prefix}_ssl.conf" -extensions req_ext -out "${prefix}_ssl_ecdsa_certificate.crt" -passin pass:${PEM_PHRASE} openssl pkcs8 -topk8 -in "${prefix}_host.key" -out "${prefix}_ssl_ecdsa_private_key.pem" -nocrypt echo "${PEM_PHRASE}" > "${prefix}_trust.txt" echo "${PEM_PHRASE}" > "${prefix}_key.txt" - Run the following commands after exporting the prefix:
Output:export prefix=ocats.hp1.inter.oracle.comopenssl req -new -newkey rsa:4096 -nodes -keyout "${prefix}_cakey.pem" -out "${prefix}_careq.pem" -subj "/C=IN/ST=Karnataka/L=Bangalore/O=Oracle/CN=${prefix}" openssl x509 -signkey "${prefix}_cakey.pem" -req -days 3650 -in "${prefix}_careq.pem" -out "${prefix}_caroot.cer" -extfile "${prefix}_ca_ssl.conf" -extensions v3_ca openssl req -x509 -nodes -sha256 -days 365 -newkey rsa:2048 -keyout "${prefix}_rsa_private_key" -out "${prefix}_rsa_certificate.crt" -subj "/C=IN/ST=Karnataka/L=Bangalore/O=Oracle/CN=${prefix}" openssl rsa -in "${prefix}_rsa_private_key" -outform PEM -out "${prefix}_rsa_private_key_pkcs1.pem" openssl req -new -key "${prefix}_rsa_private_key" -out "${prefix}_ocsepp.csr" -config "${prefix}_ssl.conf" -subj "/C=IN/ST=Karnataka/L=Bangalore/O=Oracle/CN=${prefix}" echo 1234 > "${prefix}_serial.txt" openssl x509 -CA "${prefix}_caroot.cer" -CAkey "${prefix}_cakey.pem" -CAserial "${prefix}_serial.txt" -req -in "${prefix}_ocsepp.csr" -out "${prefix}_ocsepp.cer" -days 365 -extfile "${prefix}_ssl.conf" -extensions req_ext -passin pass:${PEM_PHRASE} openssl ecparam -genkey -name prime256v1 -out "${prefix}_host.key" openssl req -new -sha256 -key "${prefix}_host.key" -nodes -out "${prefix}_ecdsa_certificate.csr" -config "${prefix}_ssl.conf" -subj "/C=IN/ST=Karnataka/L=Bangalore/O=Oracle/CN=${prefix}" openssl x509 -CA "${prefix}_caroot.cer" -req -sha256 -days 730 -in "${prefix}_ecdsa_certificate.csr" -CAkey "${prefix}_cakey.pem" -CAcreateserial -extfile "${prefix}_ssl.conf" -extensions req_ext -out "${prefix}_ssl_ecdsa_certificate.crt" -passin pass:${PEM_PHRASE} openssl pkcs8 -topk8 -in "${prefix}_host.key" -out "${prefix}_ssl_ecdsa_private_key.pem" -nocrypt echo "${PEM_PHRASE}" > "${prefix}_trust.txt" echo "${PEM_PHRASE}" > "${prefix}_key.txt" - Verify whether the certificate is properly signed by root certificate:
openssl verify -CAfile "${HS_FQDN}_caroot.cer" "${HS_FQDN}_ocsepp.cer" "${HS_FQDN}_ssl_ecdsa_certificate.crt" - Now, create the ATS CA bundle in hs-multifqdn-certs directory:
: > ats_bundle.cer sed -n '/-----BEGIN CERTIFICATE-----/,/-----END CERTIFICATE-----/p' ocats.hp1.inter.oracle.com_caroot.cer >> ats_bundle.cer printf '%s\n' '--------' >> ats_bundle.cer sed -n '/-----BEGIN CERTIFICATE-----/,/-----END CERTIFICATE-----/p' ocats.hp2.inter.oracle.com_caroot.cer >> ats_bundle.cer printf '%s\n' '--------' >> ats_bundle.cer sed -n '/-----BEGIN CERTIFICATE-----/,/-----END CERTIFICATE-----/p' ocats.rp1.inter.oracle.com_caroot.cer >> ats_bundle.cer printf '%s\n' '--------' >> ats_bundle.cer sed -n '/-----BEGIN CERTIFICATE-----/,/-----END CERTIFICATE-----/p' ocats.rp2.inter.oracle.com_caroot.cer >> ats_bundle.cer printf '%s\n' '--------' >> ats_bundle.cer sed -n '/-----BEGIN CERTIFICATE-----/,/-----END CERTIFICATE-----/p' ats_certs_caroot.cer >> ats_bundle.cer - After doing the abovesteps in hs-multifqdn-certs directory, following files will be present:
Figure 3-29 Hosted SEPP Multi FQDN files
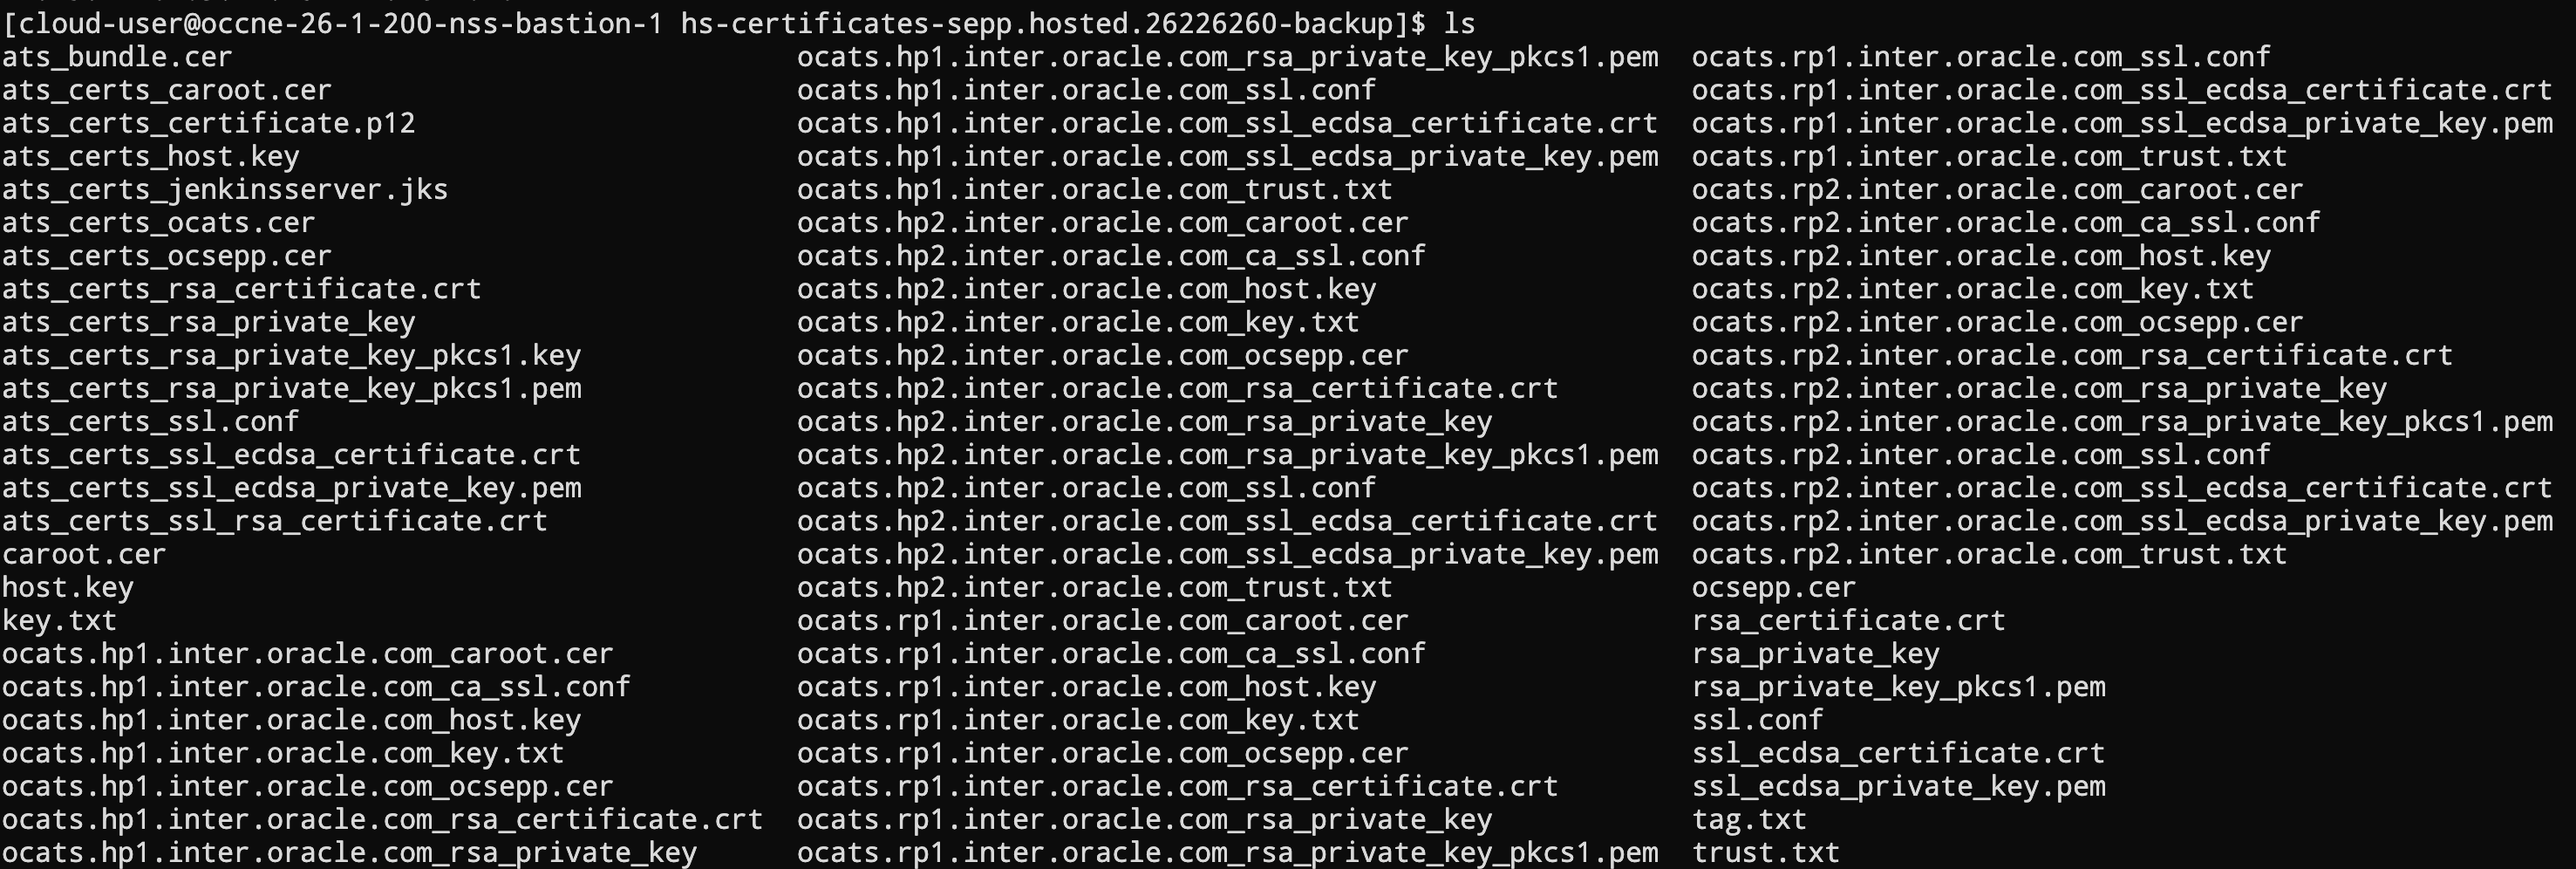
- Create or update the Hosted SEPP secret (ocats-hs-secret) and the n32-ingress-gateway-secret and n32-egress-gateway-secret:
Note:
If n32-ingress-gateway-secret and n32-ingress-gateway-secret have already been created while Hosted SEPP installation, delete them before creating the following secretskubectl create secret generic <n32-ingress-gateway-secret> \ --from-file=hs-multifqdn-certs \ -n "${DEPLOYMENT_NAMESPACE}" \ --dry-run=client -o yaml | kubectl apply -n "${DEPLOYMENT_NAMESPACE}" -f - kubectl create secret generic <n32-egress-gateway-secret> \ --from-file=hs-multifqdn-certs \ -n "${DEPLOYMENT_NAMESPACE}" \ --dry-run=client -o yaml | kubectl apply -n "${DEPLOYMENT_NAMESPACE}" -f - kubectl create secret generic ocats-hs-secret \ --from-file=hs-multifqdn-certs \ -n "${DEPLOYMENT_NAMESPACE}" \ --dry-run=client -o yaml | kubectl apply -n "${DEPLOYMENT_NAMESPACE}" -f -
3.6.6 Create ATS Health Check secret
To enable the ATS health check pipeline, the following configurations needs to be updated
in the ocats_ocsepp_values_<version>.yaml file:
Non OCI Environment
- The following parameters needs to be updated in the base64 encoded version format, occnehostip, occnehostusername, occnehostpassword, envtype.
- On installing ATS, health check secret will be created, and the
health check pipeline will be shown in the ATS GUI. If
healthcheckparameter is set to false, then the health check pipeline will not be visible in the ATS GUI.
ocats:
atsFeatures:
healthcheck: true
sshDetails:
secretname: "healthchecksecret"
occnehostip: "" # $(echo -n '10.75.217.42' | base64), Where occne host ip needs to be provided
occnehostusername: "" # $(echo -n 'cloud-user' | base64), Where occne host username needs to be provided
occnehostpassword: "" # $(echo -n '****' | base64), Where password of host
needs to be provided
envtype: "" # $(echo -n 'OCCNE' | base64), Where occne keyword needs to be providedOCI Environment
- The following parameters needs to be updated in the base64 encoded
version in the
ocats_ocsepp_values_<version>.yamlfile:
ocats:
atsFeatures:
healthcheck: true envtype: "" # $(echo -n 'OCCNE' | base64), Where occne keyword needs to be provided
sshDetails
ociHealthCheck:
passwordAuthenticationEnabled: false
bastion:
ip: "" # $(echo -n '10.75.217.42' | base64), Where occne host ip needs to be provided
username: "" # $(echo -n '10.75.217.42' | base64), Where occne host ip needs to be provided
password: ""
operatorInstance:
ip: "" # $(echo -n '10.75.217.42' | base64), Where occne host ip needs to be provided
username: "" # $(echo -n '10.75.217.42' | base64), Where occne host ip needs to be provided
password: ""3.6.7 Configuring ATS
This section describes how to configure ATS for SEPP.
3.6.7.1 Enabling Aspen Service Mesh
Note:
By default, this feature is disabled.- If ASM is not enabled on the global level for the
namespace, run the following command before deploying
ATS:
kubectl label --overwrite namespace <namespace_name> istio-injection=enabledExample:
kubectl label --overwrite namespace seppsvc istio-injection=enabled - Add the following annotations in the BDD
client section in the
ocats-sepp-custom-values.yamlfile to support ASM:To enable or disable the ASM, update the
ASMEnabledflag to true or false.ASMEnabled: false asm: configMgrPort: 9090 # config manager service port pn32fPort: 9090 # pn32f service port stubServerPort: 8080 # stub server service port plmnIgwPort: 80 # plmn ingress gateway service port n32IgwPort: 443 # n32 ingress gateway service port - Add the following value in the stub-server section in the
ocats-sepp-custom-values.yamlfile to support ASM:To enable or disable the ASM, update the
ASMEnabledflag to true or false.ASMEnabled: false - For asm deployment, set the
atsCommunicationTLSEnabledflag to false as given below:atsCommunicationTLSEnabled: false #If set to true, ATS will get necessary variables to communicate with SUT, Stub or other NFs with TLS enabled. It is not required in ASM environment. - (Optional) The user can configure the resources assigned to the Aspen
Mesh (istio-proxy) sidecars in
ocats_ocsepp_values_<version>.yamlfile sections as follows:asm: istioResources: limits: cpu: 2 memory: 1Gi requests: cpu: 100m memory: 128MiNote:
It is recommended to use the default values of the resources. - In
ocats_ocsepp_values_<version>.yamlfile, parameterexpose_tls_servicein stubserver section should be configured to "null" in ASM mode to deploy stub server in HTTP mode and HTTPS mode to support for bypassing ASM sidecars architecture.stubserver: service: expose_tls_service: null - Update the following parameters in the
ocats_ocsepp_values_<values>.yamlfile file with the appropriate certificate values, as secret creation is now required for ASM mode due to bypassing ASM sidecars architecture.In ocats section:
ocats: certificates: cert_secret_name: "ocats-sepp-secret" ca_cert: "caroot.cer" client_cert: "ssl_rsa_certificate.crt" private_key: "rsa_private_key_pkcs1.key" jks_file: "jenkinsserver.jks" # This parameter is needed when atsGuiTLSEnabled is set to true. This file is necessary for ATS GUI to be opened with secured TLS protocol.
In stubserver section:
tubserver:
env:
cert_secret_name: "ocats-sepp-secret"
ca_cert: "caroot.cer"
client_cert: "ssl_rsa_certificate.crt"
private_key: "rsa_private_key_pkcs1.key"
Note:
- If the SEPP is deployed with ASM enabled and user disables the ASM on the global level, then user needs to redeploy the setup to work without ASM.
- Mediation is supported in ASM from release 25.1.1xx onwards.
3.6.7.2 Configuring NIF
- Update the the following configuration in the
ocsepp-custom-values.yamlfile to run the ATS NIF test cases:nrfclient: nrf-client: configmapApplicationConfig: profile: primaryNrfApiRoot: <ats-release-name>-stubserver.<namespace>:8080 nrfScheme=httpNote:
Replace<ats-release-name>with the actual ATS Helm release name. - Update the the following configuration in the
ocats_ocsepp_values_<version>.yamlfile to run the enable the stubserver-4:stubserver: stubserver2: enabled: true stubserver3: enabled: true stubserver4: enabled: true
Configuring NIF Discovery Initial and Scheduled Delays
nifDiscoveryInitialDelayparameter configures the initial delay period after the starting the pod and before NIF discovery is initiated from the config manager to the NRF.nifDiscoveryInitialDelay:2000nifDiscoveryScheduledDelayparameter configures the scheduled delay before the config manager initiates NIF discovery queries to the NRF.nifDiscoveryScheduledDelay:2000- The following annotation is required to support ATS run as per bypassing
ASM sidecars architecture, do the following changes in the
ocats_ocsepp_values_<values>.yamlfile:deployment: customExtension: annotations: traffic.sidecar.istio.io/excludeInboundPorts: "8443"
3.6.7.3 ATS API
The application programming interface (API) feature provides APIs to perform routine ATS tasks such as starting the ATS suite, monitoring and stopping the ATS suite etc.
By default, this feature is enabled in ATS framework.
For more details about the ATS API feature, refer to ATS API feature section.
3.6.7.4 Enabling Static Port
Note:
ATS supports static port. By default, this feature is disabled.- In the
ocats_ocsepp_values_<version>.yamlfile under service section, set the staticNodePortEnabled parameter value to 'true' and staticNodePort parameter value with valid nodePort.ocats: service: customExtension: labels: {} annotations: {} type: LoadBalancer ports: https: port: "8443" staticNodePortEnabled: false staticNodePort: "" http: port: "8080" staticNodePortEnabled: false staticNodePort: ""
3.6.7.5 Enabling Roaming Hub Mode
SEPP ATS supports two types deployment modes:
- SEPP
- Roaming Hub or Hosted SEPP Mode
Flag has been introduced to select the deployment mode.
#Flag to enable Roaming Hub mode
RHenabled: True3.6.7.6 Configuring Hosted SEPP Mode
SEPP ATS now supports three deployment modes: SEPP, Roaming Hub, and Hosted
SEPP. A flag HSenabled has been introduced to select the Hosted SEPP
deployment mode for running ATS test cases.
Enabling Roaming Hub mode
- Update
ocats_custom_values.yamlto enable Roaming Hub Mode:To enable Roaming Hub, do the following in the
ocats_custom_values.yamlfile:#Flag to enable Roaming Hub mode RHenabled: false
Enabling Hosted SEPP mode
- Update
ocats_custom_values.yamlto enable Hosted SEPP Mode:To enable Hosted SEPP, do the following in the
ocats_custom_values.yamlfile:
Enable the Hosted SEPP parameter:ocats: #Flag to enable hosted Sepp mode (values can be : true /false) HSenabled: false #HSSecret specifies the Kubernetes secret that contains the Hosted SEPP Multi-FQDN certificate bundle used by ATS. HSSecret: "ocats-hs-secret"global: #Flag to enable hosted Sepp mode (values can be : true /false) hostedSEPP: &hostedSEPPEnabled trueNote:
The secret "ocats-hs-secret" should be present prior to ATS installation. See, Generating Hosted SEPP multi-fqdn Certificates and Secrets section to support TLSv1.2 and TLSv1.3 in SEPP Enable HS Mode. - Enable the
multiFqdnparameter and add the requiredfqdnDetailsunder both n32-ingress-gateway and n32-egress-gateway sections. Refer to the certificate files created earlier in the "ATS Framework to Support TLSv1.2 and TLSv1.3 in SEPP" section for updates.Example for the n32-ingress-gateway and n32-egress-gateway:n32-ingress-gateway: multiFqdn: enabled: true fqdnDetails: - fqdn: ocats.hp1.inter.oracle.com caroot_file: "ats_bundle.cer" rsa_certificate_file: "ocats.hp1.inter.oracle.com_ocsepp.cer" rsa_private_key_file: "ocats.hp1.inter.oracle.com_rsa_private_key_pkcs1.pem" key_store_passwd_file: "ocats.hp1.inter.oracle.com_key.txt" trust_store_passwd_file: "ocats.hp1.inter.oracle.com_trust.txt" ssl_ecdsa_certificate_file: "ocats.hp1.inter.oracle.com_ssl_ecdsa_certificate.crt" ssl_ecdsa_private_key_file: "ocats.hp1.inter.oracle.com_ssl_ecdsa_private_key.pem" n32-egress-gateway: multiFqdn: enabled: true fqdnDetails: - fqdn: ocats.hp1.inter.oracle.com caroot_file: "ats_bundle.cer" rsa_certificate_file: "ocats.hp1.inter.oracle.com_ocsepp.cer" rsa_private_key_file: "ocats.hp1.inter.oracle.com_rsa_private_key_pkcs1.pem" key_store_passwd_file: "ocats.hp1.inter.oracle.com_key.txt" trust_store_passwd_file: "ocats.hp1.inter.oracle.com_trust.txt" ssl_ecdsa_certificate_file: "ocats.hp1.inter.oracle.com_ssl_ecdsa_certificate.crt" ssl_ecdsa_private_key_file: "ocats.hp1.inter.oracle.com_ssl_ecdsa_private_key.pem"Note:
After configuring all the ats certificates files, create Kubernetes secrets for the n32-ingress-gateway and n32-egress-gateway using the certificate files listed above. - Update the retryInterval parameter to 5000 in ocsepp-custom-values.yaml. This change reduces the remote PLMN retry interval from the default 30 minutes (300000 ms) to 5 seconds. It enables Config Manager to retry pending N32 handshake attempts quickly, significantly reducing ATS testcase run time and avoiding a 30-minute wait for a single handshake retry.
global: localProfile: retryInterval: 5000 - Configure dedicated N32 gateway TLS Secrets: Update ocsepp-custom-values.yaml so that the N32 ingress and egress gateways use their dedicated TLS Secrets.
Update the k8SecretName fields under service.ssl for both gateways.n32-ingress-gateway: n32-ingress-gateway: volumeMountSecrets: featureSecrets: - ocsepp-n32-igw-secret service: ssl: privateKey: k8SecretName: ocsepp-n32-igw-secret certificate: k8SecretName: ocsepp-n32-igw-secret caBundle: k8SecretName: ocsepp-n32-igw-secret keyStorePassword: k8SecretName: ocsepp-n32-igw-secret trustStorePassword: k8SecretName: ocsepp-n32-igw-secret n32-egress-gateway: volumeMountSecrets: featureSecrets: - ocsepp-n32-egw-secret service: ssl: privateKey: k8SecretName: ocsepp-n32-egw-secret certificate: k8SecretName: ocsepp-n32-egw-secret caBundle: k8SecretName: ocsepp-n32-egw-secret keyStorePassword: k8SecretName: ocsepp-n32-egw-secret trustStorePassword: k8SecretName: ocsepp-n32-egw-secret - Disable
n32cHandshakePlmnIdListValidationEnabledparameter in global section of ocsepp-custom-values.yaml file:global: #Disable for Hosted Sepp (value can be: true/false) n32cHandshakePlmnIdListValidationEnabled: false - For Hosted SEPP deployments, update the SAN extraction regular expression present in the ocsepp-custom-values.yaml to support the format used by the new certificates. It should be updated at two places:
pn32f-svc: configs: extractSANRegex: "SAN=([^ ]+)\\s" pn32c-svc: configs: extractSANRegex: "SAN=([^ ]+)\\s" - Update the first occurence of "target" value in ATS Load Sharing to <ats-release-name>-stubserver-4:
alternate-route: staticVirtualFqdns: #Below Config will be used while running ATS Load SHaring CN32F test cases - name: http://sepp.ats.loadsharing.com alternateFqdns: #Below Target FQDNs needs to be updated for ATS DNS SRV scenarios - target: <ats-release-name>-stubserver port: 8443 priority: 100 weight: 90 - target: <ats-release-name>-stubserver-2 port: 8443 priority: 100 weight: 10 - target: <ats-release-name>-stubserver-3 port: 8443 priority: 1 weight: 90
Configuring Customized Hosted SEPP Error Code
To handle failure scenarios, a customized error code variable has been introduced for Hosted SEPP. Ensure the value matches your configuration:
#Customized error code variable for Hosted SEPP
HSErrCode: "400"3.6.7.7 Configuring Egress Rate Limiting Feature
If the Egress Rate Limiting feature is enabled in SEPP deployment, to run the
Egress Rate Limiter test cases in ATS, EgressRateLimiterFlag parameter
has been introduced in the ocats-sepp-custom-values.yaml file. If the
Egress Rate Limiting feature is disabled in SEPP deployment, ensure to set
EgressRateLimiterFlag parameter to false.
EgressRateLimiterFlag: true/falseFor more information about the feature, see the "Rate Limiting for Egress Roaming Signaling per PLMN" section in Oracle Communications Cloud Native Core, Security Edge Protection Proxy User Guide and the "Configuration Parameters" section in Oracle Communications Cloud Native Core, Security Edge Protection Proxy Installation, Upgrade, and Fault Recovery Guide.
3.6.7.8 Configuring Ingress Rate Limiting Feature
If the Ingress rate limiting feature is enabled in SEPP deployment, to run
the Ingress rate limiter test cases in ATS, IngressRateLimiterFlag parameter
has been introduced in the ocats_ocsepp_values_<version>.yaml file. If the
Ingress rate limiting feature is disabled in SEPP deployment, ensure to set
IngressRateLimiterFlag parameter to false.
IngressRateLimiterFlag: true/falseFor more information about the feature, see the "Rate Limiting for Ingress Roaming Signaling per Remote SEPP Set" section in Oracle Communications Cloud Native Core, Security Edge Protection Proxy User Guide and the "Configuration Parameters" section in Oracle Communications Cloud Native Core, Security Edge Protection Proxy Installation, Upgrade, and Fault Recovery Guide.
3.6.7.9 Configuring Single Service Account
Note:
If the user doesn't want to configure a single service account, skip the following steps.- To configure the single service account across all microservices,
the following parameter must be updated in the
ocats_ocsepp_values_<version>.yamlfile with the service account name that was created while deploying SEPP.ocats: serviceAccountName: "" # Update service account name - In the stubserver section, update the following:
Note:
Here, update the same service account name that was used while deploying SEPP.
stubserver: serviceAccount: create: false name: ""
3.6.7.10 Configuring the Cache Refresh Timeout Value
SEPP supports Refresh ahead cache. To run the ATS cases, cacheRefreshTimeout value must be set to 1000 (ms) so that cache can be updated automatically after every test case is executed when ATS suite is triggered.
To set the cache refresh timeout value:
configs:
cacheRefreshTimeout: 1000 #(ms)
cacheRefreshInitTimeout: 50000 #(ms)Note:
If ATS is not configured, the cacheRefreshTimeout value must be 30000 (ms).
3.6.7.11 Configuring the Topology Cache Refresh Timeout Value
SEPP supports Refresh ahead cache. To run the ATS cases, topologycacheRefreshTimeout value must be set to 1000 (ms) so that cache can be updated automatically after every test case is executed when ATS suite is triggered.
In the ocsepp-custom-values.yaml file, under cn32f-svc and pn32f-svc microservices, set the topologycacheRefreshTimeout parameter value to 1000 (ms).
topologyHiding:
timerConfig:
topologyhidingCacheRefreshTimeout: 30000
topologyhidingCacheRefreshInitTimeout: 50000
topologyhidingHistoryUpdateTimeout: 30000
topologyhidingHistoryRefreshSeconds: 60
config:
topologyHidingStateCheck: true
3.6.7.12 Configuring the Security Counter Measure Cache Refresh Timeout
SEPP supports Refresh ahead cache. To run the ATS cases, you must set the
value of the securityCacheRefreshTimeout parameter to 10 (ms) so that
cache can be automatically updated after every test case is run when ATS suite is
triggered.
In the ocsepp-custom-values.yaml file, under cn32f-svc and
pn32f-svc microservices, set the securityCacheRefreshTimeout
parameter value to 1000 (ms).
configs:
securityCacheRefreshTimeout: 1000 #(ms)
securityCacheRefreshInitTimeout: 50000 #(ms)
3.6.7.13 Configuring n32cHandshakePlmnIdListValidationEnabled
SEPP supports validation of PLMN ID List in n32c capability exchange
message which can be turned off. To run the ATS cases,
n32cHandshakePlmnIdListValidationEnabled value must be set to
true so that testcases validating PLMN ID List in n32c capability exchange message
can be run successfully when ATS suite is triggered.
To set the n32cHandshakePlmnIdListValidationEnabled
value, do the following:
In the ocsepp_custom_values_<version>.yaml file,
under localProfile, set the n32cHandshakePlmnIdListValidationEnabled
parameter value to true.
localProfile:
name: "SEPP-3"
plmnIdList: [{"mcc":"111","mnc":"100"},{"mcc":"111","mnc":"101"},{"mcc":"111","mnc":"102"},{"mcc":"111","mnc":"103"},{"mcc":"111","mnc":"104"},{"mcc":"111","mnc":"105"},{"mcc":"111","mnc":"106"},{"mcc":"111","mnc":"107"},{"mcc":"111","mnc":"108"},{"mcc":"111","mnc":"109"},{"mcc":"111","mnc":"110"},{"mcc":"111","mnc":"111"},{"mcc":"111","mnc":"112"},{"mcc":"111","mnc":"113"},{"mcc":"111","mnc":"114"},{"mcc":"111","mnc":"115"},{"mcc":"111","mnc":"116"},{"mcc":"111","mnc":"117"},{"mcc":"111","mnc":"118"},{"mcc":"111","mnc":"119"},{"mcc":"111","mnc":"120"},{"mcc":"111","mnc":"121"},{"mcc":"111","mnc":"122"},{"mcc":"111","mnc":"123"},{"mcc":"111","mnc":"124"},{"mcc":"111","mnc":"125"},{"mcc":"111","mnc":"126"},{"mcc":"111","mnc":"127"},{"mcc":"111","mnc":"128"},{"mcc":"111","mnc":"129"}]
# Do not change this value, this will be always true
sbiTargetApiRootSupported: true
# Enable PLMN ID List Validation in Exchange Capability Request, Default set to true
n32cHandshakePlmnIdListValidationEnabled: true
# PLMN ID List Validation Type in Exchange Capability Request, can be SUBSET or STRICT only
n32cHandshakePlmnIdListValidationType: "SUBSET"[{"mcc":"111","mnc":"200"},{"mcc":"111","mnc":"201"},{"mcc":"111","mnc":"202"},{"mcc":"111","mnc":"203"},{"mcc":"111","mnc":"204"},{"mcc":"111","mnc":"205"},{"mcc":"111","mnc":"206"},{"mcc":"111","mnc":"207"},{"mcc":"111","mnc":"208"},{"mcc":"111","mnc":"209"},{"mcc":"111","mnc":"210"},{"mcc":"111","mnc":"211"},{"mcc":"111","mnc":"212"},{"mcc":"111","mnc":"213"},{"mcc":"111","mnc":"214"},{"mcc":"111","mnc":"215"},{"mcc":"111","mnc":"216"},{"mcc":"111","mnc":"217"},{"mcc":"111","mnc":"218"},{"mcc":"111","mnc":"219"},{"mcc":"111","mnc":"220"},{"mcc":"111","mnc":"221"},{"mcc":"111","mnc":"222"},{"mcc":"111","mnc":"223"},{"mcc":"111","mnc":"224"},{"mcc":"111","mnc":"225"},{"mcc":"111","mnc":"226"},{"mcc":"111","mnc":"227"},{"mcc":"111","mnc":"228"},{"mcc":"111","mnc":"229"},{"mcc":"111","mnc":"230"},{"mcc":"111","mnc":"231"},{"mcc":"111","mnc":"232"},{"mcc":"111","mnc":"233"},{"mcc":"111","mnc":"234"},{"mcc":"111","mnc":"235"},{"mcc":"111","mnc":"236"},{"mcc":"111","mnc":"237"},{"mcc":"111","mnc":"238"},{"mcc":"111","mnc":"239"},{"mcc":"111","mnc":"240"},{"mcc":"111","mnc":"241"},{"mcc":"111","mnc":"242"},{"mcc":"111","mnc":"243"},{"mcc":"111","mnc":"244"},{"mcc":"111","mnc":"245"},{"mcc":"111","mnc":"246"},{"mcc":"111","mnc":"247"},{"mcc":"111","mnc":"248"},{"mcc":"111","mnc":"249"},{"mcc":"111","mnc":"250"},{"mcc":"111","mnc":"251"},{"mcc":"111","mnc":"252"},{"mcc":"111","mnc":"253"},{"mcc":"111","mnc":"254"},{"mcc":"111","mnc":"255"},{"mcc":"111","mnc":"256"},{"mcc":"111","mnc":"257"},{"mcc":"111","mnc":"258"},{"mcc":"111","mnc":"259"},{"mcc":"111","mnc":"260"},{"mcc":"111","mnc":"261"},{"mcc":"111","mnc":"262"},{"mcc":"111","mnc":"263"},{"mcc":"111","mnc":"264"},{"mcc":"111","mnc":"265"},{"mcc":"111","mnc":"266"},{"mcc":"111","mnc":"267"},{"mcc":"111","mnc":"268"},{"mcc":"111","mnc":"269"},{"mcc":"111","mnc":"270"},{"mcc":"111","mnc":"271"},{"mcc":"111","mnc":"272"},{"mcc":"111","mnc":"273"},{"mcc":"111","mnc":"274"},{"mcc":"111","mnc":"275"},{"mcc":"111","mnc":"276"},{"mcc":"111","mnc":"277"},{"mcc":"111","mnc":"278"},{"mcc":"111","mnc":"279"},{"mcc":"111","mnc":"280"},{"mcc":"111","mnc":"281"},{"mcc":"111","mnc":"282"},{"mcc":"111","mnc":"283"},{"mcc":"111","mnc":"284"},{"mcc":"111","mnc":"285"},{"mcc":"111","mnc":"286"},{"mcc":"111","mnc":"287"},{"mcc":"111","mnc":"288"},{"mcc":"111","mnc":"289"},{"mcc":"111","mnc":"290"},{"mcc":"111","mnc":"291"},{"mcc":"111","mnc":"292"},{"mcc":"111","mnc":"293"},{"mcc":"111","mnc":"294"},{"mcc":"111","mnc":"295"},{"mcc":"111","mnc":"296"},{"mcc":"111","mnc":"297"},{"mcc":"111","mnc":"298"},{"mcc":"111","mnc":"299"},{"mcc":"111","mnc":"300"},{"mcc":"111","mnc":"301"},{"mcc":"111","mnc":"302"},{"mcc":"111","mnc":"303"},{"mcc":"111","mnc":"304"},{"mcc":"111","mnc":"305"},{"mcc":"111","mnc":"306"},{"mcc":"111","mnc":"307"},{"mcc":"111","mnc":"308"},{"mcc":"111","mnc":"309"},{"mcc":"111","mnc":"310"},{"mcc":"111","mnc":"311"},{"mcc":"111","mnc":"312"},{"mcc":"111","mnc":"313"},{"mcc":"111","mnc":"314"},{"mcc":"111","mnc":"315"},{"mcc":"111","mnc":"316"},{"mcc":"111","mnc":"317"},{"mcc":"111","mnc":"318"},{"mcc":"111","mnc":"319"},{"mcc":"111","mnc":"320"},{"mcc":"111","mnc":"321"},{"mcc":"111","mnc":"322"},{"mcc":"111","mnc":"323"},{"mcc":"111","mnc":"324"},{"mcc":"111","mnc":"325"},{"mcc":"111","mnc":"326"},{"mcc":"111","mnc":"327"},{"mcc":"111","mnc":"328"},{"mcc":"111","mnc":"329"},{"mcc":"111","mnc":"330"},{"mcc":"111","mnc":"331"},{"mcc":"111","mnc":"332"},{"mcc":"111","mnc":"333"},{"mcc":"111","mnc":"334"},{"mcc":"111","mnc":"335"},{"mcc":"111","mnc":"336"},{"mcc":"111","mnc":"337"},{"mcc":"111","mnc":"338"},{"mcc":"111","mnc":"339"},{"mcc":"111","mnc":"340"},{"mcc":"111","mnc":"341"},{"mcc":"111","mnc":"342"},{"mcc":"111","mnc":"343"},{"mcc":"111","mnc":"344"},{"mcc":"111","mnc":"345"},{"mcc":"111","mnc":"346"},{"mcc":"111","mnc":"347"},{"mcc":"111","mnc":"348"},{"mcc":"111","mnc":"349"},{"mcc":"111","mnc":"350"},{"mcc":"111","mnc":"351"},{"mcc":"111","mnc":"352"},{"mcc":"111","mnc":"353"},{"mcc":"111","mnc":"354"},{"mcc":"111","mnc":"355"},{"mcc":"111","mnc":"356"},{"mcc":"111","mnc":"357"},{"mcc":"111","mnc":"358"},{"mcc":"111","mnc":"359"},{"mcc":"111","mnc":"360"},{"mcc":"111","mnc":"361"},{"mcc":"111","mnc":"362"},{"mcc":"111","mnc":"363"},{"mcc":"111","mnc":"364"},{"mcc":"111","mnc":"365"},{"mcc":"111","mnc":"366"},{"mcc":"111","mnc":"367"},{"mcc":"111","mnc":"368"},{"mcc":"111","mnc":"369"},{"mcc":"111","mnc":"370"},{"mcc":"111","mnc":"371"},{"mcc":"111","mnc":"372"},{"mcc":"111","mnc":"373"},{"mcc":"111","mnc":"374"},{"mcc":"111","mnc":"375"},{"mcc":"111","mnc":"376"},{"mcc":"111","mnc":"377"},{"mcc":"111","mnc":"378"},{"mcc":"111","mnc":"379"},{"mcc":"111","mnc":"380"},{"mcc":"111","mnc":"381"},{"mcc":"111","mnc":"382"},{"mcc":"111","mnc":"383"},{"mcc":"111","mnc":"384"},{"mcc":"111","mnc":"385"},{"mcc":"111","mnc":"386"},{"mcc":"111","mnc":"387"},{"mcc":"111","mnc":"388"},{"mcc":"111","mnc":"389"},{"mcc":"111","mnc":"390"},{"mcc":"111","mnc":"391"},{"mcc":"111","mnc":"392"},{"mcc":"111","mnc":"393"},{"mcc":"111","mnc":"394"},{"mcc":"111","mnc":"395"},{"mcc":"111","mnc":"396"},{"mcc":"111","mnc":"397"},{"mcc":"111","mnc":"398"},{"mcc":"111","mnc":"399"},{"mcc":"111","mnc":"400"},{"mcc":"111","mnc":"401"},{"mcc":"111","mnc":"402"},{"mcc":"111","mnc":"403"},{"mcc":"111","mnc":"404"},{"mcc":"111","mnc":"405"},{"mcc":"111","mnc":"406"},{"mcc":"111","mnc":"407"},{"mcc":"111","mnc":"408"},{"mcc":"111","mnc":"409"},{"mcc":"111","mnc":"410"},{"mcc":"111","mnc":"411"},{"mcc":"111","mnc":"412"},{"mcc":"111","mnc":"413"},{"mcc":"111","mnc":"414"},{"mcc":"111","mnc":"415"},{"mcc":"111","mnc":"416"},{"mcc":"111","mnc":"417"},{"mcc":"111","mnc":"418"},{"mcc":"111","mnc":"419"},{"mcc":"111","mnc":"420"},{"mcc":"111","mnc":"421"},{"mcc":"111","mnc":"422"},{"mcc":"111","mnc":"423"},{"mcc":"111","mnc":"424"},{"mcc":"111","mnc":"425"},{"mcc":"111","mnc":"426"},{"mcc":"111","mnc":"427"},{"mcc":"111","mnc":"428"},{"mcc":"111","mnc":"429"},{"mcc":"111","mnc":"430"},{"mcc":"111","mnc":"431"},{"mcc":"111","mnc":"432"},{"mcc":"111","mnc":"433"},{"mcc":"111","mnc":"434"},{"mcc":"111","mnc":"435"},{"mcc":"111","mnc":"436"},{"mcc":"111","mnc":"437"},{"mcc":"111","mnc":"438"},{"mcc":"111","mnc":"439"},{"mcc":"111","mnc":"440"},{"mcc":"111","mnc":"441"},{"mcc":"111","mnc":"442"},{"mcc":"111","mnc":"443"},{"mcc":"111","mnc":"444"},{"mcc":"111","mnc":"445"},{"mcc":"111","mnc":"446"},{"mcc":"111","mnc":"447"},{"mcc":"111","mnc":"448"},{"mcc":"111","mnc":"449"},{"mcc":"111","mnc":"450"},{"mcc":"111","mnc":"451"},{"mcc":"111","mnc":"452"},{"mcc":"111","mnc":"453"},{"mcc":"111","mnc":"454"},{"mcc":"111","mnc":"455"},{"mcc":"111","mnc":"456"},{"mcc":"111","mnc":"457"},{"mcc":"111","mnc":"458"},{"mcc":"111","mnc":"459"},{"mcc":"111","mnc":"460"},{"mcc":"111","mnc":"461"},{"mcc":"111","mnc":"462"},{"mcc":"111","mnc":"463"},{"mcc":"111","mnc":"464"},{"mcc":"111","mnc":"465"},{"mcc":"111","mnc":"466"},{"mcc":"111","mnc":"467"},{"mcc":"111","mnc":"468"},{"mcc":"111","mnc":"469"},{"mcc":"111","mnc":"470"},{"mcc":"111","mnc":"471"},{"mcc":"111","mnc":"472"},{"mcc":"111","mnc":"473"},{"mcc":"111","mnc":"474"},{"mcc":"111","mnc":"475"},{"mcc":"111","mnc":"476"},{"mcc":"111","mnc":"477"},{"mcc":"111","mnc":"478"},{"mcc":"111","mnc":"479"},{"mcc":"111","mnc":"480"},{"mcc":"111","mnc":"481"},{"mcc":"111","mnc":"482"},{"mcc":"111","mnc":"483"},{"mcc":"111","mnc":"484"},{"mcc":"111","mnc":"485"},{"mcc":"111","mnc":"486"},{"mcc":"111","mnc":"487"},{"mcc":"111","mnc":"488"},{"mcc":"111","mnc":"489"},{"mcc":"111","mnc":"490"},{"mcc":"111","mnc":"491"},{"mcc":"111","mnc":"492"},{"mcc":"111","mnc":"493"},{"mcc":"111","mnc":"494"},{"mcc":"111","mnc":"495"},{"mcc":"111","mnc":"496"},{"mcc":"111","mnc":"497"},{"mcc":"111","mnc":"498"},{"mcc":"111","mnc":"499"},{"mcc":"111","mnc":"500"},{"mcc":"111","mnc":"501"},{"mcc":"111","mnc":"502"},{"mcc":"111","mnc":"503"},{"mcc":"111","mnc":"504"},{"mcc":"111","mnc":"505"},{"mcc":"111","mnc":"506"},{"mcc":"111","mnc":"507"},{"mcc":"111","mnc":"508"},{"mcc":"111","mnc":"509"},{"mcc":"111","mnc":"510"},{"mcc":"111","mnc":"511"},{"mcc":"111","mnc":"512"},{"mcc":"111","mnc":"513"},{"mcc":"111","mnc":"514"},{"mcc":"111","mnc":"515"},{"mcc":"111","mnc":"516"},{"mcc":"111","mnc":"517"},{"mcc":"111","mnc":"518"},{"mcc":"111","mnc":"519"},{"mcc":"111","mnc":"520"},{"mcc":"111","mnc":"521"},{"mcc":"111","mnc":"522"},{"mcc":"111","mnc":"523"},{"mcc":"111","mnc":"524"},{"mcc":"111","mnc":"525"},{"mcc":"111","mnc":"526"},{"mcc":"111","mnc":"527"},{"mcc":"111","mnc":"528"},{"mcc":"111","mnc":"529"},{"mcc":"111","mnc":"530"},{"mcc":"111","mnc":"531"},{"mcc":"111","mnc":"532"},{"mcc":"111","mnc":"533"},{"mcc":"111","mnc":"534"},{"mcc":"111","mnc":"535"},{"mcc":"111","mnc":"536"},{"mcc":"111","mnc":"537"},{"mcc":"111","mnc":"538"},{"mcc":"111","mnc":"539"},{"mcc":"111","mnc":"540"},{"mcc":"111","mnc":"541"},{"mcc":"111","mnc":"542"},{"mcc":"111","mnc":"543"},{"mcc":"111","mnc":"544"},{"mcc":"111","mnc":"545"},{"mcc":"111","mnc":"546"},{"mcc":"111","mnc":"547"},{"mcc":"111","mnc":"548"},{"mcc":"111","mnc":"549"},{"mcc":"111","mnc":"550"},{"mcc":"111","mnc":"551"},{"mcc":"111","mnc":"552"},{"mcc":"111","mnc":"553"},{"mcc":"111","mnc":"554"},{"mcc":"111","mnc":"555"},{"mcc":"111","mnc":"556"},{"mcc":"111","mnc":"557"},{"mcc":"111","mnc":"558"},{"mcc":"111","mnc":"559"},{"mcc":"111","mnc":"560"},{"mcc":"111","mnc":"561"},{"mcc":"111","mnc":"562"},{"mcc":"111","mnc":"563"},{"mcc":"111","mnc":"564"},{"mcc":"111","mnc":"565"},{"mcc":"111","mnc":"566"},{"mcc":"111","mnc":"567"},{"mcc":"111","mnc":"568"},{"mcc":"111","mnc":"569"},{"mcc":"111","mnc":"570"},{"mcc":"111","mnc":"571"},{"mcc":"111","mnc":"572"},{"mcc":"111","mnc":"573"},{"mcc":"111","mnc":"574"},{"mcc":"111","mnc":"575"},{"mcc":"111","mnc":"576"},{"mcc":"111","mnc":"577"},{"mcc":"111","mnc":"578"},{"mcc":"111","mnc":"579"},{"mcc":"111","mnc":"580"},{"mcc":"111","mnc":"581"},{"mcc":"111","mnc":"582"},{"mcc":"111","mnc":"583"},{"mcc":"111","mnc":"584"},{"mcc":"111","mnc":"585"},{"mcc":"111","mnc":"586"},{"mcc":"111","mnc":"587"},{"mcc":"111","mnc":"588"},{"mcc":"111","mnc":"589"},{"mcc":"111","mnc":"590"},{"mcc":"111","mnc":"591"},{"mcc":"111","mnc":"592"},{"mcc":"111","mnc":"593"},{"mcc":"111","mnc":"594"},{"mcc":"111","mnc":"595"},{"mcc":"111","mnc":"596"},{"mcc":"111","mnc":"597"},{"mcc":"111","mnc":"598"},{"mcc":"111","mnc":"599"}]3.6.7.14 Configuring Request Timeout
SEPP supports requestTimeout parameter to avoid the request
timeout of services. The requestTimeout is increased in the given
services to avoid any request timeout that may happen due to the processing of response
by the stub server.
- The user has to set
requestTimeoutto 5000 in the cn32f-svc, pn32f-svc, plmn-egress-gateway, n32-egress-gateway, n32-ingress-gateway, and plmn-ingress-gateway sections of theocsepp_custom_values_<version>.yamlfile.
requestTimeout: 5000 #(ms)Note:
- If the ATS cases are failing due to the request timeout, increase the request timeout of a particular service which is creating the issue. For example set request timeout to "5000".
- If ATS is not configured,
requestTimeoutmust be set to the following values:
Table 3-24 requestTimeout
| Service | REQUEST TIMEOUT |
|---|---|
| cn32f-svc | 2000 |
| pn32f-svc | 1100 |
| plmn-egress-gateway | 1000 |
| n32-egress-gateway | 1500 |
| n32-ingress-gateway | 700 |
Updating n32-ingress-gateway config map
In the ocsepp_custom_values.yaml file, under
n32-ingress-gateway section, set the requestTimeout parameter value to
5000 (ms) for updating the config map.
routesConfig:
- id: n32f
#Below field is used to provide an option to enable/disable route level xfccHeaderValidation, it will override global configuration for xfccHeaderValidation.enabled
metadata:
requestTimeout: 1200Updating plmn-ingress-gateway config map
In the ocsepp_custom_values.yaml file, under
plmn-ingress-gateway section, set the requestTimeout parameter value to
5000 (ms) for updating the config map.
routesConfig:
- id: cn32f
#Below field is used to provide an option to enable/disable route level xfccHeaderValidation, it will override global configuration for xfccHeaderValidation.enabled
metadata:
requestTimeout: 26003.6.7.15 Idle Timeout
The Idle timeout must be increased in the given services to avoid any pending request transaction to timeout due to its idle state in the request queue.
In the ocsepp_custom_values_<version>.yaml file, under
n32-ingress-gateway section, set the jettyIdleTimeout parameter value
to 5000(ms).
#Jetty Idle Timeout Settings (ms)
jettyIdleTimeout: 5000 #(ms)Note:
- If the ATS is not configured, the
jettyIdleTimeoutvalue should be 3000 (ms). - If the ATS cases are failing due to the request timeout, increase idle timeout of a particular service which is failing. For example set idle timeout to "5000".
3.6.7.16 Configuring Polling Interval in N32 Egress Gateway
pollingInterval parameter overrides polling interval in
n32-egress-gateway. As a result of continuous configuration of Remote SEPPs while running
ATS, peer, peerset, and routes configurations are constantly being updated in
common_configuration for n32-egress-gateway. To minimize route-related failures, the cache
for updated peers, peer sets, and routes needs to be refreshed in the n32-egress-gateway.
For this, the polling interval must be updated to 2000ms in the
ocsepp_custom_values_<version>.yaml
file.
n32-egress-gateway:
commonCfgServer:
pollingInterval: 20003.6.7.17 EvictSanHeaderCacheDelay
The SEPP supports evictSanHeaderCacheDelay to update the
cache on the PN32F service with the updated values of Remote SEPP and Remote SEPP set
associated with the SAN header.
The user has to set evictSanHeaderCacheDelay parameter to
100 in pn32f-svc microservice section of custom yaml file.
configs:
evictSanHeaderCacheDelay: 100 #(ms)Note:
If ATS is not configuredevictSanHeaderCacheDelay must be set to 50000 in the pn32f-svc
section of ocsepp_custom_values_<values>.yaml file.
3.6.7.18 Configuring the Reroute Attempts for Egress Gateway
SEPP allows configuring the number of reroute attempts for alternate routing. You can
configure attempts parameter based on the requirement.
Under config manager section in ocsepp_custom_values_<version>.yaml
file, configure attempts parameter before running ATS test execution. The default value
for attempts is set to 0.
Set attempts to 3 before running ATS test execution.
alternateRoute:
sbiReRoute:
sbiRoutingErrorActionSets: [{"id": "action_0", "action": "reroute", "attempts": 3, "blacklist": {"enabled": false, "duration": 60000}}]3.6.7.19 Configuring Alternate Routing based on the DNS SRV Record for Home Network Functions
The Alternate Routing based on the DNS SRV Record for Home Network Functions feature can be enabled as follows:
Update the following parameters in ocsepp_custom_values.yaml file to
configure the DNS SRV feature:
global: alternateRouteServiceEnable : trueAt Alternate route section:
alternate-route:
global:
alternateRouteServiceEnable: trueUpdate
the Target
host:alternate-route: #Static virtual FQDN Config
staticVirtualFqdns:
- name: https://sepp.ats.test.routing.com
alternateFqdns:
#Below Target FQDNs needs to be updated for ATS DNS SRV scenarios
- target: <ats-release-name>-stubserver
port: 8443
priority: 100
weight: 90
- target: <ats-release-name>-stubserver-2
port: 8443
priority: 100
weight: 10
- target: <ats-release-name>-stubserver-3
port: 8443
priority: 1
weight: 90Here,
update the target parameter with the user-specific ATS release name.sepp-ats-rel and <stub-server-name> as
stubserver, then update the target as
sepp-ats-rel-stubserver.
Note:
For DNS SRV and SOR features, the plmn-egress-gateway must be deployed in REST mode. In theocsepp_custom_values.yaml file,
update:plmn-egress-gateway:
routeConfigMode: RESTNote:
In DNS SRV feature, the rerouting to next peer is decided on the basis of error codes or exceptions. If some exception arises which is not present in the json fileDNSSRVCriteriaSet.json
(may cause scenario failures), user must add those exceptions in the exceptions list
at the following
paths:In the file /var/lib/jenkins/ocsepp_tests/data/DNSSRVCriteriaSet.json, update
"exceptions": [
"java.net.SocketException",
"java.nio.channels.ClosedChannelException"
]In the file /var/lib/jenkins/ocsepp_tests/cust_data/DNSSRVCriteriaSet.json, update
"exceptions": [
"java.net.SocketException",
"java.nio.channels.ClosedChannelException"
]3.6.7.20 Configuring Load Sharing among Multiple Remote SEPP Nodes
- Enable the following parameters in
ocsepp_custom_values.yamlfile to configure the load sharing feature:- Enable the following flag at alternate_route
section:
alternate-route: global: alternateRouteServiceEnable: true - Replace the release name of the Target host:
alternate-route: #Static virtual FQDN Config staticVirtualFqdns: - name: http://sepp.ats.loadsharing.com alternateFqdns: #Below Target FQDNs needs to be updated for ATS DNS SRV scenarios - target: <ats-release-name>-stubserver port: 8443 priority: 100 weight: 90 - target: <ats-release-name>-stubserver-2 port: 8443 priority: 100 weight: 10 - target: <ats-release-name>-stubserver-3 port: 8443 priority: 1 weight: 90
Note:
If the user has chosen the ats release name as
sepp-ats-relModify
target: <release-name>-stubserverwith actual release name of ATS deployment.Example:
sepp-ats-rel-stubserver - Enable the following flag at alternate_route
section:
- Enable the following parameter at NrfClient Global parameters:
alternateRouteServiceEnable: true
3.6.7.21 Configuring Dual Stack
- coexistence strategy that allows hosts to reach IPv4 and IPv6 simultaneously.
- IPv4 and IPv6 allocation to the Kubernetes clusters during cluster creation.
This allocation is applicable for all the Kubernetes resources unless explicitly
specified during the cluster creation.
To support dual stack functionality
in the ATS Helm charts, the following updates are required in the
ocats_ocsepp_values_<version>.yamlfile:global: #Deployment mode for ats and stub in dual stack support. Possible values : IPv4, IPv6, IPv4_IPv6, IPv6_IPv4, ClusterPreferred deploymentMode: &deploymentMode IPv4
Single Stack cluster: IPv4, IPv6
Dual Stack cluster: IPv4, IPv6, IPv4_IPv6, IPv6_IPv4, ClusterPreferred3.6.7.22 ATS Tagging Support
The ATS tagging support feature assists in running the feature files after filtering features and scenarios based on tags. Instead of manually navigating through several feature files, the user can save time by using this feature.
For more details about tagging support feature, see ATS Tagging Support section.
By default, this feature is enabled in ATS framework but if user wants to enable or
disable the feature, set executionWithTagging flag to true or false in
the ocats_ocsepp_values_<version>.yaml file.
ocats:
atsFeatures:
executionWithTagging: trueFeature Level Tags in SEPP Mode
Table 3-25 Feature Level Tags in SEPP Mode
| Sl.No. | Tag | Selected Feature Files |
|---|---|---|
| 1. | MEDIATION | All the mediation feature files will be selected. |
| 2 | MULTIPART | All multipart feature files will be selected. |
| 3 | ORIGINATING_NETWORK_ID | All originating network id feature files will be selected. |
| 4 | ERL | All Egress rate limiting feature files will be selected. |
| 5 | TOPOLOGY | All topology feature files will be selected. |
| 6 | PREVIOUS_LOCATION_CHECK | All previous location check feature files will be selected. |
| 7 | MESSAGE_VALIDATION | All message validation feature files will be selected. |
| 8 | PROACTIVE_STATUS_UPDATE | All proactive status update feature files will be selected. |
| 9 | ALTERNATE_ROUTING | All alternate routing feature files will be selected. |
| 10 | SOR | All SOR feature files will be selected |
| 11 | Handshake | All the feature files which are written for testing handshake functionality will be selected. |
| 12 | PORT_SEGREGATION | All port segregation feature files will be selected. |
| 13 | DNS_SRV | All DNS SRV files will be selected. |
| 14 |
NETWORK_ID_VALIDATION
|
All network id validation feature files will be selected. |
| 15 |
SERVICE_API_VALIDATION
|
All service api validation feature files will be selected. |
| 16 | IRL | All Ingress rate limiting feature files will be selected. |
| 17 | API_PREFIX | All API Prefix feature files will be selected. |
| 18 | SI | All system integration feature files will be selected. |
| 19 | HEADER_VALIDATION | All header validation feature files will be selected. |
| 20 | TIME_LOCATION_CHECK | All Time Location check feature files will be selected. |
| 21 | VERBOSITY_VALIDATION | All the feature files which will have verbosity validation scenarios will be selected. |
| 22 | ASSERTED_PLMN_ID_METRIC_VALIDATION | SEPP dashboard support for detecting vulnerable messages. |
Feature Level Tags in Roaming Hub Mode
Table 3-26 Feature Level Tags in Roaming Hub Mode
| Sl.No. | Tag | Selected Feature Files |
|---|---|---|
| 1 | MEDIATION | All the mediation feature files will be selected. |
| 2 | TOPOLOGY | All topology feature files will be selected. |
| 3 | MESSAGE_VALIDATION | All message validation feature files will be selected. |
| 4 | SI | All system integration feature files will be selected. |
| 5 |
SERVICE_API_VALIDATION
|
All service API validation feature files will be selected. |
| 6 |
NETWORK_ID_VALIDATION
|
All network id validation feature files will be selected. |
| 7 | Handshake | All the feature files which are written for testing handshake functionality will be selected. |
| 8 | DNS_SRV | All DNS SRV feature files will be selected. |
| 9 | VERBOSITY_VALIDATION | All the feature files which will have verbosity validation scenarios will be selected. |
| 10 | ERL | All egress rate limiting feature files will be selected. |
| 11 | PROACTIVE_STATUS_UPDATE | All proactive status update feature files will be selected. |
| 12 | ALTERNATE_ROUTING | All alternate routing feature files will be selected. |
| 13 | HOSTEDSEPP_VALIDATION | All the feature files will be selected which will have Hosted SEPP validation scenarios. |
| 14 | PORT_SEGREGATION | All Port Segregation feature files will be selected |
Scenario Level Tags in SEPP and Roaming Hub Mode
Table 3-27 Scenario Level Tags in SEPP and Roaming Hub Mode
| Sl.No. | Tag | Selected Scenarios |
|---|---|---|
| 1 | sanity | All the scenarios will be selected which are part of sanity testing. |
3.6.7.23 ATS Helm Enhancement
ATS Helm enhancement enables configuring the ATS pipeline configuration variables directly through the ATS Helm charts.
In the ATS custom values file, the following variables are available. Update the variables in the same way to configure them through the ATS Jenkins UI:
Regression:
SELECTED_NF_a: "SEPP"
SEPPCONFIGSVCNAME_b: "ocsepp-release-config-mgr-svc.csepp"
CSEPPIGWNAME_c: "ocsepp-release-plmn-ingress-gateway.csepp"
PSEPPIGWNAME_d: "ocsepp-release-n32-ingress-gateway.csepp"
SEPPSTUBNAME_e: "sepp-ats-rel-stubserver.csepp"
NFINSTANCEID_f: "9faf1bbc-6e4a-4454-a507-aef01a101a06"
PROMSVCIP_g: "prometheus.cne-infra"
PROMSVCPORT_h: "9090"
PROMSVCURI_i: "/api/"
RERUN_COUNT_j: "1"
ELK_WAIT_TIME_k: "10"
ELK_HOSTNAME_l: "occne-elastic-elasticsearch-master.occne-infra"
ELK_PORT_m: "9200"
STUB_LOGS_n: "yes"
LOG_TYPE_o: "kubernetes"
GLOBAL_WAIT_TIME_p: "12NewFeatures:
SELECTED_NF_a: "SEPP"
SEPPCONFIGSVCNAME_b: "ocsepp-release-config-mgr-svc.csepp"
CSEPPIGWNAME_c: "ocsepp-release-plmn-ingress-gateway.csepp"
PSEPPIGWNAME_d: "ocsepp-release-n32-ingress-gateway.csepp"
SEPPSTUBNAME_e: "sepp-ats-rel-stubserver.csepp"
NFINSTANCEID_f: "9faf1bbc-6e4a-4454-a507-aef01a101a06"
PROMSVCIP_g: "prometheus.cne-infra"
PROMSVCPORT_h: "9090"
PROMSVCURI_i: "/api/"
RERUN_COUNT_j: "1"
ELK_WAIT_TIME_k: "10"
ELK_HOSTNAME_l: "occne-elastic-elasticsearch-master.occne-infra"
ELK_PORT_m: "9200"
STUB_LOGS_n: "yes"
LOG_TYPE_o: "kubernetes"
GLOBAL_WAIT_TIME_p: "120"Advantage of this configuration:
- No need to configure the pipeline through the ATS UI.
- Simply select the desired options on the Build with Parameters page and trigger the build to start ATS execution.
- Pipeline configuration remains intact even after ATS pod restarts.
3.6.7.24 Configuring LCI and OCI Header Support
Update the following configuration to run LCI and OCI header test cases:
In ocsepp_custom_values_<version>.yaml update the following:
global:
# Flag to enable LCI & OCI Header support
#Enabling LCI over N32-Ingress
seppLciEnabledN32Ingress: &n32IngressLciEnable true
#Enabling OCI over N32-Ingress
seppOciEnabledN32Ingress: &n32IngressOciEnable true
#Enabling LCI over PLMN-Ingress
seppLciEnabledPlmnIngress: &plmnIngressLciEnable true
#Enabling OCI over PLMN-Ingress
seppOciEnabledPlmnIngress: &plmnIngressOciEnable truen32-ingress-gateway:
#oci header configuration at n32-ingress-gateway
ociHeaderConfig:
overloadConfigRange: #Note - minor, major and critical conditions should be broken down in buckets of range [0 to 100] only both inclusive for it to be a valid config
minor: "[0-70]"plmn-ingress-gateway:
#oci header configuration at plmn-ingress-gateway
ociHeaderConfig:
overloadConfigRange: #Note - minor, major and critical conditions should be broken down in buckets of range [0 to 100] only both inclusive for it to be a valid config
minor: "[0-70]"nrfclient section:
nrfclient:
perf-info:
configmapPerformance:
prometheus: http://occne-kube-prom-stack-kube-prometheus.occne-infra/{cluster_name}:803.6.7.25 NRF Selection Mechanisms Using nrf client
This feature allows the SEPP to dynamically select NRF instances based on real-time availability and site redundancy through DNS SRV configurations. In addition to the static configurations by operators, the SEPP can now resolve NRFs using DNS SRV-based Fully Qualified Domain Names (FQDNs). The SEPP is configured with a primary NRF and multiple fallback NRFs, which take over if the primary NRF becomes unreachable
In ocsepp_custom_values_<version>.yaml update the following:
nrfclient:
nrf-client:
configmapApplicationConfig:
profile:
primaryNrfApiRoot: <ats-release-name>-stubserver.<namespace>:8080
nrfScheme=httpnrfclient:
nrf-client:
configmapApplicationConfig:
profile:
primaryNrfApiRoot: <ats-release-name>-stubserver.<namespace>:8443
nrfScheme=https3.6.7.26 Enabling Persistant Volume Storage
ATS supports Persistent storage to retain ATS historical build execution data, test cases, and one-time environment variable configurations.
Note:
By default, this feature is disabled.To enable persistent storage:
- Create a PVC and associate the same to the ATS pod.
- Set the PVEnabled flag to true.
- Set PVClaimName to PVC that is created for
ATS.
ocats: PVEnabled: false PVClaimName: "sepp-pvc" PVStorageClassName: "standard" PVStorage: "1Gi" RetainPVC: false
For more details on Persistent Volume Storage, you can refer to Persistent Volume for 5G ATS
3.6.8 Deploying ATS in Kubernetes Cluster
Note:
It is important to ensure that all the three components; ATS, Stub, and SEPP are in the same namespace.If the namespace does not exists, run the following command to create a namespace:
kubectl create namespace ocsepp
Deploying ATS:
helm install -name <release_name> ocats-sepp-<version>.tgz --namespace <namespace_name> -f <values-yaml-file>
helm install -name ocats ocats-sepp-<version>.tgz --namespace ocsepp -f ocats-sepp-custom-values.yaml3.6.9 Verifying ATS Deployment
helm status
                    <release_name>
kubectl get pod -n seppsvc
kubectl get service -n seppsvcFigure 3-30 Checking Pod and Service Deployment

Note:
bddclient name is now updated to ocats.3.6.10 Post Installation Steps (If persistent volume is used)
If persistent volume is used, follow the post-installation steps as mentioned in the Persistent Volume for 5G ATS section.