E EEDB Installation
This section defines the step-by-step actions performed to execute EEDB software installation on E5-APP-B-02.
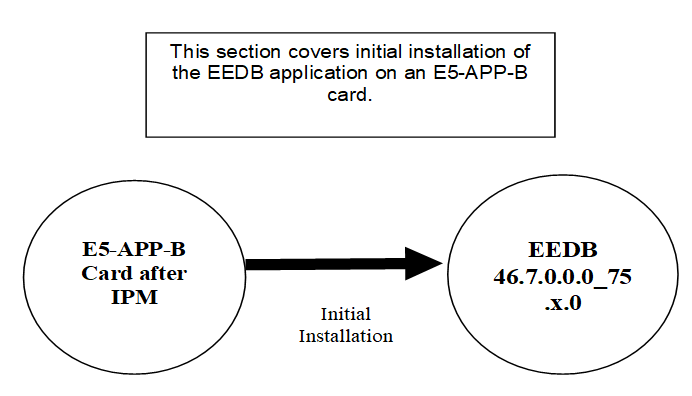
Figure E-1 Initial EEDB Application Installation Path

Upgrade Overview
Required Materials
- Two (2) target-release USB media or a target-release ISO file.
- A terminal and null modem cable to establish a serial connection.
- Write down the system configuration information.
Table E-1 EEDB System Configuration Information
Description Information Node A IP (IPv4) Node A NetMask (IPv4) Node A Default Router IP (IPv4) Node B IP (IPv4) Node B NetMask (IPv4) Node B Default Router IP (IPv4) NTP1 IP (IPv4) NTP2 IP (IPv4) NTP3 IP (IPv4) VIP Time Zone - Passwords for users on the local system:
Table E-2 EEDB User Password Table
EEDB USERS Login Node A password Node B password root eedbconfig admusr
Installation Phases
The following table illustrates the progression of the installation process by procedure with estimated times. The estimated times and the phases that must be completed may vary due to differences in typing ability and system configuration. The phases outlined in Upgrade Preparation Overview and Pre-Upgrade Overview are to be executed in the order they are listed.
Table E-3 Installation Phases for EEDB
| Phase | Elapsed Time (Minutes) | Activity | Procedure | |
|---|---|---|---|---|
| This Step | Cum. | |||
| Connectivity setup | 15 | 15 | Set up connectivity to the MPS Servers. | Setting Up the Upgrade Environment for EEDB |
| Pre-upgrade check | 5 | 20 | Verify requirements for install are met. | Verify the Pre-Upgrade Requirements |
| Configure the Network | 5 | 25 | Configure the Network using platcfg on Node A | Configure Network Interface Using platcfg Utility |
| Configure the Network | 5 | 30 | Configure the Network using platcfg on Node B | Configure Network Interface Using platcfg Utility |
| Create the bulkconfig file | 5 | 35 | Create the configuration file | Create Configuration File on Node A |
| Create the bulkconfig file | 5 | 40 | Create the configuration file | Create Configuration File on Node B |
| Pre-install health check | 5 | 45 | Run the syscheck utility to verify that all servers are operationally sound on Node A. | Perform System Health Check |
| Pre-install health check | 5 | 50 | Run the syscheck utility to verify that all servers are operationally sound on Node B. | Perform System Health Check |
| Configure Server Node A | 5 | 55 | Set hostname, designation and time. | Pre-Install Configuration on Node A |
| Configure Server Node B | 5 | 60 | Set hostname, designation and time. | Pre-Install Configuration on Node B |
| Install Servers | 30 | 90 | Install software on Node A and B | Install Application on Node A, Install Application on Node B |
Upgrade Preparation
Setting Up the Upgrade Environment for EEDB
Note:
Call My Oracle Support (MOS) for assistance if modem access is the method use for upgrade.Verify the Pre-Upgrade Requirements
Note:
Call My Oracle Support for assistance if modem access is the method use for upgrade.Software Installation Procedures
Create Configuration File on Node A
Note:
Call My Oracle Support (MOS) for assistance if modem access is the method use for upgrade.Note:
Installation of the Operating System on an Oracle Application Server should be completed before starting installation procedure. Refer to IPM MPS Server with TPD 7.6.X for TPD installation.Create Configuration File on Node B
Note:
Call My Oracle Support for assistance if modem access is the method use for upgrade.Should THIS PROCEDURE FAIL, CONTACT My Oracle Support AND ASK FOR UPGRADE ASSISTANCE.
Note:
Installation of the Operating System on an Oracle Application Server should be completed before starting installation procedure. Refer to IPM MPS Server with TPD 7.6.X for TPD installation.Pre-Install Configuration on Node A
IF THIS PROCEDURE FAILS, CONTACT MY ORACLE SUPPORT AND ASK FOR ASSISTANCE.
Pre-Install Configuration on Node B
IF THIS PROCEDURE FAILS, CONTACT MY ORACLE SUPPORT AND ASK FOR ASSISTANCE.
Generic Procedure
ISO Image download from Oracle Software Delivery Cloud
IF THIS PROCEDURE FAILS, CONTACT MY ORACLE SUPPORT AND ASK FOR UPGRADE ASSISTANCE.
Validate Upgrade Media
Validation could be performed on MPS A or B, however, this procedure specifies MPS X for simplicity.
This procedure provides instructions to perform a validation of the upgrade media on the MPS X server. This procedure assumes that the E5-APP-B card IPM procedure has been executed and the user has an EEDB Upgrade ISO image available.
IF THIS PROCEDURE FAILS, CONTACT MY ORACLE SUPPORT AND ASK FOR UPGRADE ASSISTANCE.IPM MPS Server with TPD 7.6.X
Note:
Both the MPS-A and MPS-B servers can be IPM’ed at the same time.This procedure will IPM the E5-APP-B Server.
IF THIS PROCEDURE FAILS, CONTACT MY ORACLE SUPPORT AND ASK FOR UPGRADE ASSISTANCE.
Perform System Health Check
IF THIS PROCEDURE FAILS, CONTACT MY ORACLE SUPPORT AND ASK FOR UPGRADE ASSISTANCE.


