5 Transferring Custom Node Chains
This chapter describes how to transfer custom node chains from one Oracle Communications Offline Mediation Controller system to another. You can transfer the configuration of a system with a custom node or nodes to another system that may or may not have custom nodes.
There are two scenarios described in this chapter:
-
Scenario 1 describes how to transfer a configuration with custom nodes to an Offline Mediation Controller system that has an identical base node chain
-
Scenario 2 describes how to transfer a configuration with custom nodes and a secondary custom node chain to an Offline Mediation Controller system that has an identical base node chain
In both scenarios, the goal is to update System 1 with the System 2 node chain.
Scenario 1
In Scenario 1, System 1 is the original Offline Mediation Controller system in the customer environment, as shown in Figure 5-1. The core nodes are shown in blue, and a custom node is shown in green.
Figure 5-1 Original Offline Mediation System 1
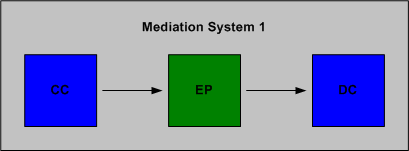
Description of "Figure 5-1 Original Offline Mediation System 1"
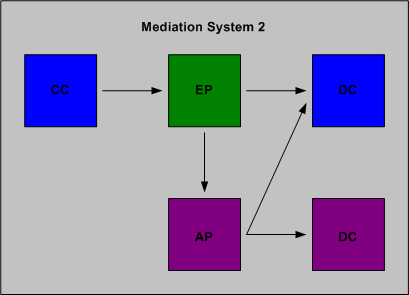
On System 2, a node chain has been verified in the lab and is ready to be deployed in the customer environment (System 1). System 2 has the identical base node chain as System 1, with two new custom nodes, shown in purple in Figure 5-2.
Updating the node chain
Use the following procedure to update System 1 with the System 2 node chain.
To update System 1 with the System 2 node chain
On System 2
To export the node configuration, tar the following directories:
-
OMC_home_1/customization
-
OMC_home_2/cartridges
On System 1
-
Ensure all data in the node chain has been processed, then delete the node chain.
-
Stop the Node Manager, Administration Server, and GUI.
-
On System 1, untar the OMC_home_2/cartridges directory into the OMC_home_1/cartridges directory.
-
On System 1, untar the OMC_home_2/customization directory into the OMC_home_1/customization directory.
-
Start the Node Manager, Administration Server, and GUI.
-
Import the configuration from System 2.
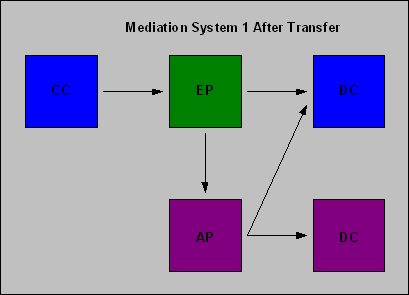
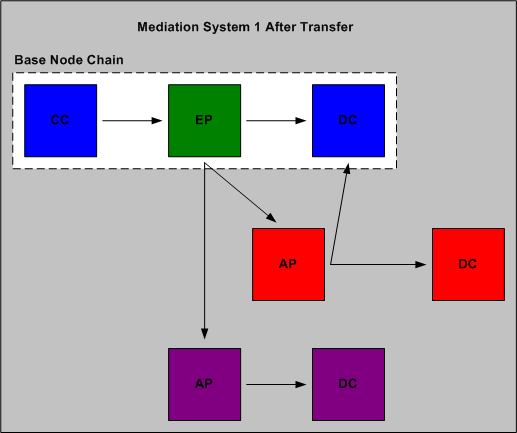
System 1 now appears as in the following diagram.
Scenario 2
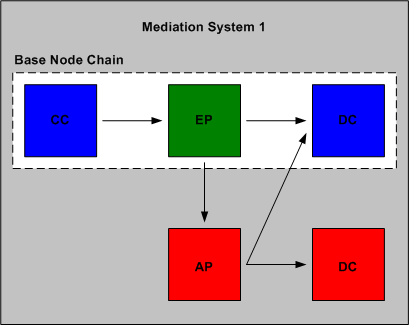
In Scenario 2, System 1 has a base node chain and a secondary node chain that contains custom nodes, shown in red in Figure 5-3.
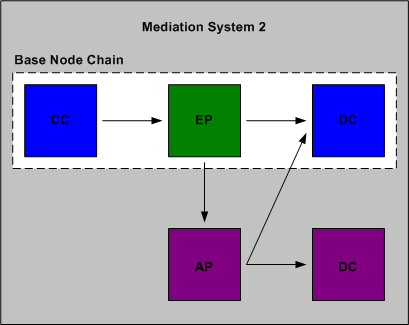
System 2 has the same base node chain as System 1 but with a secondary node chain that contains custom code, shown in purple in Figure 5-4.
Updating the node chain
Use the following procedure to update System 1 with the System 2 node chain while preserving the secondary node chain on System 1.
To update System 1 with the System 2 node chain
On System 2
-
Open the following file: OMC_home_2/customization/nodeTemplateDefs/nodeTemplateDef.xml.
-
Locate and open the same file on System 1.
-
Examine the contents of the two files and ensure the contents of both files are captured in nodeTemplateDef.xml on System 2. Remove any duplication.
-
Open the following file: OMC_home_2/customization/groupTemplateDefs/groupTemplateDef.xml.
-
Locate and open the same file on System 1.
-
Examine the contents of the two files and ensure the contents of both files are captured in groupTemplateDef.xml on System 2. Remove any duplication.
-
To export the configuration, tar the following directories:
-
OMC_home_2/customization
-
OMC_home_2/cartridges
-
On System 1
-
Ensure all data in the node chain has been processed. Then, delete the routing link between the EP node on the base node chain and the AP node on the secondary node chain.
-
Delete the base node chain.
-
Stop the Node Manager, Administration Server, and GUI.
-
On System 1, untar the following directories into the following locations:
-
OMC_home_2/cartridges into OMC_home_1/cartridges
-
OMC_home_2/customization into OMC_home_1/customization
-
-
Start the Node Manager, Administration Server, and GUI.
-
Import the configuration from System 2.
After the update, there is no routing link between the EP node of the base node chain and the AP node of the secondary node chain. You must manually restore this link via the Administration GUI.
System 1 now appears as in the following diagram.
