Creating Flows
A flow simulates a business process that needs to be tested. Flows may be synonymous with test cases or test scenarios based on how test automation strategy is developed. Each flow may have one or more test scenarios. You can create a flow by dragging and dropping components into a default scenario under the flow.
This section includes the following:
Creating Flows By Dragging-and-Dropping Components
Before creating a flow, identify the components required to create the flow.
Note: The components delivered with Oracle Utilities Testing Accelerator may have to be extended or new components have to be created.
To create a flow:
1. Navigate to the product/module in the flow tree to create the flow.
2. Right-click the product/module and select Create Flow.
3. In the Create Flow pane, enter the Flow Name, Flow Type, Tags, and Description.
4. Save in either of the following ways:
• Save: Saves the flow and redirects to the Search Flow page.
• Create Structure: Creates the flow with a default scenario and redirects to the Flow Structure page.
5. Expand the flow tree. The flow contains a default scenario with the same name as the flow name.
6. In the sequence defined by the business scenario being tested, drag and drop the components from the Approved Components pane to the flow scenario or components within the flow structure. The component moved will be added below the scenario/component to which it was moved. 
Note: Flow definition can be modified (components added or removed) only if the flow is in “In Progress” state.
7. Make sure to enter the test data at the component step level while defining a flow.
Adding Test Data in a Flow
To add data to a component in a flow:
1. In the flow tree structure, right-click the component and select Edit Test Data.
2. Enter the test data in the Test Data page. The Webservice Test Data page has 3 sections.
a. Pre Validations
The Pre Validations section can be used for specifying functions that can generate randomized test data for the flow/component step. It is used to add functions in the components that may be specific to the flow being developed. Click New Row to add new rows. 
The library in which the function exists can be selected in the Library field. Based on the library selected the function can be selected from the Function drop-down list. If the function outputs a value, provide the custom global variable name in the Output Variable field into which the function output is stored. This variable can be used as test data in the Test Data section or in subsequent pre validations or post validations sections. The function inputs can be specified against the parameter fields, based on the number of input parameters that the function needs. The variable names defined in the pre validations and post validations sections will be automatically prefixed with “fvar” and presented in the test data field's drop down under the Global Variables section, so they can clearly be distinguished from the global variables defined in the component definition.
b. Test Data
The test data corresponding to each of the elements in the component can be specified in the Test Data GUI.
• The Web Service Name and Web Transaction Type fields help define the web service end point to which the request needs to be posted to during the test execution. Most of the components have the web service name and transaction type specified as the default data in the component definition. You can select the corresponding values by clicking on the test data drop down corresponding to the web service name/transaction type fields and selecting the value under the Default Data section in the list of values.
The Web Service Details section has a switch inside the Integration Environment sub section to enable/disable the field to provide integration environment details. This pertains to the environment identifier provided in the flow or user configuration set, for a given integration environment that is being tested.
Refer to the Support for Integration Flows section for more details.
• The Log Message field appears for most of the components that have this option enabled. This is free text field and any value entered in this field will be added to the flow run summary report. This helps to identify what a component step does in a flow, by looking at the summary report.
• Test data pertaining to a component line can be specified against that specific line in the test data Value field in the Test Data section. The test data field is an editable drop down field, so test data can either be selected from the drop-down list or can be keyed into the test data field. The test data field drop down provides 3 options to populate the test data:
• Data From..: This option allows the test data to be set from the web service response of any preceding component in the flow. It allows test data to be passed between components, without the use of global variables.
Refer to the Moving Data Between Components without Using Global Variables for more information on this feature usage.
• Default Data: This section allows test data to be set from the default data specified in the component definition. For most of the UTA components, the default data is set only for the web service name and the transaction type fields. If the default data is not specified in the component definition for a given field, this option will not be displayed in the test data field drop down.
• Global Variables: This section allows test data to be set using the global variables defined in the preceding components in the same flow. The list of available global variables are displayed under this section. A global variable can be set as test data input for a given field, in which case, during the course of test flow run, the value populated into the global variable in the preceding component steps will be used as the test data. 
• If an element is a repeatable group or list element, click Add List in the Action column to add multiple repetitions of the list elements. You can add a new instance of the list elements under the group, so another set of test data can be provided.
• The bottom part of the Test Data GUI shows the functions defined in the component. Enable or disable the validations/functions defined in the component by appropriately switching Enable in the first cell. If the switch is not enabled, during the course of the test run, the function/validation will not be triggered. The switch only appears for rows to which this feature is applicable. 
Note: If the test data includes the double quotes character (“ “), it needs to be escaped with another double quote character. Example: To enter My “Test Data”, enter it as My “”Test Data””.
c. Post Validations
The Post Validations section is used to add verification functions post the base validations. Each of the component comes with a base set of validations and these can be disabled or enabled in the Test Data GUI using the switch corresponding to the validation line in the test data UI for the component. And, if any new or more of these verifications are to be added based on the flow specific requirements or if a specific set of values have to be retrieved from the response of the component run, the Post Validations section can be used.
The post validations section allows users to add any number of functions/validations to the component step in a flow. These will be specific to the component's instance in that flow. These will not apply to the component when used in other flows. Specification of functions in the Post Validations section follows the same pattern as the one specified in the Pre-validations section.
Only function calls can be added in the Post Validations section.
3. Click Save & Close to return to the Flow Creation page.
Moving Data Between Components without Using Global Variables
Test data can be linked/moved from the response of one component to the input test data field of a subsequent or a later component without using global variables. You can directly select and map the component data fields so the corresponding values are mapped.
To invoke the GUI that supports this mapping feature, click the Search icon next to the input test data fields in the Flow Test Data page.
The following sections include steps to map the test data between components without variables.
Example: Mapping personId from the response for C1-PersonAdd component to the personId field in C1-AccountAdd component.
To map to non-list elements in a response:
1. Navigate to the Create/Update Flow Structure for the test flow.
2. Navigate to the Flow Test Data page of the component into which test data should be linked to. Click the downward arrow corresponding to the test data field to show the drop-down list.
3. From the list, select Data From...
In the example, the test data page corresponds to C1-AccountAdd component in the flow, which has C1-PersonAdd component preceding the C1-AccountAdd component.
The flow tree structure up to the preceding component of the current component is displayed. 
4. Click the component from whose response the value should to be mapped. The corresponding elements in the component is displayed. 
5. Select the element from the component’s response whose value needs to be mapped to this field in the current component. The filter at the top of the xpath attributes can be used to quickly find the xpath that is needed.
In the case of the example, select the personId field from the C1-PersonAdd component.
The test data field is populated with the selected element. “-->” is prefixed to the selected element name to differentiate it from the global variables and static test data.
The following figure shows the selected personId field mapped between the components. 
6. To view/update an existing mapping, click the Test Data drop-down list and select Data From. The Map To An Element In Component's Response screen highlights the existing mapping.
Note:
• The mapping feature extracts the value from the web service response of the component used in the mapping and provides it as test data to the test data field to which it is mapped.
• This feature can also be used in the Pre-validations and Post-validations sections to map a response value from the prior component as input to base or custom functions.
To map to list elements in a response:
1. Navigate to the Create/Update Flow Structure for the test flow.
2. Navigate to the Flow Test Data page of the component into which test data should be linked to. Click the downward arrow corresponding to the test data field to show the drop-down list.
3. From the list, select Data From...
In the example, the test data page corresponds to C1-AccountAdd component in the flow, which has C1-PersonAdd component preceding the C1-AccountAdd component.
The flow tree structure up to the preceding component of the current component is displayed.
4. Click the component from whose response the value should to be mapped. The corresponding elements in the component is displayed.
5. Select the element from the component’s response whose value needs to be mapped to this field in the current component.
The following figure shows the option to map to a specific occurrence of the list element: 
6. If a specific occurrence of the list element is already known, the xpath value can be updated to point to that specific occurrence of that list.
Example: personName[2]/personId will map the personId from second occurrence of the personName list
7. If the specific occurrence is not known, conditions may be applied on one or more of the list elements to find the required value from the list.
In the above example: To find the personId corresponding to the person with the name “John”, the first condition can be enabled and the condition can be specified in the condition filter. 
The list element on which the condition needs to be specified should be selected in the xpath field and a condition type can selected from the condition drop down. Based on the condition type, the value can be provided.
The supported conditions are:
• “Less than”, “Less than or equal to”, “Greater than”, “Greater than or equal to”: These are applicable only to value type Number.
• “Equal to”, “Not equal to”, “contains”: These are applicable to value type String.
• “Equal to” and “Not equal to” condition types as applicable to value type Number as well.
• “Starts with” and “Ends with” condition types are applicable to value type String.
• “Not null” and “Is null” is used to check if the value exists or not, in the response. In case Not null or Is null option is selected, the Value field should be left blank.
If more than one condition needs to be specified, the appropriate conditions may be added by enabling succeeding condition filters. The corresponding join type also needs to be selected for multiple filters. The support join types are “And” and “Or”.
If a list/group that matches the conditions does not exist in the response, the value specified under the Default value gets populated in the corresponding test data field of the component. This can be left blank if the default value need not be populated.
8. After specifying all conditions, click Submit to save the conditions for mapping.
9. To review or update the conditions, click the Test Data drop-down list corresponding to this field and then select Data From option. The Map to Xpath window is displayed with the current conditions.
Managing Flow Test Data Using Spreadsheets
In addition to using the Oracle Utilities Testing Accelerator's workbench GUI for adding/updating test data in a flow, spreadsheets can also be used to add/update test data in the flows. The supported spreadsheet format is xlsx, which provides versatile formatting for easier input of test data. Each flow has a download spreadsheet option that allows you to download a template corresponding to the flow definition. Each worksheet in the xlsx spreadsheet holds the test data pertaining to an individual component in the flow. Test data can also be added/updated for test data sets in the flow. You can even create new test data sets in the spreadsheet. Once the spreadsheet is updated with appropriate test data, you can import the spreadsheet to update the test data in the flow from which it was downloaded.
To manage test data using spreadsheets:
1. Navigate to the Create/Update Flow Structure for the test flow.
2. Click Test Data Spreadsheet in the flow creation frame.
3. In the Manage Test Data Through Spreadsheet popup, click Download.
4. Download and save the spreadsheet to your laptop/desktop.
5. Open the spreadsheet and edit the test data:
• The spreadsheet has multiple worksheets where each worksheet maps to a component in the flow definition.
• The Documentation worksheet holds the high-level list of all the worksheets.
• The worksheets are named based on the scenario number and the components sequence in the flow.
Example: The prefix SC1_SEQ1 is used to denote scenario 1 and component sequence 1.
• Test data corresponding to a component in a flow is held in each individual worksheet. The columns marked as element name, hold the names of each individual element in the component and the columns marked with the header test data sets holds the flow test data corresponding to the flow test data set.
• Multiple values under group/list elements in the component definition can be added in the spreadsheet by duplicating the corresponding rows.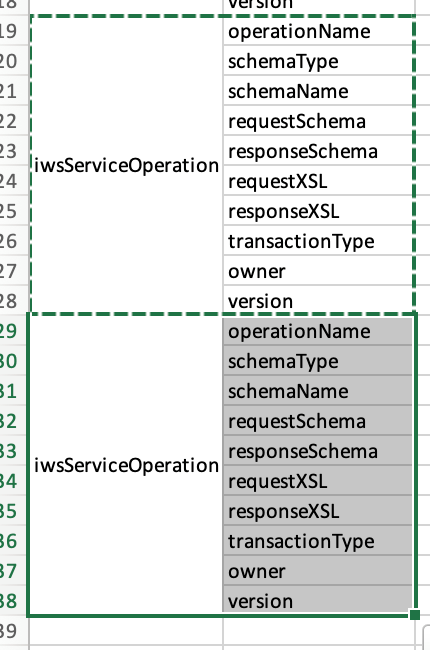
• The test data for elements in the component definition can be set against each of the rows, under the appropriate flow test data sets.
• New flow test data sets can be added in the spreadsheet. Deletion of flow test data sets through the spreadsheet is not allowed.
• After the test data is updated, the spreadsheet can be uploaded into the flow definition through the popup window displayed under step 3 in this process.
Please note the following:
• The sequence of the worksheets in the spreadsheet should not be altered.
• The flow variables defined in the flow are marked in the spreadsheet as “Global Variable”, in the test data. Similarly, the pointers used for mapping test data between components in Oracle Utilities Testing Accelerator GUI are also marked.
• Test data pertaining to subroutine flow calls cannot be managed through the spreadsheet. If the flow has a subroutine flow as a flow step, then the spreadsheet will not have test data or worksheet pertaining to the subroutine flow call step.
Annotating Components in a Flow
Annotations can be added for each component step to describe the purpose of each of the steps in an Oracle Utility Testing Accelerator test flow. This helps in understanding the functional aspects of the flow just by looking at the flow tree structure.
To add an annotation right-click a component step in the flow definition. Select Update Component Description and enter the description. The description replaces the default display of the component name in the flow step. The annotation can be removed or updated through the same process. Clearing the component description in the flow removes the annotation and displays the component name.
The following figure shows a flow without and with annotations:
Adding Documents to a Flow
To add a document to a flow:
1. Select and right-click the flow name in the Oracle Utilities Testing Accelerator flows tree structure.
2. Click Create/Update Flow Structure.
3. In the Flow Creation zone, click Documentation.
4. Click Manage.
5. Drag and drop the documentation file. Alternatively, click the field to add the file using file explorer. Make sure the Documentation File Type option is selected.
6. Add the file description in the Description field.
7. Click Save.
Deleting Documents from a Flow
To delete a document from a flow:
1. Select and right-click the flow name in the Oracle Utilities Testing Accelerator flows tree structure.
2. Click Create/Update Flow Structure.
3. In the Flow Creation zone, click Documentation.
4. Click Manage.
5. On the Delete tab, select the files to be deleted.
6. Click Delete and confirm the deletion.
Downloading Documents from a Flow
To download a document from a flow:
1. Select and right-click the flow name in the Oracle Utilities Testing Accelerator flows tree structure.
2. Click Create/Update Flow Structure.
3. In the Flow Creation zone, click Documentation.
4. Click the Description icon next to the documentation file name to view the description of the file.
5. Click the Download icon next to the file to be downloaded.
Using Global Variables
This section explains the usage of global variables to pass data across components.
In a simple test flow, add a new person in Oracle Utilities Customer Care and Billing and add a customer contact for that person. The C1-CustomerContactAdd component is a dependent component and during runtime needs the ID of the person, created using C1-PersonAdd component within the same flow.
To add component references to a dependent component (C1-CustomerContactAdd):
1. In the Edit Test Data GUI of the C1-CustomerContactAdd component, find the component line that requires the personId as input.
2. Against the personId row, click the downward arrow to open the Test Data drop-down list. All variables exposed by the preceding components are diaplayed in the Global Variables section.
In this case, personId exposed by the C1- PersonAdd component.
3. Select the personId variable from the drop down list and set it as test data against this element. 
Each of the base components expose one or more global variables that hold the output of the component during execution. These global variables can be used to set the output of one component as the input of another component.
Additionally, global variables are also created to hold output of functions used in pre-validations or post-validations sections. These global variables are defined in the Output Variable field and are to be set against only functions that return an output value. These function based global variables are automatically pre-fixed with “fVar_” and these can be used as input in the test data of subsequent steps in the flow.
All the global variables are automatically suffixed with their occurrence number. If the C1-PersonAdd component is used twice in the flow, there will be two variables (gVarPersonId1, gVarPersonId2) one for each occurrence of the component, suffixed with it's occurrence number. Custom global variables can be defined and exposed by the components through the Pre-Validations and Post Validations sections. These variables are automatically prefixed with “fvar_”, to differentiate them from the component's base global variables. These variables are also suffixed with their occurrence number in the flow, similar to the global variables specified in the component definition.
Using Container for Flow Variables
The flow variables whose values are likely to change between flow runs can be defined in a central container provided towards the beginning of the flow tree structure. This allows the Oracle Utilities Testing Accelerator users to quickly update the test data values in the flow definition before the flow run.
Container for flow variables in Oracle Utilities Testing Accelerator allows the definition of flow variables that can hold test data in a central container within a flow. These variables can be used in place of the actual test data in subsequent components in that flow, so if a need arises to update the test data within the flow, between flow runs or otherwise, you can quickly update the variable definition/value in the central container. This eliminates the need to search through the components to update the test data, in such a scenario. The flow variable container gets added as the first step in the flow definition. Defining/using this container in a flow is optional and would depend on the test flow design and requirements.
This section focuses on the following:
Adding Flow Variable Container to a Flow
To add a flow variable container to a flow:
1. Select and right-click the flow name in the Oracle Utilities Testing Accelerator flows tree structure.
2. Click Create/Update Flow Structure.
3. Click Add Global Variable Container.
4. Right-click the variable container in the flow tree structure and select Edit Test Data.
5. Define a flow variable name in the Output Variable Name field.
6. Define the variable value in the Value field.
7. Add more rows and enter the variables.
8. Click Save to save the updates.
These variables can be used as test data in the subsequent components in the flow.
Deleting Flow Variable Container from a Flow
To delete a flow variable container from a flow:
1. Select and right-click the flow name in the Oracle Utilities Testing Accelerator flows tree structure.
2. Click Create/Update Flow Structure.
3. Right-click the variable container in the flow tree structure and select Delete Component. Confirm the deletion.
Flow Lifecycle
The flow lifecycle begins once a flow is created in Oracle Utilities Testing Accelerator. It can exist in one of the several possible lifecycle states as shown in the following diagram. 
The state of a flow determines the actions that can be performed on the component. The following table summarizes the component states, and the possible actions and roles that can take the actions.
Flow Lifecycle State | Permitted Actions | Role | Resultant State (post action) |
|---|---|---|---|
In Progress | Submit for Approval | Developer, Approver, Administrator | Pending Approval |
Pending Approval | Send to In Progress | Developer, Approver, Administrator | In Progress |
Unlock | Developer, Approver, Administrator | In Progress | |
Approve | Approver, Administrator | Approved | |
Approved | Send to In Progress | Developer, Approver, Administrator | In Progress |
Locking/Unlocking Flows
A flow is/can be locked in the following scenarios:
• To prevent any other users from editing the flow until the flow is complete.
• By default when the flow is submitted for approval.
• If the flow is unlocked while in the ‘Pending Approval’ state, its state is changed back to ‘In Progress’. However, if it is moved to ‘In Progress’ state from ‘Pending Approval’ state, it stays locked until the user unlocks it.
Click the  icon to lock/unlock a flow in Oracle Utilities Testing Accelerator.
icon to lock/unlock a flow in Oracle Utilities Testing Accelerator. Note that scripts can be generated only when the flow is in an “Approved” state.
Copying Flows
To copy a flow from one product to another product(s):
1. Login to the application.
2. Navigate to the Flows menu.
3. In the left navigation pane, expand the flow to be copied.
Note: Use the Search Component field on the top of the approved component tree to find the components you need. The available components are listed similar to a type ahead search, with the product and module names under which the component is available. Select the appropriate component from the prompted results and the corresponding component is highlighted in the approved component tree.
4. Right-click the flow to be copied and select Copy Flow.
5. Navigate to the product to which the flow needs to be copied.
6. Right-click the product and select Paste Flow.
7. In the pop-up window, enter the name for the new flow.
8. Click Paste flow.
Reordering Components in a Flow
Note that a flow needs to be “In progress” for components to be re-ordered. You cannot re-order components in a flow that is locked by another user.
To change the sequence of components in a scenario:
1. Login to the application.
2. Navigate to the Flows menu.
3. In the left pane, right-click the flow for which components have to be reordered.
Note: Use the Search Component field on the top of the approved component tree to find the components you need. The available components are listed similar to a type ahead search, with the product and module names under which the component is available. Select the appropriate component from the prompted results and the corresponding component is highlighted in the approved component tree.
4. Select Create/update Flow Structure.
5. Reorder the components in any of the following ways:
• By drag-and-drop method
• Moving the components to a desired location using menu
6. Right-click the component to be moved and select Move Component.
7. Move the selected component in any of the following ways:
• Right-click another component in the flow and choose Paste Component Above.
• Right-click another component in the flow and choose Paste Component Below.
• Right-click a scenario in the flow and choose Paste Component Inside. This will move the selected component to the first position in the scenario.
8. After reordering the components, click Save to save the modified flow.
The popup closes and the flow tree is refreshed to reflect the correct order of components.
Copying Test Data from One Component to Another in a Flow
To copy the test data from one instance of a component to another instance of the same component within and across the scenario/flow:
1. Login to application and navigate to the Flows tab.
2. In the left navigation pane, right-click the flow and select Create/update Flow Structure.
3. Expand the flow.
4. Right-click a component from which you want copy the test data and select Copy Test Data.
5. Navigate to the component in the flow.
6. Right-click the component where you want to paste the test data and select Paste.
Fetching Component Test Data from an Utilities Application
Instead of manually entering the test data for a component, you can fetch the test data from a Utilities application (such as Customer Care and Billing, Meter Data Management, etc.). Provide the required WSDL name, operation name (typically read operation), the user credentials to access the WSDL and required fields that are mandatory for the specified operation. Oracle Utilities Testing Accelerator calls the WSDL with provided details and fetches the response from web service and populates in the test data of the component.
To fetch the test data:
1. Navigate to the Flows tab.
2. Select and right-click the flow and then click Create/Update Flow Structure.
3. On the Flow Definition page, navigate to the component. Right-click and select Edit Test Data.
4. On the Edit Test Data page, click Fetch Test Data.
5. On the Fetch Test Data page, enter in the web service name from which the test data has to be retrieved, operation (typically READ operation) to invoke and necessary credentials and any required info (for example: to retrieve data related to ToDoRole). 
6. Enter the WSDL name and operation name. Select the user and flow configuration set. Click Populate Form to populate the form with all fields that the web service supports.
Alternatively, use the URL and user credentials from the Flow/User Configuration properties file. Click Use Configuration Properties and select the appropriate flow/user configuration from the respective drop-down menus.
Note: While creating an integration flow (a flow where components may send requests to more than one environment) prefix the URLs with keywords that can be used while specifying the WSDL to connect to.
Example: If a flow should connect to an Oracle Utilities Meter Data Management instance apart from the Oracle Utilities Customer Cloud Service instance, specify the three properties mentioned below either in the flow or user configuration properties.
Example: If a flow should connect to an Oracle Utilities Meter Data Management instance apart from the Oracle Utilities Customer Cloud Service instance, specify the three properties mentioned below either in the flow or user configuration properties.
MDM=<MDM url>
MDM_gStrApplicationUserName=johnDoe
MDM_gStrApplicationUserPassword=enc(pj0TFjXMczsoyzmQ8GuXPt2PSydO7VCbR2jhxtkUH06Fuz+zmChpGSCr241KggFC6FwgMg==)
To fetch the test data for an Oracle Utilities Meter Data Management component:
a. Select the flow/user configuration file from the drop-down menu.
b. Enter the WSDL URL as shown below. 
7. Provide the necessary key information to retrieve data (for example: in this case the ToDoRole name) and click Fetch Test Data.
8. After the data is retrieved from the target application, review/validate it. Click Save and Close.
Unit Testing a Component in a Flow
As part of the flow development, test data needs to be provided for a component in a flow. After the test data is added, a component may have to be unit tested to make sure that the provided test data gets the flow working as expected.
To unit test a component that is part of a flow:
1. Navigate to the Flows tab.
2. Select and right-click the flow. Click Create/Update Flow Structure.
3. On the Flow Definition page, navigate to the component. Right-click and select Edit Test Data.
4. On the Edit Test Data page, provide the web service name in the component's test data. Also, provide the operation name/transaction type in the appropriate component's test data field. Fill up all the test data for the component as necessary.
5. Save the test data and click Close.
6. On the Flow Definition page, right-click the component and select Test Component.
This will open up the conversational test data entry screen for the component.
7. Select the flow and user configuration needed to test the component. Click OK.
8. Click Send to post the request to the application being tested. Clicking Send does not save the data into the test data of the component being tested.
9. After receiving the response, validate it (for errors) to see if the test data provided is appropriate. Else, adjust the test data and click Send to send a new request to the application being tested.
10. Repeat step 9 till the expected response is obtained.
11. Once the appropriate test data is set and the response is as expected, click Save to save the updated test data into the component's test data in the flow.
Note: Clicking Save will only replace any static values provided in the component's test data for a given element. If the Test Data field for a component line contains a global variable, the variable in the field will not be replaced by the static data in the request being saved.
Bulk Replacing Component Test Data in Multiple Flows
The Replace Test Data feature allows to replace/edit value of one or more elements of a component in multiple flows, at once. If the component is used in multiple flows, select all or specific flows in which the test data needs to be changed for the component. This feature allows an easy way to change an existing test data value in several flows to a new value to reflect change in test data setup.
• Access the option to replace component test data. Navigate to the Component menu and right-click the component whose test data needs to be edited/replaced. Click Find Component Usage.
• In the Find Component Usage interface, select the flows under which the component test data needs to be replaced. Select the checkbox next to the flow name(s) and click Replace Test Data.
• Click Add Row to add a row to choose the element of the component whose specified existing test data value needs to be replaced with a new value. To replace the test data of multiple elements of the component, add multiple rows that specify the xpath of the element whose test data value needs to be replaced.
• Set an existing element value to blank or enter test data for component element whose current test data value does not exist. Use #EMPTY as the value in appropriate field (Existing Value/New Value).
• Specify a particular occurrence of an element in a group element. Indicate the index of the element in the group. To replace the zip code of second address group element, specify similar to /user/address[2]/zipCode and specify the Existing Value and New Value.
• Use wildcard "%" in the Existing Value field to indicate replacing of any existing value that matches the pattern. Example: To replace a field value that contain anything that starts with a “Building” to “Apartment 123” specify the Existing Value as “Building%” and New Value as “Apartment 123”.
Flow Subroutines
A flow subroutine is a flow that can be included/used in other flows. It improves reuse of a flow. For example: Many test cases expect a ‘V’ setup to be available before being able to verify some business test cases. In this case, create a flow for ‘V’ setup and all other test case flows can reuse this ‘V’ setup flow as a subroutine in their respective flows. Specify any variables/parameters that the subroutine expects from the parent flow and also expose any variables/parameters that are created in the subroutine. Right-click Edit Test Data on the flow subroutine component in the flow.
• For a given flow test data set pertaining to the flow calling the subroutines, the test data set of the subroutine can be selected in the subroutine's test data GUI. Right-click the subroutine and select Edit Test Data.
• Only the variables defined in the default test data set of a subroutine flow can be used as input or output of the subroutine. This is to ensure standardized API for the subroutine.
Adding Subroutines to a Flow
To add an existing flow as a subroutine in a flow:
1. Right-click the scenario/component in the flow.
2. Select Add SubRoutine.
3. Specify the Release, Product Family, and Product to filter the flows.
4. From the Flows drop-down list , select the flow to be included.
5. Click Add to add it to the current flow as a subroutine.
Note:
• A flow cannot be added to itself as a subroutine. Make sure not to nest the subroutines to include other subroutines.
• A flow can only be added as a subroutine only after it’s subroutine interface has been defined. Refer to the Defining Input-Output Parameters of a Subroutine section for information on how to define the subroutine interface.
Defining Input-Output Parameters of a Subroutine
To define input and output parameters for a subroutine:
1. Navigate to the Flows tab.
2. Right-click the flow name in the product and navigate to module > flow tree structure in the left pane. Select Define Subroutine Interface.
3. Specify the parameters the subroutine expects from the calling flow and the parameters the subroutine exposes to the calling flow.
Example: If the subroutine creates an Account, it expects a personId value to be provided for it to create an Account. After an account is created, it returns the accountId. The subroutine should be defined with one input variable “personId” and another output variable “accountId”.
4. Add additional input/output variable.
a. Click Add IN/OUT Variable.
b. Enter the name and parameter type.
c. Click Save. 
This figure shows a subroutine interface definition for a flow that creates both a person and account and exposes personId and accountId as outputs, so they can be used by the calling flow.
5. After a subroutine is added to a flow calling a subroutine, map the input or output variable(s) of the subroutine.
a. Right-click the subroutine in the flow tree structure of the calling flow and select Edit Test Data.
b. Map the input/output variable of the subroutine to a variable in the calling flow.
Example: The subroutine might be exposing accountId as the variable. To use the exposed variable in the calling flow, create a new variable in the calling flow using Create New Variable. Map the output accountId variable from the subroutine flow to the newly created variable in the calling flow. This new variable can be used in the test data GUI of any component that succeeds the subroutine in the calling flow.

This figure shows the Edit Test Data screen for a subroutine that outputs a personId and accountId. New variables, personId and accountId are created and the outputs of the subroutine are mapped to the variables (gVarAccountId1 and gVarPersonId1).
Running Subroutine in a Loop
To achieve the capability to loop one or more components within a flow, create the component(s) as a subroutine flow. A subroutine flow can be run in a loop either a fixed number of times or until an exit condition is satisfied.
Example: If the subroutine creates a meter read, the user can loop the subroutine 24 times to create a meter read for every hour of a particular day.
Note: This feature only works with simple subroutines and not intended for nested subroutines. The flow re-run (from the point of failure) feature will not work if the flow has a subroutine loop defined.
To define subroutine looping, add the sub-routine flow to the parent flow. To specify the loop criteria and other details for the subroutine, open the Test Data page of the subroutine within the parent flow. Right-click the subroutine flow and select Edit Test Data. Enable the Loop subroutine switch and click Open Looping Interface to provide the criteria for executing the subroutine in a loop.
The following figure shows the Loop subroutine switch and Open Looping Interface. 
Open Looping Interface provides the following options:
• Maximum Number of Iterations: Represents the maximum number of iterations that the subroutine will be run for, irrespective of the exit criteria specified. This is useful in scenarios where the subroutine can wait but not run indefinitely (either due to wrong test data/unexpected application behavior). Use this option to run the subroutine a fixed number of times.
Example: If the subroutine creates a person entity in the application, specify the value 10 to run the subroutine 10 times resulting in creation of 10 person entities in Oracle Utilities Customer Cloud Service.
• Incrementor Type: Indicates if the loop incrementor would be a number or a date-time or list variable based, user can choose date as incrementor in case the subroutine creates meter reads for a meter and user wants to run the subroutine to create meter reads in a certain date range. The value of this incrementor sis available for usage in the subroutine flow, through the use of “incrementor” variable.
• Initial Number/Initial Date-Time: Based on the Incrementor Type selected, specify the starting number or the starting date-time to be used. This is not applicable for list variable based looping.
• Increment Value: Based on the Incrementor Type selected, specify the value by which the initial number/date should be incremented by (either a number or in days, hours, minutes and seconds). This is not applicable for list variable based looping.
The following figure shows a subroutine looping interface with the incrementor type selected as number. 
• Exit Condition: The exit condition controls when the subroutine loop would end before the Maximum Number of Iterations. This is not applicable for list variable based looping. Specify the exit condition as follows:
• Variable: Can be either based on a value of the incrementor variable or any OUT variable of the subroutine. An OUT variable of a subroutine can be used if the subroutine loop should be terminated after a particular value is available in the selected variable.
Example: We may expect that the subroutine loop should terminate if a specific value is returned in the response element of the subroutine flow. This value can be stored in an OUT variable of the subroutine flow and can be used here.
• Condition: Specifies if the value of variable should be less than, greater than, equal to etc. of the value that is specified for the Exit Condition.
• Value: The value that the variable is compared with using the condition specified above, to check if the loop needs to be terminated or continued.
Example: Assuming that the Incrementer Type was number and Initial value was 1 and Increment Value was 1 then the below values for the Exit Condition means that the subroutine is looped until the Incrementer value is equal to 5.
Variable: “Incrementer” Condition: “equals to” Value: “5”
The incrementer is a global variable that can used for setting incrementing test data in the flow.
Note: To specify the exit condition value when using a date, the date format to be specified is the same as the initial date format. To use the incrementer date as an input to a test data field, the date format may be converted to suite the test data needs, using the delivered functions in the COREDATETIMELIB or if necessary, a custom function may be created.
• List variable based looping: Subroutine looping can be used to iterate through a list of values stored in a variable.
Example: A list of values retrieved from a component's response, such as accountIds retrieved using a search component. The setVariableFromResponseList function from CORERESPONSEUTILIB can be used to retrieve a list of values from the response into a variable.
• After the incrementor type is set as “Variable” in the Subroutine looping interface GUI, the select variable field will be enabled.
• Select the variable containing the list of values that need to be iterated through, as part of the subroutine looping runs. Click Save to set the subroutine looping based on list values in a variable.
• The subroutine iterations will continue until the list of values in the variable is exhausted or until it reaches the maximum number of iterations specified, which ever comes first.
• For each iteration through the list of values, the value corresponding to the iteration from the list will be automatically stored in the variable “gvar_list_loopvar” that can be used as input to any component within the subroutine flow. This variable is automatically created as an IN variable for the subroutine flow as and when the looping is defined using the list variable option in the subroutine looping interface.
Example: If the subroutine looping is defined using a list variable that holds a set of account IDs, the gvar_list_loopvar will hold a specific ID of the account that is being used/processed as part of a specific subroutine loop.
Capturing the output from subroutine loop:
The output of a subroutine iteration/iterations can be stored in a variable using the function "appendValueToList" from the CORESTOREVALUES library. Using this function in the subroutine flow will ensure that the value provided as input to this function in each iteration gets stored in a comma separated list in the output variable of the this function i.e., the variable will hold values from all the iterations in a comma separated format, so these can be used outside the subroutine loop, in the parent test flow.
Specific values from the comma separated values can be used as input to other components in the parent flow by retrieving a single value from the list using other get functions in the CORESTOREVALUES library.
In addition to the above functions, the CORESTOREVALUES library has the function appendKeyValueToList that allows for specific values to be stored along with a key, as in a key value pair, whose value can be later retrieved using the key and the function getListValueUsingKey.
Conditional Bypass of Components in a Flow Run (Skip Component)
This feature supports finer control of a flow run. It can be specified whether a component has to be skipped or run as part of the flow run, based on the custom conditions in the component's test data in the flow. The feature can be used to selectively run or skip one or more components based on the outcome of the previous component step or based on the Flow Test Data set that is used, as part of the flow run.
To bypass/skip the running of a component within a flow:
1. Login to the application and navigate to the Flows tab.
2. On the left navigation pane, right-click the flow name and select Create/Update Flow Structure.
3. On the right pane, expand the flow structure.
4. Right-click a component and select Edit Test Data.
5. In the component's Test Data section, click the Pre-Validations tab.
6. Add the “skipStep” function from the “CoreUTAOps” library. Set the test data to “true” so that the component may be skipped during the flow run.
7. If the component should not be skipped during the flow run, set the test data for the function to “false”.
Multiple test data sets can be used to set different test data for the function making sure that the specific components in which the function exists may be skipped or run based on the input to the function.
Skipping more than one component in a flow
Additionally, the function can take in global variable which holds the values true or false as input. If certain components in a flow have to skipped during a run, then set a global variable in the Pre Validations section of the first component. The global variable can be used as an input to the skipStep function in various components. Changing the value of the global variable (using flow level test data sets) will make sure that the defined set of components are either skipped or run as part of the flow run.
Skipping components based on outcome of a component step
In cases where certain component/components have to be skipped based on the outcome of a component step result in a flow, the “CoreVerifyConditionVariableLib” library can be used. The functions in the library can be used to validate the response for a component request, much like the functions in the WSValidateLib that are used to validate a response. But, the functions in the “CoreVerifyConditionVariableLib” library output either a false or true value, but do not fail or pass the test.
The output of the functions in “CoreVerifyConditionVariableLib” can be stored into a global variable and then the global variable may be used as input to the “skipStep” function. This allows conditional bypass/running of a component based on the outcome of another component.
Note: If a certain set of components have to be skipped as part of the flow run using this feature, add the “skipStep” function in the Pre Validations section of each of the components.
Suspension/Pause and Conditional Resumption of Flow Run
In cases where a flow run needs to be suspended temporarily and resumed, subject to one or more conditions being met in the application being tested, this feature provides necessary flexibility to configure the flow steps. A simple example would be an integration test flow, where in the application/cloud service being tested sends out a message to a 3rd party application as part of the test scenario and the flow run needs to be in a wait state until the 3rd party application sends back an asynchronous message to the application/cloud servicer being tested. In such a case, the flow run needs to be suspended and the state of objects needs to be constantly monitored in the application being tested the flow run can continue, if the objects show that the asynchronous message has been received from the 3rd party application.
A new Suspend step can be added to the flow definition succeeding a component step, at which point the flow needs to be suspended until a predetermined condition in met. The predetermined condition is defined as a component/subroutine under the suspend-resume flow control structure.
The concept is simple, in that the flow will suspend the run and will resume execution if the component or subroutine step defined under the suspend-resume control structure pass.
The predetermined condition is deemed to be met if the component/subroutine step under the suspend-resume control structure passes. The validations in the component/subroutine step act as the condition verification steps.
The suspend step holds the time interval details, that specify the time/duration after which the flow run needs to check for the pre-determined condition, regularly. There is also a max time limit, after which the flow will be deemed as failed if the pre-determined condition is not met.
The following set up needs to be done to add the conditions for suspend-resume of flow run:
1. Login to the application and navigate to the Flows tab.
2. On the left navigation pane, right-click the flow name and select Create/Update Flow Structure.
3. On the right pane, expand the flow structure.
4. Right-click on the component step in the flow definition at which point the flow run needs to be suspended.
5. Select Add Suspend Step. A suspend step flow control structure is added to the flow definition and the component is moved under the structure. Subroutines can also be added under this feature as a condition.
6. Right-click the newly added suspend flow - resume control structure in the flow definition and select Edit.
7. In the pop-up window, provide the Verification Interval details that specify how often the flow run needs to check for the resume condition. This determines how often the flow run executes the component/subroutine under the suspend-resume control structure and checks for the validations to pass.
8. Provide the maximum time limit from the start of flow run suspension, until which the condition to resume needs to be verified, at the specified verification intervals. After this limit, the flow will be automatically failed if the condition to resume is not met.
9. Click Save to save the definition.
Note:
• If one or more components listed above a suspend step fail, and if the continue execution on failure flag in the flow configuration set or user configuration set is set to true, then the suspend step will be ignored and the flow run will progress to completion without suspending the flow run.
• Multiple suspend-resume steps can be added to the same flow.
• Subroutines can also be added under a suspend-resume flow control step.
• When a flow containing a suspend-resume control step is run, a hour glass icon appears against the corresponding component for which the suspend-resume step has been added.
Also, the flow run status is set as “waiting”, from the time the flow run is suspended, until the time the resumption condition is met or the flow has failed. If the resumption condition is met, the flow run will proceed further and flow run status is updated appropriately.
Component Test Data Sets
The component level test data sets allow to create test data sets specific to the component. These can be thought of as master test data sets for a component.
Example: For a C1-PremiseAdd component in Oracle Utilities Customer Cloud Service, the component level test data sets can be residential premise test data set and commercial premise test data set. Every time the C1-PremiseAdd component is used in a flow, instead of filling up the test data manually, the appropriate component test data set can be selected which automatically populates the test data from the component test data set into the component's test data GUI in the flow. This reduces a lot of work while providing test data in a flow.
Component test data sets save current test data of a component with a given name, which can later be retrieved and auto-populated it into another instance of the component either in the same flow or another flow.
Creating Reference Test Data for a Component
Save the current test data of a component for future use by saving it as a component test data set. After saving the test data set, the component can be populated with the test data contained in a Test Data Set. On the Edit Test Data page, select Test Data Set from the drop-down menu.
To create a test data set:
1. Login to Oracle Utilities Testing Accelerator.
2. On the Flows menu, navigate to the flow in which the component is used. Right-click and select Create/Update Flow Structure to open the Flow Definition page.
3. Navigate to the component for which the test data set needs to be created. Right-click the component and click Edit Test Data.
4. Click Save As Test Data Set to save the test data of the component. Specify the name of the test data set and click Save. Then, click OK to return to the Edit Test Data page.
Note: If a test data set with the same name already exists, the application asks for confirmation to overwrite the test data. 
Loading Test Data from a Component Test Data Set
To populate the test data from a given component test data set:
1. Login to Oracle Utilities Testing Accelerator.
2. On the Flows menu, navigate to the flow in which the component is used.
3. Right-click the flow and select Create/Update Flow Structure.
4. On the Flow Definition page, navigate to the component for which the test data set needs to be created.
5. Right-click the component and then click Edit Test Data.
6. Select the test data set from the drop-down menu. The test data gets populated into the component. 
Deleting Component Test Data Sets
To delete one or more component test data sets for a given component:
1. Login to Oracle Utilities Testing Accelerator.
2. On the Components menu, navigate to the component for which the test data set needs to be deleted.
3. Right-click the component and select Delete Test Data Sets.
4. Select the test data set from the popup window. Click Yes to delete the selected component test data sets. The test data set/sets should be deleted.
Flow Test Data Sets
Flow Test Data Sets allow users to create and manage multiple test data sets for the same flow. These test data sets can be used for selective or iterative run of the flow. This feature is aimed at creating multiple sets of test data per flow and swap between these test data sets before running a flow.
The Flow Test Data sets store the data specified against all the components within the flow, as a single data set. Users can copy the data set to create a new test data set and update it to reflect any changes. This feature has been provided to enhance reusability where test cases which do not differ in the flow structure, but only in the test data that is used, can be automated without having to recreate a test automation flow.
For more information, see the Iterative Flow Run section.
Creating Flow Test Data Sets
To create a flow test data set:
1. Login to Oracle Utilities Testing Accelerator.
2. On the Flows menu, navigate to the flow for which the test data set should be created.
3. Right-click and select Create/Update Flow Structure.
4. On the Flow Definition page, click Add under Flow Test Data Sets.
5. Specify the data set name and click Add.
6. Click Save As to save the test data of the flow.
7. Specify the name of the test data set and click OK.
Note: If a test data set with the same name already exists, the application asks for confirmation to overwrite the test data.
8. If the flow definition includes a subroutine, select the test data set for the subroutine. Right-click the subroutine and select Edit Test Data. Select the test data set from the Subroutine Flow Test Data Set drop-down list.
9. To edit or add test data against a flow test data set, the corresponding flow test data set has to be selected on the flow structure definition pane.
10. Navigate to the Edit Test Data page of each component in the flow and update/add the test data. 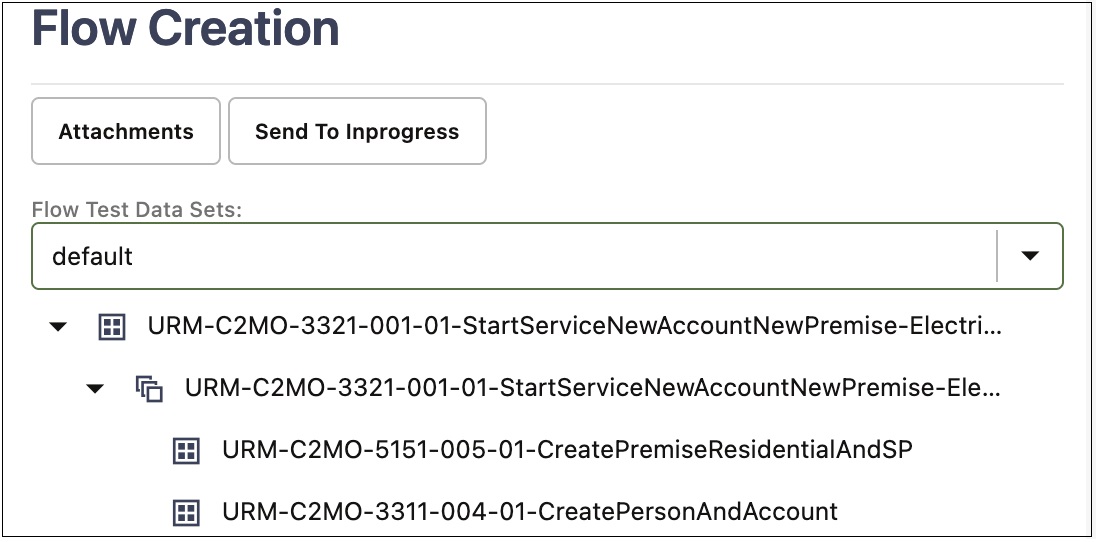
This figure shows flow test data sets option for the selected flow.
Loading Test Data from Flow Test Data Sets
To populate the test data from a given test data set:
1. Login to Oracle Utilities Testing Accelerator.
2. On the Flows menu, navigate to the flow in which the component is used.
3. Right-click the flow and select Create/Update Flow Structure.
4. On the Flow Definition page, select the test data set to be populated in the flow from the Flow Test Data Sets drop-down list.
To edit or add test data against a flow test data set, the corresponding flow test data set has to be selected on the flow structure definition pane. Navigate to the Edit Test Data page of each component in the flow and update/add the test data.
5. If the flow definition includes a subroutine, select the test data set for the subroutine. Right-click the subroutine and select Edit Test Data. Select the test data set from the Subroutine Flow Test Data Set drop-down list.