Running Test Flows
This section focuses on executing a test flow.
Running Test Flows Using a Browser
To run a test flow using a browser:
1. Login to Oracle Utilities Testing Accelerator.
2. On the Flows menu, select the product to which the flow belongs. Right-click the test flow and select Run Flow.
Note: The test flow can be run only if it is in either “Pending Approval” or “Approved” state.
3. Select the Flow Configuration and User Configuration to be used to run the test flow. These configurations hold the authentication information along with other configuration parameters required for the flow run. The flow configuration set is common for all the users of Oracle Utilities Testing Accelerator and is usually created by the admin, where as the user configuration set corresponds to the user who created the configuration set and is accessible only to the user who created it.
4. Click Run to start the test flow run.
Note: For more details about flow configuration and user configuration, refer to the A test flow is run using flow configuration sets and user flow configuration sets that contain the required properties, such as URL of the environment against which the flow to be run, username/password to be used, etc. section.
5. On the Flow Run page, the run details are displayed.
At the top of the flow run tree, the flow run start time and duration are displayed, along with the live flow run status.
The flow run has the following statuses:
• Running: Denotes that the flow run is in-progress.
• Passed: Displayed for all the flow runs that have successfully completed execution and all the validations in the flow have passed.
• Failed: The flow run execution is complete, but the flow has failed due to one or more failed in the validations in the flow.
• Stopped: Set on the flow and the flow run is stopped when user manually clicks the Stop button on the Flow Run screen.
• Waiting: The flow run is in-progress, but is currently suspended waiting for a user defined condition in the flow, to be met, so the flow execution can continue. The condition to be met is checked for at regular intervals, as defined in the flow’s suspend-resume definition.
Refer to the Suspension/Pause and Conditional Resumption of Flow Run section for more information.
Refer to the Suspension/Pause and Conditional Resumption of Flow Run section for more information.
The flow run tree shows each of the scenarios and components of the flow. Select a component in the tree to display the corresponding request and response details.
A toggle switch has been provided to view the request-response in different formats. If the Advanced View switch is enabled, the request-response details are displayed as label-value pairs, similar to the flow test data GUI, where in the label is the element name and the value is the data that was set in the request or received in the response for that element.
With the Advanced View switch disabled, the display defaults to legacy XML based view where in the request and response are visible as XML documents.
The tree shows each of the scenarios and components of the flow. Select a component in the tree to display the corresponding request and response details.
The request-response details are displayed as lable-value pairs, similar to the flow test data GUI, where in the label is the element name and the value is the data that was set in the request or received in the response, for that element.
A toggle switch has been provided to switch to a legacy xml based view where in the request and response are visible as XML documents.
6. Click View Logs to view the logs of the run.
Iterative Flow Run
To run a test flow using a browser:
1. Login to Oracle Utilities Testing Accelerator.
2. On the Flows menu, select the product to which the flow belongs.
3. Right-click the test flow and select Run Flow.
Note: The test flow can be executed only if it is either in “Pending Approval” or “Approved” state.
4. Select the Flow Configuration and User Configuration used to run the test flow.
5. Select Iterative as the Flow Run Type.
6. In the Number of Iterations field, specify the number of iterations to run the flow.
7. If the flow has more than one flow test data set, specify more than one flow test data set to be used during the iterative run. Select the checkbox next to the flow test data set name.
Note: Based on the number of iterations and flow test data sets specified, application will use test data sets for each of the iterations.
Example: If number of iterations is specified as 10 and two flow test data sets are selected, the application runs the flow with first data set for first iteration and second data set for second iteration, and switch back to first data set for 3rd iteration and so on. At the end of 10 flow iterations, there would be total of 5 runs of the flows with first data set and 5 run of the flow with second data set.
Example: If number of iterations is specified as 10 and two flow test data sets are selected, the application runs the flow with first data set for first iteration and second data set for second iteration, and switch back to first data set for 3rd iteration and so on. At the end of 10 flow iterations, there would be total of 5 runs of the flows with first data set and 5 run of the flow with second data set.
8. Click Run to start the test flow run.
Note: For more details about flow configuration and user configuration, see A test flow is run using flow configuration sets and user flow configuration sets that contain the required properties, such as URL of the environment against which the flow to be run, username/password to be used, etc..
The run details are displayed on the Flow Run page.
The tree shows each of the scenarios and components of the flow. Select a component in the tree to display the corresponding request and response details. Click View Logs to view the run logs.
Stopping Flow Run on Validation Failure
By default, the flow run continues until the last component in the flow even if there is a validation failure for a component in the flow. This behavior can be changed to make the flow run stop when a validation fails by setting the property “continueExecutionOnFailure” in the user or flow configuration to “false”.
Stopping Flow Run Manually
When a flow starts running, the Stop Flow button is enabled in the Flow Run page.
To stop a running flow, on the Flow Run page showing the current running state of a flow, click Stop Flow. The flow run will be stopped.
Note that for flows including subroutines, the parent flow that calls the subroutines should be stopped to stop the flow run. Individual subroutine flow runs cannot be stopped. A stopped flow cannot be resumed.
Viewing Flow Run Details
To view the run details of a flow:
1. Login to Oracle Utilities Testing Accelerator.
2. Navigate to the Flow menu.
3. On the left pane, navigate and right-click the flow to view the run summary. Click View Run History.
4. Click the flow run entries to view the respective details of that run. The flow run tree for the corresponding flow is displayed.
5. Click the info icon next to the failed component step in the flow run. The appropriate error is displayed along with a list of possible reasons leading to the error.
Viewing Flow Run Failure Details
If a flow run fails, the possible reasons for failure can be viewed. Click the Info icon next to the failed component step in the Flow Run Status tree structure.
To view the failure details for a flow run:
1. Login to Oracle Utilities Testing Accelerator.
2. Navigate to the Flow menu.
3. On the left pane, navigate to the flow and right-click it to view the run summary. Click View Run History.
4. Click the flow run entries to view the respective details of that run.
5. Click the Info icon next to the failed component step in the flow run. The error is displayed along with a list of possible reasons leading to the error.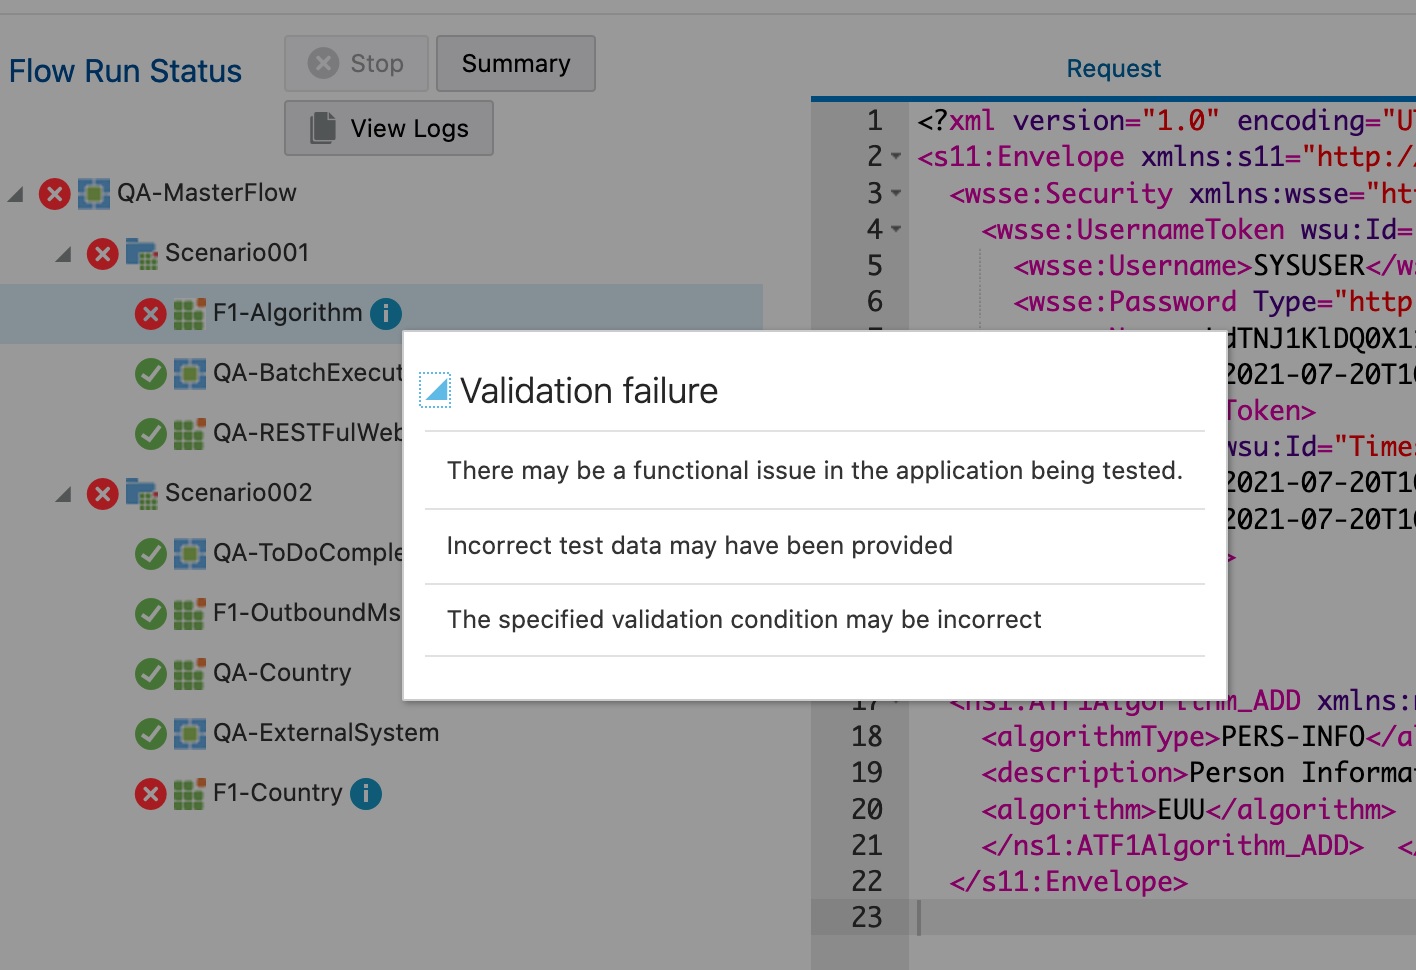
Viewing Flow Run Summary Report
To view the run summary of a flow:
1. Login to Oracle Utilities Testing Accelerator.
2. Navigate to the Flow menu.
3. On the left pane, navigate and right-click the flow to view the run summary.
4. Click View Run History.
5. Click any of the flow run entries to view the respective details.
6. On the Flow Run Status page, click Summary.
7. On the Flow Run Summary Report page, click Summary. The summary of the flow run is displayed, including total scenarios passed/failed, percentage of pass/fail, etc. You can also drill down individual scenarios and check more details.
The flow run summary can be sent via email. Specify the email address in the Summary Report page and click Email.
Conversational Test Data Management
As an alternative to the Edit Test Data GUI, test data can also be provided in XML format through the conversational Test Data Entry page. Before accessing this GUI, the component's test data needs to be populated by providing the web service name and the transaction type.
To navigate to the Conversational Test Data GUI, right-click the component in the flow tree structure (in flow development screen) and select Edit Request.
Note: This feature is only supported for web service components.
The Edit Request feature allows to:
1. Open the failed request of a component.
2. Make changes to the test data and resend the request to edge application (without running the flow multiple times).
3. Observe the response for the modified request.
4. Save the modified request as test data for the flow’s component step.
Repeat the above steps until the test data for the successful request is identified.
The Edit Request feature can be accessed from the flow structure screen/flow run interface (including from flow run history, flow set run/history, iterative run/history). User can invoke the Edit Request user interface. Right-click a component from the flow run status tree and selecting the Edit Request option. 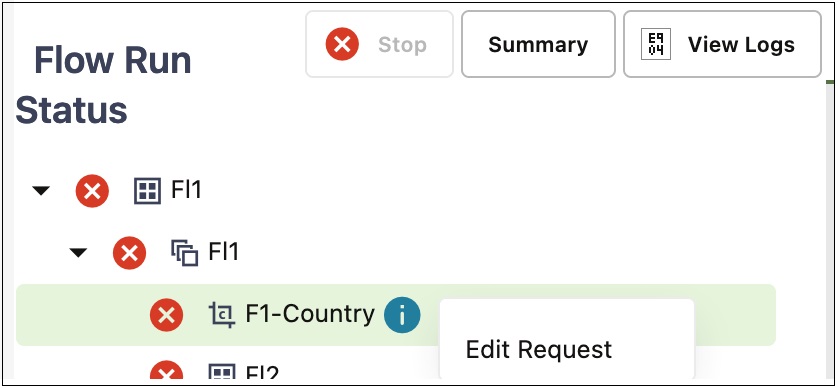
After selecting the Edit Request option from the right-click menu, a new window is displayed and prompts to select the configuration sets to be used. Modify the request by either changing test data value of one or more elements, adding/deleting new elements in the request and click Send to send the request to the application being tested and observe the response. Continue to make modifications until the desired response is received from the edge application.
The user has below options to manage request content better:
• Repopulate all schema elements. Click Refresh Schema. This helps in resetting fields that are required to make a successful request that were not present/left out in the previous/original request.
• Click Settings to allow the user to control some header level information that is sent as part of the request, including username token, timestamp and whether the request should include any schema elements that do not have any test data filled in.
• Choose to save the test data of the request to a flow test data set. Click Save to select the flow test data set to which the test data needs to be saved to in the dialog box.
Note: While saving the test data in the request XML in to the component step's test data, only static test data values defined in the component are replaced. The variables defined in the component's test data are not replaced with the test data in the XML request.
Runtime Configuration for Flow Run
A test flow is run using flow configuration sets and user flow configuration sets that contain the required properties, such as URL of the environment against which the flow to be run, username/password to be used, etc.
The flow configuration set includes configuration applicable for a particular environment. It is expected that the flow level configuration sets do not contain any user specific properties, thereby allowing many users to use a single flow configuration set.
The user configuration sets, on the other hand, are specific to each user and typically contain user-specific properties, such as the username/password used to connect to an environment.
It is expected that customers setup some generic flow configuration sets with common runtime properties and users have their personal user configuration sets that contain their credentials. While running a test flow/flow set, specify a flow configuration set and a user configuration set in combination to get generic runtime properties and user specific properties to be used for test flow/flow set run.
Note: Configuration in the user configuration sets overrides configuration in the flow configuration if the same parameter is defined in both the configuration sets.
The following properties are available by default:
• Continue Execution on Failure: Setting this flag to “true” will cause a flow run to execute all the components defined in the flow, even if one or more of the component steps fail. Setting this flag to “false” will ensure that the flow execution stops at the first component step that has failed, during a flow run.
• Application URL: The common web service's end point URL of the application that is being tested needs to be specified against this property.
Note: For Oracle Utilities Testing Accelerator that is available as part of Oracle Utilities Enterprise cloud services, the corresponding environment's URL is predefined within Oracle Utilities Testing Accelerator. Users need not provide the Application URL for the same. However, users can provide the user name and password for authentication.
• Application User Name: The user name for authentication of the web services of the application being tested needs to be specified here.
• Application User Password: The password corresponding to the above application user name for authentication of the web services of the application being tested needs to be specified here.
• SSO Federated Login: In the flow configuration set or the user configuration set, the SSO Federated Login parameter can be set to “true”, in which case, the web service request from Oracle Utilities Testing Accelerator to the corresponding Oracle Utilities cloud service will use the current user's SSO authentication, implicitly. Application User name and Application User password need not be provided if this parameter is set to “true”. If the SSO Federated Login is set to “false”, the username and password should be provided for web services authentication. This parameter can be set to “true” only in Oracle Utilities Testing Accelerator that is available as part of Oracle Utilities Enterprise cloud services. For Oracle Utilities Testing Accelerator on-premises installations, this parameter should be set as false.
• Environment Name: A custom free text environment name can be provided to denote the environment against which the flows are/will be run. This name appears in the summary report so users reviewing the report know the environment the flow/flows were run against.
• Email Recipients: The summary report is automatically emailed to the email addresses specified against this property. Multiple email addresses can be provided, separated by a “;”(semi-colon).
• Rest Authorization Type: This property is applicable to REST based components and allows for adding authorization type in the header. Supported values: [basic|none]. Default is “none”.
• Rest Proxy: In cases where a REST end point needs to be accessed through a proxy, this rest proxy can be set against this property.
• Rest Redirect: Setting this property to “true” will enable Oracle Utilities Testing Accelerator to access the any end points that are a result of redirection of the REST API request. Default value is “false”.
This section focuses on managing the flow and user configuration sets:
Creating a Flow Configuration Set
1. Login to the application.
2. Navigate to the Tools menu.
3. On the left pane, click Flow Configuration Sets.
4. On the Manage Flow Configuration Sets page, click Create.
5. Specify the name of the flow configuration set being created and click Create.
6. If the flow configuration set is created successfully, a message appears confirming that the operation was successful and redirects to the Manage Flow Configuration Sets page.
7. Search for the configuration set created and click Edit to create flow level configuration properties.
8. Each of the property is a key-value pair. By default some of the property names are listed on the Edit page. You can either enter a value for the existing property or choose to create a new property by clicking Add Property.
Important! It is recommended that sensitive information (such as passwords) be encrypted. Toggle the Encrypt switch to encrypt the corresponding row of the property.
Creating a User Configuration Set
1. Login to the application.
2. Navigate to the Tools menu.
3. On the left pane, click User Configuration Sets.
4. On the Manage User Configuration Sets page, click Create.
5. Specify the name of the user configuration set to be created and click Create.
6. If the user configuration set is created successfully, a message appears confirming that the operation was successful and redirects to the Manage User Configuration Sets page.
7. Search for the configuration set created and click Edit to create user level configuration properties.
8. Each of the property is a key-value pair. By default some of the property names are listed on the Edit page. You can either enter a value for the existing property or choose to create a new property by clicking Add Property.
Important! It is recommended that sensitive information (such as passwords) be encrypted. Toggle the Encrypt switch to encrypt the corresponding row of the property.
Editing a Flow Configuration Set
1. Login to the application.
2. Navigate to the Tools menu.
3. On the left pane, click Flow Configuration Sets.
4. On the Manage Flow Configuration Sets page, search for the flow configuration set to be edited, and click Edit.
5. On the Update Flow Configuration Set page, click Add Property to either enter a value for the existing property or choose to create a new property.
Important! It is required that sensitive information (such as passwords) be encrypted. Toggle the Encrypt switch to encrypt the corresponding row of the property.
Editing a User Configuration Set
1. Login to the application.
2. Navigate to the Tools menu.
3. On the left pane, click User Configuration Sets.
4. On the Manage User Configuration Sets page, search for the user configuration set to be edited, and click Edit.
5. On the Update User Configuration Sets page, click Add Property to either enter a value for the existing property or choose to create a new property.
Important! It is recommended that sensitive information (such as passwords) be encrypted. Toggle the Encrypt switch to encrypt the corresponding row of the property.
Copying a Flow Configuration Set
1. Login to the application.
2. Navigate to the Tools menu.
3. On the left pane, click Flow Configuration Sets.
4. On the Manage Flow Configuration Sets page, search for the flow configuration set to be copied, and click Copy.
5. Enter the new configuration set name and click Confirm to create a copy.
Copying a User Configuration Set
1. Login to the application.
2. Navigate to the Tools menu.
3. On the left pane, click User Configuration Sets.
4. On the Manage User Configuration Sets page, search for the user configuration set to be copied, and click Copy.
5. Enter the new configuration set name and click Confirm to create a copy.