- Core User Manual
- OAuth 2.0
- Client Maintenance
- Client Maintenance – Create
54.3.3 Client Maintenance – Create
This function enables the System Administrator to create a new client
i.e. Third Party Provider and define details like Client ID, Client Secret, Scopes,
Redirect URLs etc.
To create client:
- Navigate to the above path.The Client Maintenance screen appears.
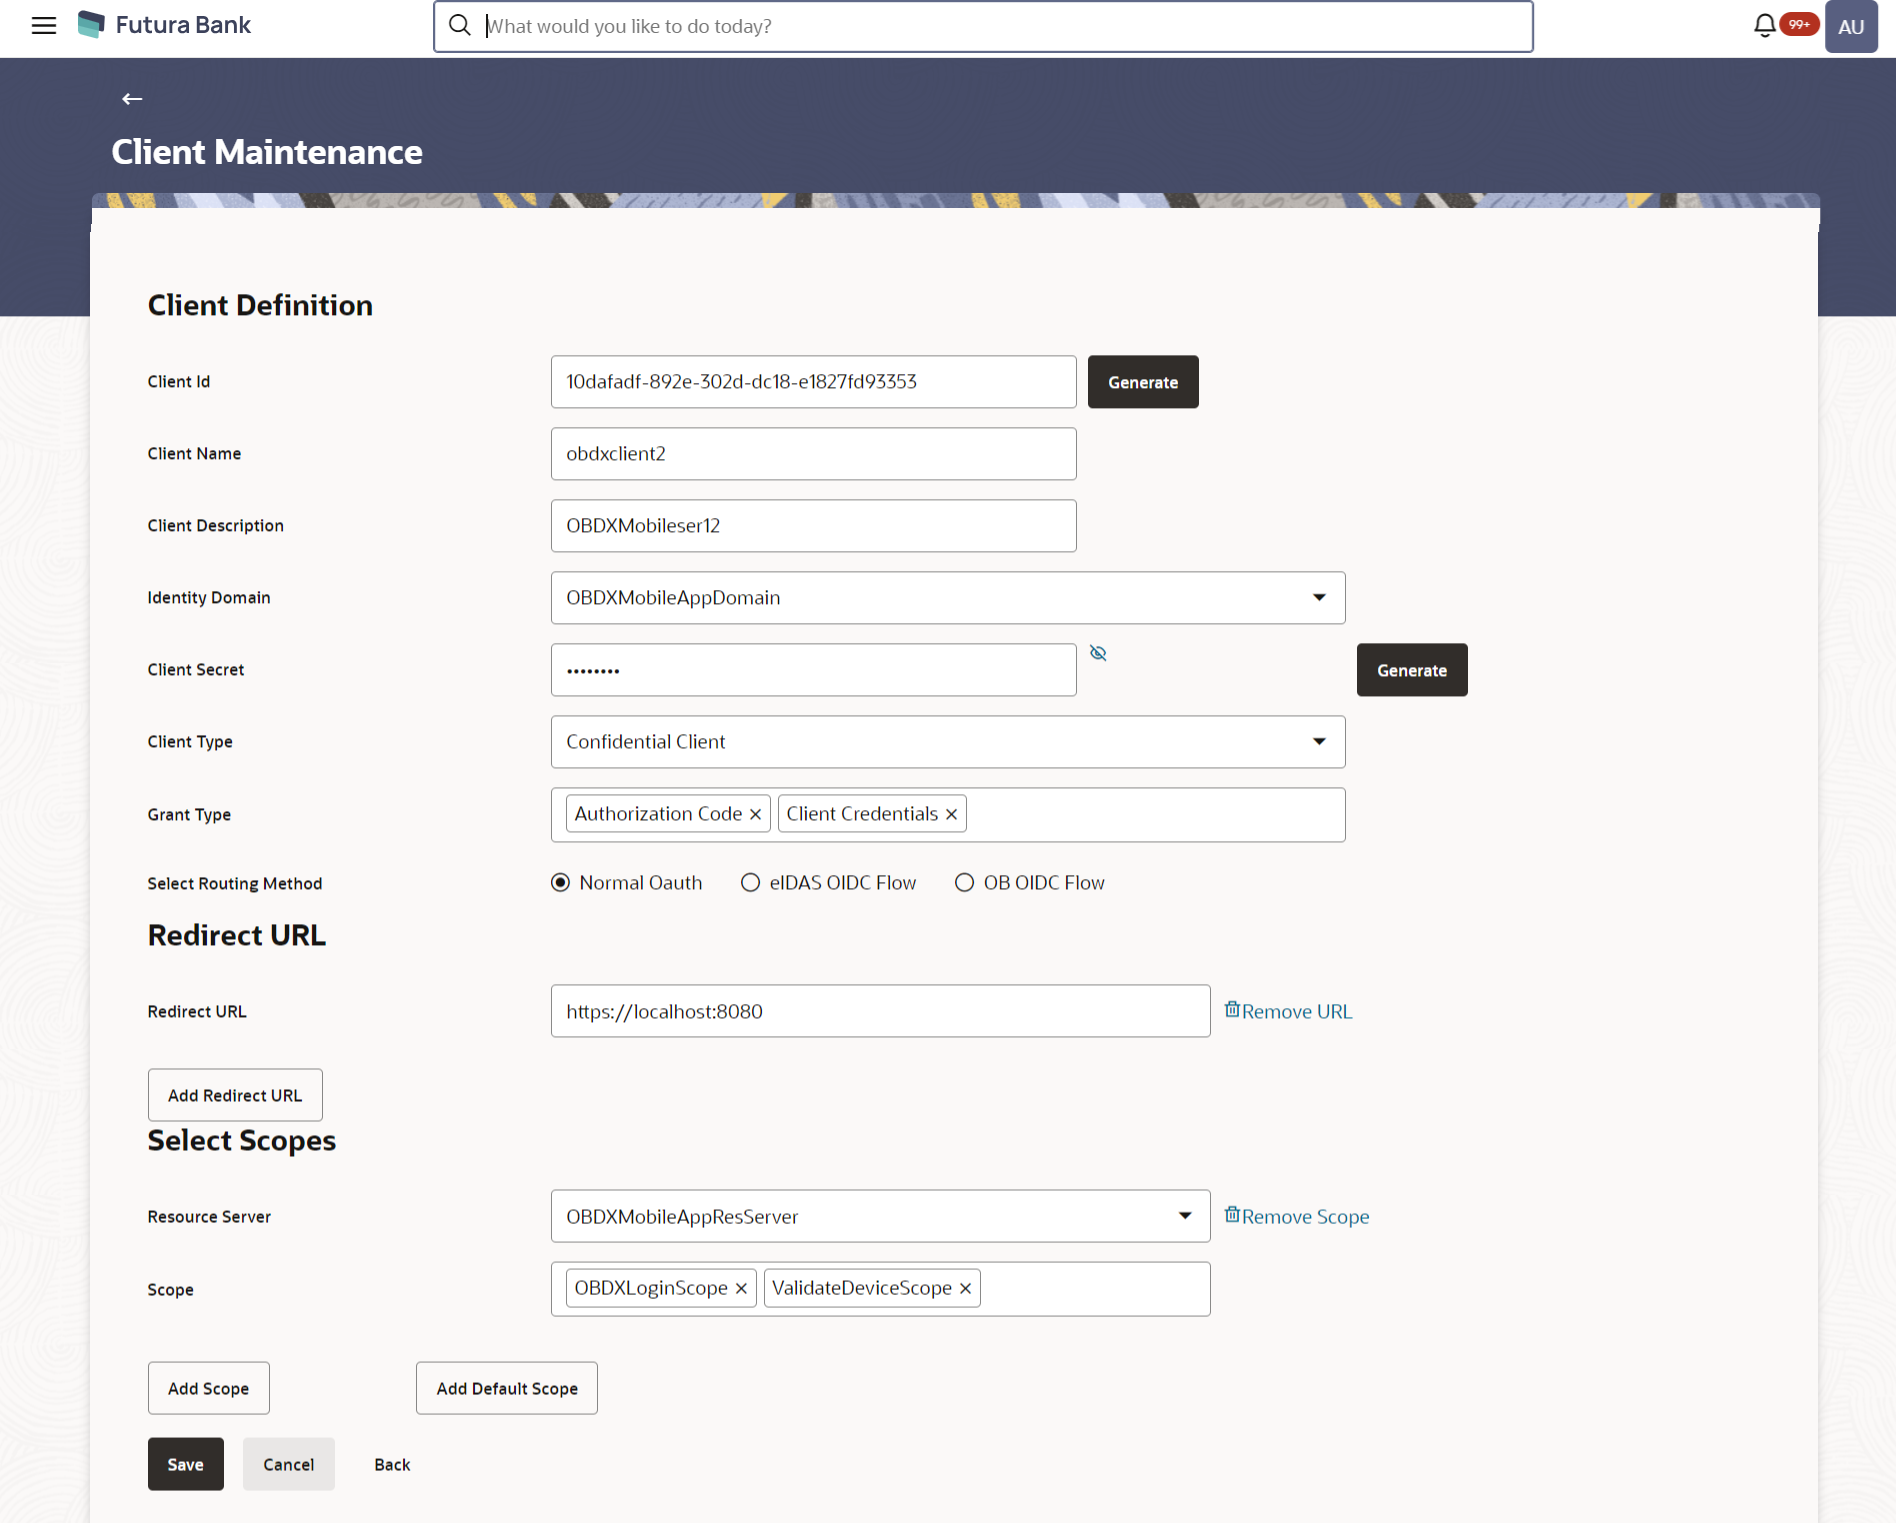
- Click Create to create a new client. The Client Maintenance - Create screen appears.
Table 54-9 Field Description
Field Name Description Client ID Specify the Client ID or click Generate to auto-generate the client Id for the client to be created. Client Name Specify the client name for the client to be created. Client Description Specify the client description for the client to be created. Identity Domain Select the Identity Domain to which client belongs. Client Secret Specify the client secret or click Generate to auto-generate the client secret for the client to be created. Client Type Select the client type for the client to be created. Grant Type Select the grant type for the client to be created. User can select multiple grant types. Redirect URL Redirect URL Specify the redirect page URL. It is the page that the user will need to be re-directed to post Authorization Code flow Select Scopes Resource Server Select the resource server from which the scopes need to be selected for the client. Scope Select the scope to be defined for the client. User can select multiple scopes from the same resource server. Default Scope Select the default scope to be defined for the client. - In the Client Id field, enter the client Id or click Generate to auto-generate the client Id for the client to be created.
- In the Client Name field, enter name for the client to be created.
- In the Client Description field, enter description for the client to be created.
- From the Identity Domain list, select the identity domain in which the client needs to be created.
- In the Client Secret field, enter the client secret or click Generate to auto-generate the client secret for the client to be created.
- From the Client Type list, select the appropriate client type for the client to be created.
- From the Grant Type list, select the appropriate grant
type for the client to be created.
Note:
Click icon to add Redirect page
URL.
OR
Click
 icon to remove already added Redirect page URL.
- From the Default Scope list, select the default scope to
be defined for the client.
Note:
Click Add Scope to add scope.OR
Click Add Default Scope to add default scope.
OR
Click
 icon to remove already added default scope.
- Click Save to save the changes.OR
Click Cancel to cancel the transaction.
OR
Click Back to navigate to the previous screen.
- The Review screen appears.Verify the details, and click Confirm.
OR
Click Cancel to cancel the transaction.
OR
Click Back to navigate to the previous screen.
- The success message of client creation appears along with the reference
number.Click OK to complete the transaction.
Parent topic: Client Maintenance
