- Core User Manual
- Role Transaction Mapping
- Create Application Role
32.4 Create Application Role
To create an application role transaction mapping:
- Navigate to one of the above paths.The Role Transaction Mapping screen appears.
- Click Create.The Role Transaction Mapping - Create screen appears.
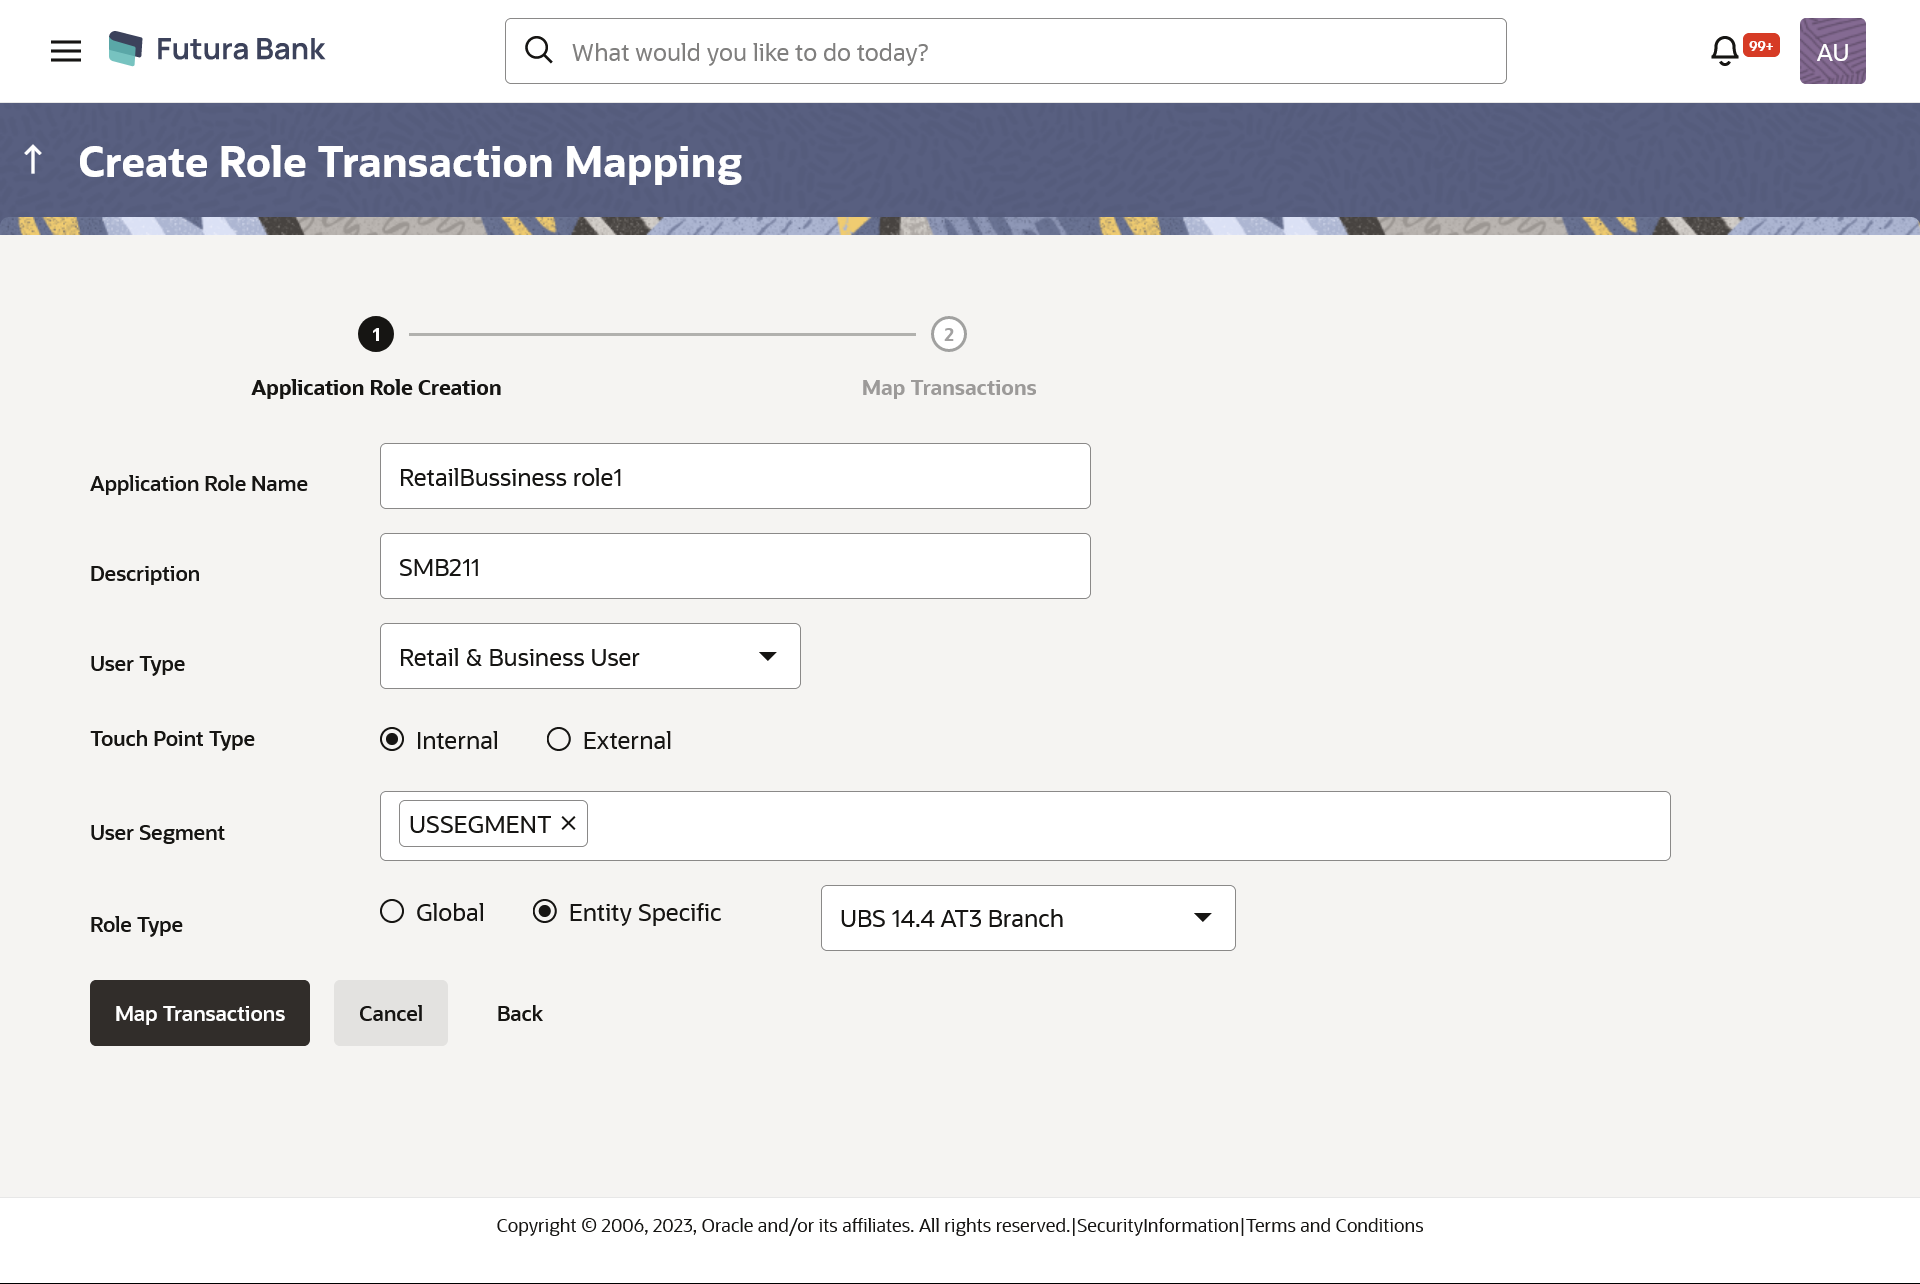
Table 32-3 Field Description
Field Name Description Application Role Name Name of the application role. Description Description of the application role. User Type Type of the user for which the application role is to be created. The options are:- Retail & Business User
- Corporate User
- Administrator
Touch Point Type Type of Touch Point. The options are:- Internal: (for internal touch points like internet, Mobile Application, Siri, Chatbot etc.)
- External : (for third Party applications)
User Segment User segments of selected user type for which the maintenance is to be done. This field is applicable only for Retail & Business user type and Internal touch point type. Role Type Type of the role. The options are:
- Global
- Entity Specific
Note:
Mapping an Entity to a role will not be a mandatory step. If no entity is mapped to an application role, it would be globally available across all entities. Factory shipped roles will be always ‘Global’ roles.Map Transactions In following section user can do entitlement mapping.
Module Name The modules for which the transaction mapping is to be done. Transactions under the selected modules will get displayed for mapping. Note:
Select All option from the drop-down to select all modules.Map Transactions to Touch Points The internal touch points for which the transaction mapping is done for application role. All the internal touch point maintained in the system gets displayed here.
Transactions Transaction Name Name of transaction to be mapped to the application role. Action Name of the action that can be performed for that transaction by the user to which this application role is assigned. - Perform- This action lets the user to perform or initiate those transactions and should be given to maker role.
- View- This action lets the user to view the initiated and approved transactions by other users and should be given to viewer role.
- Check- This action lets the user to check those transactions to which he/she has access and should be given to checker role.
- Approve- This action lets the user to approve those transactions and should be given to approver role
- Release- This action lets the user to release those transaction and should be given to releaser role
Scope Name List the scopes for the external touch point. This field is displayed and enabled, if you select External option in the Touch Point Type field.
Once a scope is mapped to a role, it cannot be mapped to any other role.
- In the Application Role Name field, enter the name of the application role.
- In the Description field, enter the description of the application role.
- From the User Type list, select appropriate type for which role is to be created.
- From the Touch Point Type list, select appropriate
option.
- If you select External;
- From the Scope Name list, select the appropriate scope to map to application role.
- If you select Internal and User Type as Retail &
Business;
- From the User Segment list, select the appropriate segments for which maintenance is to be done.
- If you select Internal;
- From the Role Type
list, select the role type Global
or If there is any specific role then select
Entity Specific.
- If you select Entity Specific option, then select the Entity specific role from list.
- From the Role Type
list, select the role type Global
or If there is any specific role then select
Entity Specific.
- If you select External;
- From the Role Type list, select the role type Global or
If there is any specific role then select Entity
Specific.
- If you select Entity Specific option, then select the Entity specific role from list.
- Click Map Transaction to map transaction to the
role.The Application Role Creation screen to add transaction modules and touch points appears.
OR
Click Back to navigate back to previous screen.
OR
Click Cancel to cancel the transaction.
Figure 32-9 Role Transaction Mapping - Application Role Creation
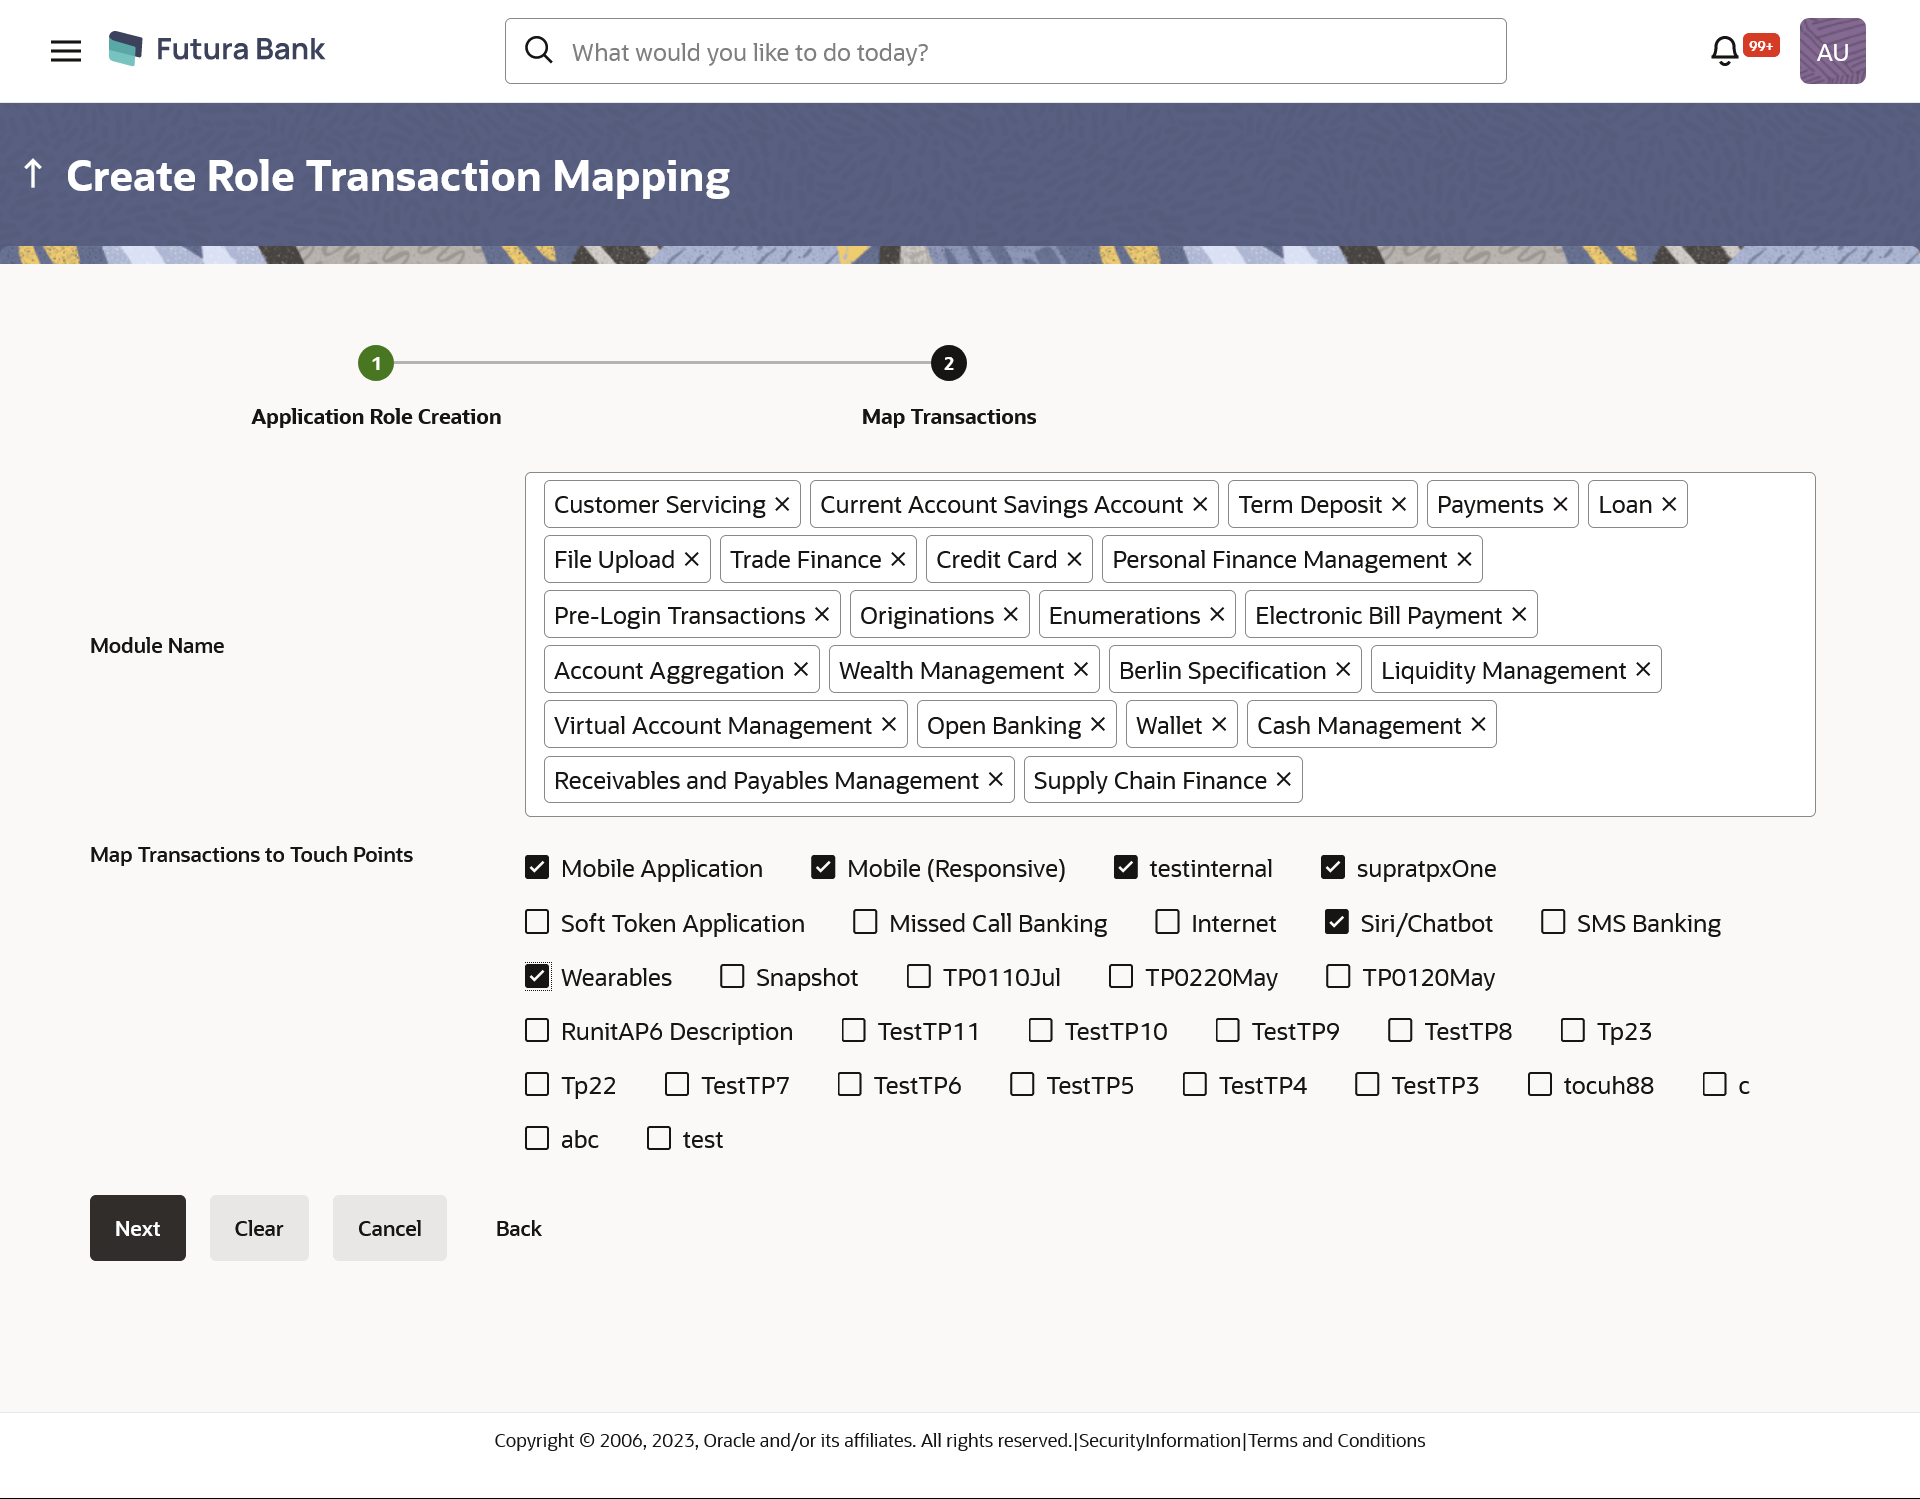
Table 32-4 Field Description
Field Name Description Map Transactions
In following section user can do entitlement mapping.
Module Name The modules for which the transaction mapping is to be done. Transactions under the selected modules will get displayed for mapping.
Note:
Select All option from the drop-down to select all modules.Map Transactions to Touch Points The internal touch points for which the transaction mapping is done for application role.
All the internal touch point maintained in the system gets displayed here.
- Select appropriate modules for transactions mapping.
- Select the check box (against the list of Touch Points to map the transactions to selected touch points.
- Click Next.
The entitlement mapping section Map Transaction appears.
OR
Click Clear to reset the entered details.
OR
Click Cancel to cancel the transaction.
OR
Click Back to navigate to the previous screen.
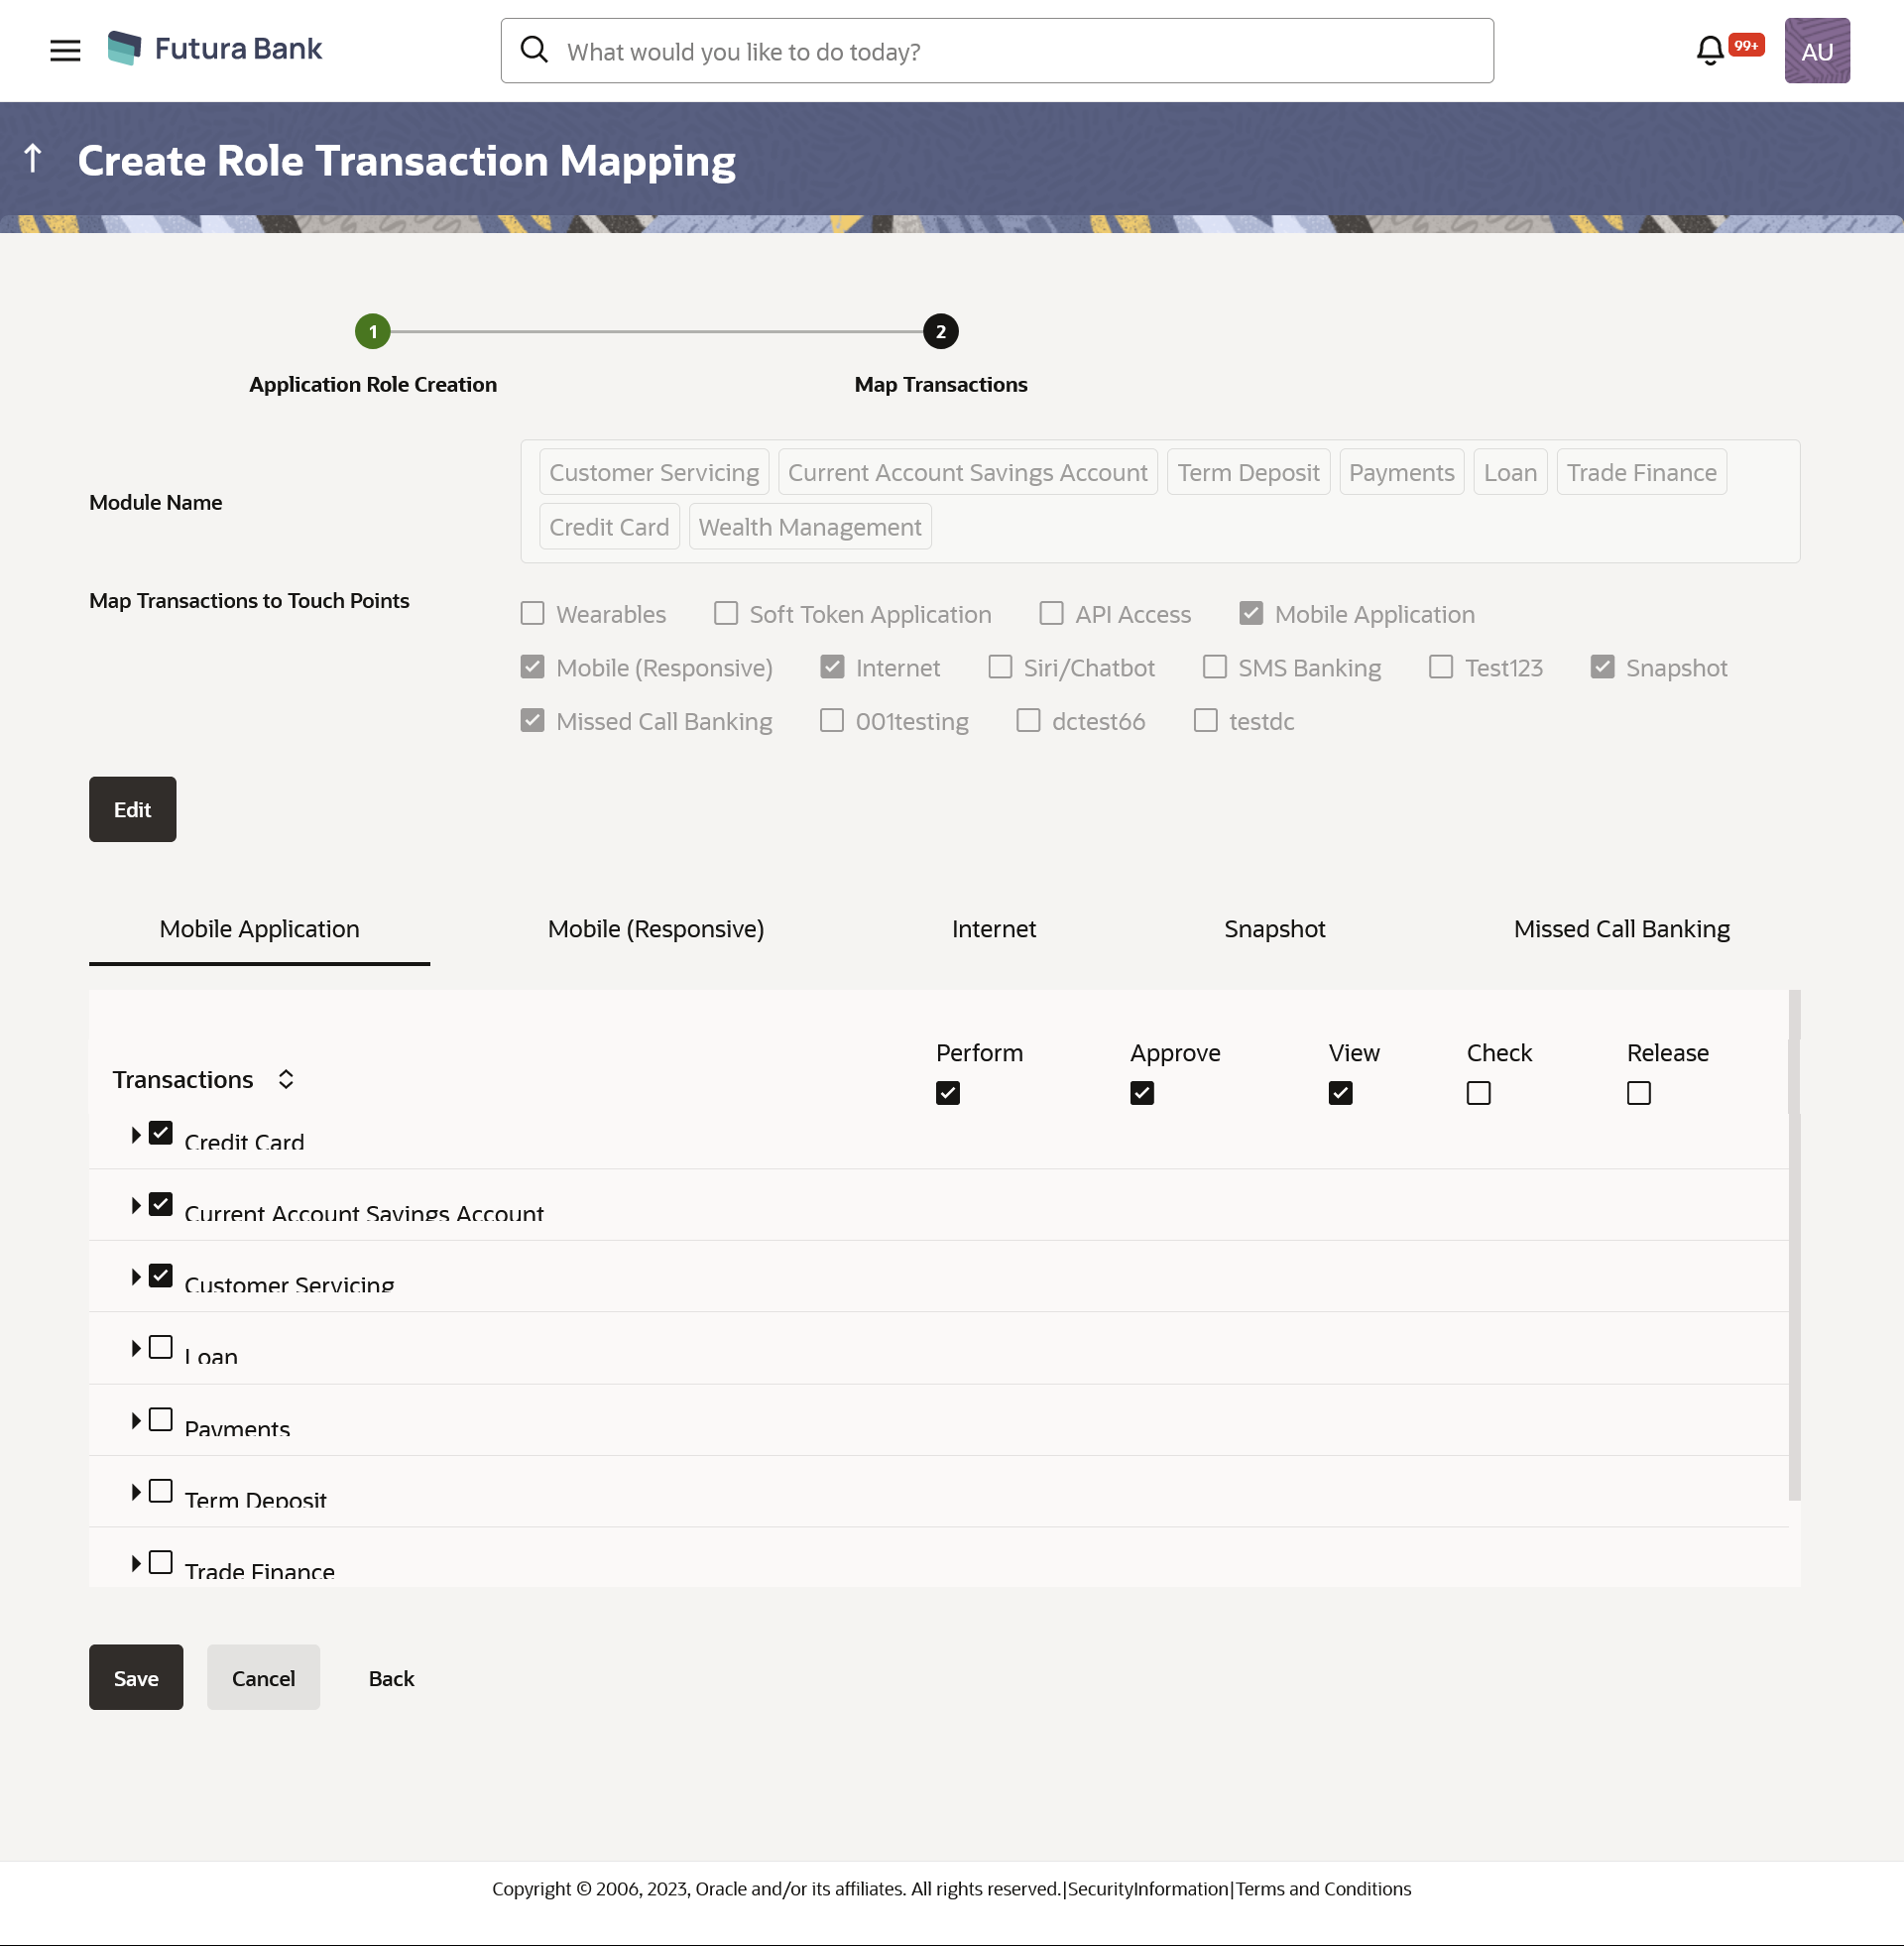
Figure 32-10 Role Transaction Mapping - Map Transaction
Table 32-5 Field Description
Field Name Description Transactions
Transaction Name Name of transaction to be mapped to the application role. Note:
Note: It is mandatory to map the transactions under the Essential category to the application role.Action Name of the action that can be performed for that transaction by the user to which this application role is assigned.
- Perform- This action lets the user to perform or initiate those transactions and should be given to maker role.
- View- This action lets the user to view the initiated and approved transactions by other users and should be given to viewer role.
- Check- This action lets the user to check those transactions to which he/she has access and should be given to checker role.
- Approve- This action lets the user to approve those transactions and should be given to approver role
- Release- This action lets the user to release those transaction and should be given to releaser role
- Click on the desired Touch Point tab for e.g. Internet.
- To map the transactions to the role, click
 icon against the particular module, then select the transaction type,
and then transactions to be mapped.
 - Select the respective check boxes preceding to transaction to be mapped.OR
Select the checkbox at header level if you want to map all the transactions below that at one instance.
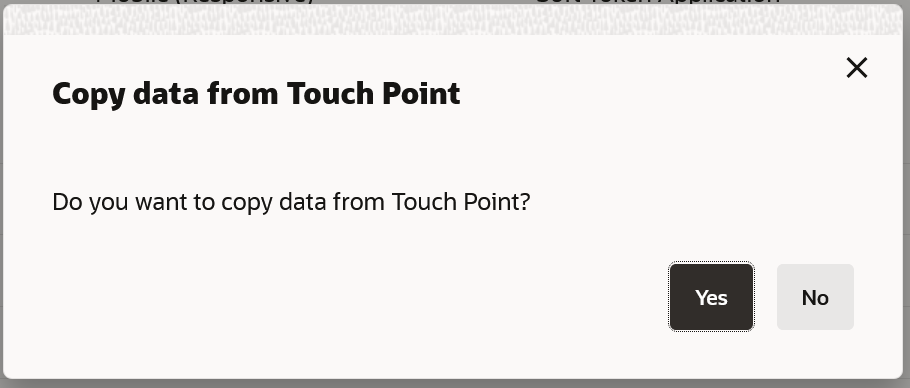
- Click on the next touch point tab, a pop up window appears for asking
Copy data from touch point.
Figure 32-11 Copy data from touch point Confirmation popup window
- Click Yes to select the touch point from which the data has to be copied.
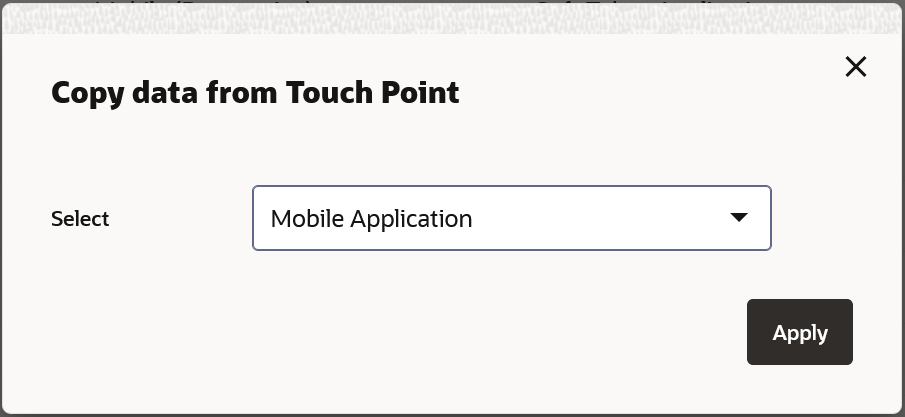
- Copy transaction mapping details of touch point to another popup window.
Figure 32-12 Copy data from touch point Confirmation popup window
- From the Select list, select the touch point from the list.
- Click
Apply.
OR
Click No. to do the mapping operationally.
- Click Save to save the changes.OR
Click Cancel to cancel the transaction.
OR
Click Back to navigate to the previous screen.
- The Role Transaction Mapping - Review screen
appears.Verify the details, and click Confirm.
OR
Click Cancel to cancel the transaction.
OR
Click Back to navigate to the previous screen.
- The screen with success message of Application Role Policy
Map appears. Click OK to complete the transaction.
Parent topic: Role Transaction Mapping
