- Core User Manual
- Goal Category Maintenance
- Goal Category - Create
45.2 Goal Category - Create
Using Goal category create option, the System Administrator can create
new goal categories and sub categories.
To create a goal category:
- Navigate to one of the above paths.The Goal Category Maintenance screen appears.
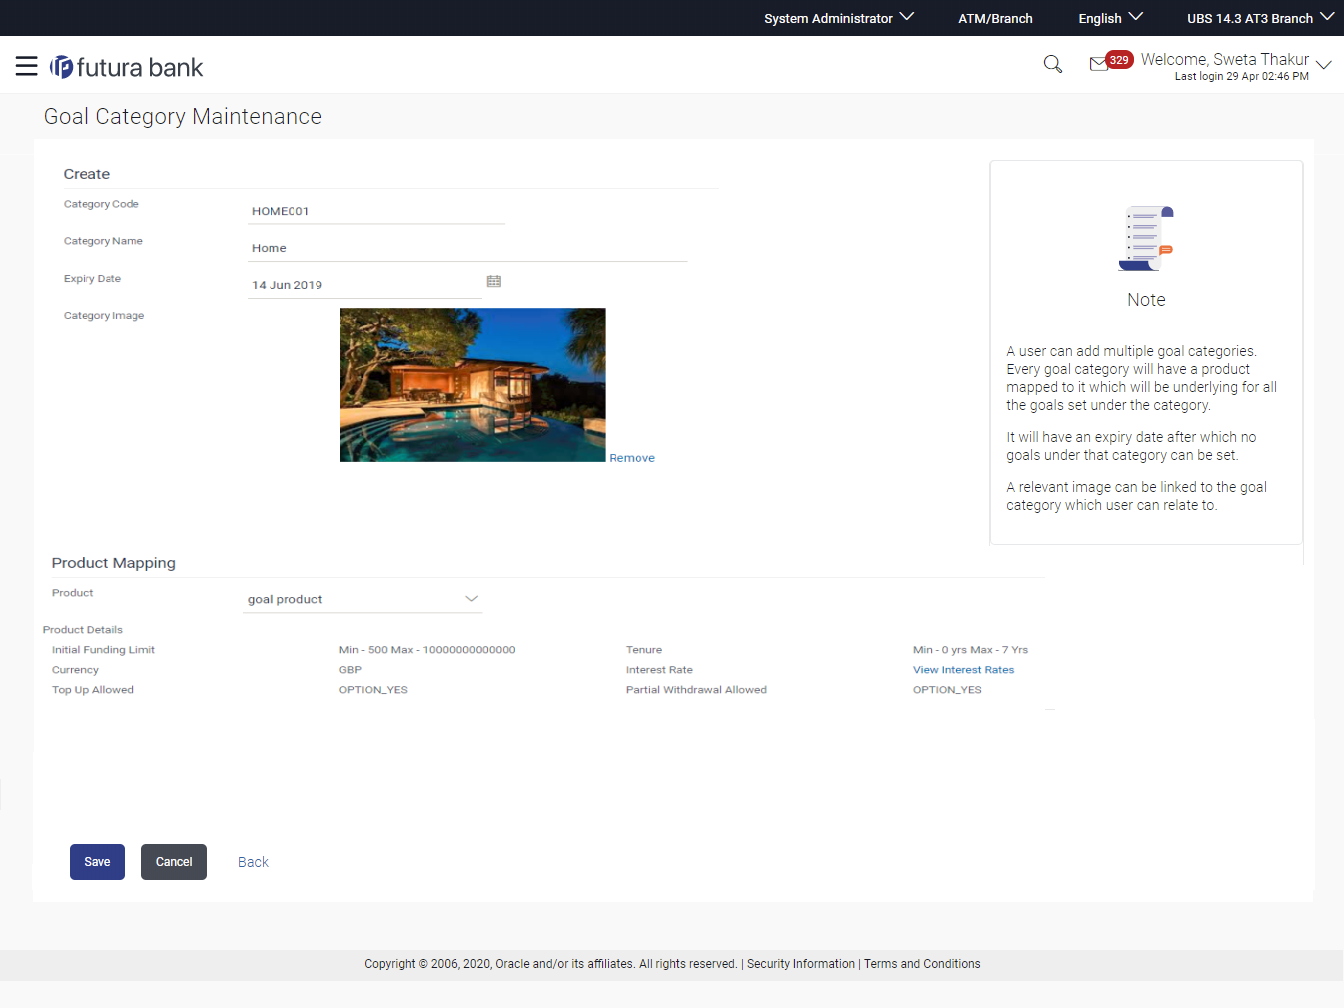
- Click Create.The Goal Category - Create screen appears.
Table 45-3 Field Description
Field Name Description Category Code Unique id maintained for the category. Which will be used for internal search for bank administrator. Category Name Name of the category.
Expiry Date Expiry date of the goal category. If the expiry date reaches, the user will not be able to view the category while creating a new goal. Category Image Image of the category for which category to be created. Product Mapping Product Name of the product to be mapped to the category under which the goal shall be opened. Bank maintains different products based on the category of the goal. Product Details Initial Funding Limit The initial amount that the user is investing for his goal. It must be within the limits of the product mapped. Tenure The period of the goal created should fall within this range. Currency The currency with which a goal can be created. Interest Rate Click the View Interest Rates hyperlink to view the interest rate slab. Interest rate slab is set for the particular tenure, and is displayed according to the amount selected. Top Up Allowed Whether top up for the goal is allowed or not. Partial Withdrawal Allowed Whether partial withdrawal of the goal is allowed or not. - In the Category Code field, enter the code for the goal category.
- In the Category Name field, enter the name of the goal category.
- From the Expiry Date list, select the appropriate date.
- Click Choose Files to choose the category image.
- From the Product list, select the appropriate option.
- Click Save to save the category details.OR
Click Cancel to cancel the transaction.
OR
Click Back to navigate to the previous screen.
- The Review screen appears.Verify the details, and click Confirm.
OR
Click Cancel to cancel the transaction.
OR
Click Back to navigate to the previous screen.
- The success message of goal category creation appears.Click OK to complete the transaction.
Parent topic: Goal Category Maintenance
