- Core User Manual
- Group Corporate Onboarding
- Step 2: Party Account Access
- Party Account Access- Edit
16.3.3 Party Account Access- Edit
To Search and Edit the party account and transaction access:
- Navigate to one of the above paths.The Party Account Access screen appears.
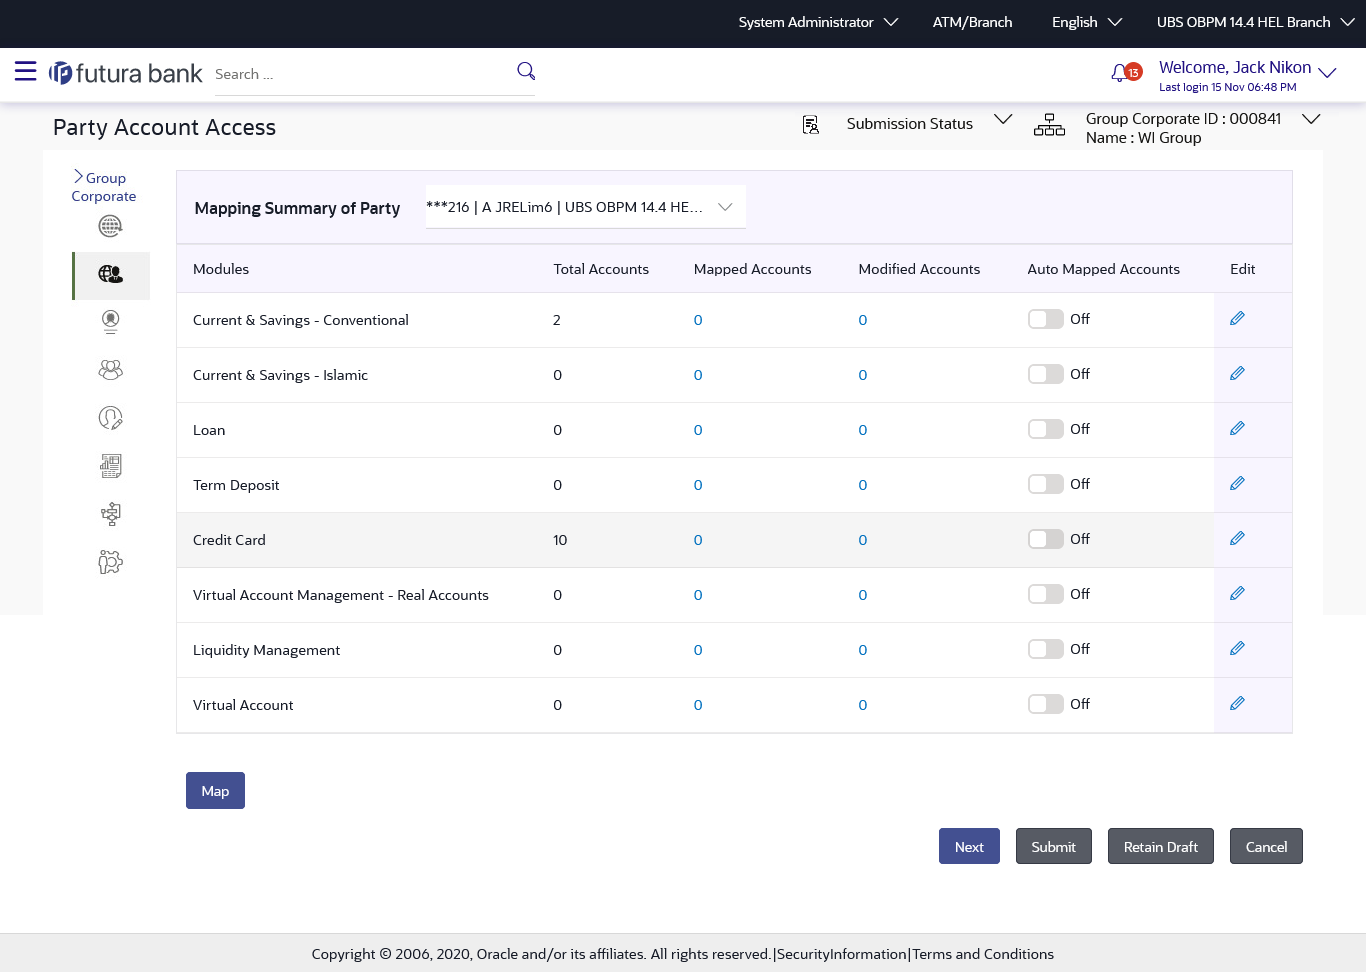
- From the Mapping Summary of Party dropdown list, select the corporate party id.
- For a searched party, summary screen will be displayed with total accounts associated with corporate party, status of the accounts mapped for the internet banking, modified accounts if any and Auto account mapping status .
- Click the link under the total Mapped accounts or
Modified accounts, The Party Account
Access – View (Transaction Mapping) screen appears. . The search
result according to the search criteria appears.OR
Click Cancel to cancel the transaction.
- If there is no mapping done for a party, the count for the Mapped Accounts will be ‘0’
- All the accounts held by the selected party as a relationship with the bank as available in the core banking system or the respective mid-office system will be fetched and displayed in the respective categories
- Click Map or Edit (available
across each banking module).The Party Account Access - Edit screen appears.
OR
Click Cancel to cancel the transaction.
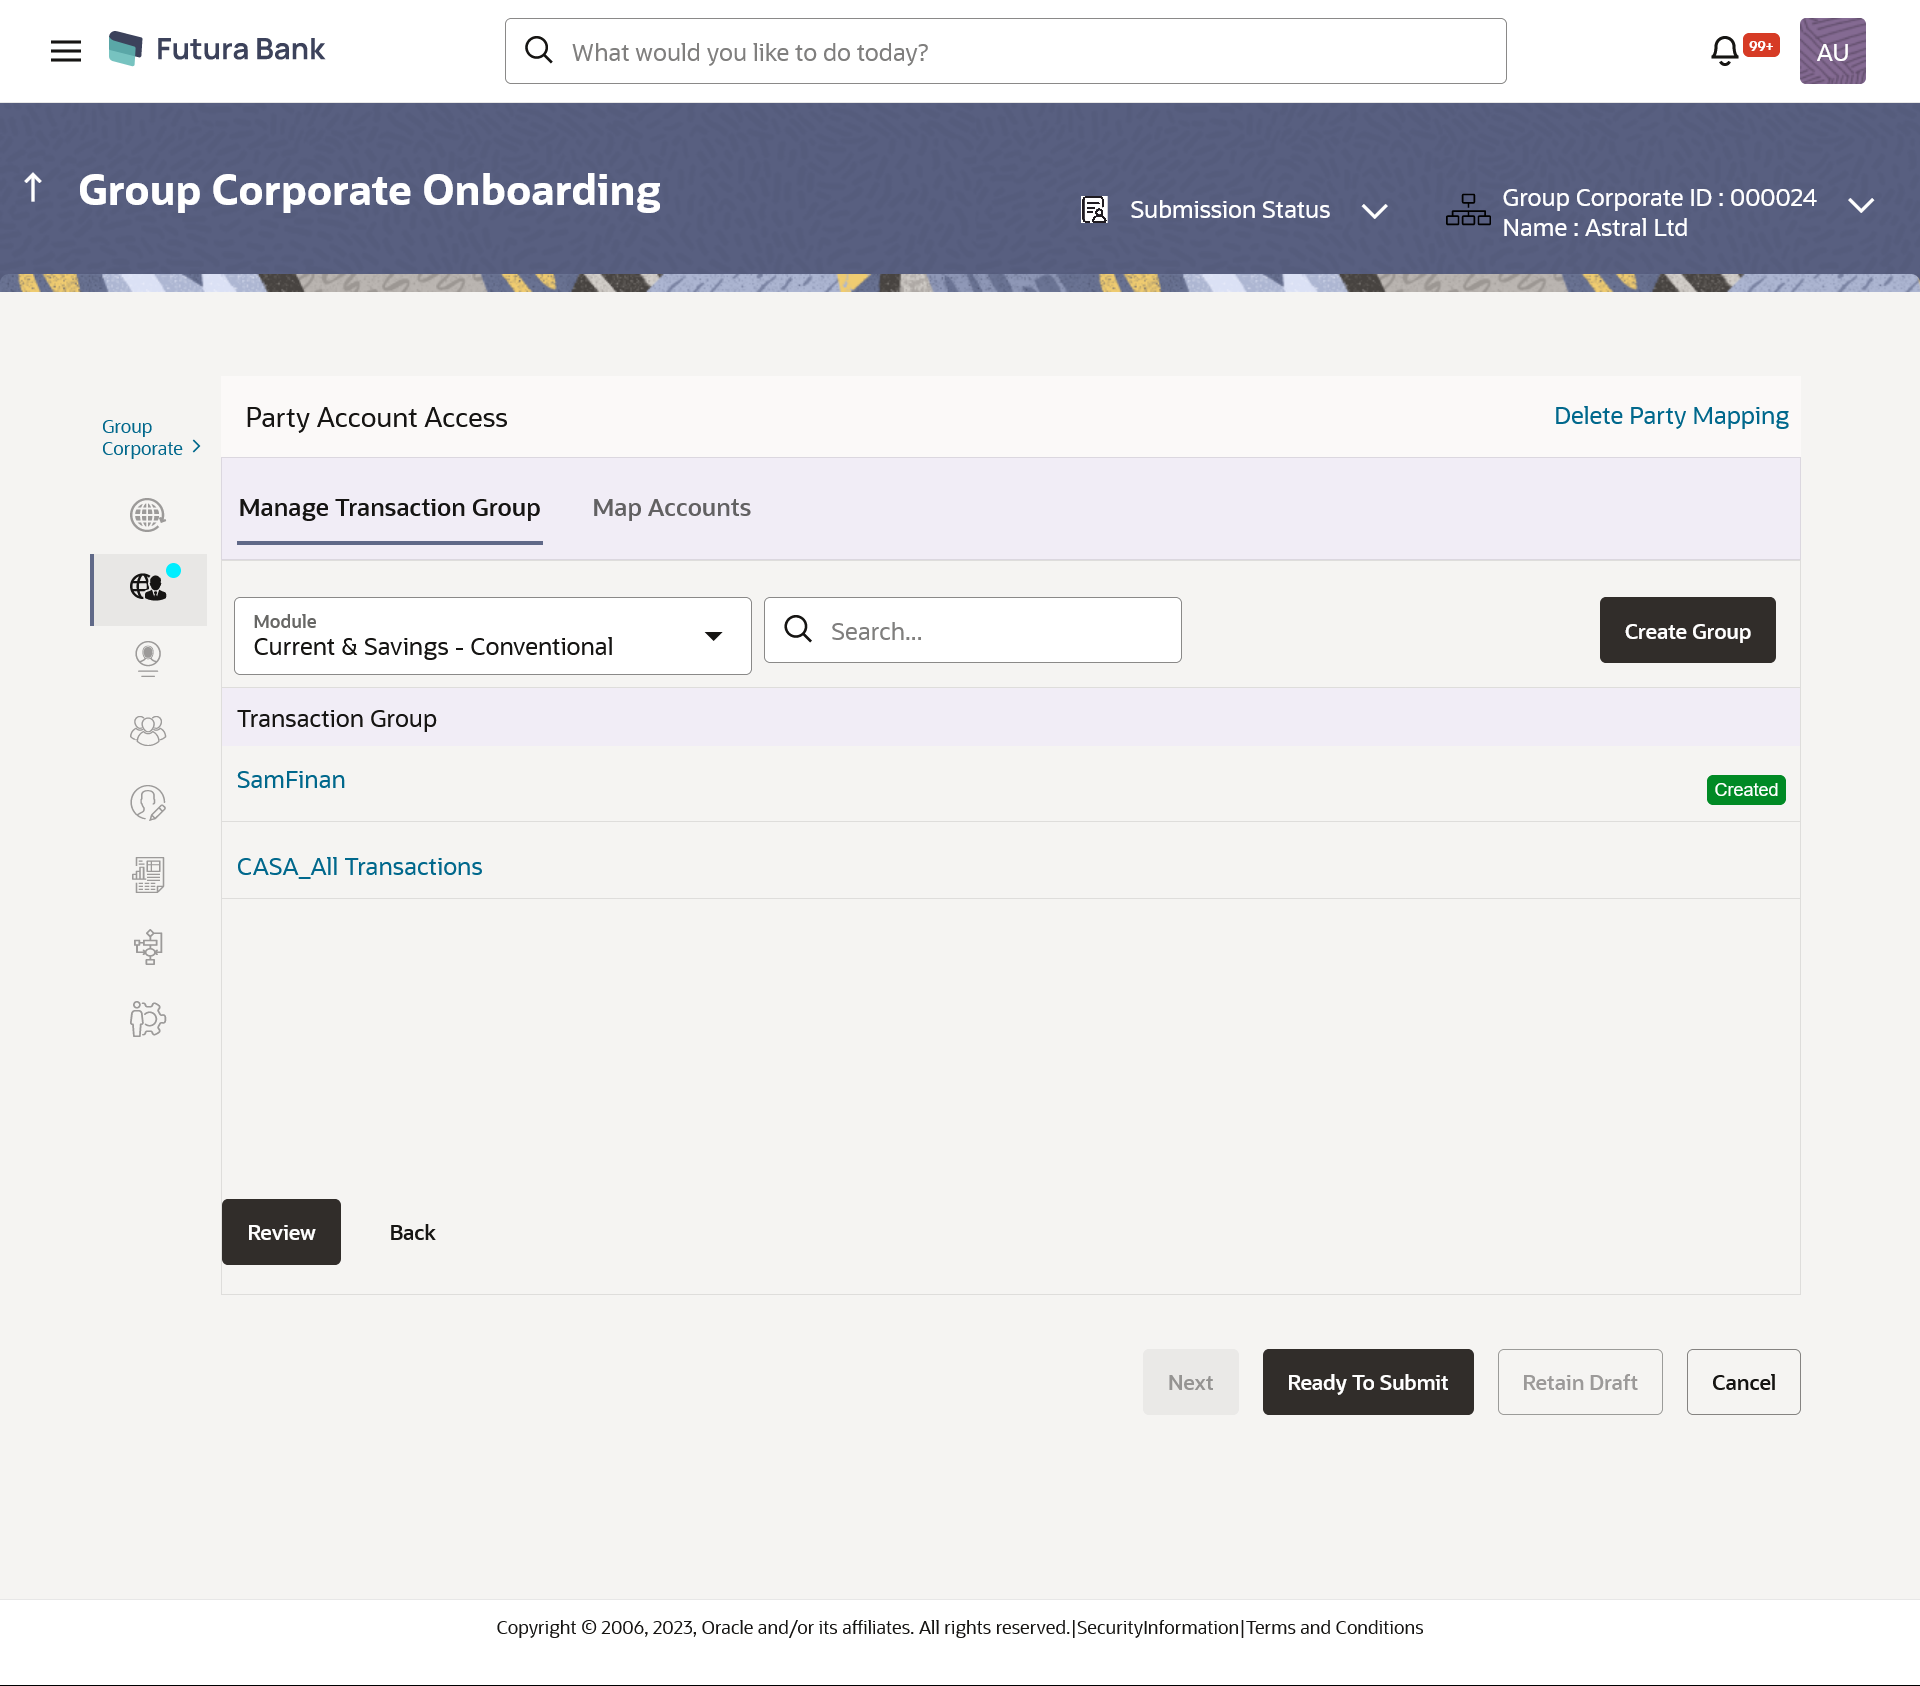
Figure 16-24 Party Account Access – Edit Details
- The Party Account Access screen has two tabs. Header of the screen shows the Group Corporate Name and Group ID. The manage Transaction Group tab lists down all the modules, transaction groups created.
- Navigate and select specific module tab (Including viz. Current and Savings Accounts for both Conventional and Islamic, Credit Card, Term Deposit, Loan accounts along with Liquidity Management enabled Real Accounts (including External Accounts if any) and VAM enabled Real and virtual accounts for a Corporate.) in the first column for which account and transaction access mapping maintenance need to be setup.
- The user can create a new transaction group by clicking
the 'ADD' button. On clicking Add, a new overlay will
open where all the transactions and inquiries will be listed. User can provide a
name the group and select the required transactions and inquiries and click the
Save button.OR
Click Reset to clear added details in overlay screen.
- A new group can also be created by cloning/copying an existing transaction group. Once the user selects an existing transaction group, system will populate the screen with the transactions selected in the copied group in editable mode. User can select or deselect some of the transactions as per requirements and create a new group by providing a different transaction group name.
- There will be one factory shipped Transaction group for
each module, which will have all transactions and inquiries grouped
together.
Note:
Factory shipped user groups cannot be deleted or modified. - Once the transaction groups are created, user can select specific module, along
with the transaction groups and can select ‘All Accounts’
to map the selected transaction group/s to all the existing accounts
under the selected party. OR
If transaction groups need to be mapped to specific accounts, then the user needs to select the
respective check boxes preceding the account number. - Once the user maps the accounts, system will show a tag as 'Modified' followed by the transaction group name after the account number.
- To map the new accounts, select appropriate option from Auto
Map toggle button; Select Auto if you
wish to allow access to all future Accounts across banking module. OR
Select Manual if you wish to explicitly map new accounts and transactions.
- User can unmap the transaction groups by selecting accounts and then clicking on Save to reset their mapping with Group Corporate.
- User can click on Delete Party Mapping to delete all the transaction and party account access maintenance done for corporate party in one step.
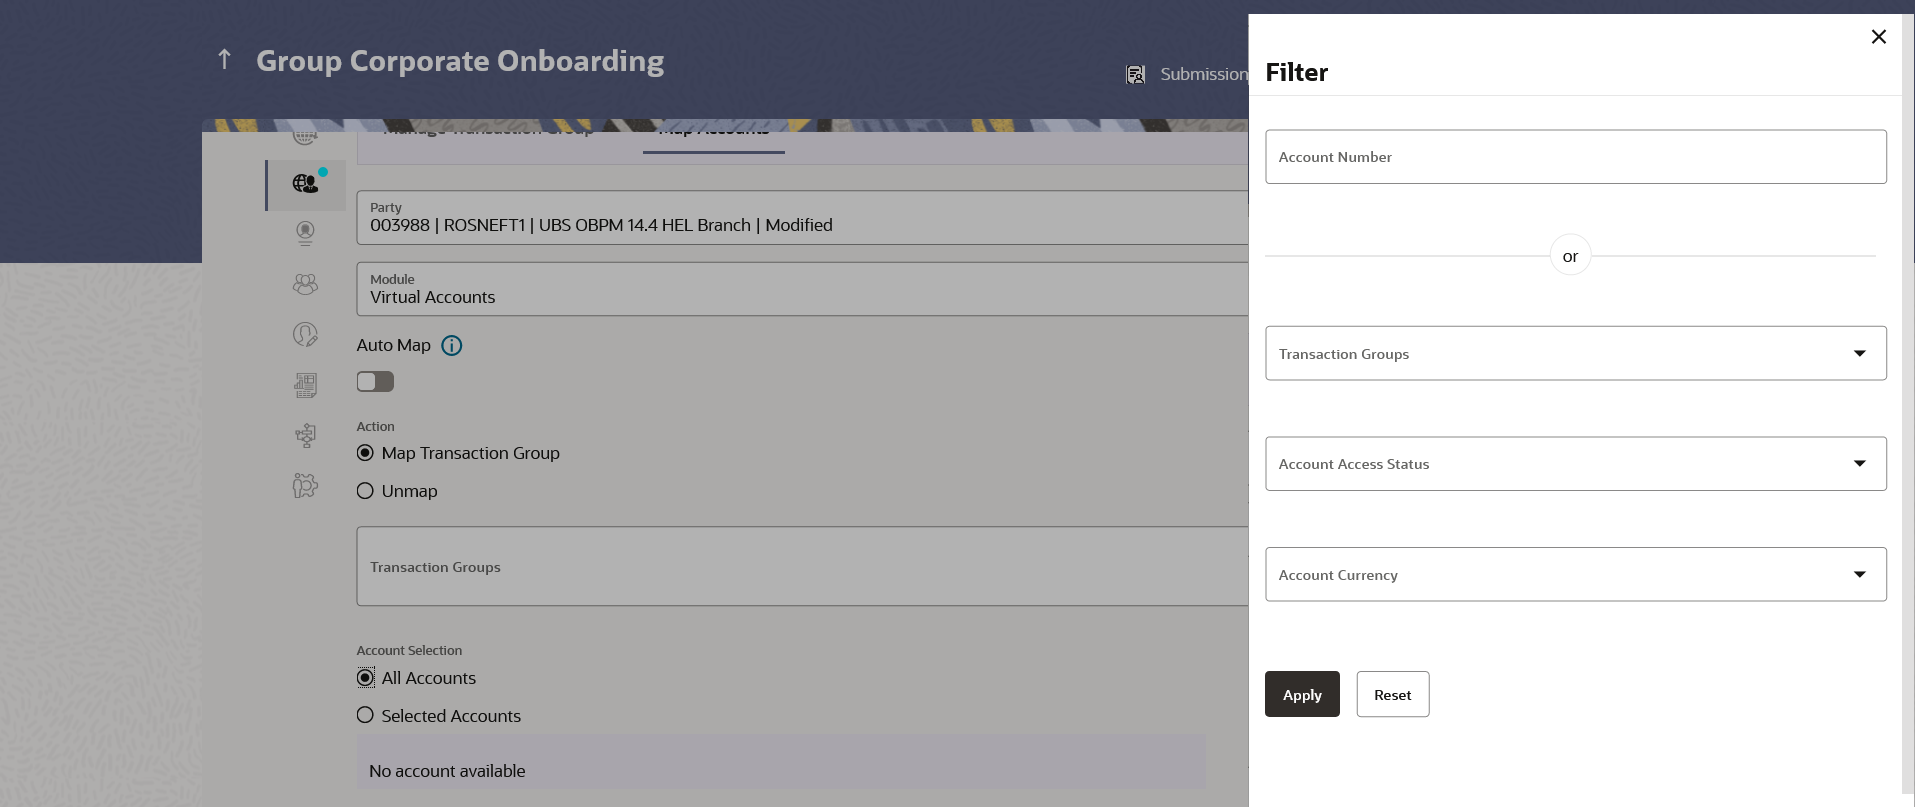
- User can drill down his search by applying filter to search an account basis on Transaction Group, currency, mapping status
- Click Save to save the maintenance, and redirect to the
review page. OR
Click Cancel to cancel the transaction.
OR
Click Submit to submit the steps performed so far for approval.
OR
Click Retain Draft to save the details entered as draft.
OR
Click Cancel to cancel the transaction.
Note:
Admin can submit the maintenance after any step. Maintenances saved so far will be sent for approval in one flow. Admin would not be able to make any changes or maintain another step for the same Group Corporate till the time the approval of the wizard is not done. - The Review screen appears.Verify the details, and click Submit.
OR
Click Edit to modify the details entered.
OR
Click Next to proceed to next step.
OR
Click Retain Draft to save all the steps completed so far, and allow Admin resume the same application.
OR
Click Cancel to cancel the transaction.
- The success message appears along with the transaction reference number
Note:
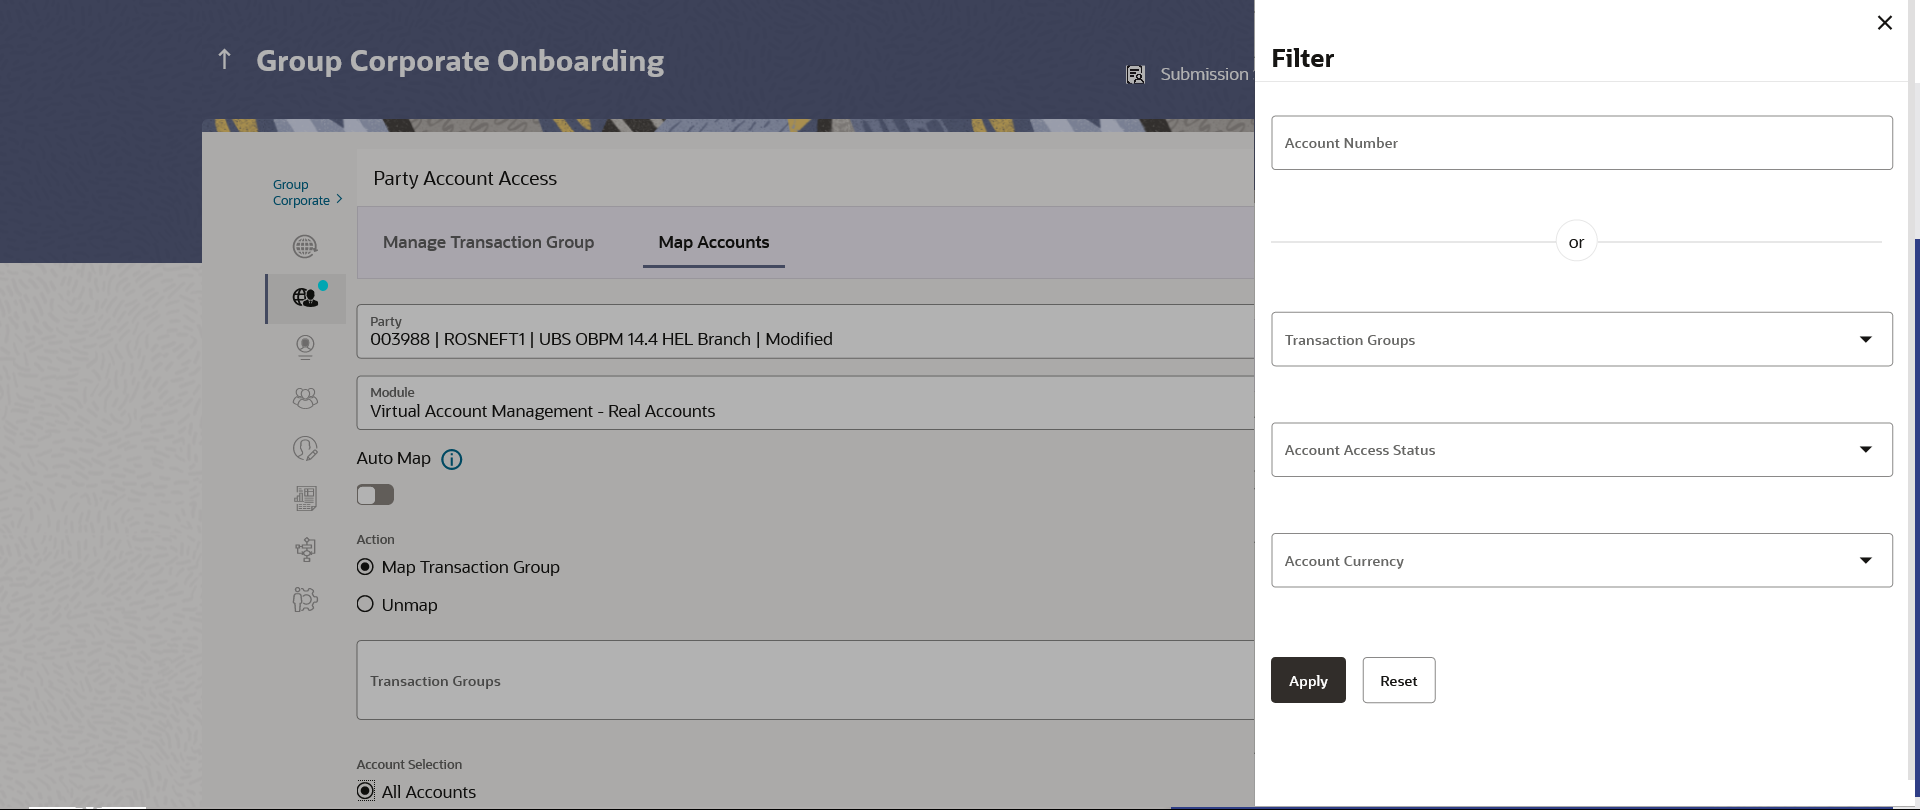
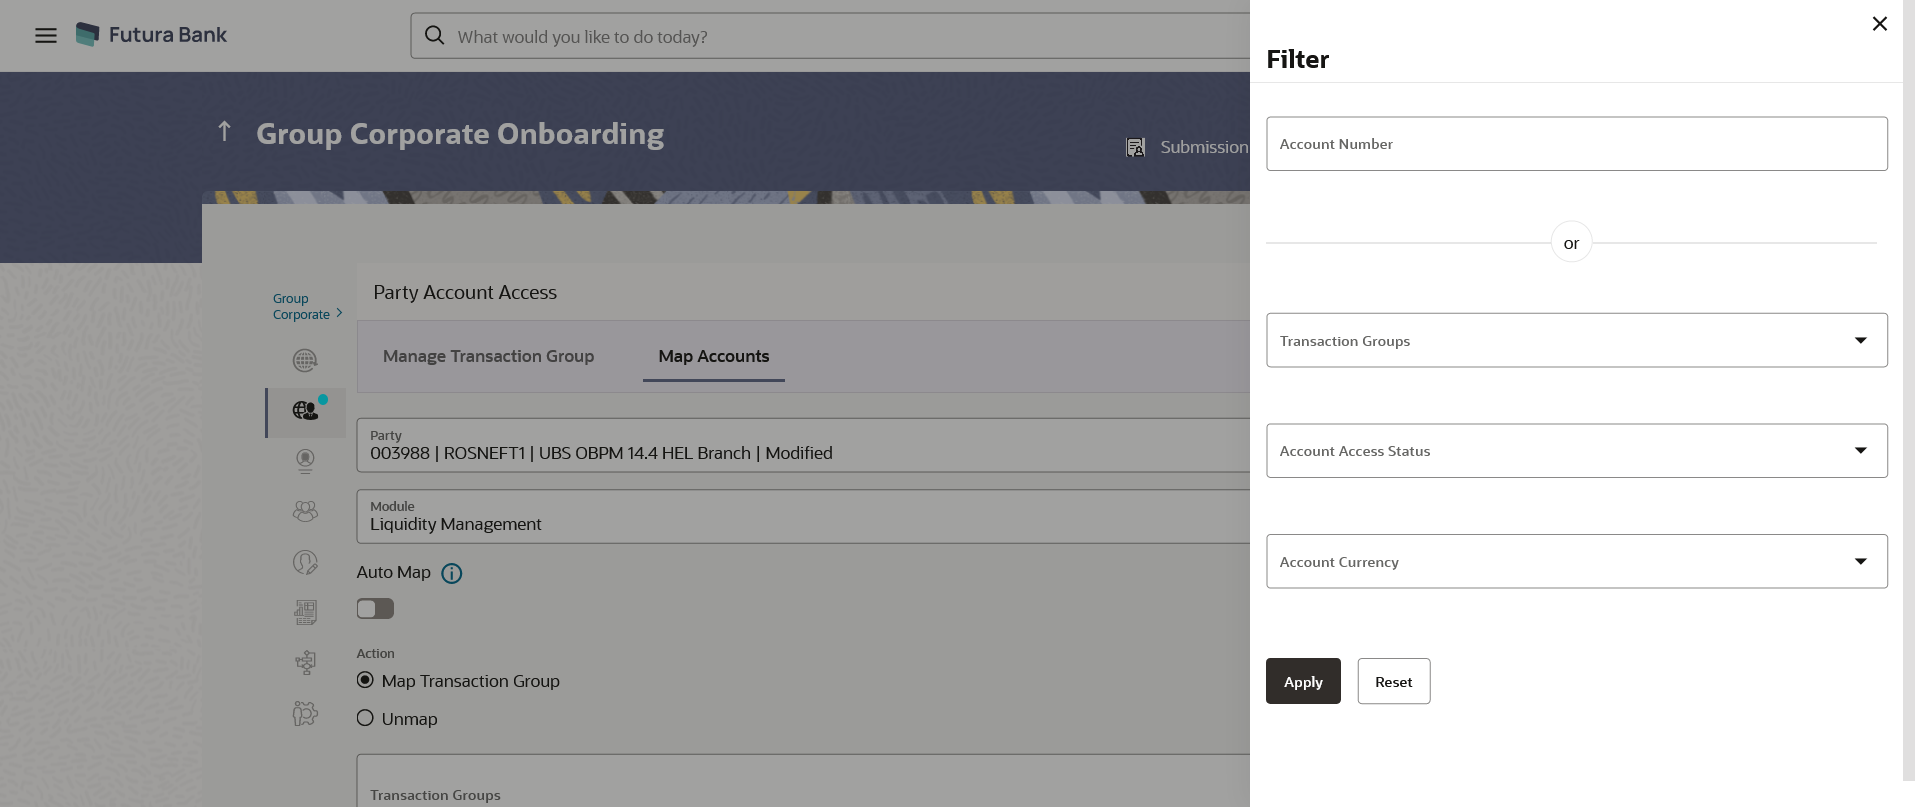
Following flow explains the Drill down options to search by applying Filter to search an account for Virtual Accounts Management & Liquidity Management module –Figure 16-25 Virtual Account Management (Real Account ) Tab-
Parent topic: Step 2: Party Account Access
16.3.3 To view Virtual Account Management - Real Accounts:
- Navigate to one of the above paths.The Party Account Access screen appears.
- In the Account Number field, enter the exact Real
Account number.OR
From the Branch name drop down, select the Branch name.
OR
From the Transaction groups, select the transaction group.
OR
From the Account Access Status field, select an appropriate status.
OR
From the Currency field, select the required currency.
- Click Apply to Apply the filter.OR
Click Reset to reset the entered data.
- The user can filter through two sections :1. On the basis of the Account Number.
OR
2. A combination of branch name, currency filters and other parameters . After the OR division, the user can use these search parameters alone or in a combination to filter search results.
16.3.3 To view Liquidity Management Accounts:
- Navigate to one of the above paths.The Party Account Access screen appears.
- In the Account Number field, enter the exact Real
Account number.OR
From the Branch name drop down, select the Branch name.
OR
From the Transaction groups, select the transaction group.
OR
From the Account Access Status field, select an appropriate status.
OR
From the Currency field, select the required currency.
- Click Apply to Apply the filter.OR
Click Reset to reset the entered data.
- The user can filter through two sections :1. On the basis of the Account Number.
OR
2. A combination of branch name, currency filters and other parameters . After the OR division, the user can use these search parameters alone or in a combination to filter search results.
16.3.3 To view Virtual Accounts:
- Navigate to one of the above paths.The Party Account Access screen appears.
- In the Virtual Account Number field, enter the exact
Virtual Account number.OR
In the Virtual Account Name field, enter the Virtual Account Name.
OR
From the Virtual Entity search, select the Virtual Entity name.
OR
From the Branch name drop down, select the Branch name.
OR
From the Transaction groups , select the transaction group.
OR
From the Account Access Status field, select an appropriate status.
OR
From the Status drop down, select the status.
OR
From the Currency field, select the required currency
- Click Apply to Apply the filter.OR
Click Reset to reset the entered data.
- The user can filter through two sections :1. On the basis of the Account Number.
OR
2. A combination of branch name, currency filters and other parameters . After the OR division, the user can use these search parameters alone or in a combination to filter search results .
