- Core User Manual
- Password Policy Maintenance
- Password Policy Maintenance - Create
37.3 Password Policy Maintenance - Create
To create a new password policy:
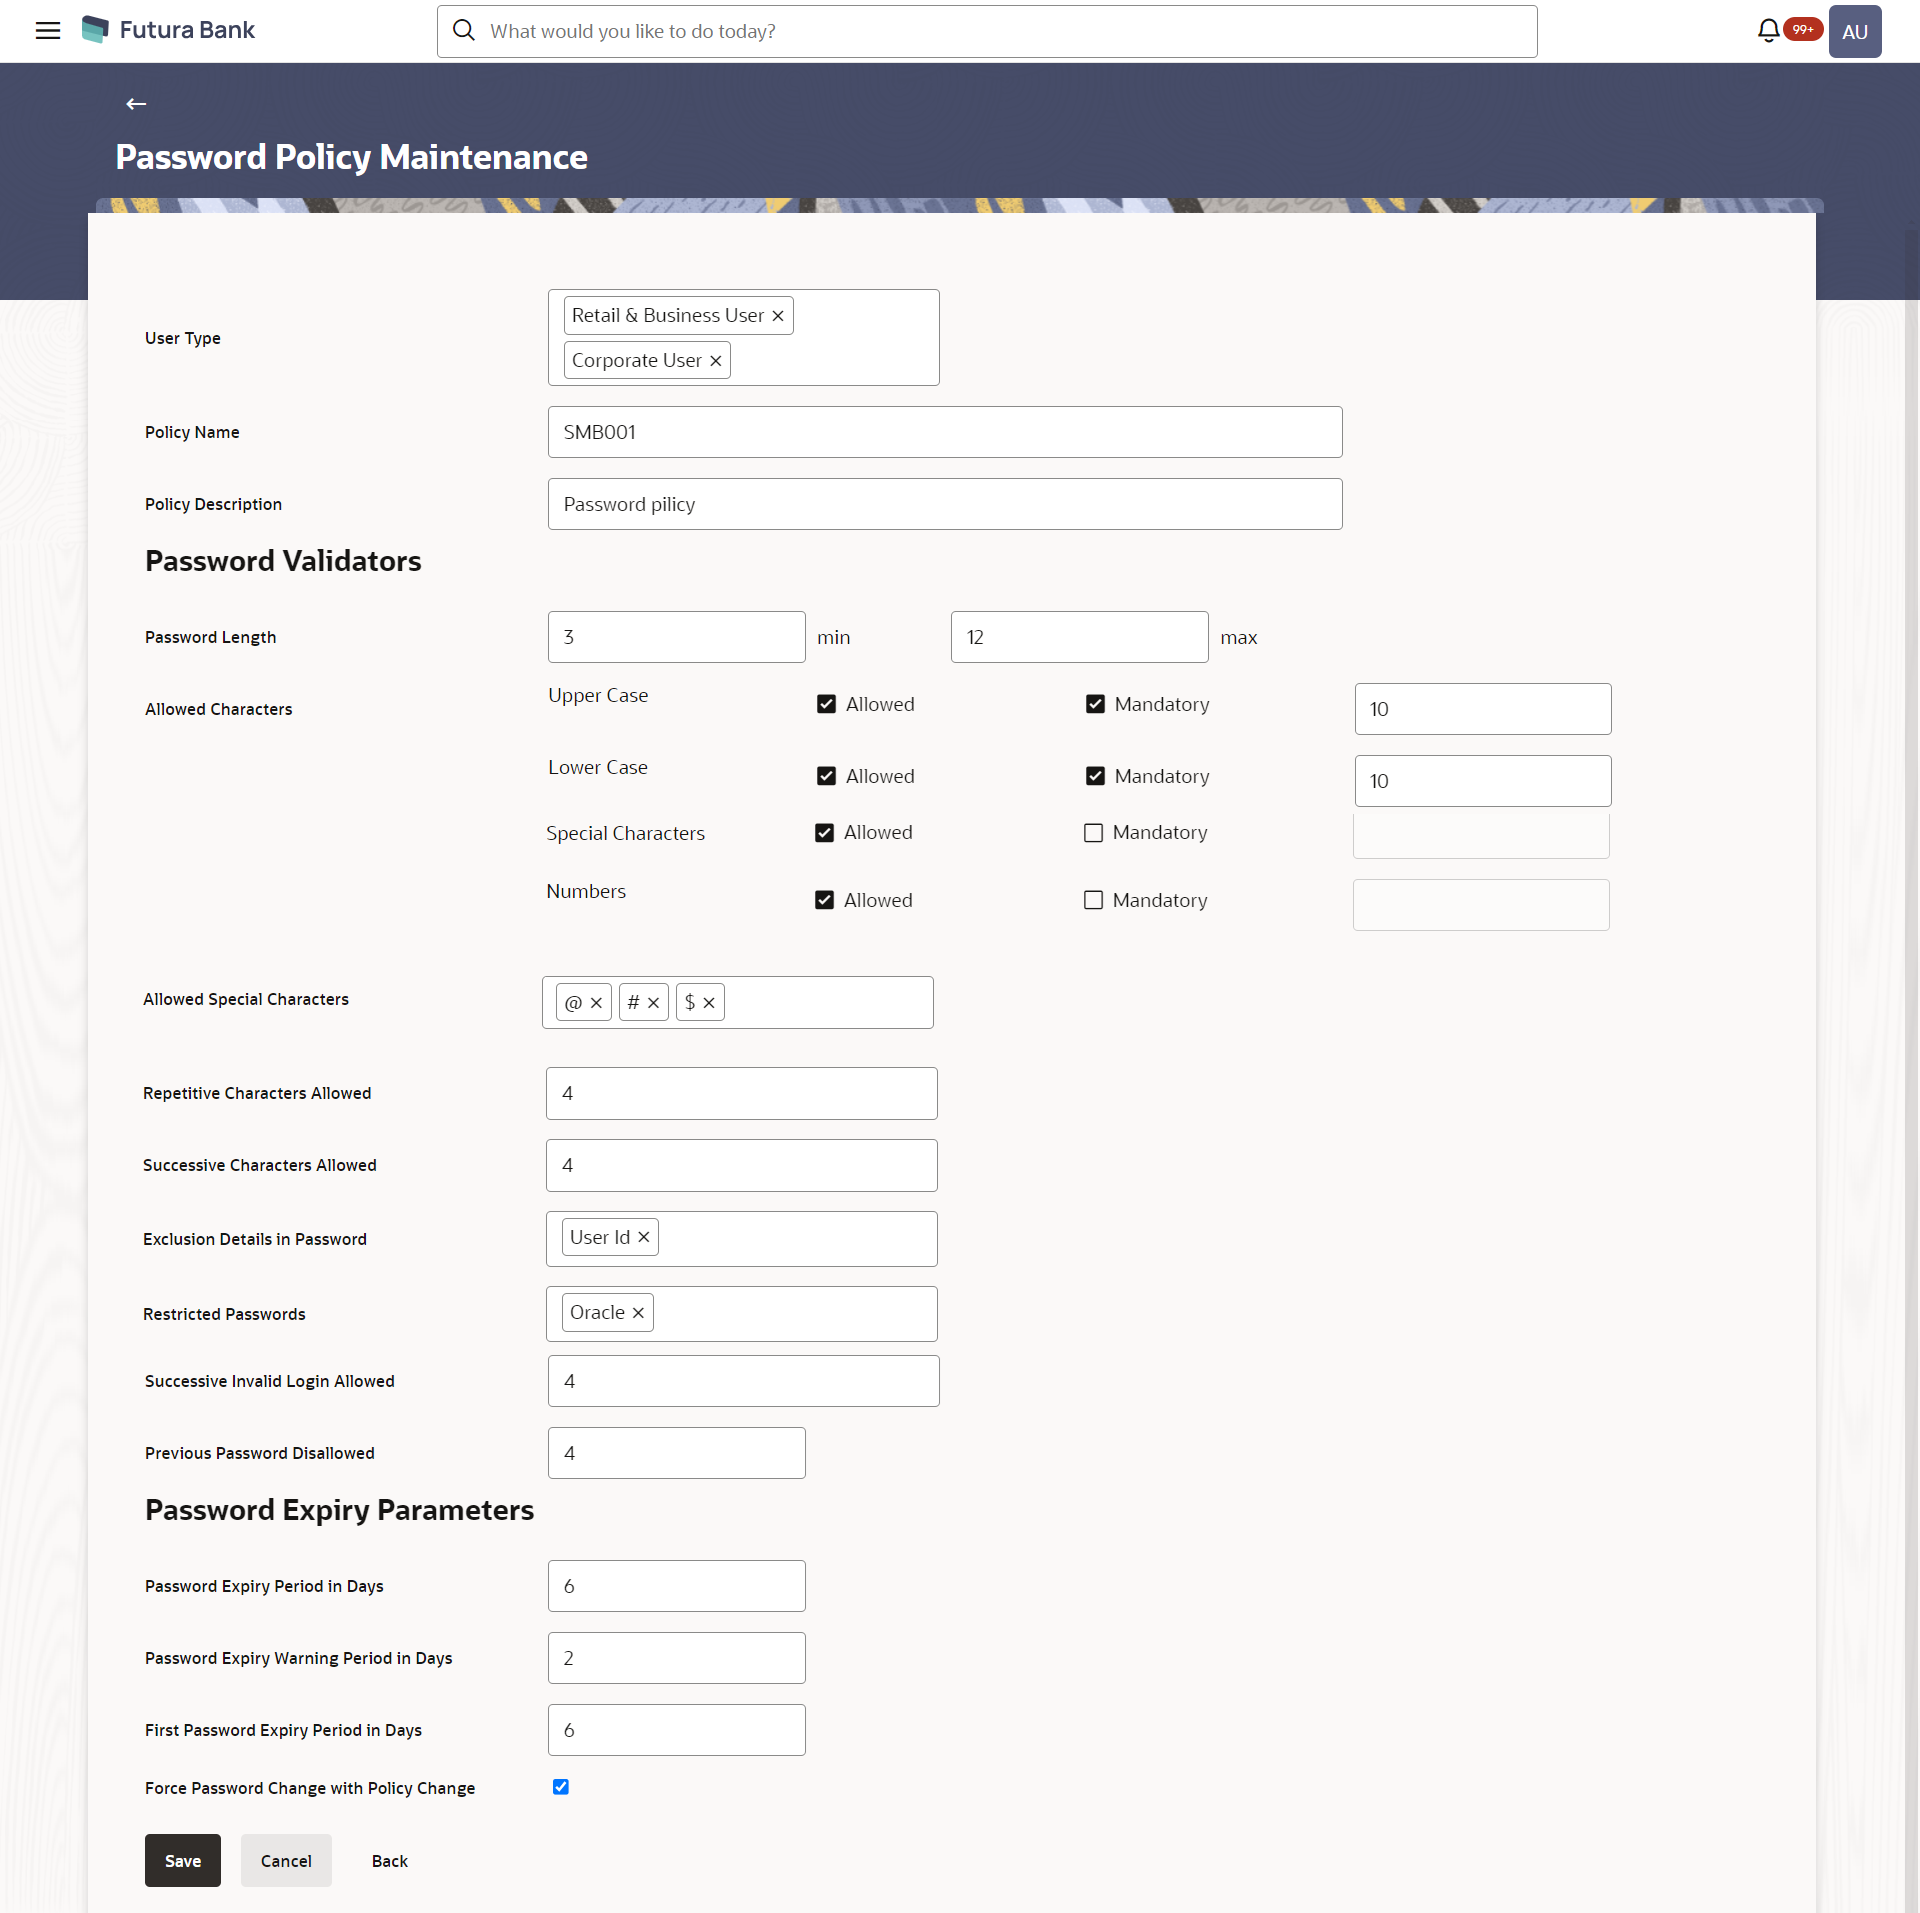
- Navigate to one of the above paths.The Password Policy Maintenance screen appears.
- From the Enterprise Role list, select the appropriate role.
- To apply the password policy, select the appropriate user type.
- In the Policy Name field, enter the password policy name.
- In the Policy Description field, enter the password description.
- In the Password Validators section, enter the minimum
and maximum length of the password in the min and max field.
Table 37-3 Field Description
Field Name Description User Type Indicates the user type for which the password policy is applied. Multiple user types can be selected for a single policy. The user type are:- Corporate User
- Administrator
- Retail User
Policy Name Password policy name. Policy Description Brief description of the password policy. Password Validators Password Length The minimum and maximum length of the password. Allowed Characters Characters allowed in the password. Different types of characters are: - Upper Case
- Lower Case
- Special Characters
- Numbers
Mandatory Select the Mandatory check box to make the selected allowed character mandatory in the password. This field only gets enabled if the user has selected ‘Allowed’ for that character.
Mandatory Characters Allowed Enter the number of mandatory characters that should be present in the password. This field only gets enabled if the user has selected ‘Mandatory’ for that character.
Allowed Special Characters Enter the allowed Special characters in the password. The example of special characters could be, @, #, &, etc.
This field only gets enabled if the Administrator has allowed special characters in the password (in Allowed Characters field).
Repetitive Characters Allowed Number of repetitive characters allowed in the password. For example: If you enter 2 in this field, user can enter 2 repetitive characters in his password like aabcd. If user enters aaabcd as his password, system will display error.
Successive Characters Allowed Number of successive characters allowed. For example: If you enter 4 in this field, then user cannot enter four successive characters (aaaa/1111) in the password.
Exclusion Details in Password Select the exclusion option from the list. You can select multiple values from the list. Exclusion details includes:- First Name
- Last Name
- User ID
- Date of Birth
- Party ID
Restricted Password Enter the restricted password. User can input multiple commonly used passwords which the Bank does not want it’s user to define as password. For example: If you enter restricted password as Password123, the system does not allow the user to set his password as ‘Password123’.
Successive Invalid Login Allowed Enter the number of attempts allowed for login with incorrect password. User will get locked once he reached the maximum invalid attempts allowed. Previous Password Disallowed Enter the disallowed number of historic passwords. For example: If you enter 5 in this field user can not define his last five passwords as his new password.
Password Expiry Parameters Password Expiry Period Enter the number of days after which the password will get expired. Password Warning Period Enter the period in days in this field, post which user will get a warning message to change his password. This field should only be enabled if the Password Expiry Period is set.
First Password Expiry Period Enter the number of days after which user’s first system generated password will get expired. Force Password Change with Policy Change Select the check box to force change the password if there is a change in any of the parameter in the password validators section. - Click Save to save the password policy details. OR
Click Cancel to cancel the transaction.
OR
Click Back to navigate to the previous screen.
- The Review screen appears.Verify the details, and click Confirm.
OR
Click Cancel to cancel the transaction.
OR
Click Back to navigate to the previous screen.
- The success message of password creation appears along with the transaction
reference number.Click OK to complete the transaction.
Parent topic: Password Policy Maintenance
