- Core User Manual
- Role Transaction Mapping
- Search & View Application Role
32.1 Search & View Application Role
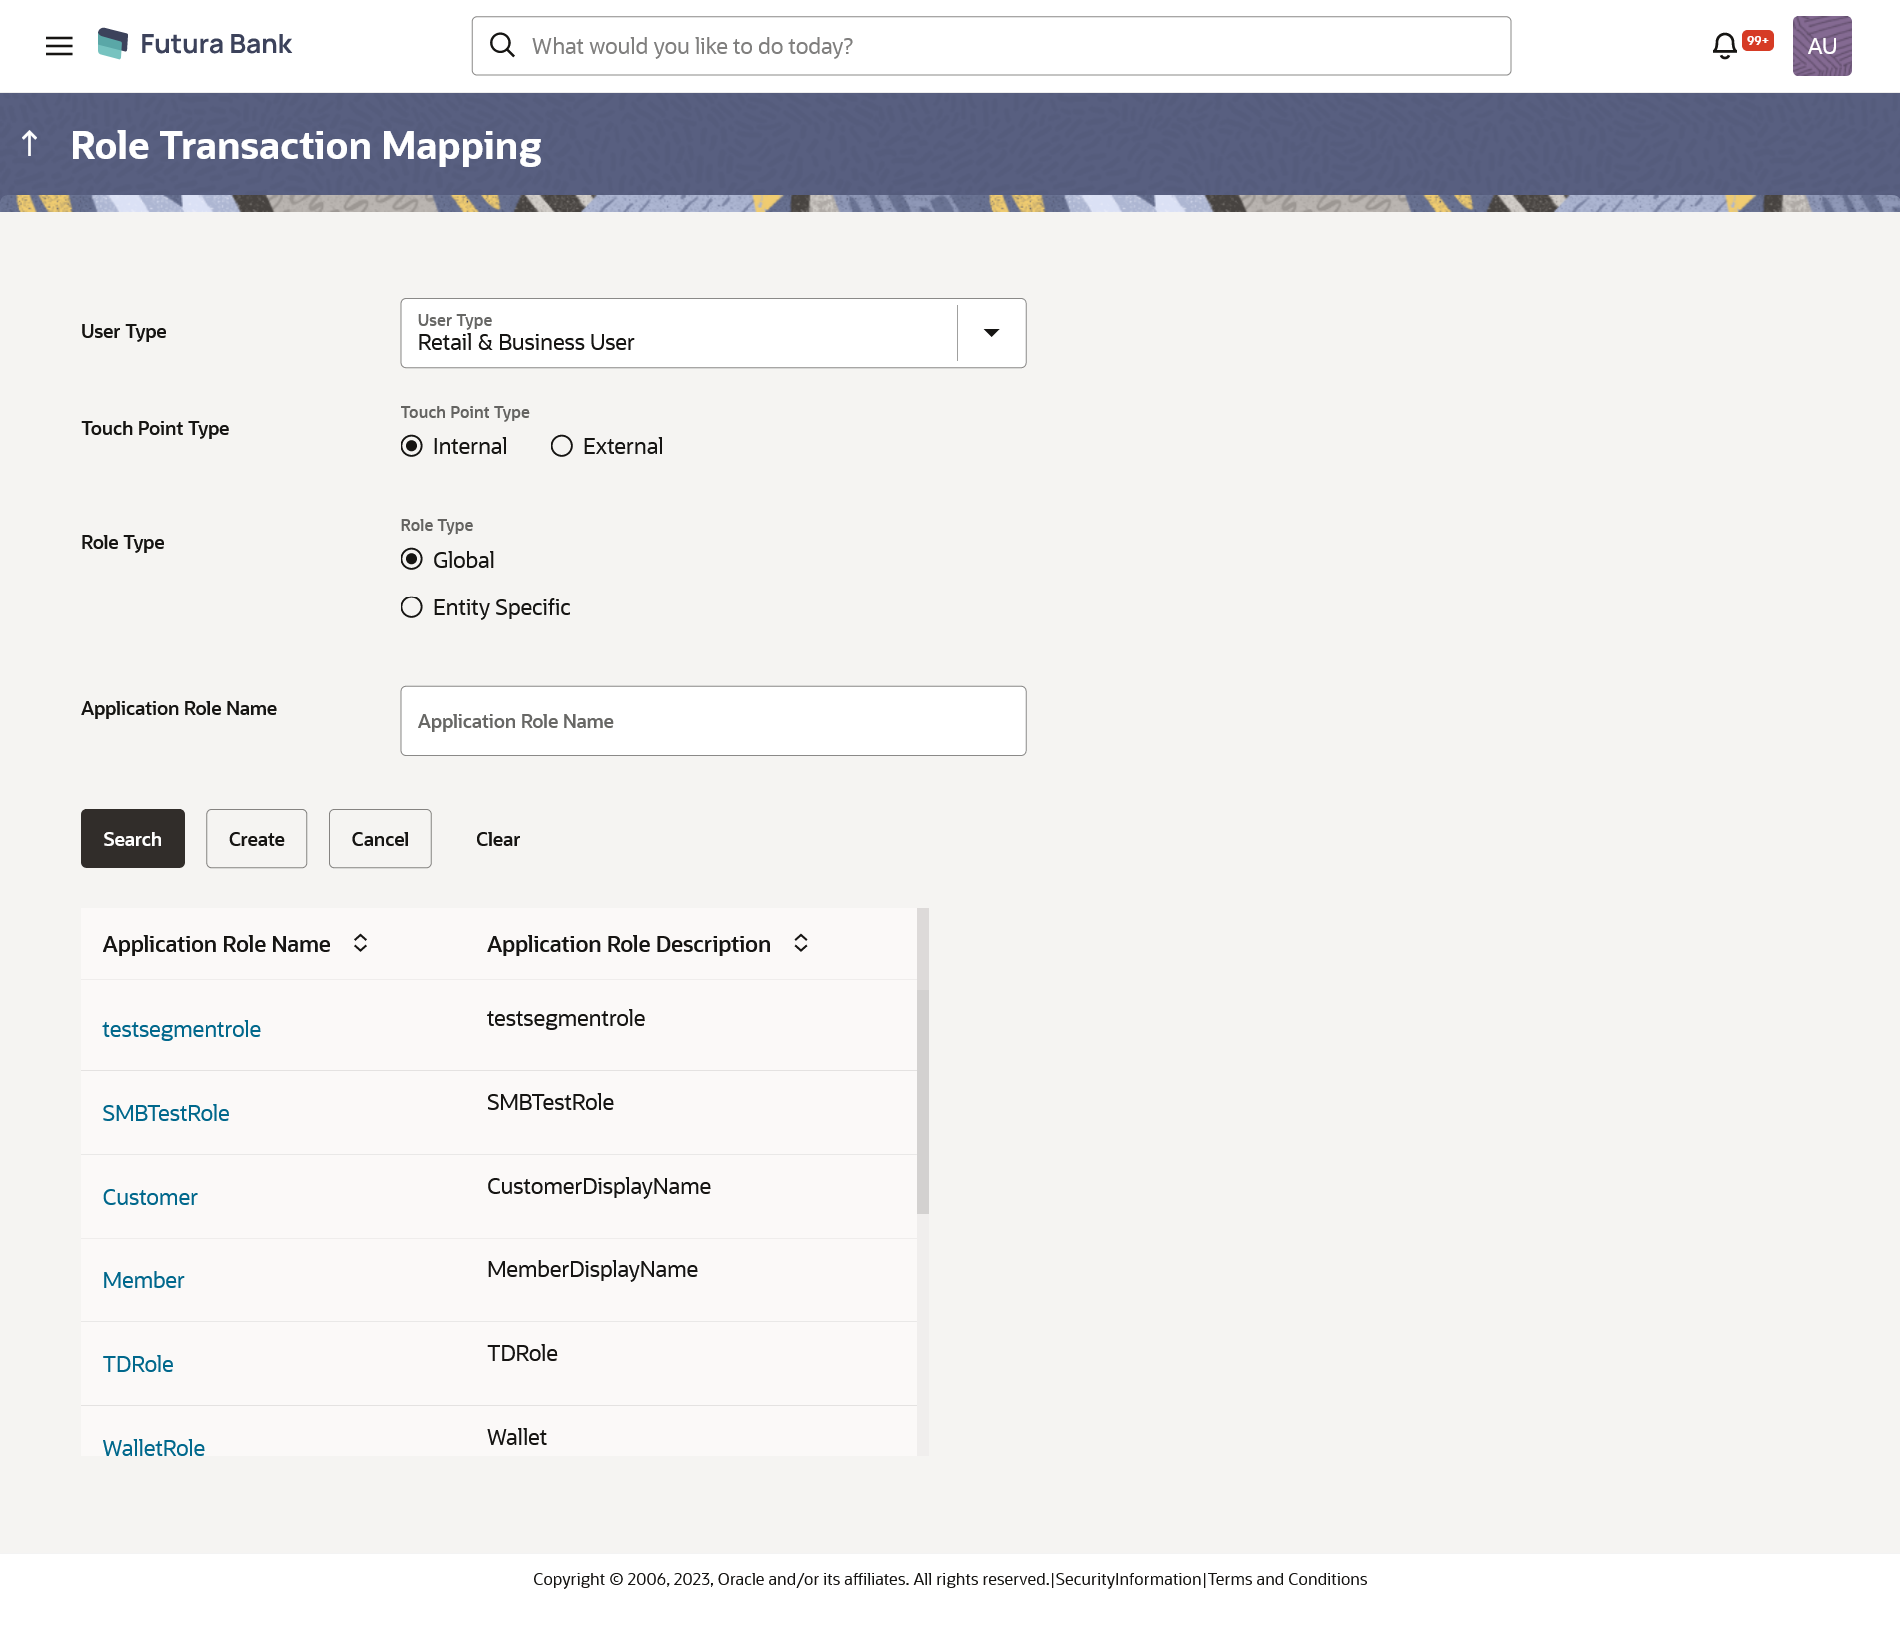
To search & view application role/ application roles:
- Navigate to one of the above paths.The Role Transaction Mapping screen appears.
- In the User Type field, select the user type.
- In the Touchpoint Type field, select desired option.
- In the Role Type field, select the desired option. If entity specific is selected, the entity needs to be specified
- In the Touchpoint Type field, select desired option.
- In the Role Type field, select the desired option.
- In the Application Role Name field, enter the name of the application role.
- Click Search.The search result based on search criteria displayed in Application Role Details section.
OR
Click Clear to reset the search parameters.
OR
Click Cancel to cancel the transaction.
Figure 32-2 Search Application Roles - Search Results
Table 32-1 Field Description
Field Name Description User Type User type for which the application role is created. Retail & Business User , Corporate User and Administrator are three user types available in the application.
Touchpoint Type Type of the touchpoint. The options are:
- Internal
- External
Role Type Type of the role. The options are:
- Global
- Entity Specific - For entity specific, the entity needs to be selected
Application Role Name Name of the application role. Application Role Details Application roles can be views based on Touch Point Type-Internal and External in different tabs. Application roles are grouped and displayed User Segment wise.
Application Role Name Name of the application role. Application Role Description Description of the application role. - Click on the Application Role Name to view the
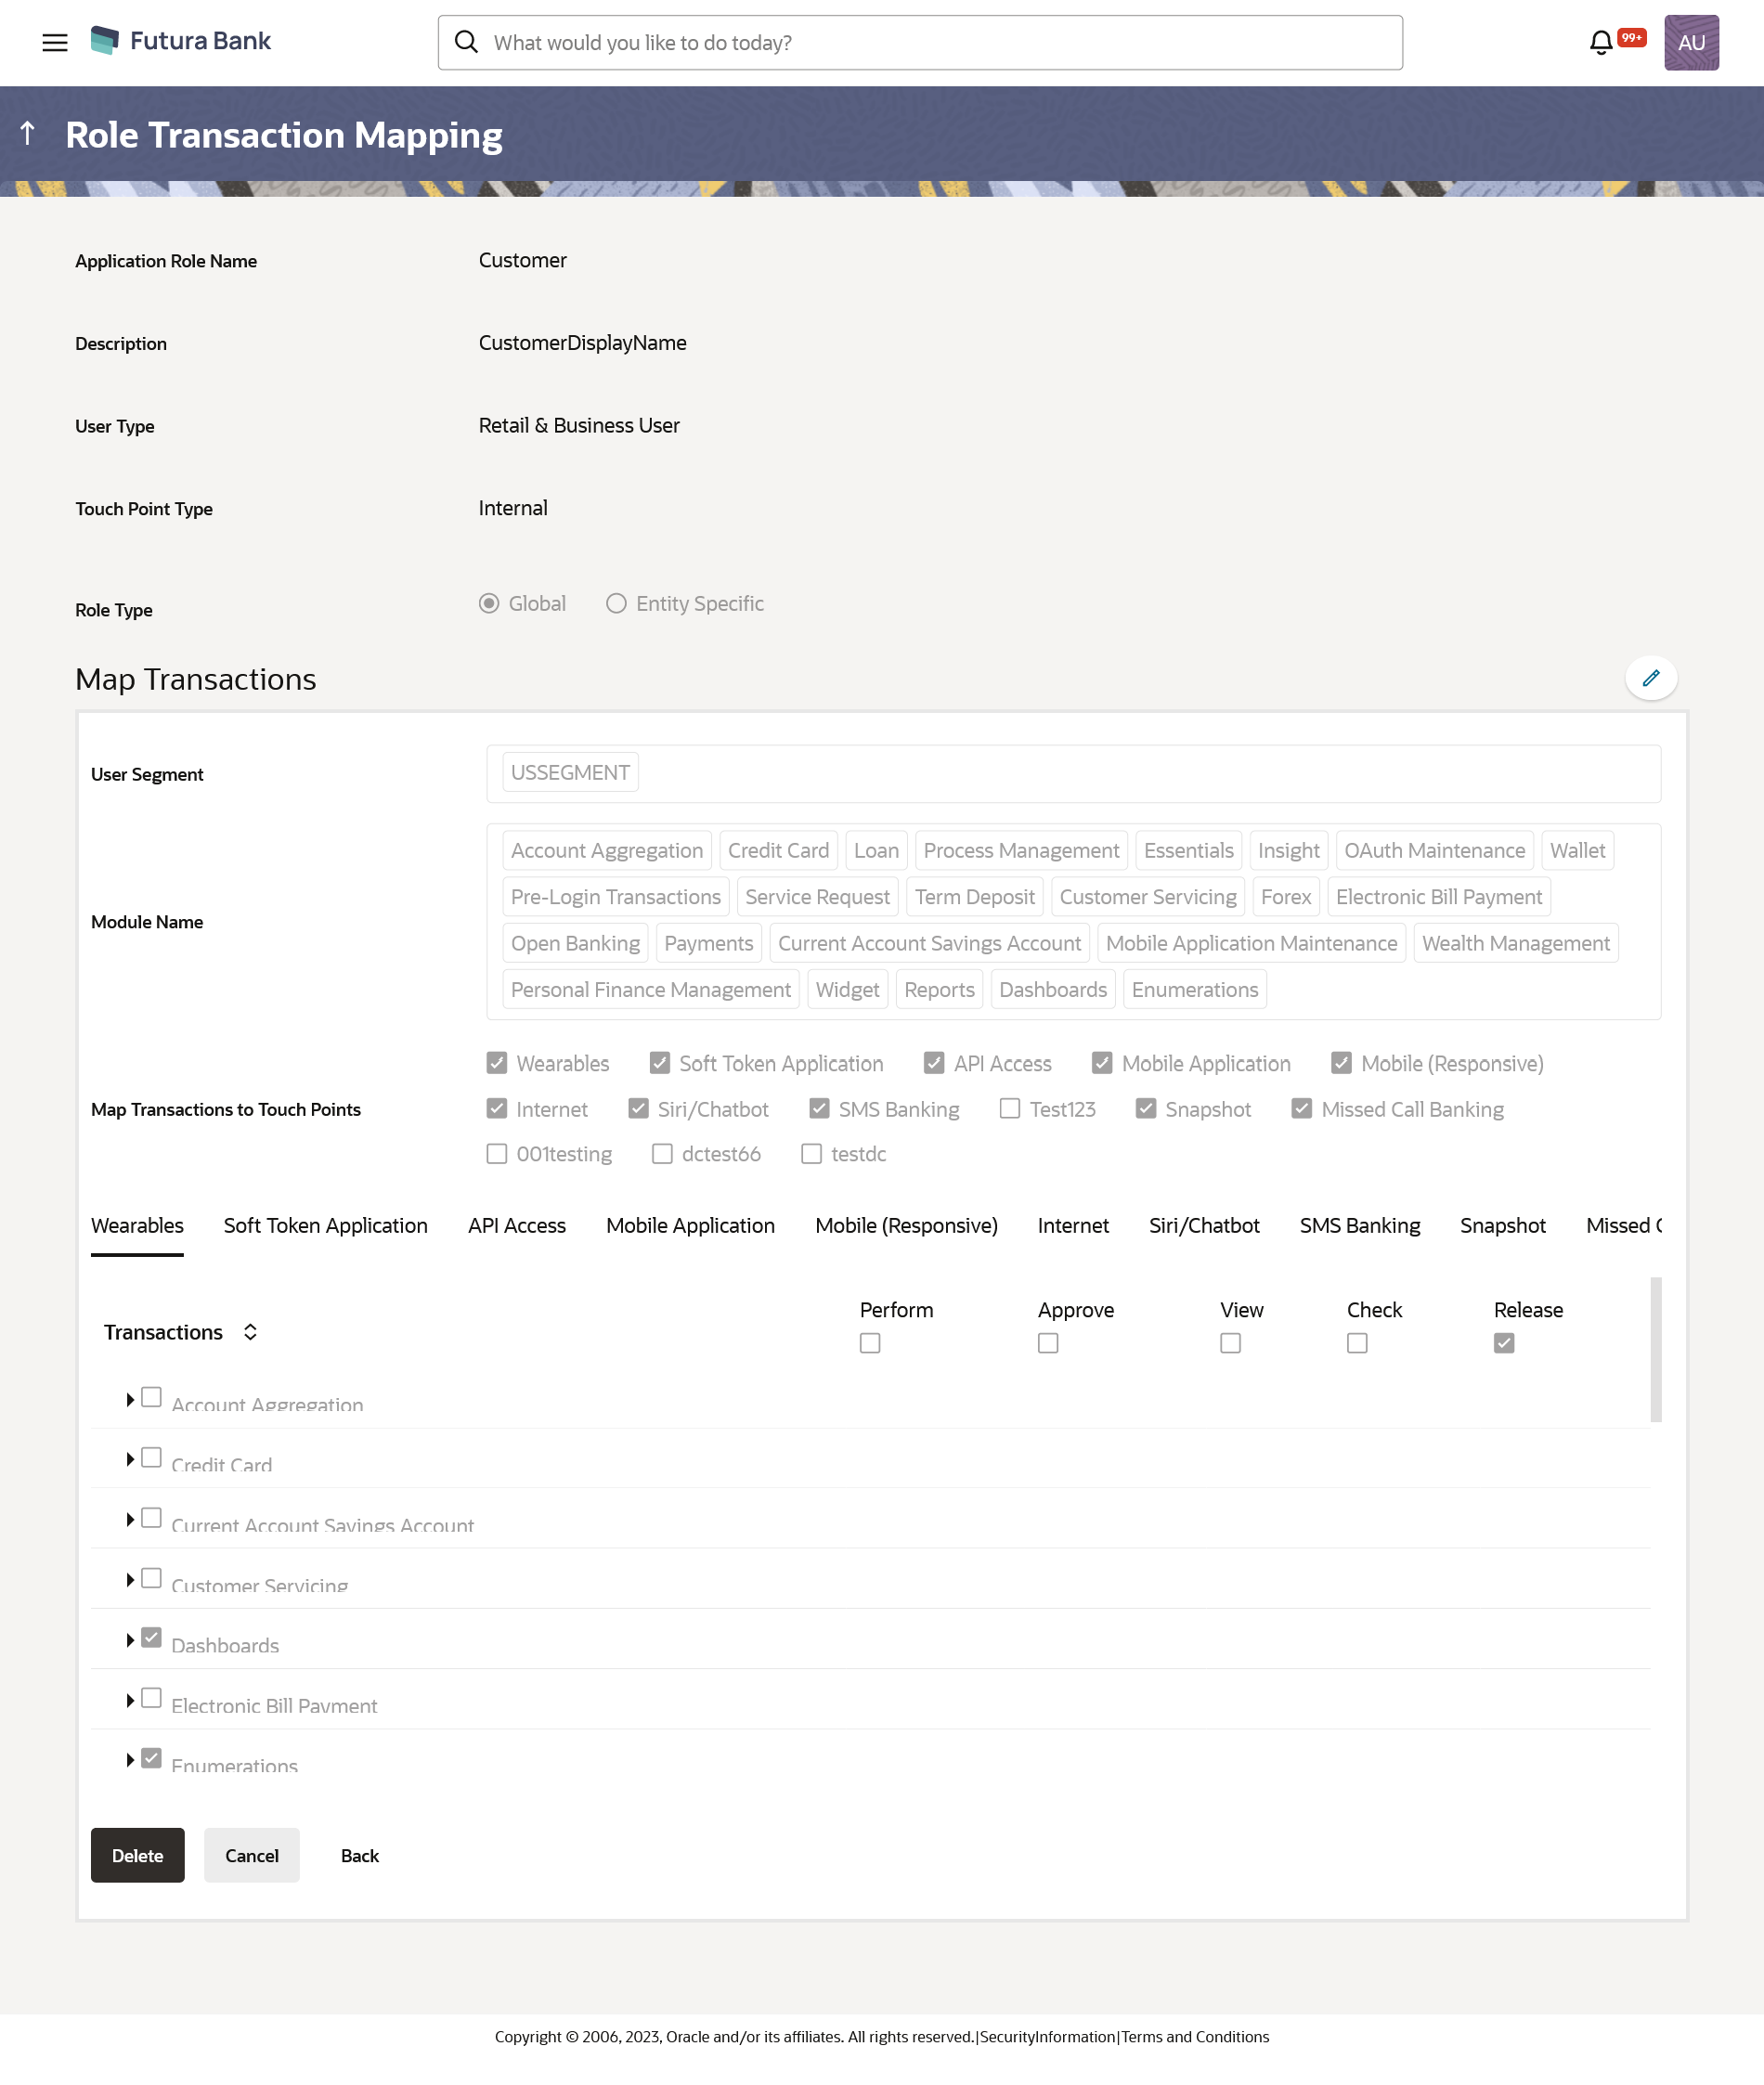
details.The Role Transaction Mapping - View screen appears.
Figure 32-3 Role Transaction Mapping - View
Table 32-2 Field Description
Field Name Description Application Role View Application Role Name Name of the application role. Description Description of the application role. User Type User type for which the application role is created. Touch Point Type Type of Touch Point. User Segment Segment of the user for which the application role is created. This is applicable only for Retail & Business user type and Internal touch point type.
Map Transactions Module Name Name of the module for which role transaction mapping is done. Map Transactions to Touch Points Touch points for which the transaction mapping is done for application role. Transactions Displays all the transactions for the selected module which are mapped to the application role for the selected touch points. Transactions are grouped under Transaction Categories and Module. Type of Action Name of the action that can be performed for that transaction by the user to which this application role is assigned.
- Perform- This action lets the user to perform or initiate those transactions and should be given to maker role.
- View- This action lets the user to view the initiated and approved transactions by other users and should be given to viewer role.
- Check- This action lets the user to check those transactions to which he/she has access and should be given to checker role.
- Approve- This action lets the user to approve those transactions and should be given to approver role
- Release- This action lets the user to release those transactions to which he/she has access and should be given to releaser role
- Click
 icon against the particular category to view the transaction mapping
details.
 - Click to
 icon modify the transaction role mapping.The Role Transaction Mapping screen appears in editable form.
Click Delete To delete the application role along with the transaction mapping.
(Deletion of any role is only allowed if there are no users attached to that role)
OR
Click Back to navigate to the previous screen.
OR
Click Cancel to cancel the transaction.
Parent topic: Role Transaction Mapping

