44.2 Spend Category - Create

Using spend category create option, the System Administrator can create new spend categories and sub categories.

To create a spend category:

  1. Navigate to one of the above paths.
    The Spend Category Maintenance screen appears.
  2. Click Create.
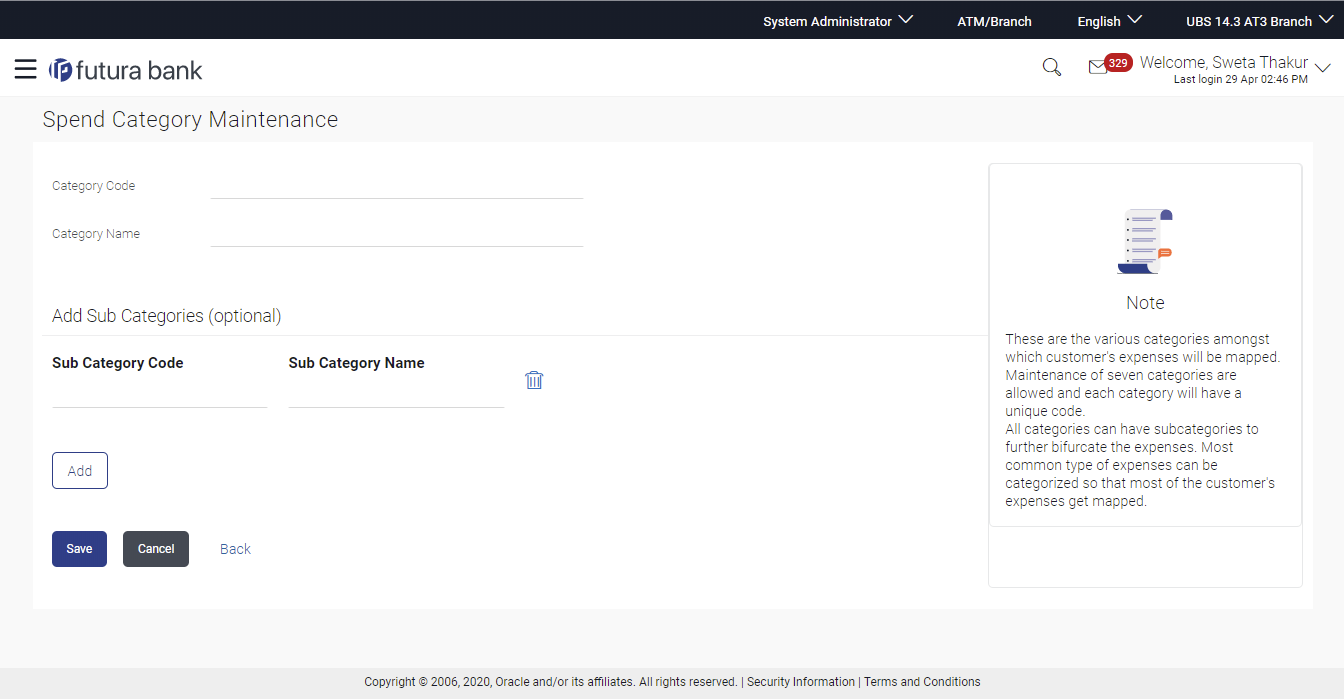
    The Spend Category - Create screen appears.

    Figure 44-4 Spend Category - Create


    Table 44-3 Field Description

    Field Name Description
    Category Code Unique ID maintained for the spend category.
    Category Name Name of the category. Transactions are mapped to the category name to classify spending under each category.
    Sub Category Details
    Sub Category Code Unique ID maintained for the spend sub-category.
    Sub Category Name Name of the subcategory based on the category name. Transactions can be further classified under the sub categories available under a category. For e.g. Spend category name could be Household Expenses and under that, sub categories could be Grocery, Rent etc.
  3. In the Category Code field, enter the code for the spend category.
  4. In the Category Name field, enter the name of the spend category
  5. In the Sub Category Details section, enter the relevant information for subcategories.
  6. Repeat step 4 to add more sub categories to a sub category.

    Note:

    You can click delete icon to delete a spend sub category or click Add to add more spend sub categories.
  7. Click Save to save the category and sub category details.
    OR

    Click Back to navigate to the previous screen.

    OR

    Click Cancel to cancel the transaction.

  8. The Review screen appears.
    Verify the details, and click Confirm.

    OR

    Click Edit to modify the details.

    The user will be navigated back to the create screen.

    OR

    Click Cancel to cancel the transaction.

  9. The success message of spend category creation appears.
    Click OK to complete the transaction.