31.3 Touch Point Group Maintenance - Create

Using this option, System Administrator can create a new touch point group and add touch points to a group.

Note:

System Administrator cannot club one touch point as part of multiple groups. While creating group, touch points which are already part of a group will not be available for selection.

To create a touch point group:

  1. Navigate to one of the above paths.
    The Touch Point Group Maintenance screen appears.
  2. Click Create.
    The Touch Point Group Maintenance screen appears.

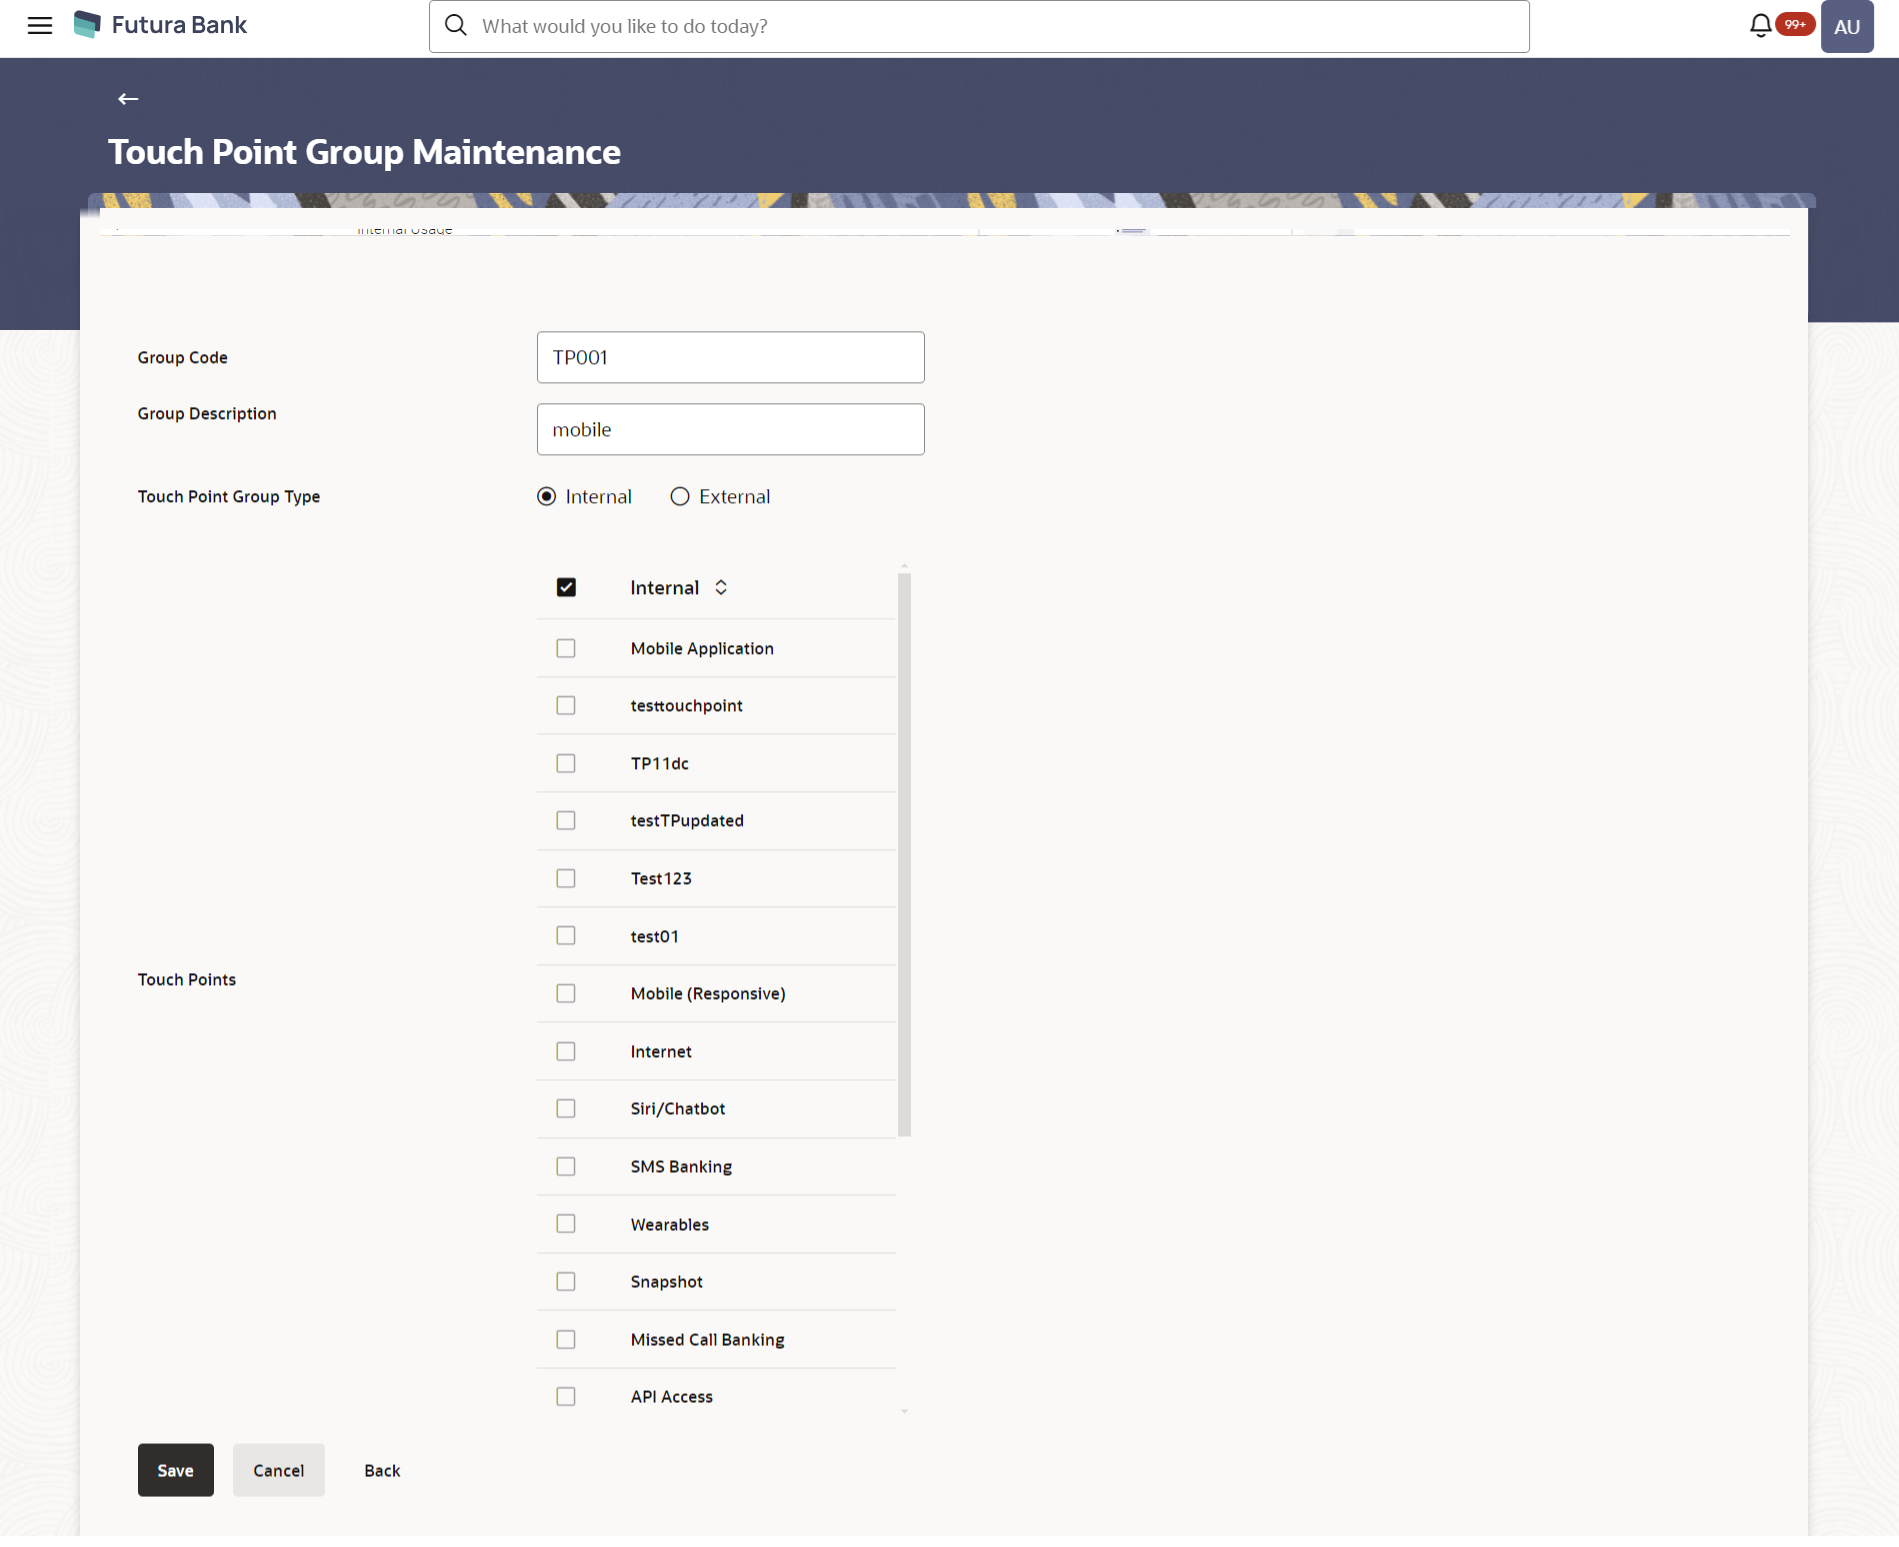
    Figure 31-5 Touch Point Group Maintenance - Create


    Table 31-4 Field Description

    Field Name Description
    Group Code Unique group code defined for touch point group.
    Group Description Touch point group description defined for touch point groups.
    Touch Point Group Type Select the type of Touch point group type i.e. whether the type is Internal or External.
    Touch Points
    Internal Touch Points Displays all the internal touch points maintained.

    Note:

    1) Internal touch points which are not part of any other group will be listed for selection.

    2) Touch points which are already a part of  any other group will be shown in disabled mode.

    External Touch Points Displays all the external touch points maintained.

    Note:

    1) External touch points which are not part of any other group will be listed for selection.

    2) Touch points which are already a part of any other group will be shown in disabled mode.

  3. In the Group Code field, enter the unique group code for touch point group.
  4. In the Group Description field, enter the touch point group description.
  5. In the Touch Points field, select the checkbox against the Internal / External Touch Points.

    Note:

    To select all available Internal / External Touch Points in one instance, select the checkbox adjacent to Internal / External Touch Points.
  6. Click Save to save the Touch point group details.
    OR

    Click Cancel to cancel the transaction.

    OR

    Click Back to navigate to the previous screen.

  7. The Review screen appears.
    Verify the details, and click Confirm.

    OR

    Click Cancel to cancel the transaction.

    OR

    Click Back to navigate to the previous screen.

  8. The success message of Touch Point Group Maintenance saved successfully appears along with the transaction reference number.