- Core User Manual
- Group Corporate Onboarding
- Step 4: User Group Maintenance
- User Groups – Create
16.5.1 User Groups – Create
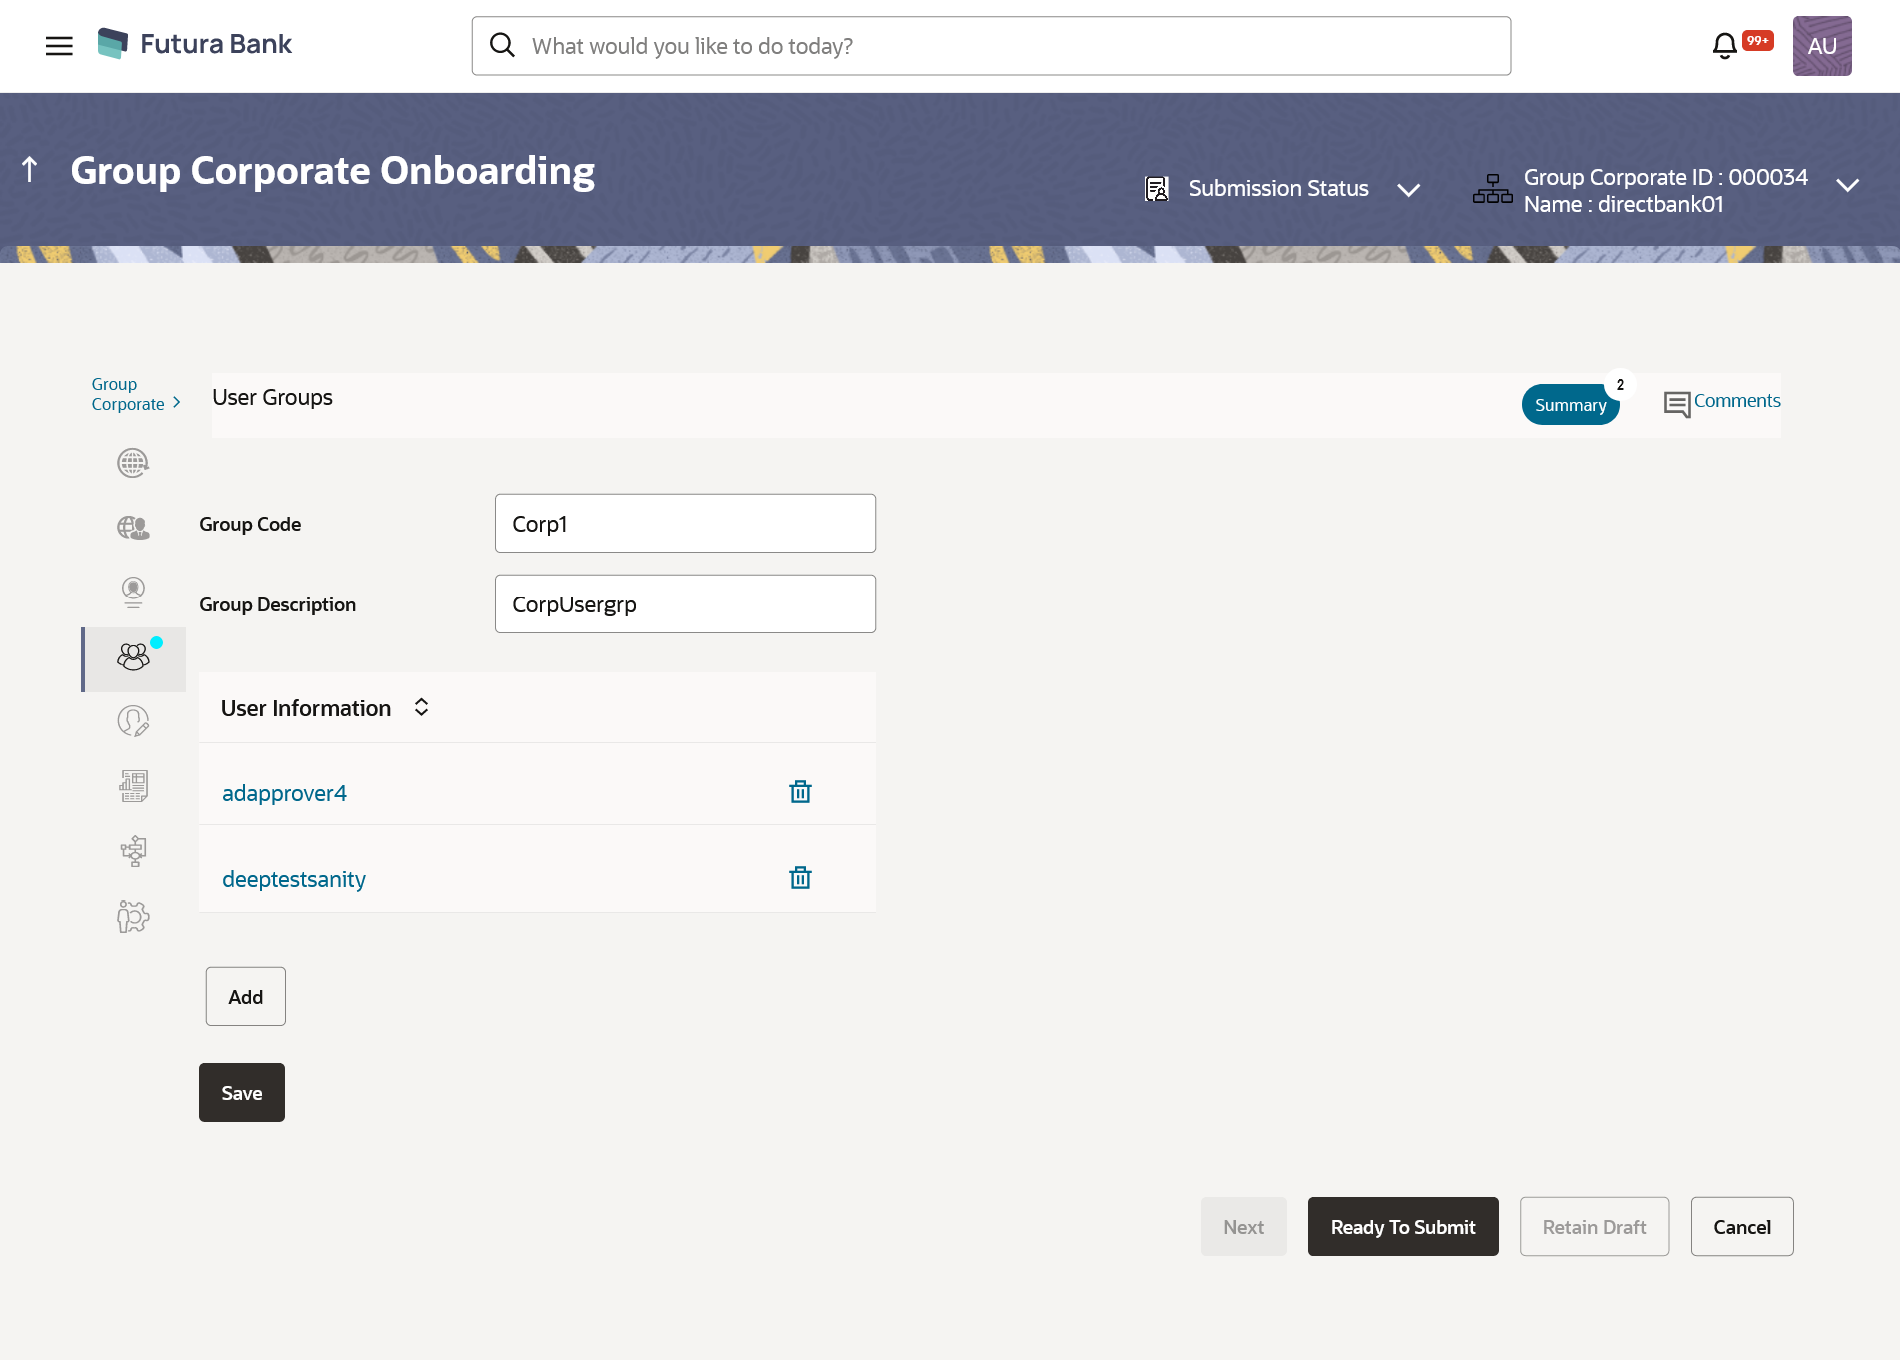
Administrator can create multiple user groups and one user can be part of multiple user groups. Bank Administrator will be allowed to create user group even without adding a single user.
To create a user group:
- Navigate to one of the above paths.The User Group screen appears.
- The User selection screen appears. Select the appropriate option.
Table 16-23 Field Description
Field Name Description Group Code To specify User Group code. Group Description To specify User Group description. User Information Search and select user to map with User Group which is being created Table 16-24 Field Description
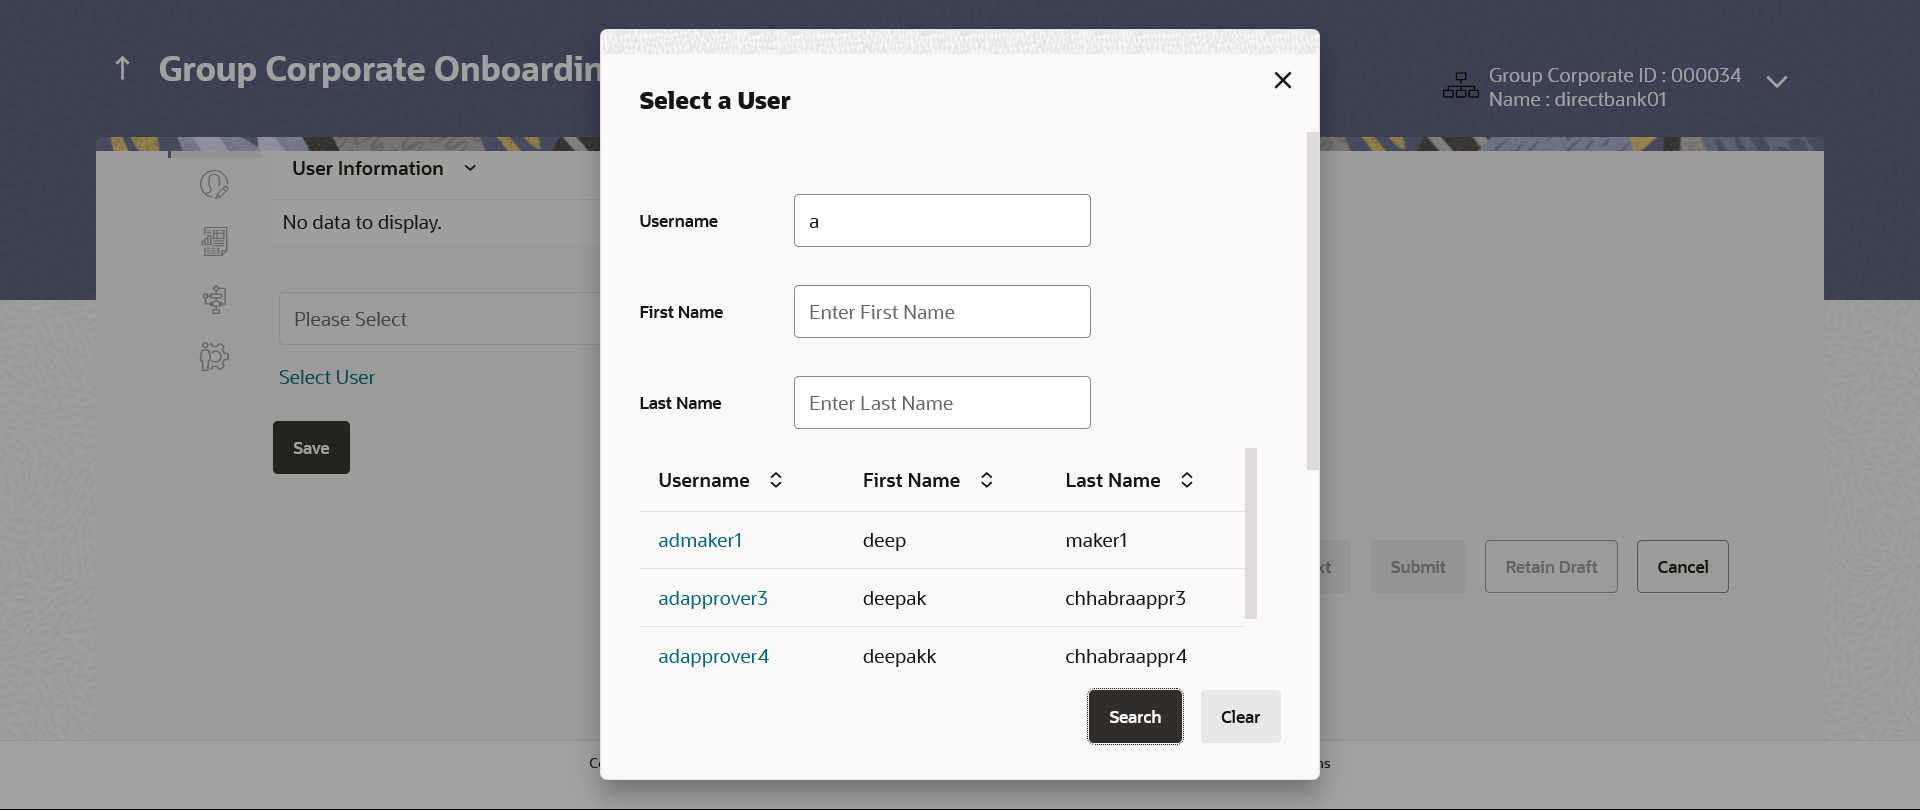
Field Name Description Search User Username Search User by using User name to map with user group First Name Search and select user by using First name and add a user to the user group. Users belonging to the same Group Corporate will be listed.
Last Name Search and select user by using Last name and add a user to the user group. Users belonging to the same Group Corporate will be listed.
Search Result Username Display username of the searched user First Name Display First name of the searched user Last Name Display Last name of the searched user - Click Create.
- In the Group Code field, enter the group code.
- In the Group Description field, enter the group name.
- In the User Group section, Click
Add to add the selected user in the User Group.
Click on the Select User link, the Select User popup appears.
Search the user by adding search criteria, and click Search.
Based on search criteria, search result appears.
Click on the user which to be added, and click Add to add to table.
Note:
Once added, the user name will be removed from the user drop-down to avoid duplication of users.
Click icon to remove a user from the User Group.
- Click Save to save the maintenance, and redirect to the
review page. OR
Click Next to proceed to the next logical step.
OR
Click Submit to submit the steps performed so far for approval.
OR
Click Retain Draft to save the details entered as draft.
OR
Click Cancel to cancel the transaction.
Note:
Admin can submit the maintenance after any step. Maintenances saved so far will be sent for approval in one flow. Admin would not be able to make any changes or maintain another step for the same Group Corporate till the time the approval of the wizard is not done. - Click Add Another to add another maintenance of the same
step.
OR
Click Edit to modify the details entered.
OR
Click Next to proceed to next step.
OR
Click Retain Draft to save all the steps completed so far, and allow Admin resume the same application.
OR
Click Cancel to cancel the transaction.
Parent topic: Step 4: User Group Maintenance

