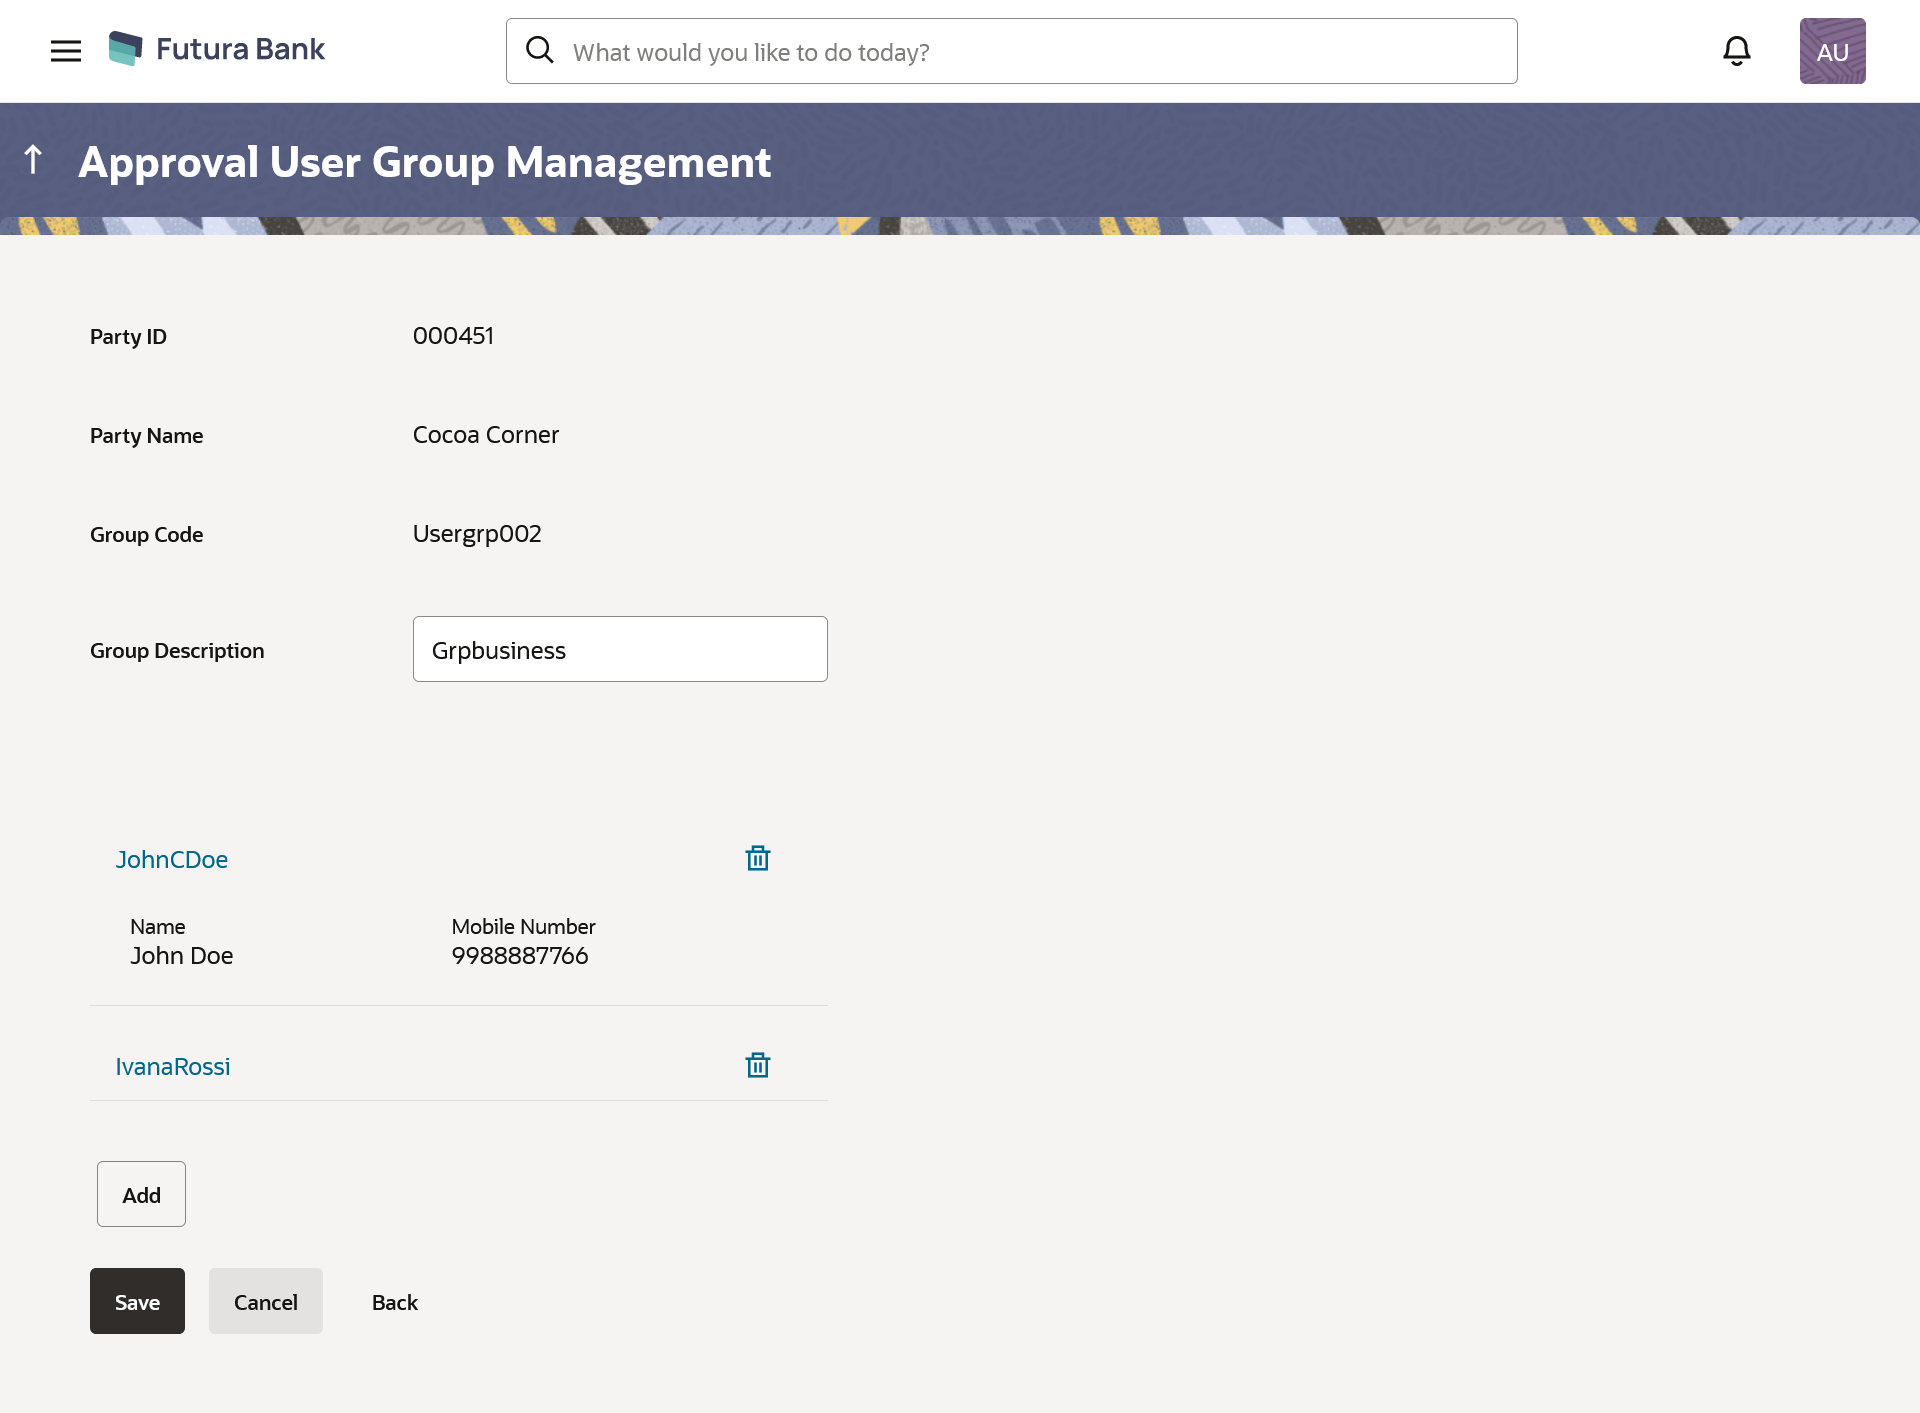
55.3.3 User Groups - Retail & Business User – Edit Group

This function enables the Bank Administrator to edit the description of existing user groups. Bank Administrator can also add new users and remove existing users of the user group as part of this function.

A check is performed on minimum and maximum number of users allowed as a part of user group while adding or removing the users from the user group.

To edit or update a user group:

  1. Navigate to the above path.
    The User Group Management screen appears.
  2. In the Party ID field, enter the Party ID.
  3. Click Search.
    User groups maintained if any under the party are displayed on the screen.
  4. Click on Party ID link to view details of the selected Approval Workflow.
  5. Click Edit to edit the user group.
    The User Groups - Edit screen displays the mapping of the user group.

    Figure 55-10 Retail & Business User – Edit Group


    Table 55-7 Field Description

    Field Name Description
    Edit
    Party ID Party ID of which user groups are to be viewed/ edited.
    Party Name Party name of Party ID of which user groups are to be viewed/ edited.
    Group Code User Group code is displayed.
    Group Description User Group description is displayed in editable form.
    User Name

    User name of the user who is part of the user group.

    User name list to select and add a new user to the user group.

    User ID User ID of the user who is a part of the user group is displayed.
  6. Click Add to add the selected user in the User Group. Once added, the user name will be removed from the user drop-down to avoid duplication of users.
    Click delete icon to remove a user from the User Group.
  7. Click Save to save the User Group.
    The User Group-Edit- Review screen post necessary validations appear.

    OR

    Click Cancel to cancel the transaction.

    OR

    Click Back to navigate to the previous screen.

  8. Verify the details, and click Confirm.
    The User Group-Edit – Confirmation screen appears.

    OR

    Click Cancel to cancel the operation.

    OR

    Click Back to navigate to the previous screen.

  9. The success message of user group updation appears along with the transaction reference number.
    Click OK to complete the transaction.