- Deposit Services User Guide
- RD Maintenances
- View and Modify Amount Block
6.2 View and Modify Amount Block
You can view or modify the already added block details using this screen.
Note:
The fields, which are marked with an asterisk, are mandatory.- On the Homepage, from the Deposit
Services mega menu, under Term Deposits
and Maintenance, click View and Modify Amount
Block, or specify View and Modify Amount
Block in the search icon bar and select the screen.
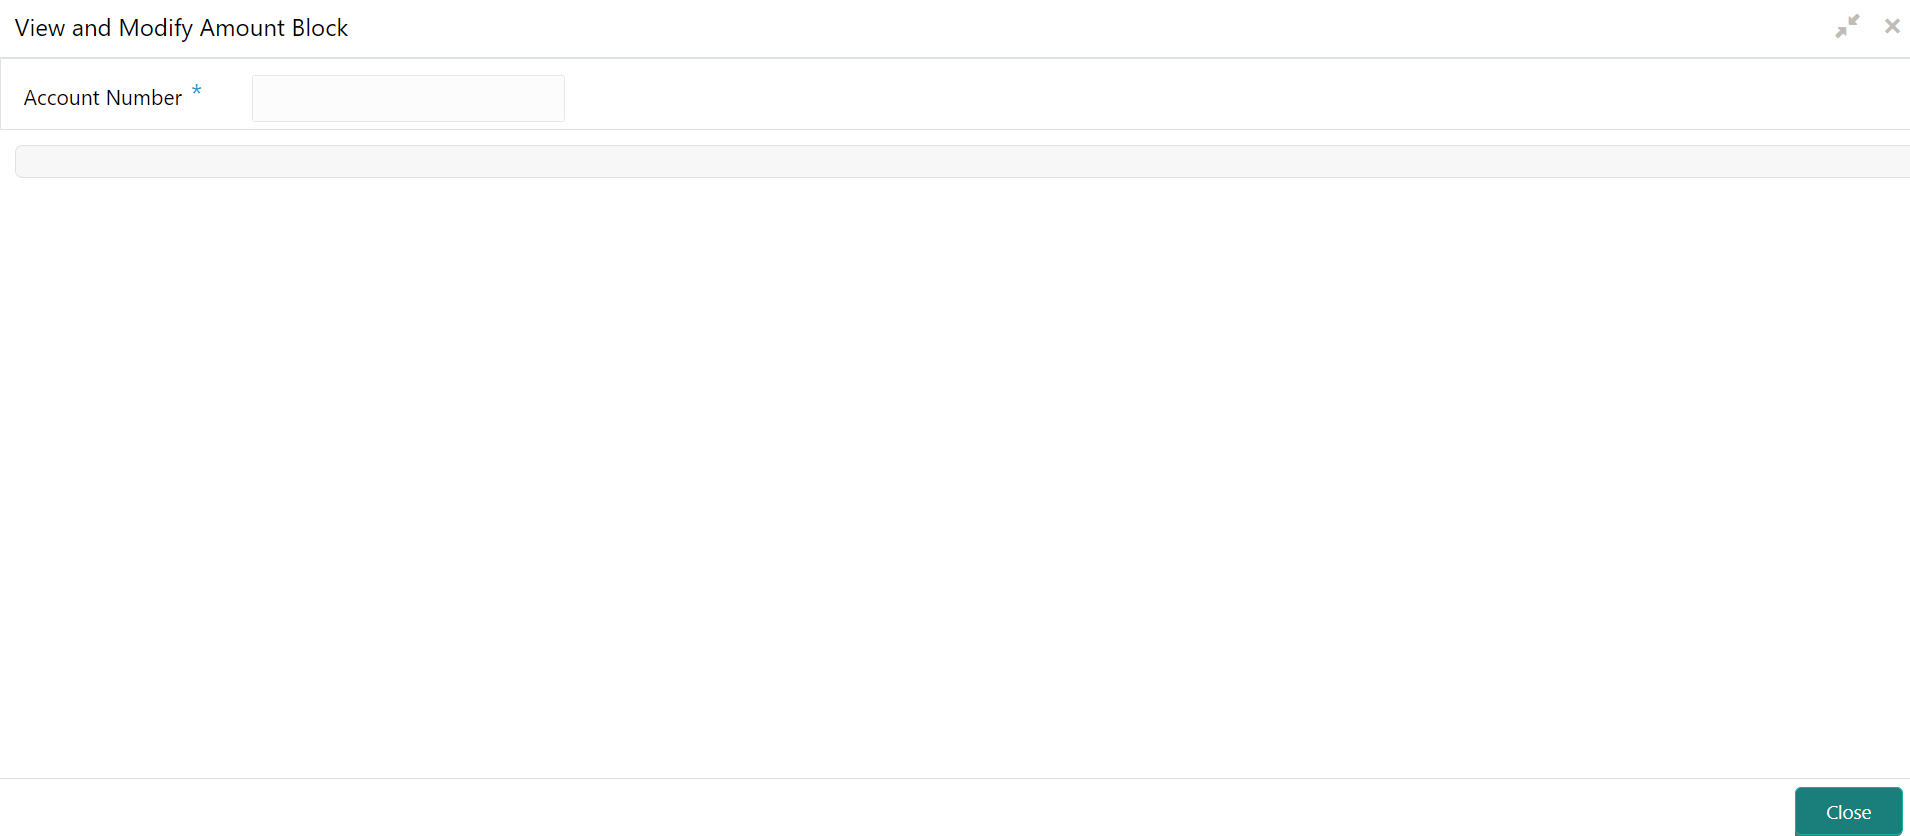
The View and Modify Amount Block screen is displayed.
- On the View and Modify Amount Block screen, specify the
account number in the Account Number field.The Amount Block Details section is displayed.
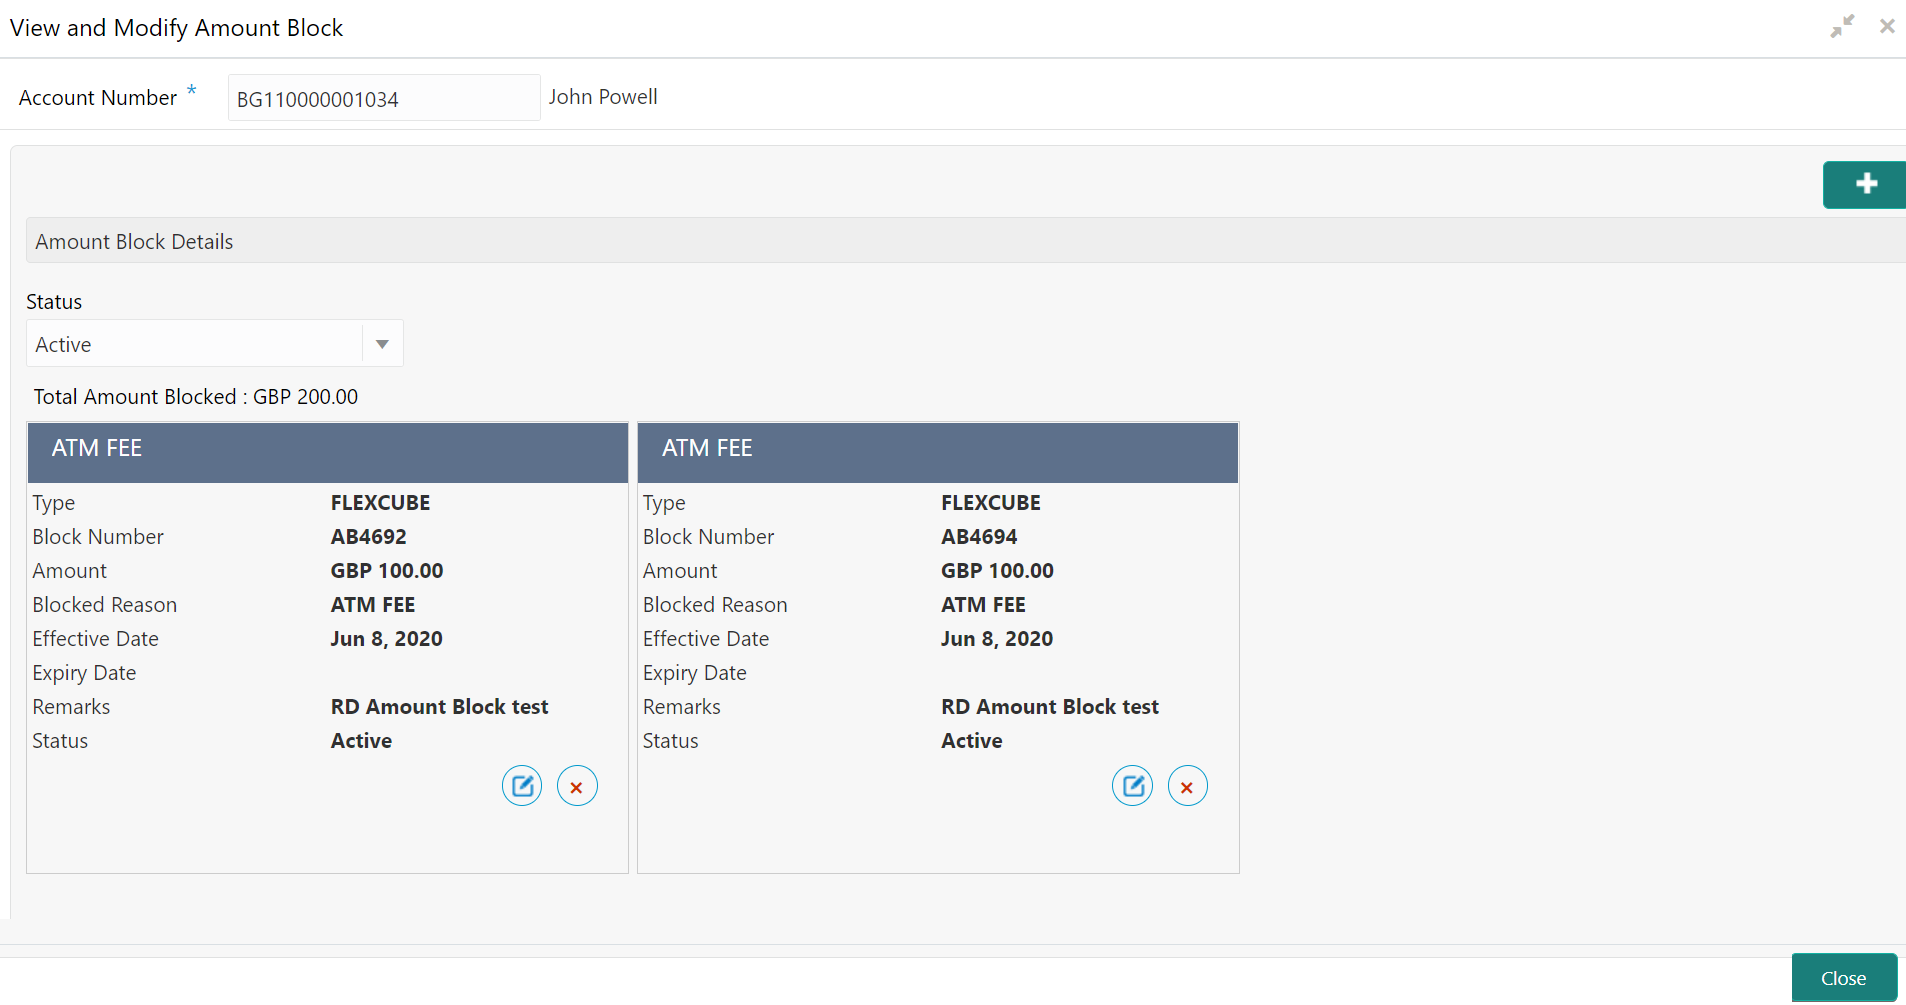
Figure 6-4 View and Modify Amount Block Details

Description of "Figure 6-4 View and Modify Amount Block Details" - On the Amount Block Details section, view the block
details. For more information on fields, refer to the field description
table.
Table 6-2 View Amount Block Details – Field Description
Field Description Account Number
Specify the account number for performing the block. Note:
The account holder's name is also displayed adjacent to the field.Amount Block Details
This section displays the RD amount block details.
Status
Select the block status of the RD account. The options are:- Active
- Not Activated
- Closed
- Expired
- All
Total Amount Blocked
Displays the total amouont blocked on the RD account.
<Block Reason> Displays the block reason as the top of the widget. Type
Displays the block type.
Block Number
Displays the block number.
Amount
Displays the block amount along with the currency.
Blocked Reason
Displays the block reason along with code.
Effective Date
Displays the block effective date.
Expiry Date Displays the block expiry date.
Remarks Displays the block remarks.
Status Displays the block status.
- You can add a RD amount block by clickng the
 icon. For more information, refer Create Amount Block screen.
- You can edit a RD amount block details by clicking the
 icon. For more information, refer Modify Amount Block.
- You can delete a RD amount block details by clicking the
 icon. For more information.
- Modify Amount Block: As you click the
 icon from the View and Modify Amount
Block screen from a particular widget, that widget
details are opened in Modify Recurring Deposit Amount
Block screen.
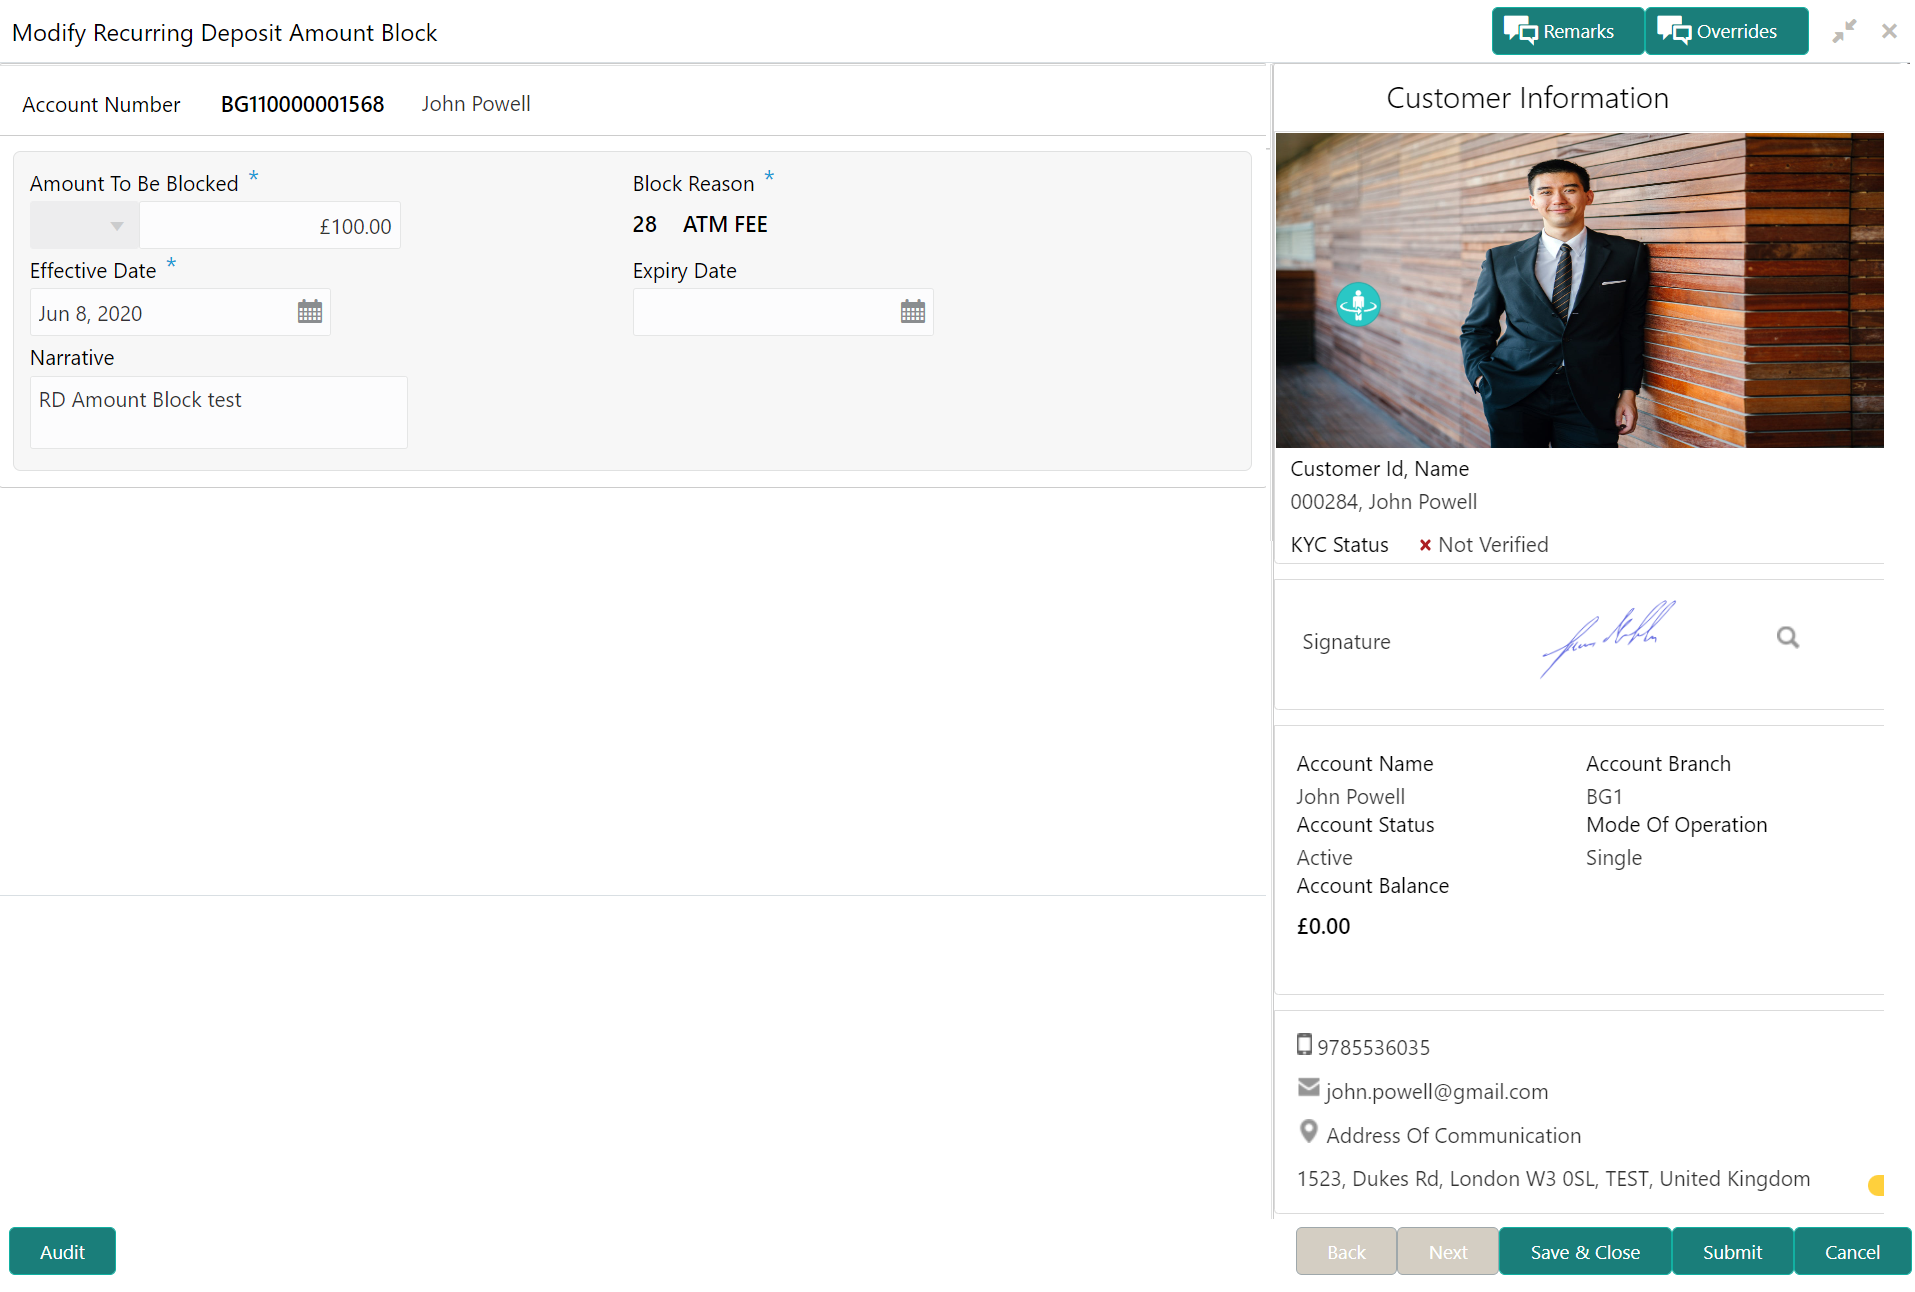
- In the Modify Recurring Deposit Amount Block
screen, modify the required details.
Figure 6-5 Modify Recurring Deposit Amount Block

Description of "Figure 6-5 Modify Recurring Deposit Amount Block"For more information on fields, refer to the field description table.
Table 6-3 Modify RD Amount Block – Field Description
Field Description Account Number
Displays the account number and name for performing the block. Aslo, to the right the customer information is displayed. Block Number
Displays the block number of the RD account. Type
Displays the type of block on RD account. Amount To Be Blocked
Specify the RD amount to be blocked. Note:
By default, the currency and amount is displayed. The currency is editable, but if required you can edit the amount.Block Reason
Displays the reason for the block on RD account. Effective Date Specify or select the effective date for the block. Note:
By default, the effectiev date is displayed. If required you can edit the date.Expiry Date Specify or select the expiry date for the block. Note:
By default, the expiry date is displayed. If required you can edit the date.Narrative Specify the narration, if any for the block. Note:
By default, a narration is displayed. If required you can edit it. - Click SubmitThe screen is successfully submitted for authorization.
- Click Close.
Parent topic: RD Maintenances
