- Current Account and Saving Account User Guide
- Amount Block
- Consolidated Amount Block
7.3 Consolidated Amount Block
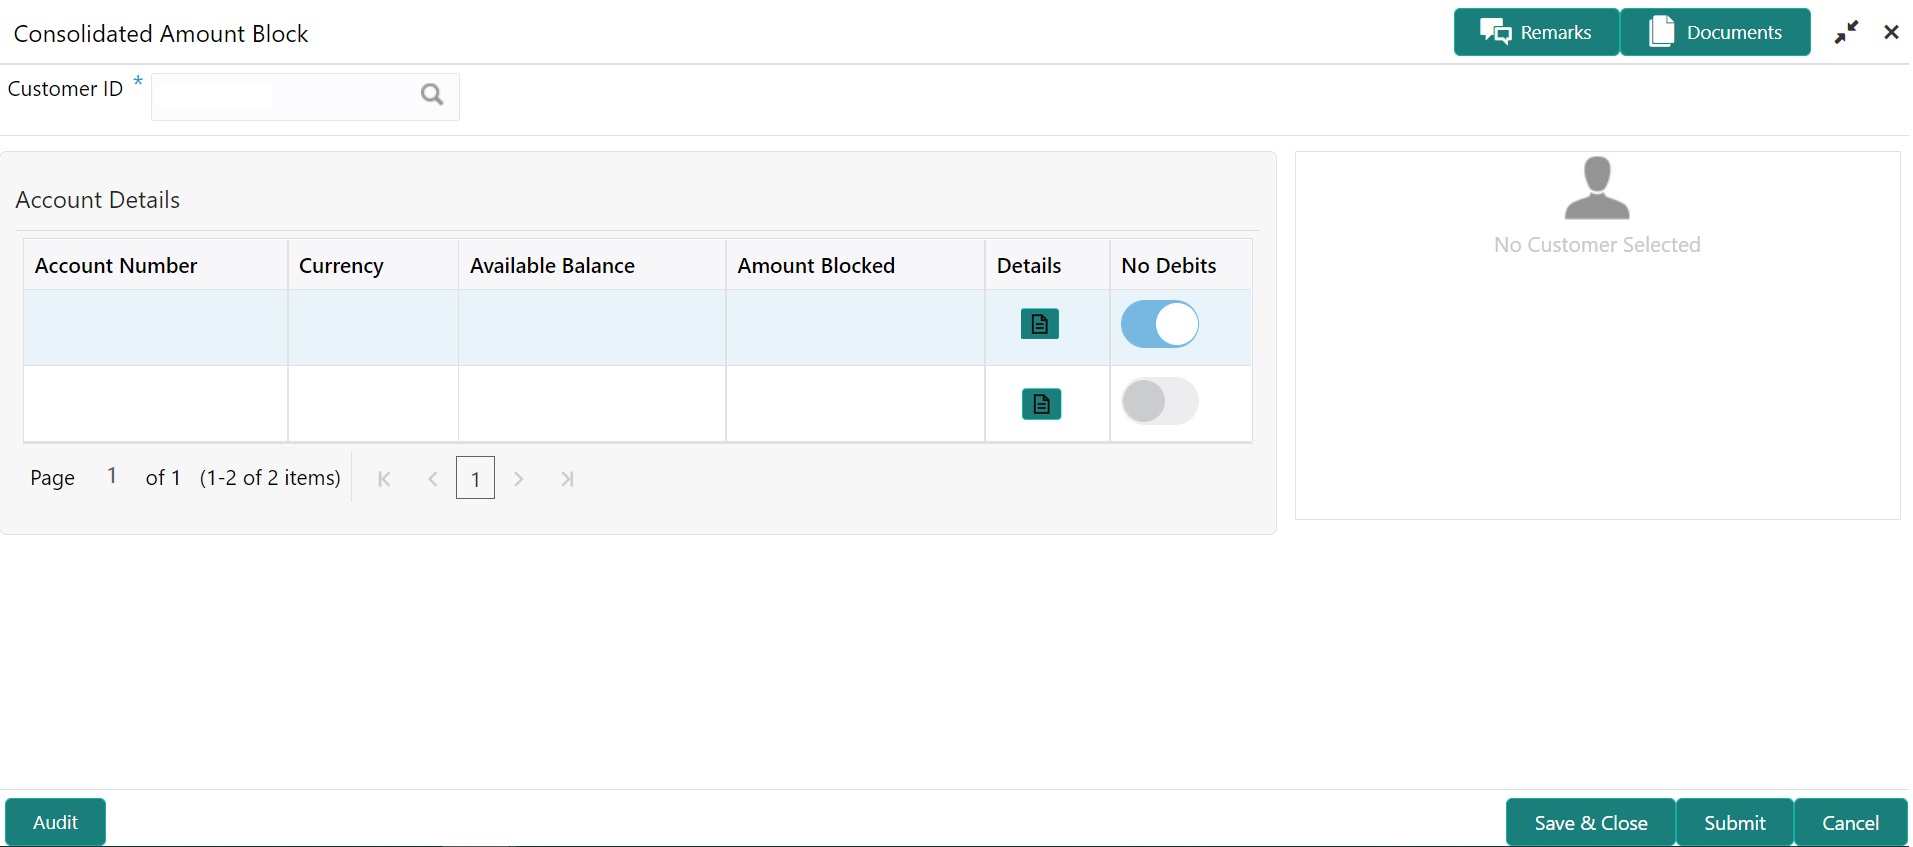
This topic describes the systematic instructions about the Consolidated Amount Block. The consolidated amount block allows the user to view all the accounts of the customer and the possible amount blocks or No-debits placed on those accounts.
- On the Homepage, from Account
Services, under Amount Block, click
Consolidated Amount Block, or specify the
Consolidated Amount Block in the Search icon
bar.Consolidated Amount Blockscreen is displayed.
Note:
The fields which are marked in asterisk blue are mandatory. - On Consolidated Amount Block screen, specify the fields. For more information on fields, refer to the field description table.
Table 7-4 Consolidated Amount Block - Field Description
Field Description Customer ID Enter the Customer ID or click the search icon to view the Customer ID pop-up window. By default, this window lists all the Customer ID’s present in the system. You can search for a specific Customer ID by providing Customer ID or Customer Name and click on the Fetch button. Note:
Customer Name is displayed based on the Customer ID selected.Account Details This section account details of the customer. Account Number Displays the account number of the customer. Currency Displays the currency of the amount. Available Balance Displays the available balance on the customer’s account. Amount Blocked Displays the amount blocked on the account. Details Displays  icon to view the details of the individual amount
blocks placed on the selected account.
Note:
If you click the icon, the Account Blocked Details section is displayed. For more information, refer Amount Blocked Details section.No Debits Switch to  to block the total available balance on the
account.
Note:
A warning message is displayed to confirm the action. Click Confirm to proceed.Switch to
 to not to block the total available balance on
the account.
- To view amount blocked details:
- Click
 icon from the Details field.
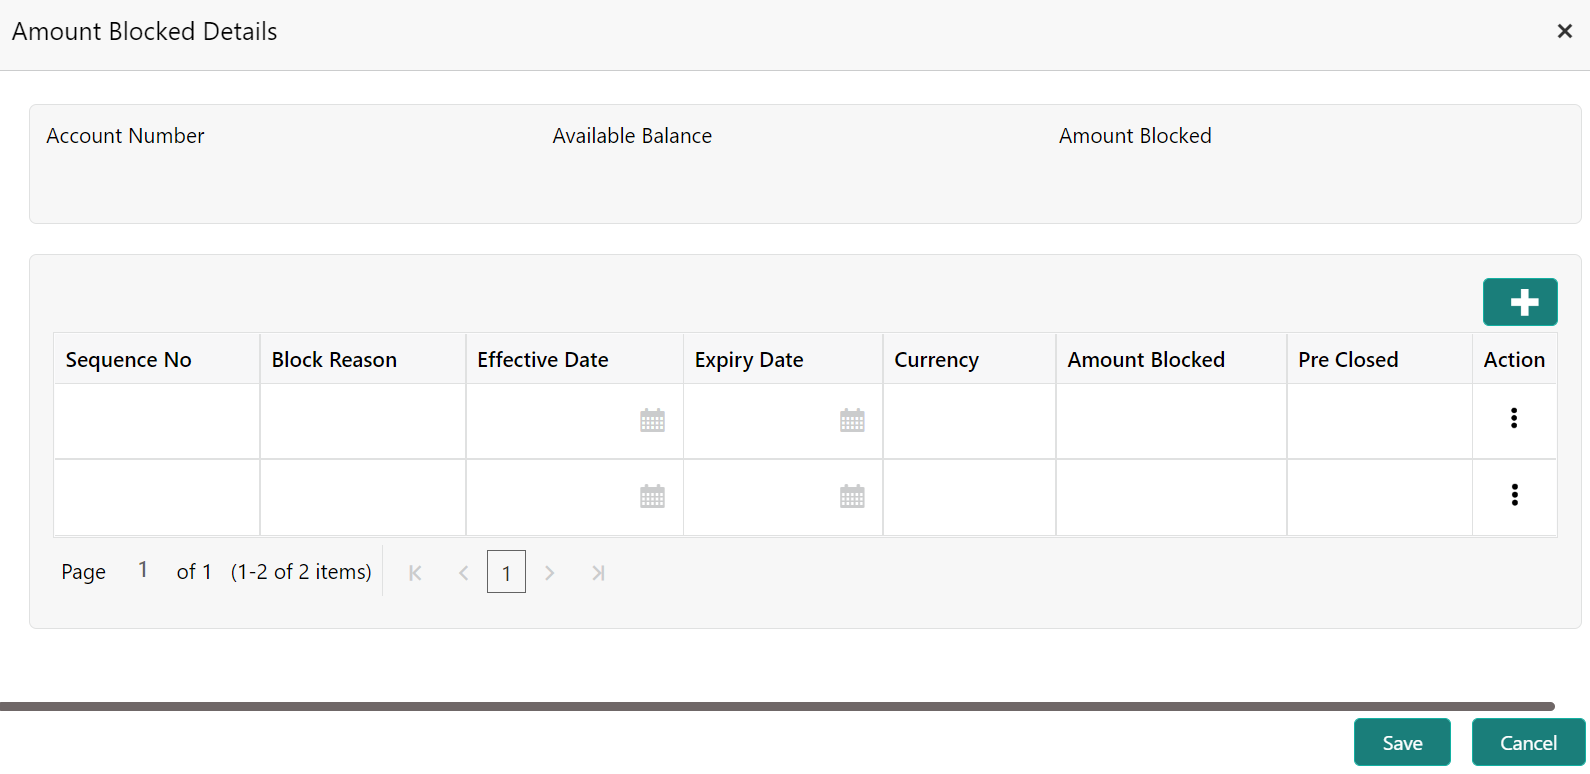
The Amount Blocked Details section is displayed.
Note:
If no amount blocks are available for the account, then the screen displays a message to add an amount block. You need to click to proceed. For more information, refer Add Amount Block.
- In the Account Blocked Details section,
perform the required action. For more information on fields,
refer to the field description table.
Table 7-5 Account Blocked Details - Field Description
Field Description Account Number Displays the account number of the customer. Available Balance Displays the available balance in the account. Amount Blocked Displays the total amount blocked for the account. Sequence No Displays the sequence number for the details. Block Reason Displays the reason for blocking the account. Effective Date Displays the effective date of the amount block. Expiry Date Displays the expiry date of the amount block. Currency Displays the currency of the account. Amount Blocked Displays the amount blocked for each sequence. Pre Closed Displays a blank field or a value as Yes. Note:
A blank field is displayed when the amount block is active. Yes value is displayed when amount block is pre-closed before its expiry date.Action Displays  icon to perform the following action:
- Edit: If you select this option, then the fields are enabled. You can update the required details and click icon to confirm the updates.
- Pre-close: If you select this option, then a warning message is displayed before submitting the record. You need to click Confirm to proceed.
- Click Save.
- Click
- To add new amount block:
- Click
 .
.
A new row is added and enabled.
- All the fields are similar as displayed in the Table 7-5 table, except here all the fields are enabled and there are Edit and Delete links displayed in the Action field.
- Click Save.
- Click
- To view amount blocked details:
- Click Submit.
Parent topic: Amount Block

