3.1.1 Simulation
You can add the basic TD details to simulate the interest and maturity value for the TD account.
To perform TD simulation:
Note:
The fields marked as Required are mandatory.- On the Homepage, from the Retail Deposit
Services mega menu, under Term Deposits
and Transactions, click Account
Opening, or specify Term Deposit Account
Opening in the search icon bar and select the screen.The Term Deposit Account Opening screen is displayed.
- On the Term Deposit Account Opening screen, click the
 icon or specify the customer number in the Customer
ID field, and press Enter or
Tab.
icon or specify the customer number in the Customer
ID field, and press Enter or
Tab.- If you click the
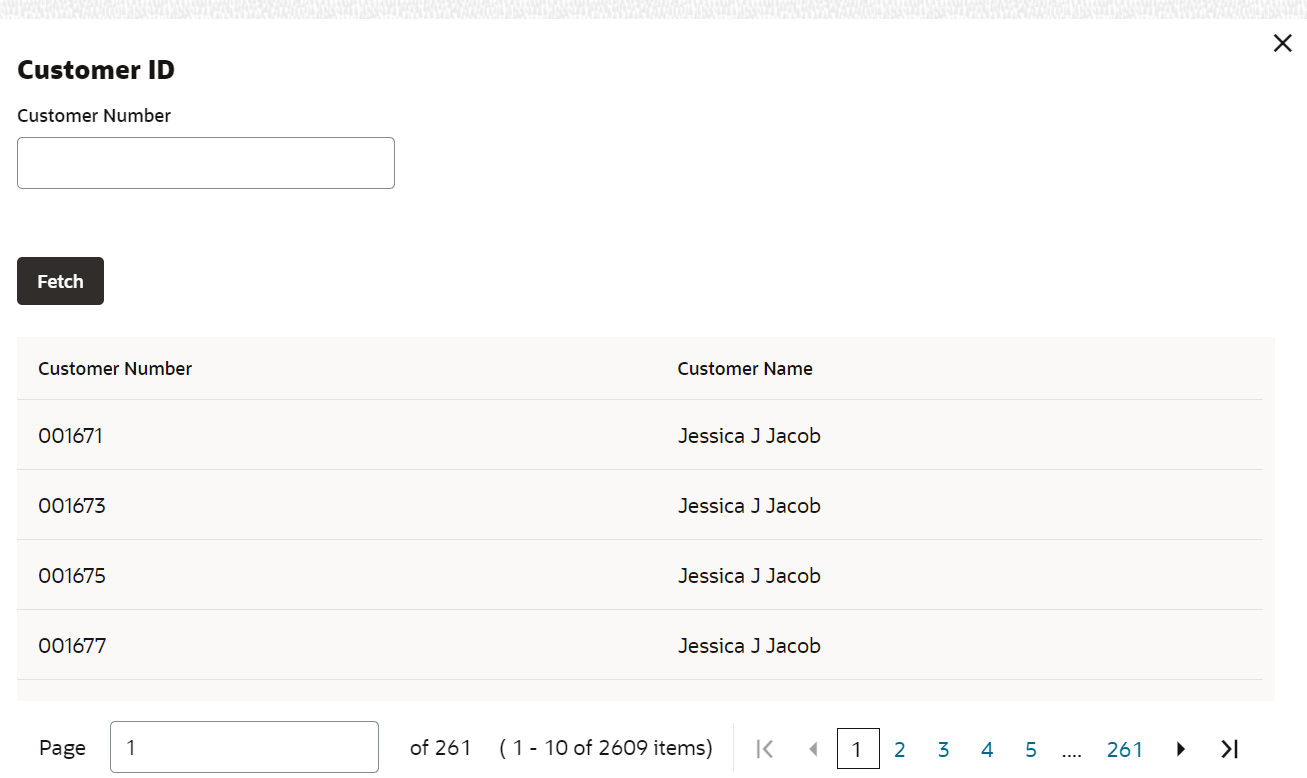
 icon, then the following section is displayed:
 - Specify the customer ID in the Customer Number field.
- Click Fetch.The customer number and name are displayed in the table.
- Select the Customer Number from the table.The details related to the selected customer number are displayed in the tabs.
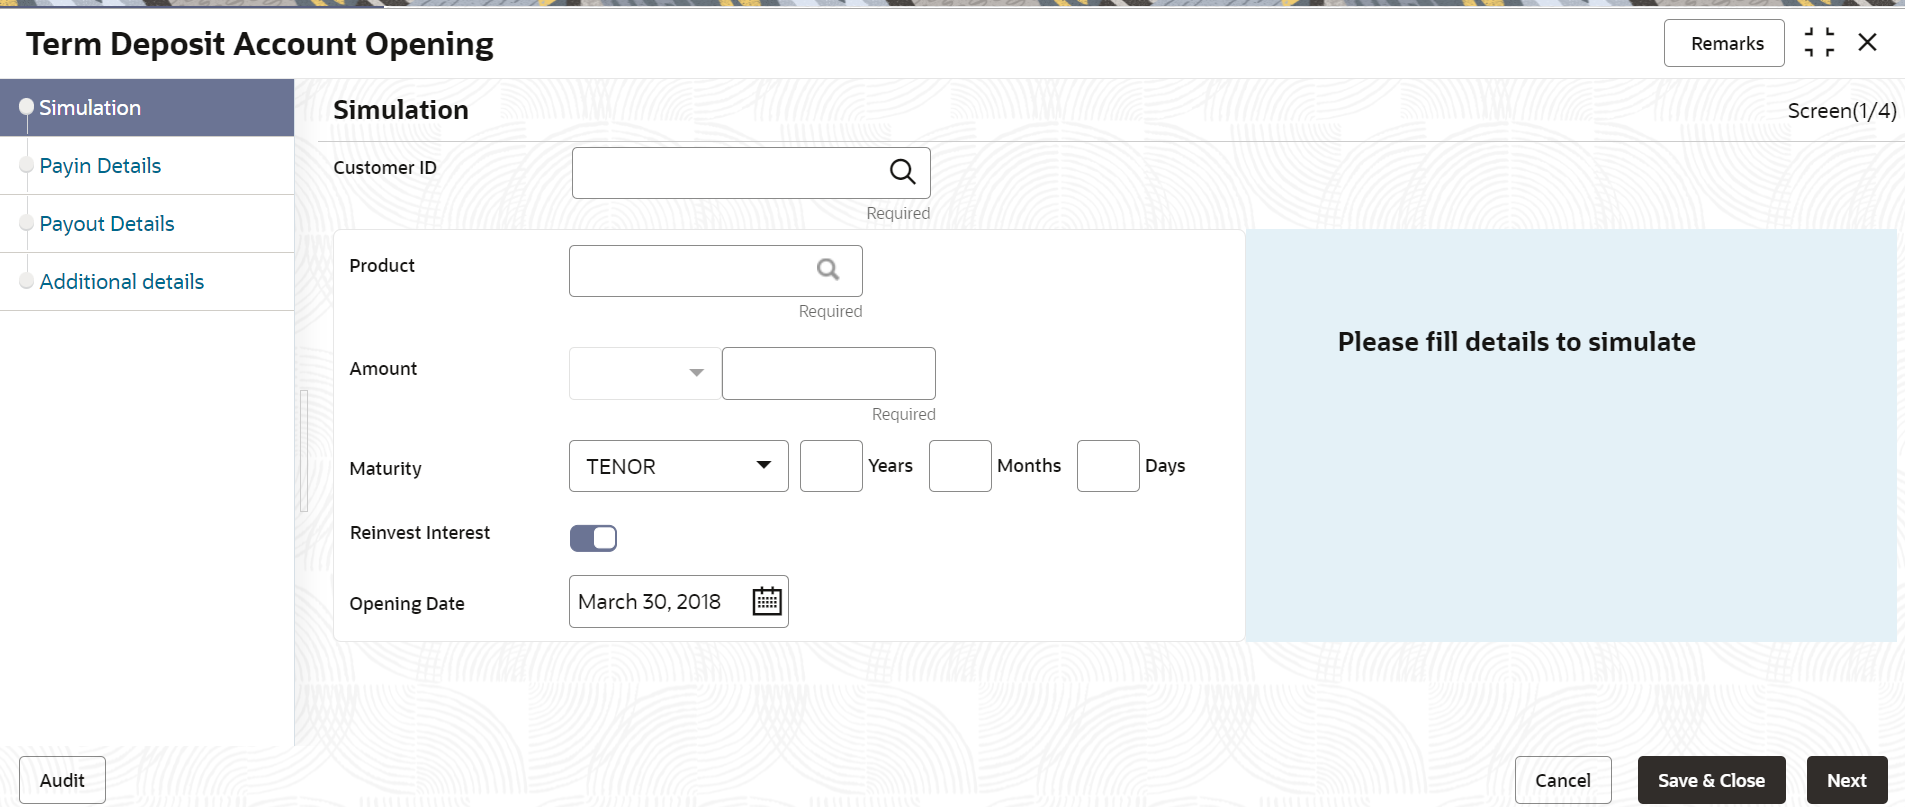
Figure 3-3 Term Deposit Account Opening - Simulation
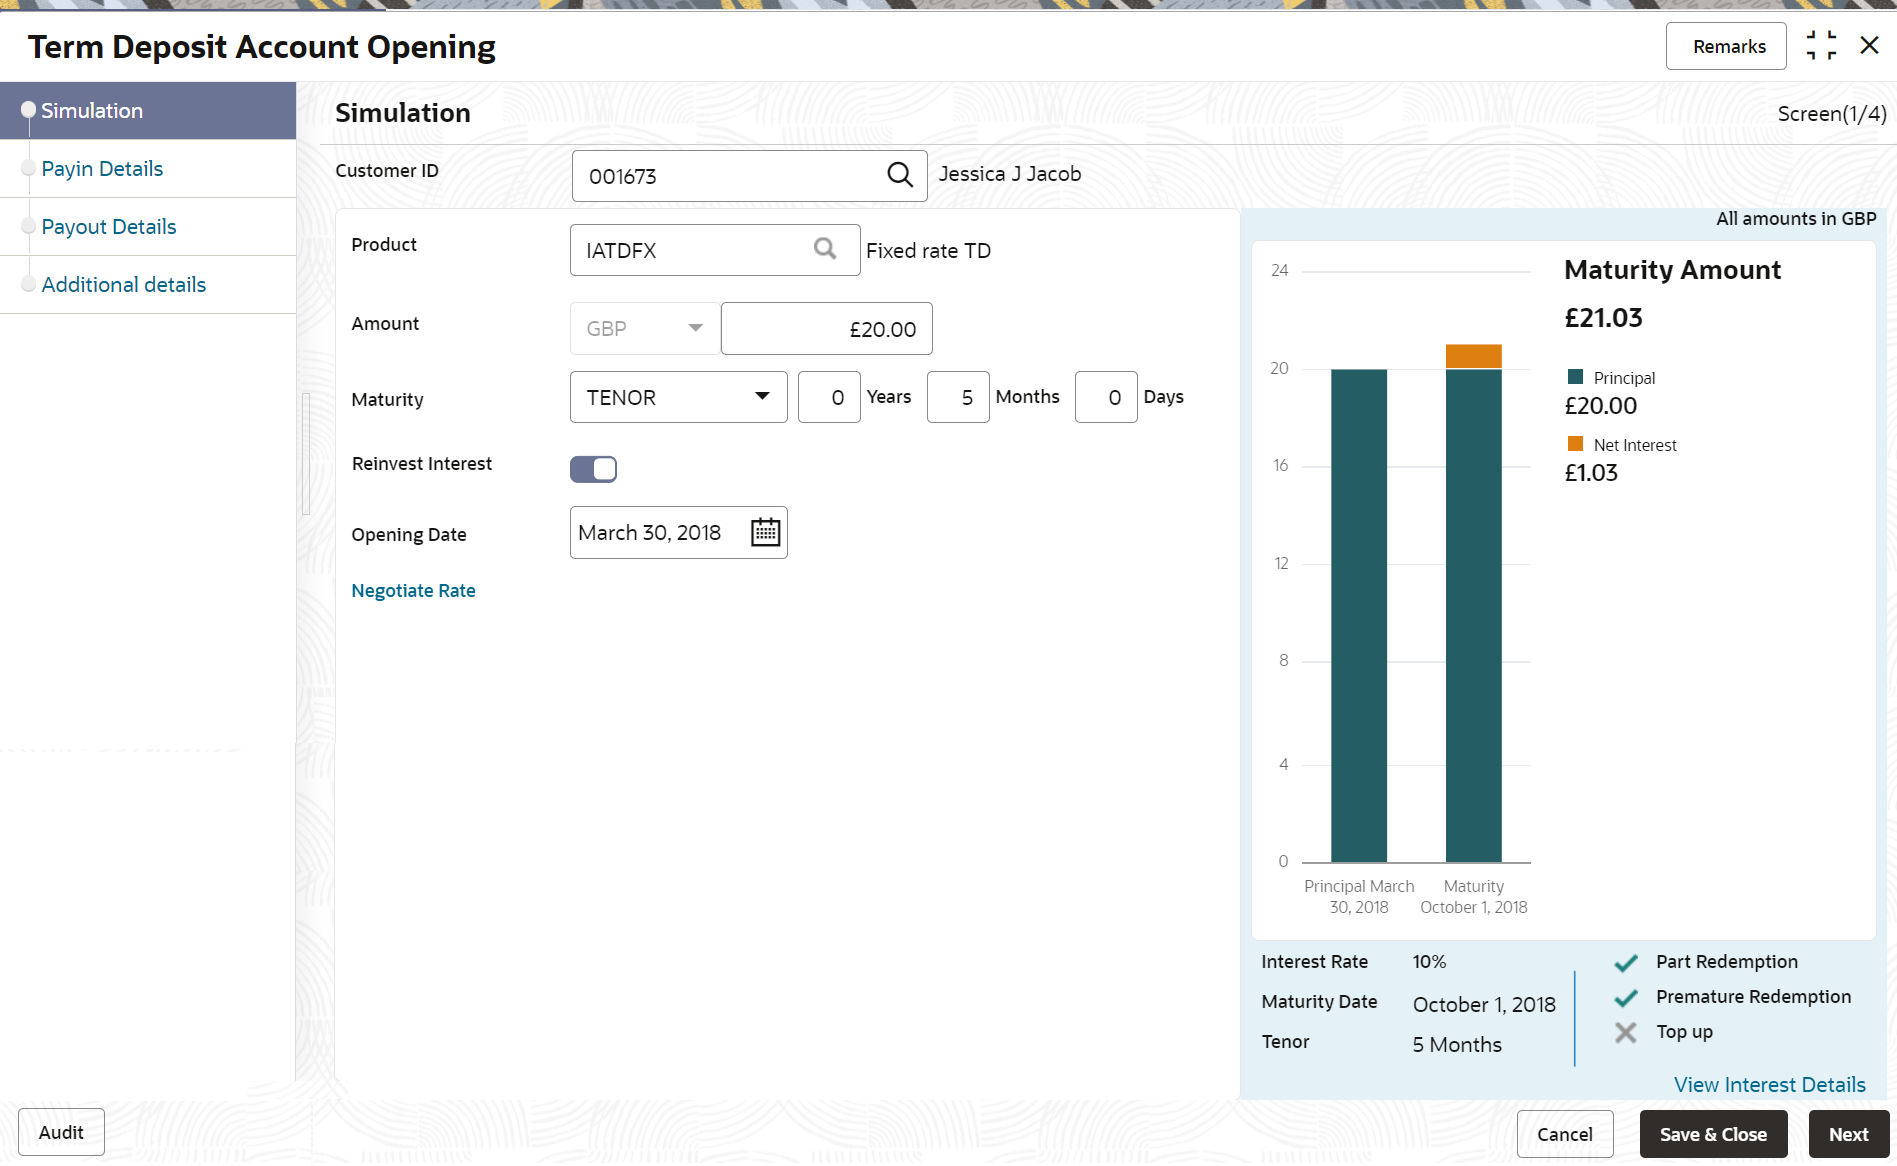
Description of "Figure 3-3 Term Deposit Account Opening - Simulation" - If you click the
- Perform the required actions on the Simulation tab. For more information on fields, refer to the field description
table.
Table 3-1 Term Deposit Account Opening - Simulation – Field Description
Field Description Customer ID
Specify the customer for whom the TD is to be opened. Note:
The customer name is also displayed adjacent to the field.Product
Select the deposit product under which the TD is to be created. Note:
For information, on the Product section, refer Fetch Product.Product Description
Display the description of the deposit product selected. Amount Specify the deposit amount. Note:
By default, the amount currency will be of product selected.Maturity Select the option for TD maturity. The options are: - Tenure: If you select this option, then specify the tenure for maturity in years, months, and days in the fields displayed adjacent.
- Date: If you select this option, then specify or select the date.
Reinvest Interest Switch to
 to reinvest the interest in TD.
Switch to
 to be paid out the interest.
Note:
The interest amount is paid out during interest liquidations.Opening Date Specify the deposit opening date. Branch Code Displays the branch code of the teller’s logged in branch. - To fetch Product:
- Click
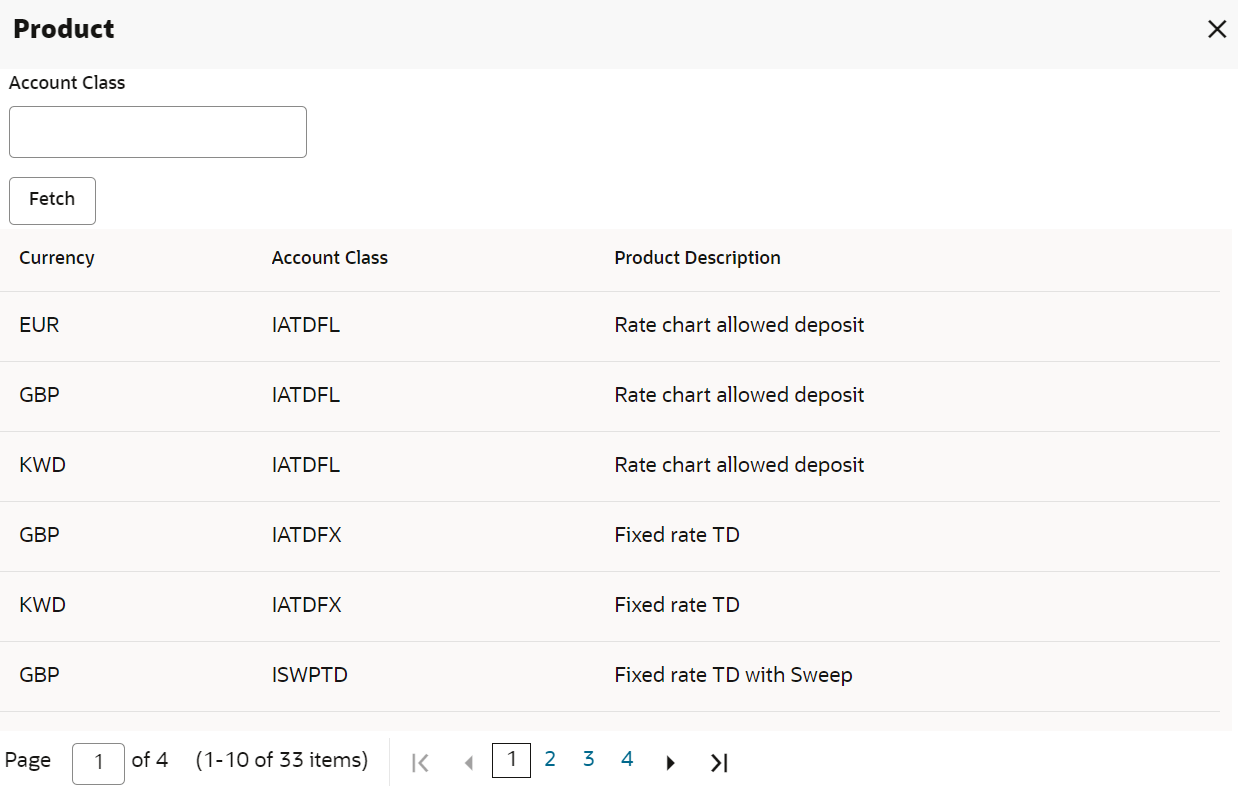
 icon from the Product field.The Product section is displayed.
 - Specify the number in the Account Class field.
- Click Fetch.The details are fetched and displayed in a table.
- Select the account class from the table.
- You can negotiate the rate by performing the following action if
required:
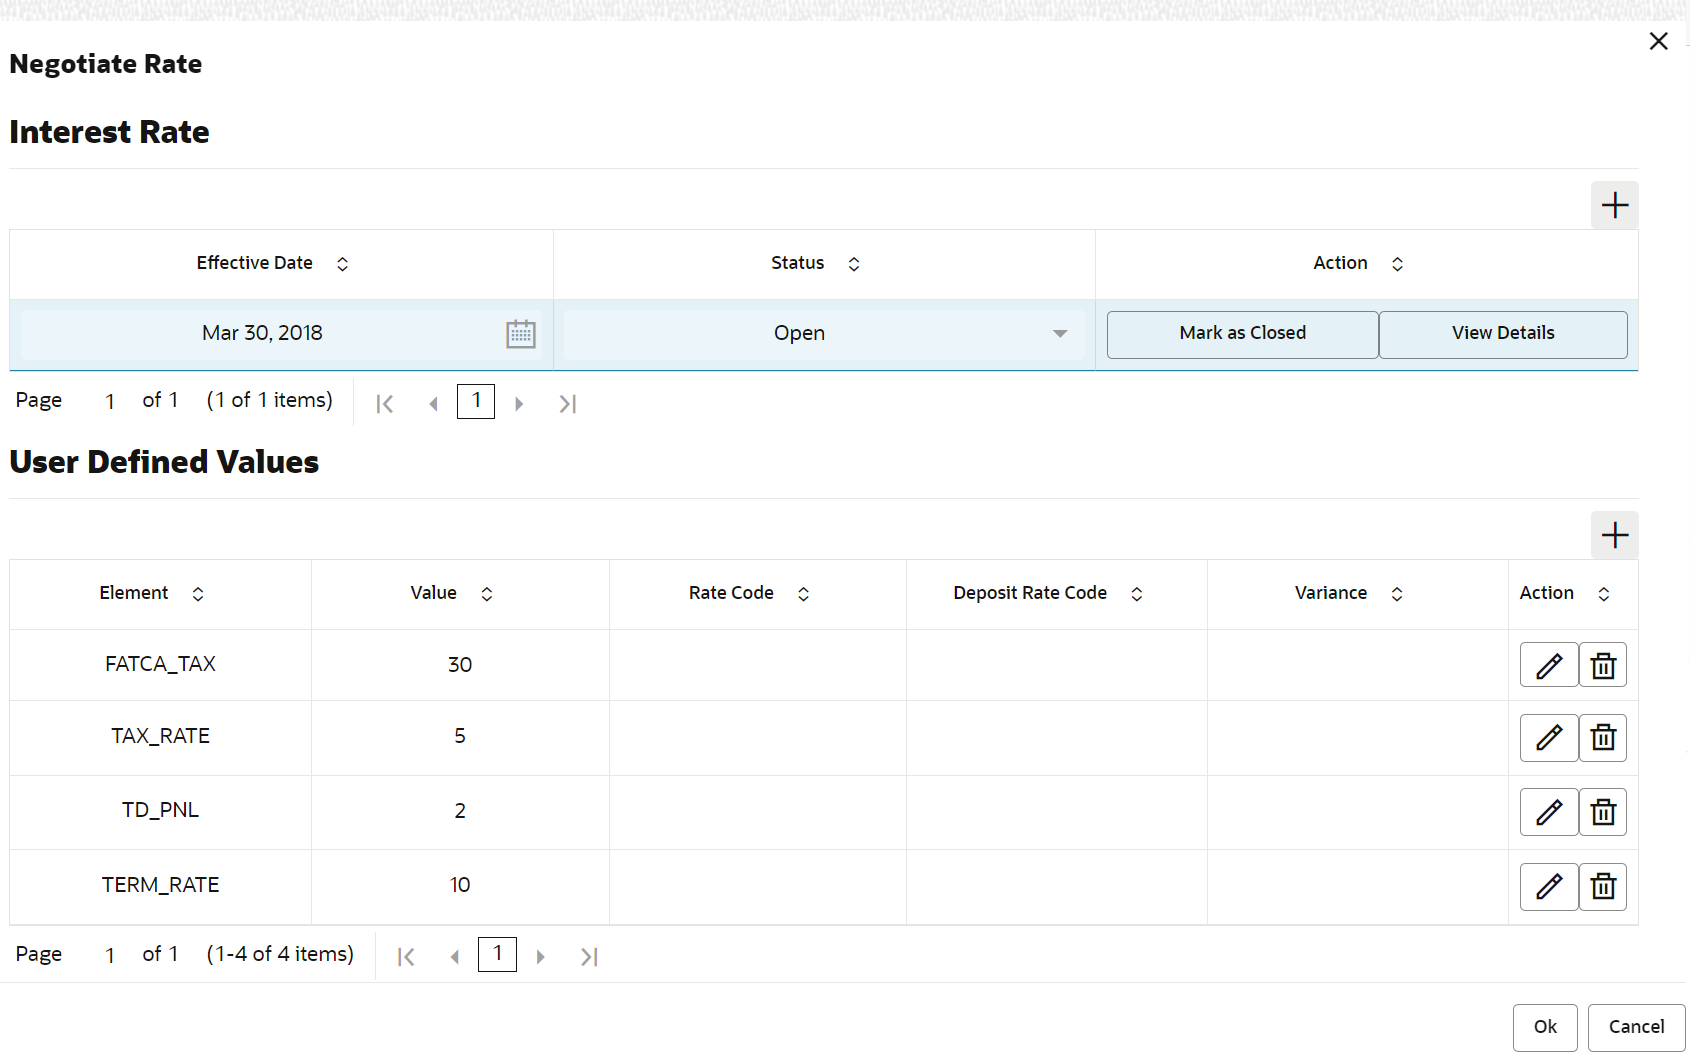
- Click the Negotiate Rate link.The Negotiate Rate section is displayed.
- On the Negotiate Rate screen, perform the
required action. For more information on fields, refer to the field description
table.
Table 3-2 Negotiate Rate – Field Description
Field Description Interest Rate This section displays the interest rate details. Effective Date Displays the date from which the interest rate is effective. Status Displays the status of the interest. Action Click Mark as Closed, to close the interest rate.
Click View Details, to view the user defined values.
User Defined Values This section displays the user defined values details. Note:
This section is displayed if you click View Details from the Action field.Element Displays the user defined elements that are already linked to the Interest product. Value Displays the user defined value. Rate Code Displays the rate code for the user defined value. Deposit Rate Code Displays the deposit rate code for the user defined value. Variance Displays the variance for the user defined value. Action Click the
 icon, to edit the user defined value
details.
Click the
 icon, to delete the user defined value
entry.
Click the
 icon, to confirm the edited details. This
icon is displayed, only after you click the edit
icon.
- You can also add new row to the Effective Date
and User Defined Values sections, by clicking the
 icon.
icon. - Click OK.
- Click the Negotiate Rate link.
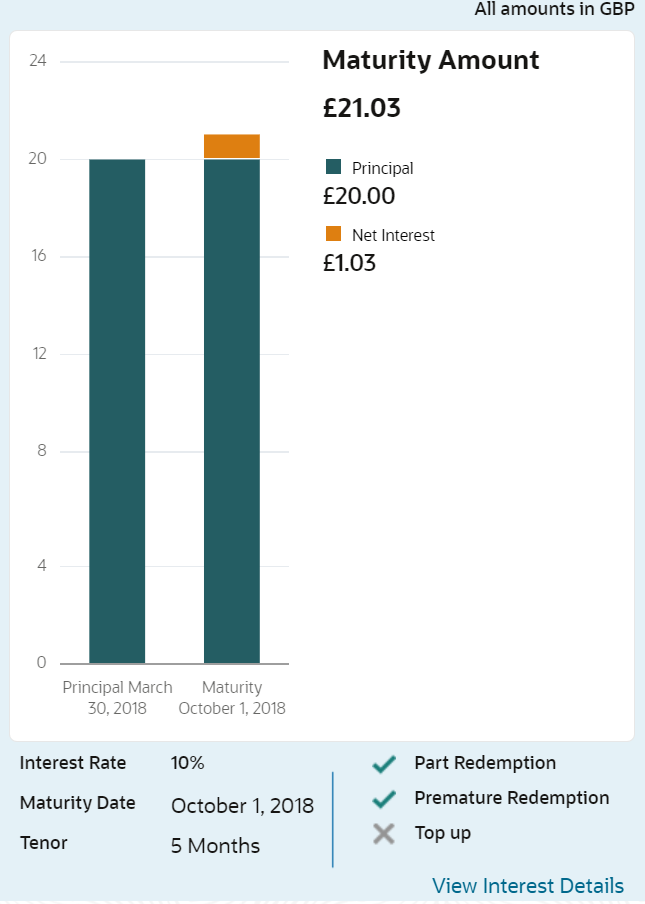
- On providing the inputs, a simulation will be triggered and displayed as
output.The simulation details are displayed.
- Based on the input data provided, the system simulates the details of TD and
displays them in a widget on the right side. For more information on fields, refer to the field description
table.
Table 3-3 TD Account Opening - Output Details – Field Description
Field Description Maturity Amount Displays the maturity amount for the TD. Principal Displays the total principal of the TD. Net Interest Displays the Net interest on the principal (Interest – Tax). Interest Rate Displays the Interest rate applicable for the TD. Maturity Date Displays the maturity date of the TD. Tenor Displays the tenor of the TD in Years, Months & Days. Part Redemption Displays whether the part redemption is allowed for the deposit. Premature Redemption Displays whether premature redemption is allowed for the deposit. Top-up Displays whether the top-up is allowed for the deposit. View Interest Details Click this link if the interest details are required to be viewed. Date Displays the date of interest payout / compounding date. Reinvested Interest / Paid out Interest Displays the reinvested interest / paid out interest. Principal Displays Principal amount after the interest liquidation on this date. Note:
Once the deposit simulation is completed, you can provide the simulated details to the customer. - Click Next.The Payin Details tab is displayed.
Parent topic: Account Opening
