17.1.1 Inbox
This topic provides the systematic instructions to view messages received in their inbox.
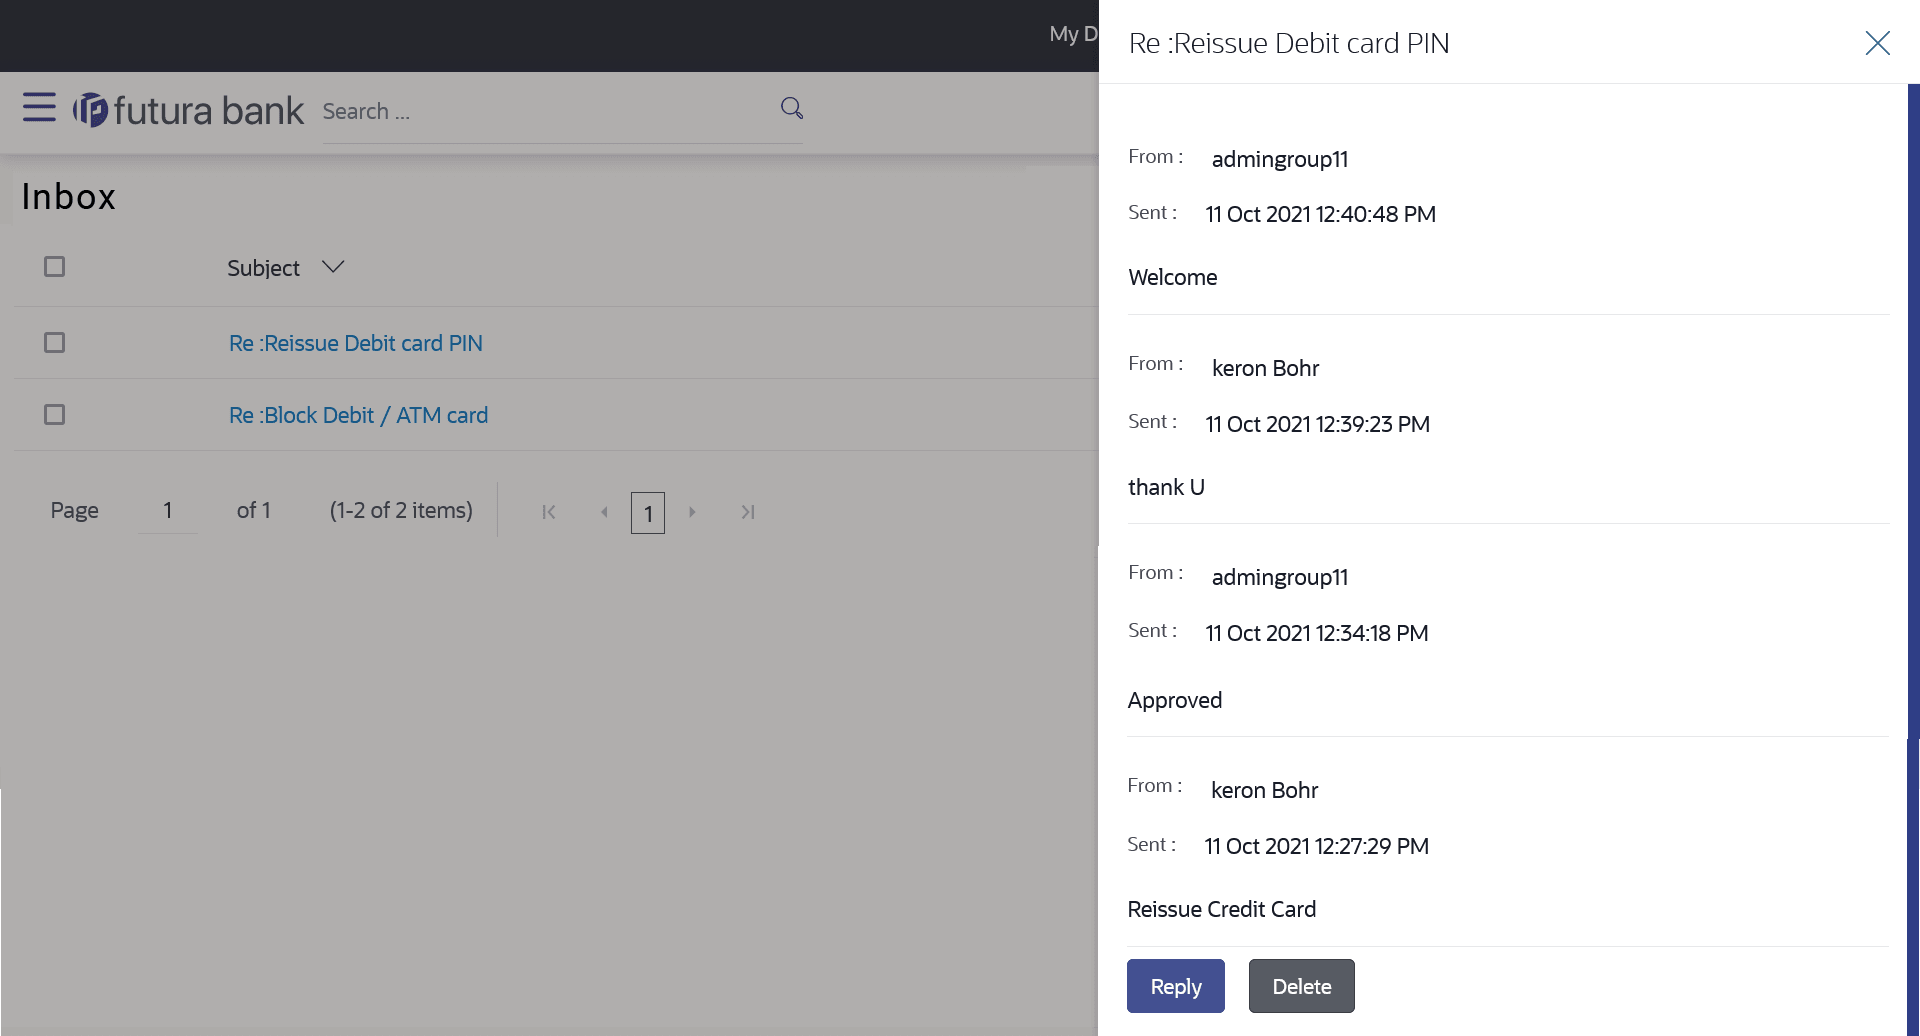
The user can view an individual message by clicking on the subject of the specific mail.
To view received mails:
- Perform anyone of the following navigation to access the Inbox screen.
- From the Dashboard, click Toggle menu, click Menu, and click Mailbox. Under Mailbox, click Mails, then click Inbox.
- Access through the kebab menu of any other screens available under Mailbox .
The list of received messages appears on the Inbox screen.
- Click on the subject link of an individual message to view the details of that
message.
Note:
The fields which are marked as Required are mandatory.For more information on fields, refer to the field description table.
Table 17-1 Inbox - Field Description
Field Name Description Subject The subject of the mail is displayed against each mail record. Date The date and time on which the mail was received is displayed against each mail record.
To access the Inbox:
- Perform one of the following actions:
- Click the subject of a mail you want to
view.
The mail details are displayed on the overlay window.
- Click Refresh to refresh the folder.
- To delete one or multiple messages, select the specific check boxes against the mail and click Delete.
- Click on kebab menu to access mailbox related transactions.
Note:
The fields which are marked as Required are mandatory.For more information on fields, refer to the field description table.
Table 17-2 Inbox - Message Details - Field Description
Field Name Description Message Details Message Heading The subject of the received mail. From The name of the sender of the mail. Sent The date and time on which the mail was received. Content The content of the mail. Mail Chain All the mails forming part of the mail chain being viewed are displayed one below the other with the mail received most recently displayed on top. Each mail in the chain contains the following:
- The name or ID of the sender of the mail. Mails sent by you will have your name displayed against the From field and those sent by a bank administrator will have the ID of the bank administrator displayed.
- The date and time at which the mail was sent.
- The content of the mail as sent by you or the administrator.
Note:
A mail chain is formed when a user sends a mail to the bank and a bank administrator responds to the mail.An overlay containing the details of the mail appears.
- Click the subject of a mail you want to
view.
- Perform one of the following actions:
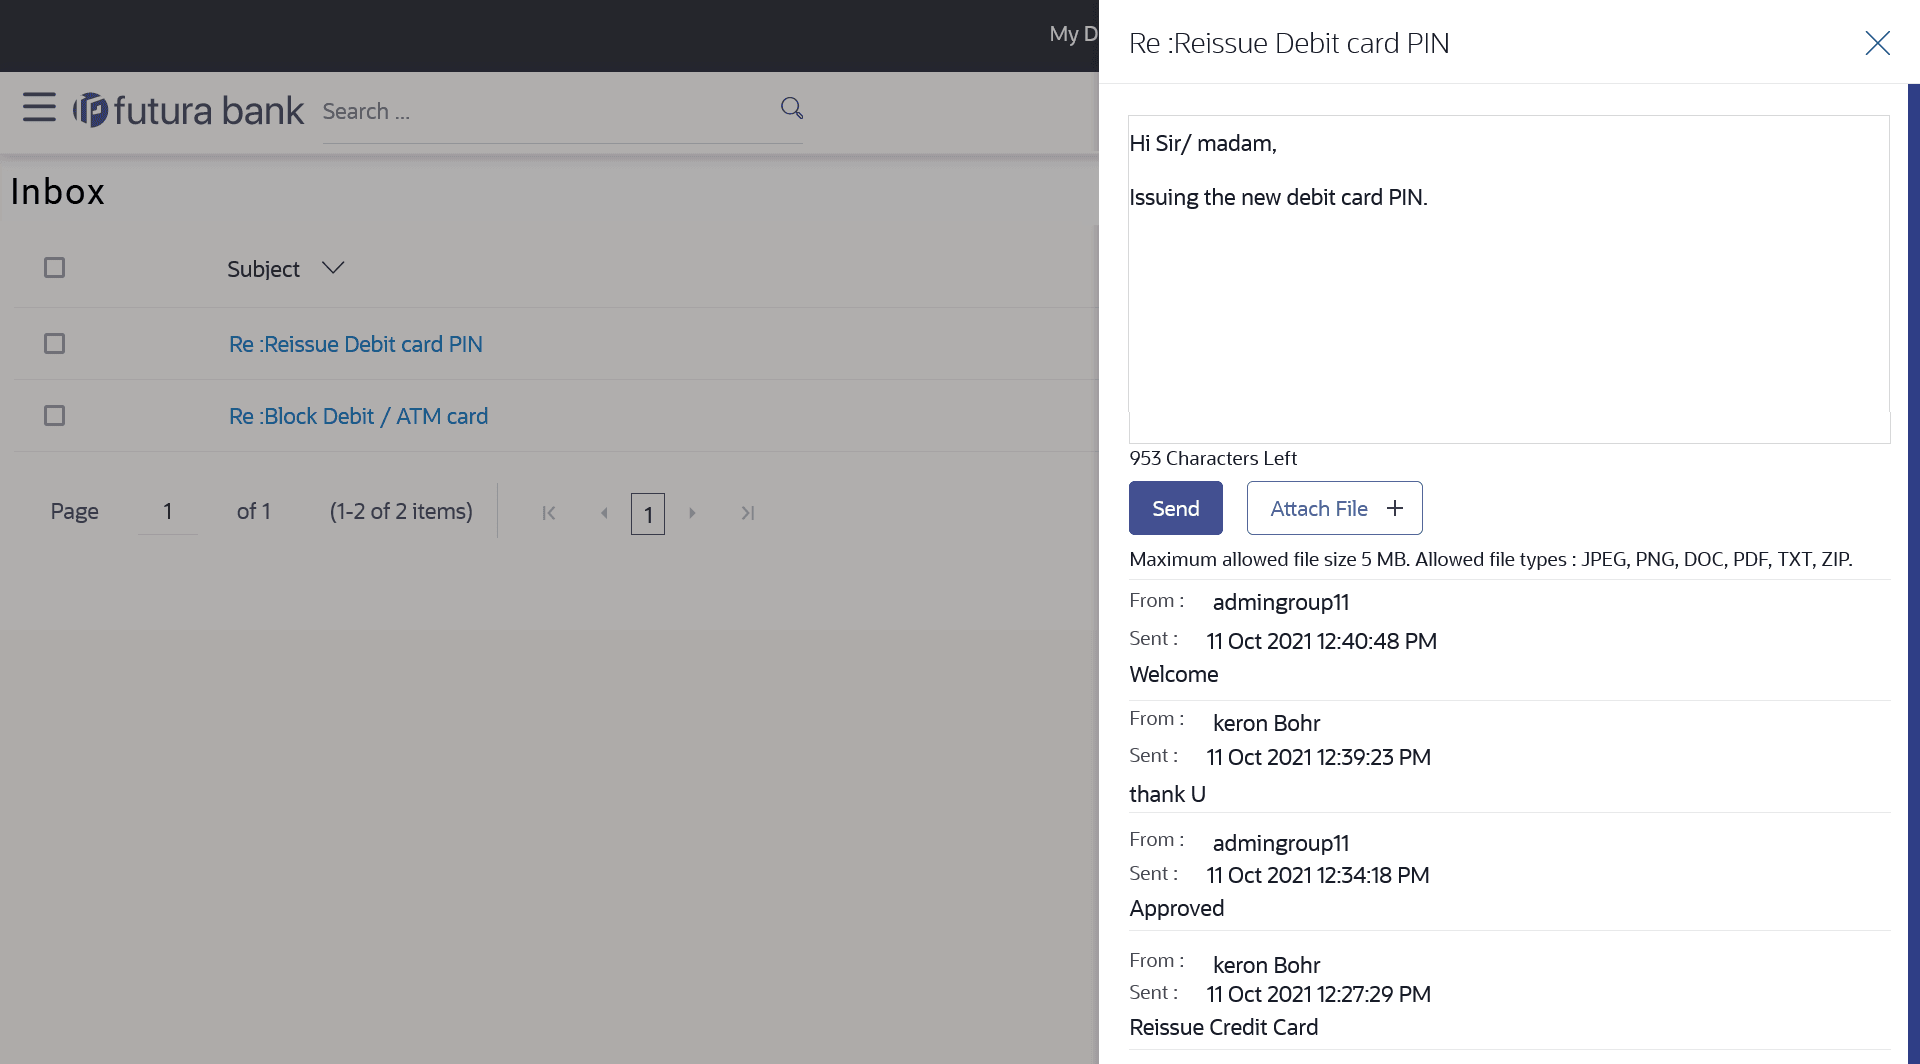
- Click Reply if you wish to respond to the mail.
- Click Delete to delete the message.
- Click
 to close the overlay window.
Note:
The fields which are marked as Required are mandatory.For more information on fields, refer to the field description table.
Table 17-3 Inbox - Reply - Field Description
Field Name Description Message - Reply Message Enter a response to be sent to the bank. Attach File + Browse and select the reference document file sent along with an email message. Note:
Maximum allowed file size 5MB and allowed file types are JPEG, PNG, DOC, PDF, TXT, ZIP. - Perform one of the following actions:
- Click Send to send the response to the bank.
A message confirming that the mail has been sent successfully appears.
- Click Attach File + to add an attachment to the response mail.
- Click Send to send the response to the bank.
Parent topic: Mails


