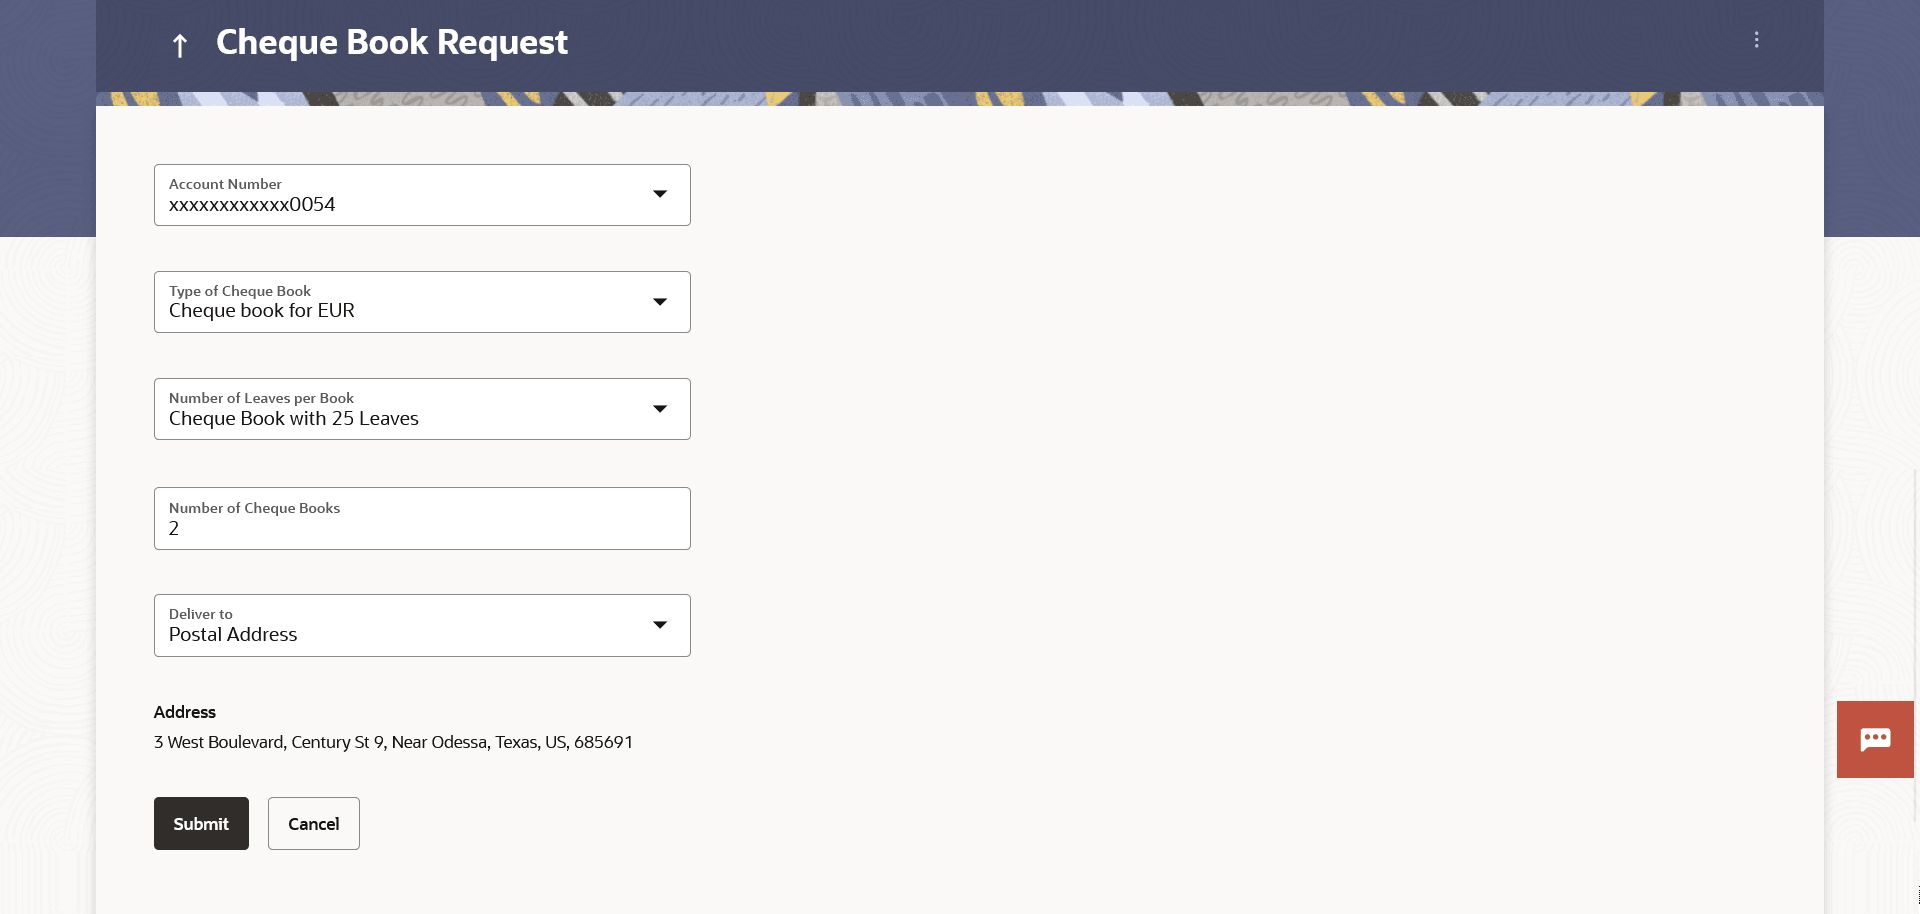
4 Cheque Book Request
This topic provides the systematic instructions for user to submit online requests for cheque books.
This feature is available only for accounts with cheque book functionality enabled.
Cheques are widely used instruments for making payments. Users receive cheque books as part of account facilities availed. If the user is out of cheque leaves, a request can be raised, for issuance of a new cheque book/s.
While requesting for cheque book, the user can specify his preferences such as the number of cheque books required, leaves per cheque book and the cheque book type.
User can specify the location for delivery of the new cheque book. User can request the cheque book to be delivered at a specific branch or provide a personal address.
Note:
Send to Modify functionality is now supported for this transaction.To request for a cheque book:
- Perform anyone of the following navigation to access the Cheque Book
Request screen.
- From the Dashboard, click Toggle menu, click Menu, then click Accounts, and then click Current and Savings . Under Current and Savings , click Cheque Book Request.
- From the Search bar, type Current & Savings – Cheque Book Request and press Enter.
- From the Dashboard, click Toggle menu, click Menu, then click Accounts, and then click Current and Savings . Under Current and Savings , click Overview, then click Cheque Book Requestof Quick Links widget
- Access through the kebab menu of transactions available under the Current and Savings module
The Cheque Book Request screen appears.
Note:
The fields which are marked as Required are mandatory.For more information on fields, refer to the field description table.
Table 4-1 Field Description
Field Name Description Account Number Account number with the account nickname for which the cheque book is to be requested. The account number could be either the user’s Party account or any linked party accounts that he has access to. Type of Cheque Book The type of cheque book. Number of Cheque Books Number of cheque books required. This field appears if you have the facility to request for multiple cheque books.
Number of Leaves per Book Number of cheque leaves needed per cheque book. Delivery To Delivery location of the cheque book. The options are:
- Postal Address
- Branch Near Me
Address The complete address of the primary account holder’s work place, residence or that defined as postal address will be displayed based on which option has been selected in the address selection field. This section appears if you select Branch Near Me option in the Delivery To field. City The city where the cheque book is to be delivered. Branch Near Me The branch in the selected city, where the cheque book is to be delivered.
Note:
The options in this field depend on the selected option in the City field.Branch Address The complete branch address based on the selection above.
Note:
The address displayed here depends on the selected option in the Branch Near Me field. - From the Account Number list, select the account for which the cheque book is to be requested.
- From the Type of Cheque Book list, select the desired option.
- From the Number of Leaves per Book list, select the number of leaves required in each cheque book.
- In the Number of Cheque Book list, enter the required number of cheque books.
- From the Delivery To list, select the delivery location of
choice.
- If you select the Branch Near Me option;
- From the City list, select the desired city.
- From the Branch Near Me list, select the desired
branch.
The complete address of the selected branch appears.
- If you select the Branch Near Me option;
- Perform one of the following actions:
- Click Submit to submit the cheque book
request.
The Review screen appears.
- Click Cancel to cancel the transaction.
- Click Submit to submit the cheque book
request.
- Perform one of the following actions:
- Verify the details and click
Confirm.
The success message of cheque book request along with the service request number appears.
- Click Back to navigate back to the previous screen.
- Click Cancel to cancel the transaction.
- Verify the details and click
Confirm.
- Perform one of the following actions from confirmation page:
- Click Home to go to the Dashboard screen.
- Click View Account Details to visit the account details page.
