5 Cheque Status Inquiry
This topic provides the systematic instructions for users to view the status of cheques they have written at any time.
The customer can view the status of either a single cheque by providing a cheque number or that of a cheque series by defining a cheque range.
Customers can also search for cheques based on their status i.e. used, not used, stopped, etc.
Note:
The Cheque Range and Cheque Status fields are displayed if the Oracle Banking Digital Banking Experience application is integrated with Universal Banking Solutions and the region is not India.Using the Manage Columns feature, bank can configure and enable customizable UI display/download option for the end users. Using this feature, users can personalize the information to be displayed/downloaded from search grid displayed on the screen.
By clicking on Manage Columns option available on the screen, user can
- Rearrange columns
- Remove specific columns.
Note:
- The downloaded report will have the same columns as displayed on the UI as per user preference as well as there will also be an option to modify the column selection while downloading.
- The column preferences setup by the user will be saved for future reference i.e. in case the user revisits this screen, the preferred columns will only be displayed in the table.
To inquire about the cheque status:
- Perform anyone of the following navigation to access the Cheque Status
Inquiry screen.
- From the Dashboard, click Toggle menu, click Menu, then click Accounts, and then click Current and Savings . Under Current and Savings , click Cheque Status Inquiry.
- From the Search bar, type Current & Savings – Cheque Status Inquiryand press Enter.
- From the Dashboard, click Toggle menu, click
Menu, then click Accounts, and then
click Current and Savings
.
Under Current and Savings , click Overview, then click Cheque Status Inquiryof Quick Links widget.
- Access through the kebab menu of transactions available under the Current and Savings module.
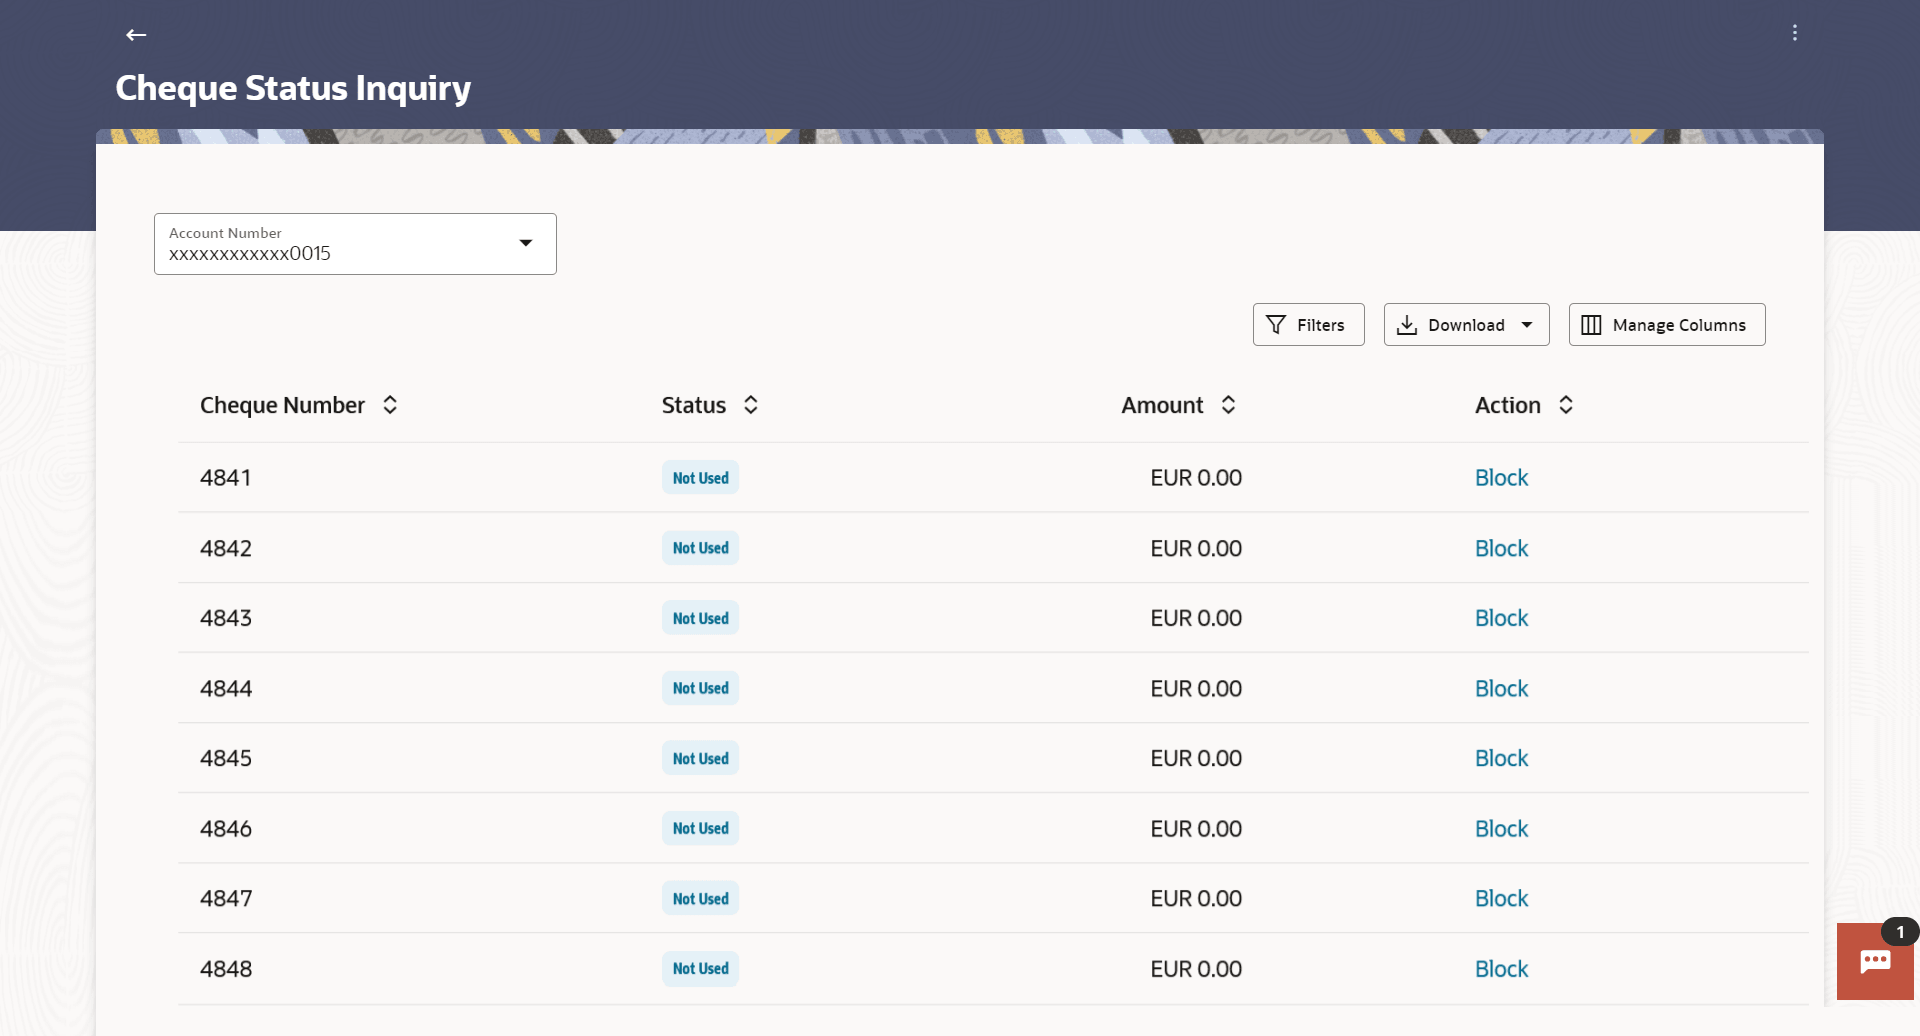
Cheque Status Inquiry screen appears.
Note:
The fields which are marked as Required are mandatory.For more information on fields, refer to the field description table.
Table 5-1 Cheque Status Inquiry - Field Description
Field Name Description Account Number Select an account number to view the status of cheques associated with that account. Cheque Status Inquiry Results Cheque Number The cheque number of which status is being viewed. Status The current status of the cheque is displayed against it. Reason The reason for which the cheque has been stopped, rejected or cancelled. A value will be displayed here only if the cheque is in any of these three statuses. Amount The amount for which the cheque was issued. Action Click on the Block link to stop a cheque that has been issued for making payment. - From the Account Number list, select an account to view the
status of cheques associated with that account. The cheque status inquiry appears of the selected account.
- Perform one of the following actions:
- Click the
 icon to download the records in CSV & PDF format.
- Click the
 icon to setup a column preference by rearranging or removing
columns
- Click on the Block link under
Action column to stop a cheque that has been issued for
making payment.
The system redirects to the Stop/Unblock Cheque screen.
- Click the
- Perform one of the following actions:
- Click
 to search the cheque based on search
criteria;
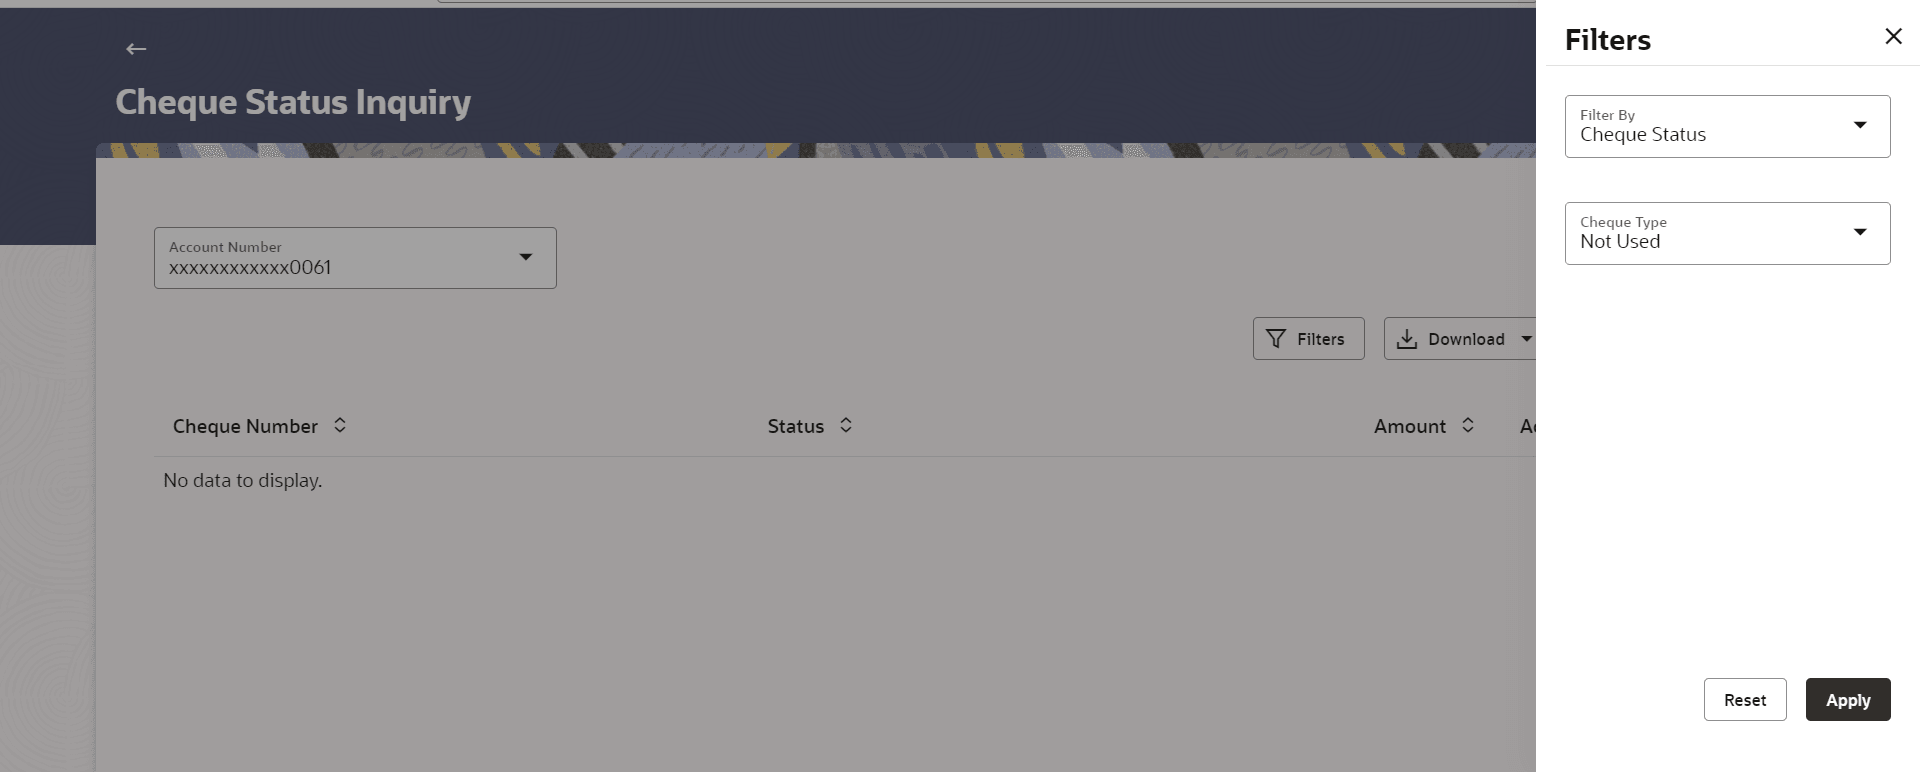
The Filter overlay screen appears.
Figure 5-2 Cheque Status Inquiry- Filter Criteria
Note:
The fields which are marked as Required are mandatory.For more information on fields, refer to the field description table.
Table 5-2 Cheque Status Inquiry- Filter - Field Description
Field Name Description Filter By Allows the customer to specify the criteria by which to view the status of cheques. The options are:
- Cheque Number
- Cheque Range
- Cheque Status
Note:
The Cheque Range and Cheque Status fields are displayed if the Oracle Banking Digital Banking Experience application is integrated with Oracle FLEXCUBEUniversal Banking and the region is not India.Cheque Number The customer can define the cheque number for which he wants to view the status.
This field appears if you select Cheque Number option from the Filter By list.
From The customer is required to define the starting cheque number of the range for which to view cheque status. This field is appears if you select Cheque Range option from the Filter By list.
To The customer is required to define the last cheque number of the range for which to view cheque status. This field appears if you select Cheque Range option from the Filter By list.
Cheque Type The customer is required to identify a specific status in order to view cheques that belong to that status. The options are:
- Used
- Not Used
- Stopped
- Rejected
- Cancelled
This field appears if you select the Status option from the Filter By list.
The From Date and To Date search fields will be disabled if the customer selects either the Not Used or Cancelled status.
From Date The customer is required to specify the start date in a date range from which cheques of a particular status are to be fetched. This field appears if you select Status option from the Filter Bylist.
To Date The customer is required to specify the last date in the date range for which cheques of a particular status are to be fetched. This field appears if you select Status option from the Filter By list.
- From the Filter By list, select the criteria
by which user wish to view the status of cheques.
- If you select the Cheque Number
option:
- In the Cheque Number field, enter the cheque number.
- If you select the Cheque Range
option:
- In the From field, enter the cheque start number.
- In the To field, enter the cheque end number.
- If you select the Cheque Status
option:
- From the Select Status list, select the appropriate option. If you have selected Used, Stopped and Rejected option:
- From the From Date list, select the appropriate date.
- From the To Date list, select the appropriate date.
Note:
The From Date and To Date fields enabled if the Used or Stopped or Rejected option is selected in the Cheque Type field.
- If you select the Cheque Number
option:
- Perform one of the following actions:
- Click Apply to apply the search
criteria.
The results of the cheque status inquiry appear.
- Click Reset to clear the data entered.
- Click Apply to apply the search
criteria.
- Click

