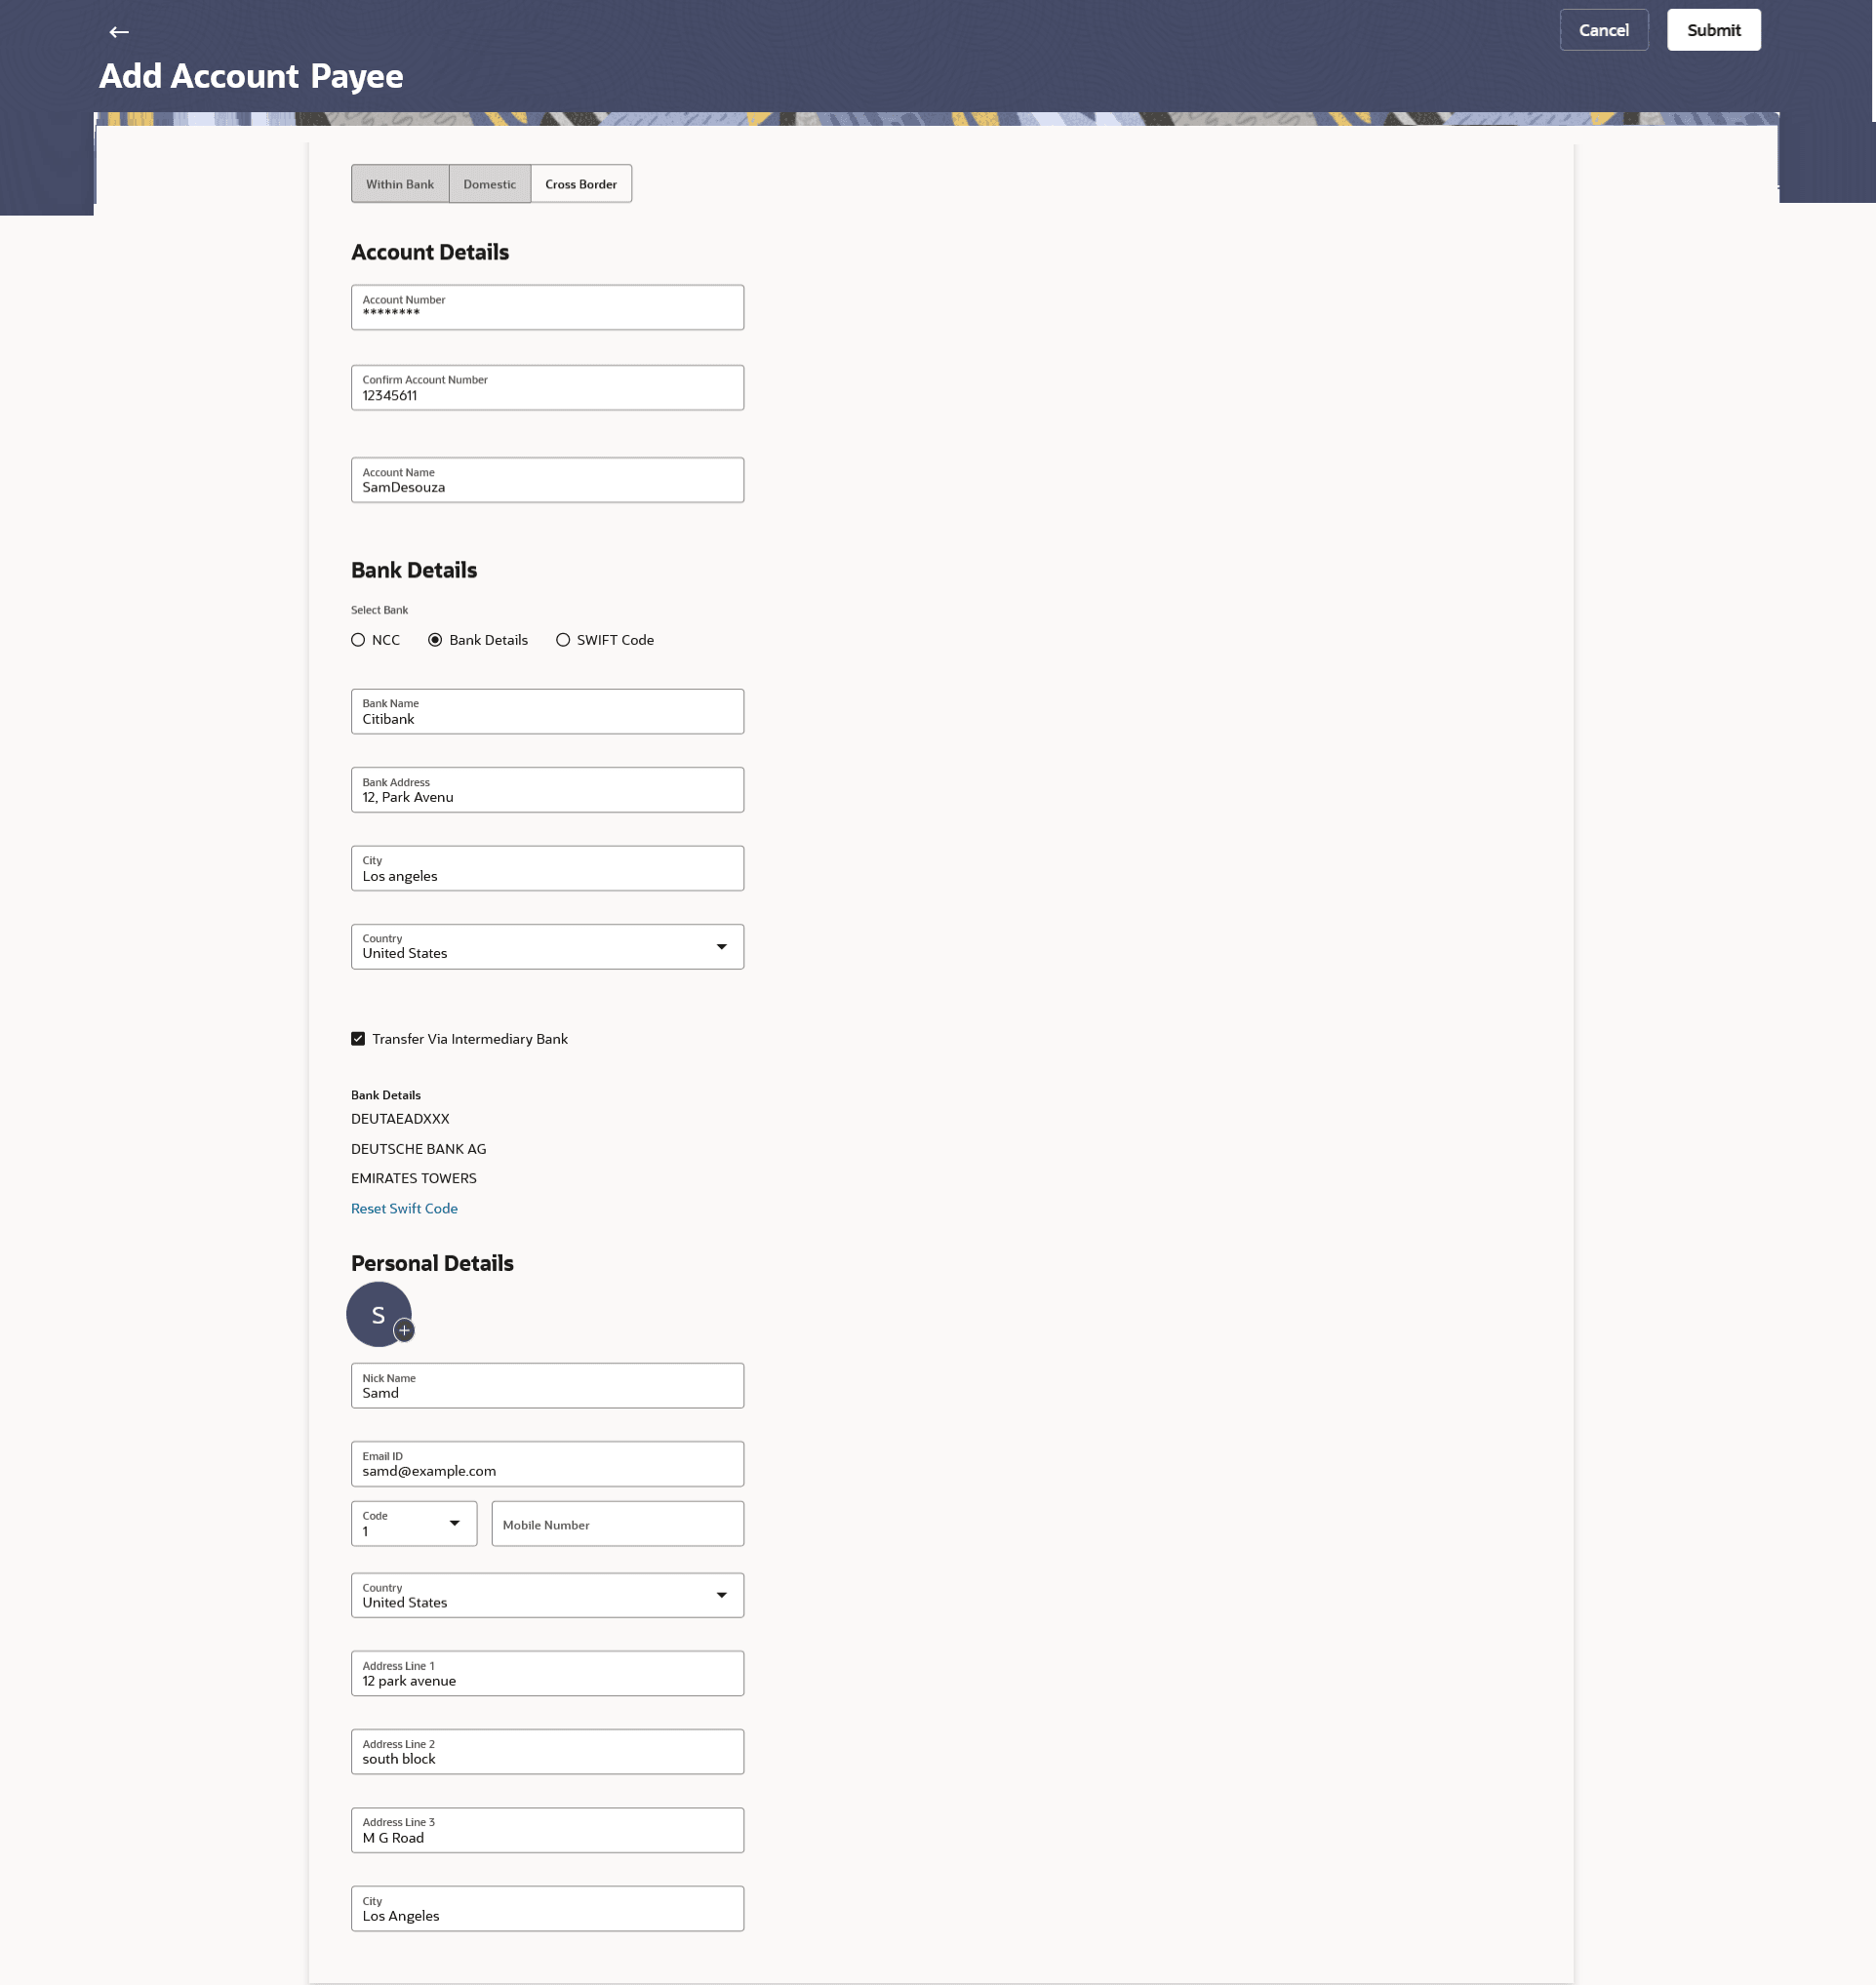
2.2.3 Add Payee - Cross Border Bank Account
This topic describes the systematic instruction to Add Payee - Cross Border Bank Account screen.
The Cross Border fund transfer involves the transfer of funds to an account that is maintained outside the country and beyond geographical boundaries. Hence, while adding a payee who holds the cross-border account, the user is required to specify extensive details of the payee’s account including the network code to be used to transfer money to the account as well as the details of the bank in which the account is held.
Figure 2-9 Add Payee – Cross Border Account
Note:
The fields which are marked as Required are mandatory.For more information on fields, refer to the field description table.
Table 2-5 Add Payee – Cross Border Account - Field Description
| Field Name | Description |
|---|---|
| PayeeType | Select Cross Border. |
| Account Details | Information specified in below fields are related to account details. |
| Account Number | Specify the account number of the payee. |
| Confirm Account Number | The user is required to re-enter the payee’s account number in this field. |
| Account Name | Enter the name of the payee as maintained against the payee’s bank account. |
| Bank Details | Information specified in below fields are related to bank details. |
| Select Bank | The option to select the bank.
The options are:
|
| Lookup Swift Code | Link to search the SWIFT code.
This link enabled if the Swift Code option is selected in the Select Bank field. For more information on Lookups, refer Lookups section. |
| National Clearing Code Lookup | Link to search the NCC code.
This link enabled if the NCC Code option is selected in the Select Bank field. For more information on Lookups, refer Lookups section. |
| Select Bank - Bank Details | Below fields are enabled if the Bank Details option is selected in the Select Bank field. |
| Bank Name | Name of the bank in which the payee account is held. |
| Bank address | Complete address of the bank at which the payee account is held. |
| Country | Country of the bank. |
| City | City to which the bank belongs. |
| Transfer via Intermediary Bank | The option to select another bank for Cross Border transaction as an intermediary bank.
The options are:
|
| Swift Code Lookup | Link to search the SWIFT code.
This link enabled if the Swift Code option is selected in the Select Bank field. For more information on Lookups, refer Lookups section. |
| National Clearing Code Lookup | Link to search the NCC code.
This link enabled if the NCC Code option is selected in the Select Bank field. For more information on Lookups, refer Lookups section. |
| Bank Details - Select Bank | Below fields are enabled if the Bank Details option is selected in the Select Bank field. |
| Bank Name | Name of the bank in which the payee account is held. |
| Bank address | Complete address of the bank at which the payee account is held. |
| Country | Country of the bank. |
| City | City to which the bank belongs. |
| Personal Details | Information specified in below fields are related to personal details. |
| Upload Photo | Select this option to upload a profile photo against the payee.
Following actions are available on the + icon:
This option will only appear if no photo has been uploaded against the payee. Note:
|
| Nickname | Specify a nickname to be assigned to the specific account of the payee for the purpose of easy identification. |
| Email ID | Email address of the payee.
Note: This field is provided simply as a base product feature and will be available to send across to the backend Payments Processor during posting a payment. There will be no notifications sent to the payee on this email address by OBDX. Doing any processing of this field would be an implementation time activity. |
| Country | Enter the country of the payee’s bank. |
| Address Line 1- 3 | Enter the address of the payee’s bank. |
| City | Enter the city of the payee’s bank. |
To create a payee for the within bank account transfer:
Parent topic: Add Account Payee
