3.2 Make Payment - Multiple Payments
This topic describes the systematic instruction to Multiple Transfers screen.
The Multiple Payments feature allows users to initiate payments towards a group of people as part of a single transaction. This feature, users can initiate payments towards own accounts, saved payees or new payees of different transfer types i.e., Within Bank, domestic and Cross Border transfers, with different transfer dates, all at once from a single screen.
To initiate multiple payments:
User can add payment for either Saved Payee, My Accounts, or New Payee type of payee.
- Follow the steps from 1-3 of Make Payment-Saved Payee
chapter. Follow the one of the actions for desired type of payee:Perform one of the following actions:
- If you select Saved Payee;
On click open drawer with Saved Payees listed along with search option.
User can select the desired payee.
- If you select My Accounts;
On click open drawer with Own Accounts mapped to the user listed.
Search the desired Own Accounts with Search option.
- If you select New Payee;
On click open drawer with Add Account Payee fields.
Fill the details of the payee in the drawer. Add Account Payee.
Note:
Fields under Transfer From, Payment Details, Fees and Charges and Additional Details are same as mentioned above for Make Payment - Saved Payee. - If you select Saved Payee;
- Perform one of the following actions:
- Click Next to save the details and allows the user to add another payment.
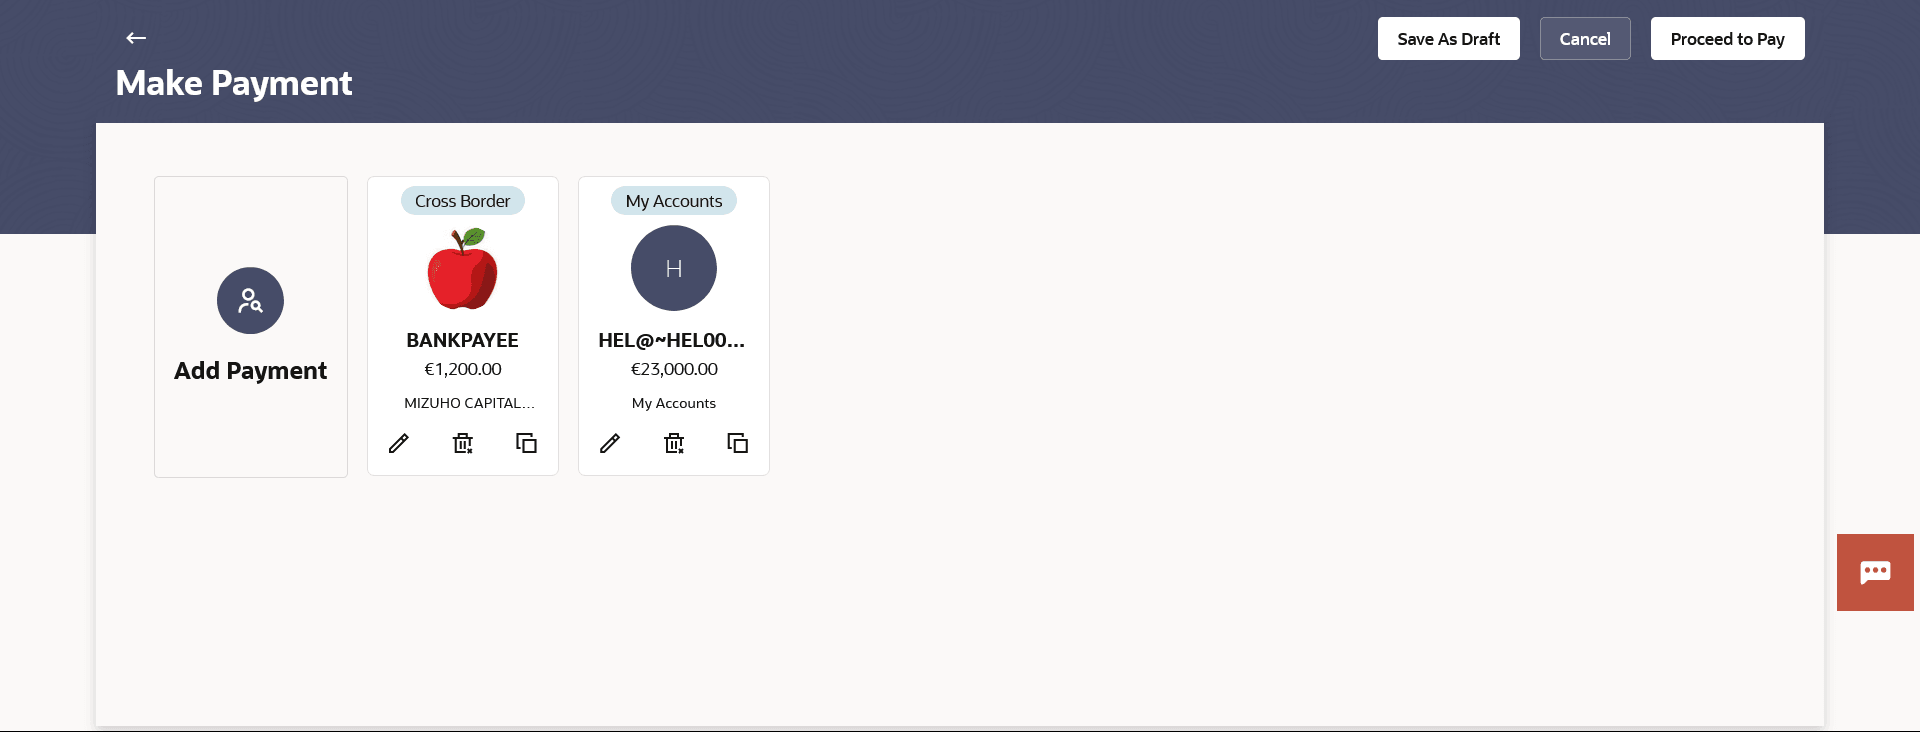
The Make Payment screen appears along with the added payment record based on payee type.
- Click Discard to cancel the added record.
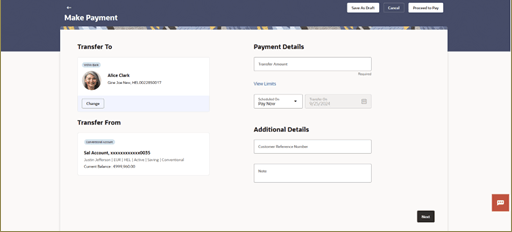
Figure 3-10 Make Payment – Initiate Screen
Note:
The fields which are marked as Required are mandatory.For more information on fields, refer to the field description table.
Table 3-10 Multiple Transfers - Field Description
Field Name Description Each card displays below details Payment Type Displays the payment type associated with the payee. It could be:
- Within Bank
- My Accounts
- Domestic
- Cross Border
Account Name Displays the Account name provided for the payee. Transfer Amount Specify the amount for which the payment is to be made. Bank Name Displays bank name of the payee in case of Domestic and Cross Border. Displays the My Account in case of Own Account payments.
Displays the Within Bank in case of Within Bank payments.
Actions The actions can be performed from the badge.
The options are:
-
 icon – to edit the transfer details of that record
 Icon - to delete the record.
 icon – to create a copy of payment details
- Click Next to save the details and allows the user to add another payment.
- Click the Add Payment and repeat above steps to add new payment.
- Perform one of the following actions:
- Click the
 icon against a saved record to edit the transfer details of that record. The
Payment Details screen appears, and user can edit and save the details.
- Click the
 icon against a payment to delete the record.
- Click the
 icon against a payment to create a copy. The Payment Details screen
appears, where user can change the payee and payment details as required.
- Click the
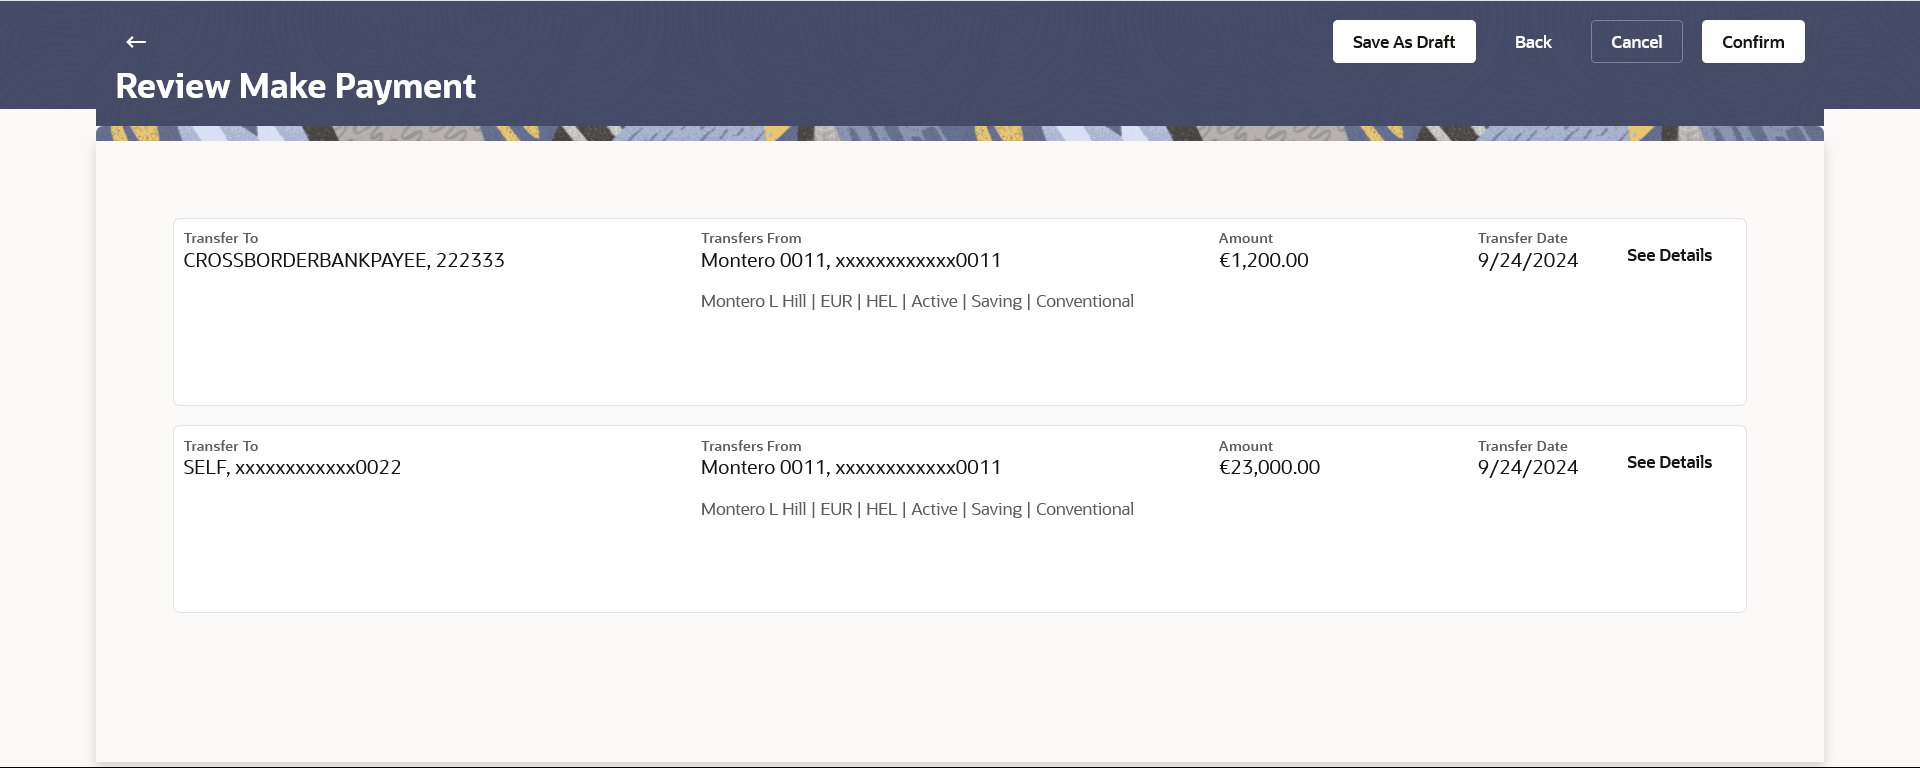
- Click Proceed to Pay to initiate the request for the payment. The Review Make Payment screen appears.Perform one of the following actions:
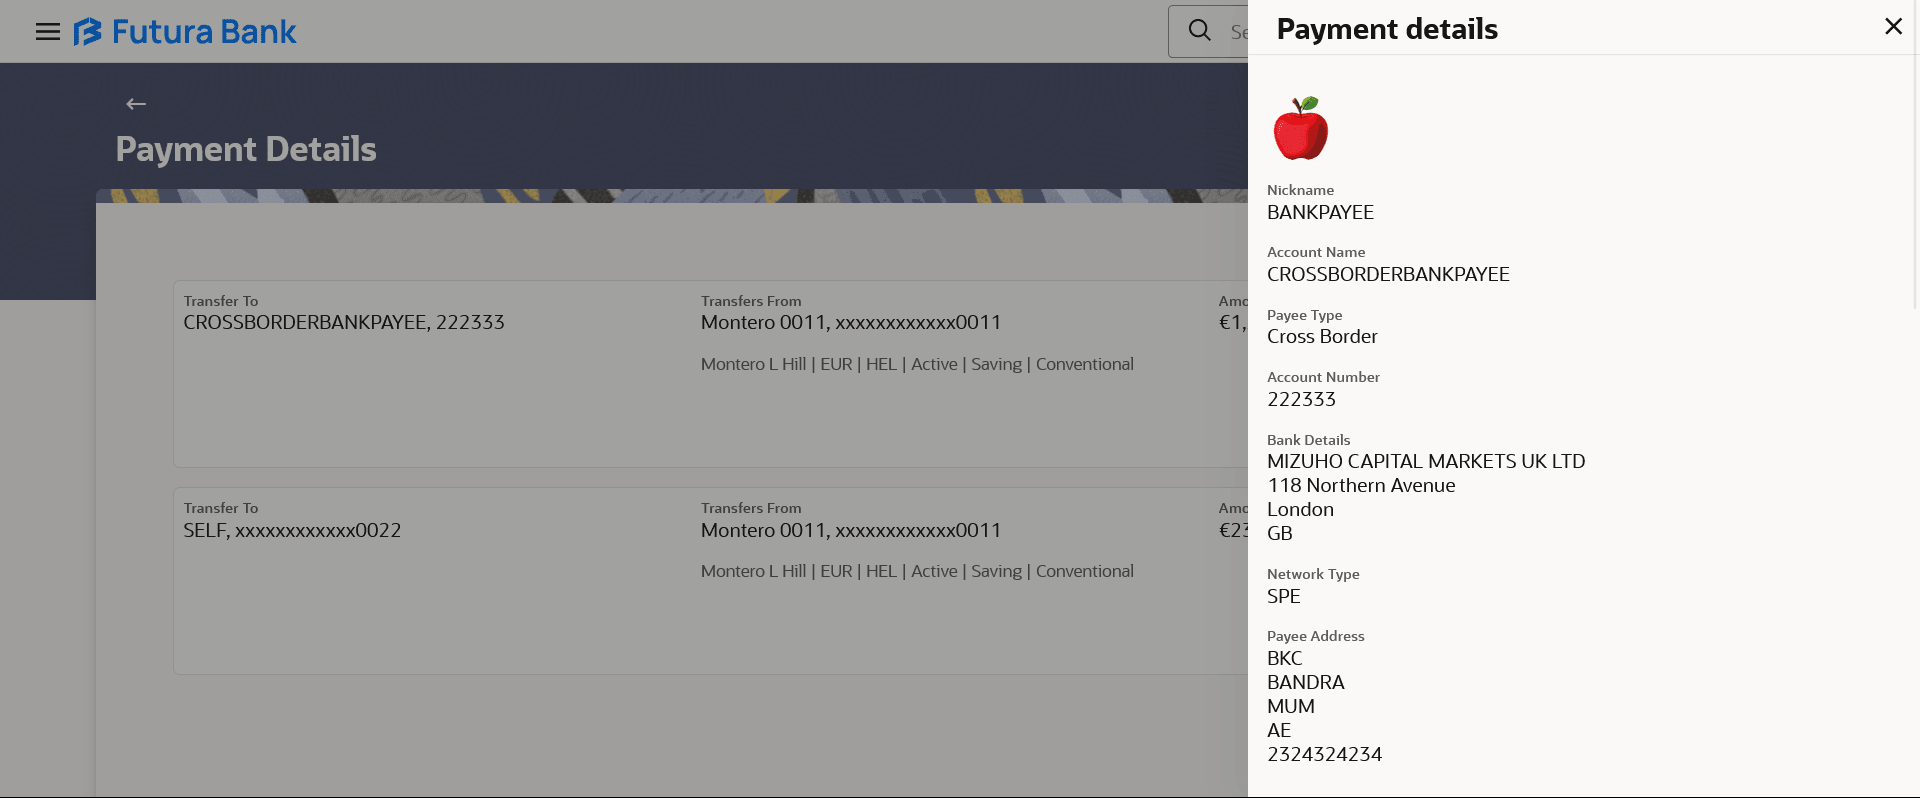
- Click the See Details next to the payment record, to view the payment
details.
Figure 3-13 Make Payment – Review – View Details Screen
- Click Save as Draft to save incomplete transaction as a draft.
Note:
Perform one of the following actions:- For Multiple Transfers, the Save Draft feature will generate an individual draft for each payment included. Each draft will have the same name, followed by a sequence number.
- Click Back to navigate back to previous screen. OR Click Cancel to cancel the transaction.
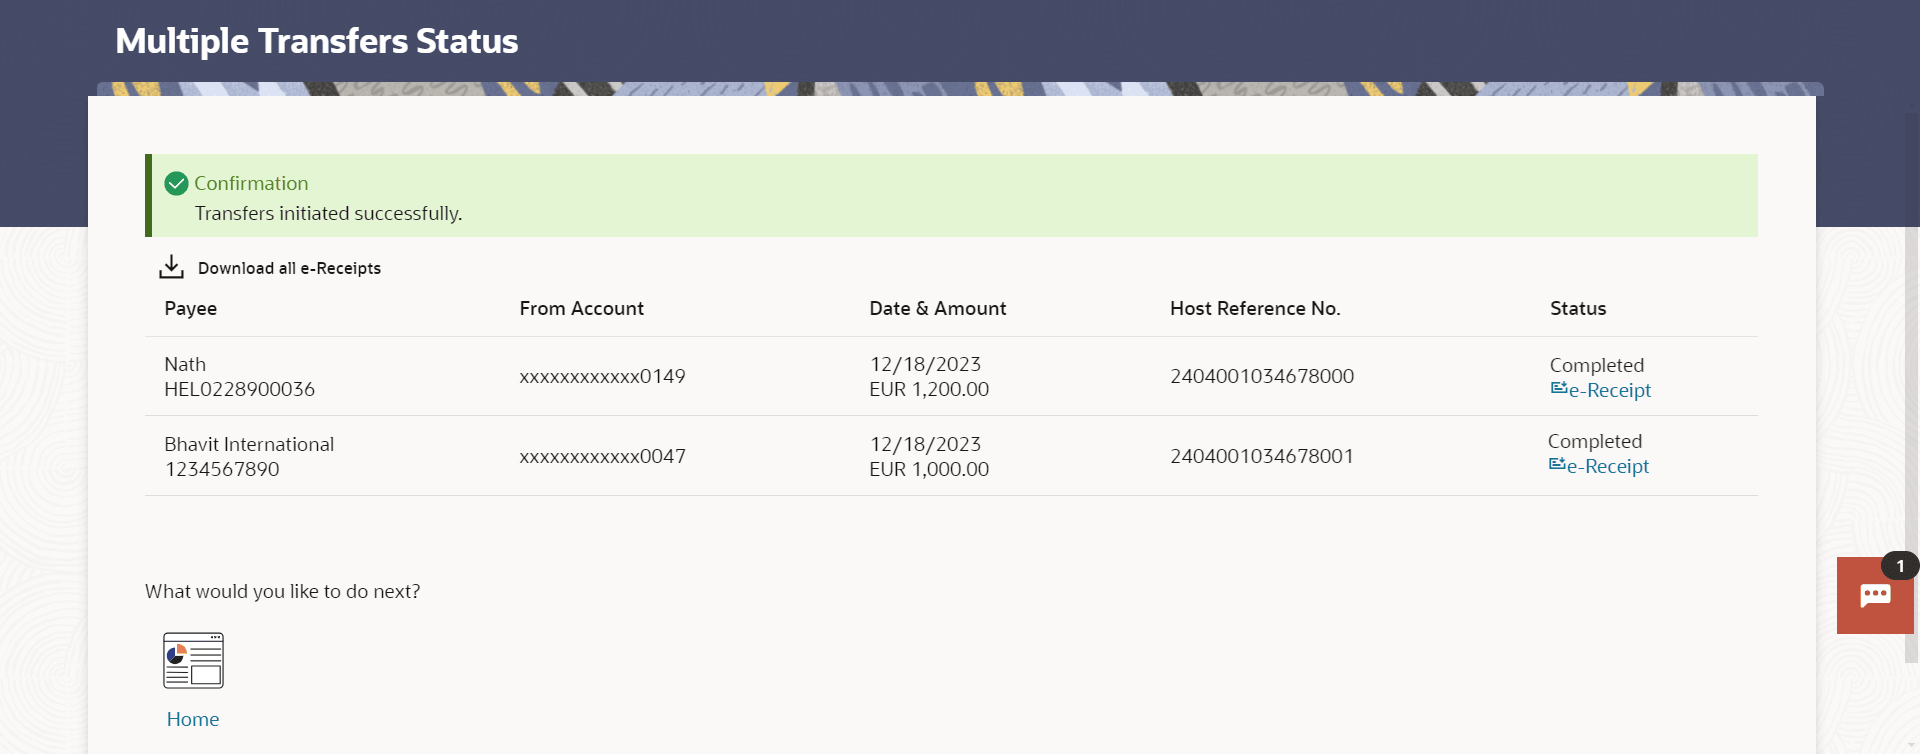
- Click Confirm. A success message is displayed along with the transaction status.
Note:
The fields which are marked as Required are mandatory.For more information on fields, refer to the field description table.
Table 3-11 Multiple Transfers Status - Field Description
Field Description Transfer To The account to which the funds are transferred. Transfer From The source account from which the funds are transferred. Amount The amount that is transferred towards the payee’s account. Transfer Date The date of transfer. Reference Number A unique number is created once the transaction is finished in the Core Banking system. Status The status of the transaction.
It could be:
- Processed
- Failed
- Click the See Details next to the payment record, to view the payment
details.
- Perform one of the following actions:
- Click the e-Receipt link against a particular record for which you want to download the e-receipt.
- Click (Save as favourite
 ) icon to save payment as favourite transaction.
- Click
 (Share) icon to share to share payment details.
- Click
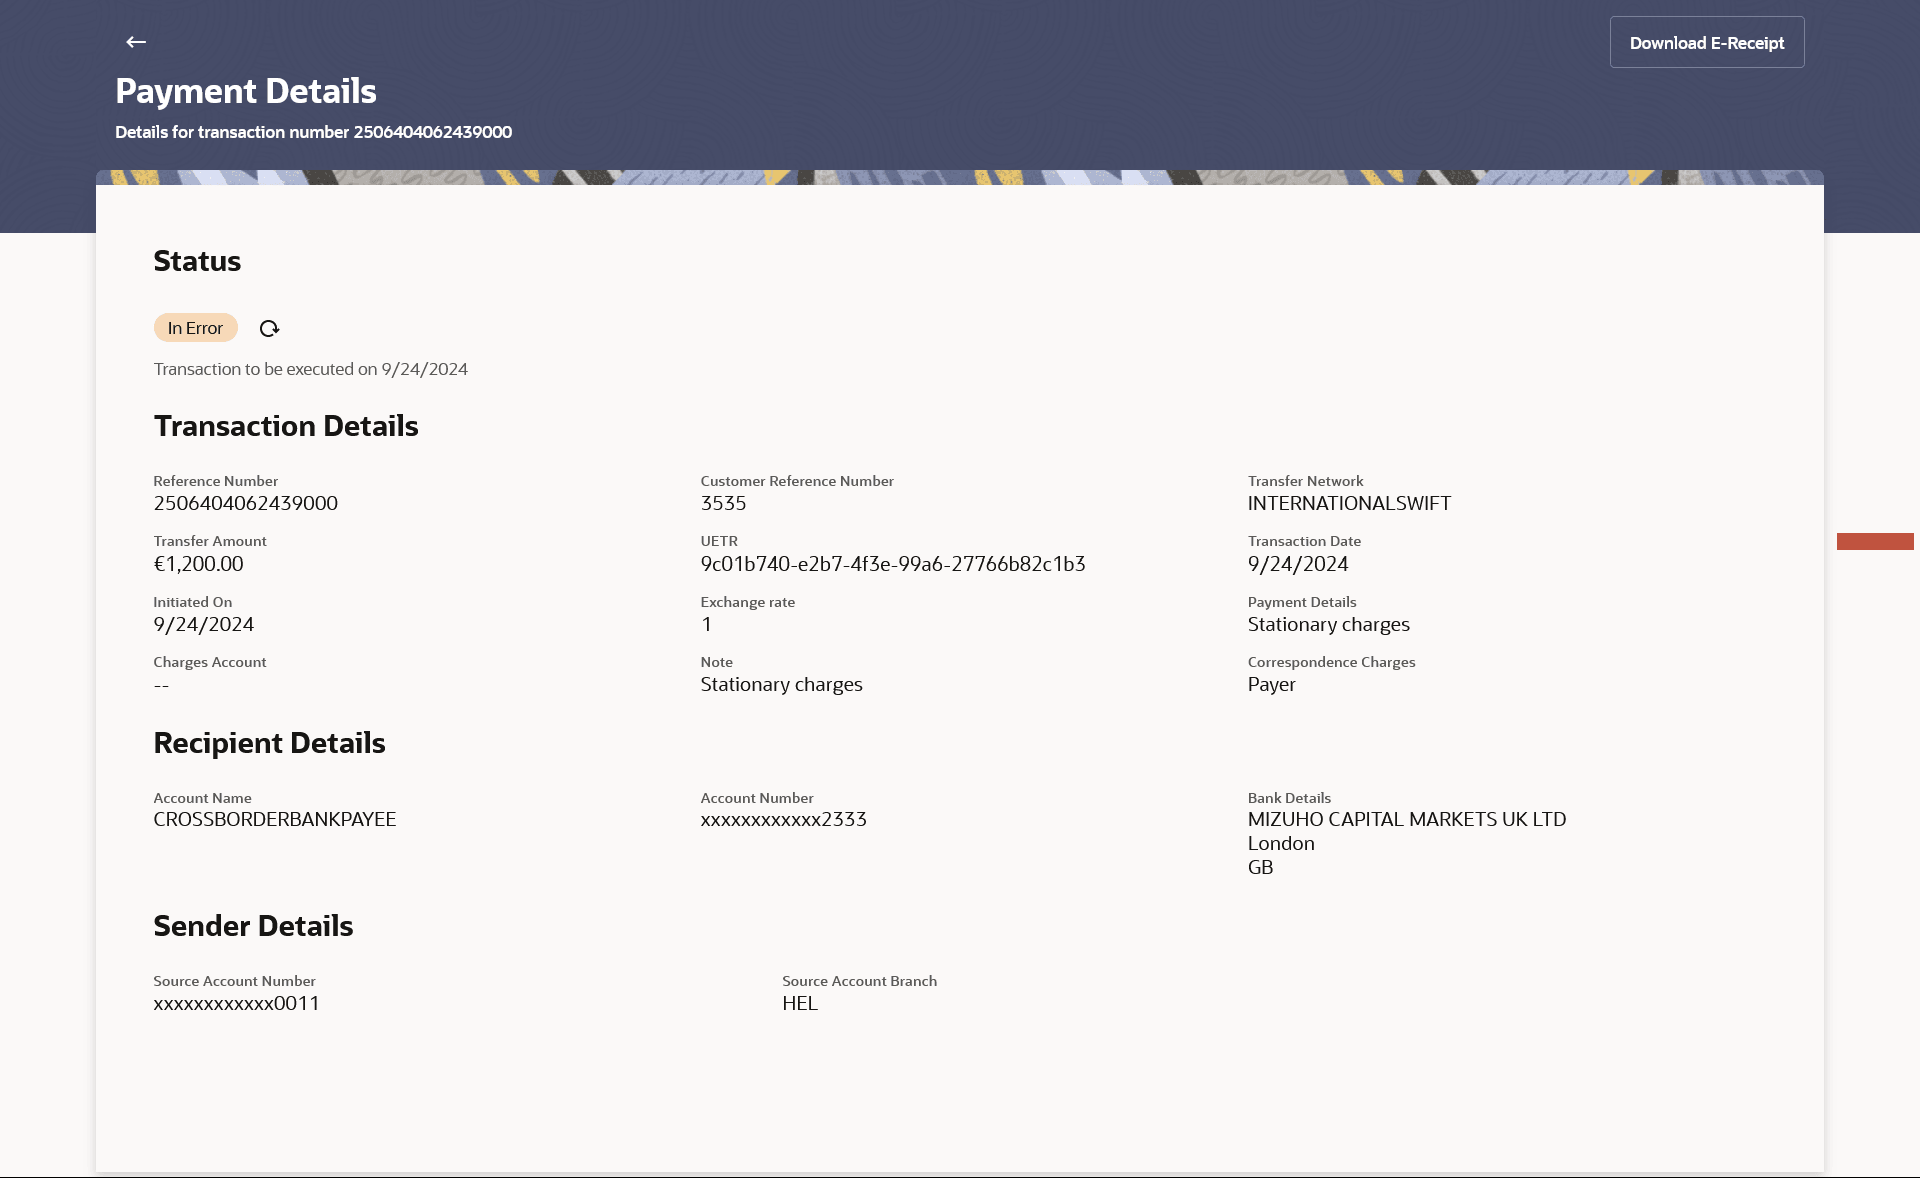
 (Check Status) icon to view the status of the payment transaction. System
redirects to the Payment Details screen.
Figure 3-15 Make Payments - Payment Details
- Click Download E-receipt to download the e-receipt. For more information, refer the e-receipt section in the Retail Customer Services User Manual.
- For more information on the Payment Details, refer the Outgoing Payments -Payment Details section.
- Click Payments, it will navigate to My Payment page.
- Click Go to Dashboard to go to the Dashboard screen.
Parent topic: Make Payment
