2.3 EAR Marking Maintenance
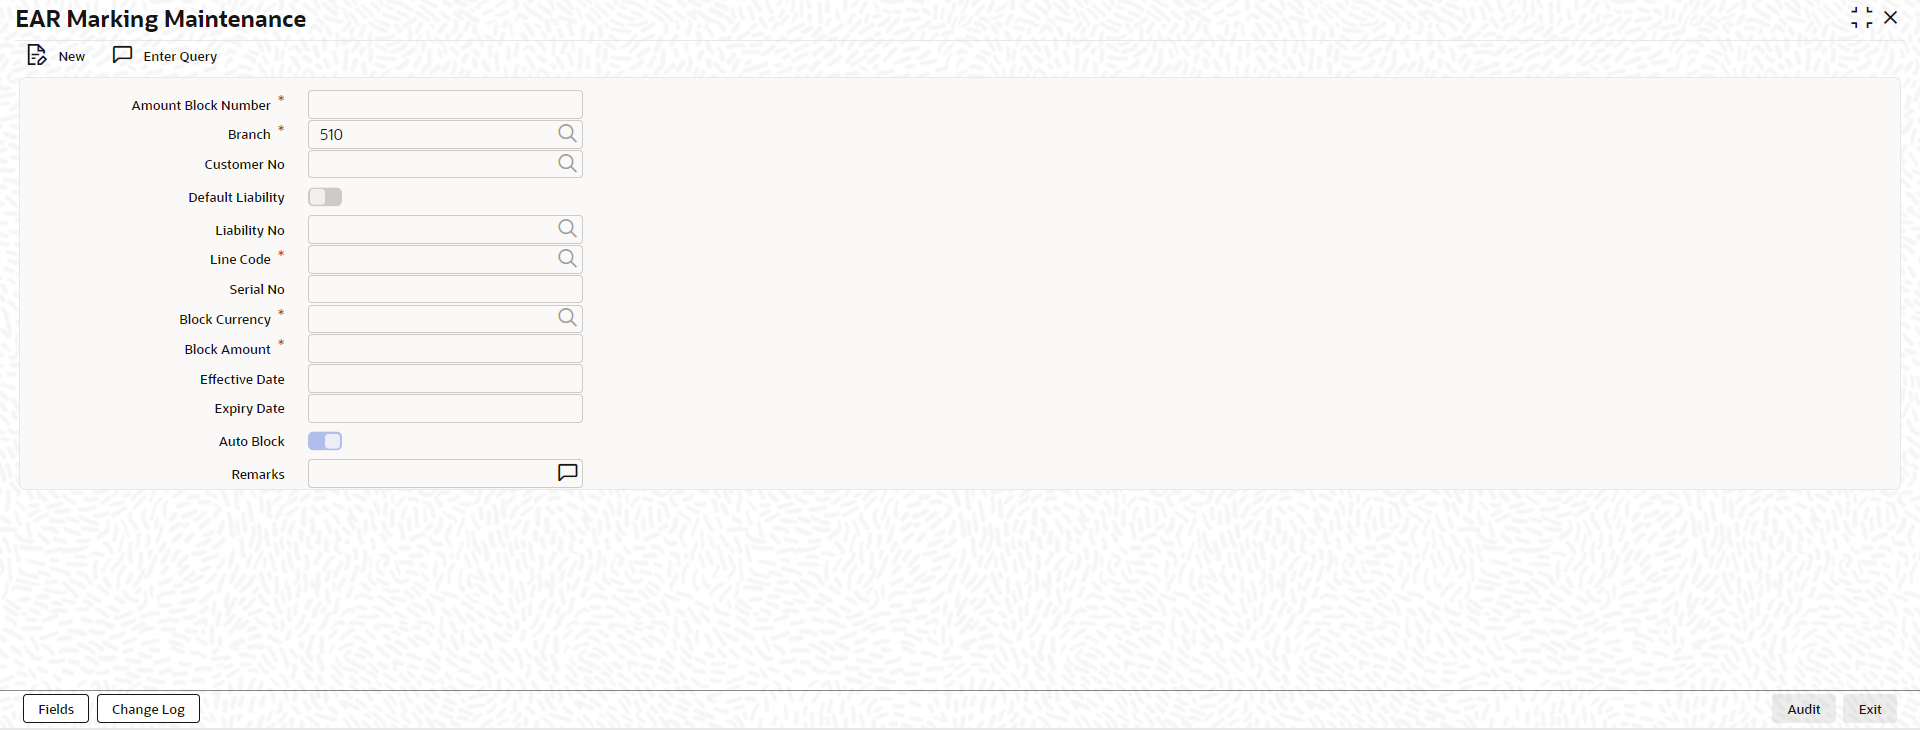
This topic describes about the procedure to block line amount.
Note:
The fields, which are marked with an asterisk, are mandatory.- On the Home screen, specify
GEDBLOCK in the text box and click the
 icon.The EAR Marking Maintenance screen is displayed.
 - On EAR Marking Maintenance screen, click
New and specify the fields.For more information on fields, refer to the field description table.
Table 2-116 EAR Marking Maintenance - Field Description
Fields Description Account Block Number Specify the unique number which is to be assigned for every block that has been created. Branch Click the  icon and select the branch from the list.
Customer No Click the  icon and select the customer number from the
list.
Default liability Switch to
 to enable this parameter. When a customer
number is selected from drop-down list, default
liability toggler is enabled by default and Liability No
column shows the liability to which this customer is
linked as default.
Switch to
 to disable this parameter. If a customer is
linked to multiple liabilities and blocking transaction
needs to consider the entity belonging to a liability
which is not default, then default liability needs to be
disable and liability number can be selected from
drop-down list against this field.
Liability No Click the  icon and select the liability number from the
list.
Line Code Click the  icon and select the line code from the
list.
Serial Number The system displays the serial number for the line chosen in the Line Code field. Block Currency Click the  icon and select the currency based on which the
Block amount for the facility has to be considered. Once
authorized, this entry is non-amendable.
Block Amount Specify the amount to be blocked for ear marking. The block amount cannot be a negative value. Effective Date Specify the date from when this block amount for that facility becomes effective. Note:
Effective date cannot be backdated.
Expiry Date Specify the date till when this block amount for that facility is applicable. Auto Block Switch to
 to indicate that the system should
automatically create block for the specified amount for
the specified facility.
Switch to
 to indicate that the block on the facility is
manual.
Remarks Specify the remarks. - Click Save to save the record.
- On EAR Marking Maintenance screen, click
Change log tab.The Change Log screen is displayed.
You can see the history of all block changes that have happened for a selected record. For each block record, you can view the record details, remarks, warnings, fields that are modified.
In Change Log View subsystem, you can only view the old and new values of the following fields and the dependent fields that are modified.
You should be able to view the details of particular record of that screen by using the change log button. The result should list all the modifications on the particular record.
Changes made to the record will be highlighted in the View Changes button.
For more information on Change log, refer Change Log.
Parent topic: Limits
