- Credit Card Origination User Guide
- Credit Card Origination
- Credit Card Application Entry Stage
- Card Preference
2.1.6 Card Preference
This topic provides the systematic instructions to capture the card related information for the customer.
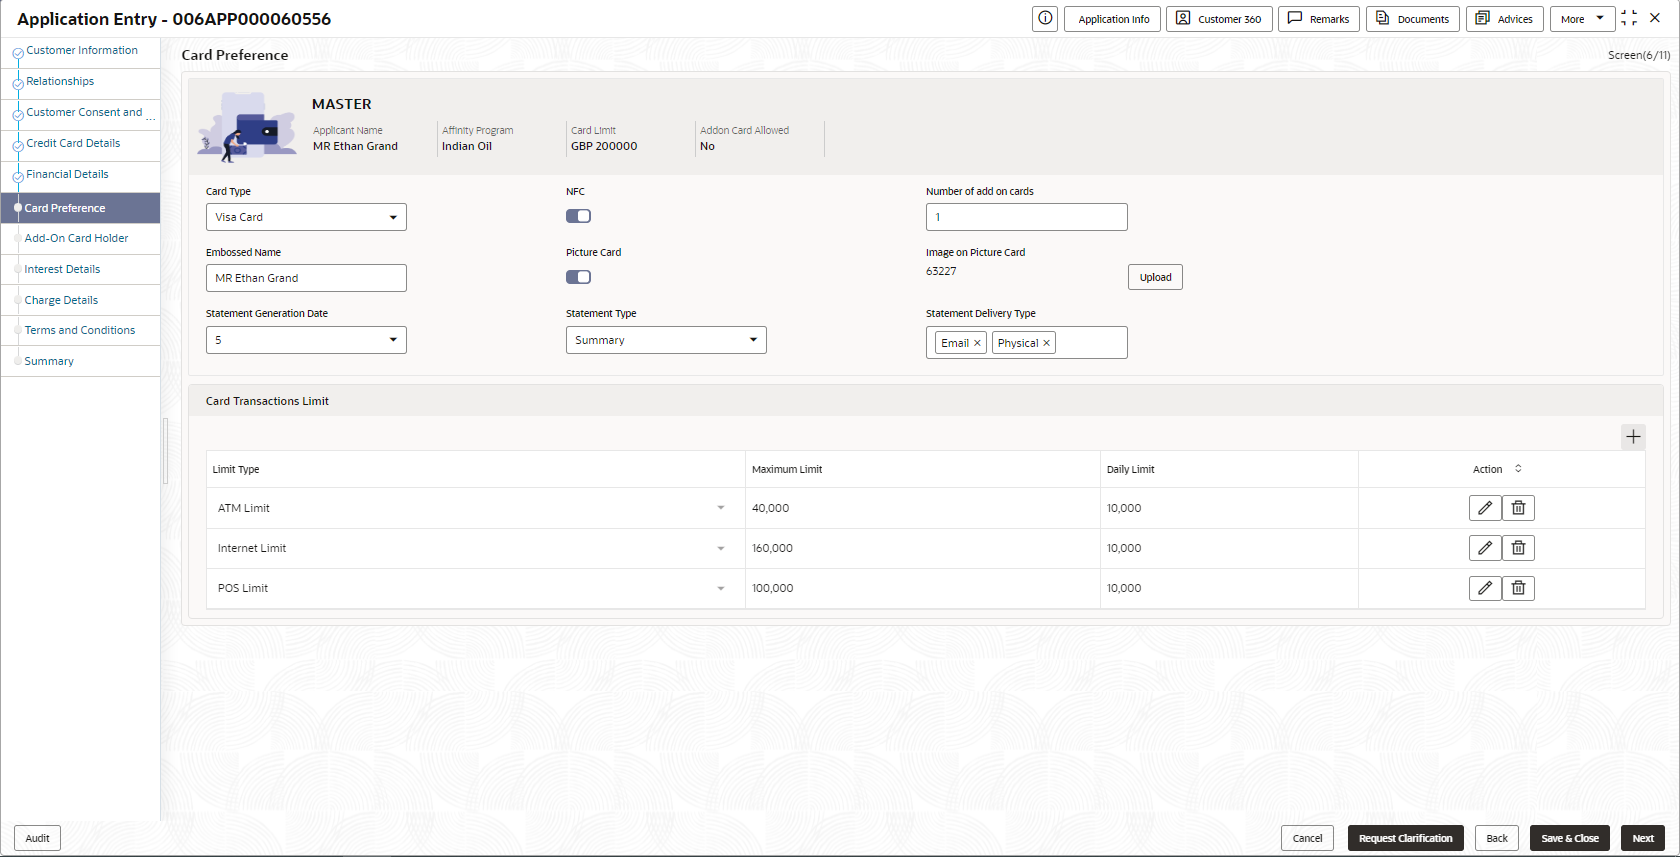
Card Preference data segment is used to capture the card related information for the customer.
To capture card preferences:
- Click Next previous data segment to proceed with the next data segment,
after successfully capturing the data.
The Card Preference screen displays.
- Specify the fields on Card Preference screen.
Note:
The fields, which mentioned as Required, are mandatory.For more information on fields, refer to the field description table.Table 2-11 Card Preference – Field Description
Field Description Business Product Name Displays the name of business product. Product Image Displays the product image which is uploaded while creating a product. Applicant Name Displays the name of the applicant. Affinity Program Displays the affinity program. Card Limit Displays the card limit. Addon Card Allowed Displays whether the addon card is allowed. Card Type Specify the card type which you prefer.
The available options are:
- Master Card
- Visa Card
NFC Specify to enable Near Field Communication (NFC) facility. Number of add on cards Specify the number of cards required. Embossed Name Specify the name to be embossed on the card. Picture Card Select the toggle to enable the picture card. Image on Picture Card Select the image file from the drive and click Upload to add the image to card. Statement Generation Date Select the date when the statement should be generated. Statement Type Select the type of statement.
Available options are:
- Detailed
- Summary
Statement Delivery Type Specify the statement delivery type such as Email or Physical Card Transactions Limit In this section you can capture card transaction limit details.
Click add icon to add the transaction limits.
Limit Type Select the limit type.
Available options are:
- ATM Limit
- POS Limit
- International Limit
- Internet Limit
Maximum Limit Specify the maximum limit allowed. Daily Limit Specify the daily limit allowed. - Click Next to navigate to the next data segment, after successfully capturing the data. The system validates for all mandatory data segments and data fields. If mandatory details are not provided, the system displays an error message for the user to take an action. The User cannot to proceed to the next data segment, without capturing the mandatory data.
Parent topic: Credit Card Application Entry Stage
