- Retail Loans Origination User Guide
- Retail Loans Account Origination Process
- Application Entry Stage
- Financial Details
- Parent / Guardian Financial Details
2.2.8.1 Parent / Guardian Financial Details
This topic describes systematic instructions to configure parent or guardian financial details.
To add parent or guardian financial details:
- Click Next in Admission Details screen to proceed with the next
data segment, after successfully capturing the data.
Only if Account Type is selected as Education Loan in Loan Details data segment.
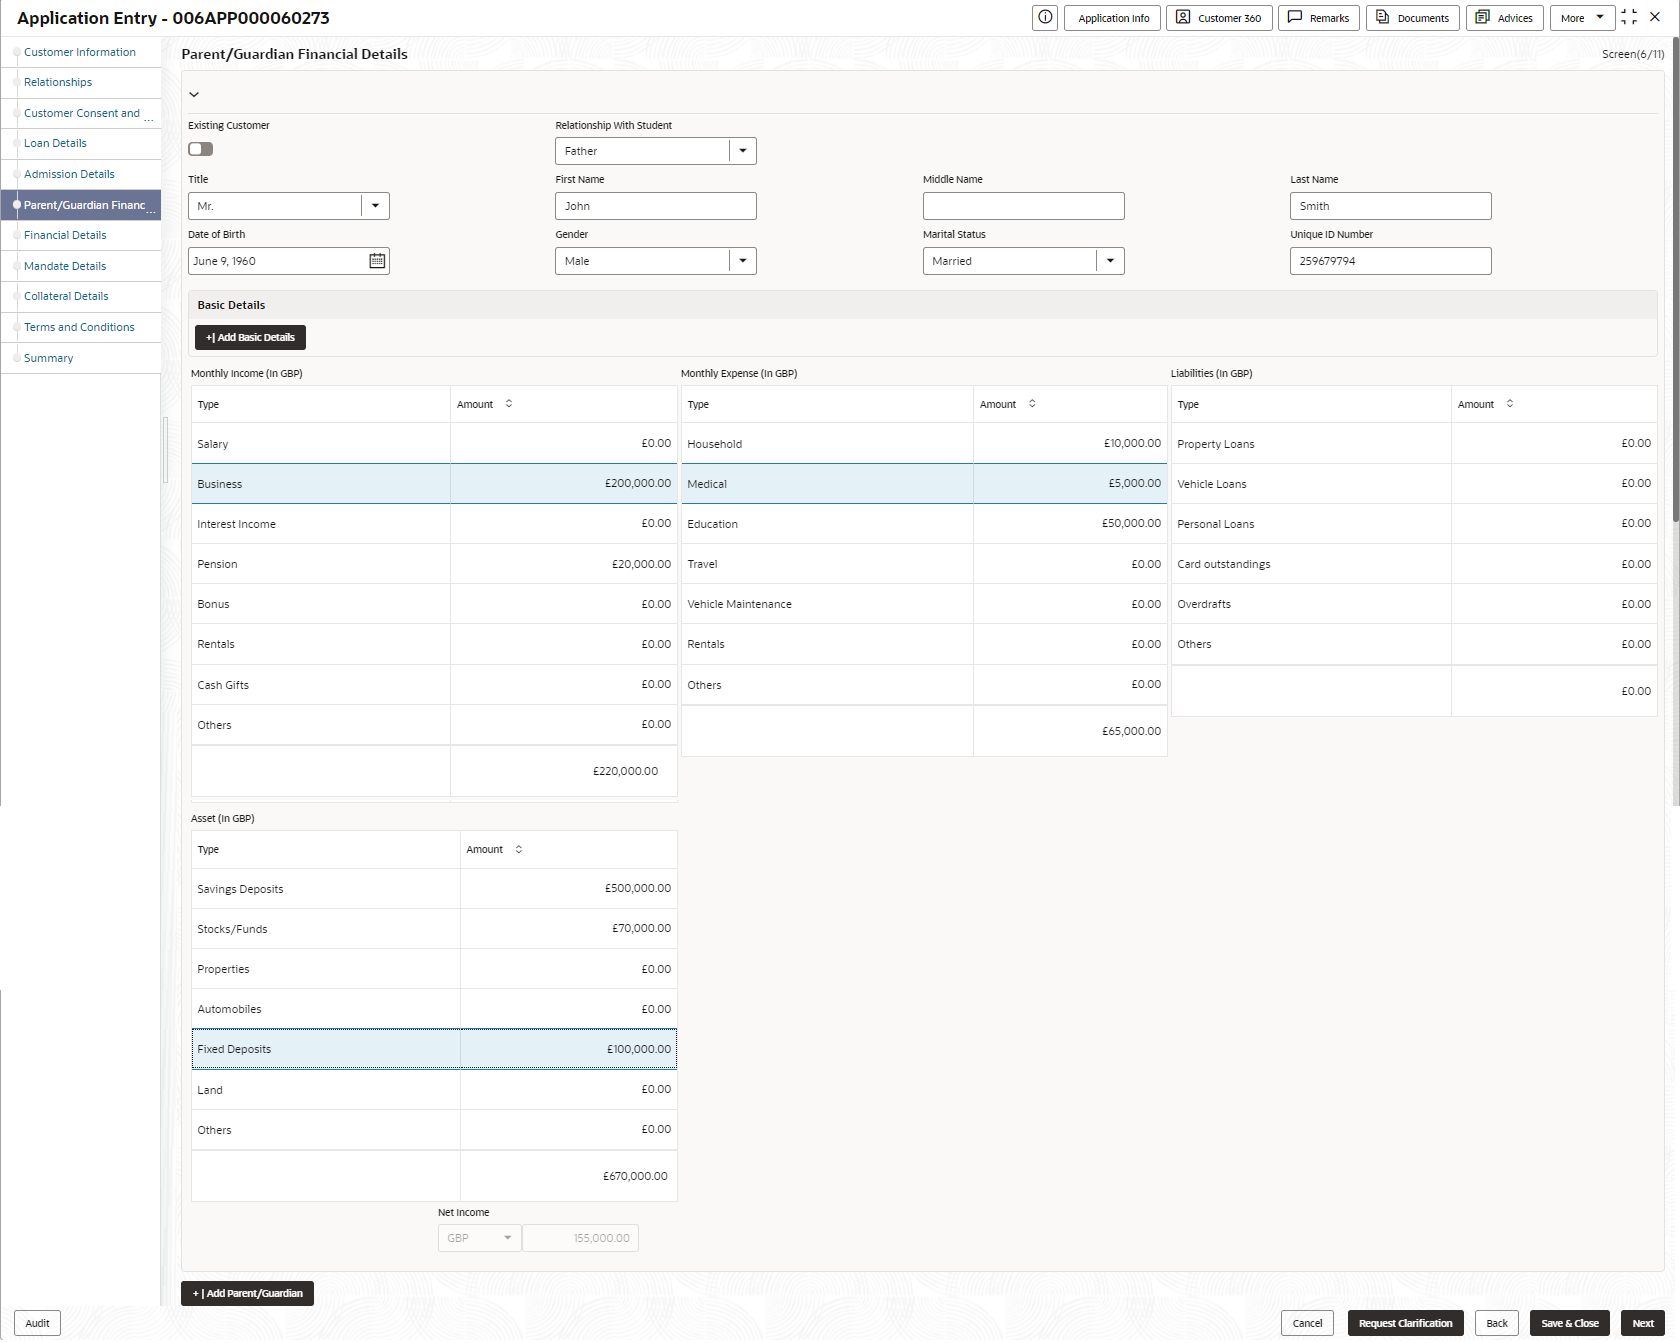
The Parent/Guardian Financial Details screen displays. - Specify the details in the relevant data fields. For more information on
fields, refer to the field description table below.
Table 2-17 Parent/Guardian Financial Details – Field Description
Field Description Existing Customer Select to indicate if the user is existing customer or not. Relationship With Student Select the relationship of parent or guardian with the student. Title Select the title. First Name Specify the first name. Middle Name Specify the middle name. Last Name Specify the last name. Date Of Birth Select the date of birth. Gender Select the gender. Marital Status Select the martial status. Unique ID Number Specify the unique ID number. Basic Details Default values available as options in drop-down list can be used as attributes to configure the Quantitative Score which will be used during Assessment stage.
Refer to Configuration User Guide for the list of attributes available in this release.
Income Type Specify the type of the income. More than one type of Income can be captured for an applicant. The list of values are available for the user to select. Business may add appropriate values to this list.
Employment Type Specify the type of the employment. The list of values will be available for the user to select. Business may add appropriate values to this list. Employment Type is reckoned as an attribute for Quantitative Score calculation for the given Applicant.
Employee Number Specify the employee number. Industry Select the industry type from the drop-down list. Office Name Specify the office name. Educational Qualification Specify the education qualification. Designation Specify the designation. Employment Date Range Select the employment start date and end date. Add /View Address In this section you can add or view already captured address.
Refer 3.2.1 Customer Information section for field level description of address task flowIncome and Expense Details The following are the different data elements which are available in this section. These values reckon as attributes for Quantitative score card calculation. Monthly Income Specify the monthly income of parent or guardian in the below fields.
- Salary
- Business
- Interest Income
- Pension
- Bonus
- Rentals
- Cash Gifts
- Others
Monthly Expenses Specify the monthly expenses of parent or guardian in the below fields. - Household
- Medical
- Education
- Vehicle Maintenance
- Rentals
- Others
Liabilities Specify the liabilities of parent or guardian in the below fields. - Property Loans
- Vehicle Loans
- Personal Loans
- Card Outstandings
- Overdrafts
- Others
Asset Specify the asset of parent or guardian in the below fields. - Savings Deposits
- Stocks/Funds
- Properties
- Automobiles
- Fixed Deposits
- Land
- Others
Net Income Displays the system automatically displays the net income over expenses. - Click Next to navigate to the next data segment, after successfully capturing the data. The system validates for all mandatory data segments and data fields. If mandatory details are not provided, the system displays an error message for the user to take an action. The user cannot to proceed to the next data segment, without capturing the mandatory data.
Parent topic: Financial Details
