- Standalone Scheduler Property File Creation
- Creating Property File for Standalone scheduler
- Creating Property File
- Setting BIP/GI Upload Queue
1.2.6 Setting BIP/GI Upload Queue
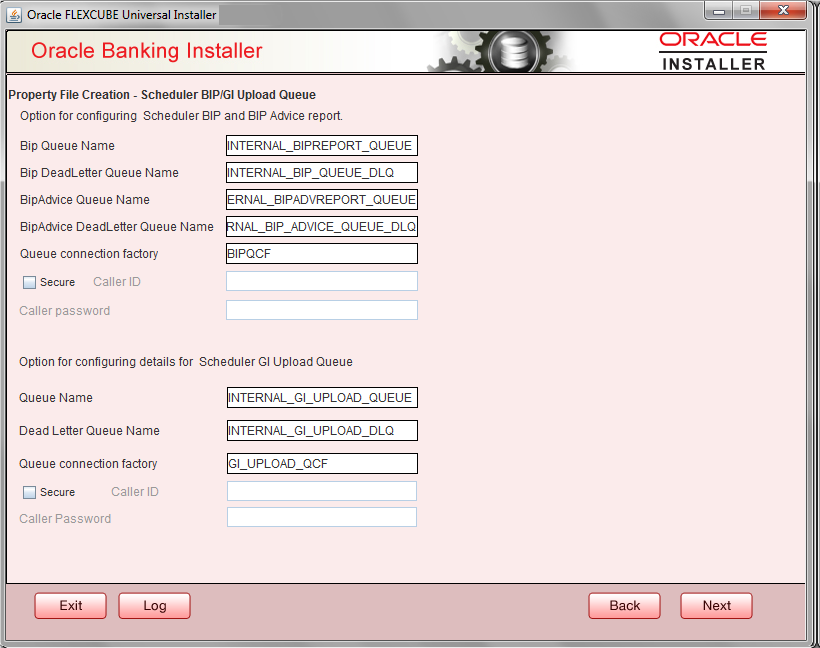
This screen describes how to create the property file. Here, you need to set the BIP and BIP Advice report details.
- Click the Next button and the following screen is displayed. Oracle Banking Installer - Scheduler BIP/GI Upload Queue.
- In the Oracle Banking Installer - Scheduler BIP/GI Upload
Queuescreen, specify the fields.
For more information, refer the field description table.
Field Description BIP Queue Name Specify the BIP queue name as ‘INTERNAL_BIPREPORT_QUEUE’. BIP DeadLetter Queue Name Specify the BIP deadletter queue name as ‘INTERNAL_BIP_QUEUE_DLQ’. BIPAdvice Queue Name Specify the BIP advice queue name as ‘INTERNAL_BIPADVREPORT_QUEUE’. BIPAdvice DeadLetter Queue Name Specify the BIP adivce dead letter queue name as ‘INTERNAL_BIP_ADVICE_QUEUE_DLQ’. Queue Connection Factory Specify the queue connection factory as ‘BIPQCF’. Secure Check this box to indicate that it is a secured deffered queue connection factory. The caller ID and caller password will be enabled.
Specify the caller ID and caller password for the secured queue connection factory.
Enter these values for GI Upload Queue.
Queue Name Specify the queue name as ‘INTERNAL_GI_UPLOAD_QUEUE’. Dead Letter Queue Name Specify the dead letter queue name as ‘INTERNAL_GI_UPLOAD_DLQ’. Queue Connection Factory Specify the queue connection factory as ‘GI_UPLOAD_QCF’. Secure Check this box to indicate that it is a secured deferred queue connection factory. The caller ID and caller password as shown in the following screen:
Specify the caller ID and caller password for the secured queue connection factory.
- Once you have specified the above details, click ‘Next’ and system displays the next screen.
Parent topic: Creating Property File
