- Setting up Plug-Ins
- Set Up Plug-Ins
- Integrating Oracle FLEXCUBE IS and BPEL
- BIP Interactive reports configuration
1.2.8 BIP Interactive reports configuration
This topic explains the configuration of BIP Interactive Reports.
- Login to the BIP domain console,
http/s://<hostname>:<port>/<console>. - To add the FCJCustomProvider, refer the steps from /Custom Provider Configuration.
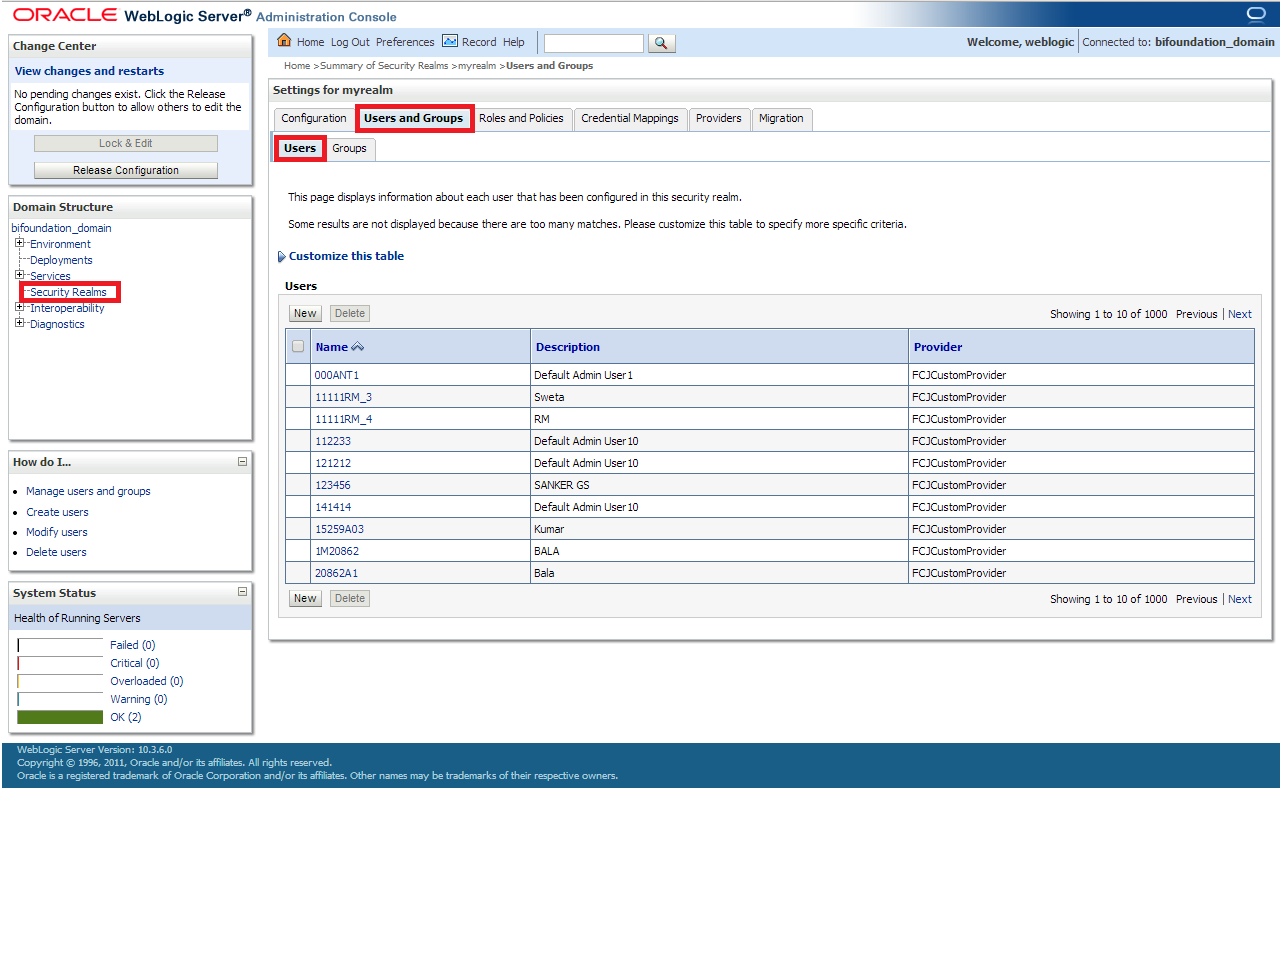
- After adding, navigate to security realms, then myrealm, and then
Users and Groups and check if the users from the schema are displayed
in the Users tab, and Roles from the schema are displayed under the
Groups Tab.The Users and Groups screen is displayed.
Figure 1-56 Settings for myrealm - Users and Groups
- Login to the Enterprise Manager (em)
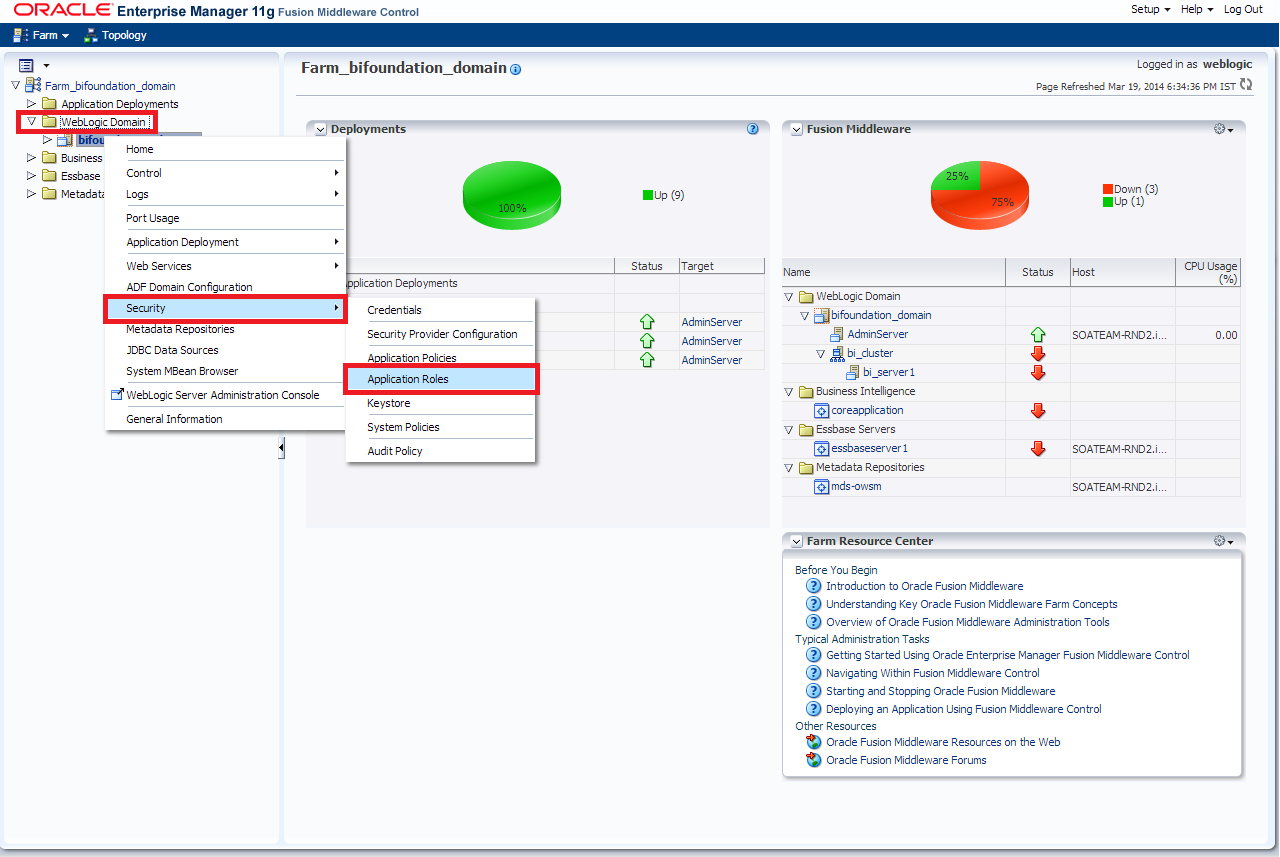
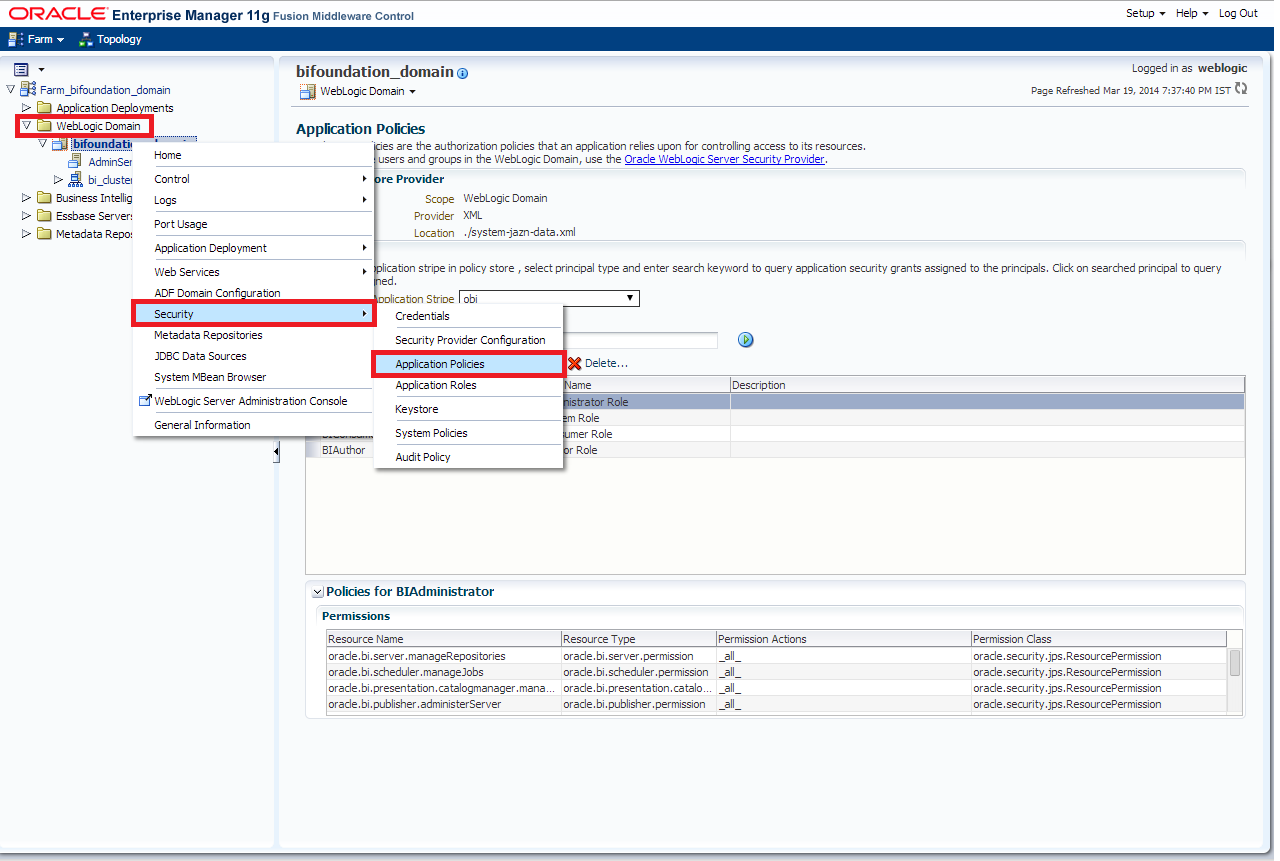
http/s:<hostname>:<port>/em.- Right click on the domain (in which BI suite is installed) under the WebLogic domain.
- Go to security and then navigate to application roles.
- Navigate to the Application Roles screen as mentioned in below screenshot.The Application Roles screen is displayed.
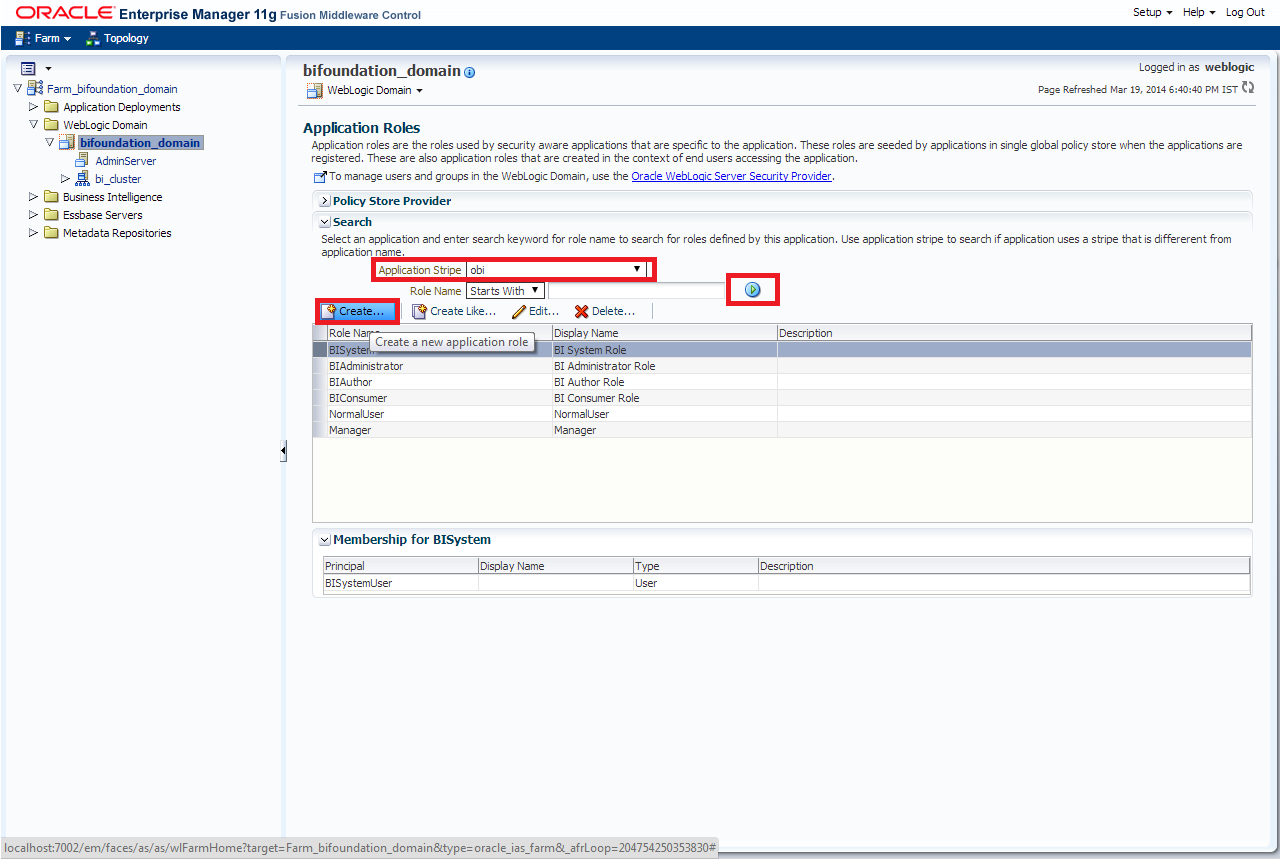
- After navigating to the Application Roles screen, specify the following details.
- Select the Application Stripe as obi from the dropdown list.
- Click on the Search button.
- Click on Create button to add a role.
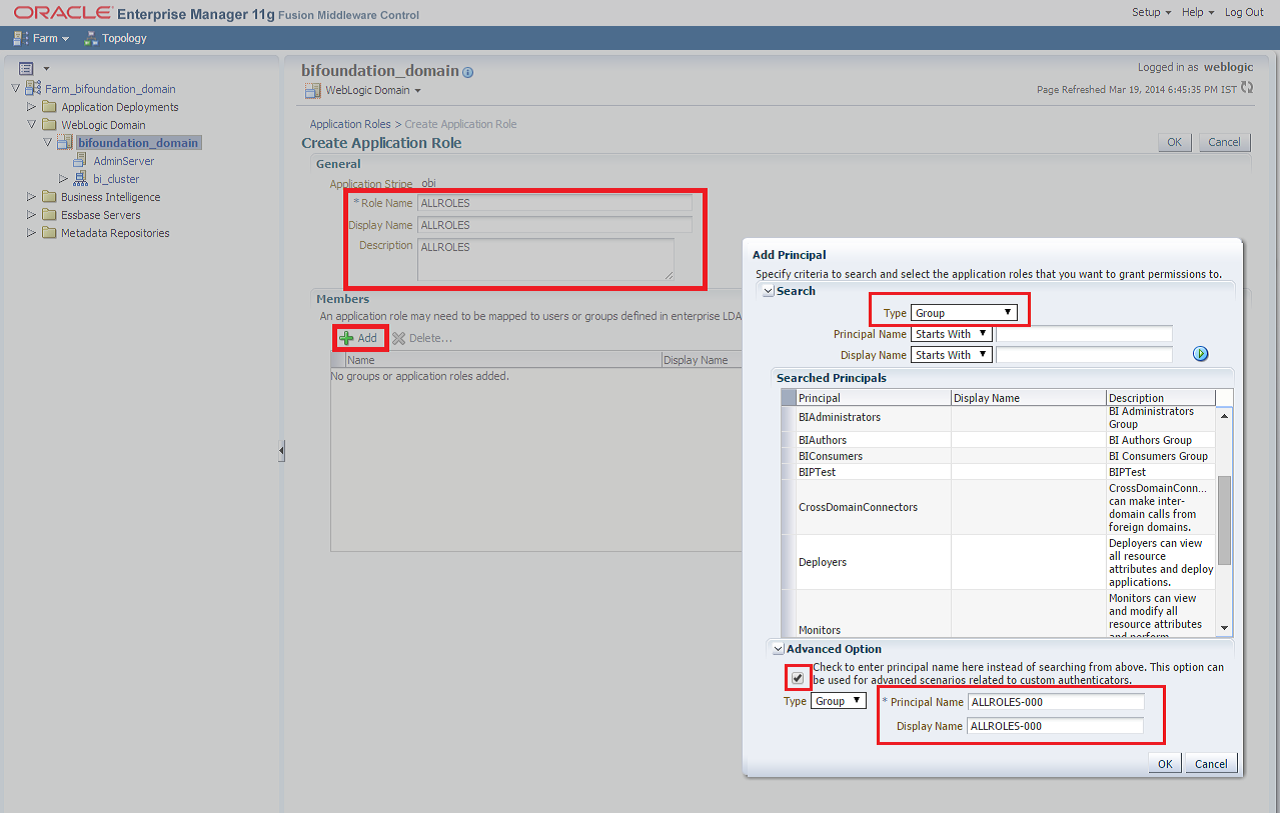
- After clicking on Create button, specify the fields.The Create Application Role screen is displayed.
- On the Create Application Role screen, specify the following details.
- Enter the Role name (mandatory), Display name (optional) and, Description (optional).
- Click on the Add button.
- Select Type as Group from the dropdown list in the Add Principal pop-up window.
- In the Advanced Option check the checkbox and select the type as Group below
- Click on the Search button, if the roles are listed then select the roles like ALLROLES-000, ADMINROLE-000 from the list.
- Enter the Principal Name (mandatory), which is the role present in the FCUBS (ex: ALLROLES-000, ADMINROLE-000), Display Name (optional).
- Click on the OK button in the Add Principal pop-up window and also on the Create Application Role screen.
- After getting information message like A new role added successfully, then again:
- Right click on the domain (in which BI suite is installed) under the WebLogic domain.
- Go to Security and navigate to Application Policies. The Navigation - Security - Application Policies screen is displayed.
Figure 1-60 Navigation - Security - Application Policies
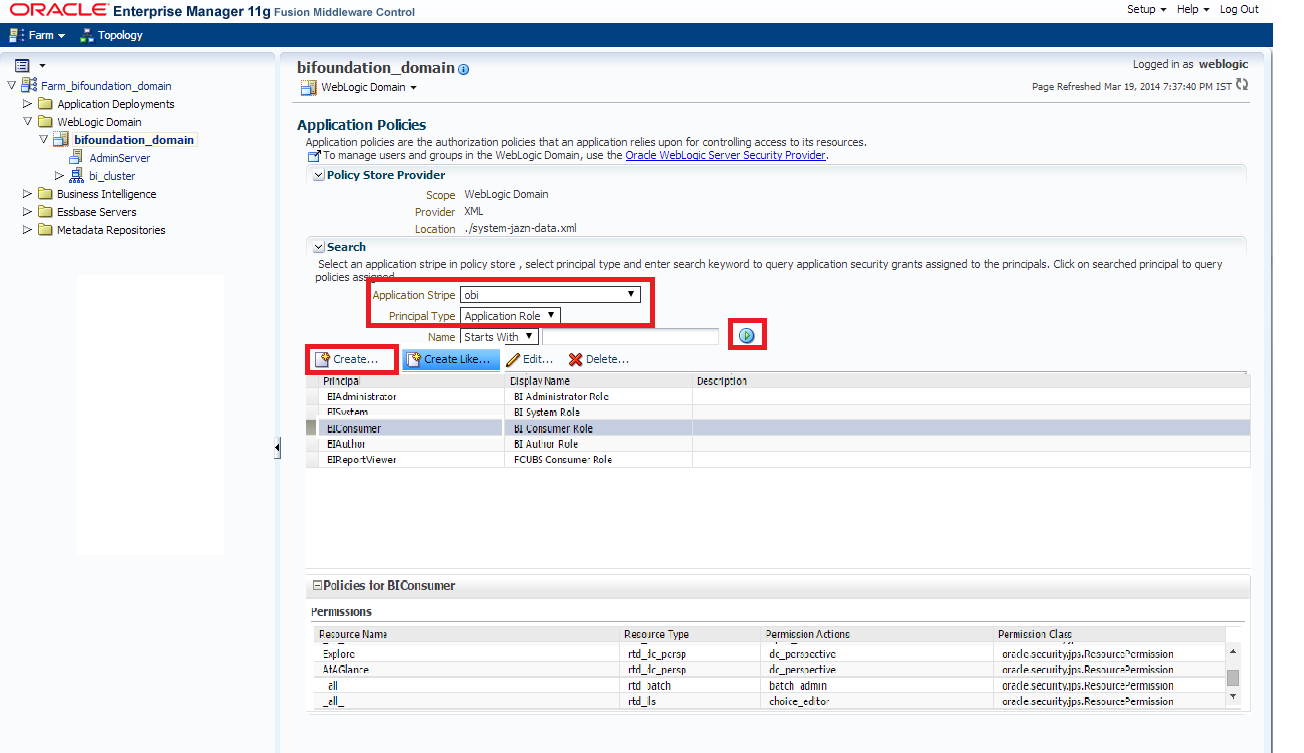
- After navigating to the Application Policies screen, specify the following details.
- Select the Application Stripe as obi from the drop-down and Principal Type as Application Role.
- Click on the search button.
- Select BIConsumer (it should be highlighted) from the list and click on the Create button.
The Application Policies screen is displayed. - After navigating to the Create Application Grant screen,
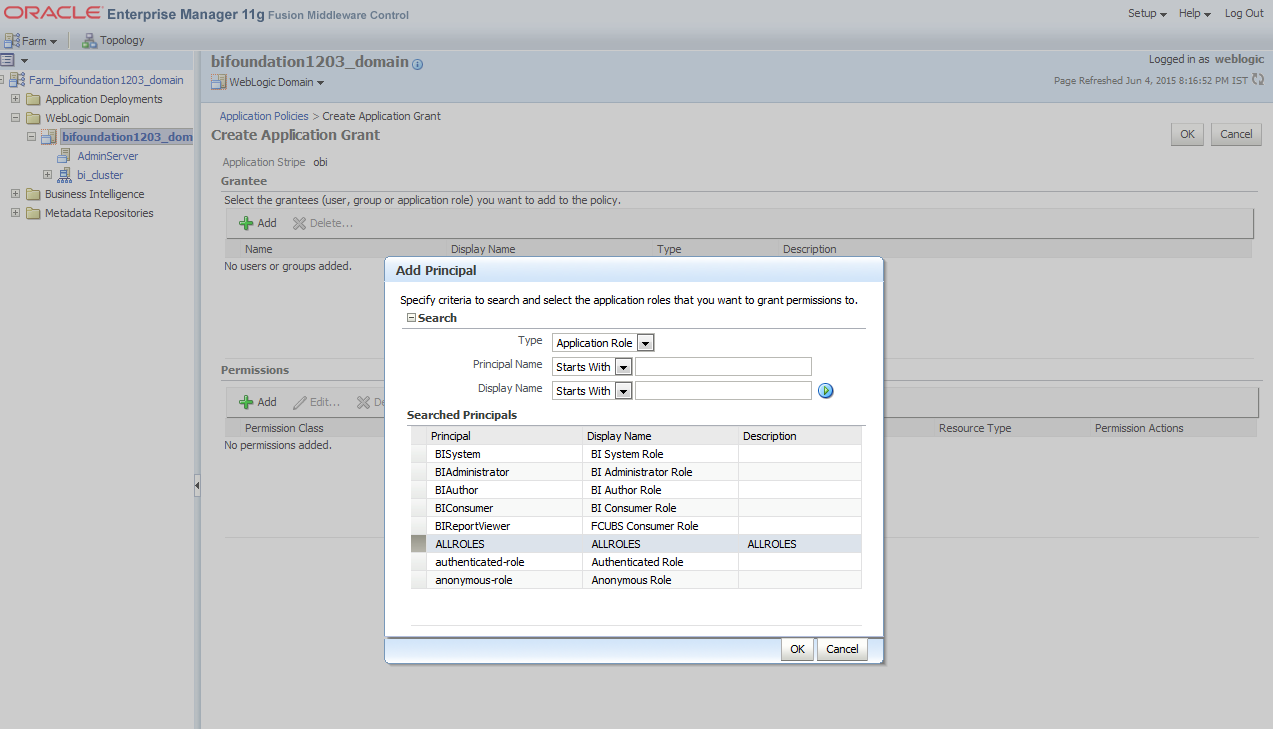
- Click on the Add button.The Add Principal pop-up window is displayed.
- Select Type as Application Role from the dropdown list in the Add Principal pop-up window and click on the search (triangle icon instead of the word search TBD) button.
- From the Searched Principals list, select ALLROLES that has been created earlier in the Application Role screen.
- Click on the OK button in the Add Principal pop-up window and on the Create Application Grant screen.The Create Application Grant screen is displayed.
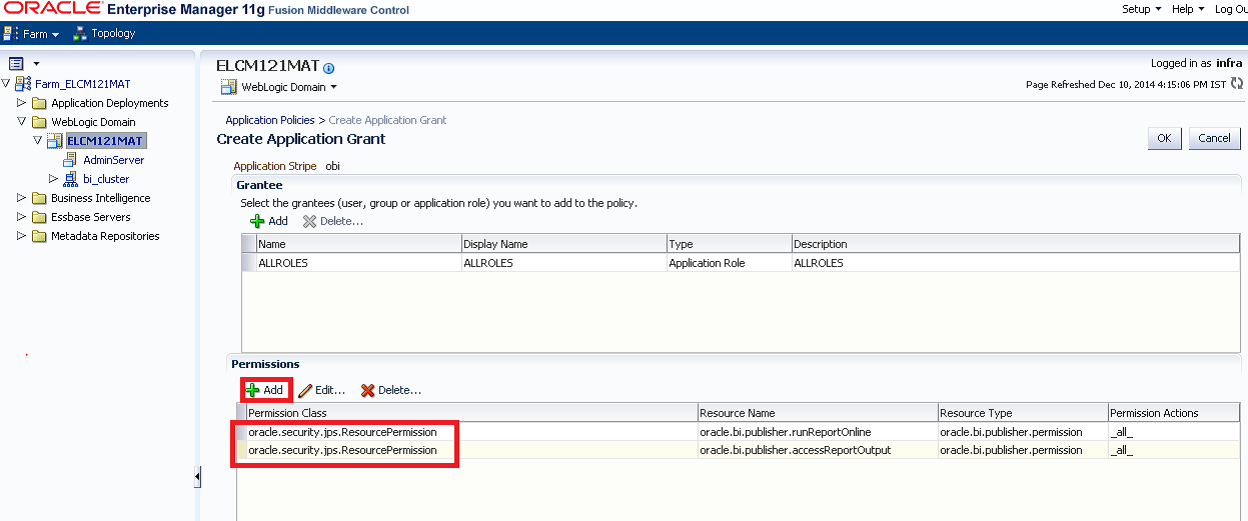
- Click on the Add button under Permissions and add the two permissions one by one as mentioned below.
- oracle.bi.publisher.runReportOnline
- oracle.bi.publisher.accessReportOutput
- Click on the Add button.
- After getting information message as A security added successfully, then:
- Login into the BIPublisher , http/s:<hostname>:<port>/xmlpserver.
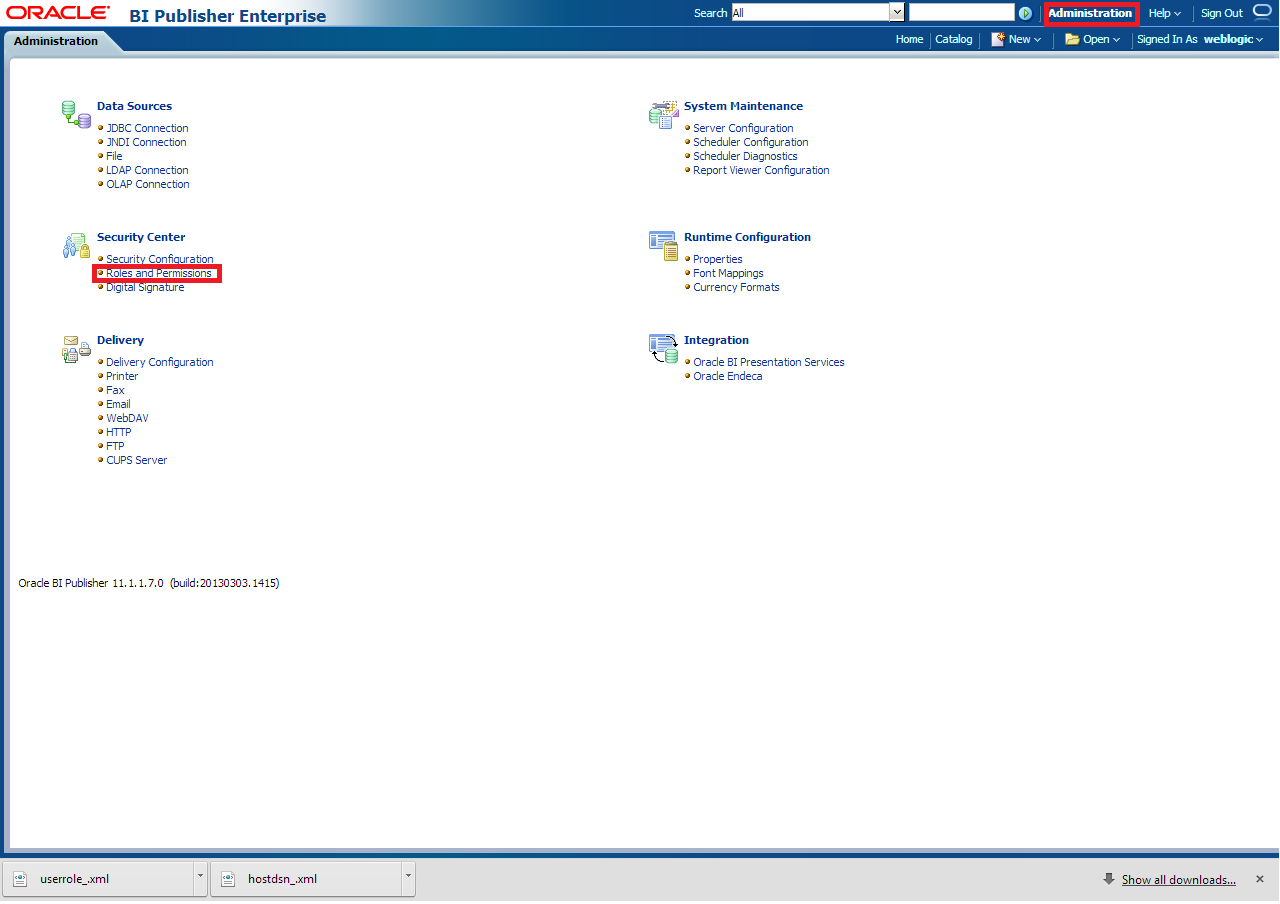
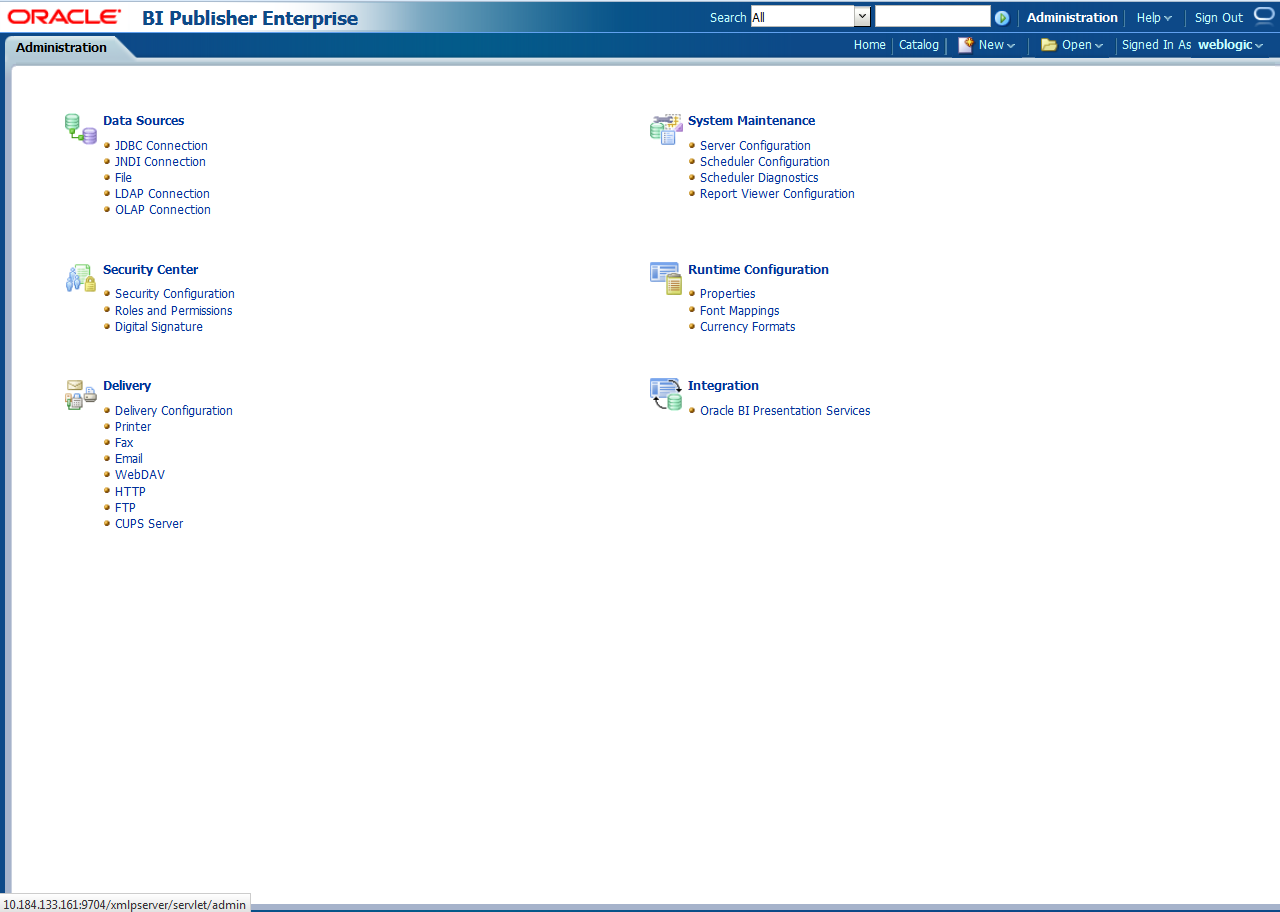
- Click on the Administration.
- Click on the Roles and Permission under Security Center and check if the added role (in em) is displayed. If not, restart the servers.The BIPublisher - Administration screen is displayed.
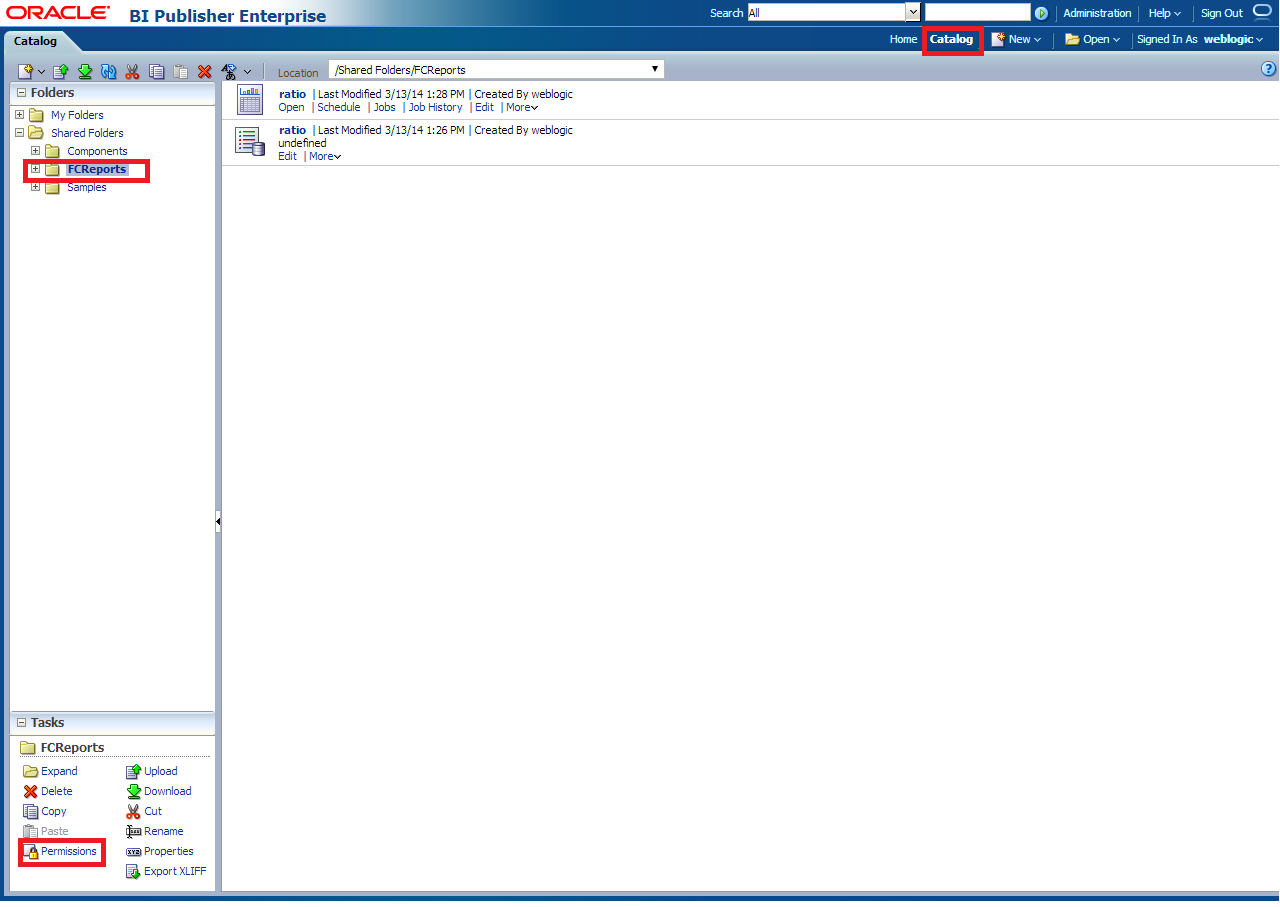
- Click on the Catalog, select the folder that has been created, and click on Permissions under the Tasks.BIPublisher - Catalog screen is displayed.
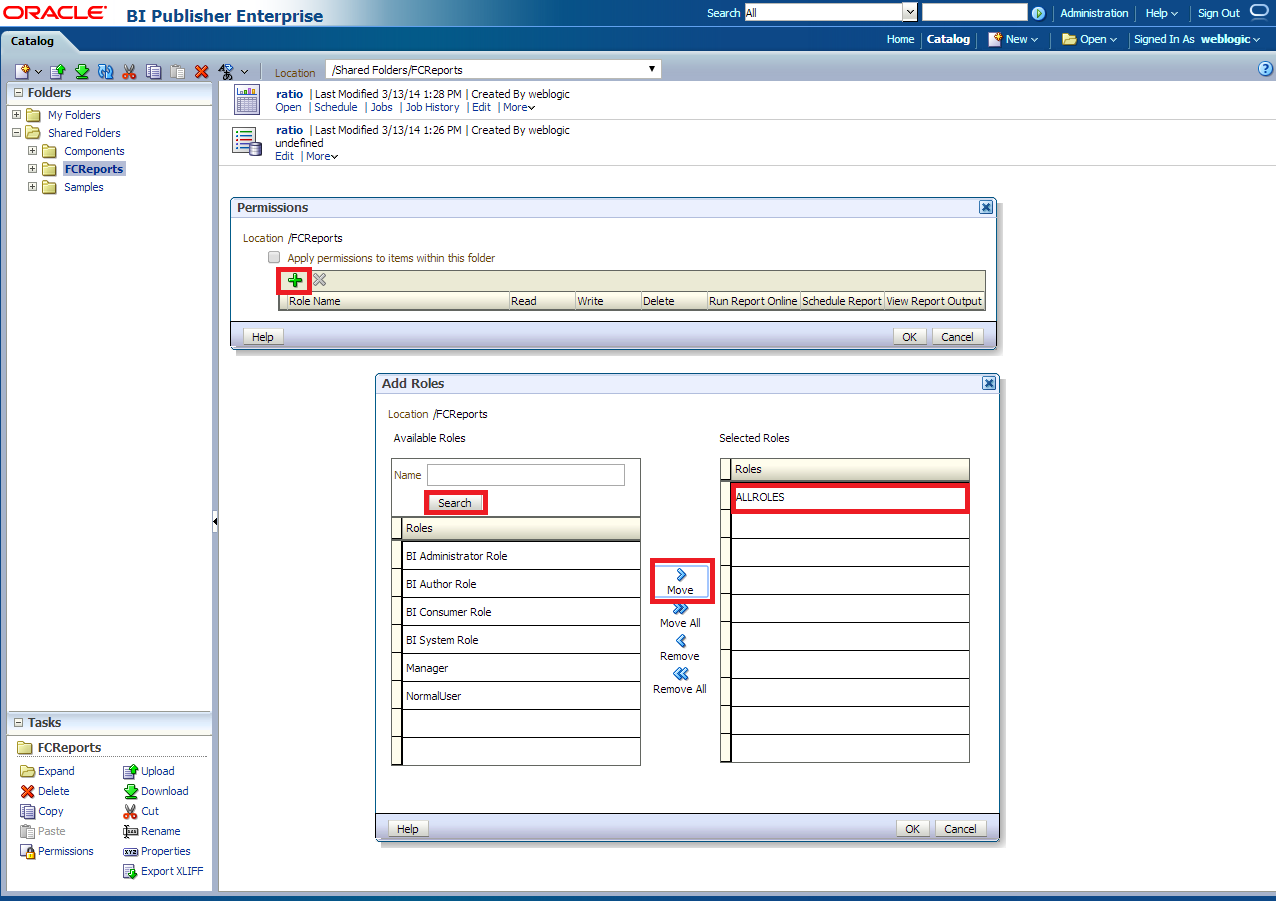
- Click on the Add button.The Add Roles screen is displayed.
- Click on the Search button in Add Roles pop-up window.
- Select the role that has been created and click on the Move button and click on OK.
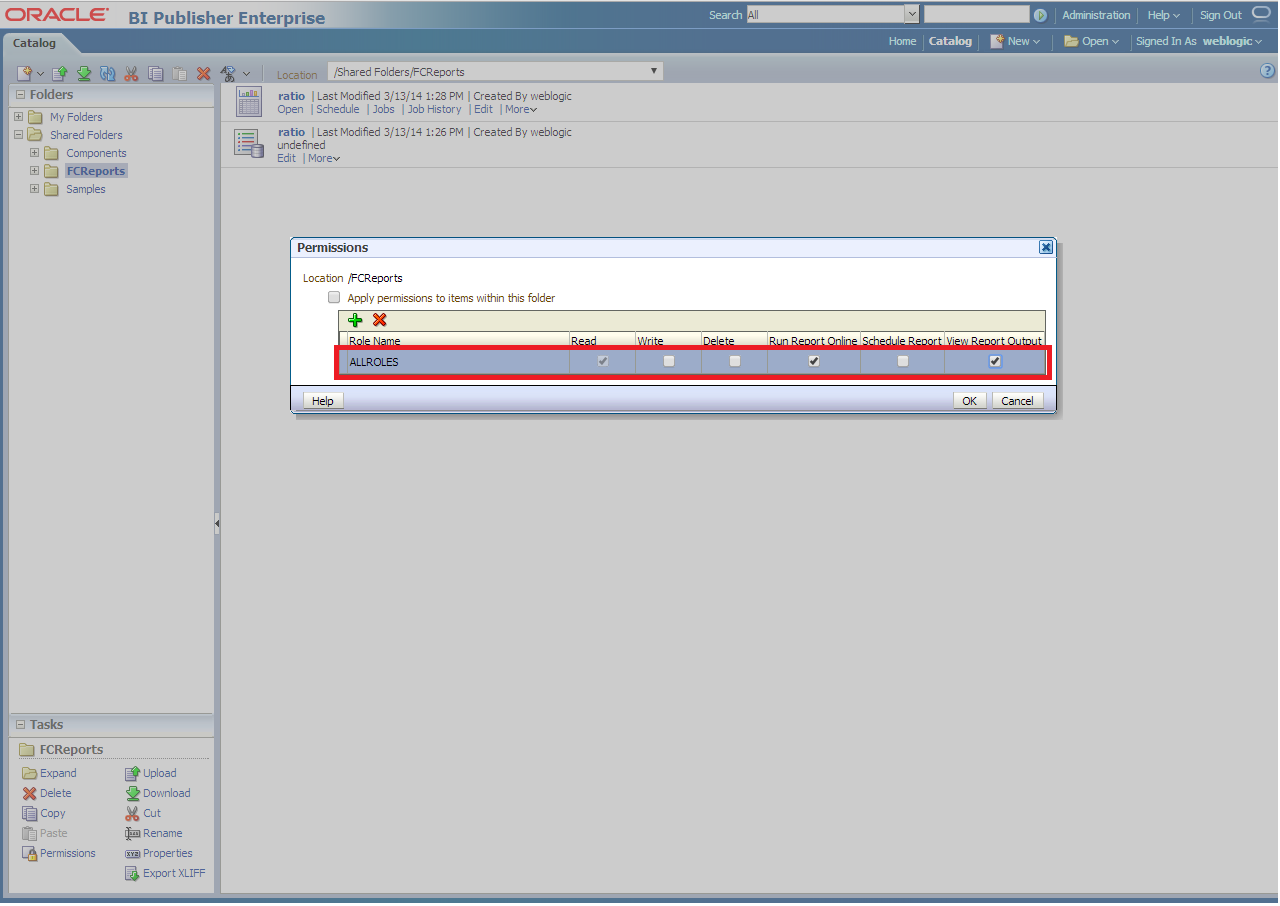
- Finally, the role will be added, and select the options that have to be provided for the particular role and check if the permissions are only to items within the folder if necessary.The Permissions with added role is displayed.
- Now the reports in the folder will be accessed accordingly based on the roles.
Note:
Similarly, we can set the permissions at the report level also for a particular role. - Login in to Bi Publisher http://server:port/xmlpserver.
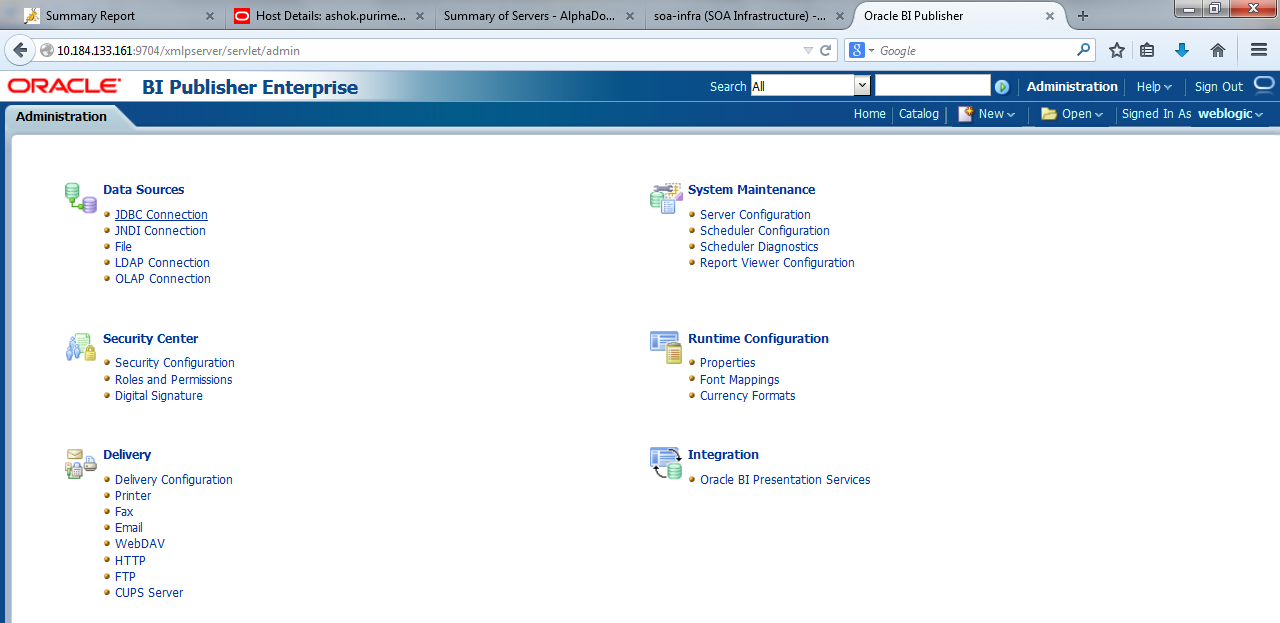
- Click on the Administration.The Administration screen is displayed.
Figure 1-69 Administration - JDBC Connection
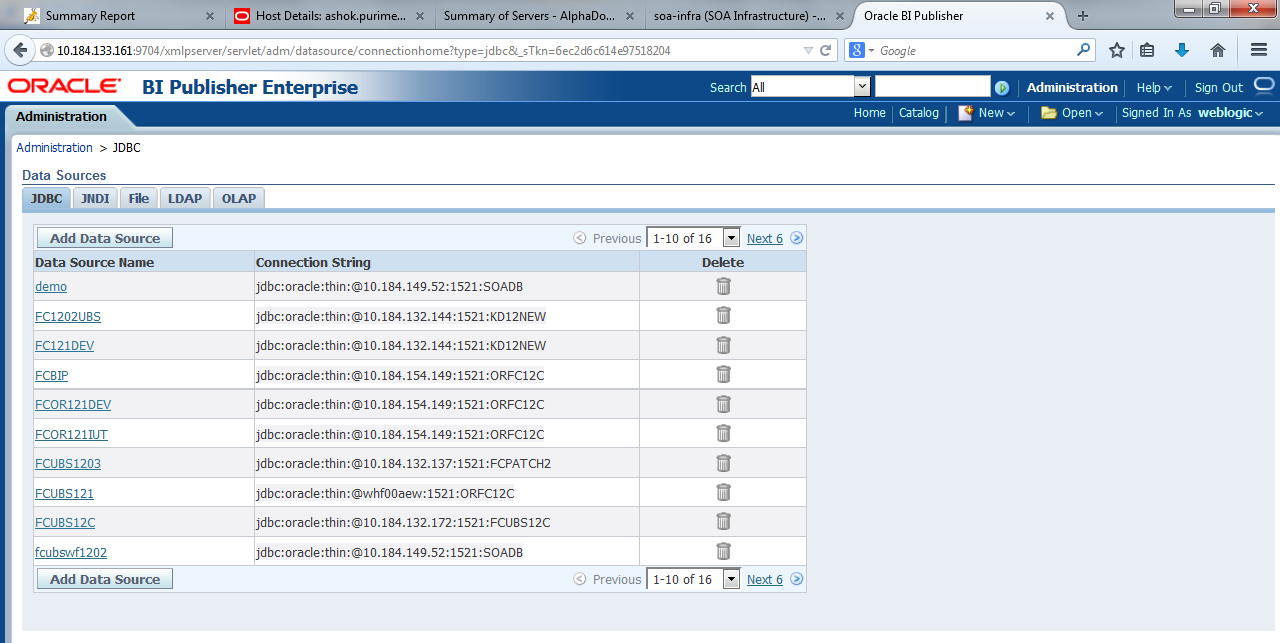
- Under Data Sources, click on JDBC Connection.The Administration - JDBC screen is displayed.
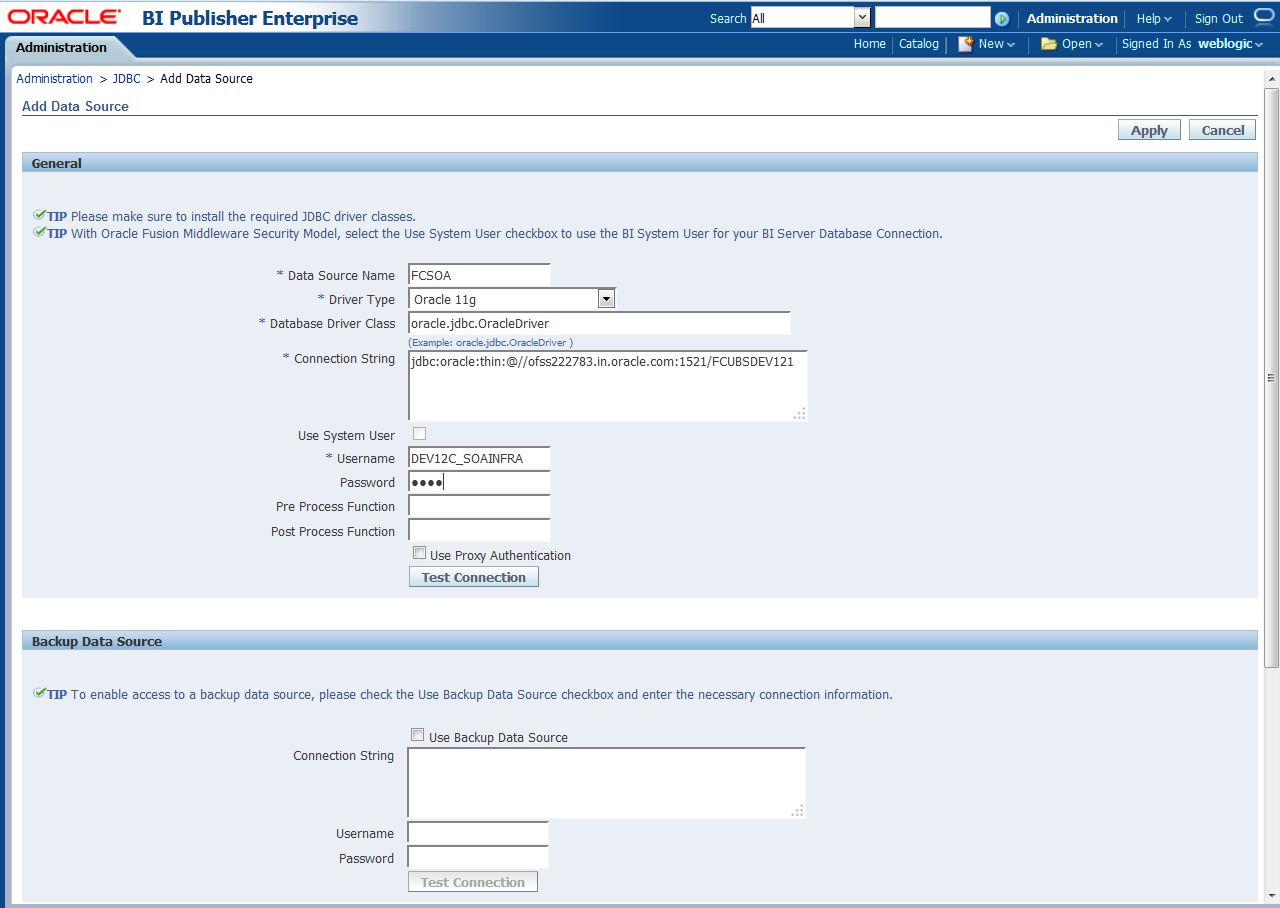
- Click on Add Data Source and create the data source with data source name as FCSOA and use soa schema details to create the same.The Administration - JDBC - Add Data Source screen is displayed.
Figure 1-71 Administration - JDBC - Add Data Source
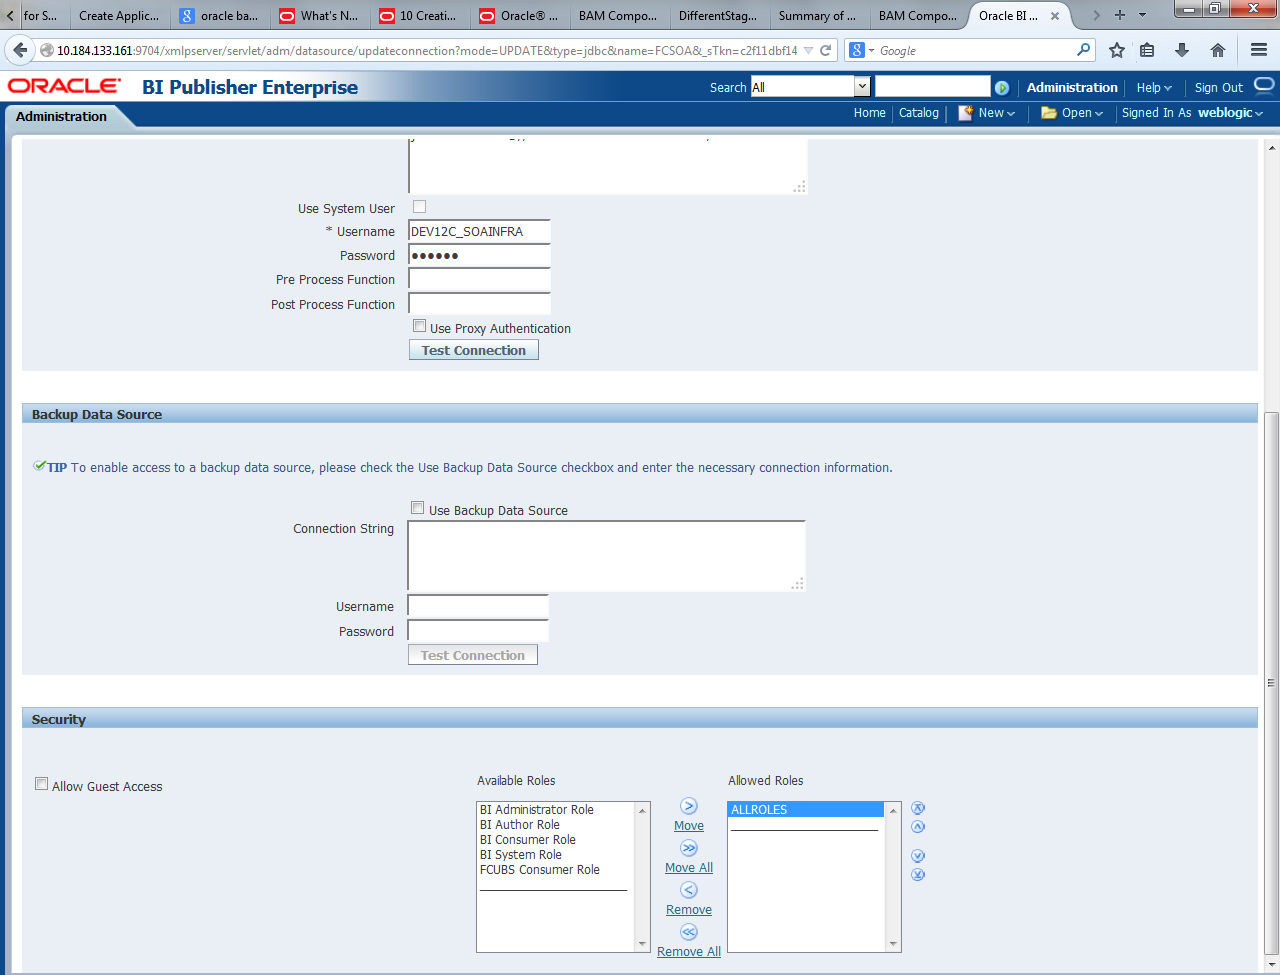
- Add the FCIS roles to Allowed Roles under Security.Administration - JDBC - Add Data Source (Security) screen is displayed.
Figure 1-72 Administration - JDBC - Add Data Source (Security)
- Click on the Test Connection.
- Once the connection is established successfully, click on Apply.
- Follow steps 15 to 17 to create the data source for FCIS Schema and give the name FCBIPBPEL.
Parent topic: Integrating Oracle FLEXCUBE IS and BPEL
