- Financial Institution Onboarding User Guide
- Financial Institution Customer Onboarding
- Onboarding Enrichment
- Customer Profile
- Basic Info
1.4.1.1 Basic Info
This topic provides the systematic instruction to capture the Basic Info about the Financial Institution customer.
- Click Configure option in the Onboarding
Enrichment screen to add the additonal information for Financial
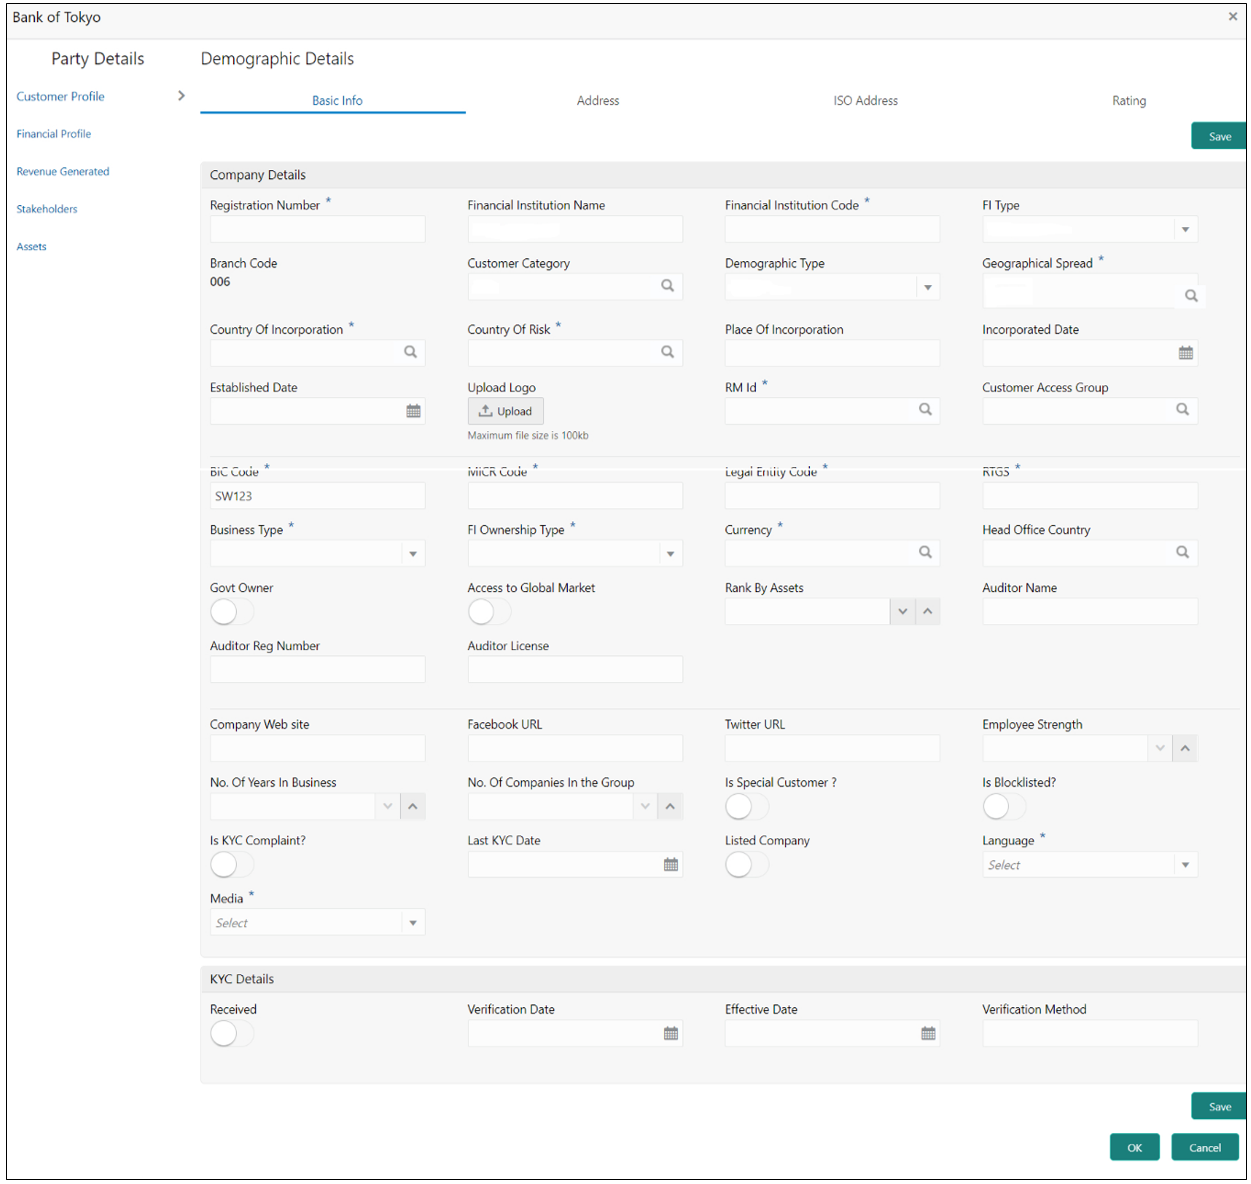
Institution customer.The Demographic Details – Basic Info screen is displayed.
Figure 1-14 Demographic Details – Basic Info
- Specify the required details in the Basic Info
segment.
Note:
The fields, which are marked with an asterisk, are mandatory.For more information on fields, refer to the field description table.
Table 1-5 Demographic Details – Basic Info – Field Description
Field Description Registration Number Specify the registration number of the company. Financial Institution Name Specify the Financial Institute name. Financial Institution Code Specify the Financial Institute code. Financial Institution Type Select the type of Financial Institute. Branch Code Specify the branch code. Note:
For the parent customer, the branch code defaults as the logged-in branch. For subsidiaries, the values can be entered at the time of capturing the details.Customer Category Click Search icon and select the customer category. Demography Type Specify the company demography from the drop-down list. The available options are:- Global
- Domestic
Country of Incorporation Click Search icon to fetch the country code from the list. Country of Risk Click Search icon to fetch the country code from the list. Place of In-corporation Specify the place of incorporation of the company. Incorporation Date Specify the incorporation date. Established Date Specify the established date. Upload Logo Upload the logo of the Financial Institute customer. RM ID Select the RM to be associated with the customer. Customer Access Group Click Search and select the customer access group for the party. Note:
NOTE: User should have required access to onboarding a party within a customer access group.For more details, refer Oracle Banking Party Configuration User Guide.
BIC Code Specify the BIC Code of the Financial Institute. MICR Code Specify the MICR Code of the Financial Institute. Legal Entity Code Specify the Legal Entity Code of the Financial Institute. RTGS Specify the RTGS Code of the Financial Institute. Business Type Specify the Business Type of the Financial Institute. Financial Institute Ownership Type Specify the ownership type of the Financial Institute. Currency Specify the Currency Code of the Financial Institute. Head Office Country Specify the Head Office location of the Financial Institute. Govt Owner Specify if the owner of the Financial Institute is a Govt Official. Access to Global Market Specify if Financial Institute has access to Global Marker. Rank by Assets Specify the Rank by Assets. Auditor Name Specify the Auditor Name. Auditor Reg Number Specify the Auditor Reg. Number. Auditor License Specify Auditor License. Company Website Specify the company website. Facebook URL Specify the Facebook URL of the company. Twitter URL Specify the Twitter URL of the company. Employee Strength Specify the employee strength of the company. No. Of Years In Business Specify the number of years the Financial Institute is in business. No. Of Companies In the Group Specify the number of companies that are part of the FI group. Is Special Customer? Select the toggle if Financial Institute is in special Customer Category. Is Blocklisted? Select the toggle if Financial Institute is in Block list. Is KYC Complaint? Select the toggle if Financial Institute is in KYC Complaint. Last KYC Date Specify the last KYC Date of the Financial Institute. Listed Company Select the toggle if Financial Institute is in Listed Company. Language Click Search to select the langauge. Media Click Search to select the media. - On the Free Tasks screen, select the required task and
click Acquire and Edit.The KYC – Customer KYC Details screen displays.
- On the KYC – Customer KYC Details screen, click
KYC Details to update the status of KYC check.The KYC Details screen displays.
For more information on fields, refer to the field description table.
Table 1-6 KYC Details - Field Description
Tile Name Description Report Received Select the toggle to recevie the reports. By default, the Toggle is off.
Verification Date Specify the date or use the calendar icon to select the KYC verification date. Effective Date Specify the date or use the calendar icon to select the KYC effective from date. KYC Method Specify the Method by which the KYC is completed. KYC Status Select the KYC status from the drop-down list. The available options are:- Compliant
- Non-Compliant
- Yet to Verify
- Click OK to update the KYC Actions details.
- Click Next to navigate to next data segment.The KYC - Comments screen displays.
- Specify the overall comments for the KYC stage.
- Click Post to post the comments.
- Click Submit to submit the KYC
stage.
The Checklist window is displayed and select the Outcome
The available Outcome options are:- If Approve is selected, the task is moved to the Onboarding Enrichment stage.
- If Reject is selected, the task is terminated.
After Submit successful screen displays and Task will be available in the Free Task screen.
Parent topic: Customer Profile
