1.3 KYC
This topic provides the systematic instruction to capture the KYC information about the Financial Institution customer to be onboarded using Oracle Banking Enterprise Party Management.
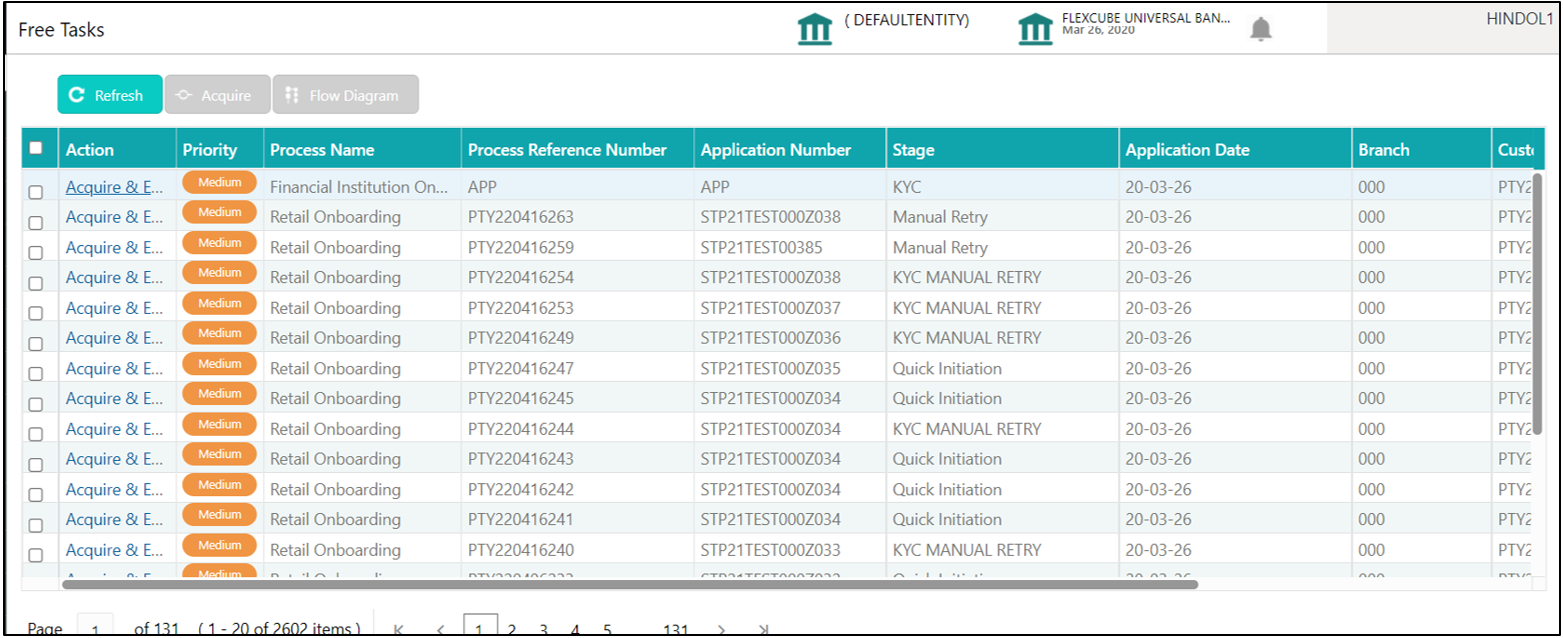
- On the Home page, click Tasks.
Under Tasks, click Free
Tasks.The Free Tasks screen is displayed.
- On the Free Tasks screen, select the required task and
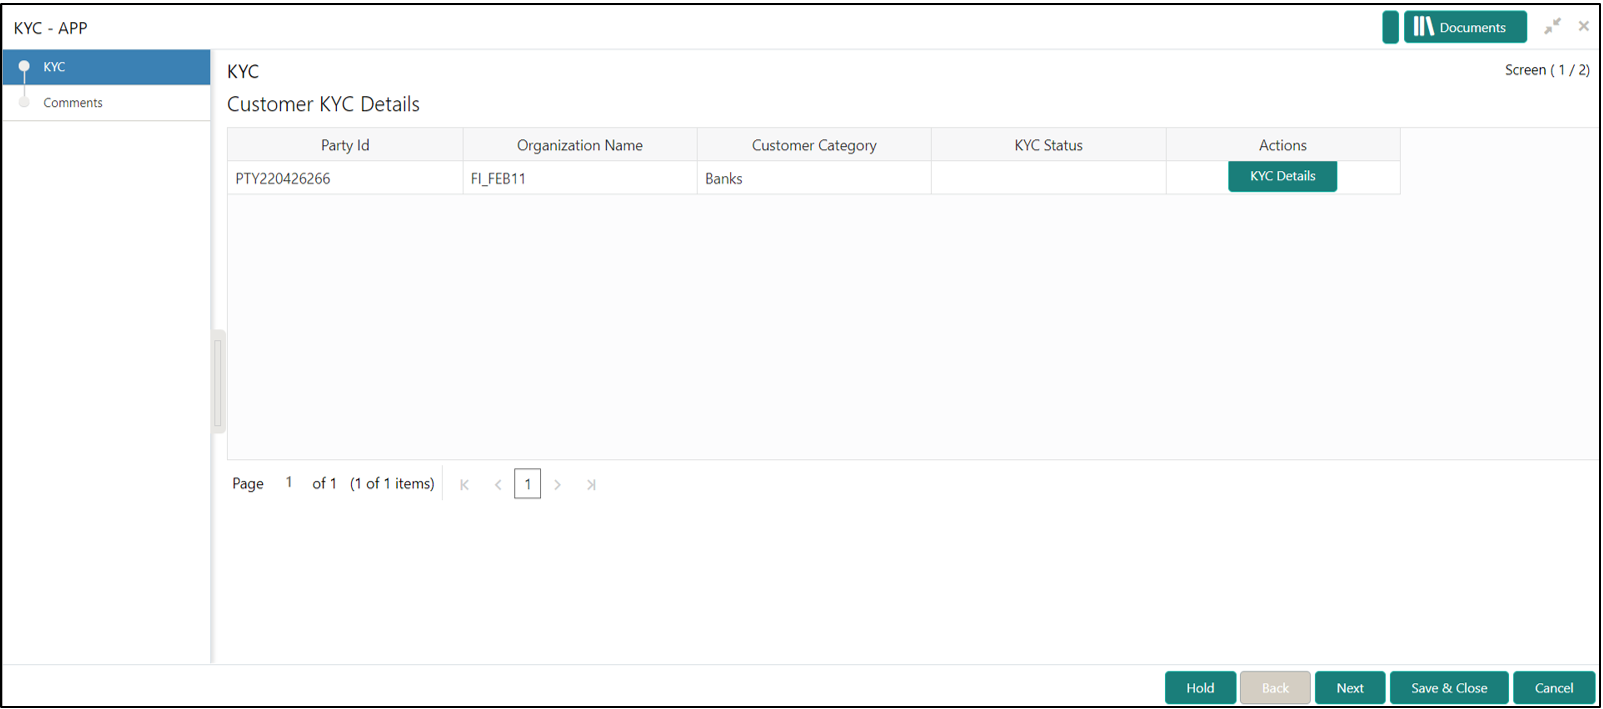
click Acquire and Edit.The KYC – Customer KYC Details screen displays.
- On the KYC – Customer KYC Details screen, click
KYC Details to update the status of KYC check.
For more information on fields, refer to the field description table.
Table 1-3 KYC Details - Field Description
Tile Name Description Report Received Select the toggle to recevie the reports. By default, the Toggle is off.
Verification Date Specify the date or use the calendar icon to select the KYC verification date. Effective Date Specify the date or use the calendar icon to select the KYC effective from date. KYC Method Specify the Method by which the KYC is completed. KYC Status Select the KYC status from the drop-down list. The available options are:- Compliant
- Non-Compliant
- Yet to Verify
- Click OK to update the KYC Actions details.
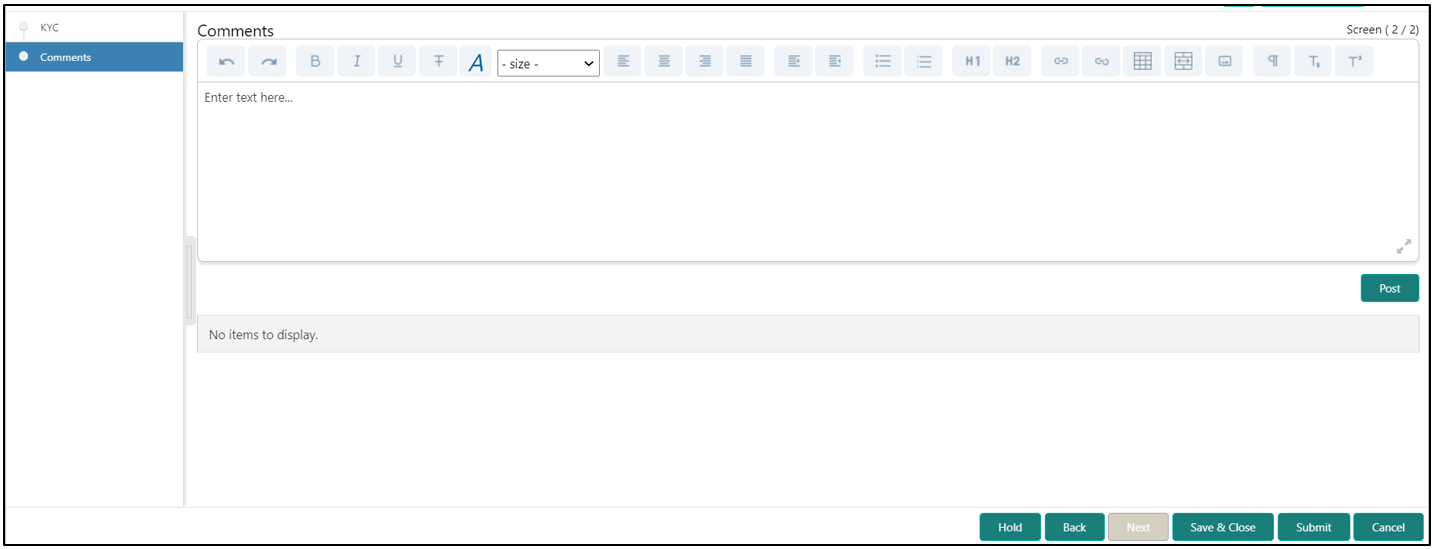
- Click Next to navigate to next data segment.The KYC - Comments screen displays.
- Specify the overall comments for the KYC stage.
- Click Post to post the comments.
- Click Submit to submit the KYC
stage.
The Checklist window is displayed and select the Outcome
The available Outcome options are:- If Approve is selected, the task is moved to the Onboarding Enrichment stage.
- If Reject is selected, the task is terminated.
After Submit successful screen displays and Task will be available in the Free Task screen.
Parent topic: Financial Institution Customer Onboarding


