2 User

This topic describes about the maintenance of the user and their access.

Controlled access to the system is a basic parameter that determines the robustness of the security in banking software. Only authorized users can access the system with the help of a unique User Login ID and password. The user profile of a user contains the details of the user in four sections - User details, Status, Other details and User role branches.

2.1 Create User

This topic provides the systematic instructions to create the user and assign their activities based on their entity login.

Specify User ID and Password, and login Home screen.
The Create User screen allows the user to create the user and assign their activities based on their entity login.
  1. On Home screen, click Security Management. Under Security Management, click User.
  2. Under User, click Create User.
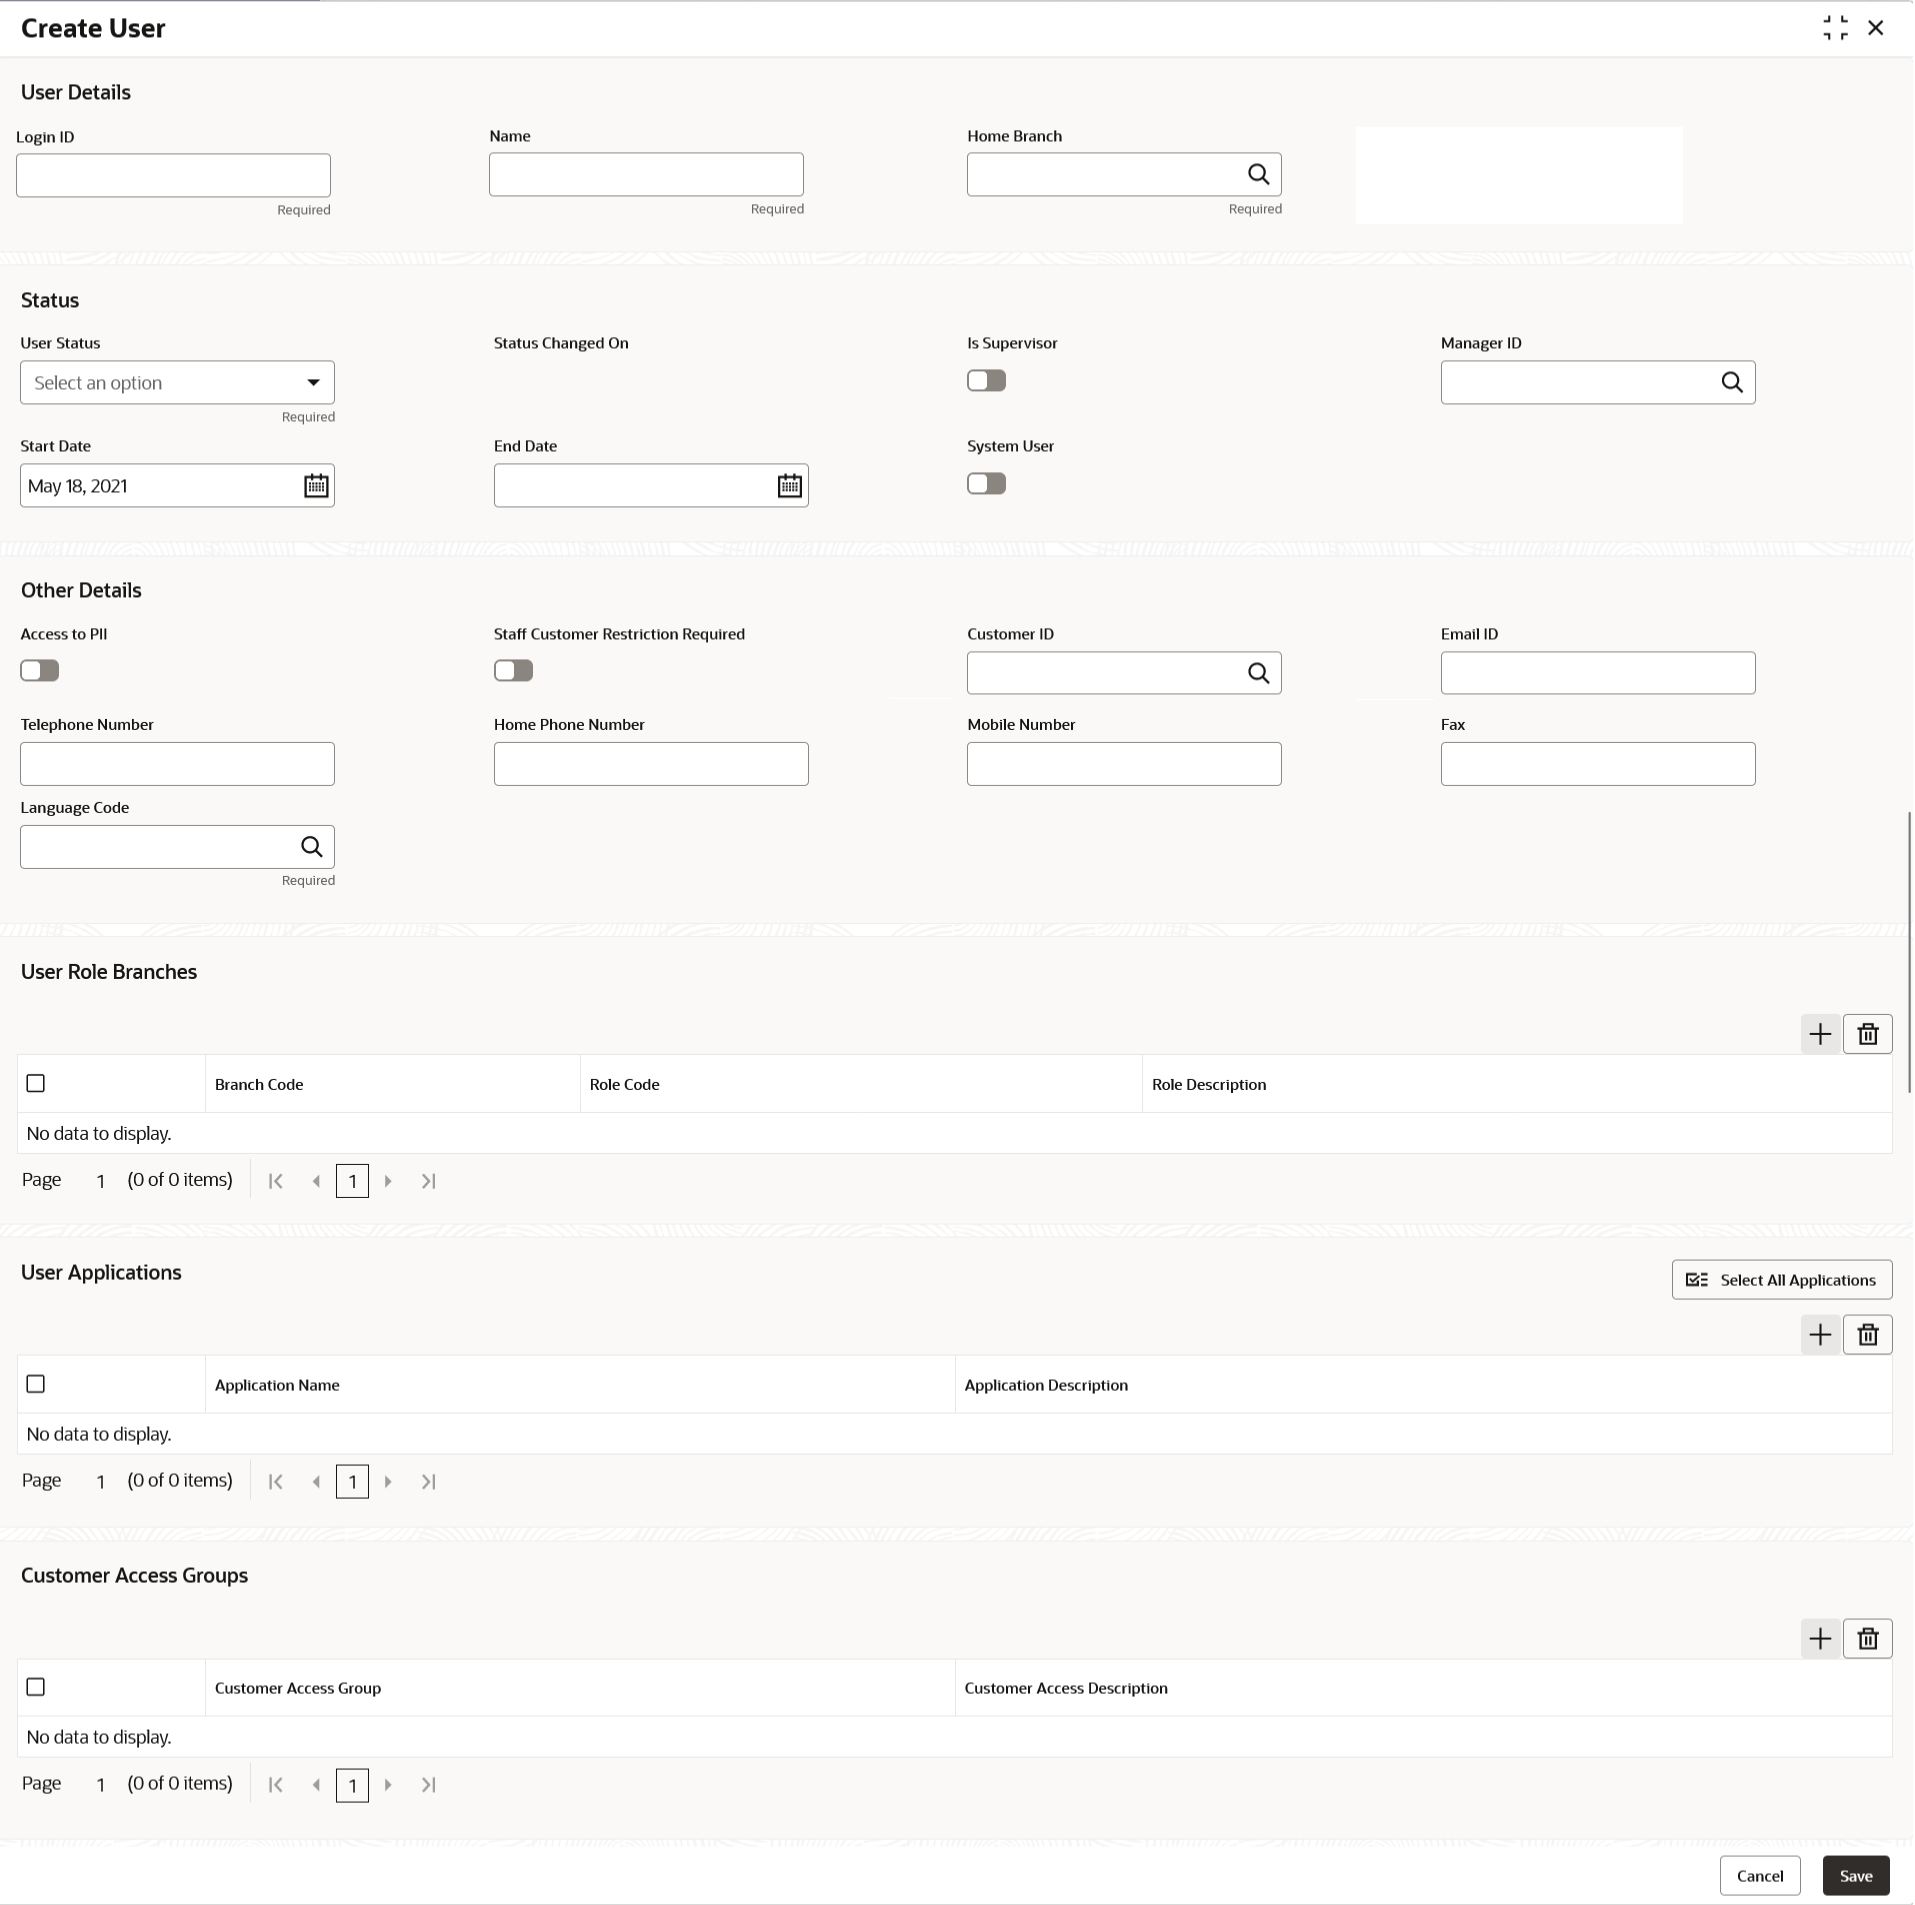
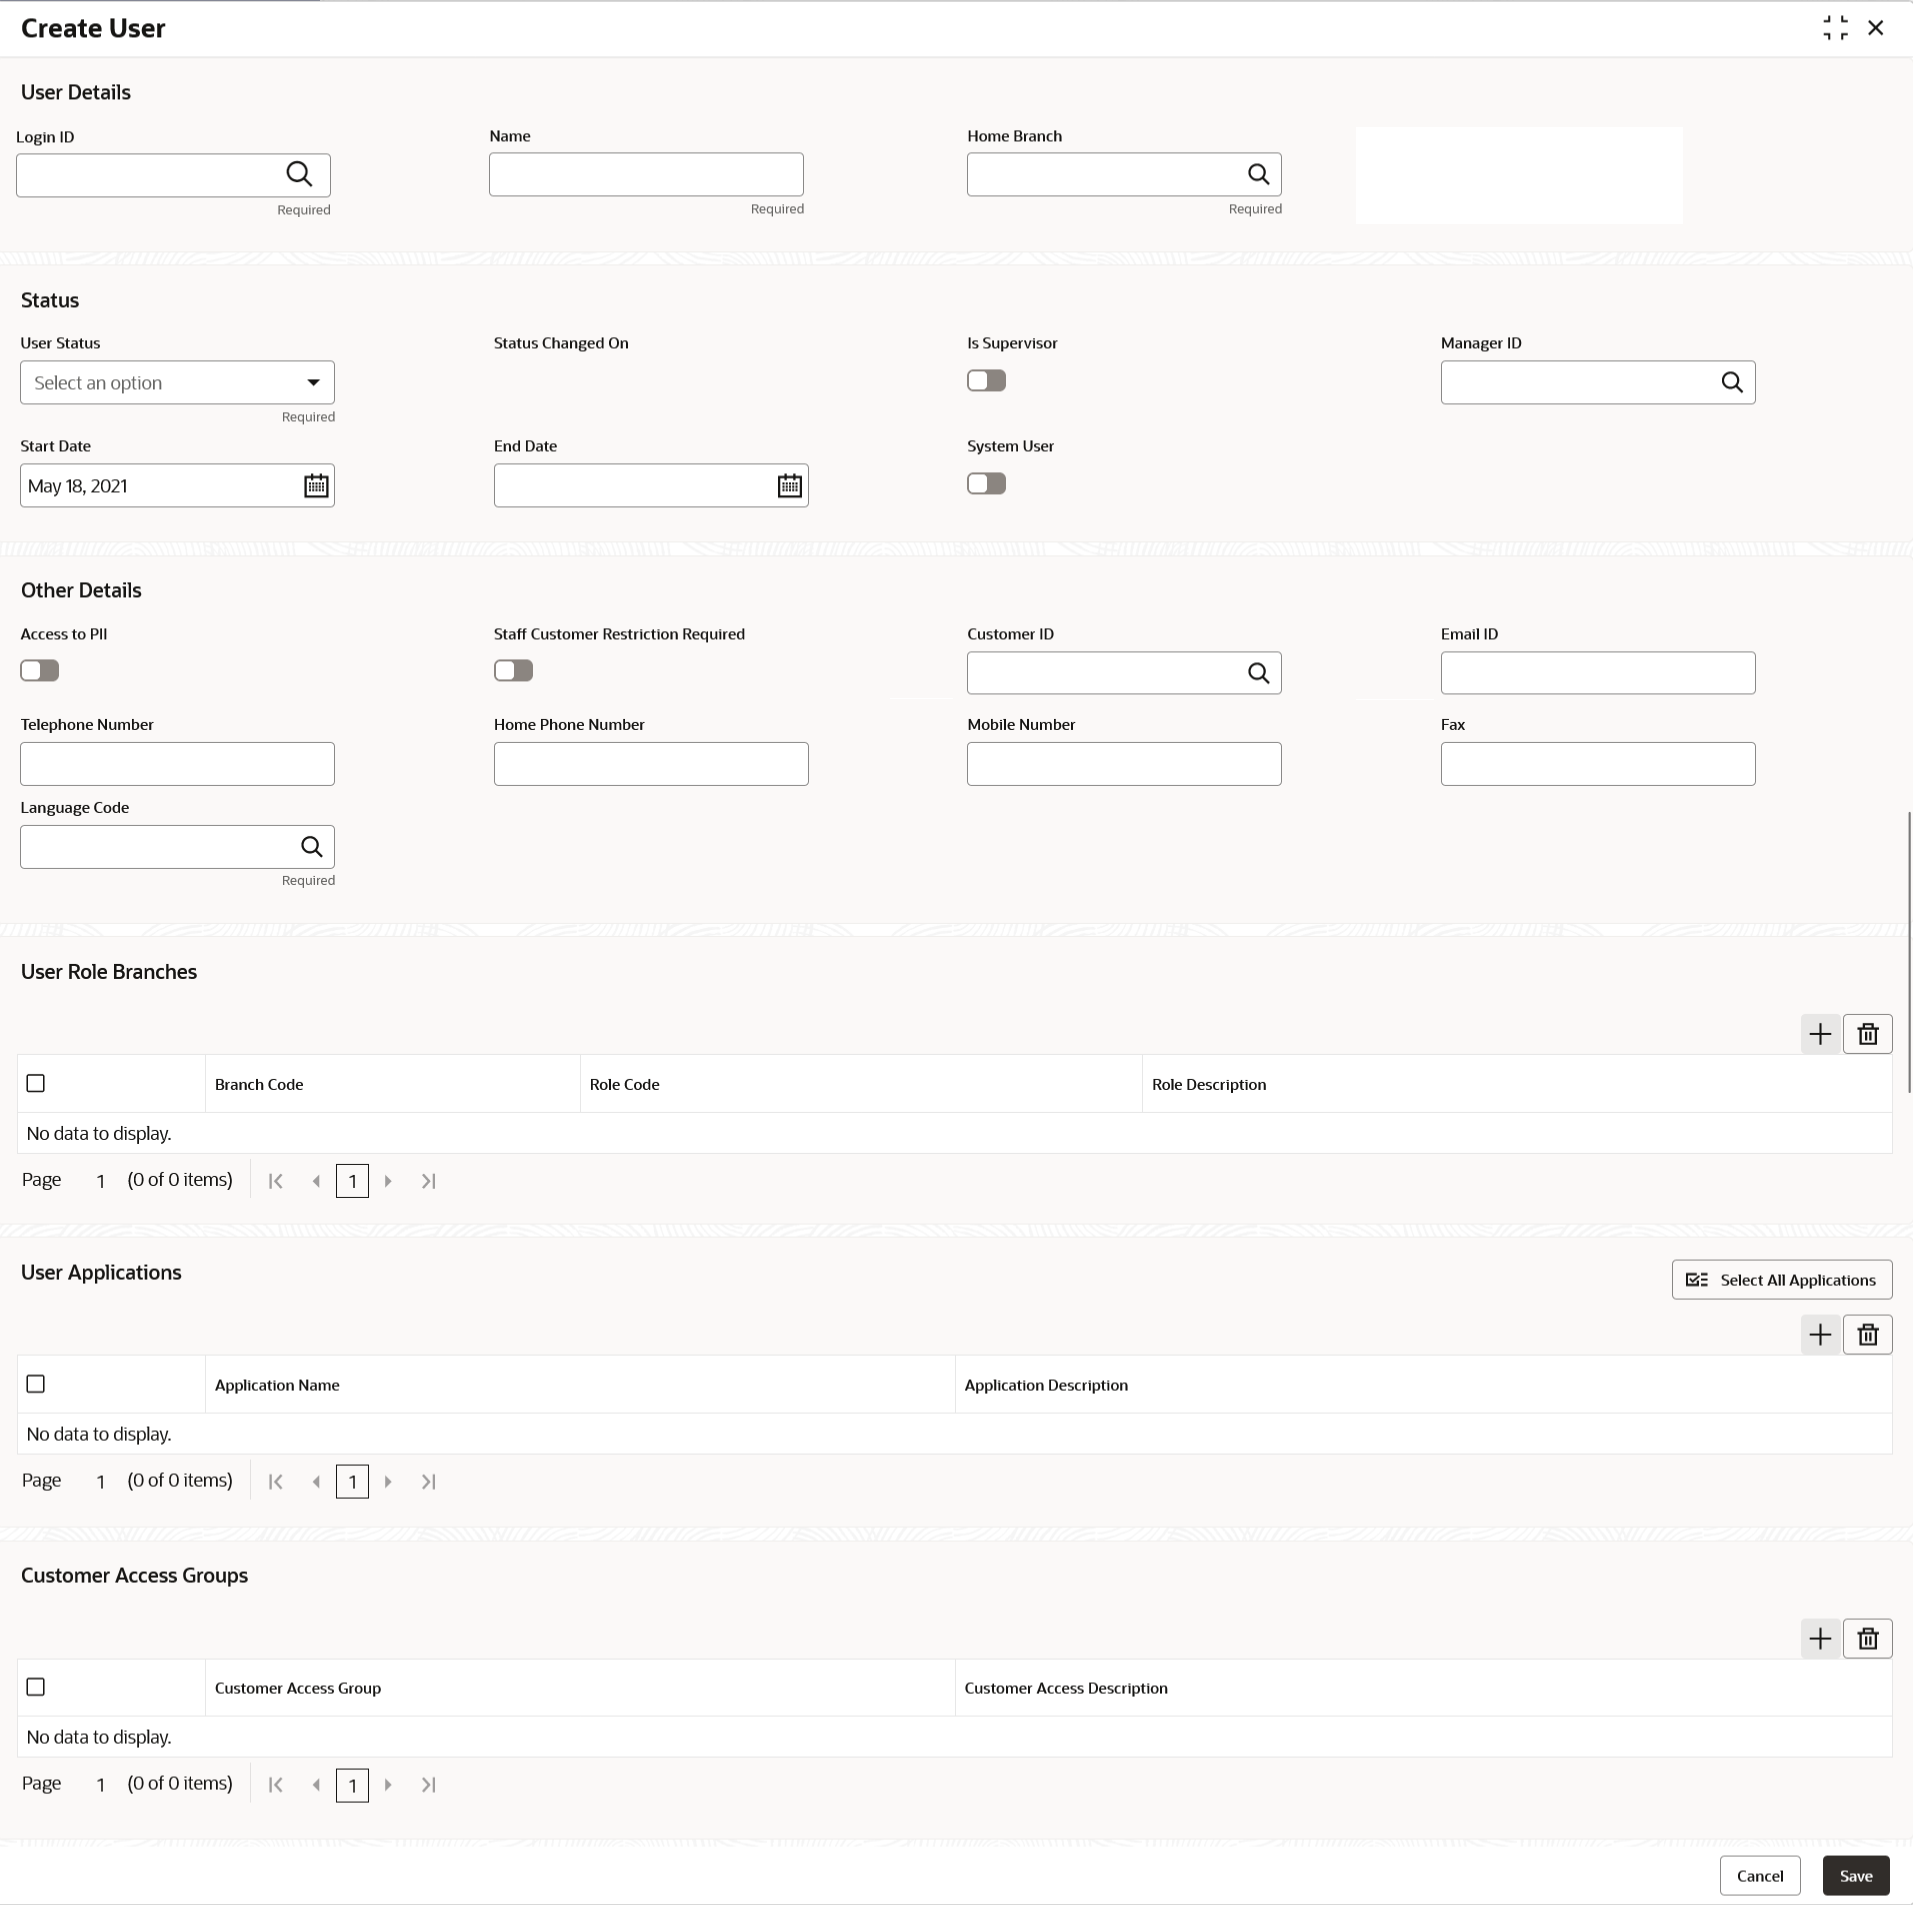
    The Create User screen displays.

    Figure 2-1 Create User - Single Entity


    Figure 2-2 Create User - Multi Entity


  3. Specify the fields on Create User screen.

    Note:

    The fields which are marked with asterisk are mandatory.
    For more information on fields, refer to the field description table below.

    Table 2-1 Create User - Field Description

    Field Description
    Login ID

    Single Entity - Specify login ID with which a user logs into the system. This login ID is unique across all branches. The minimum length of login ID can be configurable and the maximum number can be 12 characters.

    Multi Entity - Search and select the required login ID from the LOV.

    Name Specify the name of the user.
    Home Branch Click the Search icon and select required home branch.
    User Status Select the user status from the drop-down list.
    Status Changed On Displays the last modified status.
    Is Supervisor Select the toggle to indicate whether the user is a supervisor or not.

    By default, this option is disabled.

    Manager ID Click the Search icon and select the required manager ID.
    Start Date Select the start date from when the user is valid.
    End Date Select the end date till when the user is valid.
    Access to PII

    Select the toggle to enable the user to access the Personal Identifiable Information of the entity.

    By default, this option is disabled.
    Staff Customer Restriction Required

    Select the toggle to enable the staff customer restriction.

    By default, this option is disabled.
    Customer ID Click the Search icon and select required customer ID.
    Email ID Specify the user Email ID at the time of the creation. All system generated password is communicated to the user through this mail ID.
    Telephone Number Specify the user contact number.
    Home Phone Number Specify the user home contact number.
    Mobile Number Specify the user mobile number.
    Fax Specify the fax details of the user.
    Language Code Click the Search icon and select the required language code.
    User Role Branches Specify the user role branches details.

    Note:

    A minimum of one user role and branch must be mapped.
    Branch Code Click the Search icon and select the required branch code.
    Role Code Click the Search icon and select the required role code.
    Role Description Displays the description about the role, based on the selected role code.
    User Applications Specify the user application details.
    Application Name Click the Search icon and select the required application.
    Application Description Displays the description about the application based on the selected application.
    Customer Access Groups Specify the customer access group details.
    Customer Access Group Search and select the required customer access group from the list.
    Customer Access Description Displays the additional information about the customer access based on the selected group.
  4. Click + to add a row and provide the required details in the columns.
  5. Click Select All Applications button to select all the applications for which the user needs the access.
  6. Click Save to save the details.
    The user can view the configured users in the View User.

    Note:

    User modification is not allowed while the user is logged in. However, the administrator can clear off the user and perform modifications. For more information, refer to the Clear User topic.

2.2 View User

This topic provides the systematic instructions to view the list of configured users.

Specify User ID and Password, and login Home screen.
The user can configure the user using the Create User screen.
  1. On Home screen, click Security Management. Under Security Management, click User.
  2. Under User, click View User.
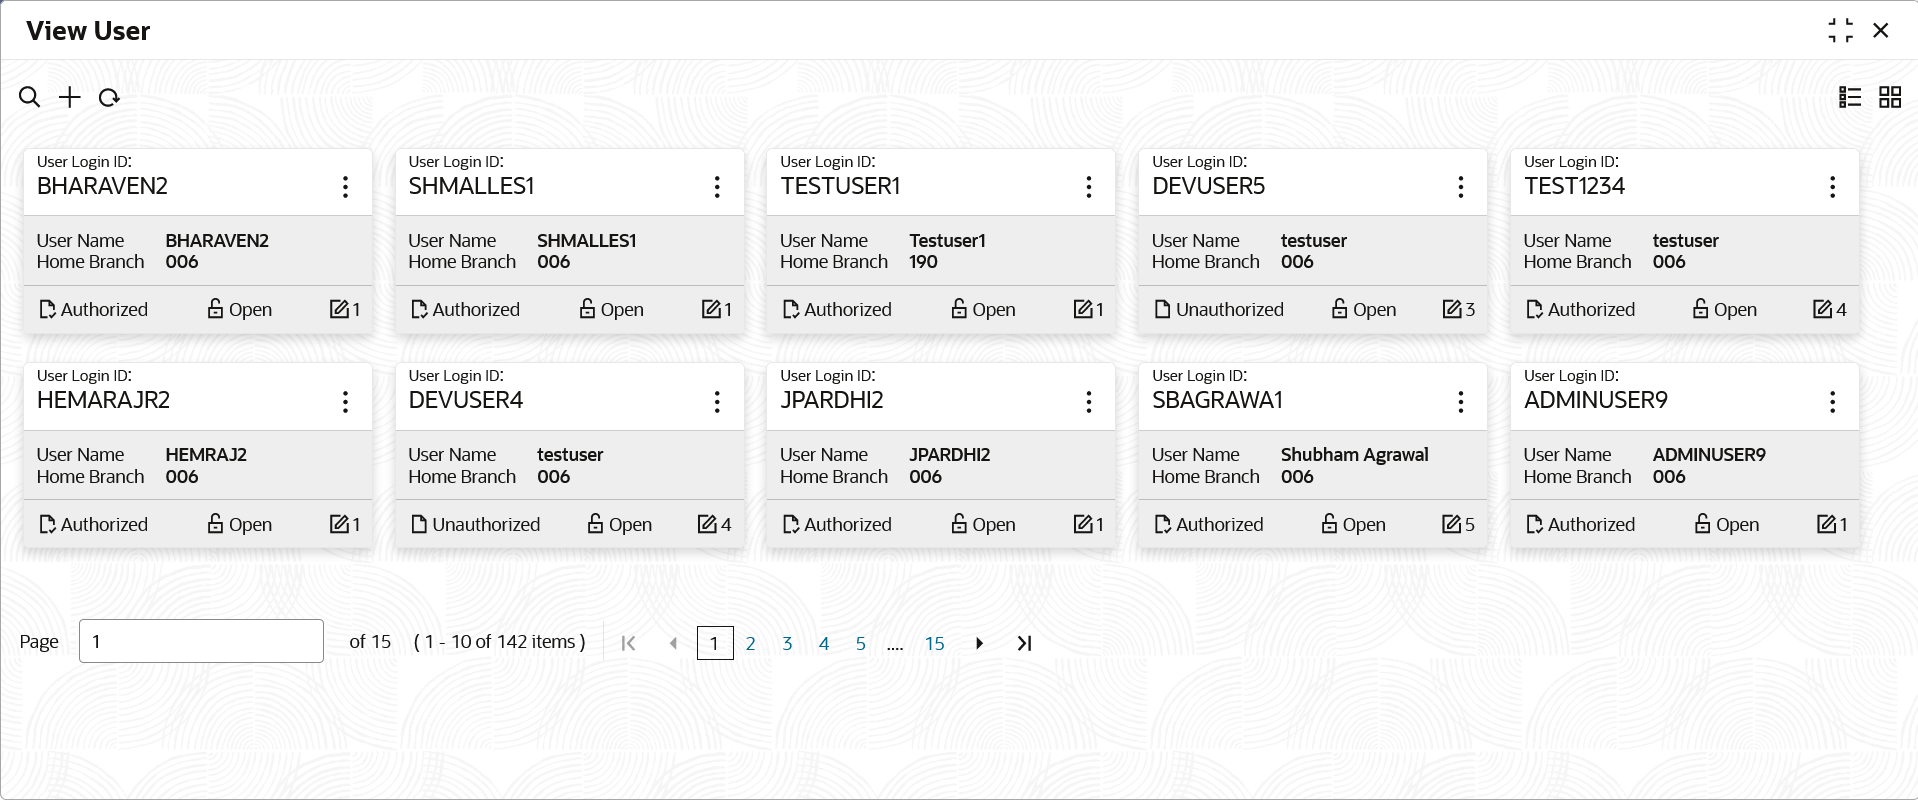
    The View User screen displays.
    For more information on fields, refer to the field description table.

    Table 2-2 View User - Field Description

    Field Description
    User Login ID Displays the user login ID details.
    User Name Displays the user who has created the record.
    Home Branch Displays the details of the home branch associated with the user.
    Authorization Status Displays the authorization status of the configured user.
    The available options are:
    • Authorized
    • Rejected
    • Unauthorized
    Record Status Displays the record status of the configured user.
    The available options are:
    • Open
    • Closed
    Modification Number Displays the number of modification performed on the record.

2.3 Clear User

This topic provides the systematic instructions to clear the user.

Specify User ID and Password, and login Home screen.
The Clear User screen allows the user to clear off the current users.
  1. On Home screen, click Security Management. Under Security Management, click User.
  2. Under User, click Clear User.
    The Clear User screen displays.

    The user can search for the user based on the User Login ID and Branch Code parameters.

  3. Specify the fields on the Clear User screen.

    Note:

    The fields which are marked with asterisk are mandatory.
    For more information on fields, refer to the field description table below.

    Table 2-3 Clear User - Field Description

    Field Description
    User Login ID Specify the user login ID.
    Branch Code Specify the branch code.
  4. Click Query, once the parameters are specified.
    The system displays the following details of the users who have logged into the system.
    • Branch Code
    • User Login ID
    • User Name
  5. Click Reset to reset the query parameters.
  6. Select the check box against the relevant user record and click Save to force log out of the selected user.

2.4 Unlock User

This topic provides the systematic instructions to unlock the user.

Specify User ID and Password, and login Home screen.
The Unlock User screen allows the user to unlock the users.
  1. On Home screen, click Security Management. Under Security Management, click User.
  2. Under User, click Unlock User.
    The Unlock User screen displays.
  3. Select the User Login ID from the drop-down list.
  4. Click Unlock to unlock the selected users.
  5. Click Clear to clear the details.