1 Role

This topic describes about the maintenance of role and the respective access rights.

The users who works in the same department at the same level of hierarchy need to have similar user profiles. In such cases, the user can define a Role Profile that includes access rights to the functional activities that are common to a group of users. A user can be linked to a Role Profile by giving the user access rights to all the functional activities in the Role Profile.

The roles defined is effective only after the dual authorization.

1.1 Create Role

This topic provides the systematic instructions to create role.

Specify User ID and Password, and login Home screen.
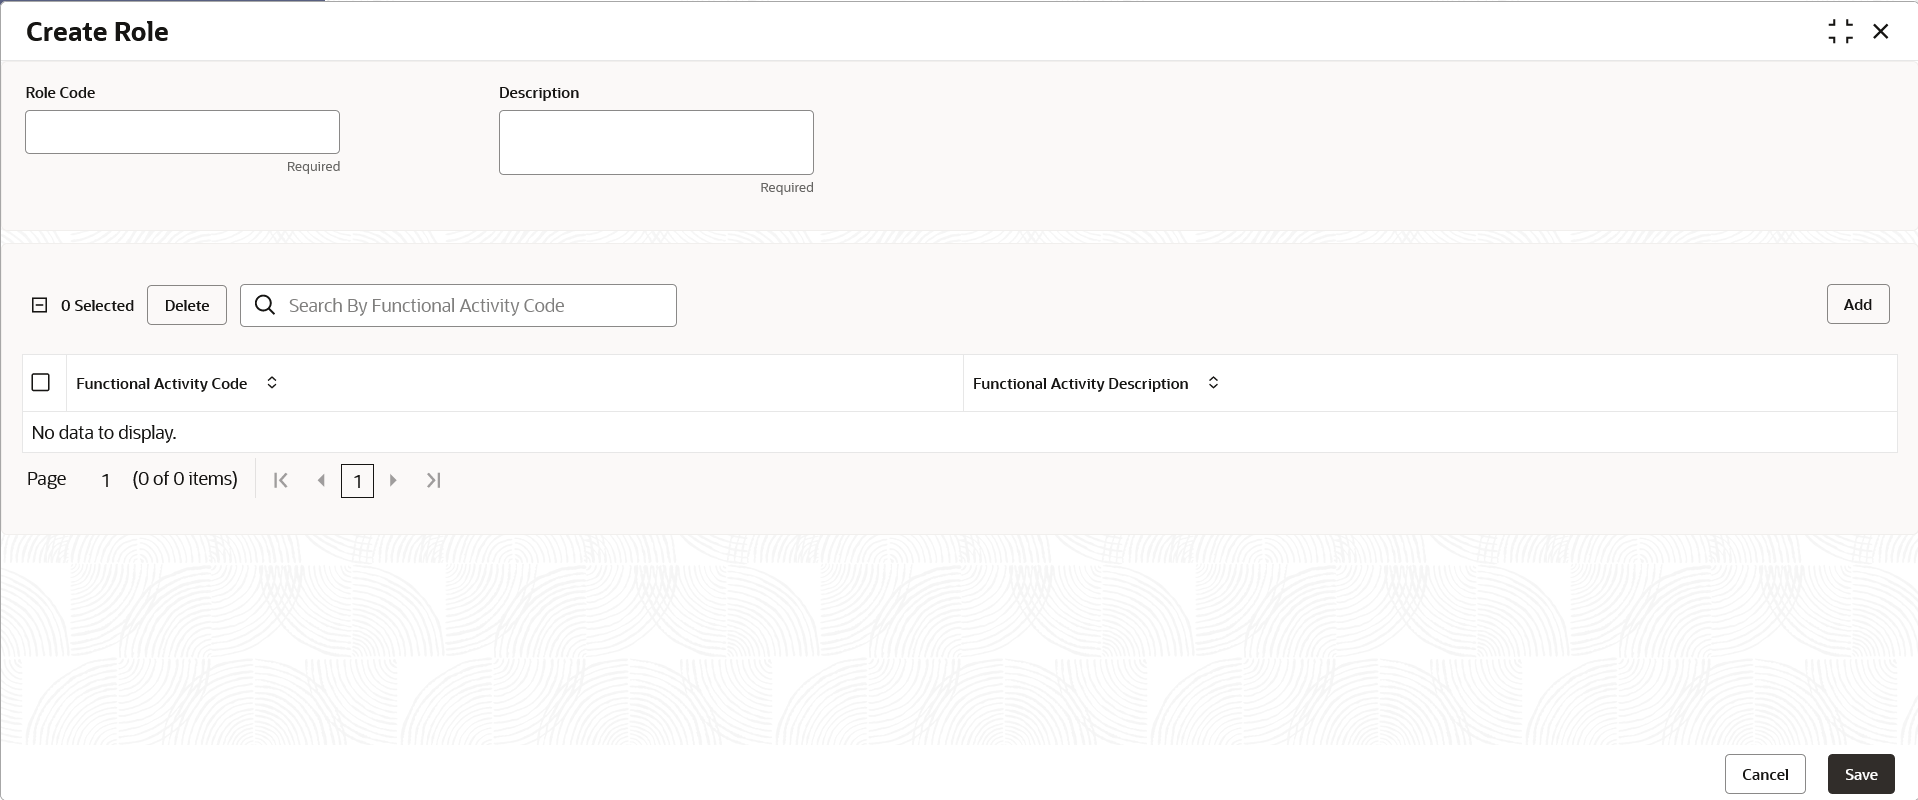
The Create Role screen allows the user to create roles and assign their activities.
  1. On Home screen, click Security Management. Under Security Management, click Role.
  2. Under Role, click Create Role.
    The Create Role screen displays.
  3. Specify the fields on the Create Role screen.

    Note:

    The fields which are marked with asterisk are mandatory.
    For more information on fields, refer to the field description table below.

    Table 1-1 Create Role - Field Description

    Field Description
    Role Code Specify the code of the role.
    Description Specify the description about the role.
  4. Click Add button to add a functional activity code.
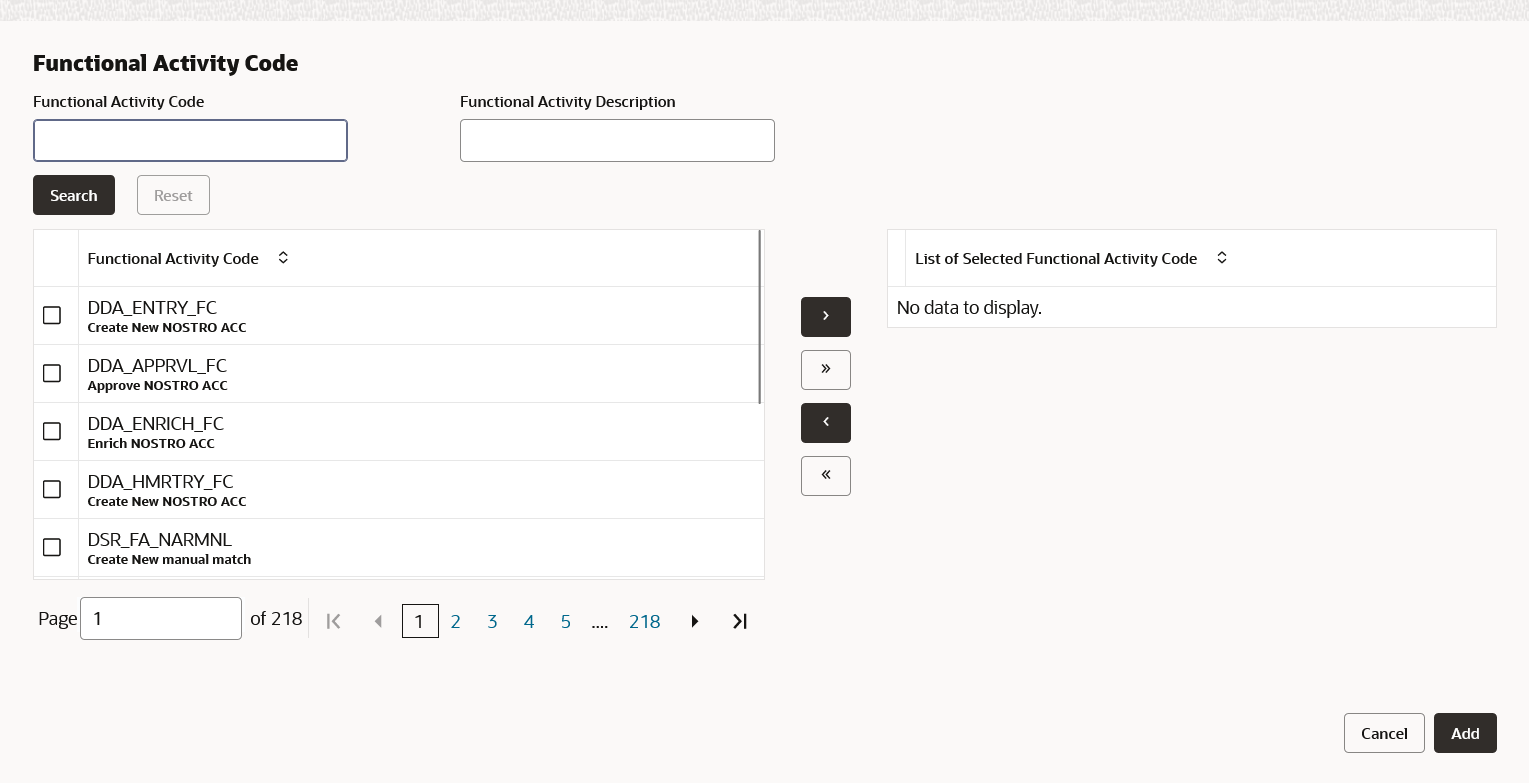
    The Functional Description popup displays.

    Figure 1-2 Function Description


  5. Specify the functional activity code or functional activity description in the respective fields.
  6. Click Search to filter the required functional activity list.
  7. Select the required functional activity code to which the role profile must have access. For more information on functional activity, refer to Functional Activity Codes

    Note:

    User can select only 50 functional activity codes at a time using Select All (>>) option.
  8. Perform the following actions on functional activity code screen:
    1. Click Add button to add a functional activity for the role creation.
    2. Click Cancel button to discard the changes.
  9. Click Delete button to delete the functional activity code to which the role profile access is not required.
  10. Click Save to save the details.
    The user can view the configured roles in the View Role.

1.2 View Role

This topic provides the systematic instructions to view the list of configured roles.

Specify User ID and Password, and login Home screen.
The user can configure the role using the Create Role screen.
  1. On Home screen, click Security Management. Under Security Management, click Role.
  2. Under Role, click View Role.
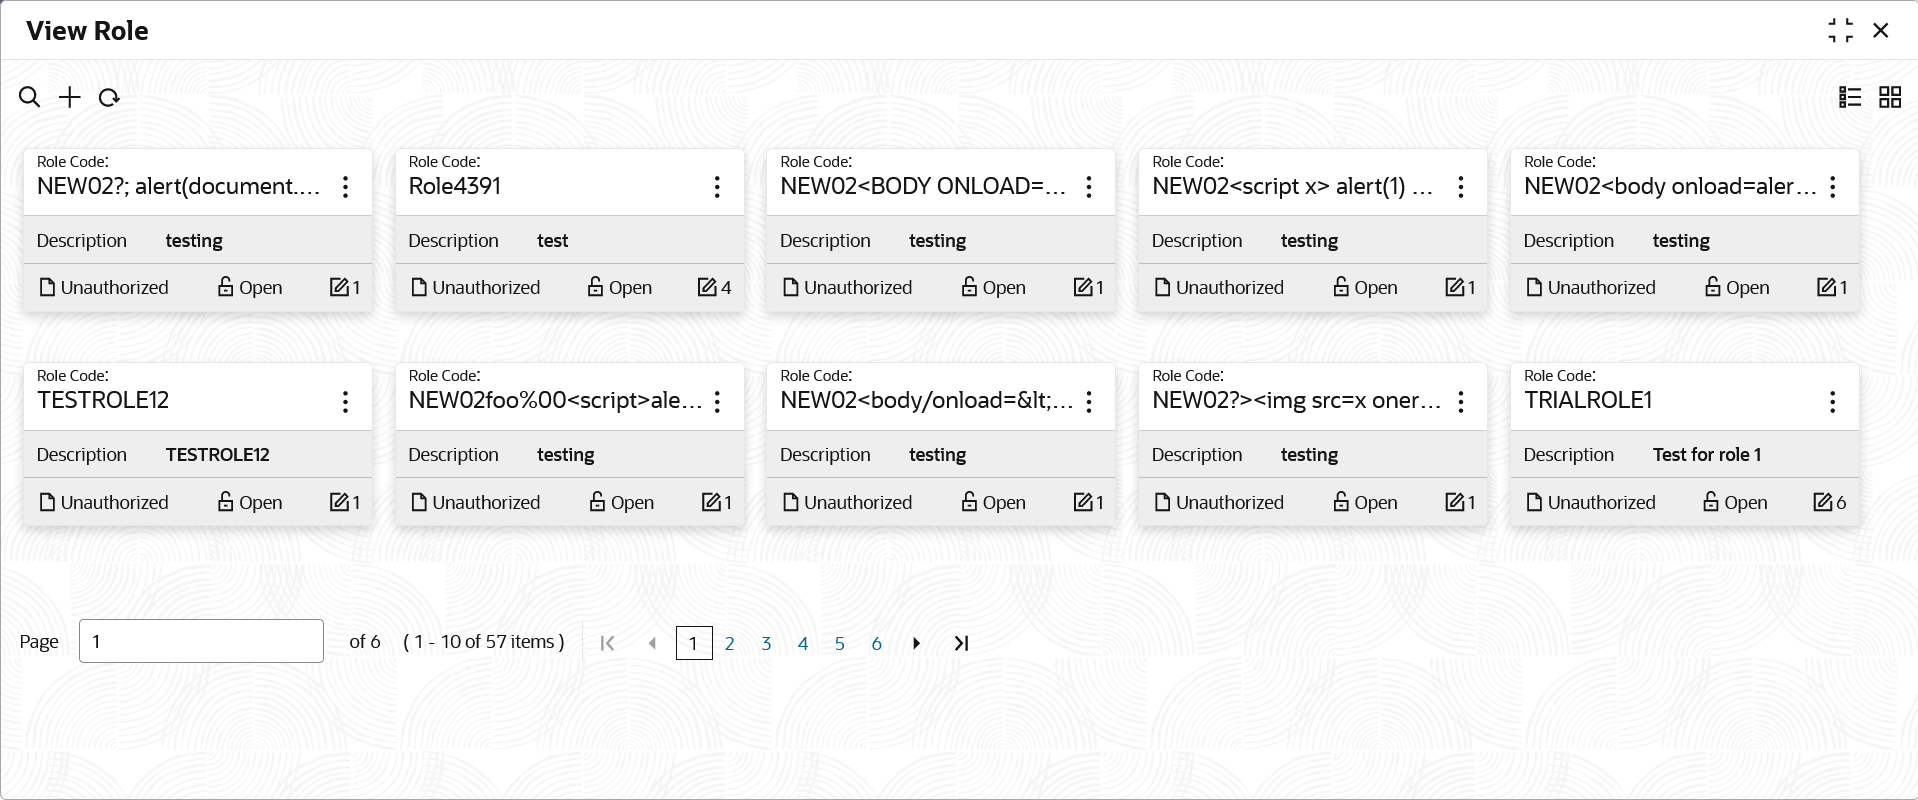
    The View Role screen displays.
    For more information on fields, refer to the field description table.

    Table 1-2 View Role - Field Description

    Field Description
    Role Code Displays the code of the role.
    Description Displays additional details about the role.
    Authorization Status Displays the authorization status of the configured role.
    The available options are:
    • Authorized
    • Rejected
    • Unauthorized
    Record Status Displays the record status of the configured role.
    The available options are:
    • Open
    • Closed
    Modification Number Displays the number of modification performed on the record.