Create Process
You can build a process by adding one or more members called Process Nodes. If
there are Predecessor Tasks associated with any member, the tasks defined as
predecessors precede the execution of that member. The Write role should be mapped to
your user group, from the User Group Role Map window.
To define a process in the Process window:
- Click the New button from the List toolbar. The
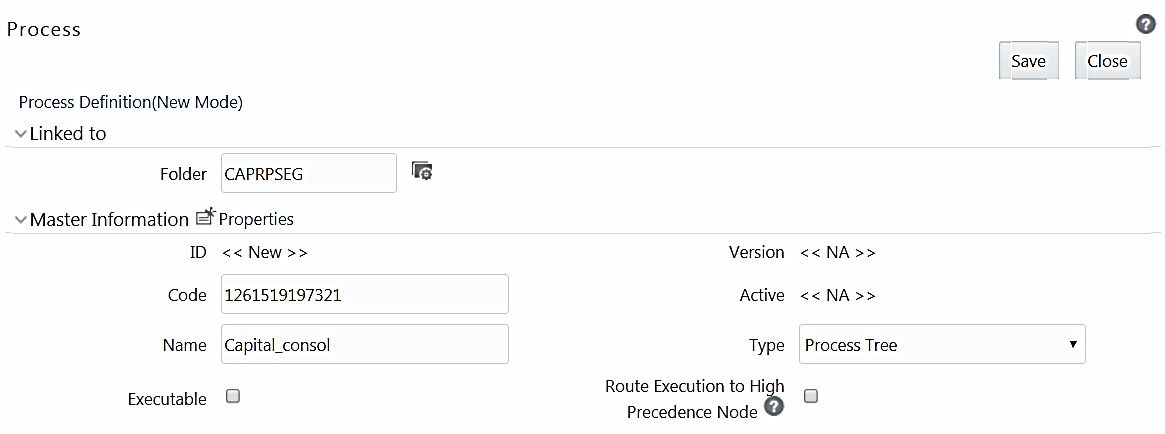
Process Definition (New Mode) window is displayed.
Figure 12-16 Process Definition (New Mode) window

- Click adjacent to the Folder field in the Linked to
grid. The Folder Selector window is displayed. The folders to which your
user group is mapped are displayed.
- Select the checkbox adjacent to the required folder. Click OK.
- Click New from the List toolbar to create a new folder/segment. For more information, see Segment Maintenance.
- Search for a folder by specifying any keyword and clicking the Search button.
Table 12-6 Fields in the Master Information pane and their Descriptions
Field Name Description ID Refers to the default ID of a newly created process and is <<New>>. Code Enter a valid code for the process. Ensure that the code is alphanumeric with a maximum of 30 characters in length and there are no special characters except underscore “_”. Name Enter a valid name for the process. Ensure that the process name is alphanumeric and does not contain any of the following special characters: #, %, &, +, ", and ~. Version By default, the version field is displayed as <<NA>> for the new process being created. Once the process definition is saved, an appropriate version is assigned as either -1 or 0 depending on the authorization permissions. For more information, see Process Definition Versioning. Active By default, the Active field is displayed as <<NA>> for the new process being created. Once the process definition is saved, the status is set to “Yes” if you are an authorizer or No if the created process needs to be authorized by an authorizer. Type Select the process type based on which you would like to create the rule from the drop-down list. Executable Select the checkbox if you want to bunch rule executions for concurrency.
If you are selecting the checkbox, you can add only Computation or Classification Rules as Components. For more information, see Concurrent Rule Execution.
Route Execution to High Precedence Node Select the checkbox if you want to route the execution of this Process definition to the high precedence node set up in the AM server. - Click Properties in the Master Information grid. The
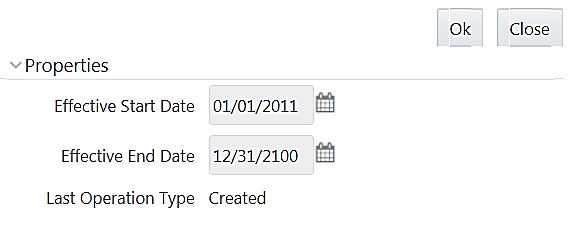
Properties window is displayed.
Figure 12-17 Properties window
 You can edit the following tabulated details in the Properties window.
Table 12-7 Fields in the Properties window and their Descriptions
Field Name Description Effective Start Date, Effective End Date Effective Dating is not implemented for process definition. Last Operation Type By default, this field displays the last change done to the process definition. While creating a process, the field displays the operation type as Created. - Click OK. The properties are saved for the current process definition.