Defining Data Mapping for File Extraction (T2F, H2F)

You can map data from a source table to the specified file in the Data Mapping window. The source can be an RDBMS table or HDFS source. To load data to a file along with other sources, you need to define the Data Mapping and specify the Source Entities. Source-Target mapping is not required since the table structure is completely extracted to the specified file. However, if you want to do an F2T after T2F, source to target mapping is required. For example, for DB2 you cannot directly load data from DB2 to RDBMS, so you need to map data from Table to File (T2F) and then File to Table (F2T).
After execution of T2F or H2F definition, the extracted file will be present in /ftpshare/<INFODOM>/dmt/def/<DEFINITIONNAME>/<BATCH_ID>/<DATE_FOLDER>. The column names in the table will not be present in the extracted file.

Figure 7-17 Source Entity Details pane


This image displays the Source Entity Details pane.

  1. Select Extract to File option as Load Type.
  2. Click Select.
    The Entity Selection window is displayed.

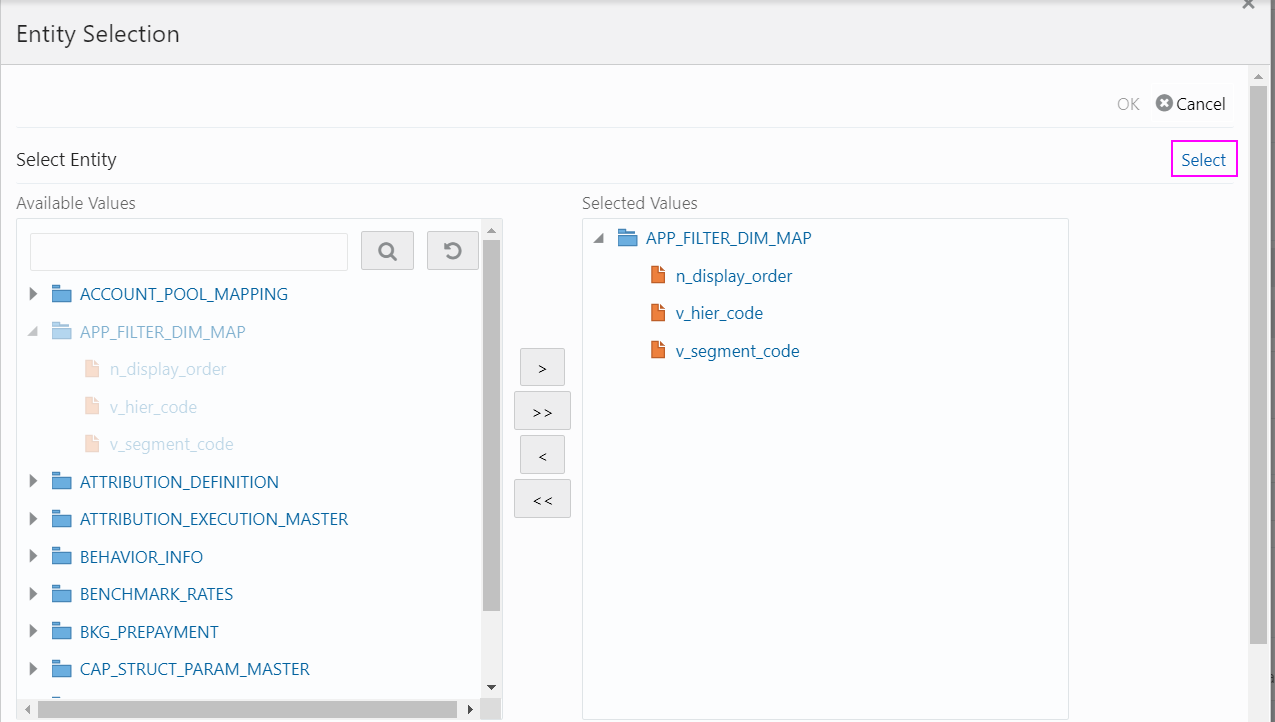
    Figure 7-18 Entity Selection window


    This image displays the Entity Selection window.

    The Select Entity grid displays all entities in the selected Source or Infodom. Expand the Entity name to view the attributes in each entity.
  3. Select the required entities or attributes you want to extract to file:
    • Select an entity and click the Forward Arrow icon if you want to extract all attributes in an entity.
    • For extracting only selected attributes in an entity, expand the required entity, select the attribute and click Forward Arrow icon.
    • Click the Double Forward Arrow icon to select all entities.
    • To remove an attribute from the Selected Values, select the attribute and click the Backward Arrow icon.
    • Click the Double Backward Arrow icon to remove all selected values.
  4. Click Select to populate the selected entities or attributes in the Source Entity Details grid.

    Note:

    Whenever you make any changes in the Select Entity grid, click Select to refresh the Source Entity Details grid to reflect the changes.

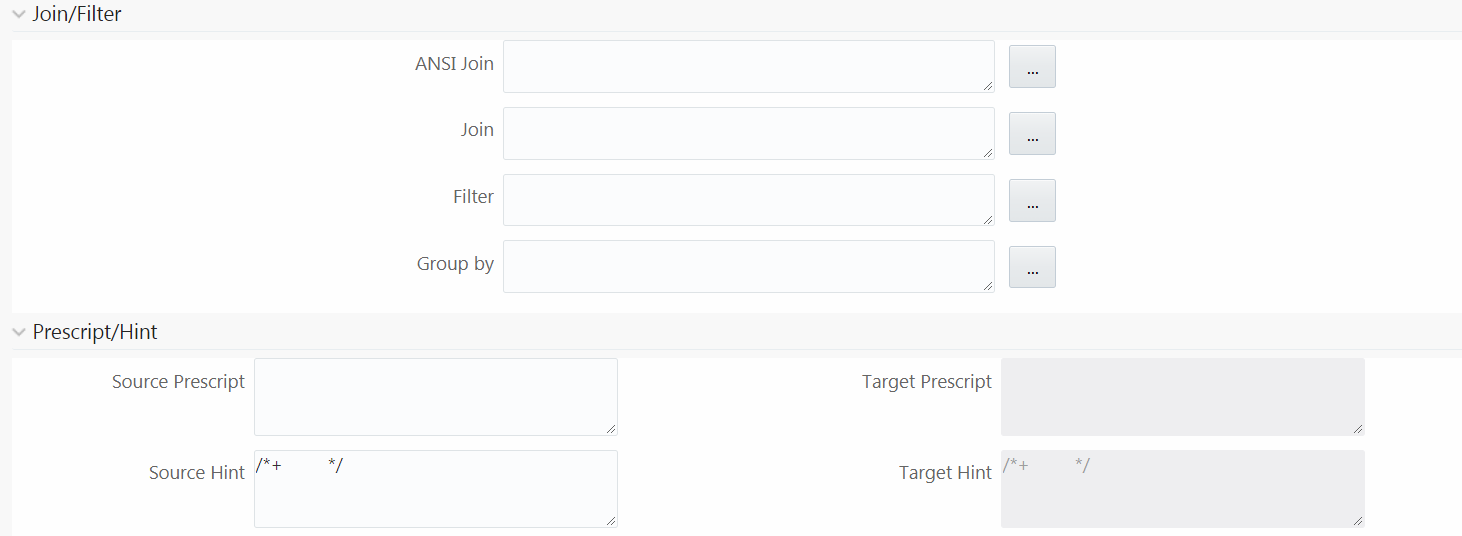
    Figure 7-19 Join/Filter pane


    This image displays the Join/Filter pane.

  5. If you are mapping from multiple Source Tables, define an expression to join the column data corresponding to each table. Specify the ANSI Join or Join to join the source tables and enter the Filter criteria and Group By to include during extraction. For example, “$MISDATE” can be a filter for Run-time substitution of the MIS Date.

    Note:

    If the defined expression uses function that has a placeholder or calls a stored procedure that has a placeholder for String data type, enclose the placeholder in single quotes. Using double-quotes would generate an error during extract definition or batch execution. Additionally, expressions with Date/Timestamp data type placeholders are not supported.
  6. Specify Source Prescript if any.
    For more information, see Prescripts.
  7. Specify Source Hint if any, for faster loading. Oracle hints follow (/*+ HINT */) format. The mapping level hint is not applicable.
    For example, /*+ PARALLEL */.

    Note:

    Hints are not supported for T2F definitions.

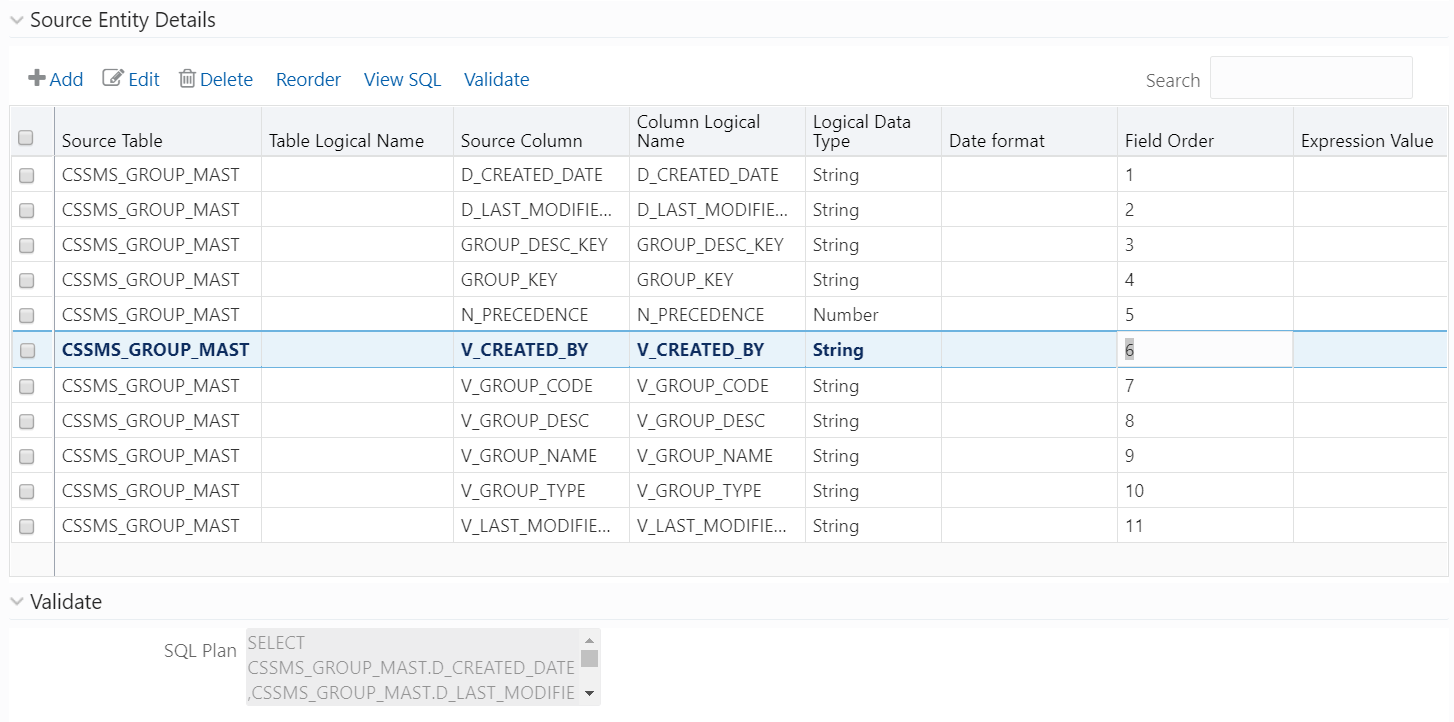
    Figure 7-20 Source Entity Details pane


    This image displays the Source Entity Details pane.

  8. Perform the following actions if required:
    • Click the Add icon to add a new custom column by defining it from the Expression Builder window.
    • Click the Edit icon to edit the Expression Value defined using the Expression Builder window. You can also edit the expression value by double-clicking the Expression Value column and manually typing the proper expression.
    • Double-click the Field Order number and update the value to change the order in which columns should appear in the target file.

      Note:

      No validation is provided for missing Field Orders. Hence, during execution, those columns after the missing field order will be omitted. Click Reorder to sort and reorder the Field Order numbers to fill any missing numbers.
    • Double-click the Logical Data Type and select the required option from the drop-down list to change the Data Type of the target column. The available Data types are Number, String, Date Time, Integer, and Timestamp.
    • Double-click the Date Format and modify the date format, if required, for the target column.

      Note:

      Date Format should be mentioned for target columns with Logical Data Type as Date Time. Else, the execution will fail.
    • Select an attribute and click the Delete icon if you do not want that attribute in the target file.

      Note:

      The View SQL and Validate button will be enabled only if your user group is mapped to the User Role DMADV.
  9. Click View SQL to view the complete query in the SQL Plan pane.
  10. Click Validate to validate the query by converting to the selected data source. If validation is successful, the Explain Plan for the SQL query is displayed in the SQL Plan pane. Otherwise, the SQL exception is displayed.
  11. Click Ok to save the changes in the Entity Selection window.
  12. Click Properties to specify the properties.
  13. Click Save to save the mapping details.
    The Data Mapping definition will be saved as version 1.