- Analytical Application Infrastructure User Guide
- Rule Run Framework
- Rule
- Create Rule
- Select Business Processor as Target
Select Business Processor as Target
Note:
If you are not able to view the Combination Mapper pane properly due to resolution issues, click Collapse View in the Map toolbar.- Click the icon adjacent to the Measure displayed under the Target page
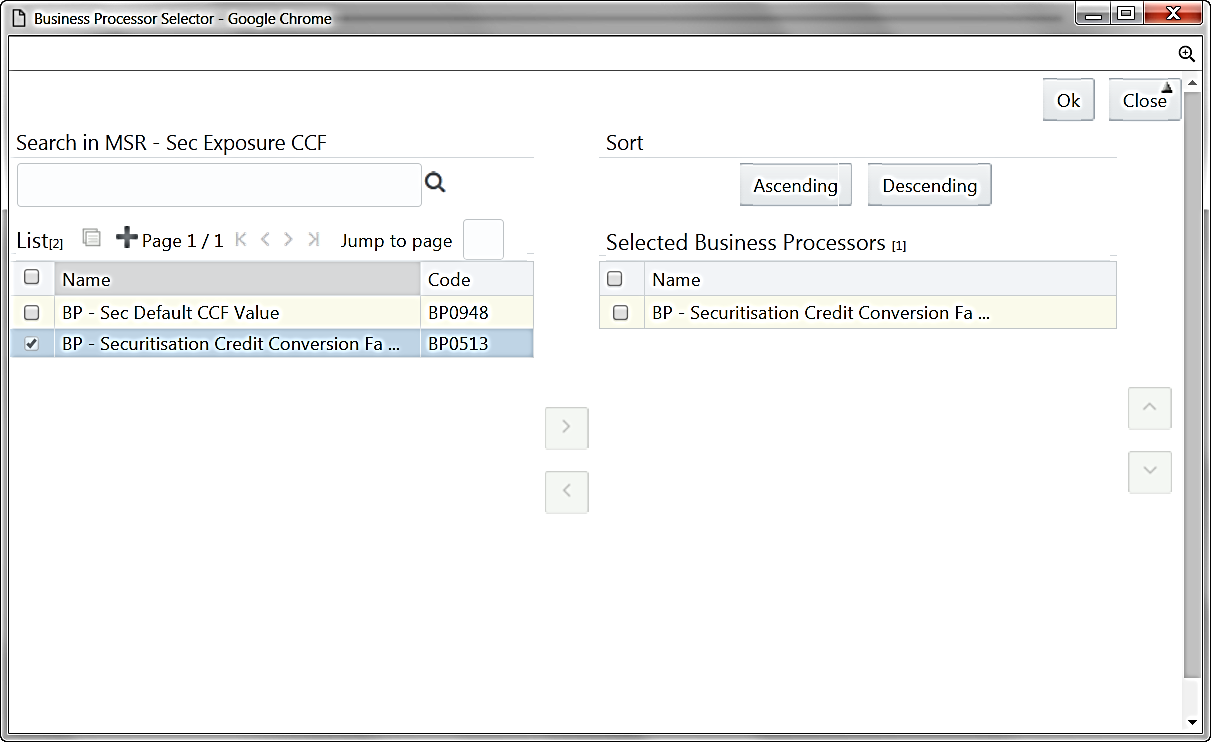
column. The Business Processor Selector window is displayed.
Figure 12-9 Business Processor Selector window

- Select the checkbox adjacent to the Business Processor name and click the
Forward Arrow icon. In Business Processor Selector window, you can:
- Search for a Business Processor by specifying the nearest keyword and clicking the Search icon.
- Click to view the details of a selected Business Processor.
- Click the Add icon to define a new Business Processor. For more information see Create Business Processor.
- Click Ascending or Descending to sort the selected components in the ascending or descending order.
- Click the Upward Arrow icon or Downward Arrow icon to re-arrange the selected list of Business Processors.
- Click the Backward Arrow icon to remove the selected Business Processors from the Selected Business Processors pane.
- Click OK. The selected Business Processors are listed
under the Combination Mapper pane along with the Source
and Filter definition details. 0.After selecting Business Processor(s) in the Combination Mapper pane, you can set the Default Target member, specify Parameters, and exclude child nodes for the Rule definition, if required.
- You can set the selected Target member as default by clicking on the
header bar of the required Business Processor and selecting the
Default Member checkbox.
When a Target member is selected as default, all the unmapped Source member combinations for that Target object will be logically mapped to the default member and the corresponding target appears disabled. Run time parameters cannot be applied for such defaulted target BP’s. However, the logical mappings will not overwrite the physical mapping.
- You can specify parameters for the selected Business Processor. Select
the checkbox(s) adjacent to the required Business Processor and click
adjacent to the checkbox selected. The Parameters pop-up is displayed.
Note:
A physical mapping is established when mapping is explicitly done upon a combination of source and target members.- For Classification Rules and Computation Rules with
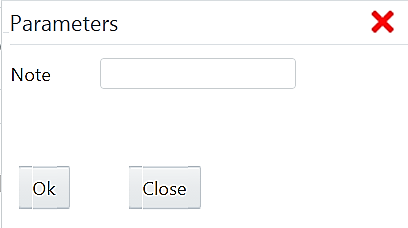
non-parameterized BP, the Parameters pane is displayed
as shown here:
Figure 12-10 Parameter pane

Enter the required note in the text field and click OK.
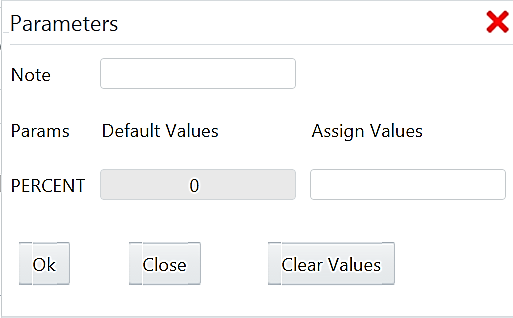
- For a Computation Rule with parameterized BP, the Parameters pop-up is displayed as given.
Enter the required note in the text field. The Parameter Default Value is fetched from the Business Processor definition and the Assign Values can be entered manually that is considered during Rule execution at Runtime. You can also clear the Assign Value field by clicking Clear Values. Click OK.Figure 12-11 Parameter pane

- You can exclude child node(s) in the Combination
Mapper pane, if they are not required in the Rule
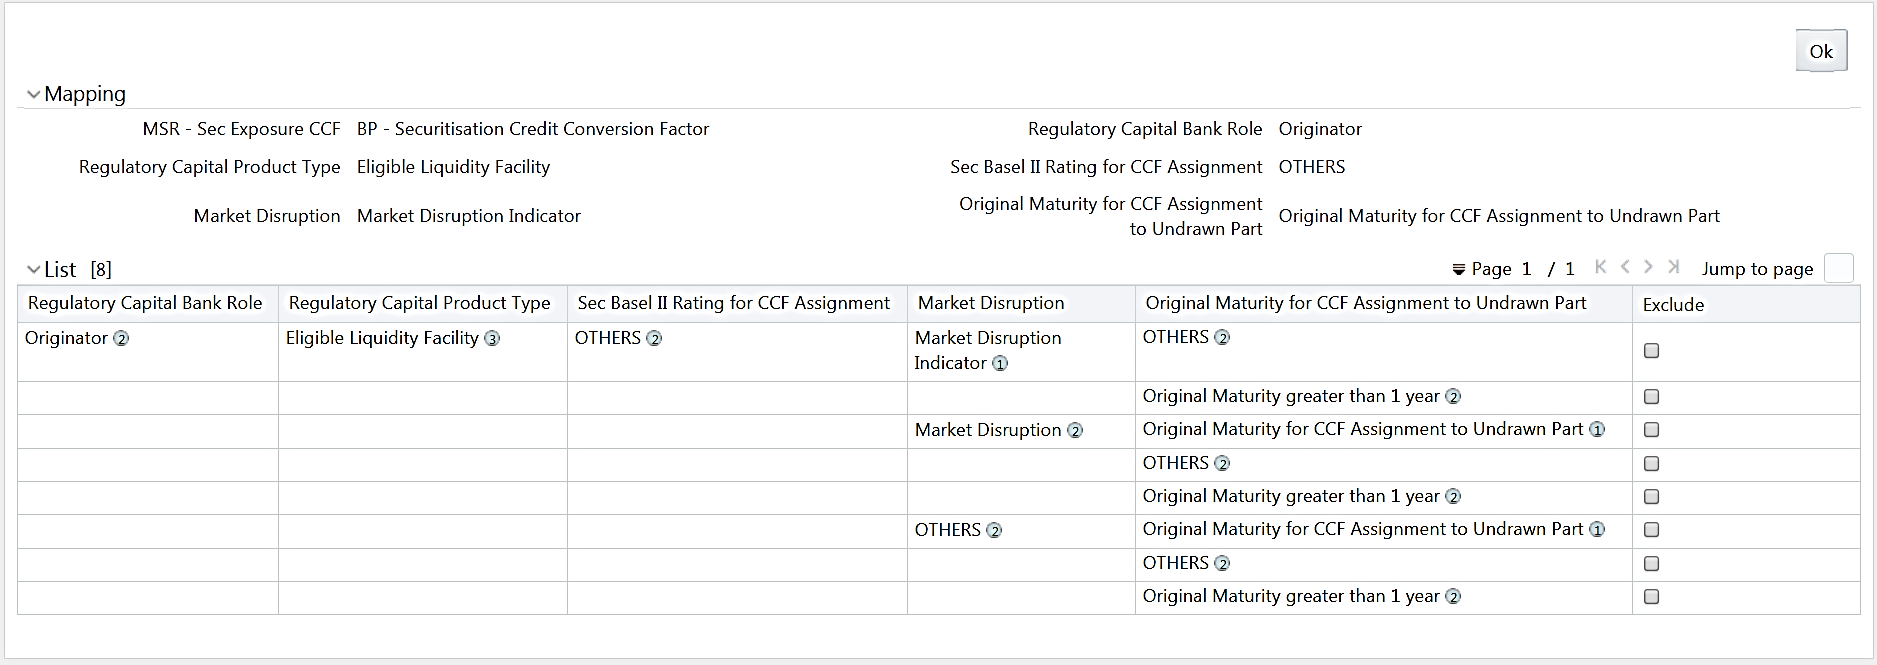
execution. Click (Exclude). The Rule Exclude window
is displayed.
Note:
The exclude icon is available only for the combinations with physical mappings. When a default member is removed from the target member, all logical mappings are removed retaining only physical mappings.Figure 12-12 Rule Exclude window

The Rule exclude window displays only the Child nodes associated with a Parent node. Ensure that the selected Parent has associated Child nodes and is not the default member in the target.
- For Classification Rules and Computation Rules with
non-parameterized BP, the Parameters pane is displayed
as shown here:
- Select the checkbox adjacent to Rule code that you want to exclude and click OK.
Once all the necessary details are entered, click Save. The Rule definition is saved with the provided details and is displayed in the Rule window.Note that the default version of a new Rule definition created by an Authorizer is 0 and the one created by non-authorizer is -1. For more details on Versioning, see Rule Definition Versioning.The Audit Trail section of the Rule Definition (New Mode) window displays metadata information about the Rule definition created. The User Comments section facilitates you to add or update additional information as comments. - You can set the selected Target member as default by clicking on the
header bar of the required Business Processor and selecting the
Default Member checkbox.