- Process Modelling Framework Orchestration Guide
- Event-Based Orchestration of Process Flow
- Configure an Event Consumer
Configure an Event Consumer
After adding an Event Consumer activity on the Canvas, configure the activity.
You can add details for Activity, Consumer, Implementation, and Notifications.
To configure an Event Consumer, follow these steps:
- Click an Event Process Flow in the Process Modeller window to display it in the PMF Canvas.
- Double-click the Event Consumer activity icon, or click
the Edit Activity icon that displays when you mouse over
the activity, to display the activity configuration details in the
Producer Activity drawer window.The window displays four tabs: Activity, Consumer, Implementation, and Notifications. The details in the Notification tab are optional.To configure details in the Activity tab, follow these steps:
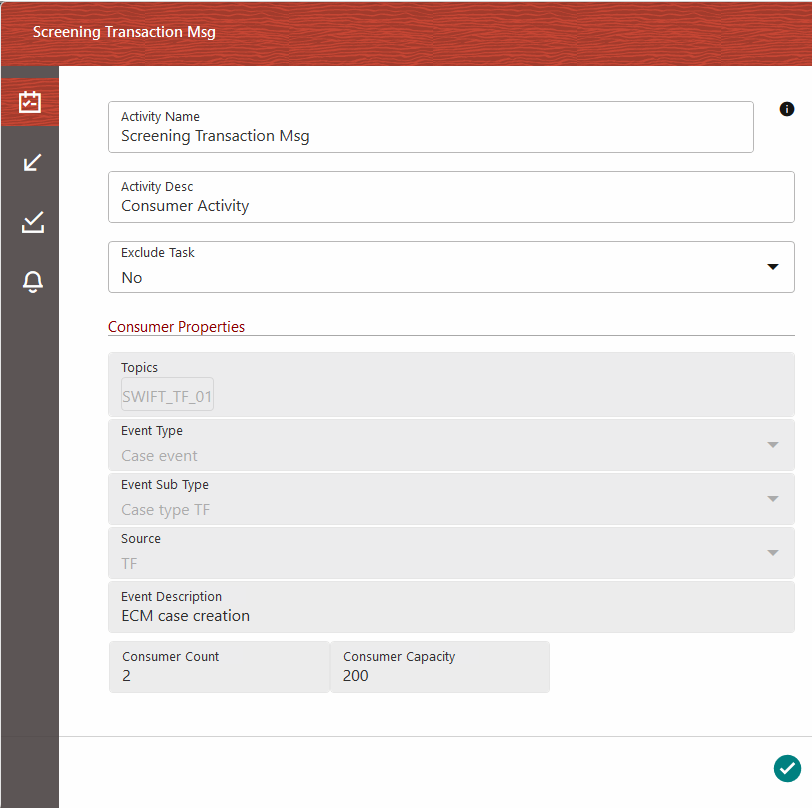
Figure 16-7 The Consumer Activity tab

- Enter a name for the Consumer Event in the Activity Name field.
- Enter a description for the Consumer Event in the Activity Description field. By default, the Activity Type field displays as Event Consumer and is read-only.
- Select the appropriate status from the Status drop-down.
- Select Yes or No from the Exclude Task drop-down.
- In the Consumer Properties section, the following fields are displayed based on the selection in the Configure an Event Producer window:
- The selected topic from the Topics drop-down.
- The selected event type from the Event Type drop-down.
- The selected event subtype from the Event Sub Type drop-down.
- The selected source OFSAA application from the Source drop-down. The Event Description field is populated based on the selection in the Event Sub Type drop-down.
- Consumer Count – The number of threads to be created for a given consumer.
- Consumer Capacity – indicates the number of messages that each of the
threads can process.
Note:
By default, the Consumer Count is 2 and Consumer Capacity is 200. - After entering the details, click the Accept icon to save the details.
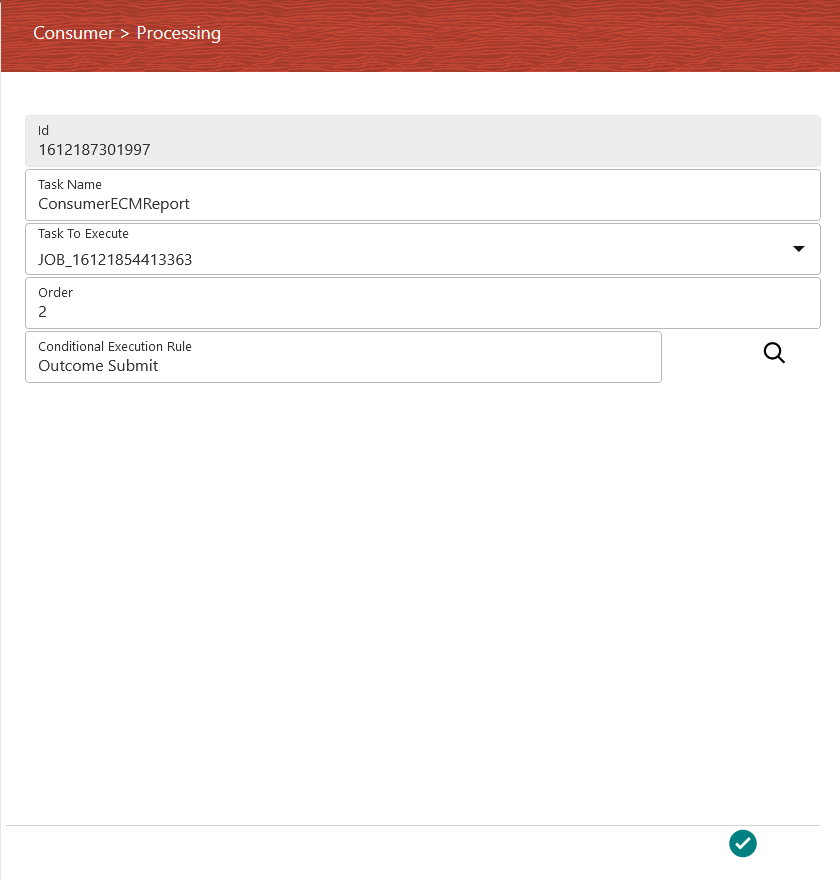
To configure details in the Consumer tab, follow these steps:Figure 16-8 The Consumer tab
 To configure details in the Implementation tab, follow these steps:
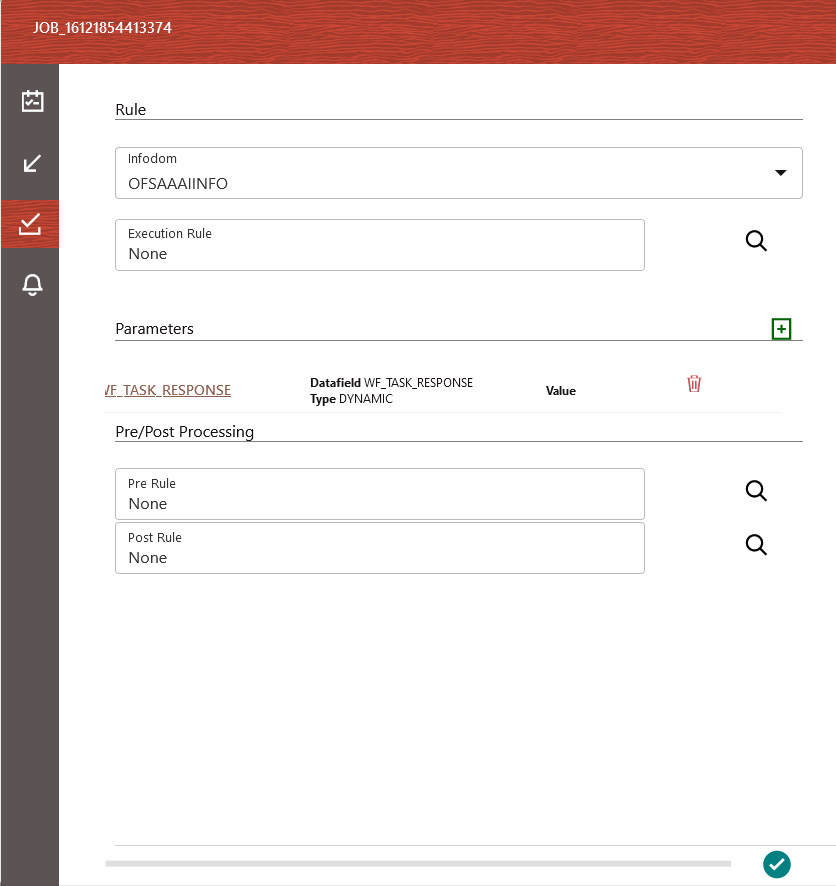
Figure 16-9 The Implementation tab

- Enter a name for the consumer task in the Task Name field. By default, the ID field displays the unique identifier for the consumer task.
- Select the appropriate jobs from the Tasks To Execute drop-down.
- Enter the order of execution in the Order field. For example, 1 marks the order as to be executed first.
- Click the Search icon from the Conditional Execution Rule drop-down and select the required application rule. Click the Accept icon to save the details.
To configure details in the Implementation tab, follow these steps:- Click the Implementation tab to select the rules required for the execution.
- Select the required Infodom from the Infodom drop-down.
- Click the Add icon to display the popup with fields required for the Parameters section.
- Select the required job to be connected to from the Connected To drop-down.
- Select the required data field from the Data Fields drop-down.
- Select the required parameter type from the Parameter Type drop-down. The options are Dynamic and Static. If you select Static, then enter the value in the Value field. Click the Accept icon to save the details.
- In the Pre/Post Processing section, click the Search icon from the Pre Rule drop-down and select the required application rule to be executed before the processing of the event. Click the Accept icon to save the details.
- Click the Search icon from the Post Rule drop-down and select the required application rule to be executed after the processing of the event. Click the Accept icon to save the details.
- After entering the details, click the Accept icon to save the details.
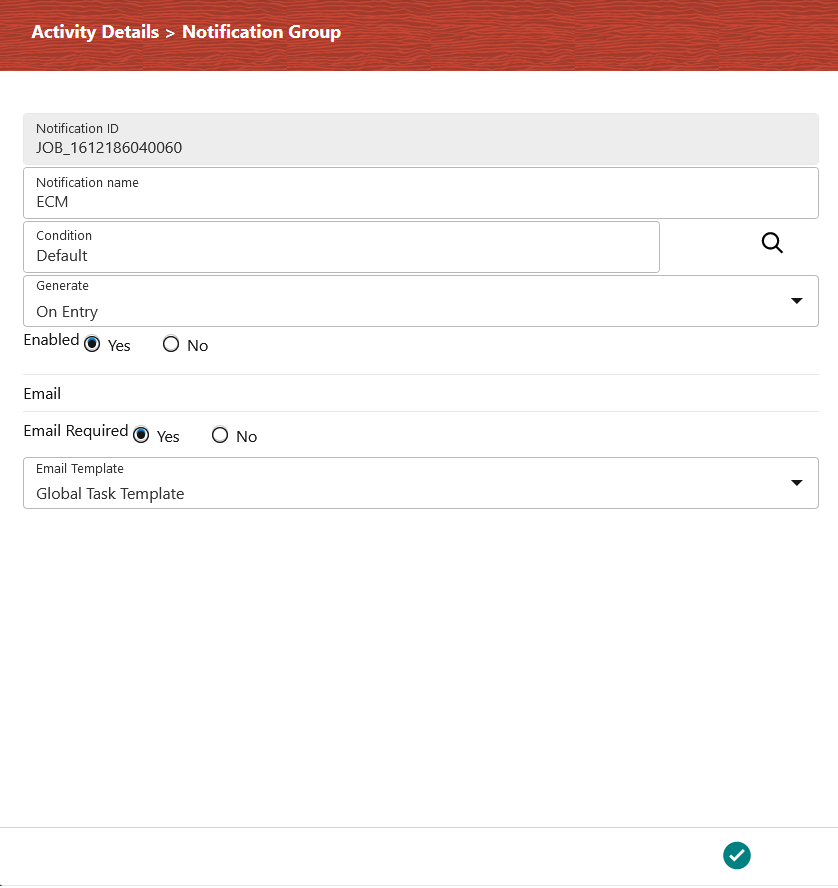
To configure details in the Notifications tab, follow these steps:Figure 16-10 The Notifications tab

- Click the Notification tab.
- Click the Add icon to display the fields required for the Notifications.
- Enter a name for the notification in the Notification Name field. The Notification ID field is auto-populated based on the ID from the application.
- Click the Search icon from the Condition drop-down and select the required application rule. Click the Accept icon to save the details.
- Select the condition to generate the notification from the Generate drop-down.
- Select Yes in the Enabled field to activate the notification.
- In the Email section, select Yes in the Email Required field to select to receive the notification through email. Select No to disable this option.
- Select the required email template from the Email Template field.
- Click the Accept icon to save the details.