5.3.3.4.3 Defining Forecast All Business Rules
The definition of a Forecast All Business Rule is part of the Create or Edit Forecast All Business Rule process. When you click Save in the Create Forecast All Business Rule process, the Rule is saved, and the Forecast All Business Rule summary page is displayed. However, Product Characteristic assumptions have not yet been defined in the products at this point. Start defining the Product Characteristic assumptions for MDBSS before clicking Save.
Defining Forecast All Business Using Node Level Assumptions
Node Level Assumptions allow you to define assumptions at any level of the Multi Dimensional Balance Sheet Structure (MDBSS) hierarchy. The MDBSS supports a hierarchical representation of your chart of accounts, so you can take advantage of the parent-child relationships defined for the various nodes of your MDBSS hierarchies while defining rules. Children of parent nodes on an MDBSS automatically inherit the assumptions defined for the parent nodes. However, assumptions directly defined for a child take precedence over those at the parent level.
Prerequisites
Performing basic steps for creating or editing a Forecast All Business Rule.
To define a Forecast All Business Rule, follow these steps:
- Navigate to Forecast Balance page.
- Based on the selected Method, Forecast Balance page will be
displayed.
- New Add
Figure 5-191 Forecast All Business-New Add

- Select Margin Type as Rate or
Percent.
If Margin Type is selected as Rate, the provided Margin is used as a fixed spread. If Margin Type is selected as Percent, the Margin must be provided as the Percentage of forecast rate. If the margin is 10% of the forecast rate, 10 must be provided.
- Enter Pricing Term.
- Select Pricing Multiplier as Month, Day or
Year.
Note:
Pricing Term and Pricing Multiplier are optional fields. By default, the pricing based on the instrument’s next reprice (or maturity) tenor. - Enter values for Balance, Net Margin, and Gross Margin
values for Buckets.
The contractual margin over the interest rate code used in computing net rate. Gross margin minus any fees. Contractual spread over interest rate code used in the calculation of the gross rate.
- Click Apply.
You can also use the Excel Export feature to download the data in Excel format.
- Select Margin Type as Rate or
Percent.
- Target Average
Figure 5-192 Forecast All Business- Average

- Select Margin Type as Rate or
Percent.
If Margin Type is selected as Rate, the provided Margin is used as a fixed spread. If Margin Type is selected as Percent, the Margin must be provided as the Percentage of forecast rate. If the margin is 10% of the forecast rate, 10 must be provided.
- Enter Pricing Term.
- Select Pricing Multiplier as Month, Day or
Year.
Note:
Pricing Term and Pricing Multiplier are optional fields. By default, the pricing based on the instrument’s next reprice (or maturity) tenor. - Enter values for Balance, Net Margin, and Gross Margin
values for Buckets.
The contractual margin over the interest rate code used in computing net rate. Gross margin minus any fees. Contractual spread over interest rate code used in the calculation of the gross rate.
- Click Apply.
You can also use the Excel Export feature to download the data in Excel format.
- Select Margin Type as Rate or
Percent.
- Target End
Figure 5-193 Forecast All Business-Target End

- Select Margin Type as Rate or
Percent.
If Margin Type is selected as Rate, the provided Margin is used as a fixed spread. If Margin Type is selected as Percent, the Margin must be provided as the Percentage of forecast rate. If the margin is 10% of the forecast rate, 10 must be provided.
- Enter Pricing Term.
- Select Pricing Multiplier as Month, Day or Year.
Note:
Pricing Term and Pricing Multiplier are optional fields. By default, the pricing based on the instrument’s next reprice (or maturity) tenor. - Enter values for Balance, Net Margin, and Gross Margin
values for Buckets.
The contractual margin over the interest rate code used in computing net rate. Gross margin minus any fees. Contractual spread over interest rate code used in the calculation of the gross rate.
- Click Apply.
You can also use the Excel Export feature to download the data in Excel format.
- Select Margin Type as Rate or
Percent.
- Target Growth Percent
Figure 5-194 Forecast All Business-Target Growth Percent

- Select Margin Type as Rate or
Percent.
If Margin Type is selected as Rate, the provided Margin is used as a fixed spread. If Margin Type is selected as Percent, the Margin must be provided as the Percentage of forecast rate. If the margin is 10% of the forecast rate, 10 must be provided.
- Enter Pricing Term.
- Select Pricing Multiplier as Month, Day or Year.
Note:
Pricing Term and Pricing Multiplier are optional fields. By default, the pricing based on the instrument’s next reprice (or maturity) tenor. - Enter values for Balance, Net Margin, and Gross Margin
values for Buckets.
The contractual margin over the interest rate code used in computing net rate. Gross margin minus any fees. Contractual spread over interest rate code used in the calculation of the gross rate.
- Click Apply.
You can also use the Excel Export feature to download the data in Excel format.
- Select Margin Type as Rate or
Percent.
- Target Growth Percent- Allocated
Figure 5-195 Forecast All Business - Target Growth Percent- Allocated

- Select Margin Type as Rate or
Percent.
If Margin Type is selected as Rate, the provided Margin is used as a fixed spread. If Margin Type is selected as Percent, the Margin must be provided as the Percentage of forecast rate. If the margin is 10% of the forecast rate, 10 must be provided.
- Enter Pricing Term.
- Select Pricing Multiplier as Month, Day or Year.
Note:
Pricing Term and Pricing Multiplier are optional fields. By default, the pricing based on the instrument’s next reprice (or maturity) tenor. - Enter values for Balance, Net Margin, and Gross Margin
values for Buckets.
The contractual margin over the interest rate code used in computing net rate. Gross margin minus any fees. Contractual spread over interest rate code used in the calculation of the gross rate.
- Click Apply.
You can also use the Excel Export feature to download the data in Excel format.
- Select Margin Type as Rate or
Percent.
- Rollover
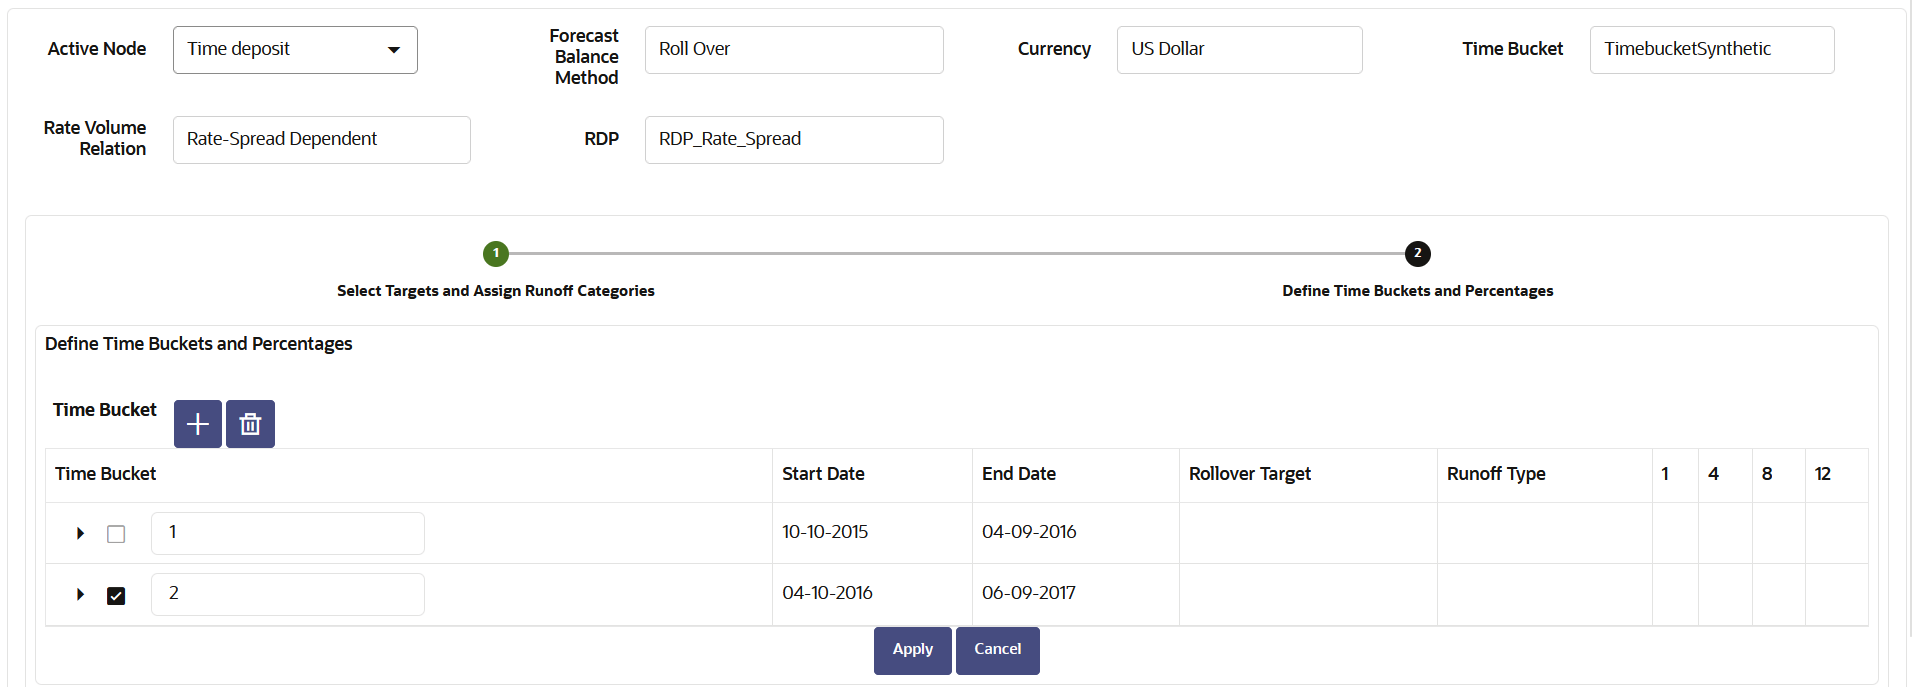
Figure 5-196 Forecast Balance-Rollover

- Click Create button to select a Target node. The Hierarchy page will appear.
- Select the MDBSS node for the rollover and click Ok.
Note:
You can use Search functionality to search a MDBSS node. The searched node will display in Search Results tab. - The selected MDBSS node(s) will appear in
Select Target and Assign Categories
section.
Figure 5-197 Forecast Balance-Rollover

- Select the desired runoff type (Total, Prepay, Maturity, Payment, Core, Volatile, Devolvement, Recovery, or NPA).
- Click Apply to navigate to Define Time Buckets and Percentages section.
- Define the input bucket ranges. You only need to define
multiple bucket ranges if you want to vary rollover assumptions by
modeling buckets. The bucket ranges defined here only apply to
rollover occurring from the source leaf to the target leaf. You must
have at least one bucket range defined. Typically, you define a
bucket range from the first modeling bucket to the last modeling
bucket, covering the entire modeling horizon. To define a bucket
range, perform below steps:
- Add Time Bucket using Add icon. Default bucket is 1 and you cannot delete this.
- Select a Time Bucket. Based on selected Time Bucket, start bucket date and end bucket date will display.
- Continue adding time buckets until all desired ranges have been defined. Expand the Time Bucket to add percentage.
- In Enter the percentage rollover for the given Target.
- Click Apply.
You can also use the Excel Export feature to download the data in Excel format.
- Rollover with New Add
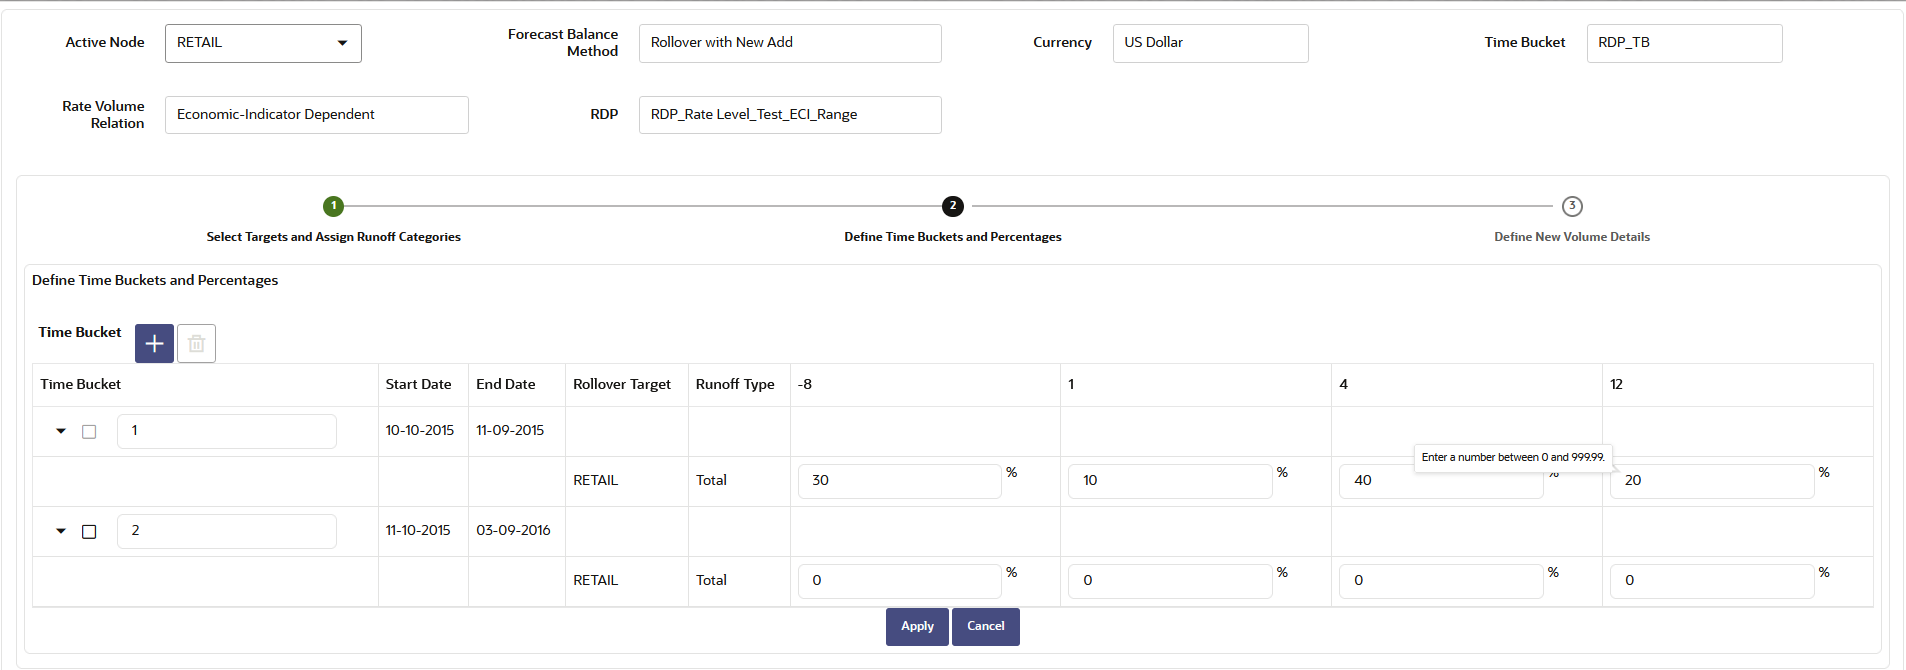
Figure 5-198 Forecast Balance-Rollover with New Add

- Click Create button to select a Target node. The Hierarchy page will appear.
- Select the MDBSS node for the rollover with New Add and
click Ok.
Note:
You can use Search functionality to search a MDBSS node. The searched node will display in Search Results tab. - The selected MDBSS node(s) will appear in
Select Target and Assign Runoff
Categories section.
Figure 5-199 Forecast Balance-Rollover with New Add

- Select the desired runoff type (Total, Prepay, Maturity, Payment, Core, Volatile, Devolvement, Recovery, or NPA).
- Click Apply to navigate to Define Time Buckets and Percentages section.
- Define the input bucket ranges. You only need to define
multiple bucket ranges if you want to vary rollover assumptions by
modeling buckets. The bucket ranges defined here only apply to
rollover occurring from the source leaf to the target leaf. You must
have at least one bucket range defined. Typically, you define a
bucket range from the first modeling bucket to the last modeling
bucket, covering the entire modeling horizon. The default Bucket
Range includes all modeling buckets. To forecast new business in a
subset of the modeling horizon, reduce the bucket range by
increasing the bucket start date or decreasing the bucket end date.
As you change the bucket start and/or the bucket end, the view
adjusts accordingly to display only buckets within the selected
range. To define a bucket range, perform below steps:
- Add Time Bucket using Add icon. Default bucket is 1 and you cannot delete this.
- Select a Time Bucket. Based on selected Time
Bucket, start bucket date and end bucket date will display.
Figure 5-200 Forecast Balance-Rollover with New Add

- Continue adding time buckets until all desired ranges have been defined. Expand the Time Bucket to add percentage.
- Enter the percentage rollover for the given Target.
- Click Apply to navigate to
Define New Volume Details section.
Figure 5-201 Forecast Balance-Rollover with New Add

- The New Volume Detail section is used to input new volume assumptions. In this section, you can select the range of modeling buckets and input balance or percentage assumptions for each modeling bucket within this bucket range. Enter the targeted value.
- Click Apply.
You can also use the Excel Export feature to download the data in Excel format.
- Rollover with Growth%
Figure 5-202 Forecast Balance-Rollover with Growth%

- Click Create button to select a Target node. The Hierarchy page will appear.
- Select the MDBSS node for the rollover with New Add and
click Ok.
Note:
You can use Search functionality to search a MDBSS node. The searched node will display in Search Results tab. - The selected MDBSS node(s) will appear in
Select Target and Assign Runoff
Categories section.
Figure 5-203 Forecast Balance-Rollover with Growth%

- Select the desired runoff type (Total, Prepay, Maturity, Payment, Core, Volatile, Devolvement, Recovery, or NPA).
- Click Apply to navigate to
Define Time Buckets and Percentages
section.
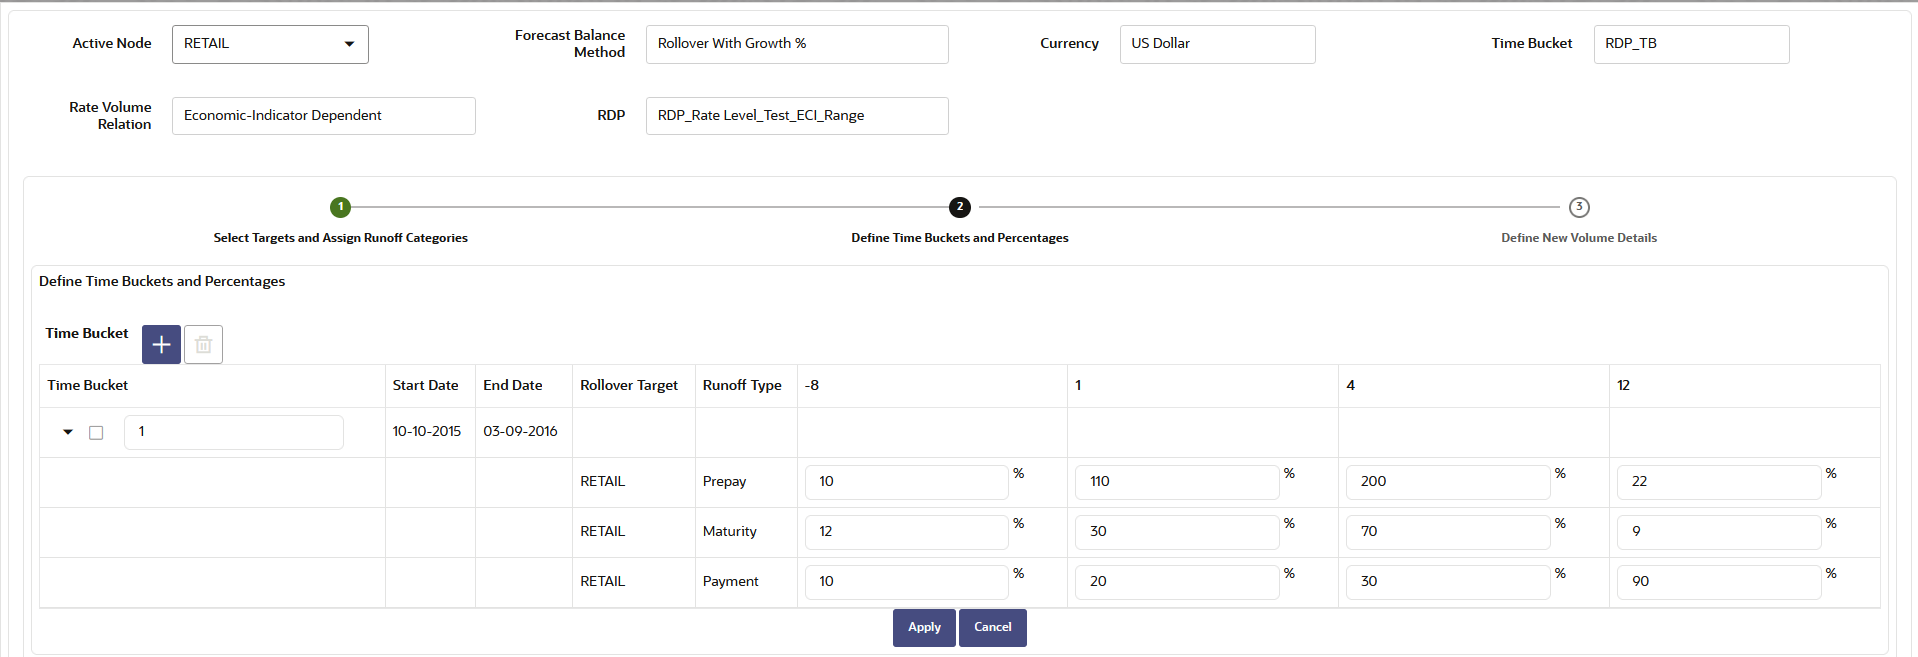
Figure 5-204 Forecast Balance-Rollover with Growth%

- Define the bucket ranges. You only need to define
multiple bucket ranges if you want to vary rollover assumptions by
modeling buckets. The bucket ranges defined here only apply to
rollover occurring from the source leaf to the target leaf. You must
have at least one bucket range defined. Typically, you define a
bucket range from the first modeling bucket to the last modeling
bucket, covering the entire modeling horizon. The default Bucket
Range includes all modeling buckets. To forecast new business in a
subset of the modeling horizon, reduce the bucket range by
increasing the bucket start date or decreasing the bucket end date.
As you change the bucket start and/or the bucket end, the view
adjusts accordingly to display only buckets within the selected
range. To define a bucket range, perform below steps:
- Add Time Bucket using Add icon. Default bucket is 1 and you cannot delete this.
- Select a Time Bucket. Based on selected Time Bucket, start bucket date and end bucket date will display.
- Continue adding time buckets until all desired ranges have been defined. Expand the Time Bucket to add percentage.
- Enter the percentage rollover for the given Target.
- Click Apply to navigate to
Define New Volume Details section.
Figure 5-205 Forecast Balance-Rollover with Growth%

- The New Volume Detail section is used to input new volume assumptions. In this section, you can select the range of modeling buckets and input balance or percentage assumptions for each modeling bucket within this bucket range. Select corresponding row to the first modeling bucket. If rate-volume relationships are used, this cell also corresponds to the first rate tier. Enter the targeted value.
- Click Apply.
You can also use the Excel Export feature to download the data in Excel format.
- New Add