D.2 Fix for Primary Key Constraints
The Multi EDQ Screening process fails when you try to insert in the CS_WATCHLIST table, due to an interlock problem at the database level when two or more of the EDQ try to perform an action over the same database. You will experience a unique constraint as multiple systems are trying to update the same data.
The error caused due to locking of the record is removed by a creating multiple EDQ instances and then insert data into the temporary table by running CS batch.
For example, consider five EDQ server instances. Error is caused when the five EDQ
servers are loaded into the same CS_WATCHLIST table. To overcome the
scenario, five temporary tables (CS_WATCHLIST1, CS_WATCHLIST2, CS_WATCHLIST3,
CS_WATCHLIST4, and CS_WATCHLIST5) are created. Each EDQ
servers are individually loaded into each watchlist table, and then the five tables are
merged into the CS_WATCHLIST table.
CS_WATCHLIST1CS_WATCHLIST2CS_WATCHLIST3CS_WATCHLIST4CS_WATCHLIST5
- Log into the EDQ Application.
- Click Customer Screening project from Project Browser. For more information on Importing the OFS Customer Screening Projects, see Oracle Financial Services Sanctions Pack Installation and Configuration Guide.
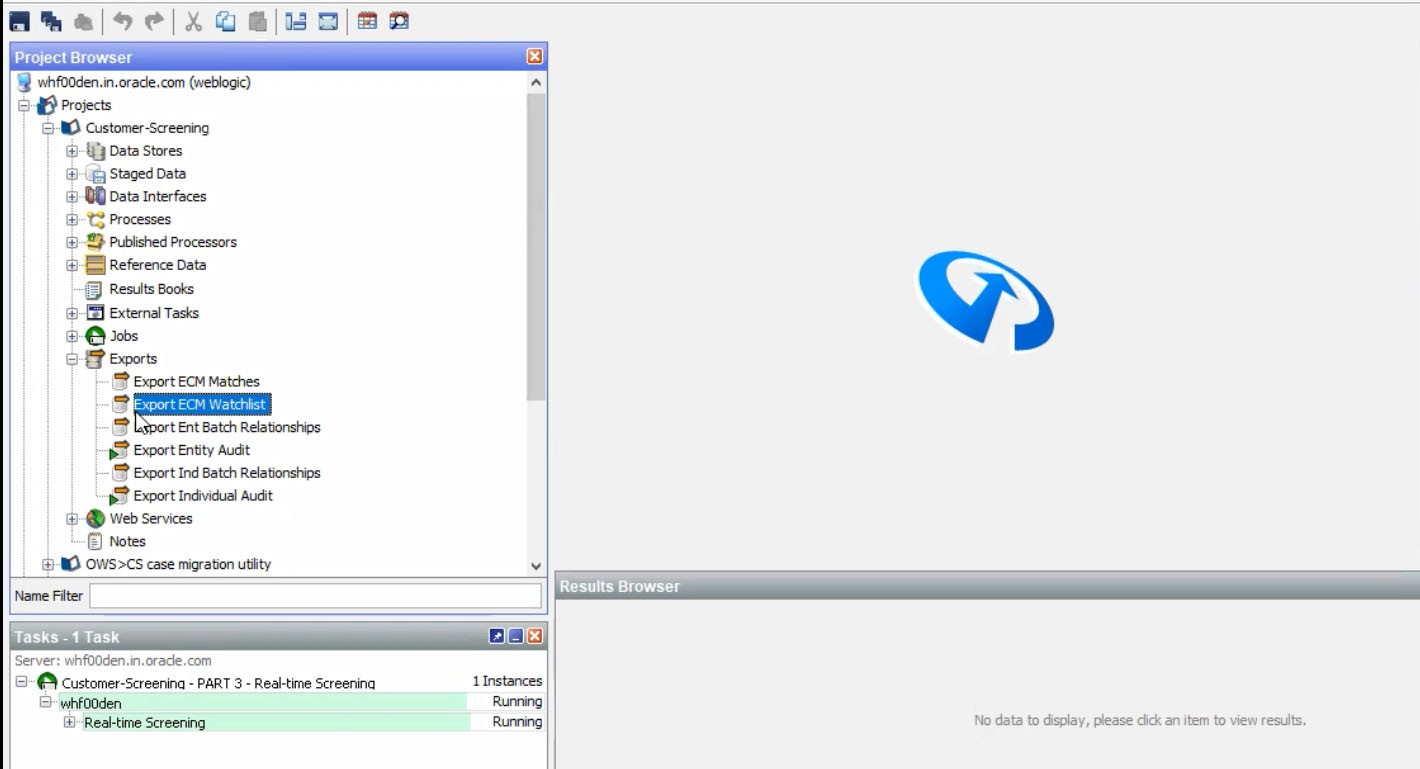
- Click Export ECM Watchlist in the Export folder under
Customer Screening project to open the Edit Export
Definition page.
Figure D-16 Export Folder

- Select the
ECM_Watchlistdata interface from the staged data table and click Next to open the data store table.ECM_Watchlistis the staged data that you will export. - Select the ECM Watchlist Output as data store from the Data Store table and click Next to open the Table Selection screen. ECM Watchlist Output is the data store which will be used as the target for the export.
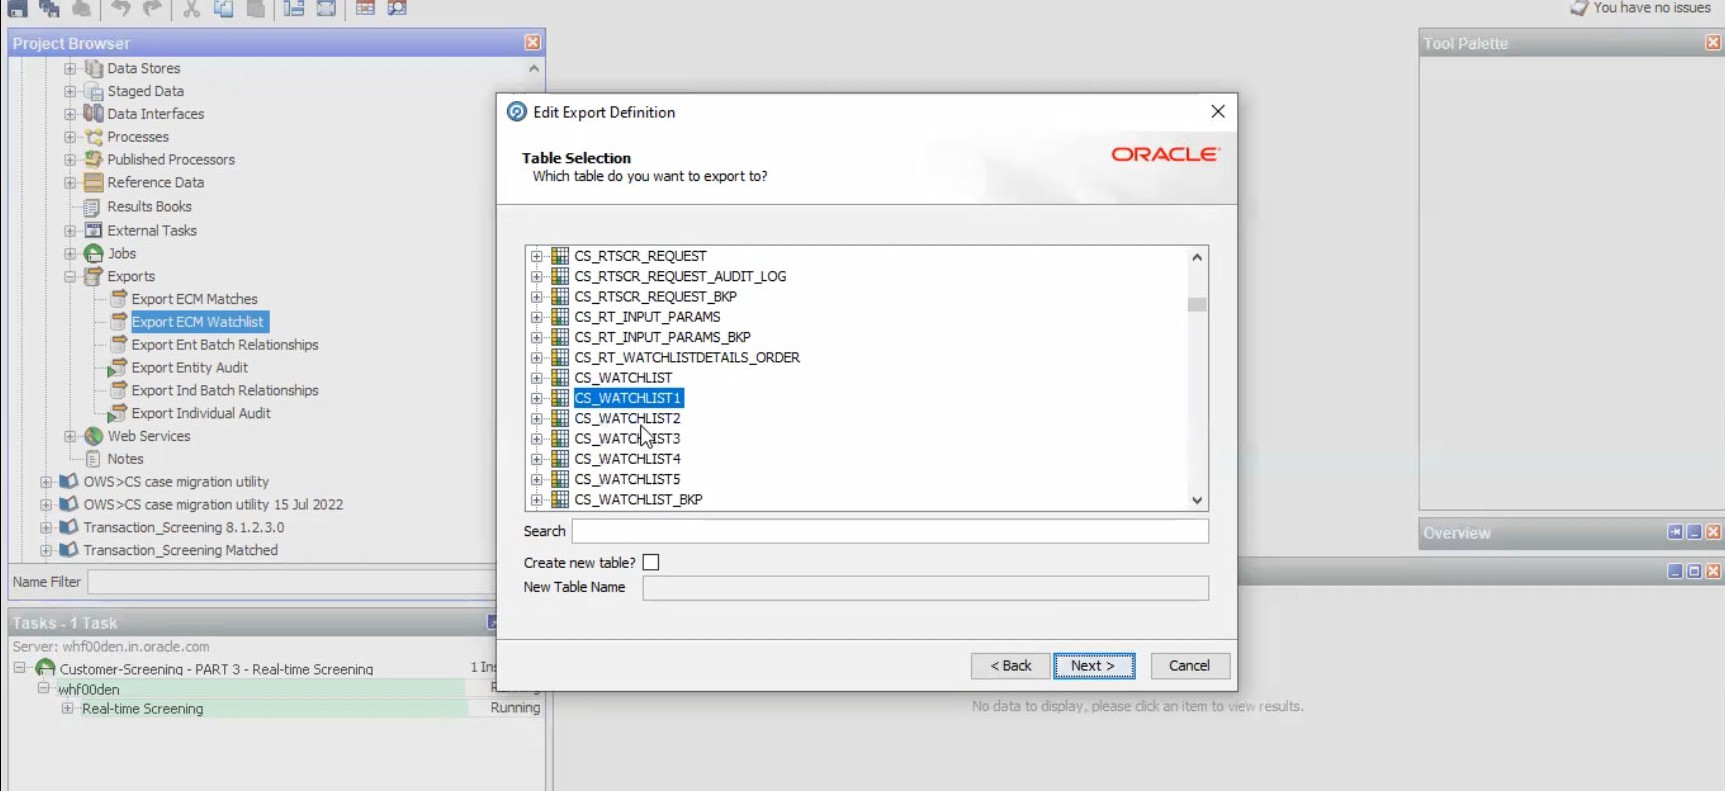
- In the Table Selection table by default
CS_Watchlisttable is selected. Instead ofCS_Watchlist, selectCS_Watchlist1and click Next to open Column Mapping table.Figure D-17 Loading EDQ Server to CS_Watchlist1

- Click Next in Column Mapping table and click Finish the
process in Export Name screen. The EDQ server will be loaded to the
CS_Watchlist1.The same procedure steps must be repeated for the remaining EDQ servers if you have multiple EDQ servers.
Merging the table is a pre-configured procedure. The multiple watchlist table will auto populate to
CS_Watchlist.